Yet another fermentation box build...

Homebrew Talk - Beer, Wine, Mead, & Cider Brewing Discussion Forum

Help Support Homebrew Talk - Beer, Wine, Mead, & Cider Brewing Discussion Forum:

This site may earn a commission from merchant affiliate links, including eBay, Amazon, and others.

Small_Batch

Active Member
Joined
Mar 9, 2010
Messages
26
Reaction score
0
Location
Kansas City
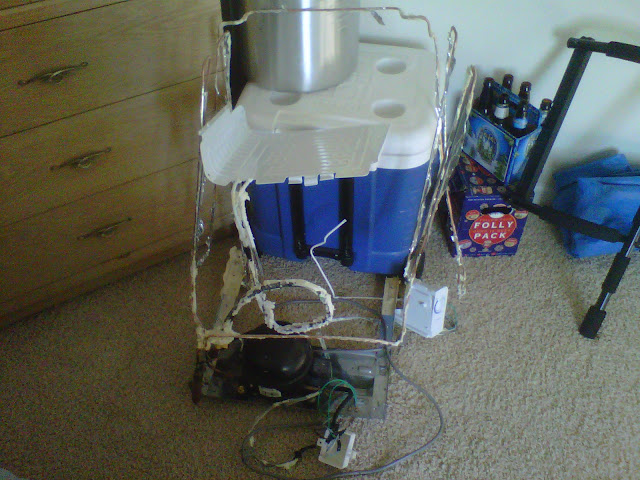
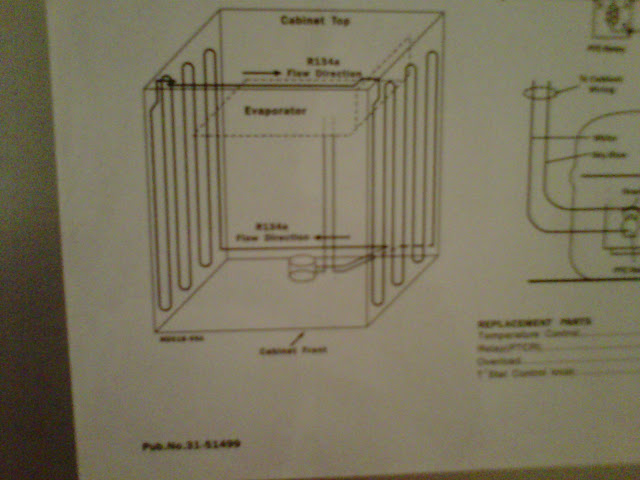
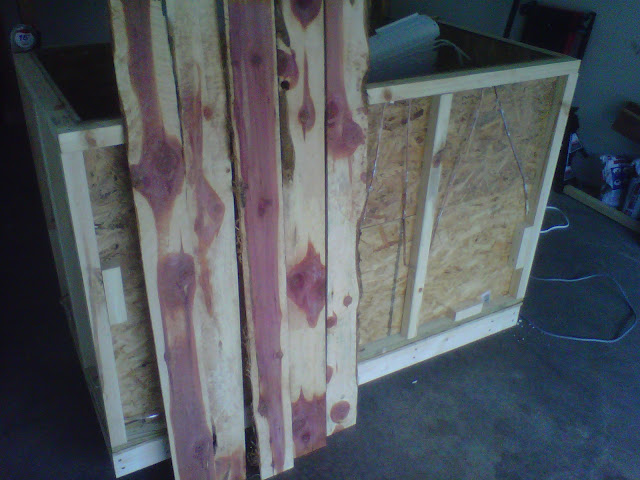
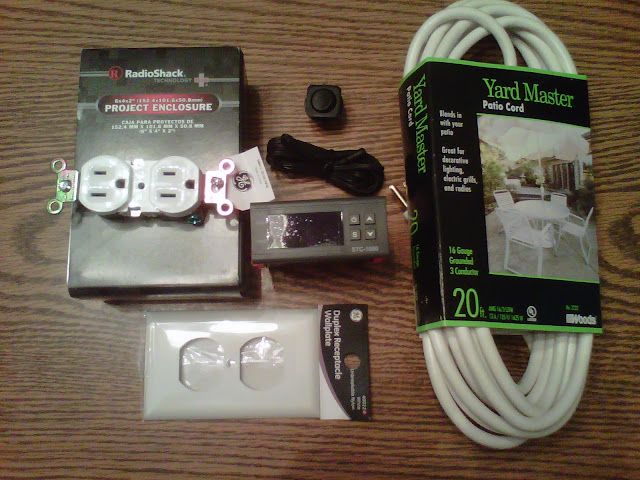
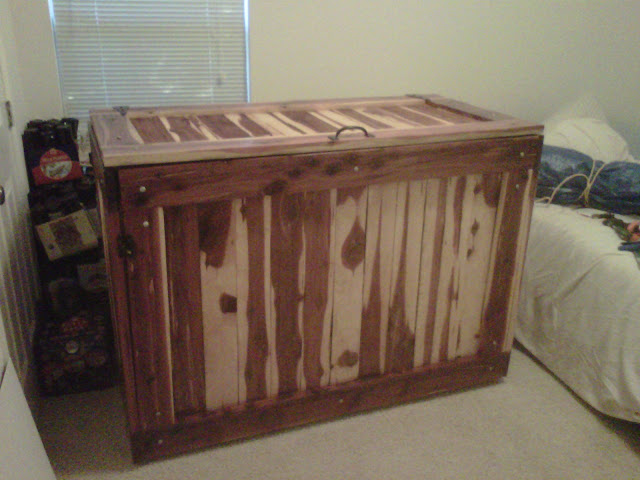
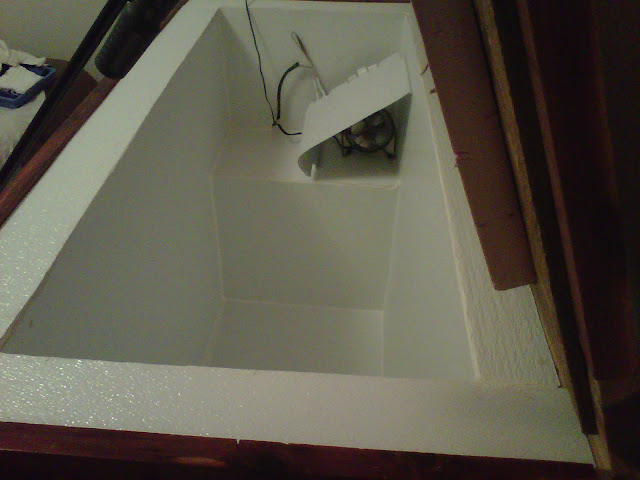
SOOO I got bored this summer and decided to attack a new project. My very own, one of a kind, cedar lined temperature controlled fermentation box!! WOOHOOO!! :rockin:
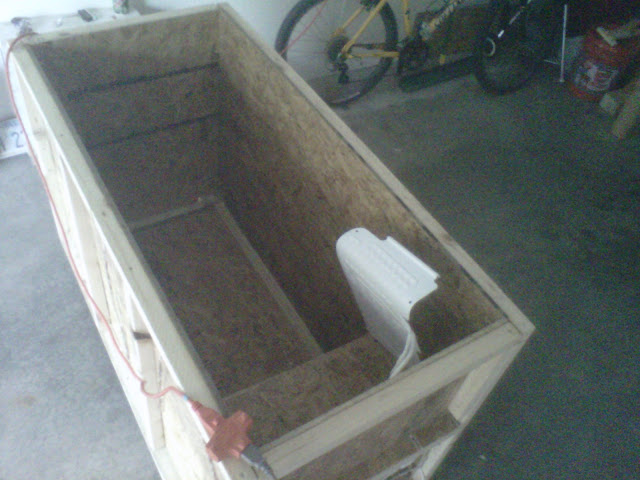
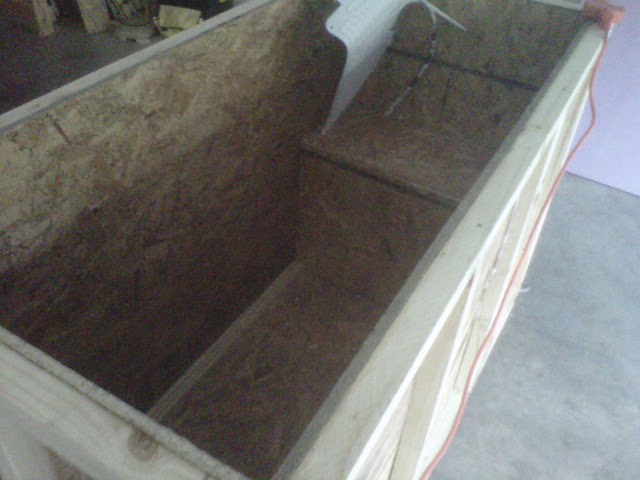
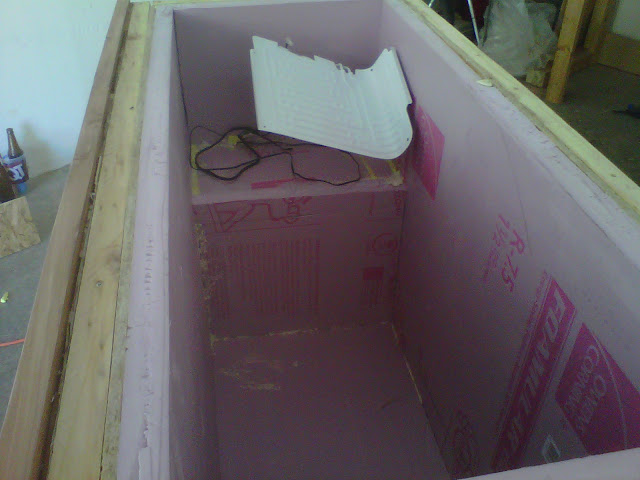
This post will display how I took this:
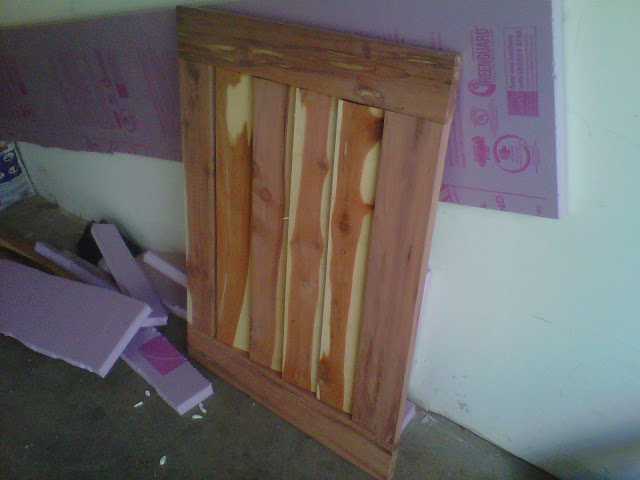
IMG00018-20100412-2045.jpg


Into this:
IMG00058-20100724-1547.jpg

Unfortunately, this isn't a completely finished picture. It is missing wood sealer & hardware. THe final reveal will be soon! I promise!
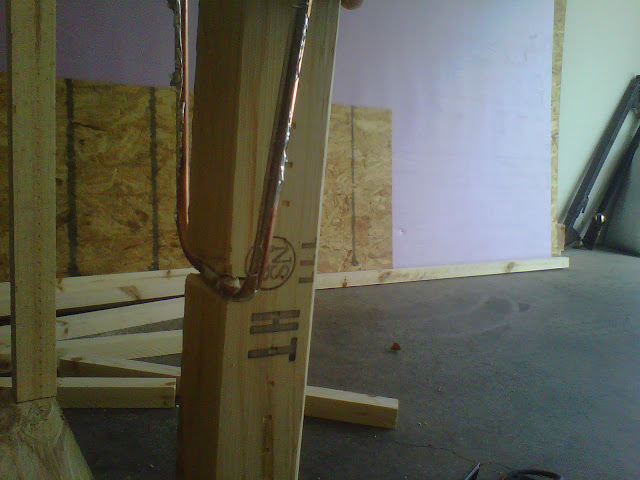
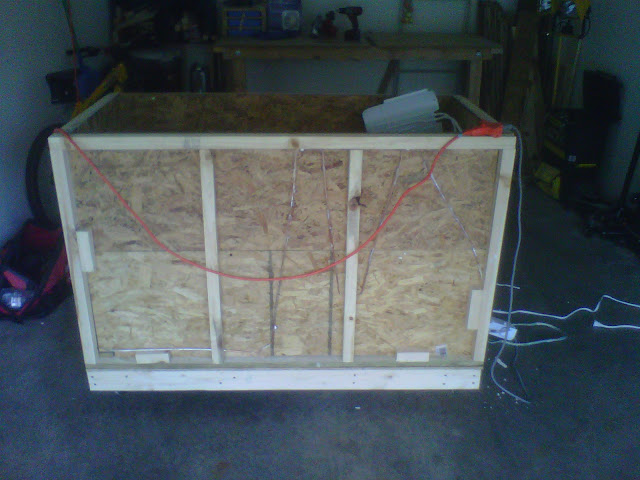
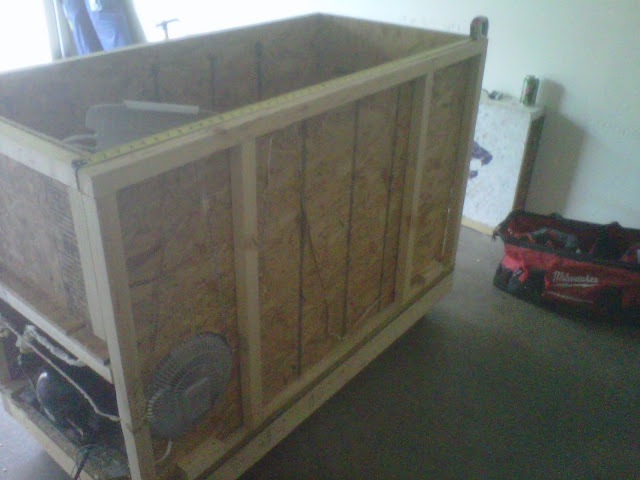
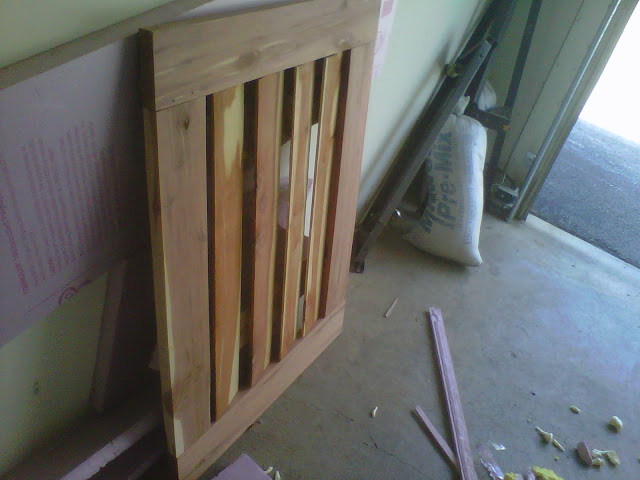
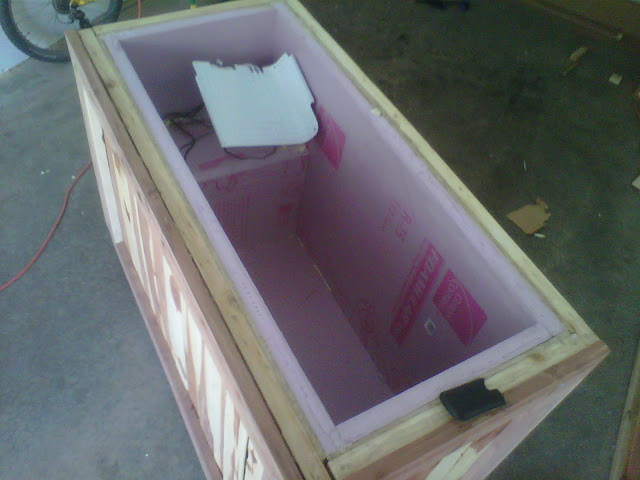
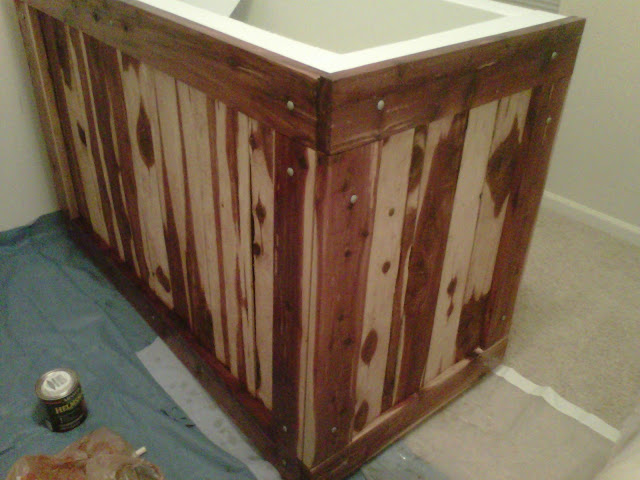
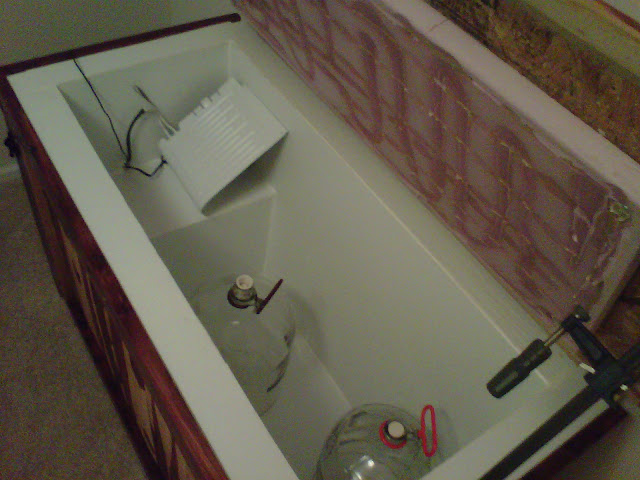
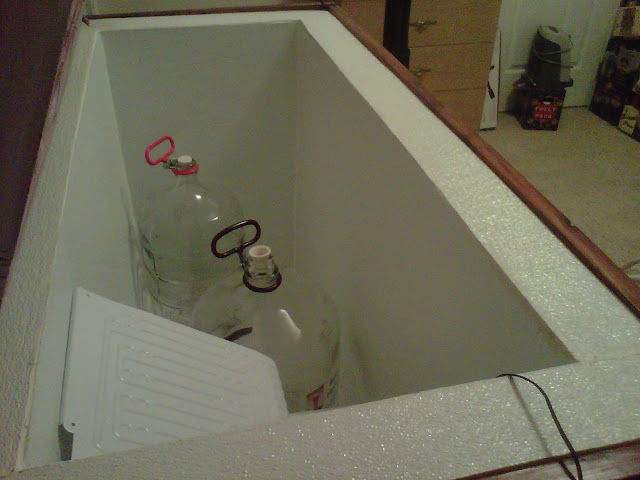
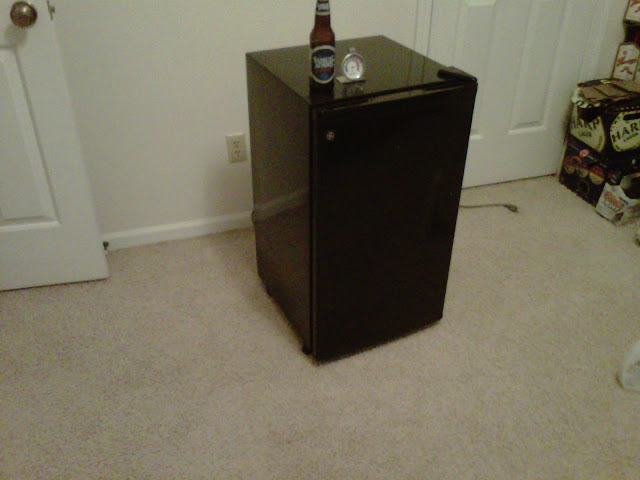
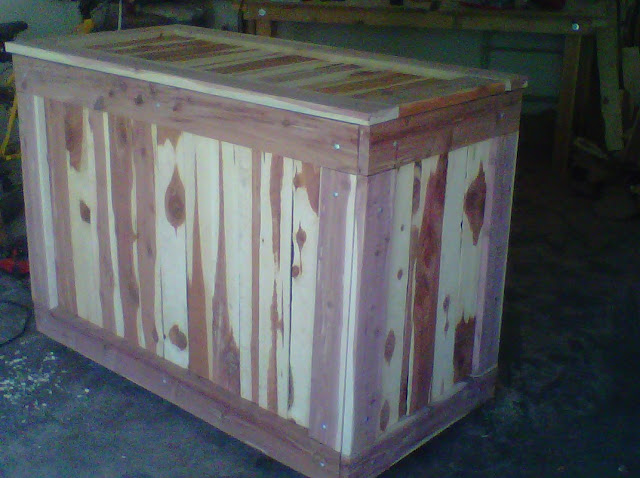
 
The obvious first step is to tear down a perfectly good mini fridge. FYI to those who haven't done this or who plan on doing this: you will cut your hands. It is inevitable. Well... unless you wear gloves. I couldn't seem to quit once I started and my gloves were ALL the way in my garage (3rd floor apartment w/ garage across the parking lot). Tools: screwdriver, phillips and flat head, monkey wrench, box cutter, blood, sweat, & tears.
IMG00002-20100502-1801.jpg


IMG00003-20100502-1802.jpg


The back of the unit displays coil locations and various other equipment specs displayed in this fuzzy crappy picture.
IMG00020-20100412-2046.jpg
 
Step two: start building!!
2a: a base & sides, mount the guts. I forgot to take pictures in stages so a few steps were skipped...
IMG00026-20100612-1328.jpg


Notched out the frame so the coils wouldn't get smashed by the plywood. Should these have been on the outside of the frame? oh probably, but that wouldn't have allowed enough inner clearance after insulation for all of the goodies I wanted for the inside.
IMG00027-20100612-1329.jpg
 
2b: Finish framing it up!
IMG00032-20100612-1921.jpg


IMG00034-20100612-1922.jpg


IMG00036-20100612-1922.jpg


Test to be sure I didn't crimp any coils... a little scary at first. I also realized I should have designed it to be able to replace the refrigeration system.. oops. Note the white stuff (frost) on the expansion "valve." IT WORKS!!!
IMG00037-20100612-1923.jpg
 
Looking cool man. This is what I wish I woulda done for my kegerator, but couldnt find the guts to gut my relatively new dorm fridge. Was that an older one?

Any reason for the cedar, other than it looking wicked awesome?
 
2c: I thought I had a really good idea..haven't we all? Use a vapor barrier on the outside of the front of the box, drill some holes in the frame, and use a fan to pull air across the coils that will then also blow on the compressor! GENIUS! Well, it works..but not as efficiently as it could be. story of my life...

Fan location w/o the 4mil plastic attached
IMG00038-20100612-1925.jpg


Another view
IMG00033-20100612-1921.jpg
 
Looking cool man. This is what I wish I woulda done for my kegerator, but couldnt find the guts to gut my relatively new dorm fridge. Was that an older one?

Any reason for the cedar, other than it looking wicked awesome?

A guy on craigslist complained that the fridge kept freezing things not realizing he could have looked at the back and replaced the thermostat for probably relatively cheap. He sold it to me on the cheap.

Surprisingly enough, another guy on craigslist has his own sawmill and cells cedar planks and boards (rough cut) for hella cheap. $2 per 1x4x10ft planks. Oh, and it looks wicked awesome. Only issue - not kiln dried. Under tarp for some time in humid & hot southern Missouri sun dried instead.
 
2d: Make it look purdy..er... badass spikes explosions man stuff.

1/8"thk planks
IMG00039-20100612-1928.jpg


An access door to cover the compressor
IMG00061-20100725-1506.jpg


Note the "louvered" planks so that bastard heat can get the F away from my beer!! Whoa, sorry for the outburst. It has been really hot lately...
IMG00062-20100725-1506.jpg
 
Step three: INSULATE! i assumed 1.5"thk foamboard would suffice. Not to mention the entire can of great stuff to bridge gaps.

IMG00064-20100725-1507.jpg


IMG00063-20100725-1506.jpg
 
Where did you put the insulation? And how much/what type?

Edit: Oh, there it is, you beat me to it. Shouldnt the insulation be on the outside of the coolant lines?
 
Step 4: line the inside with FRP board and calk. Oh man! I'm getting sooo close!! :rockin:

so far this is the only picture I have taken of the lined inside - it just so happens to show the sealed cedar and not much detail. Stay tuned for future updates! I plan on being completely finished by Wednesday / Thursday of this week - giving me a few days to finish my keggle, brew a batch, and put this bad dad to use.

IMG00042-20100613-1750.jpg


Due to my "camera" a.k.a. cell phone, the purdy purple tones aren't so noticeable in this picture.
 
Where did you put the insulation? And how much/what type?

A previous post shows where - along the walls in the inside. Its typical 1.5" foam board from the apartment Depot. The lid is also insulated (not pictured). Am i sure it will be enough? Not really. I'm not worried about ales but lagers may put a strain on my tiny evaporator coils.
 
Side step 5: Electronics

I'm sure anyone who has ever researched a temperature control module on this site will recognize this set-up. No big surprise here.
IMG00064-20100725-1508.jpg


I can't seem to find my finished control box picture.. bummer dude!
 
Where did you put the insulation? And how much/what type?

Edit: Oh, there it is, you beat me to it. Shouldnt the insulation be on the outside of the coolant lines?

Oh - it took my two 4'x8' sheets with plenty of extra. Had I thought ahead, I would have shortened it up a bit so the inside would have been 4' long. Had this been the case, I probably could have laid out the panels to all fit on one sheet. Roughly a $16 mistake. Meh...

Edit: The copper lines that are shown in the notched frame picture are the condensing coils - the hot side of the refrigeration cycle. The evaporator coils are located in the white "shelf" that is shown inside of the box itself. It was initially the shelf of the mini fridge.
 
I agree with kpr, shouldn't the cooling lines all be on the inside of the insulation? And where does the fan blow if its all sealed off by insulation? Either way tho, I'm sure it'll smell damn good. I love the smell of fresh cedar.

EDIT: didn't see the second page of this thread, OOPS! so nevermind about the cooling lines. but is the fan to circulate the hot air out, to circulate the cool air around the inside? looks great tho!
 
No biggie. Thanks! I'm not much of a wood worker so this is a pretty big project for me. The fan will pull air across the outside of the coils on the front of the box. The back of the box won't be covered since it'll be up against a wall. I will also have a tiny fan on the inside to help circulate the air.
 
Very cool. Great work for not being much of a wood worker, those slanted vent slats (louvres?) looked awesome.
 
UPDATE:

I finally finished the fermentation box. Flipped the switch on the control box, plugged in a few variables and she was off and running. It took longer than I had hoped to get the box from ambient 80deg (my apartment is hot...) to a nice & cool 60deg but that is just something I will have to deal with having such a large box. Once cool, I just the unit off and it warmed by 1deg C after 20 minutes. I felt this was pretty good inside an empty container.

I am thinking about making a divider panel to put inside to make the effective cooling area mcuh smaller - i.e. more efficient. I would also like to add some beer bottles & extra waterfilled carboys for some thermal mass.

Would I do it again? Of course! I love working with my hands and creating. Is there a better way? YES!! BUY A DEEP FREEZER! Just my $0.02.

Finished box:
IMG00070-20100816-1943.jpg


Insides
IMG00072-20100816-2000.jpg


Unfortunately, the FRP board pulled away from the top insulation for some reason - looks like it ate away at the foamboard.. so much for reading instructions. It looks ugly but works.
IMG00073-20100816-2001.jpg


IMG00076-20100816-2001.jpg


Time to make my Keggle!
 
I haven't tested how low I can get the temperature but I'm guessing it would struggle to get much lower than lagering temps. It holds temp really well so it would just be a matter of time to get it down to its lowest temp. I'm hoping that when I install a separation panel to make the affected cooling area smaller, it will become much more efficient. I'm also hoping that, with this panel, I can have a dual zone chamber to do lagers on the evaporator coil side and ales on the opposite side. I always seem to be about 93% done with every single project I do. There is just always something that will make it 0.01% better!
 
Looks great!
Hope min turns are as good!

Can you give me some advice on bending the copper? I took apart my mini over the weekend and was left with a rats nest of copper. How did you bend it without kinking it?

Any advice would be appreciated!

Thanks!
 
Back
Top