OP
OP
I have a pair of March 809 pumps. They've worked fine for 3 years.

Thought I posted this, but had to register first. So if this repeats, that's why.
Ok, burner-buyers. If you've seen mention of the NB 210,000 BTU banjo burners priced @ approx. $44 and think that you just gotta have that - perhaps because it would seem to outshine the 100,000 BTU BG-14s carried by Agri Supply for approx. $33 - think again. I jumped on that hook and for a difference of over $30 ended up with three...BG-14s (remorse, chagrin, etc.) See, Agri Supply is accurate in that the BG-14 with a standard regulator is 100,000 BTU and NB was accurate that the 210,000 BTU burner it sells has that specification WHEN paired with the 0-30 PSI regulator that most of us would be acquiring anyway for this rig. NB omits the BG-14 reference. I'm not saying NB is deceptive, I'm saying that NB sells the BG-14 for more than I've seen Agri Supply sell them. Feel free to learn vicariously from me.

What's the best way to cut this slotted angled iron? I've seen the 18 gauge and 14 at HD or Lowes. Thanks

Love this thread! I am in awe after reading through ALL 65 pages! It's like beer pr0n.
Since this thread goes back 4-1/2 years, can any of the early builders comment on how their brewstand has held up?
I'm wondering the same thing about how well everybody's stands are holding up this long. I'm curious how it's holding up based on time and based on uses (roughly how many brews)
I don't know how many brews I've put on it. But it's holding up like a champ and and don't foresee any issues with it outlasting me.
Every other brew or so I check the nuts/bolts for tightness, and occasionally I have to wrench on some of them.
")


Reaver, thanks for the response. I've been looking at the UniStrut ones for a while as well and thanks for the link to that thread, been reading through it to see what I can learn from it as well. Just the design of Channel Strut appeals to me in that it just looks stronger.
Having said that, the same problem of sourcing at an inexpensive price seems to remain. I went to Home Depot, Lowes, and Rona, but nobody carries it. Fastenal carries it and has 10ft lengths in stock, but they want about $60 per length + tax (http://www.fastenal.com/web/products/details/48124?searchMode=productSearch&filterByVendingMachine=). Figuring I'd need 3 10ft lengths = about $180 + tax, and that's before fasteners.
So I'm back to square one, has anyone sourced any of this in Canada for a reasonable price?
Love this thread! I am in awe after reading through ALL 65 pages! It's like beer pr0n.
Since this thread goes back 4-1/2 years, can any of the early builders comment on how their brewstand has held up?


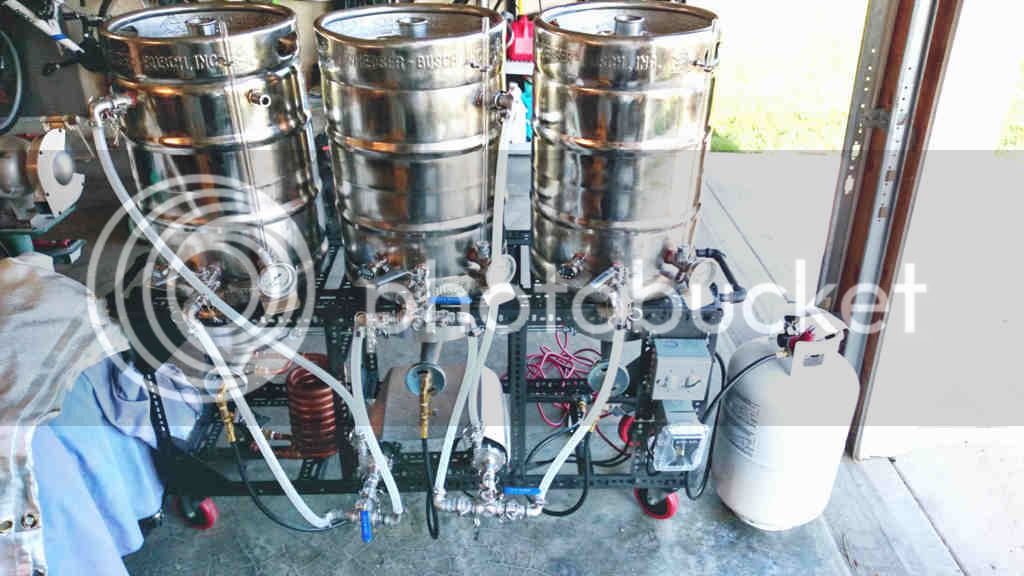
Why are folks using two pumps? I assumed you would use one pump and just change hose connections around as needed? Just curious??
That depends on if you fly sparge and/or recirculate mash. If you batch sparge, you can lauter, then swap to pump in the sparge, then swap to lauter again.
I prefer to fly sparge, so I will be be lautering with one pump, and then sparging with the other at the same time. I haven't gotten my single tier up and running yet, but that's the plan.

Almost done, just need to get the HERMS coil in and get some more hose:
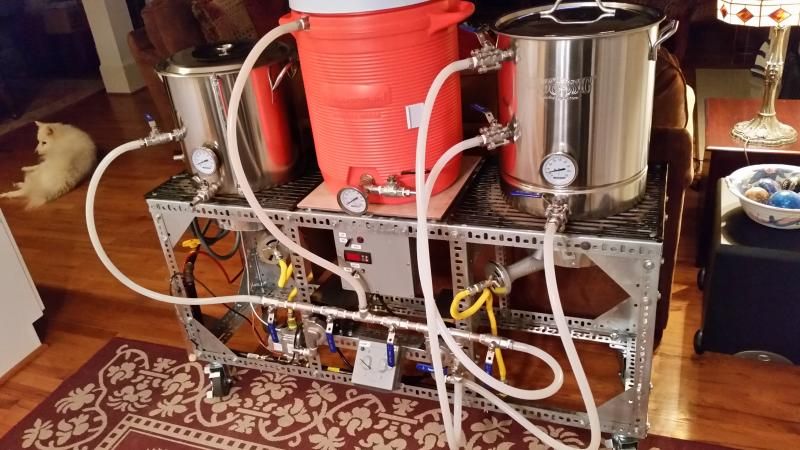
Your wife is going to kick your butt if she catches you with that thing in the living room!
Looking good!!


After scouring the internet and this forum, I landed on this set up. Hope to brew with it soon.
Enter your email address to join:
