habrew
Member
I'd like to share my experience converting an old fridge to a garage fermenter and storage. Before starting this project, I read many websites, I watched a handful of videos, I looked at wiring diagrams and spec sheets. After all this I determined there are a few ways to go about this and no single tutorial or write up would cover everything I needed to know.
For my needs I wanted to take an old G.E. fridge and use the STC1000 temp controller to maintain a steady temperature without sacrificing the freezer and door light. What I had to do was find the thermister, figure out the wiring, bypass the thermister, power the temp controller and attach it. I found a few really helpful/inspiring write ups and videos and went to it.
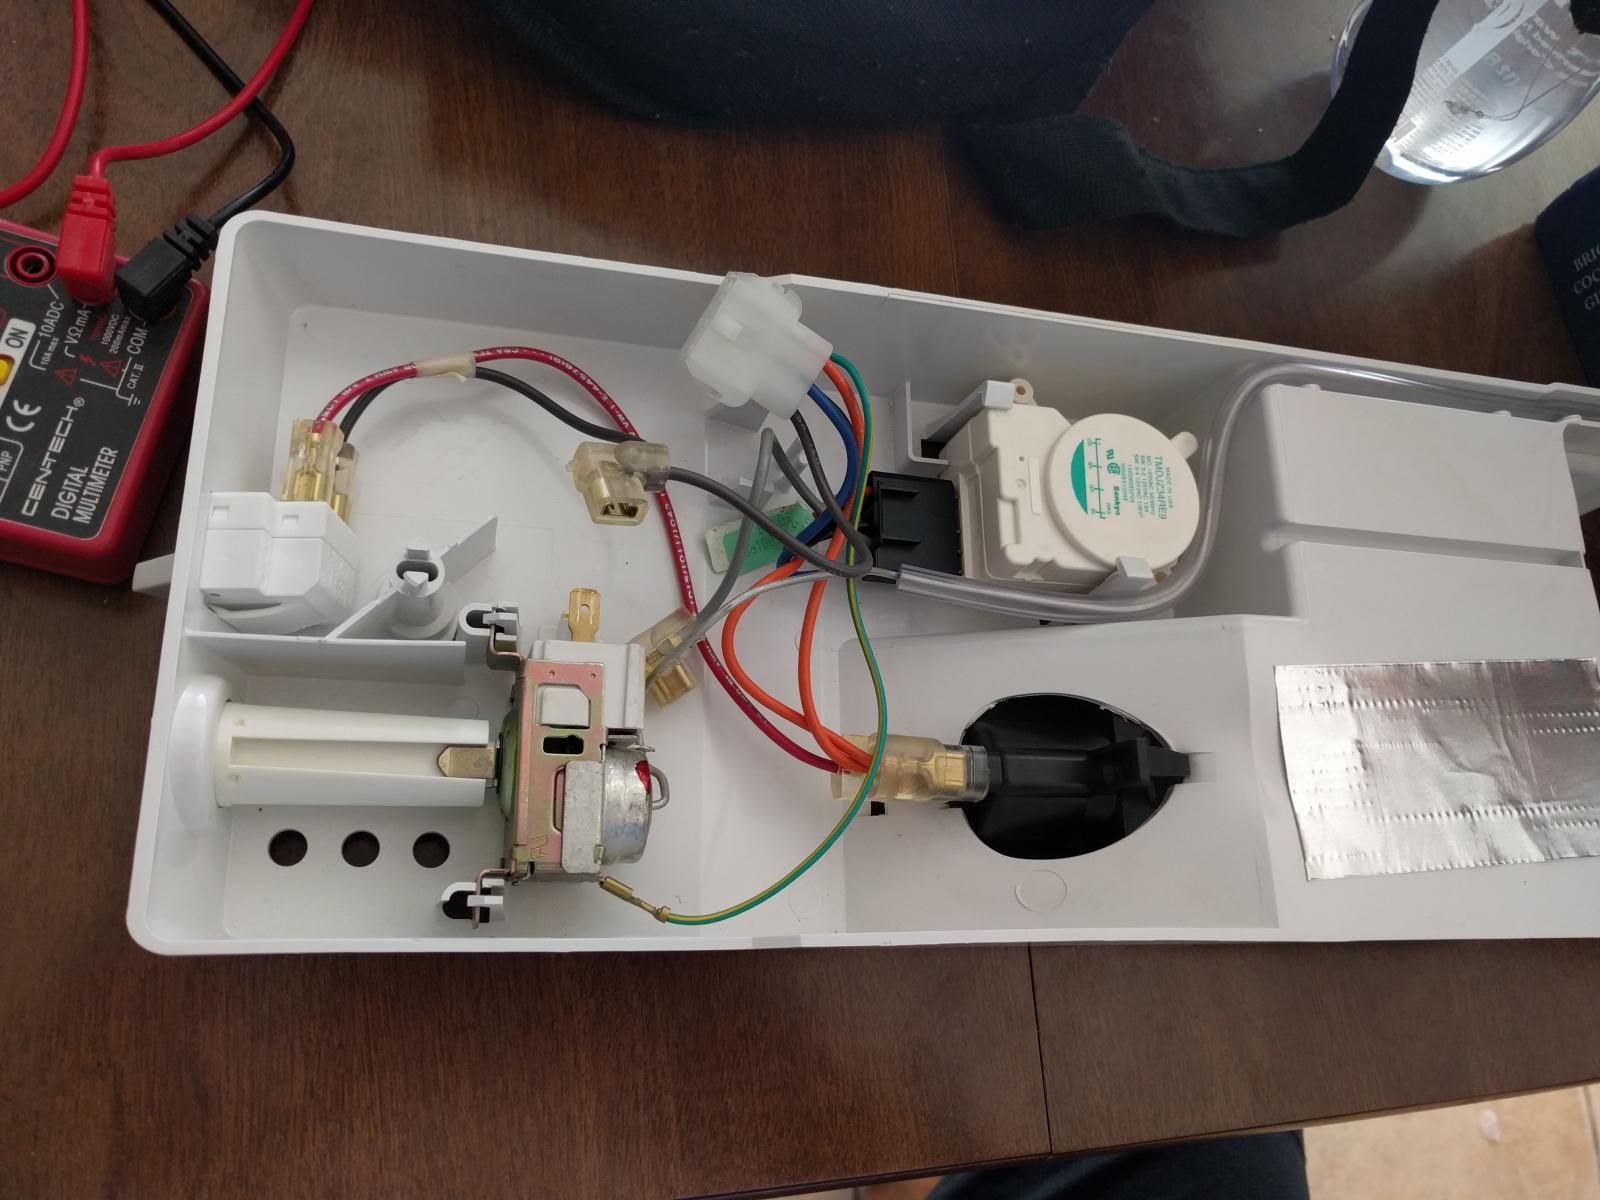
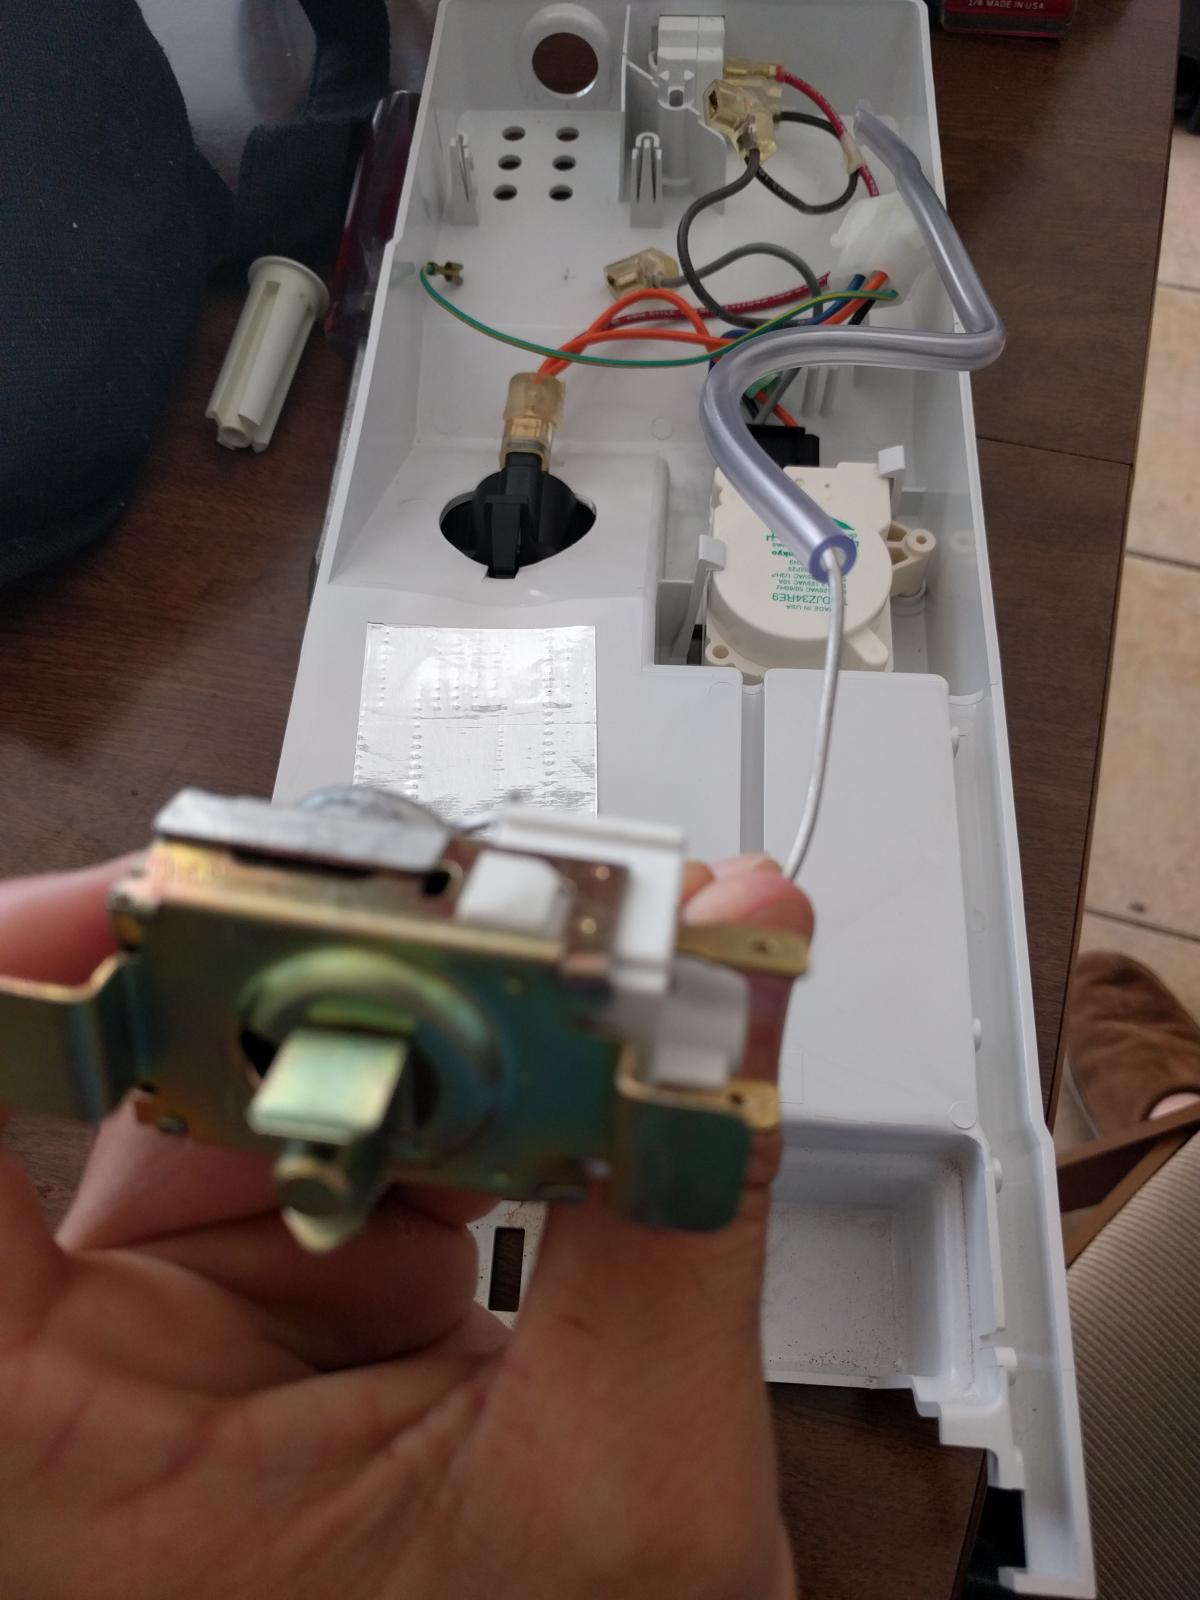
The thermister was at the top of the fridge compartment (between the fridge and freezer) inside a long cover that faces out to the door with a temp dial (mine went from 0 to 9). This part unscrewed easily and had only a single connector. Check out my first attachment for a pic. Inside I found all the wiring to control the fridge (yay!) The door switch for the light, the timer for the condensers, the thermister and thermostat, the light housing and spade connectors (again, yay!).
Now time to figure out wiring. Being that the control cover used only one connector I decided the positive, common, and ground wires were all there. I'm not really great with electronics so here's how I figured this out:
At this point I had a good idea of what was what. I knew I control the fridge separately from everything. I needed to know how. I read a great write up at http://www.eckraus.com/blog/convert-refrigerator-to-fermentation-chamber that outlines finding the resistance of the thermostat and designing a small circuit to control it with the temp controller. I ended up not using his great info because as I probed I found my thermostat didn't work the same way. What I was seeing was the resistance stayed a constant 1.6ohms in any temperature unless the dial was set to zero.
Infact, I was totally boggled until I watched a video on youtube by a user named Homebrew Chris https://youtu.be/ex0k-AQ5CtM. The issue (and happy coincidence) was that the thermostat is a mechanical switch. When the temp hit a certain degree, it would make a complete AC connection. As soon as I discovered this I realized I could just use the STC controller directly. Then it dawned on me... I had line level positive, common, and ground. BOOM :rockin:
At this point I was finally able to decide how far I could take the project. I could use the STC to control the fridge chamber separately, I could even power it! Heck, I could power a heater! (I've saved that for another day as it's 100F degrees today and I doubt I'll need a heater for the next 4 months.)
I've included a handful of images, here's a breakdown of what you're seeing:
Right now the fridge is happily cooling back to a good fermenting temp. So what else do I have for you? ADVICE! w00t!
For my needs I wanted to take an old G.E. fridge and use the STC1000 temp controller to maintain a steady temperature without sacrificing the freezer and door light. What I had to do was find the thermister, figure out the wiring, bypass the thermister, power the temp controller and attach it. I found a few really helpful/inspiring write ups and videos and went to it.
The thermister was at the top of the fridge compartment (between the fridge and freezer) inside a long cover that faces out to the door with a temp dial (mine went from 0 to 9). This part unscrewed easily and had only a single connector. Check out my first attachment for a pic. Inside I found all the wiring to control the fridge (yay!) The door switch for the light, the timer for the condensers, the thermister and thermostat, the light housing and spade connectors (again, yay!).
Now time to figure out wiring. Being that the control cover used only one connector I decided the positive, common, and ground wires were all there. I'm not really great with electronics so here's how I figured this out:
- the door-swtich only handles positive wires
- the thermostat handles a ground and positive
- the light handles positive and common
- I looked up the odd white round thing and found it was a timer. That meant it had to be powered. Therefore it has a positive
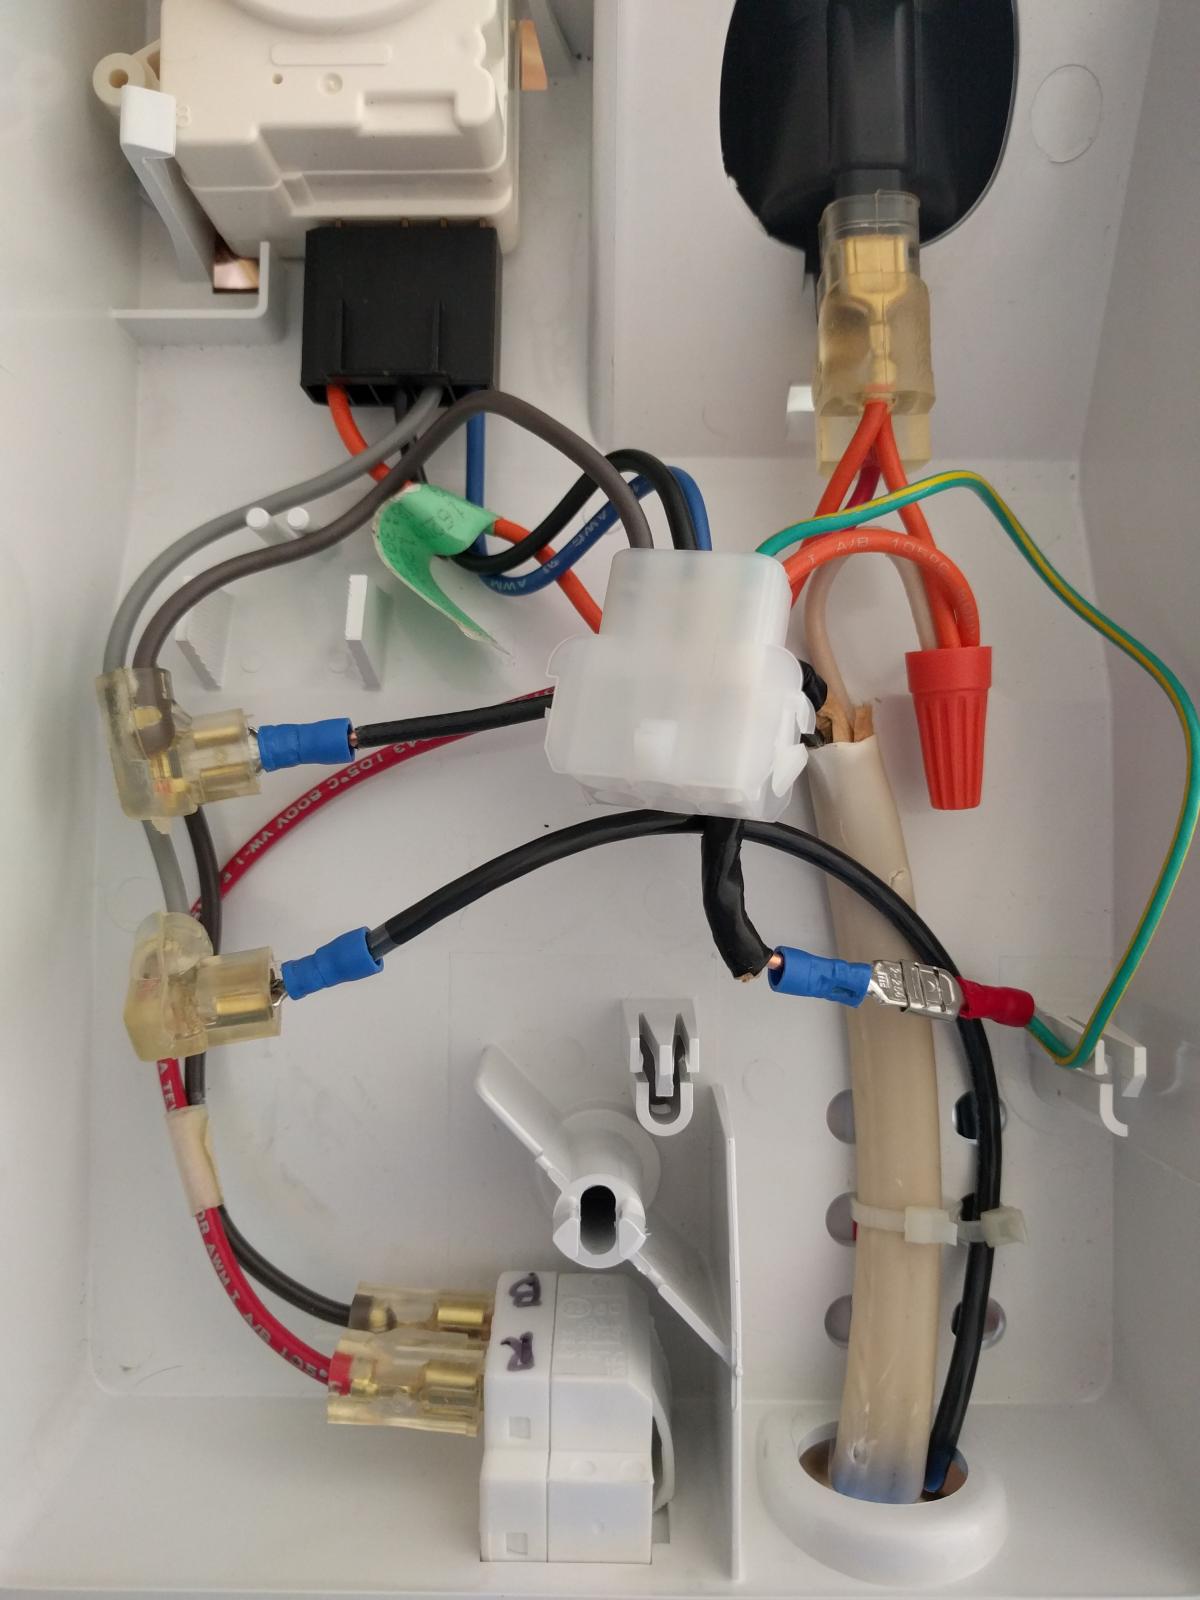
- All that meant the dark gray, and blue wires were positive. The light gray and red wires were switched power. That makes the orange wires common and the green/yellow wire ground.
At this point I had a good idea of what was what. I knew I control the fridge separately from everything. I needed to know how. I read a great write up at http://www.eckraus.com/blog/convert-refrigerator-to-fermentation-chamber that outlines finding the resistance of the thermostat and designing a small circuit to control it with the temp controller. I ended up not using his great info because as I probed I found my thermostat didn't work the same way. What I was seeing was the resistance stayed a constant 1.6ohms in any temperature unless the dial was set to zero.
Infact, I was totally boggled until I watched a video on youtube by a user named Homebrew Chris https://youtu.be/ex0k-AQ5CtM. The issue (and happy coincidence) was that the thermostat is a mechanical switch. When the temp hit a certain degree, it would make a complete AC connection. As soon as I discovered this I realized I could just use the STC controller directly. Then it dawned on me... I had line level positive, common, and ground. BOOM :rockin:
At this point I was finally able to decide how far I could take the project. I could use the STC to control the fridge chamber separately, I could even power it! Heck, I could power a heater! (I've saved that for another day as it's 100F degrees today and I doubt I'll need a heater for the next 4 months.)
I've included a handful of images, here's a breakdown of what you're seeing:
- The inside of the control cover.
- The long thermister and the thermostat.
- All the common wires attached with a wingnut; the ground, positive, and switched power for the thermostat attached with spade connectors. Also, notice the Romex wire leading out. This will power the STC and AC heater outlet.
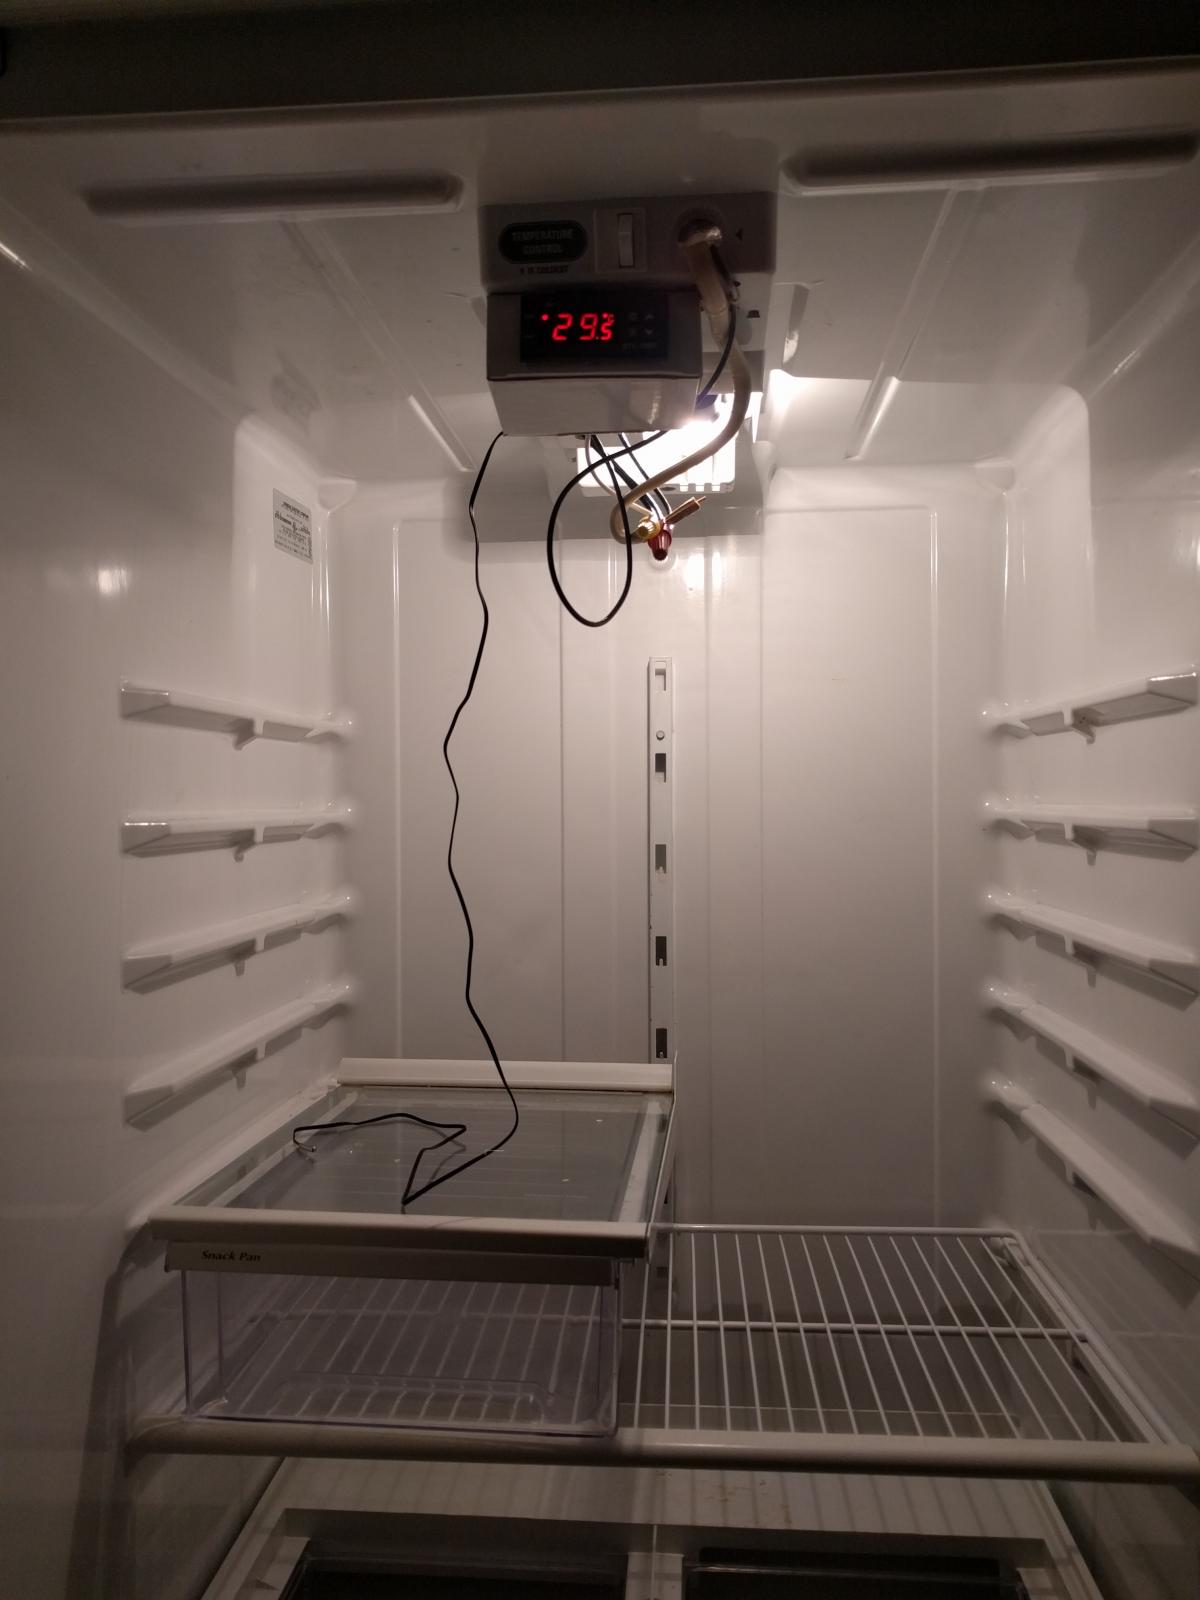
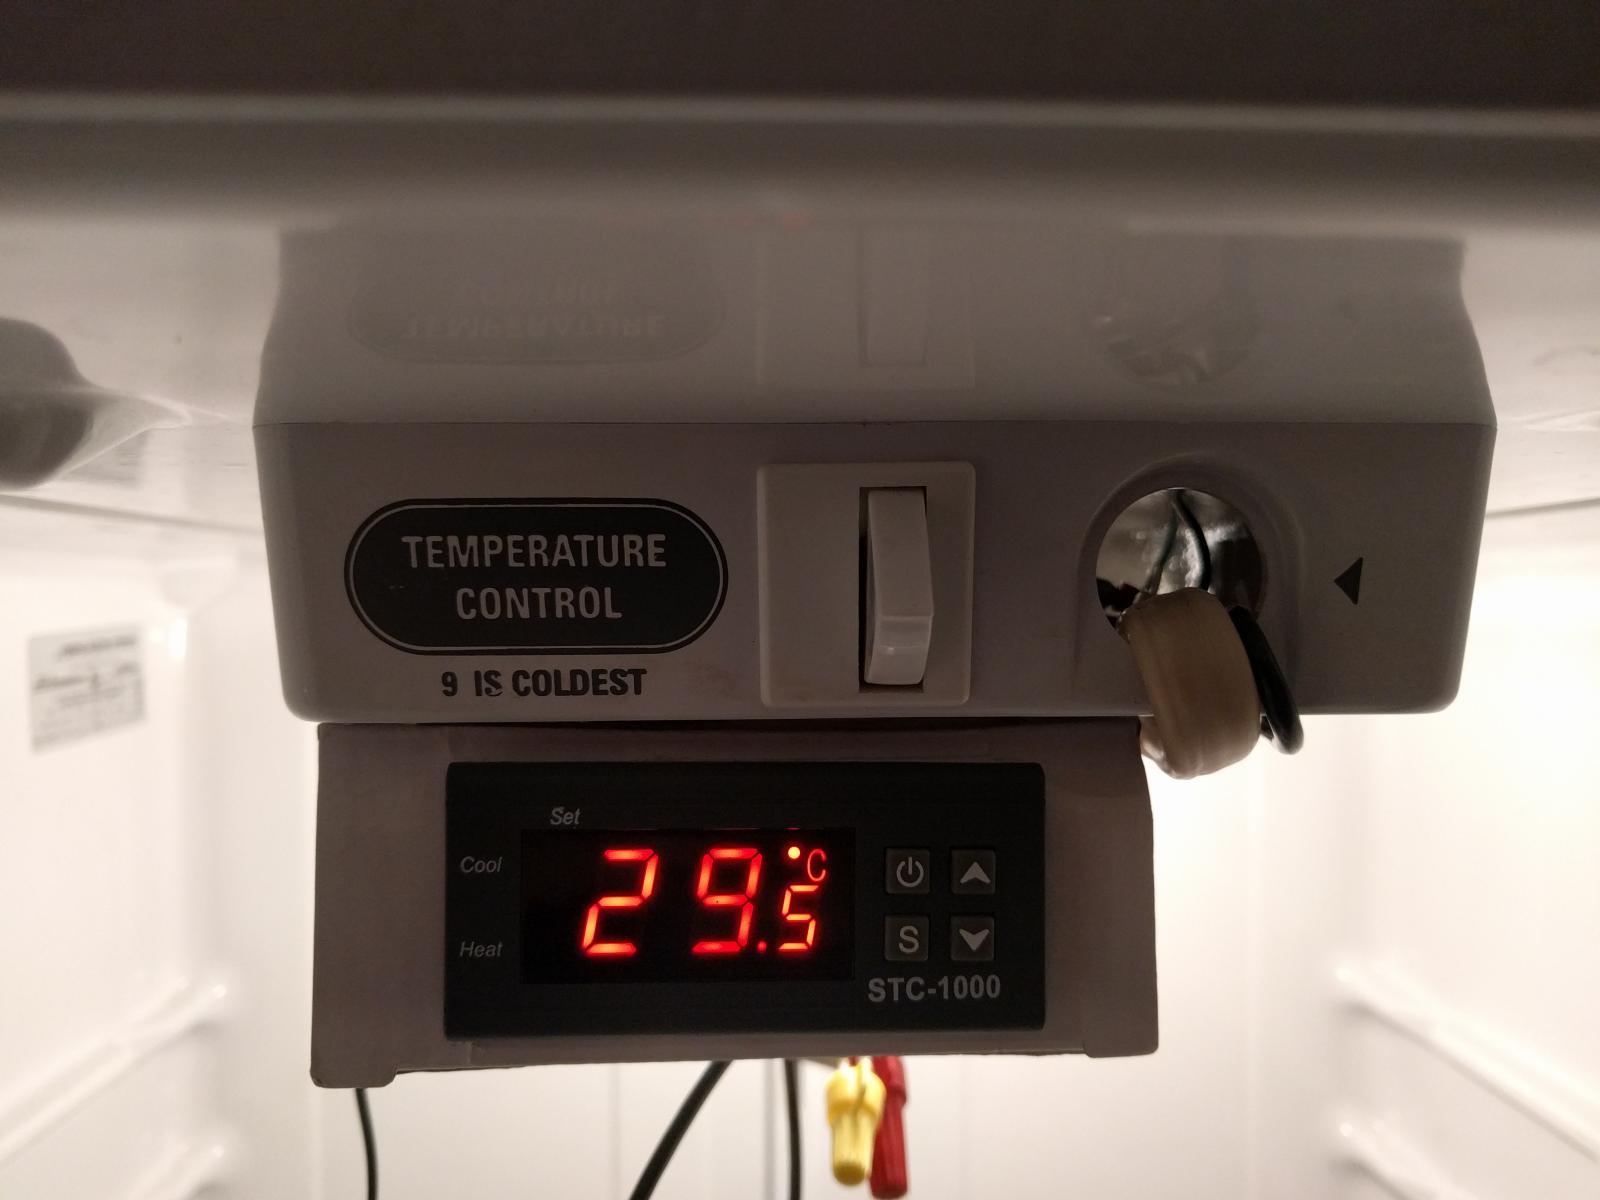
- The STC is mounted in a small box for now, the whole project is installed within the fridge and running. I still plan to complete the kit with a heater and final enclosure.
- A final pic of the controller.
Right now the fridge is happily cooling back to a good fermenting temp. So what else do I have for you? ADVICE! w00t!
- Don't shock yourself. keep things unplugged when not in use and use surge protectors.
- If you buy an STC make sure you're buying the right type. Both Celsius and Fahrenheit are available.
- The screws that hold the wires in the controller are weak and strip easy. Be gentle and don't use larger that 14ga wire.
- DON'T FORGET: the STC starts in delay mode and may take 7-10 minutes to start cooling/heating.


