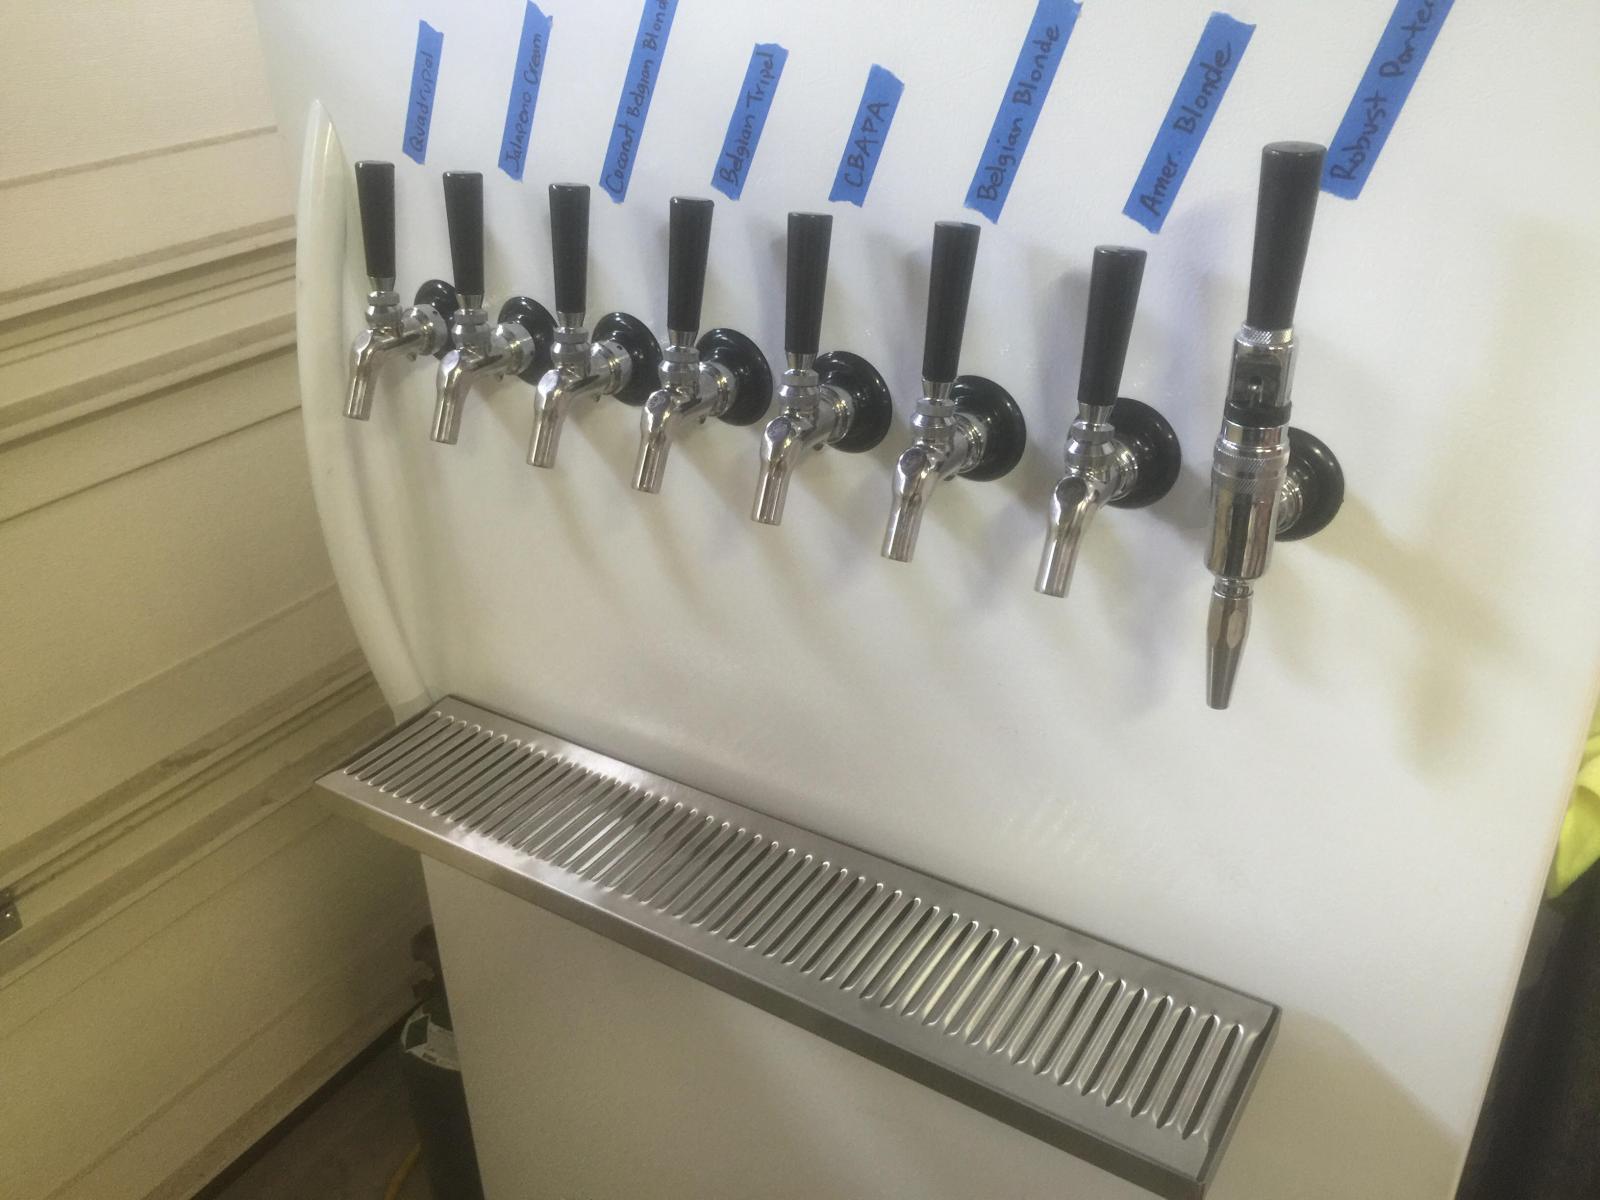
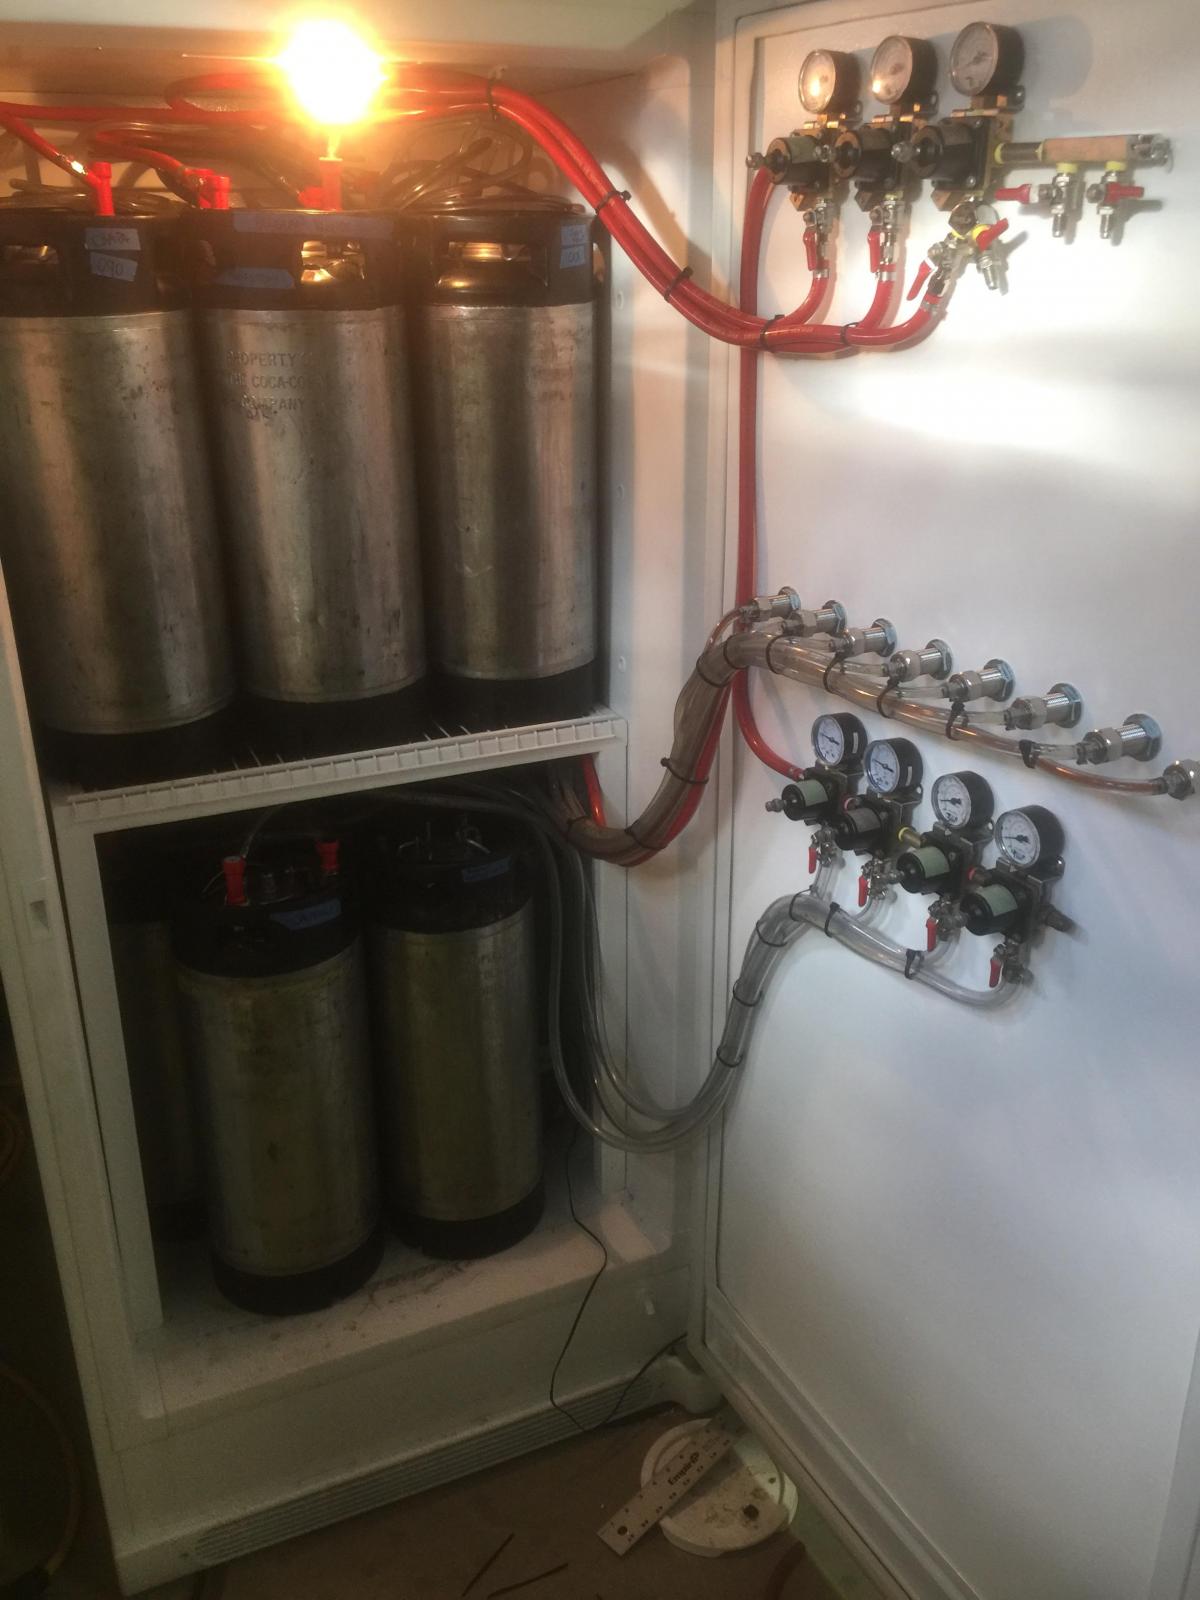
Upright Keezer, 8 taps, 11 kegs

Homebrew Talk - Beer, Wine, Mead, & Cider Brewing Discussion Forum

Help Support Homebrew Talk - Beer, Wine, Mead, & Cider Brewing Discussion Forum:

This site may earn a commission from merchant affiliate links, including eBay, Amazon, and others.
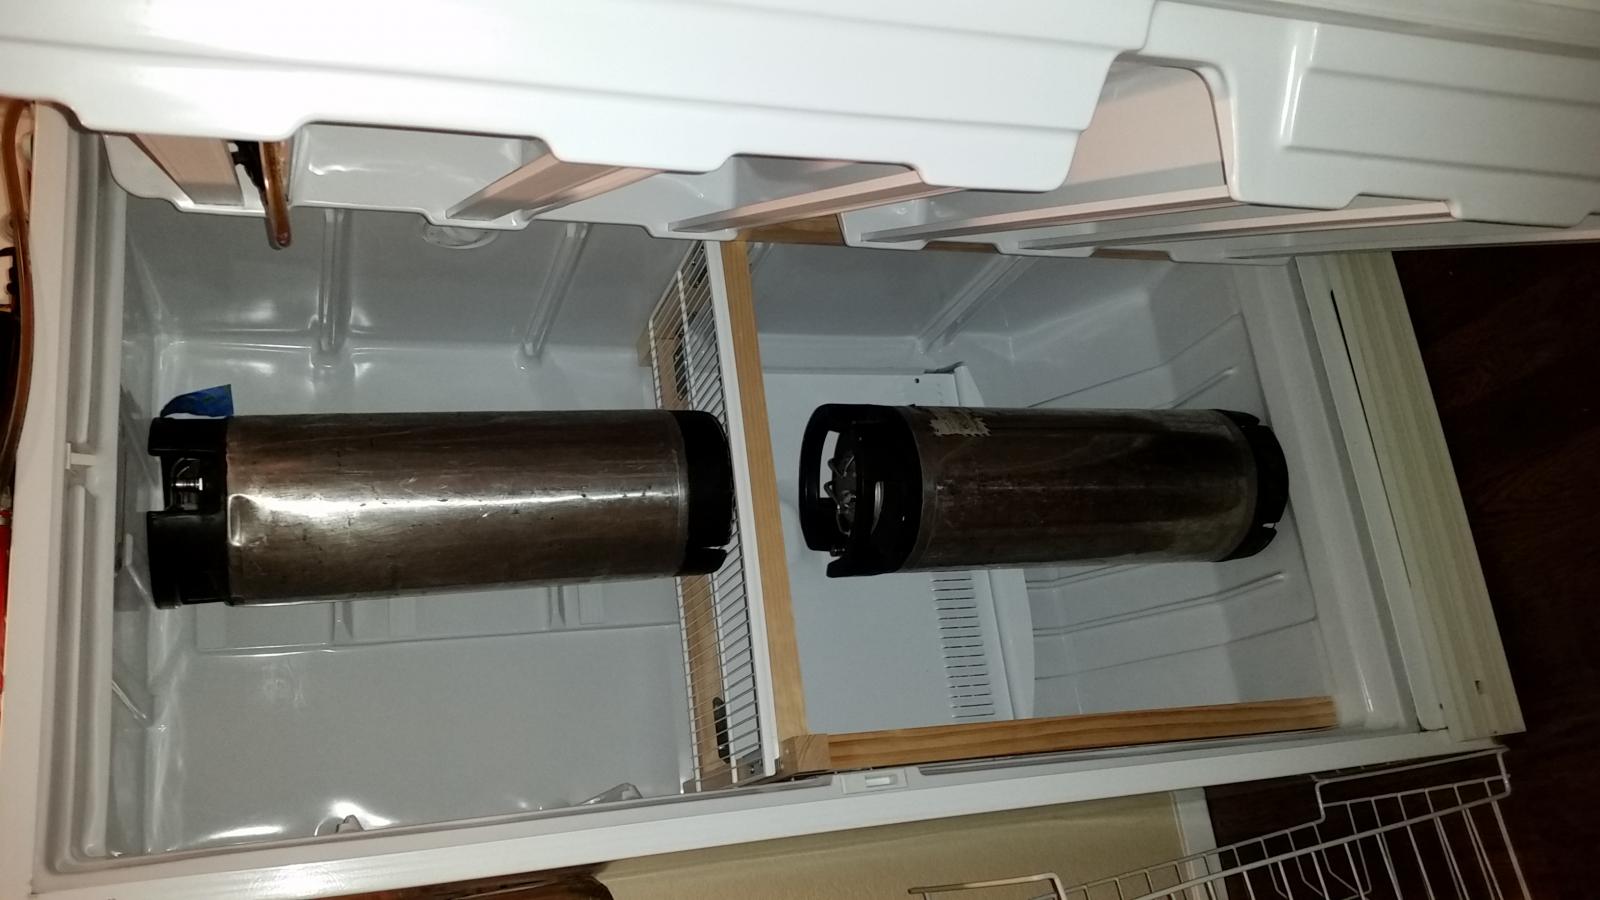
I'm in the process of building one of these and wanted to provide a pic with it full of pin-locks (well, 10 pin locks and one ball lock at least).
I beveled the inside corners of the rear 2x2 support legs so that the kegs would fit all the way into the corners. But even with that, it still slightly hits the shelf bars on the lower three shelves, so I removed them.
It's not that big of a deal breaker to me though as I'm considering using that surface to mount all of my secondary regulators anyway. Plus, the shelves don't really even fit a 12oz. bottle. So they have very little use for beer storage for me. Yeast, maybe...

The freezer I scored from a friend who was moving and not taking it with them. The price was perfect, at free! (Well, I'm sure I'll be brewing them a couple kegs worth for their new housewarming party at least)
This will be replacing my 4 tap kegerator that I made from a top freezer/bottom fridge. It will have one stout tap and 7 regular faucets. I am having a struggle trying to source three more matching Perlick 525SS faucets to match the four I already have (damn my OCD!). So if anyone has any sources, I'd love to hear them!

Fortunately, this freezer came at a perfect time as the chest freezer that was holding all of those kegs is struggling to keep cold anymore.

2015-08-31.png
 
I'm in the process of building one of these and wanted to provide a pic with it full of pin-locks (well, 10 pin locks and one ball lock at least).


Great setup! The question of how many pin locks has come up several times and now we have an answer. :rockin: I like how you actually have more room above the kegs for dealing with the disconnects.

Post a pic when complete. :mug:
 
Hey JonW,

I have an upright I am about to put taps on the door in. Do you think it would be possible to put the taps behind a drink shelf? In other words, if you had drilled your holes a little higher, so that the hoses ended up inside the channel created by the plastic molded drink shelf? I am pressing on mine and there doesn't seem to be anything inside (insulation, etc.). I think I can fit 6 taps worth in there, but of course I have no way to see inside without cutting the plastic.

Thoughts? TIA!

-BD
 
I looked at doing that, but with 8 there was just no way. Some shelves are thicker than others, so you may be OK with 6 taps. It is completely open inside that space. Obviously, the length of your shanks are going to come into play as well as where you route the hoses coming out of the shelf area. The side wall of the shelf ends up flush with the inside walls of the freezer, so you'll still have to come out towards the front at some point. On mine, some shelves have a little more vertical space than others, so I ended up doing the shanks at the top of one of the taller shelf areas. That still leaves me plenty of room on that shelf for storing my taster glasses that are not as tall.
 
Ok thanks. Glad you considered this and didn't think I was crazy! I agree with the shelf becoming flush, so the hoses would need to drop out of there. I think I would need elbow tailpieces, but my 4" shanks should be good.

I will give it another look. It may not be worth the headache of working blind here, but I think it would make for a cleaner inside.

Another ?: I live in FL where it's hot and humid. My freezer (well, fridge now) is in my garage. I assume the stainless shanks and taps are going to conduct heat into the fridge, meaning they will be cold and likely develop condensation. I know it's drier where you live, but do you expect this to be correct, and will it be an issue over time? I know the freezer will have to work harder as a result. Would I be better insulating the taps so they conduct less heat into the freezer?

-BD

I have four SS taps outside (back patio). I'm in Clearwater. If you insulate the shank on the inside of the freezer, they won't get sweaty unless you are pouring beers, in which case they will get cold and sweat a little.

I have 3 fridges running in this heat. Here's some data I've gotten using a Kill-a-Watt meter. This should help you.

My 7.2cuft keezer costs about $1.50 / month to run. I measured that in July. Considering it's in that blistering 90+ humidity all the time, that's pretty good.

I have another chest freezer in the garage that uses almost the exact same power, even though it's a 15cuft. It's only for fermenting though, no taps or collar.

I have an upright side-by-side refrigerator in my garage that I use as a normal fridge. It's costing me about $9.50 per month. I think it's a lot more power because it's an upright, and because it's running a freezer (at freezing temps), which probably uses a lot more juice to maintain. Further, normal fridges blow air around to get the cold air from the freezer side to the fridge side. Chest freezers don't have fans. The moving air in the upright probably causes more heat entry at the seals etc.
 
Thanks, that helps. I think I would try to shield off the shanks as you stated. I know the shanks should be cold for best beeresults, but I'm not running a bar, so it'll do!

-BD


Just to clarify - the side that will sweat will be outside the freezer not the section inside the freezer.
 
Can someone direct me to the 90 degree tail pieces?- cant find them on any homebrew websites.

Cant wait to get this going!

Cheers.
 
I would suggest to use John Guest fittings on the end of the shank, instead of barbed tail pieces like that. I wish I had done that (my damned shanks have welded barbed tails ugh).

There are John Guest fittings that are 1/2" BSP on one side to screw right onto your shank, and quick disconnect tubing on the other side. So nice, especially for anyone trying to use stiff beer line (e.g., Bev Seal).

Anyway, for anybody looking to outfit a keezer, maybe do a quick search on here for John Guest and you'll see some really clean installations.
 
Unless the John Guest fittings have a right angle built into them, they'll likely make your stiff lines stick into the keg area too much. The right angle tail pieces keep everything very tidy.
 
Has anyone done this build using a bank of secondary regulators instead of a manifold?

I was planning to use the 20cu ft freezer and install 6 taps. One would be dedicated to soda, which needs to be at a higher PSI than beer, I would also like the flexibility of having different beers at their appropriate carbonation level instead of having everything the same.

My idea was to have the secondary regulators installed on a board hanging on the underside of the shelf support so they could be easily accessed. It would be installed as far forward as possible in order to leave room for a couple of kegs behind it that would be carbonating.

Does anyone have any thoughts on this approach?
 
Funds permitting (I still have to acquire all of the extra parts I need to upgrade from my 4 tap kegerator), I'm planning on putting at least eight secondaries in for the kegs.
However, after test fitting them, they would be pretty tight to fit on the keg shelf anywhere without compromising keg space.
My plan is to see if I can get them on the door - a row above and below the taps. I'm honestly pretty close to just removing the door shelves as they're almost worthless anyway. Only a couple of them will hold 12oz. bottles and when you're working with kegs and bump the door, half of those want to fall out on you.

I currently only have five secondaries available for the build and am waiting on the funds to get all of the additional parts that I need. At this point, I'm just limping it along with a 5lb co2 tank inside to have some extra keg storage.
 
My plan is to see if I can get them on the door - a row above and below the taps. I'm honestly pretty close to just removing the door shelves as they're almost worthless anyway. Only a couple of them will hold 12oz. bottles and when you're working with kegs and bump the door, half of those want to fall out on you.

I was considering removing shelves as well, but using the extra space to instead mount the board with the secondaries to the front of the shelf instead of on the door. Assuming that removing the shelves would add enough room to allow for that.

I am trying to avoid removing the shelves so that I can use them for glassware.
 
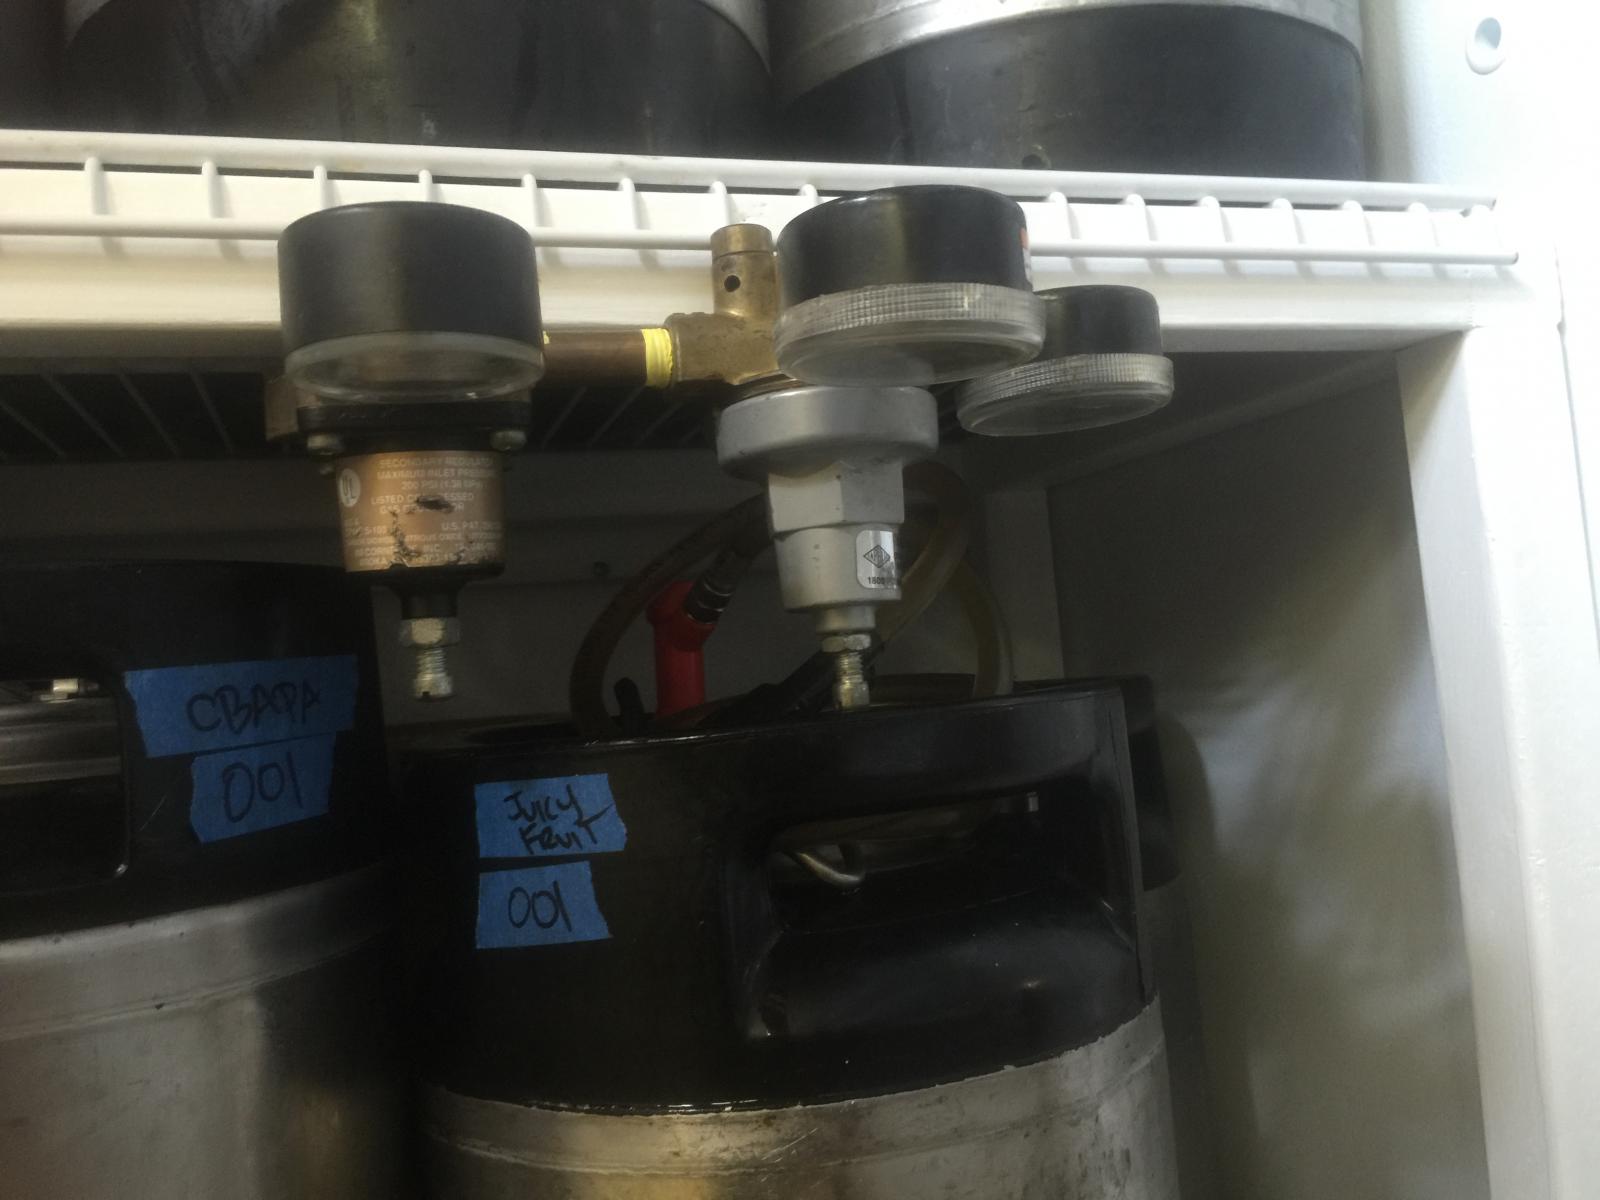
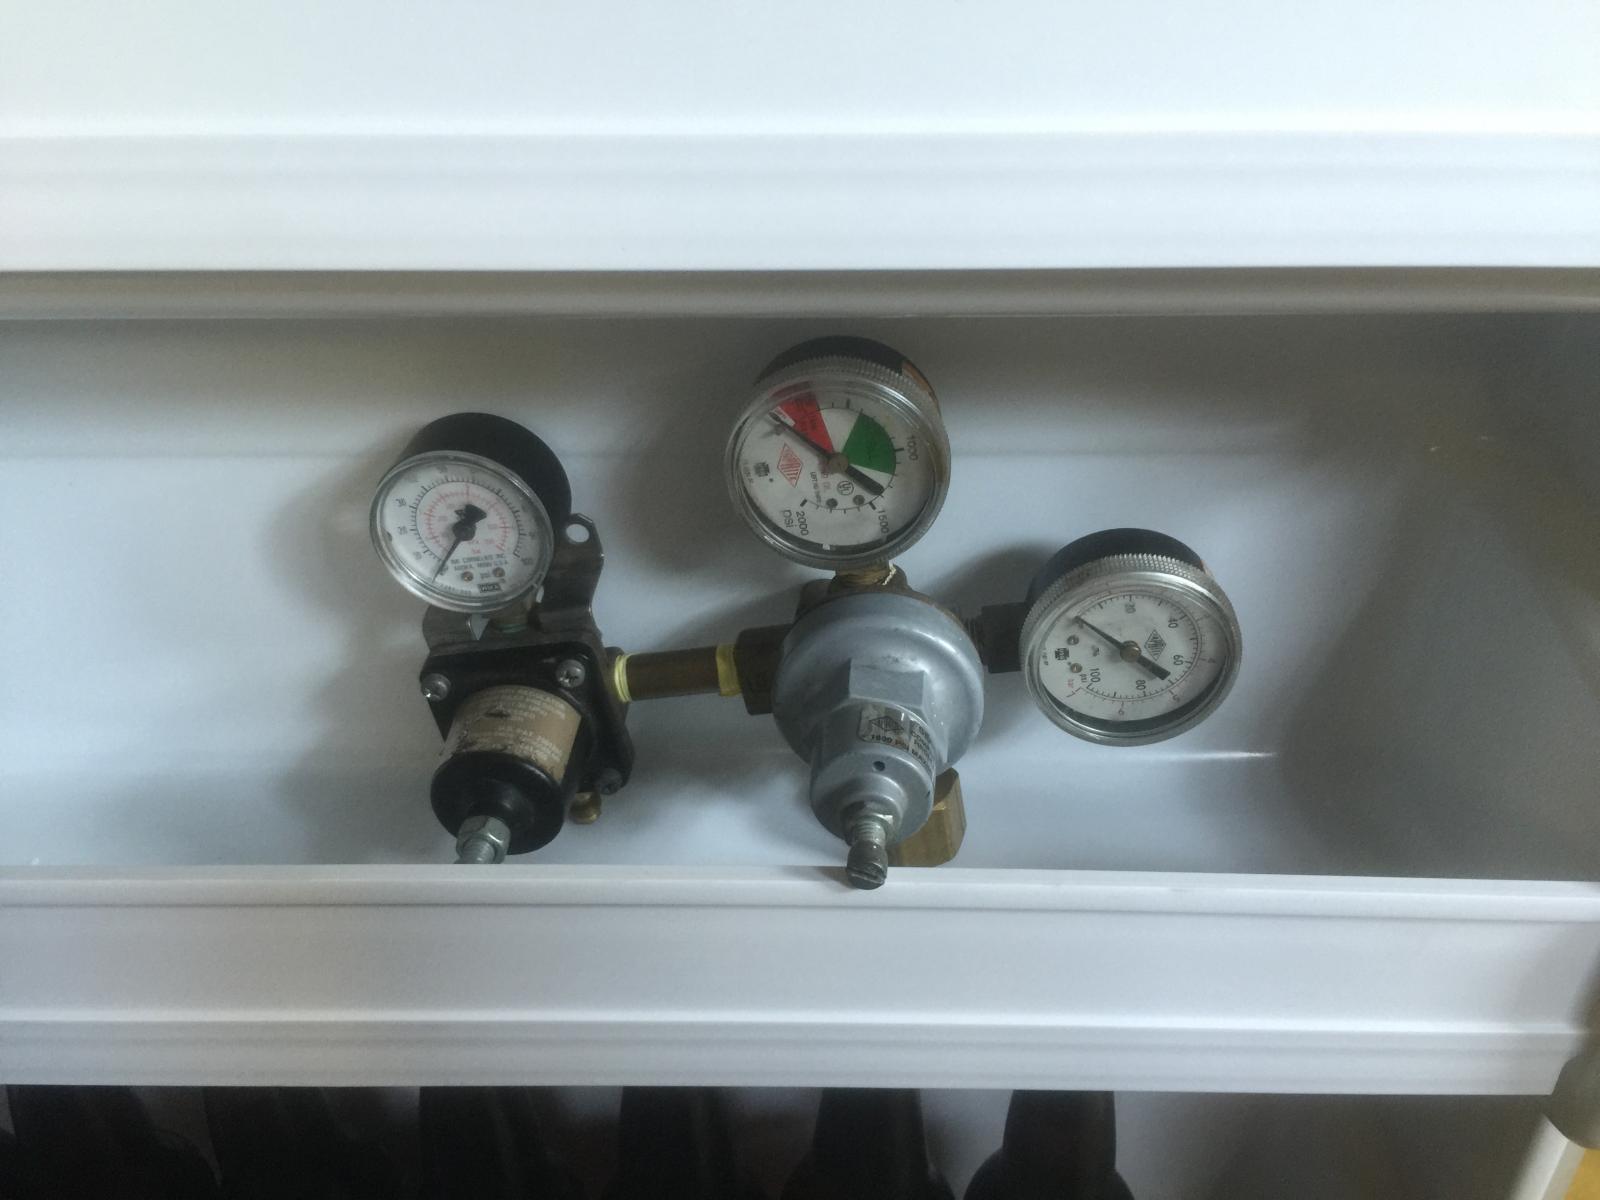
These pics should help.
Ball lock is on the left, pin on the right.
My shelf is dead center top to bottom in the freezer.
You can see why I think the door would be a better place for them...

Also for reference, the silver regulator is a primary, the black is a secondary.

IMG_1755.jpg


IMG_1757.jpg
 
I have an 8 tap 11 keg build that I did with the assistance of this lovely thread, but I too desire the ability to do secondary regulation. The ones through morebeer and other online outlets seemed pricey... as much as 55 bucks a piece.

I was at harbor freight yesterday and noticed this:

http://www.harborfreight.com/125-psi-air-flow-regulator-with-gauge-68219-8127.html

8 bucks. Any sage advice from the forum as to why this might not solve this problem?

It's range goes up to 125psi, for the regulator and more for the gauge. Given the fact that a few psi can make a fairly significant change in carbonation, I think it would be difficult to dial in the exact pressure you are going for. Given that, it kind of defeats the purpose of having all those secondary regulators if you only have something like +/- 3-5psi accuracy. Now you could swap out the gauge for one that has a smaller range like 0-30psi, but you are kind of polishing a turd at that point cause a new gauge will probably be as much or more than the $8 regulator.
 
So I've only had my freezer plugged in and set at 38 for maybe three weeks, and already, my evaporator cooler and back wall of my freezer was a solid block of ice and hardly letting any airflow though to cool the freezer.

I did disconnect the defrost heater when I first got it, but after spending the last 45 minutes pulling kegs and defrosting the cooling fins with a heat gun, I just reconnected the heater and am letting it go through a couple of defrost cycles.

This seemed to start becoming an issue when I added four kegs that were fresh from the carboy at around 68 degrees. The length of time that it ran to get those cold froze the back wall, so I only assumed that the coils were solid ice as well. Plus I noticed that the air flow coming from the top of the freezer was only a small percentage of what it was when I first plugged it in.

This could just be a perfect storm of the high humidity that we've been having lately in So Cal, plus the fact that I still haven't got the taps through the door yet, making me open it if I want anything from the kegs inside.

Either way, I figured I'd post and let everyone know what I'm experiencing.
Since I'm not fermenting in this, I don't think the temporary rise of internal temperature is really going to have long enough to change the temperature of that much liquid mass and even if it did, I can't see it affecting much.

If I notice different though, I'll report back with that info.
 
This could just be a perfect storm of the high humidity that we've been having lately in So Cal

I think this is the culprit right here as I just had the issue also. I've never had problems before, but a week or two ago during the high heat and humidity mine ran for an extended period and iced up. I don't have as many kegs in mine as I usually do, so I think that contributed to less temperature stability. I was also in and out of mine a lot because I was storing some food products in there temporarily. I'm going to change the logic in my BCS so that I can set some maximum run times and build in some defrost time if it hits the max run time.
 
Has anyone done this build using a bank of secondary regulators instead of a manifold?

I was planning to use the 20cu ft freezer and install 6 taps. One would be dedicated to soda, which needs to be at a higher PSI than beer, I would also like the flexibility of having different beers at their appropriate carbonation level instead of having everything the same.

My idea was to have the secondary regulators installed on a board hanging on the underside of the shelf support so they could be easily accessed. It would be installed as far forward as possible in order to leave room for a couple of kegs behind it that would be carbonating.

Does anyone have any thoughts on this approach?

I just hauled a 19.5 cu. ft. home yesterday... Not a bad CL find at all. $25 and it RUNS GREAT! They just wanted it gone.

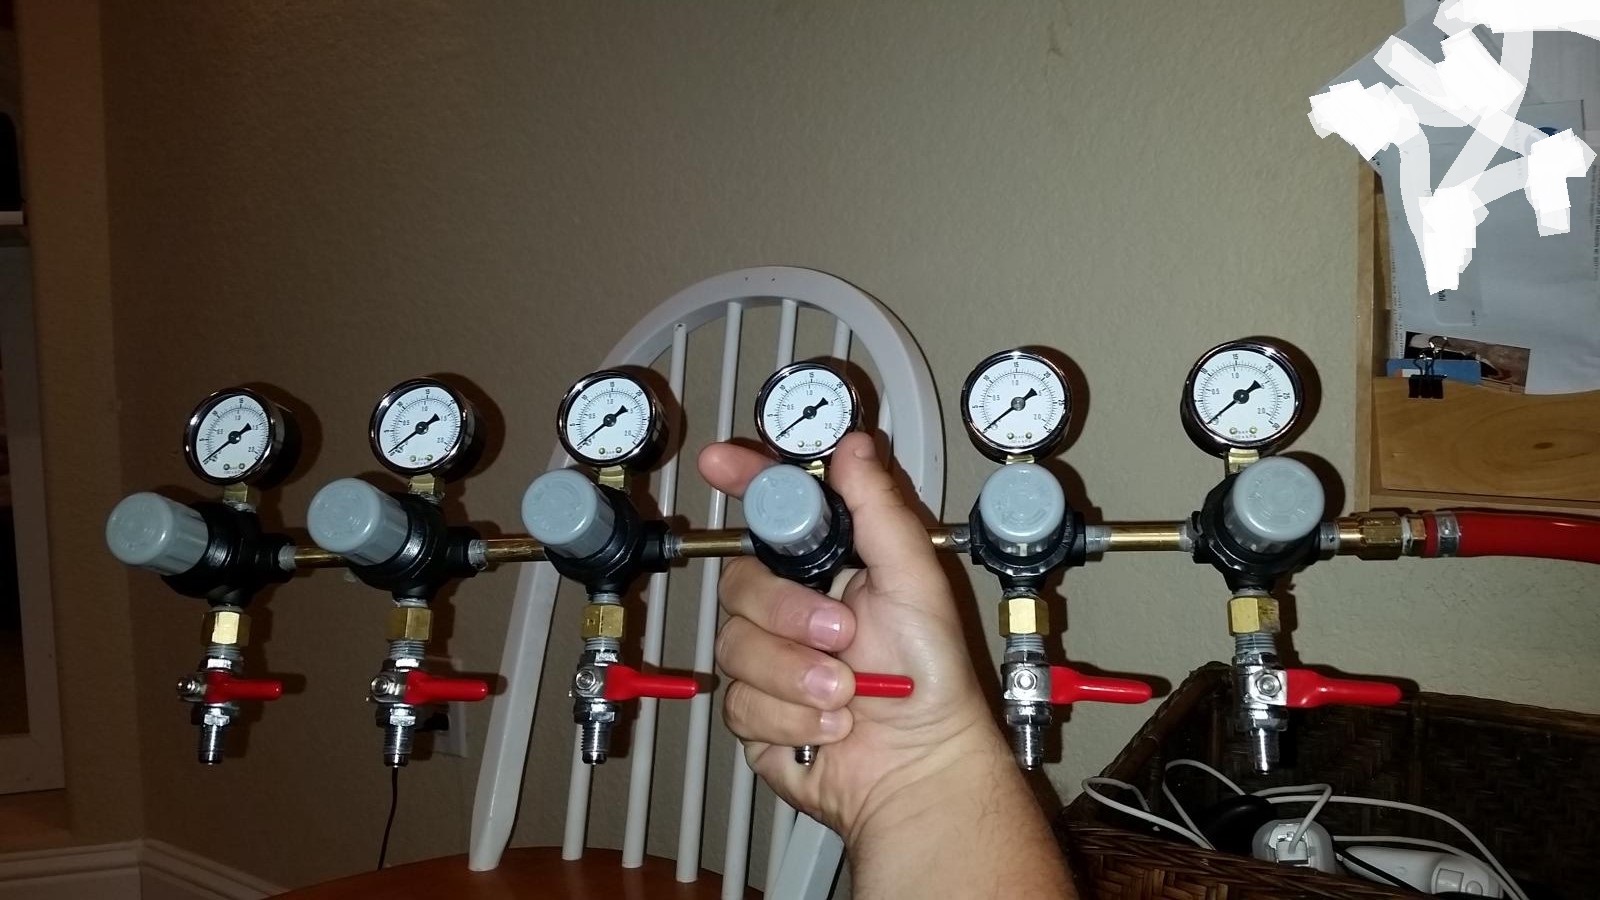
I have already built a 6 place regulator block. I plan on having 5 taps. The 6th place will be used for carbonating kegs. I'll run a hose off it, over to my manifold I had been using. I found some 150 psi regulators somewhere really cheap. (Maybe Harbor Freight?) I wanted gauges with a more useful range so I found some on eBay for cheap! They are 0-30 psi gauges. I connected it all with brass nipples and output from each with a check-valve ball valve as you would see on a distribution manifold.

I have no idea how many kegs will fit yet, as I haven't loaded kegs into it.

Regulator Manifold.jpg
 
Hey JonW,

Planning on doing mine soon... similar freezer. You pit your tabs above the third door shelf (from the top). Any reason you could't put the above the top shelf? I realize that is a longer/higher run for the bottom kegs, but shouldn't be too much of an issue. Any thoughts?

-BD
 
Hey JonW,

Planning on doing mine soon... similar freezer. You pit your tabs above the third door shelf (from the top). Any reason you could't put the above the top shelf? I realize that is a longer/higher run for the bottom kegs, but shouldn't be too much of an issue. Any thoughts?

-BD

I didn't want the taps too high as it would prevent the kids from fetching me a beer! ;)

All kidding aside, there were several reasons I went at the level I did. I had already planned on having a menu board on the door, so I wanted that at eye level. Additionally, I liked having the hoses close to the center of the door so that it made routing easier. Lastly, my wife would have been mad if I put them too high! :cross:
 
I have already built a 6 place regulator block. I plan on having 5 taps. The 6th place will be used for carbonating kegs.

This is basically what I had in mind as well, only I was going to have 7 regulators. 6 for faucets and 1 for carbonating.

I have most of my parts, minus regulators and freezer. I do have a 20.2 cu ft upright I am currently using for fermenting, so I can test fit some things.

I was considering 2 groups of 6 regulators, then a separate single regulator with a Y for carbonating, all mounted to a piece of plywood on the front left of the stand. I think that if the regulators are arranged properly, they would fit in between the shelves when the door is closed, which would keep me from having to remove the shelves, then the kegs could be in fit behind plywood. I am going to have to play around with a little more to see if it would work out.
 
Looks great Huaco! Did you go taller on the bottom to fit a sankey? If all goes as planned, I should be building mine out this weekend thanks to Bobby M. and some bent ss pieces!!
 
Looks great Huaco! Did you go taller on the bottom to fit a sankey? If all goes as planned, I should be building mine out this weekend thanks to Bobby M. and some bent ss pieces!!

No, had to match the height of the hump in back. It levels off in back and I was able to eliminate 2 rear legs on the shelf I built. It is really sturdy.
 
Well, I finally saved up enough cash and bought everything I needed. Just finished the majority of the build, but may work on building my STC-1000 into the door. It's functional at this point though, at least.

I did remove all of the door shelves after all. Especially after the door slammed closed on me while trying to load a keg into it and broke a couple of bottles that I had stored there.
I also skipped on the 90 degree tailpieces as the line bends just fine and may even take up less space. Plus, I couldn't find the 90's for a decent price anywhere.

I have 7 Co2 secondary regulators mounted to the door, one with a splitter in case I need to serve all 8 taps on Co2. I also have two outputs on the high side for carbonating.
There is also a nitro tank and regulator on the outside for the nitro tap.

I did 10' feet of 3/16"ID line for all kegs and the pours have been greatly improved in comparison to the 5-6' lines I had in my previous kegerator.

Honestly, the hardest part about my build is that I'm a bit OCD and had to have matching 525SS faucets to match the ones I already had. Those were a bit of a challenge to acquire.

Kegerator1.jpg


kegerator2.jpg
 
I've done similar on my second-hand freezer. Taken the door panel off as CrazyDave has. I also replaced mine with the white FRP panel. It's good stuff. My magnetic gasket was all janked up so I'm going to try to simply use some foam weather strip to seal the gap in place of the magnetic seal. I'll also use latches to secure the door closed.

My question for CrazyDave... How did you secure your gas system to the FRP board? It seems a like a screw would simply pull out of the plastic.

I have decided to use 5 taps on my Kegerator and came up with a really strong way to mount the taps. See below:

1. I located and each tap 3" on center. I drilled a small pilot hole.
2. (with the inner panel off) I used a speed square and a piece of straight metal rod to push through the foam insulation in the door to locate the hole in the foam on the inside of the door.
3. I used a hole saw to make a hole for each tap but only through the metal front of the door.
4. Using PVC large enough to fit a shank through the I.D., I made crude saw teeth on the end and "sawed" out the foam insulation.
5. I cut the PVC to length (depth of the door without the inner panel mounted) and inserted the pieces inside the door.
6. Mount New FRP Board flat panel.
7. Locate hole locations on inner panel and use the 7/8" hole saw to create holes for shank.
8. Mount shank and tighten with lock nut.

This produces a significantly more stable tap mount because you have something to actually compress against (the PVC pipe). Rock solid... Just wanted to share for someone else building in the future.
 
My question for CrazyDave... How did you secure your gas system to the FRP board? It seems a like a screw would simply pull out of the plastic.


I didn't use FRP for the exact reason you mention. I actually used lauan plywood which is at Home Depot as "underlayment". I cut it to size and coated both sides heavily with a good quality semi-gloss latex paint.
Lauan is good for areas of high humidity and as it's about 1/4" thick, there's enough there for the screws to hold on to.
Also, as a bonus, the sheet of underlayment was only $10 vs. the $30-35 that FRP was.
 
^^^^
Annnnnd... I'm kicking myself now! lol! I didn't have paint on hand. I would likely have cost me nearly the same in the long run anyway.
I'm still considering a location for my gas distribution system. Maybe I can carve out a small section of door foam about 1/4" deep and inlay some ply in there under the FRP. That would get some nice traction for some screws to hold onto.


Or just gorilla glue a sheet of something to the back of the FRP for the screws to hold onto. You can get a quarter sheet of lauan for pretty cheap...
Since it'll be behind the FRP anyway, you shouldn't really need to paint it.
 
Ok. Frustrated. I suppose I just need to suck it up and buy a new gasket, but the weather stripping didn't work. Any idea on how to seal the door on this upright freezer? I've heard there's universal gasket kits out there but I don't know if they are any good. The factory gasket for this door is PRICEY!
 

Latest posts

Back
Top