Turning your Fermonster into a complete closed transfer system for cheap!

Homebrew Talk - Beer, Wine, Mead, & Cider Brewing Discussion Forum

Help Support Homebrew Talk - Beer, Wine, Mead, & Cider Brewing Discussion Forum:

This site may earn a commission from merchant affiliate links, including eBay, Amazon, and others.
This may be anecdotal, but I left one of my lids in StarSan for longer than I intended and it cracked rather easily on its next use.

Is it possible that you are doing this?
No, I did not soak it at all. I had 1/2 gal of sanitizer in the fermenter with lid attached and I shook it a few times.

This is a fresh replacement lid I had just bought and it was the first time using it.
 
What about just transferring at a lower pressure? You guys seem brave pushing the Fermonsters to 10psi. When I had mine, I never went above 2-3psi when transferring.
Right. I have a stainless Chapman with no valve. I only use enough pressure to get a siphon going, then let gravity take over. It takes awhile, but if I don’t have anything else to do, I can draw a pint, and sit there smiling while I watch my beer flow into my keg! 😁
 
I may just use what has worked for the past few years - sticking with fermenting in a keg. When/if I do need to use a fermenter for conditioning (typically only stouts), I can use the Fermonster and just not do an O2-free transfer and just do it the traditional way using a syphon, I don't think stouts are as susceptible to oxidation.
 
I’ve posted this in a few thread and I get quite a bit of messages regarding my process of doing this so I figured I would create a thread on the process. This is by far the cheapest closed fermenting/ transferring system.


So what you will be doing is modifying a fermonter’s solid lid and fitting it with both liquid and gas keg posts and a floating dip tube.Here is the easiest/cheapest way to go;

1) 7 Gallon Fermonster with spigots (makes hydro samples easy) with solid cap $33.99
FerMonster Carboy With Spigot - 7 gal. | MoreBeer

2) Fermontisourus pressure kit $29.99 - you’re buying this to take the parts, the liquid and gas posts and the floating dip tube to use for your solid lid.
Fermentasaurus Pressure Kit | MoreBeer
Optional pressure kit for the Fermentasaurus Concial Fermenter allows you to ferment under pressure, carbonate, and serve all in one vessel!
www.morebeer.com
www.morebeer.com

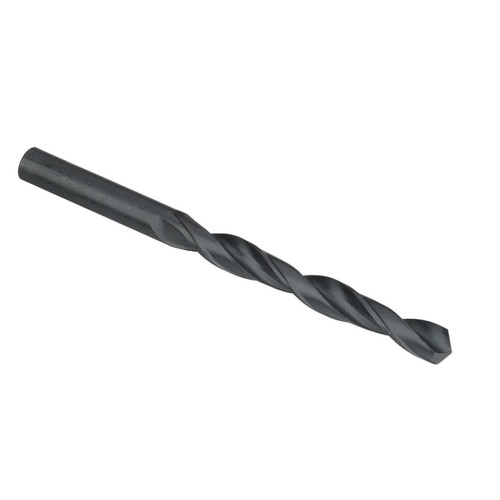
3) 7/16” or 1/2” drill bit so you can drill out the solid cap for the posts. Make sure you measure so that have them far enough a part so both ball lock fittings can go on at the same time but close enough when you maintain the stability of the lid. $2.
drillsandcutters.com

7/16" HSS Black Oxide Jobber Length Drill Bit, Qualtech
7/16" HSS Black Oxide Jobber Length Drill Bit, Qualtech. Find this item and other cutting tools on DrillsandCutters.com.
drillsandcutters.com

4) then you just needs some hose, clamps, and balllock fittings for your transfer lines.

all together you’re looking at just below $70 for a fermenter with closed transfer and pressure dryhoping capabilities. It’s also light weight and incredibly easy and quick to clean


30FEFF3A-3AB0-4993-BAE5-F262FCF3B52B.jpeg


Benefits of doing this verses fermenting in the keg;
1) You will yield a full 5 gallons of trub free beer from each of your recipes helping you become more consistent
2) You now can use all your kegs for serving purposes.
3)You can see fermentation take place which for me is almost as good as watching a fire lol
I made this assembly, and it works great, I have brewed 4 time with it and they have all been great. One small question. The connections I put in the lid leak, not a lot but it "hisses" when I am doing a pressure transfer to my keg. I have a washer in the set up, but it is not pressure tight. I really don't think it effects the beer, but it bugs me. Is there a specific kind of washer I should use?
 
I’ll run the gas through the liquid post and cbds as I’m removing the cap to slightly pressurize and keep it flowing as I drop them in then I close the cap and pressurize. This is the only opportunity for any o2 pick up. I’m sure a minimal amount does get in but This is exactly what breweries such as OH are doing when they open their ports to dryhop.
 
I made this assembly, and it works great, I have brewed 4 time with it and they have all been great. One small question. The connections I put in the lid leak, not a lot but it "hisses" when I am doing a pressure transfer to my keg. I have a washer in the set up, but it is not pressure tight. I really don't think it effects the beer, but it bugs me. Is there a specific kind of washer I should use?
Leaks keep coming up (just go back to page 14 of this thread) so I went to my bench and took some pics... This is pretty much universal with bulkheads wether in a kettle or fermenter:
There are 2 points which must be sealed against leaks, and best practice is to have the seal on the inside of a vessel so you don't collect residue on the passage out. A grooved locknut and o-ring are best as flat washers may spall, but don't snug up against the coupler;
IMG_1605.jpg

The first point is where the threads go through the nut and you'll want enough teflon tape to seal that;
IMG_1607.jpg

The second point, which relies on teflon tape to fill the grooves of the threads meeting the inside of the oring, is where the outside of the o-ring meets the surface... you don't want anything to get past it here, so any washers on the outside of the vessel are uneeded and should not be counted on to seal. Once again: The seal must occur on the inside of the vessel:
IMG_1606.jpeg

Simply holding the nut with a wrench and cranking the fitting hand-tight and not much more will seal it...overtightening will cause it to deform and leak.
:mug:
EDIT: A detail I should have included: Always tighten on the outside so that you're 'pulling' to o-ring against the surface you want to seal.. DO NOT turn the nut and o-ring as that can deform it.
 
Last edited:
Back
Top