I lost the PM , but i think it was you that PM'd me.. its about 8.5-9", and will float based on on how deeply you thread the fitting.Anybody with a horizontal yeast catcher feel like chiming in??


I lost the PM , but i think it was you that PM'd me.. its about 8.5-9", and will float based on on how deeply you thread the fitting.Anybody with a horizontal yeast catcher feel like chiming in??
Anyone bought one of these recently from RuralKing and actually received free shipping? I tried to order online and use Paypal to pay and its making me pick a shipping method costing more than the conical and the stand together, and I already entered the FREESHIP code...thanks Im ready to get two on the way, we have rounded up all the stainless to outfit them over the last month or so.
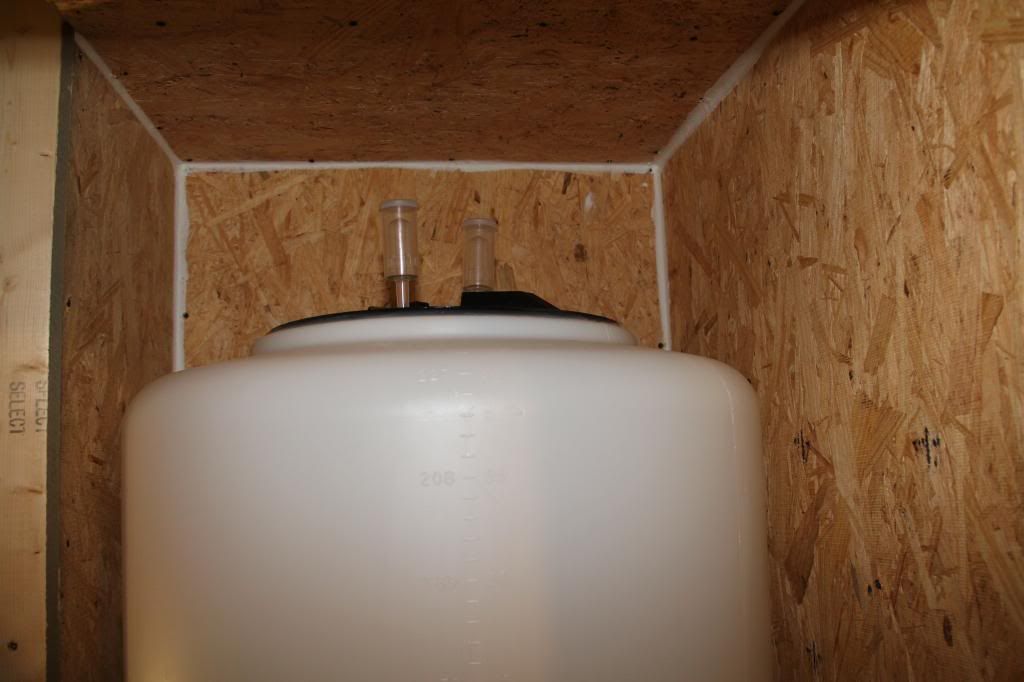
I know this thread centers around a 15 gallon setup but the concepts are the same just on a smaller scale. Here is the update on the 60 gallon:
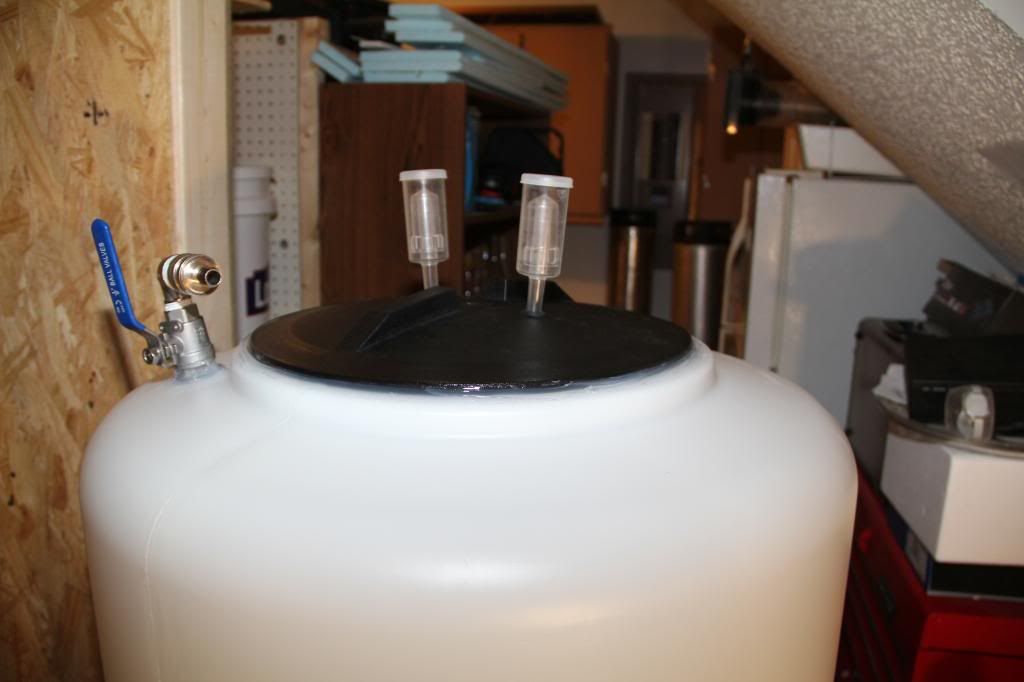
Alright it is all sealed up. I will do some basic pressure tests once the sealant has had ample time to cure (moving liquid in and ensuring the air locks bubble away as that is about as much pressure as the lid will ever have to sustain). The FDA sealant says no VOCs... yeah right - it gives you a good buzz...
I went with twin airlocks just to be safe. I'll have to use blow off tubes during the initial 60 gallon ferment but should only need the 2 airlocks each year when 15 gallons are added. The SS 1/2" valve with QD connects to a 20 inch deep 1/2" ss tube that will allow siphoning or addition of liquid (it reaches 25 gallons down into the product). Any more than 25 gallons can be removed from the bottom.

I have never needed a blow off tube with 11 gallons in there.


Food grade silicone works awesome for underneath the threaded collar. Others have had luck with double o-rings in the threads for the actual lid.
http://www.oringwarehouse.com/ 70-durometer Silicone, Red
This is where i got mine. I can't remember the sizes though.

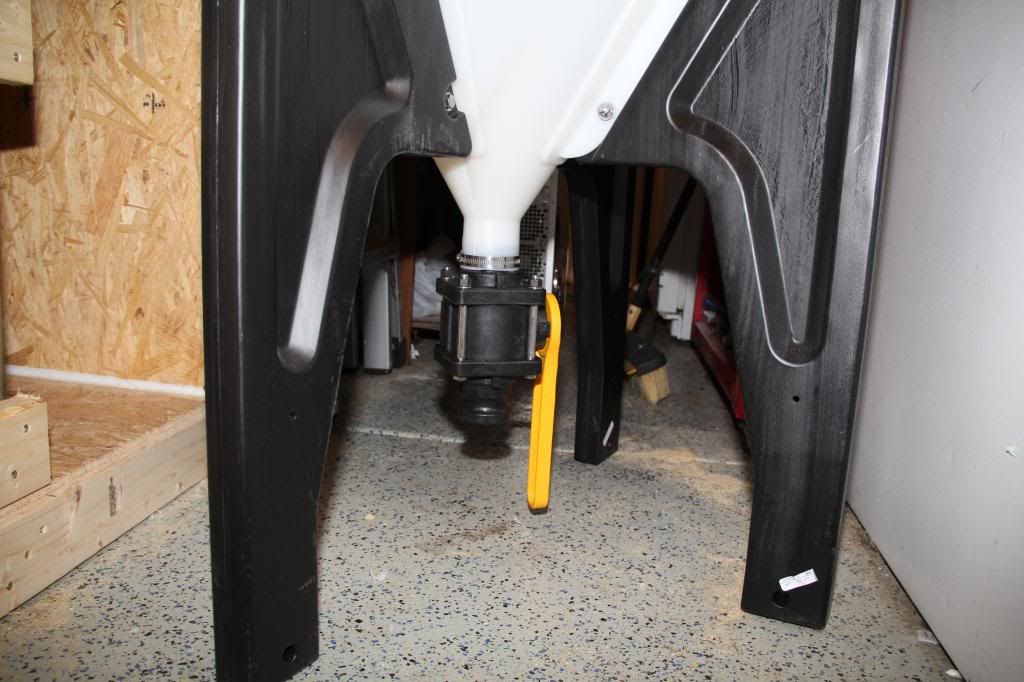
I would recommend going with a valve that is easily removed. so either :
http://www.amazon.com/dp/B001GLUML4/?tag=skimlinks_replacement-20
http://www.amazon.com/dp/B001GLUMVO/?tag=skimlinks_replacement-20
OR
http://www.brewershardware.com/1-1.5-Tri-Clover-X-1.5-Male-NPT.html
http://www.brewershardware.com/1.5-Tri-Clover-Butterfly-Valve-Squeeze-Trigger-TC10VBFVST1.html
That one would work. I used the polypropylene one but the SS would work. Ensure you use the ss hose clamp on the conical side. If the valve side leaks I'd seal it with a bead of FDA approved clear silicone adhesive.
When I frst built one if these I used the banjo quick disconnects. They made it really easy to remove the valve and clean it after each use.
You obviously use a threaded nipple, but for a few bucks you could set yourself up with the QD's which are nice, before and after the valve.
Sent from my iPhone using Home Brew
Would it help to smear all the threads with Keg lube?
I have seen where someone did that. I forget exactly how they attached it, but it is a pretty neat idea. I started down that path with mine, and ended up abandoning the Banjo pieces parts, and buying stainless parts from brewers hardware, including an 1-1/2" sight glass that i use as a yeast catcher. I would never go back at this point.
Its great to be able to see what the yeast you have caught looks like. Sometimes theres still a bit of trub in it, so i'll dump and try again until i get the good stuff.
Just curious, has anyone tried to add a coupling to expand the opening on the out of the valve, and then just screw in a Ball Canning Jar to it? I was thinking of trying that.
I cut a piece of ss to the same size of a mason jar lid, drilled a 1.5" hole in it for a tc ferrule and silver soldered it. Cut a gasket out of silicone sheet stock and she seals up nice. Works great and I'm doing a 2" one next.
https://www.homebrewtalk.com/f51/mason-jar-sight-glass-harvester-423808/

Enter your email address to join:


