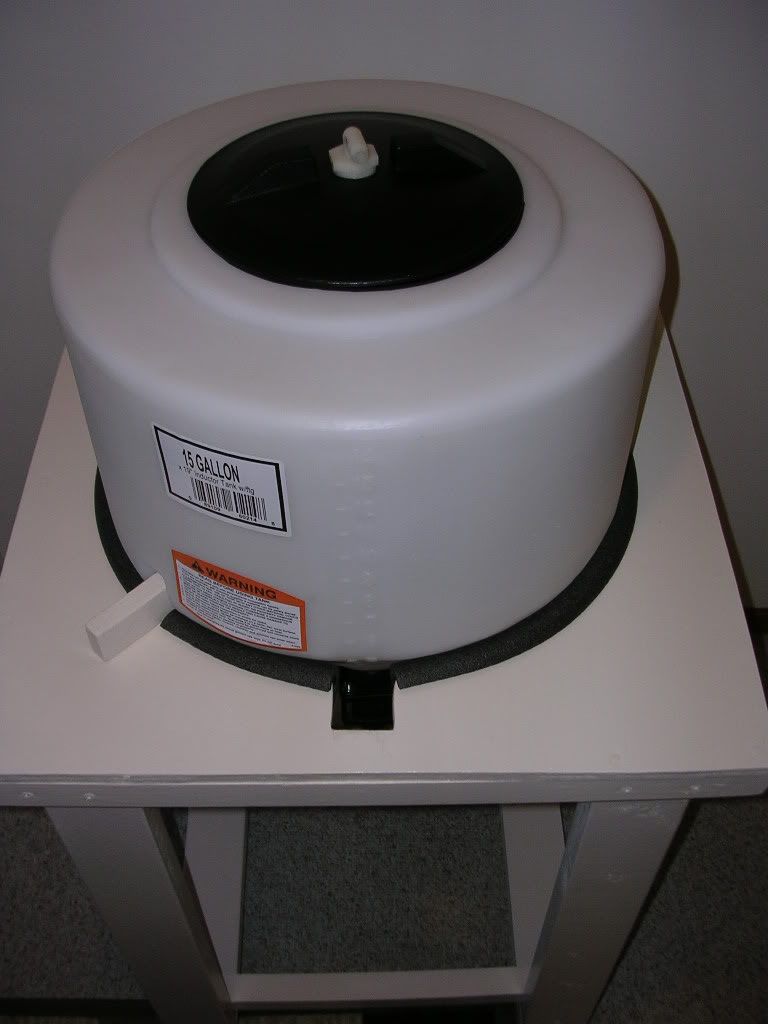
Super Simple 15G Plastic Conical

Homebrew Talk - Beer, Wine, Mead, & Cider Brewing Discussion Forum

Help Support Homebrew Talk - Beer, Wine, Mead, & Cider Brewing Discussion Forum:

This site may earn a commission from merchant affiliate links, including eBay, Amazon, and others.
I too love the simplicity of this setup and i don't even have a sampling/transfer port (yet!). I screw it down real tight, watch the yeast pile up at the bottom of the cone, transfer with the auto syphon through the top, and then dump the yeast through my bottom valve into a sanitized mason jar for storage when complete. Once or twice I had my brew day times align with a kegging day so i was able to simply dump my new beer on top of the yeast pile which was a nice bonus of not having to clean out the conical between brews.

I was able to pick up mine for something like $65 (my whole order was over $100 with other parts that I later returned) from ruralking.com when they still allowed free shipping on orders over $99, but now they screw you with a shipping fee of $50+ for a each conical... Man am I kicking myself for not buying 4-5 of these when I had the chance. Best deal I can find now is on Amazon or eBay for about $100 shipped to PA... Anyone have a cheaper source?

I picked up a 15.9 gal Speidel bucket style fermenter as they are $90 and don't any additional hardware for draining. I havent used it yet but I'm anxious to see how it works

If you want multiple conicals, just get two or more from spraysmarter and you'll qualify for free shipping over $249.
 
Just checked and the free shipping over $249 isn't valid anymore... Shipping for one (to PA) and the conical is roughly $100. For $100 I still believe these tanks are worth it, I was just trying to get an idea of any other sources that don't charge $35-$40 shipping when the tank is $65
 
If you go for the one with the built-in legs (I believe these are the only ones made of hdpe as opposed to the medium density the other ones are made of) it'll take two of them to meet the 249 minimum free shipping. Just gotta leave them in your "shopping cart" for a couple days as they send you coupon codes trying to entice you to complete your purchase. I believe it took just two days to get the free ship code. Before that they sent 5% & 10% coupon codes. I'm in eastern PA for what it's worth.
 
If anyone needs a spare lid and insert let me know as I have three of them laying around. One lid has a blowoff hole and two holes for a cooling coil, but the other two are factory.
 
I just cleaned this fermenter after first use and noticed a gouge inside. It's hard to see but I can definitely feel it. About the size of a quarter. Has anyone else found something like this?

I think I may be able to return it.

Thanks
 
The cooling coil works great. With no insulation I can get about 15 degrees below ambient with ice water that is in the upper 30's. My o rings are a -456 size and they are Parco brand but I can't remember where I got them from. I think they are epdm or nitrile.

http://www.theoringstore.com/index.php?main_page=product_info&products_id=1372

These are pretty reasonable priced rom what I remember though.
 
I have a few questions maybe some one can please help answer.

When they installed the threaded black lid with screws, did they drill all the way through so the screw goes into the tank?

How deep is the lip where the lid attaches to?

I was thinking about making another lid and installing maybe 10 of these so I can hold some pressure. https://www.nutty.com/E-Z-Lok-Inserts-for-Plastic-Wood_c_272.html
 
The screws thread into the lip that is about the same thickness as the rest of the tank. Maybe 1/16". the screws go well into the tank. The screws go through your applied silicone to hopefully seal the lid. I'm about to test mine to fine the leak(s).
 
The screws thread into the lip that is about the same thickness as the rest of the tank. Maybe 1/16". the screws go well into the tank. The screws go through your applied silicone to hopefully seal the lid. I'm about to test mine to fine the leak(s).


Thats pretty annoying that they screw into the tank exposing the ends. I was thinking about sinking these fittings into the lip if it was thick. But I guess not.

Thank you for looking into this.
 
If you're worried about the screws just replace them with stainless steel screws. As far as leaking goes, who cares.... If it's tight it leaks into a jar of water. Otherwise it leaks into the atmosphere.. If you're thinking you'll pull O2 into the fermenter, there's plenty of CO2 in there to protect your beer. My tank is the one that has the threads for the lid molded into it and it never seals, no matter what I've done. I've made 100's of gallons of beer with it that way and the beer turns out just fine.

Cheers!!!

 
Hey guys I have one of these fermenters and I am going to be adding a banjo valve and a trub catcher to it. I saw this link:

https://www.chaosbrewclub.net/forum/equipment/plastic-conical-fermenter

and wanted to emulate the build. But while I was perusing Amazon I saw one of these:

http://www.amazon.com/gp/product/B004VJSPPI/?tag=skimlinks_replacement-20

And wondered if it would do the trick as well. It looks to be the cheaper as well as better option due to the fact it can be taken apart and cleaned.
 
Last edited by a moderator:
Its been a while for anything new on this thread, but I wanted to throw out my idea that is working well.

Similar to a HERMS coil in a HLT, (Actually the same tubing I used) I installed around a 20' coil of stainless 1/2" tubing in my plastic conical, and then on the outside, connected hoses out for temp control.

For my temp control, I gutted a mini fridge, mounted it to the bench my ferminters are on, and stuck the ice tray portion into a cooler that holds about 5 Gallons of water. I have fishtank pumps that are controlled by PIDs, Temp sensors in Thermowells in the fermenters.
Summer here in Florida, I was able to get (2) 10 Gallon batches of beer to Cold crash at 48 degrees with just minor spray foam insulation.

Pictures to follow, but I built 2 fermenters, temp control, and a bench for around $400. Works like a champ.

Has anyone else done the Mini Fridge option on here?
 
Does anybody know what size the stainless screws are that hold the lid on? I just ordered one and it came missing 3 of the 8 screws?! They predrilled for the screws but apparently got distracted at assembly time.
 
Just back them out and take them to your hardware store. If you oversize them it won't be a big deal since this is pretty soft plastic.
 
I just finished building my first conical. I used a lot of silicone to make the ports and threaded fitting air tight. I put in my first batch on Saturday and there's no blow off action, so the lid is leaking around the lip. I put a silicone gasket around the lip of the lid, but it's obviously not enough. I'll try some other gasket options for next batch and see what happens.

Assembly, Mounted and leak testing, First brew batch and blow off attached, Attachments for secondary trub and transfer

20170226_182506.jpg


20170319_141009.jpg


IMG_5208.jpg


IMG_5209.jpg
 
I have one of these and have to say with the addition of the 14g fast ferment, this thing is probably not worth it anymore. Sealing it is tough (although maybe not necessary). Hope it works out!
 
I found the fast ferment 14g for $170.

http://www.homebrewfinds.com/2017/0...als-are-available-choose-from-two-offers.html

Yes, you save $60. But there's no doubt the fast ferment is a better solution. So I guess it's up to the brewer if the 60 buck savings is worth it.

I do get the whole build it myself thing though. It's the whole reason I did it. Gotta find a better way. I just don't think this is the way anymore. Now, building a walk in fermentation chamber/cooler.... we'll see how that turns out
 
Everything I read about the Fast Ferment is the quality of the plastics was bad and the build quality was bad. Crap shoot if you get a good sealing lid and a valve that holds up for more than 3 brews. That's why I chose to build my own.
 
I found the fast ferment 14g for $170.

http://www.homebrewfinds.com/2017/0...als-are-available-choose-from-two-offers.html

Yes, you save $60. But there's no doubt the fast ferment is a better solution. So I guess it's up to the brewer if the 60 buck savings is worth it.

I do get the whole build it myself thing though. It's the whole reason I did it. Gotta find a better way. I just don't think this is the way anymore. Now, building a walk in fermentation chamber/cooler.... we'll see how that turns out

The 14g fastferment only holds 14 gallons. This thing maxed out just barely exceeds 18.75 gallons... Making it perfect for 15 gallon batches
 
I just finished building my first conical. I used a lot of silicone to make the ports and threaded fitting air tight. I put in my first batch on Saturday and there's no blow off action, so the lid is leaking around the lip. I put a silicone gasket around the lip of the lid, but it's obviously not enough. I'll try some other gasket options for next batch and see what happens.

Assembly, Mounted and leak testing, First brew batch and blow off attached, Attachments for secondary trub and transfer

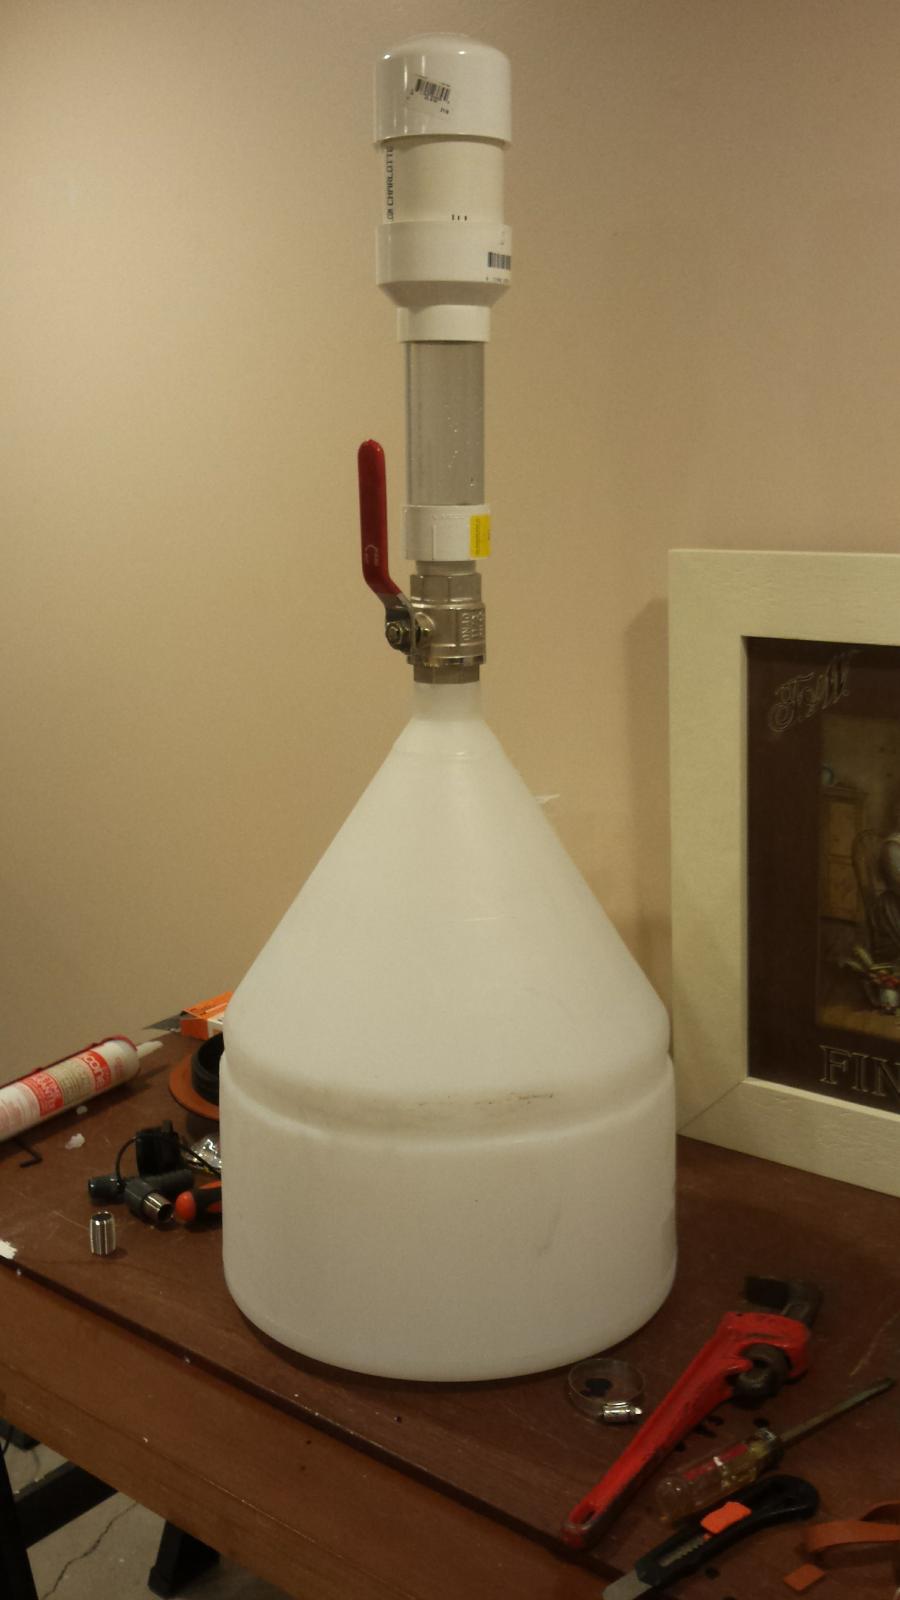
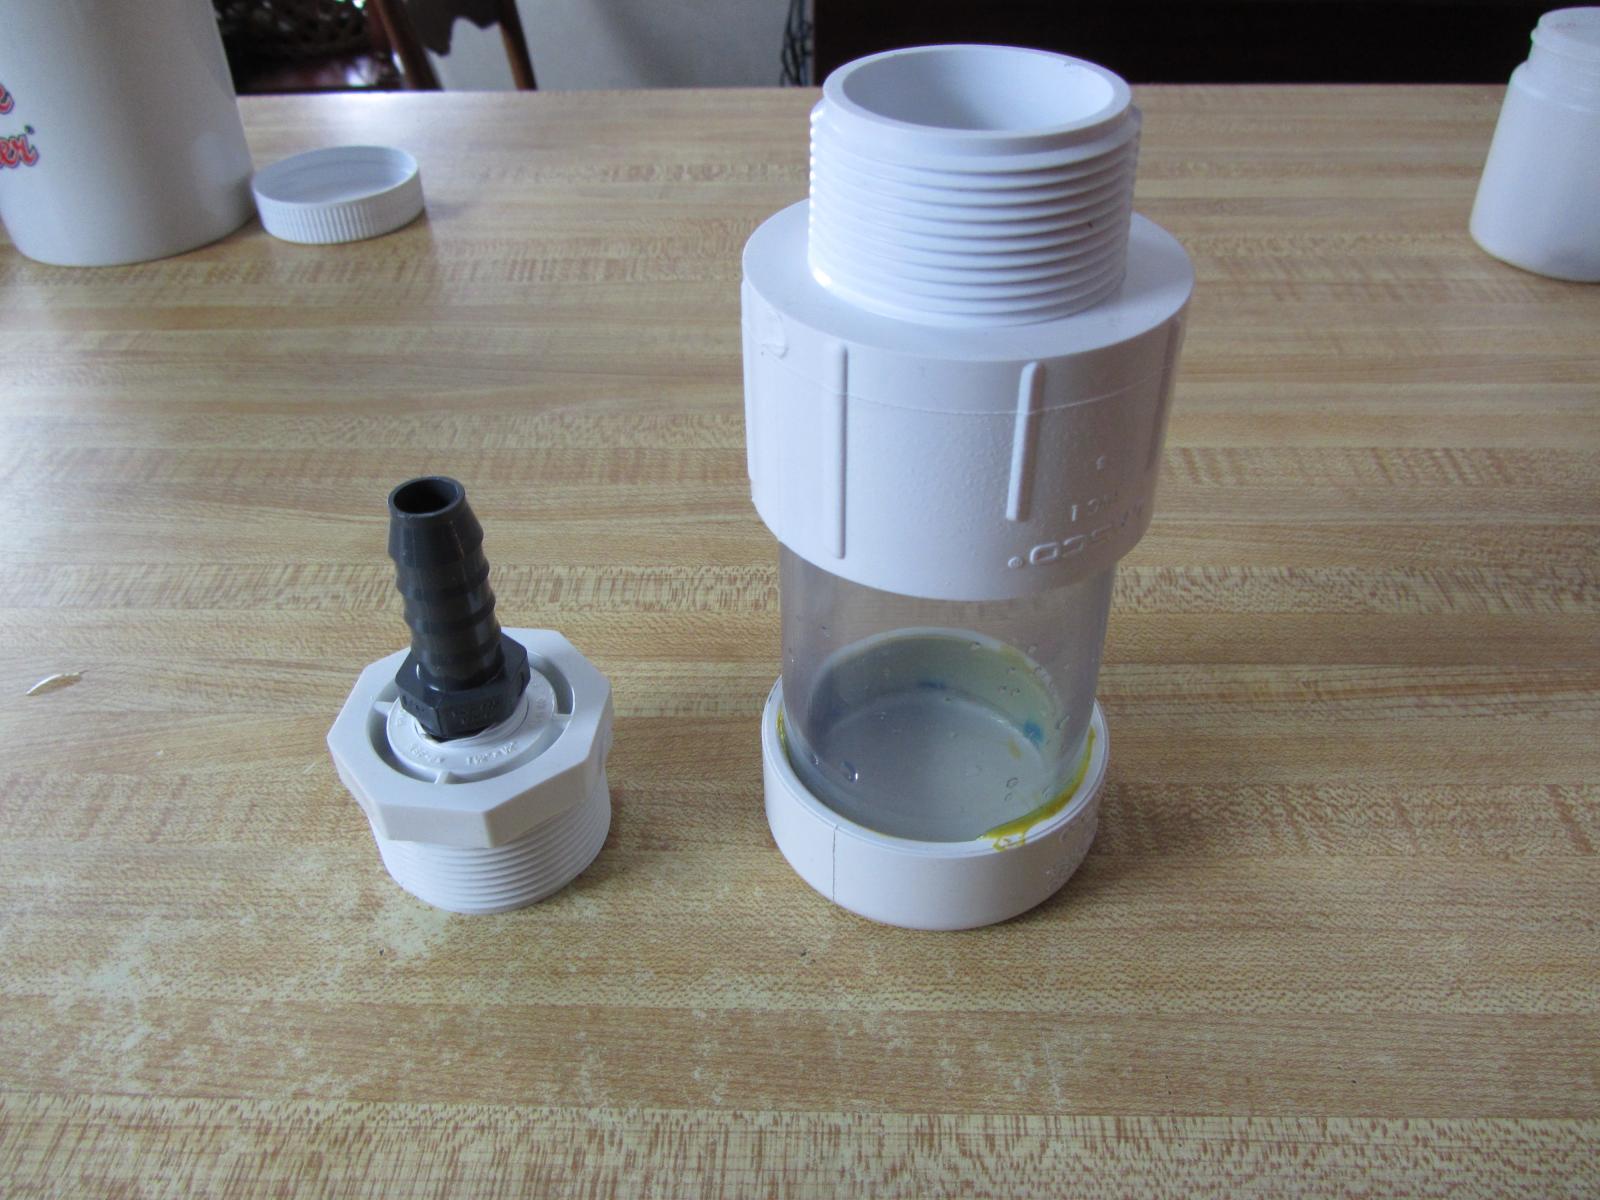
Looking to replicate your awesome yeast catching setup! Correct me if I am wrong on anything below:
-1.5 in. SS ball valve
-1.5 in. threaded male to 2 in. female
-2 in. clear pvc piping (where did you find this?)
-2 in. female reducer to 3 in. female
-3 in. piping
-3 in. end cap
 
The 2" clear PVC I got from McMaster Carr, part number 49035K48. It's really expensive. Hindsight being 20/20, I would have gone with straight 3" clear PVC and some different fittings and just have the 3" catch. You lose a lot of internal volume going with 2", but save a bit of money. That's why the catch is so long. The valve is chrome coated brass off eBay for $15 shipped. Everything else you guessed correct.
 
The 2" clear PVC I got from McMaster Carr, part number 49035K48. It's really expensive. Hindsight being 20/20, I would have gone with straight 3" clear PVC and some different fittings and just have the 3" catch. You lose a lot of internal volume going with 2", but save a bit of money. That's why the catch is so long. The valve is chrome coated brass off eBay for $15 shipped. Everything else you guessed correct.

As much as I love your setup, I really want to find a way to use my 1 gallon clear growler as a yeast catcher! May use a 1.5 npt to 1.25 inch barb fitting. Use a clear 1 inch i.d. blowoff tube into the opened glass growler neck.
 
Has anyone found there tanks to have scratches/gouges inside? I was able to return my first one due to this. However, the manufacturer said he will no longer replace due to scratches. I told him it was for fermenting beer and needed to be smooth and he said that is not what its designed for so no more returns. Guess I gotta agree. The replacement was fine though.
 
Has anyone found there tanks to have scratches/gouges inside?
I honestly didn't check mine. My current fermentation is going very slowly because the temperature in my basement is sitting around 63 degrees. Once it's done I'll clean it out and check.

This batch has been weird and I'm not sure if it's from the fermenter or the temp. The foam/krausen was almost a "solid" cake at the top and I had to scoop it out with a sanitized slotted spoon. I'm also not sure about sediment since I can't see through the plastic. I had a decent amount of trub in my collector, but my sampling from the side valve had sediment in it as well. I just pulled the trub collector and put the secondary collector in place, so I guess we'll see.
 
I happened to be in the neighborhood (Indy) and was able to stop into spraysmarter to pick up a 40gal conical. I also bought the lid seal. Very clean flawless interior. So far I've installed a thermowell (@10gal mark) and sample port (@ 2gal mark) using a bulkhead fitting from morebeer. I'll be adding a glycol chiller and heating with warm water during colder months. Living in Michigan I usually don't brew in the dead of winter. Once I complete my stand fabricated of 1" black pipe (legs) and square tube braces I'll get started on the chiller which I expect to have up & running by mid summer. I have a large tank liquid C02 on hand that I fill 20lbrs with to prevent 02 intrusion during sampling, bottling, dumping etc.

I'll post up s summary soon.
 
Making a small "fermentation chamber" to warm up you beer is really easy. Choose any of the temp controllers out there, buy some pink foam and tape, and grab a small space heater. Make a cube that fits around your fermenter and place the heater in there. Works great and is cheap. Look for an old fridge on craigslist to use as both a chiller and heater.
 
I honestly didn't check mine. My current fermentation is going very slowly because the temperature in my basement is sitting around 63 degrees. Once it's done I'll clean it out and check.

This batch has been weird and I'm not sure if it's from the fermenter or the temp. The foam/krausen was almost a "solid" cake at the top and I had to scoop it out with a sanitized slotted spoon. I'm also not sure about sediment since I can't see through the plastic. I had a decent amount of trub in my collector, but my sampling from the side valve had sediment in it as well. I just pulled the trub collector and put the secondary collector in place, so I guess we'll see.

If your basement is 63, that's pretty ideal as your fermentation will run several degrees warmer. You may need to add some heat to get it to finish. A heat pad taped to the side will work. Or point a small space heater at it. Good time to buy a space heater as they are on clearance right now.
 
I just circulate warm water heated with fish tank heaters. Things I already have on hand. Temp controlled using stc1000 on a pump.

For 10gal batches I just float a 13 gal. Poly carboy directly in the plastic 55 gal drum again heated using fish tank heaters on the stc1000
 
Just transferred to the keg today. Pretty easy to do. First I emptied and sanitized the secondary collector, hooked it up again, and cycled the valve to make sure there wasn't gunk stuck in the ball valve. Then I sanitized the tube and fittings, hook it up, and open the valve.

Next time I might just use the sampling valve to transfer, since it will be sitting above any gunk. Opening and closing the main valve with the empty secondary collector disturbs the beer because of the air bubble, so it might have stirred some gunk back into the beer. Either way I'm pretty happy, other than the leaking lid. I might just put an extremely think bead of silicone around the top to act as a gasket.
 
Back
Top