Stc-1000+

Homebrew Talk - Beer, Wine, Mead, & Cider Brewing Discussion Forum

Help Support Homebrew Talk - Beer, Wine, Mead, & Cider Brewing Discussion Forum:

This site may earn a commission from merchant affiliate links, including eBay, Amazon, and others.
I got my unprogrammed stc 1000 from blackbox today... It took all of 30 minutes to pull it apart and flash with my $7 uno clone (DCcdinino uno) thanks to the instructional videos.... still debating on whether I need the second probe or not.... I dont believe I will for my conical with the chiller/ heating pad setup since my temp probe reads from the center of the liquid inside... or would it still be useful?
 
I'm sorry, but that is not going to happen. First off, it is beyond the scope, secondly it would be hard to implement, thirdly it would probably not fit within code space left. Though, the source code is open, so you are free to implement it yourself if you wanna take a stab at it, you'd probably need to shave other functionality out though.

Fair enough.

This is probably not news to you, but for completeness, make sure the box is leak free. More insulation is better that little, but mostly make sure there are no places air could seep through.
Go for a low wattage heater, no more than is needed (40W goes a long way). Preferably something with a large surface area and won't get hot to the touch. Use a correctly sized fuse.

It's currently 8 degrees F outside, and 26 degrees F in my garage. I figured it's a good opportunity to test my new insulated fermentation box. I placed a 25W desk lamp inside the box, along with the STC-1000+'s temperature probe, with a setpoint of 50 degrees F, and after an hour it has reached an equilibrium with the lamp on 100% of the time with an internal temperature of 42 degrees F.

Thus, 25W is insufficient to maintain 50 degrees in a 26 degree garage, as the box currently is. I'll have to look around for a heat source closer to 50W tomorrow, plus look into sealing the box better than it already is.
 
Thus, 25W is insufficient to maintain 50 degrees in a 26 degree garage, as the box currently is. I'll have to look around for a heat source closer to 50W tomorrow, plus look into sealing the box better than it already is.


Did you do the test with or without a mass of liquid inside the chamber. Without it you're trying to bring an empty space up from nothing and hold it there. A jar of water or a carboy filled with water would be a better test.
 
Taking temp in the center imo is more of a reason to use it, id try to take temp closer to the wall
ok...I have a bunch of probes since I have like 5 stc1000/clones... I see on gethub where it mentions the resistor to add the second probe which I have but where it the best place to permanently install it? did I read it right in that it suggests installing it between to of the 5 programming points? Seems odd to me...
 
ok...I have a bunch of probes since I have like 5 stc1000/clones... I see on gethub where it mentions the resistor to add the second probe which I have but where it the best place to permanently install it? did I read it right in that it suggests installing it between to of the 5 programming points? Seems odd to me...

you can,i buy the correct size surface mount resistor and put it in front of the terminal block. Not the easiest to do the first time around though
 
ok...I have a bunch of probes since I have like 5 stc1000/clones... I see on gethub where it mentions the resistor to add the second probe which I have but where it the best place to permanently install it? did I read it right in that it suggests installing it between to of the 5 programming points? Seems odd to me...

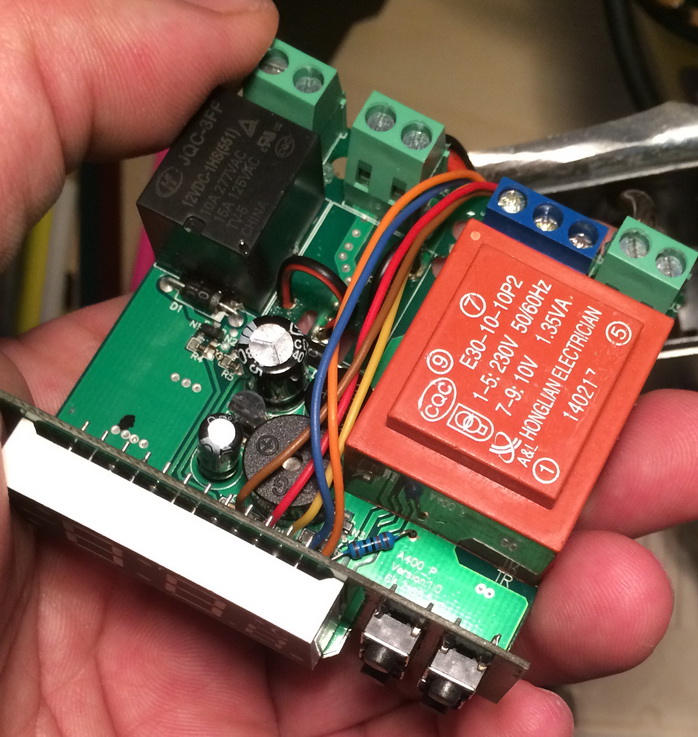
I'll try to explain as good as I can. The missing resistor can be difficult to install, due to being surface mount and obscured by the screw terminal. The ressistor should be connected between AN1 and ground. However, AN1 is shared with ICSPCLK. The probe should then be connected between AN1 and VCC. All these connections are availiable on the programming header as well, so it can be easier to tap in there. Electrically it is the same thing.
 
Did you do the test with or without a mass of liquid inside the chamber. Without it you're trying to bring an empty space up from nothing and hold it there. A jar of water or a carboy filled with water would be a better test.

A larger mass of liquid (or anything else) in the chamber will not affect the rate of heat flow into, or out of, the chamber for any given inside vs. outside temperature difference. The larger mass will only slow down the rate at which the inside of the chamber + mass comes to equilibrium. The preceding holds if the mass is not undergoing exothermic or endothermic processes (eg fermentation.)

So, Mike's test is valid, and shows he needs more heater capacity for his chamber configuration and temperature differential.

Brew on :mug:

Agreed. I replaced the 25W bulb with a 60W bulb, and I can achieve 50 degrees F in my 22 degree garage. I just changed the setpoint to 65 degrees F to see if 60W is sufficient to raise it up to d-rest temperatures. I will also be improving the sealing of my box tonight, which I expect will improve things.

Here is a picture of the box I built out of a 4x8 foot 1-inch thick polyisocyanurate foam board with aluminum film facing on both sides, held together with nothing more than 2-inch wide aluminum tape. The five-sided box (open on the bottom) is to be placed on the base, made from two layers of the same material. I am going to seal the inside seams with silicone caulk, and add a rubber weather seal strip between the base and the bottom edge of the box so that it seals better.

k6A419hIcmMwfQz0MdOPxXO9UTHDKwcOe0DI4bnFUi0
 
I said it before and I'll say it again. I'm not a fan of bulb heaters. They do get hot.
Isocyanopropyschmoppy board sounds like excellent insulation, but I'll venture a guess it will realease nasty fumes if it gets hot and might make good kindle.
I'm not gonna preach or point fingers, it never helps anyway, but if you are gonna use a bulb at least be smart about it (like safety distances, don't let heat accumulate and use a correctly sized fuse).
 
I'm wide open for ideas for heat sources. I had ordered a small 200 watt ceramic space heater, but that can be returned if a better heat source exists, keeping in mind I sized this box to hold two carboys, and I only have one STC-1000+ with only one temperature probe, so the temp probe will be attached to one carboy with the other going along for the ride.

Not that wikipedia is a definitive source, but I researched the available rigid panel insulations that are available, and it seemed to be one of the least toxic, and one of the most fire resistant.

http://en.wikipedia.org/wiki/Polyisocyanurate
 
I'm wide open for ideas for heat sources. I had ordered a small 200 watt ceramic space heater, but that can be returned if a better heat source exists, keeping in mind I sized this box to hold two carboys, and I only have one STC-1000+ with only one temperature probe, so the temp probe will be attached to one carboy with the other going along for the ride.

Very timely. I literally just finished constructing three DIY "fermwrap" setups sized to fit individual bucket/carboy fermenters. The cost of each unit was $14 and was a snap to construct - but I did have to borrow my wife's "cropadile" gadget for smooshing the eyelets together. If you have ReptileBasics connect it for you then it's an added dollar - probably worth it.

For two 6.5 gallon carboys side-by-side you would want 5 feet of 12" heat tape plus the connection kit (plus having them connect it) and shipping brings the cost to ~$25 delivered and ready to use.

12" heat tape: http://www.reptilebasics.com/12-heat-tape (5 feet should be plenty)
connection kit: http://www.reptilebasics.com/thg-amp-wireset (add the 'Reptile Basics Connect for me' fee)
 
I finally got around to build one of these tonight, and since I couldn't find any real confirmation that it would work with a Nano to program it, I can confirm that it worked without a hickup for me.

Now, as a heat source, I went with a 500W thing with a fan in it. Was the smallest I could find that wouldn't require water immersion. I poured some 16C water into a 10L carboy to test it out, set it to go up to 20C and hold there for awhile, and by the time it got there I had 45C in the fridge.

What's my best option here - get a smaller heat source and try to find another use for this one, or try to attach a second probe and set it to like 30C so I don't overshoot like crazy?

Oh, and thanks a bunch for putting this together and open sourcing it, awesome stuff!

We probably cross-posted but you could try the option I mentioned above your post:
https://www.homebrewtalk.com/f258/stc-1000-a-464348/index166.html#post6708570

You may want to check local pet stores to see if they carry this heat tape if you're not in the US.
 
For two 6.5 gallon carboys side-by-side you would want 5 feet of 12" heat tape plus the connection kit (plus having them connect it) and shipping brings the cost to ~$25 delivered and ready to use.

Thank you. I've had my eye on that very solution. I was actually thinking of getting two of them, just less than 3 feet each to leave room for the temperature probe to be adhered to the side of one of the carboys, with a wrap of reflectix around the outside to reflect the heat into the carboy/bucket, with an elastic band or two to hold the whole shebang together.

That'd get me to 70 watts per carboy/bucket. My test with the 60 watt lightbulb heater is telling me that in a 22 degree garage, I can only get to 58 degrees, not the 65 I'm shooting for. So it would seem, given the current temp in my garage, unless I see a significant improvement with some weather sealing, I'd need to run both sets of heat tape even if I only had one carboy in there. Hmm.
 
I used an old hair dryer - on low...

Its usually on 30 sec, then off for a while. Once it reaches the set temps.
Raising temps it might be on for 2 minutes.
 
Has anyone shaved the temp probe. I'm trying to put it down my thermowell, but being oval
it doesn't fit. I need to shave to round to get it to fit...

Or other small, round probes as replacements available ?
 
I assume we have exhausted all interesting discussion of the actual topic of this thread? If so, let the side topics continue.

My probe hates getting shaved, by the way.
 
I am trying to assemble the Arduino pro mini and CP2102 using the manual on github. I have set the program to using the board Arduino Pro or Pro Mini (5V, 16 MHz) 2/ ATmega328 on COM3. I dont get a response when I go the serial monitor. The first time I assumed I had ruined the board. But after this second one I am not sure if I am doing this correctly.

Is there a way to test the Arduino pro mini to be sure it is working correctly? What do I need to set in the Arduino program?
 
First off... You might need to download a driver for the CP2102 here. Have you done that?
Secondly, have you uploaded the sketch ok?
Other than that, I think I'll need to let the others help out, @smithabusa perhaps? He has got thins thing down :)
Om on linux myself, so I'm not familiar with the pitfalls of using windows :)
 
Yes I have download the driver. I have both linux and windows so can upload the sketch using either. I have uploaded the sketch using Arduino Uno, but wanted to make a cable similar to the one in the manual.

Thanks for your reply.
 
I am trying to assemble the Arduino pro mini and CP2102 using the manual on github. I have set the program to using the board Arduino Pro or Pro Mini (5V, 16 MHz) 2/ ATmega328 on COM3. I dont get a response when I go the serial monitor. The first time I assumed I had ruined the board. But after this second one I am not sure if I am doing this correctly.

Is there a way to test the Arduino pro mini to be sure it is working correctly? What do I need to set in the Arduino program?

If you need a sanity check I'm happy to look at yours for you if you want to mail it to me, I've got parts for about ten of these coming in the next day or so also if you happen to need another if yours is damaged or no good. Did you remove the 3.3v pin like in alphas instructions?

I've flashed a couple hundred of them now and the biggest thing is making sure the programming pads are clean of the wax. I have a little wire brush I scuff them, then a tooth brush to clean off. Did you solder to them or just holding?
 
Yes I removed the 3.3v pin. The first one I soldered. This one I am testing step by step. I'll solder the wires to pro mini as soon as I get a chance and test it again.
 
Yes I removed the 3.3v pin. The first one I soldered. This one I am testing step by step. I'll solder the wires to pro mini as soon as I get a chance and test it again.

sounds good, if you get stuck and want to mail me the stc and the adruino I can pinpoint the issue for you.

Greg
 
Well I played the v1.0 lottery and lost. I ordered from Amazon (Lerway Tech) for $16. There's no version number printed on the PCB, but I don't see the pin header I need. I had an STC1000 that I bought four or five years ago and it's a v1.1. Should have just bought one from blackbox. Anyways, just a heads up and recommendation not to buy on Amazon from that seller if you're in the market for an STC-1000+.

I wish there was a way to flash these newer versions!

I have them I stock as well with 1.07 on them if you need one.

Greg
 
I have them I stock as well with 1.07 on them if you need one.


Greg


Just checked out your site, that is a damn nice controller setup you're selling! Half of my brewing enjoyment comes from building stuff and DIY, so this was more of a way to try something new and tinker with an STC-1000. I just built a brewpi for my fermenter so I'm not really needing the +, I just wanted to flash one and build a box for fun.
 
Just checked out your site, that is a damn nice controller setup you're selling! Half of my brewing enjoyment comes from building stuff and DIY, so this was more of a way to try something new and tinker with an STC-1000. I just built a brewpi for my fermenter so I'm not really needing the +, I just wanted to flash one and build a box for fun.

Cool deal :) Thanks for the nice comments
 
Well I played the v1.0 lottery and lost. I ordered from Amazon (Lerway Tech) for $16. There's no version number printed on the PCB, but I don't see the pin header I need. I had an STC1000 that I bought four or five years ago and it's a v1.1. Should have just bought one from blackbox. Anyways, just a heads up and recommendation not to buy on Amazon from that seller if you're in the market for an STC-1000+.

I wish there was a way to flash these newer versions!

if you look you'll see that seller has different version ones pictured for different prices... He sells them on ebay too and since its the sorting system there isnt as confusing and shady as amazons its easy to see this... you want the one pictured without the "CE" in the corner of the sticker for sure but even that may not be a guarantee if the seller substitutes or buys from different suppliers...

I bought one from black box and flashed it and everything went well but at $26 a pop from him with shipping (I really dont blame him) vs $15-16 street price these normally have shipped from one less middleman in the chain, I'd like to find a reliable source as well since I'm looking to buy 3 or four more of these and lets face it I'm not loaded so every $ counts especially when we are talking a 30-40% price difference.. As it is its killing me to wait till me next payday rather than use credit..

But it doesnt really matter since china is closed and all sellers are "out of the office" till after this weekend due to the Government mandated "spring holiday" anyway...
that said I already bought one that was the wrong version but that was before I discovered the Eilitech ones were not the correct version.
 
Can you post a picture of the other side and the solder joint?
Before you do the soldering you have to scratch the paint around the the drilled hole on the board so you will have the good solder joint.
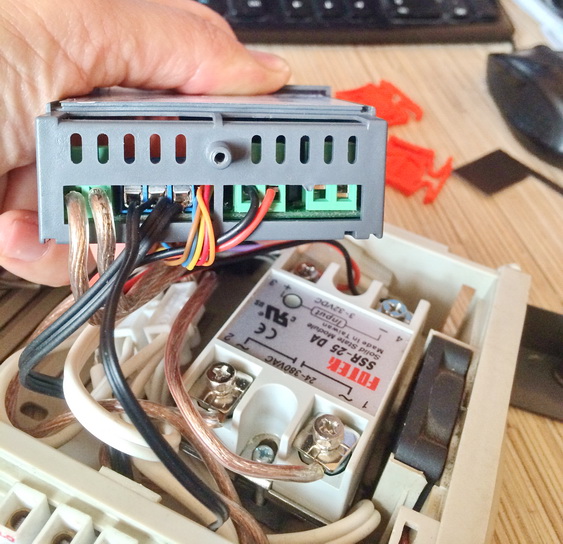
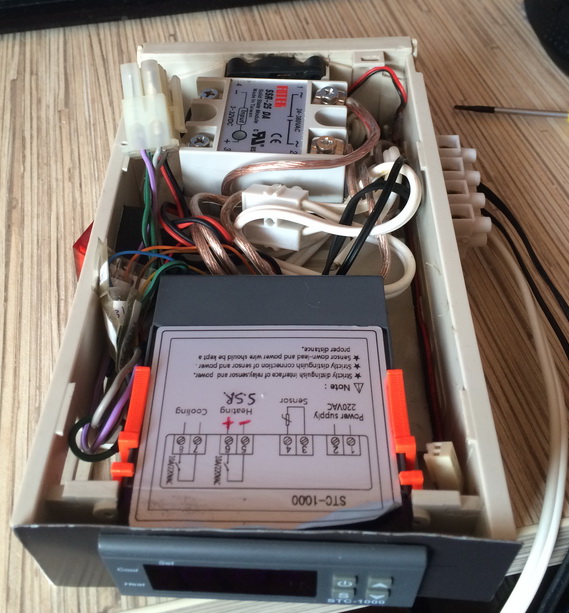
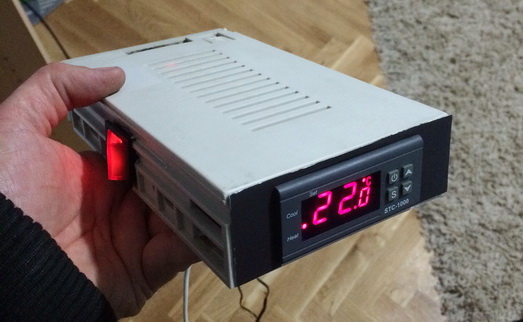
I packed mine in an old HDD rack and it is driving an SSR.

I am using stc-1000+ for an chicken incubator and I need very steady temperature so the PID version is better for me but I will wait until @alphaomega enables second temperature probe in that firmware.
The second temperature probe I use just to check the temperature in the corners of my incubator and I am not using it to regulate the temperature.

@Ben58
I bought it here at an local electronic parts shop

ntc3.jpg


ntc4.jpg


ntc5.jpg


ntc6.jpg
 
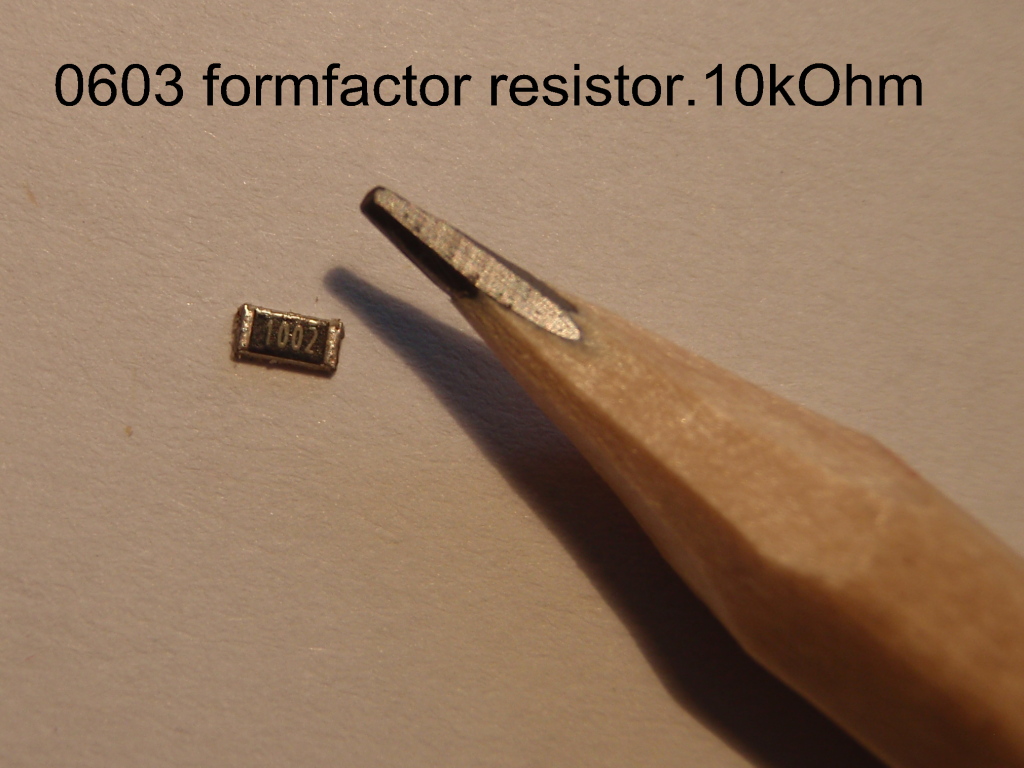
These resistors can easily be found on many different and assorted printed circuit boards if you deconstruct some old consumer electronics. Note the 1002 on it.

resistor.jpg
 
I have some spares if anyone needs.some, about 5 bucks shipped first class mail for the terminal block and a couple resistors as they are easy to lose if you arent very careful.
 
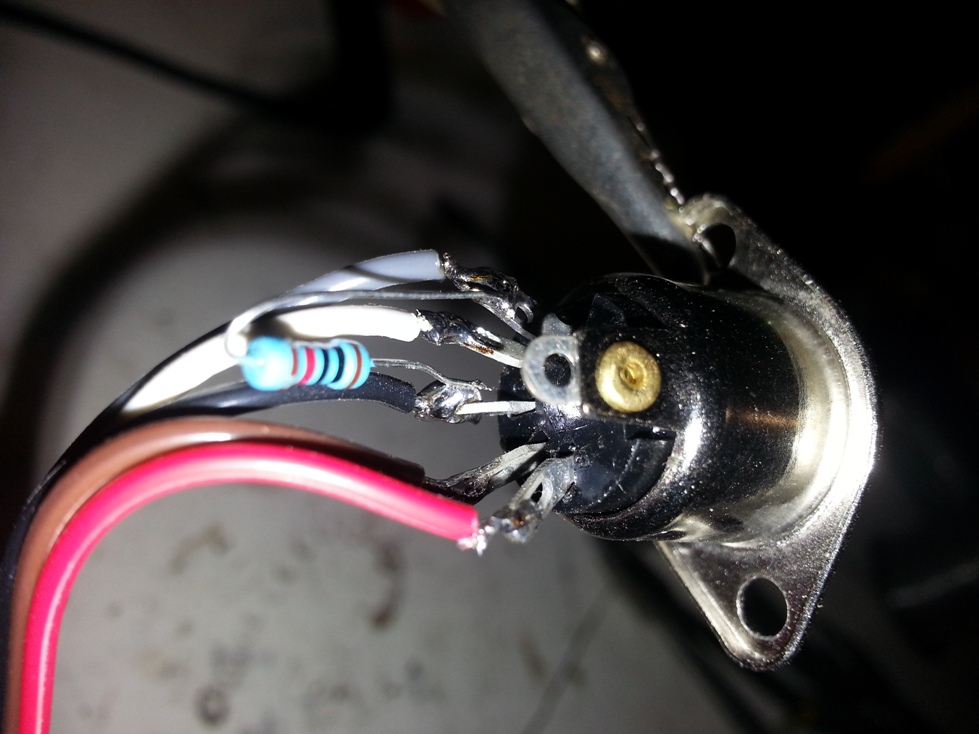
I used resistors like priest77 only I soldered them to my 5-pin midi panel connectors that I use for easy re-flashing. I got my 3 terminal blocks from china on ebay pretty cheap. Just be sure to get the 5mm not 2.5, I learned the hard way. I still have lots of resistors if anyone want's some (just PM me your name and address and how many you need) , but I don't have any extra terminal blocks. Here's a pic of how I installed my resistors.

Connector.jpg
 
Back
Top