Forbein11
Well-Known Member
BUILD THREAD
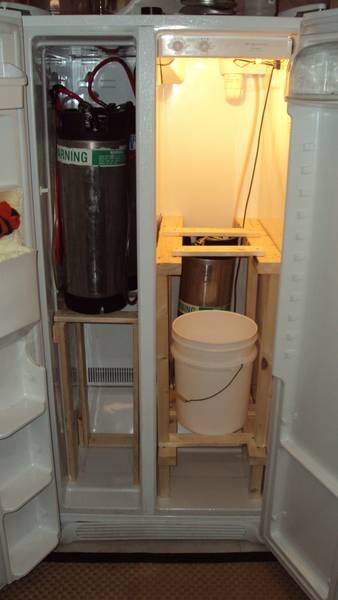
After viewing Boerderij_Kaboute's side-by-side fermentation chamber thread, https://www.homebrewtalk.com/f51/side-side-fermentation-chamber-build-105054/, I decided to attempt one of the ideas later talked about in the thread. I wanted to create a unit I could lager in and/or serve kegged beer out of one side and ferment ales in the other side. I picked up a 2003 Frigidaire on craigslist for $100. The freezer side will be for kegged beer serving and/or lagering depending on my needs. The fridge side will be for fermenting ales.


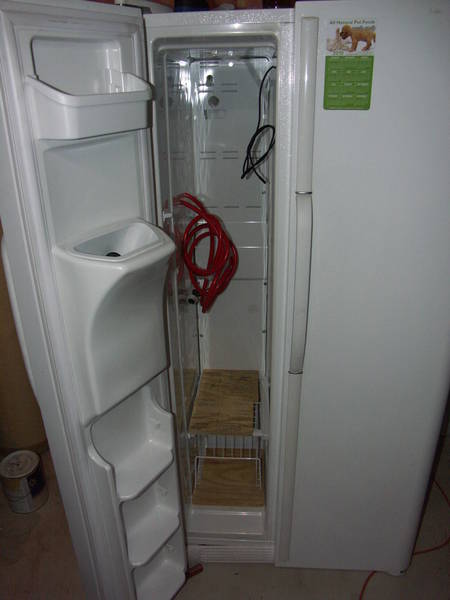
First, I stripped everything out of both sides. I took out the drawers, shelves, icemaker. For this build, there is no need to remove any of the back panels in the freezer to expose the compressor and fan unless you want to be sure everything is running properly after the temp control is wired in. I found it helpful to be able to see this though.
To control the whole thing I purchased a Love TSS2-2100 control. One side controls the freezer temperature and the other controls the fridge side. At the moment, I only need cooling. Heat could later be added by using a single stage Love to control a heater on the fridge side. There are two thermostats on this fridge model. One controls each side. To get to these you need to remove the temperature control system panel on the front and side of the fridge (open fridge pic above shows this on the top of the fridge section and running down the side to the back). All the wires you will need are behind this panel. Mine removes with four screws, 3 in front and one in the back by the fan/damper.

When you take it out it will look like this (I've pulled the thermos out of their place-on the right). You can see the damper motor and damper box at the back. Damper motor is the silver round thing.

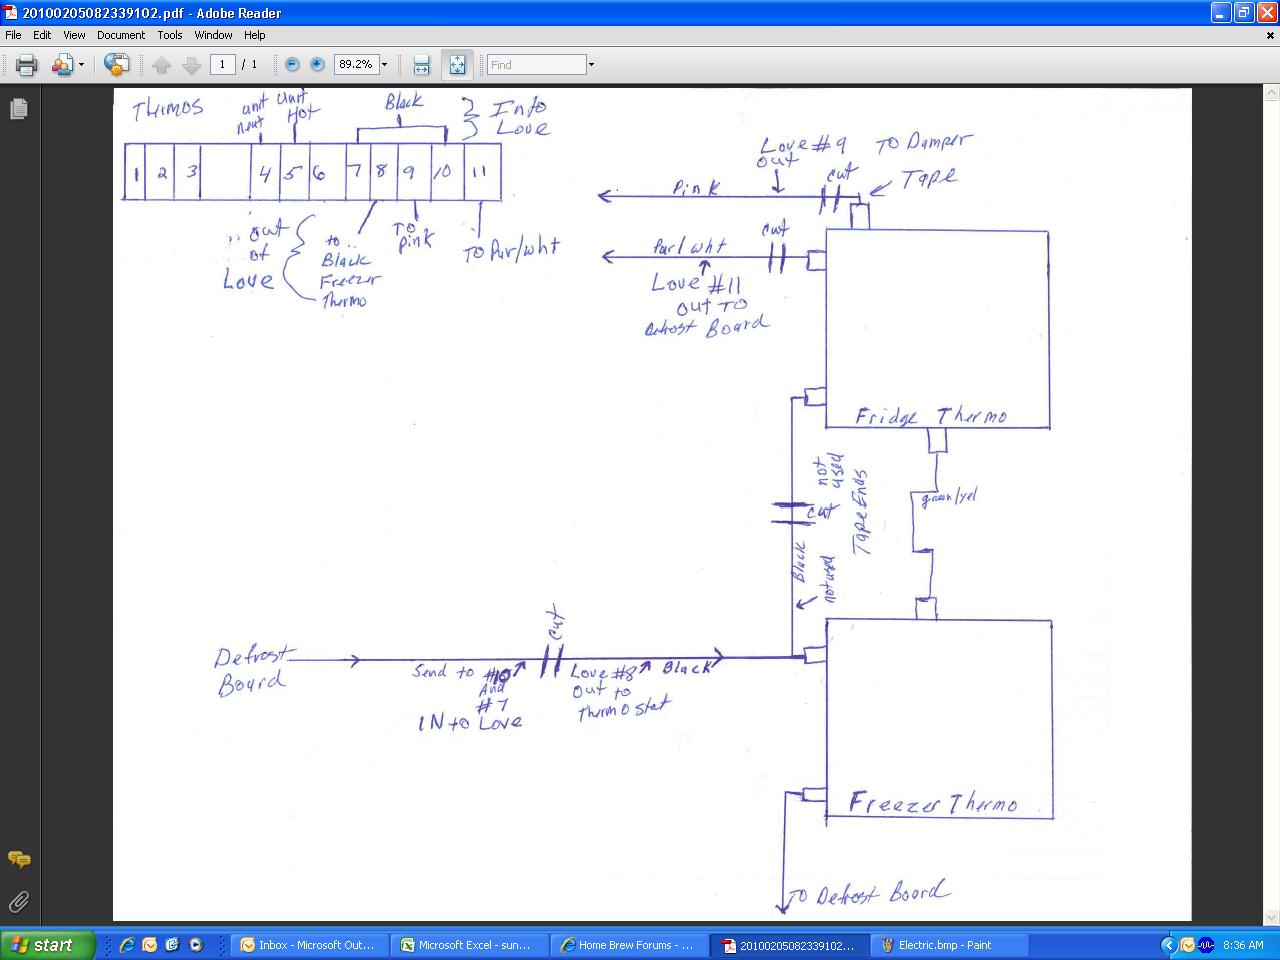
Now the Love controler needs to be hooked up to run this thing. I got a wiring schematic online on the frigidaire site. There may be one in your manual if you can get it. I used the freezer thermo and bypassed the fridge thermo since it is more than a on/off switch. I'll post some kind of wiring diagram in a follow up to this as I'm not sure how to get it in here. The Love needs power to run. You need to pull hot and neutral from the wiring harness that connects this assembly to the fridge. I tapped (cut wire, reconnected and add 3rd as a pigtail coming out) the black hot wire and light blue neutral wires prior to them entering the adaptive defrost board (pic below). The hot runs to #5 on the Love and the neutral light blue runs to #4 on the love. Please don't take these colors as gospel. Even a different Frigidaire may have different wiring. Now, if assembly connected, the Love will power up (will throw error code though as no temp probes hooked up)

Next hook up the freezer and fridge thermos. I cut the black wire going into the freezer thermo. Run a wire from this (non-thermo side of cut wire)to #7 and #10 on the Love. This will provide juice to both switches on the Love. Now, run a wire from #8 on the Love back to the other side of the cut you made a minute ago (into thermo side) into the freezer thermo. Disconnect the black jumper wire between the freezer and fridge thermo. Tape both of these ends off the prevent a short.
Now for the fridge thermo. Cut the pink and the purple/white wires that leave the fridge thermo. These wires control the damper motor and compressor. This opens the damper door when the fridge calls for cold and closes then it is not calling. Closing the damper prevents cold air from being blown into the fridge when only the freezer is calling for cooling. Run a wire from the Love to the pink wire going to the damper from #9. This will act to let the damper door close. Run a wire from #11 on the Love to the pur/wht wire going to the defrost board. This will allow the compressor and fan to come on and open the damper door. Tape off any wire not connected to prevent a short. Connections below.

Now hook up the temp probes to check if everything is working. The temp probe each have 2 wires, blue and brown. I don't think it matters which color goes where. I connected the brown from probe #1 to #1(Love), Brown from probe #2 to #2(Love) and hook both blues to #3(Love). Plug the whole unit in to see if everything works (reads temp, can be set to cycle both fridge and freezer on and off). You will have to set your Love to how you want it to control for this to work. Fully wired pic below before neatly taping everything into the assembly.

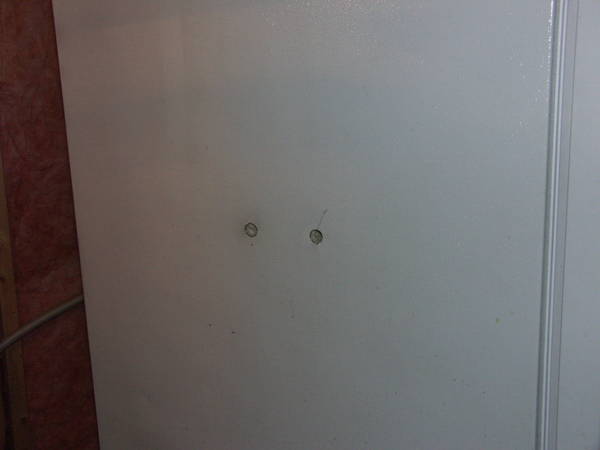
I installed the Love into the side of the fridge (easiest for wiring). Cut through the skin(outside) and plastic (inside) with a dremel or similar. Cut out the insulation. The thread linked at the beginning shows how to do this. I had no coils in the walls to concern myself with. Connect wires through hole, push Love through and silicone in place.
I'll grab some pics of the finished unit and update the post, hopefully tonight. I'll also try to wrap up with an small details to neaten/finish it up.
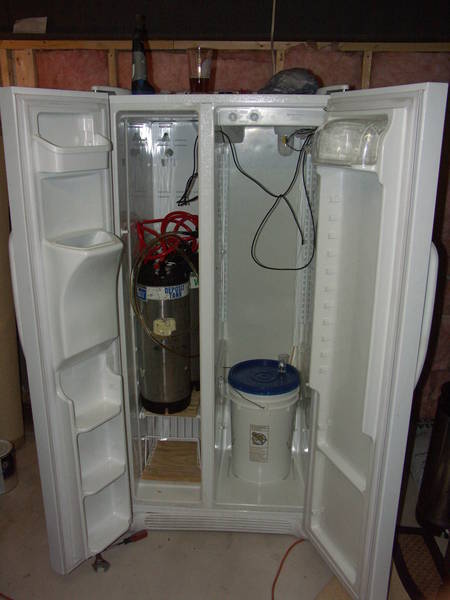
Right now I have a keg hooked up in the freezer side carbonating at 42 deg. At the moment I've got picnic taps for these kegs. I might add faucets and shanks to the freezer side when I can afford them and some new Perlicks. For now I can pre-chill and carb while waiting for a spot in my keezer (3 tap) to open up. Of course, I could brew more and just have 5 beers on tap.:rockin: Let me know if you have any questions.
After viewing Boerderij_Kaboute's side-by-side fermentation chamber thread, https://www.homebrewtalk.com/f51/side-side-fermentation-chamber-build-105054/, I decided to attempt one of the ideas later talked about in the thread. I wanted to create a unit I could lager in and/or serve kegged beer out of one side and ferment ales in the other side. I picked up a 2003 Frigidaire on craigslist for $100. The freezer side will be for kegged beer serving and/or lagering depending on my needs. The fridge side will be for fermenting ales.
First, I stripped everything out of both sides. I took out the drawers, shelves, icemaker. For this build, there is no need to remove any of the back panels in the freezer to expose the compressor and fan unless you want to be sure everything is running properly after the temp control is wired in. I found it helpful to be able to see this though.
To control the whole thing I purchased a Love TSS2-2100 control. One side controls the freezer temperature and the other controls the fridge side. At the moment, I only need cooling. Heat could later be added by using a single stage Love to control a heater on the fridge side. There are two thermostats on this fridge model. One controls each side. To get to these you need to remove the temperature control system panel on the front and side of the fridge (open fridge pic above shows this on the top of the fridge section and running down the side to the back). All the wires you will need are behind this panel. Mine removes with four screws, 3 in front and one in the back by the fan/damper.
When you take it out it will look like this (I've pulled the thermos out of their place-on the right). You can see the damper motor and damper box at the back. Damper motor is the silver round thing.
Now the Love controler needs to be hooked up to run this thing. I got a wiring schematic online on the frigidaire site. There may be one in your manual if you can get it. I used the freezer thermo and bypassed the fridge thermo since it is more than a on/off switch. I'll post some kind of wiring diagram in a follow up to this as I'm not sure how to get it in here. The Love needs power to run. You need to pull hot and neutral from the wiring harness that connects this assembly to the fridge. I tapped (cut wire, reconnected and add 3rd as a pigtail coming out) the black hot wire and light blue neutral wires prior to them entering the adaptive defrost board (pic below). The hot runs to #5 on the Love and the neutral light blue runs to #4 on the love. Please don't take these colors as gospel. Even a different Frigidaire may have different wiring. Now, if assembly connected, the Love will power up (will throw error code though as no temp probes hooked up)
Next hook up the freezer and fridge thermos. I cut the black wire going into the freezer thermo. Run a wire from this (non-thermo side of cut wire)to #7 and #10 on the Love. This will provide juice to both switches on the Love. Now, run a wire from #8 on the Love back to the other side of the cut you made a minute ago (into thermo side) into the freezer thermo. Disconnect the black jumper wire between the freezer and fridge thermo. Tape both of these ends off the prevent a short.
Now for the fridge thermo. Cut the pink and the purple/white wires that leave the fridge thermo. These wires control the damper motor and compressor. This opens the damper door when the fridge calls for cold and closes then it is not calling. Closing the damper prevents cold air from being blown into the fridge when only the freezer is calling for cooling. Run a wire from the Love to the pink wire going to the damper from #9. This will act to let the damper door close. Run a wire from #11 on the Love to the pur/wht wire going to the defrost board. This will allow the compressor and fan to come on and open the damper door. Tape off any wire not connected to prevent a short. Connections below.
Now hook up the temp probes to check if everything is working. The temp probe each have 2 wires, blue and brown. I don't think it matters which color goes where. I connected the brown from probe #1 to #1(Love), Brown from probe #2 to #2(Love) and hook both blues to #3(Love). Plug the whole unit in to see if everything works (reads temp, can be set to cycle both fridge and freezer on and off). You will have to set your Love to how you want it to control for this to work. Fully wired pic below before neatly taping everything into the assembly.
I installed the Love into the side of the fridge (easiest for wiring). Cut through the skin(outside) and plastic (inside) with a dremel or similar. Cut out the insulation. The thread linked at the beginning shows how to do this. I had no coils in the walls to concern myself with. Connect wires through hole, push Love through and silicone in place.
I'll grab some pics of the finished unit and update the post, hopefully tonight. I'll also try to wrap up with an small details to neaten/finish it up.
Right now I have a keg hooked up in the freezer side carbonating at 42 deg. At the moment I've got picnic taps for these kegs. I might add faucets and shanks to the freezer side when I can afford them and some new Perlicks. For now I can pre-chill and carb while waiting for a spot in my keezer (3 tap) to open up. Of course, I could brew more and just have 5 beers on tap.:rockin: Let me know if you have any questions.