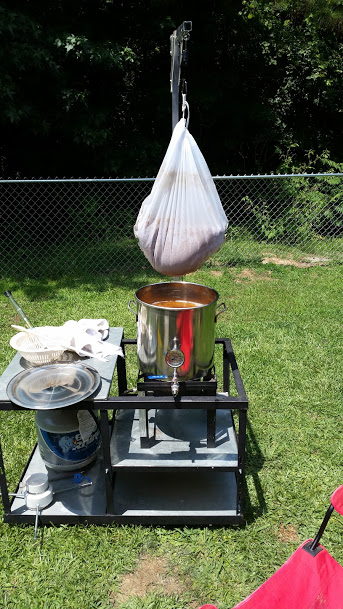
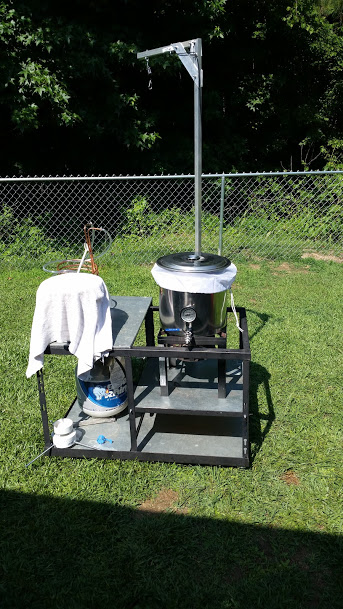
Show your BIAB Stand/Set up

Homebrew Talk - Beer, Wine, Mead, & Cider Brewing Discussion Forum

Help Support Homebrew Talk - Beer, Wine, Mead, & Cider Brewing Discussion Forum:

This site may earn a commission from merchant affiliate links, including eBay, Amazon, and others.
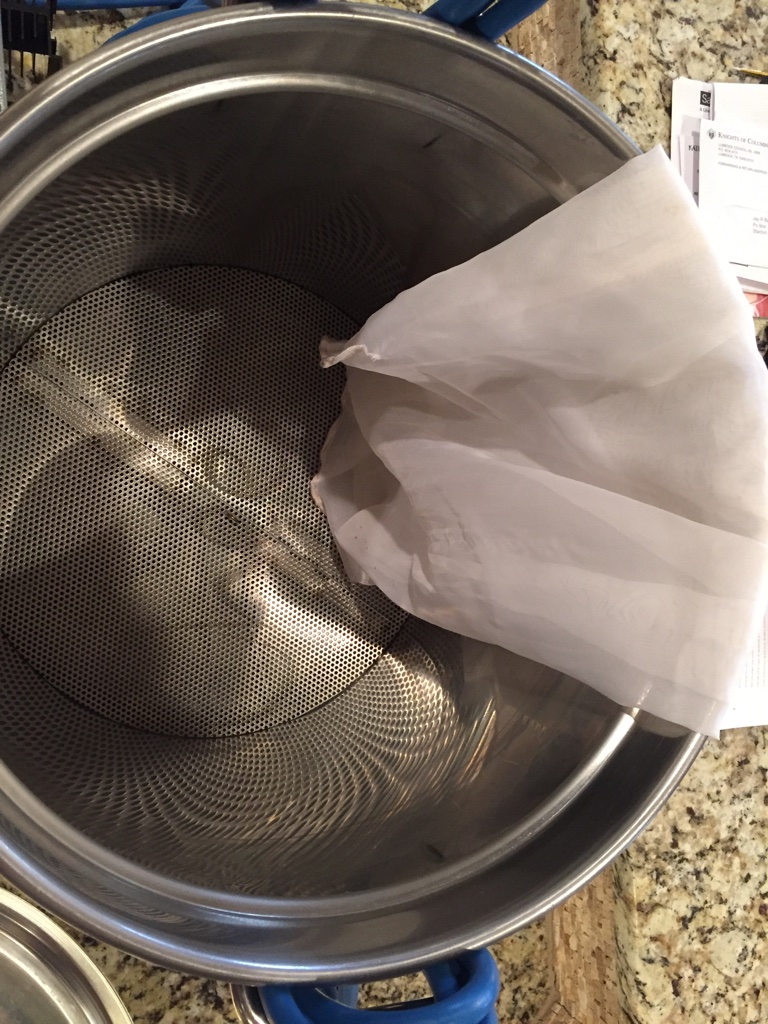
I'm building a basket... I work in a fabrication shop. The issue I had with traditional voile bags was even in my steam basket with feet, if I ran the pump it clogged the bag and turned it into a waterballoon. I eventually had to switch to a more course material similar to a paint strainer bag, but I get a bunch more drain matter in my wort then I would like. Just wondering how the baskets prevail.

Hmmm, I use a Wilser bag with my BB system/false bottom and never had it completely clog. On my very first brew with it, a Rye PA it did pull with enough force to dent the bottom of the kettle where the four silicone feet for the false bottom were, but I never lost flow or pumped it dry. The pump output was throttled back about half.

I'm reasonably certain that the COFI filters are 800 micron, so keep that in mind when comparing notes.
 
I'm reasonably certain that the COFI filters are 800 micron, so keep that in mind when comparing notes.

I'm getting a filter made by Chad at ArborFab (he also does all the work for Utah Biodiesel). It's 400 micron which is what they recommend for BIAB baskets. They do 300 for pellet hops.
 
He also makes the COFI filters and said they were 800u, per Darrin's spec...

I didn't realize we were talking about a slightly different thing. The COFI filter is like what's used in the Brew Boss...got that. I'm using more of a basket without the lid and all that...it's going to be 400 micron.

Is Darrin the guy the makes the Brew Boss? Or is this Darrin at BrewersHardware.com?
 
Yes the Brew-Boss COFI basket is a fancier version of what most are discussing here, but they are essentially the same thing, except that the COFI is 800u and most people that get a basket from Chad for BIAB get 400u.

I was just trying to point out the differences for people trying to compare experiences/performance between systems as Just-A-Sip was a few posts earlier. I know when I first started looking at the mesh basket approach I assumed the COFI filters were 400u.

Darrin is the owner of Brew-Boss and I believe he chose the larger mesh to ensure the mash never gets stuck, regardless of the brewer's experience level.

I'm interested in a 400u basket myself, but need more feedback from people who have a 400u basket and recirculate...
 
I'm interested in a 400u basket myself, but need more feedback from people who have a 400u basket and recirculate...


FWIW I contacted Chad at Arbor Fab. After this thread I was having second thoughts about the 400 micron basket I'm having him make. He said the 600 & 800 micron mesh is better for grains.

I'm planning on recirculating with a Blichmann kettle and Tower of Power. I went ahead and told him to use 800 micron mesh to avoid any issues with recirculation. My concerns are wort clarity and temp stability with temp stability being more important. It's still at least a month off from the basket being completed and the first batch being made but I'll report back with my impressions.

I feel good about the 800 seeing as how the Brew Boss uses that and I know those who have them really seem to like them and have little to no issues with it. Thanks for the helpful info. :)
 
I don't post much, but I sure spend a lot of time on this forum ha. I use a 400 mesh basket and recirculate. Works pretty good. I can only run my chugger pump about 1/2 throttle. I crush my grains as tight as I can on my Barley Crusher. My system isn't dialed in all the way yet. I still have some temp issues. I've had the temp sensor in the kettle and in the output in a tee. In the tee seems to work better. There is some temp stratification happening under the basket (I'm assuming here) during the mash though. I want to mess around with a 3-way valve and whirlpool the wort under the basket at the same time as returning wort to the top for recirculation. We'll see how that goes but I'm having a blast brewing on this system. Have brewed 5 times so far on this so there is lots to learn/tweak still.
One thing I didn't care for was the stainless hop spider, 300 micron. Works fine for small amounts of hops but I definitely prefer to let the hops run free in the boil/whirlpool for hoppy beers. This also means my plate chiller has to go. Well it doesn't have to I guess but I don't like it regardless. All good, I don't mind immersion chillers at all and the extra clean up of the kettle is worth the flavor/aroma in my beers. I like to brew hoppy beers 90% of the time.
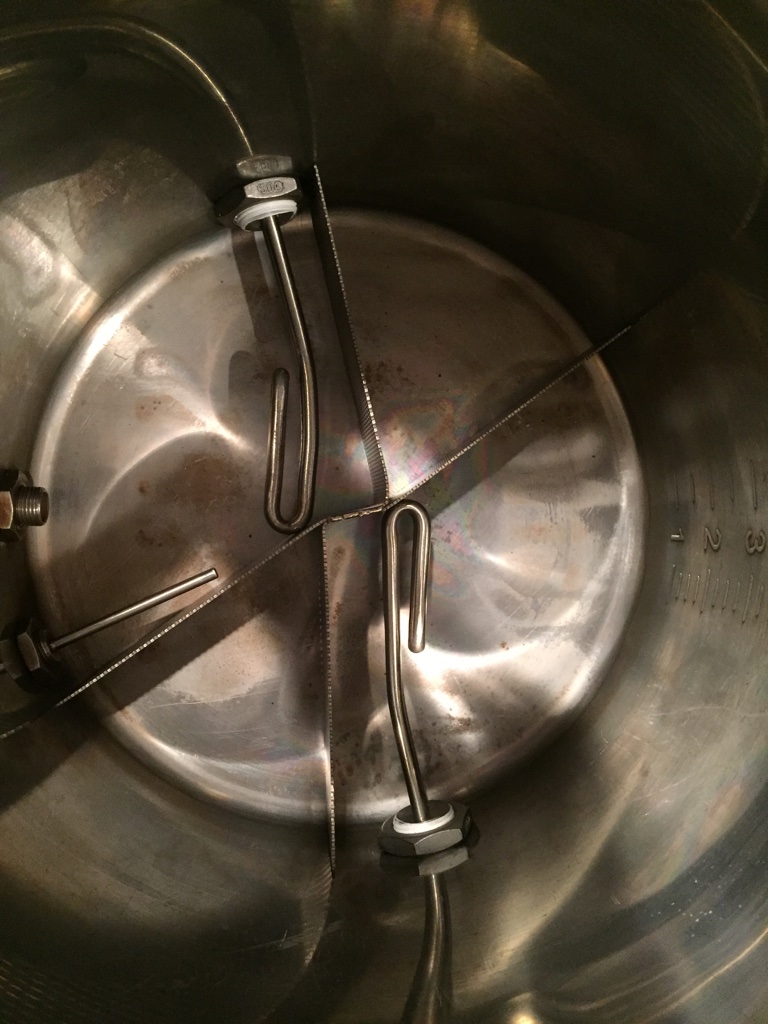
This is an old network telco rack I made a base for; perfect for this sort of thing. 62 qt bayou kettle, 5500 watt ss element, and brewhardware fittings.


Very nice! What size batches are you brewing, and is the 5500W element really needed, or would a 4500W be plenty (planning my electric build)?

Brew on :mug:
 
I'm brewing 5 gallon batches almost always. When I need to do a 10 gallon batch I'll probably mash in a cooler or do some sort of sparge through the basket. I've boiled 10 gallons of water fairly easily with 5500 watt. Not sure if 5500 watts is needed, but I'm limited on time (have 3 little ones) and the whole reason for this setup was to save time. I'd rather have 5500 watts over 4500 watts. I can knock out a 5 gallon brew in 3 1/2 hours including cleanup. Probably quicker if I prepped the night before. I am using a BRU-matic DBC1MA controller and it can control or throttle the element whether in manual control mode or PID mode so being overpowered (if there is such a thing ha) on the element isn't a problem. Seems to take about 20-30 minutes to get to strike temp from 60 F water, 10-15 min to reach mash out, and 10-15 min to reach a boil.
 
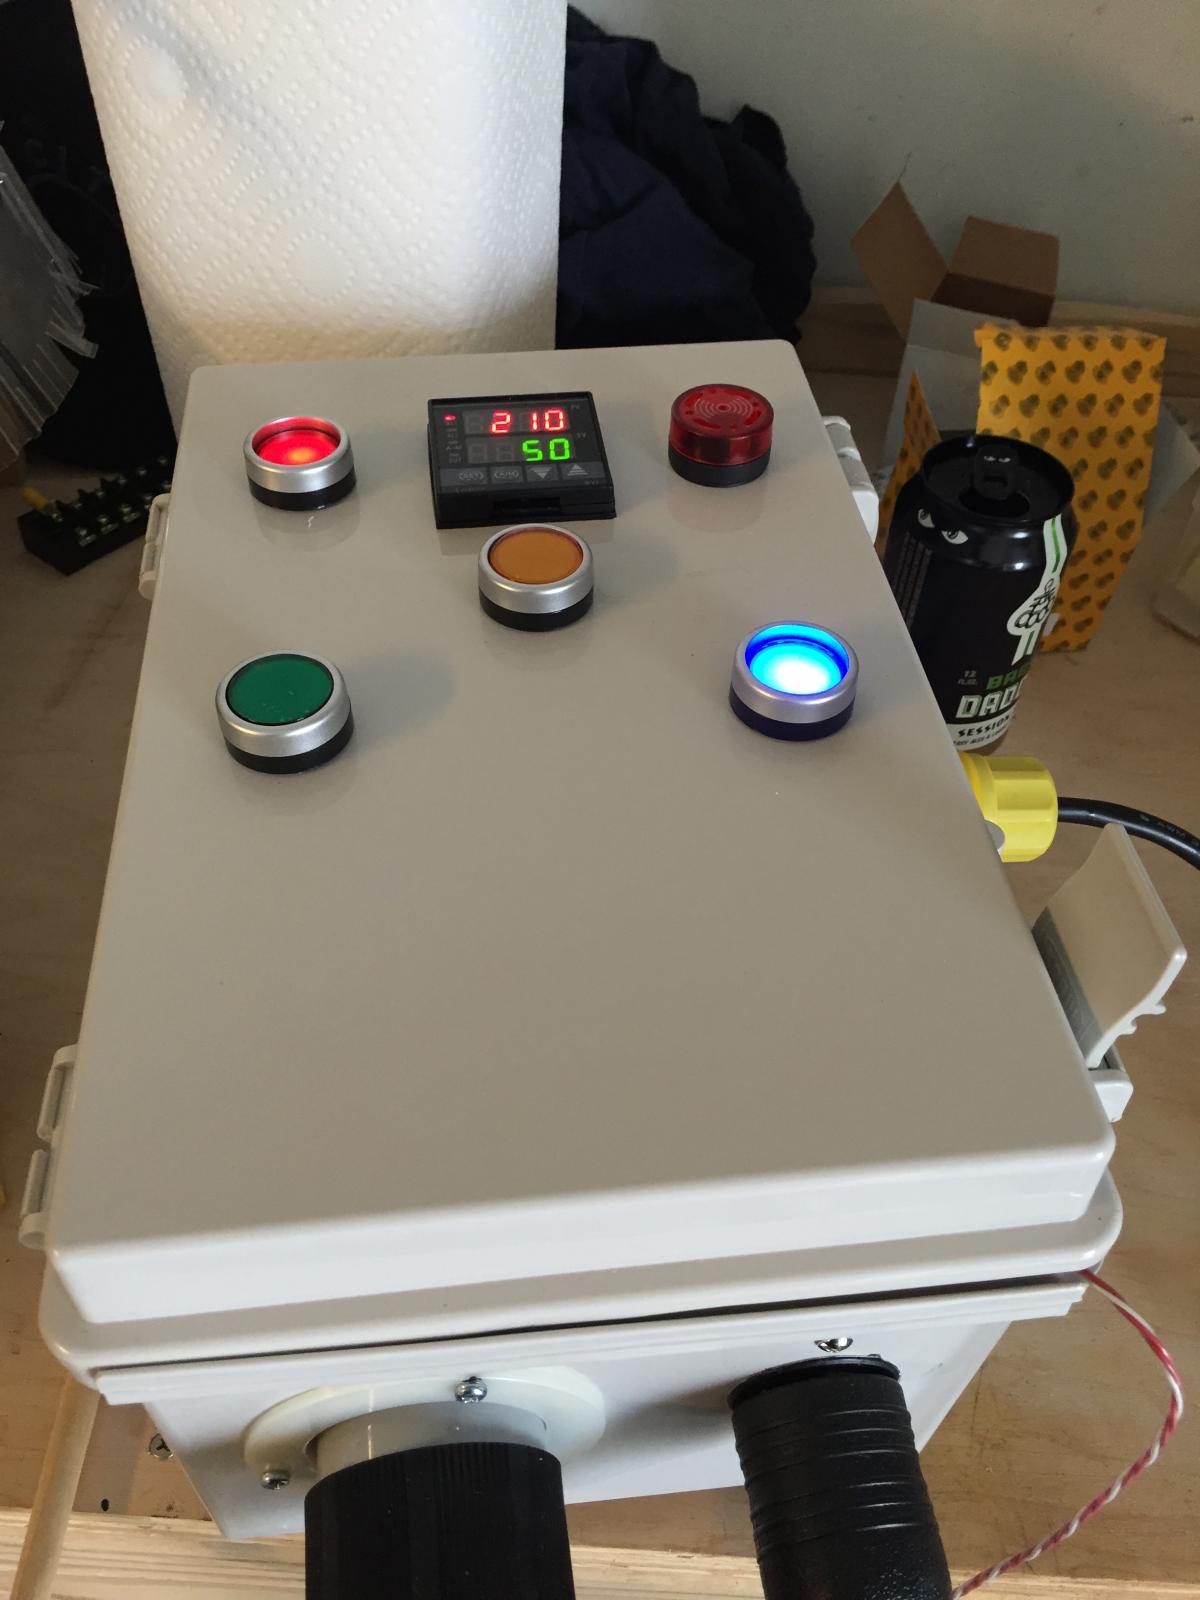
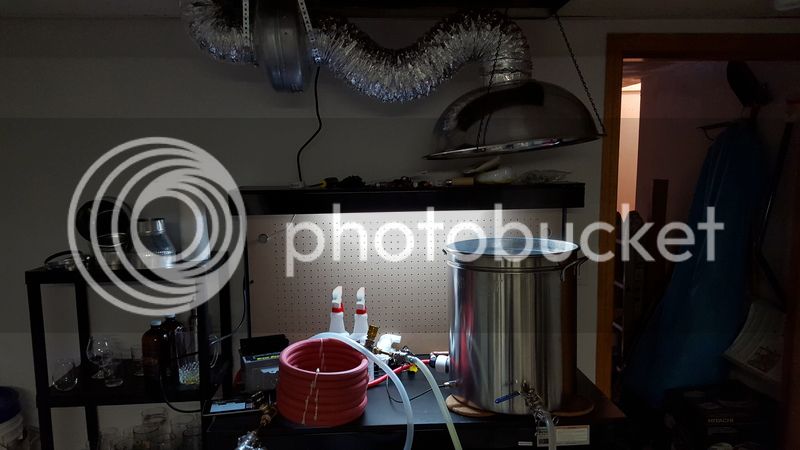
Nothing too fancy. Built a control panel. Will put it on the wall over by the plug soon. Pulley on ceiling.

2015-07-31 16.02.46.jpg


2015-07-31 17.33.41.jpg
 
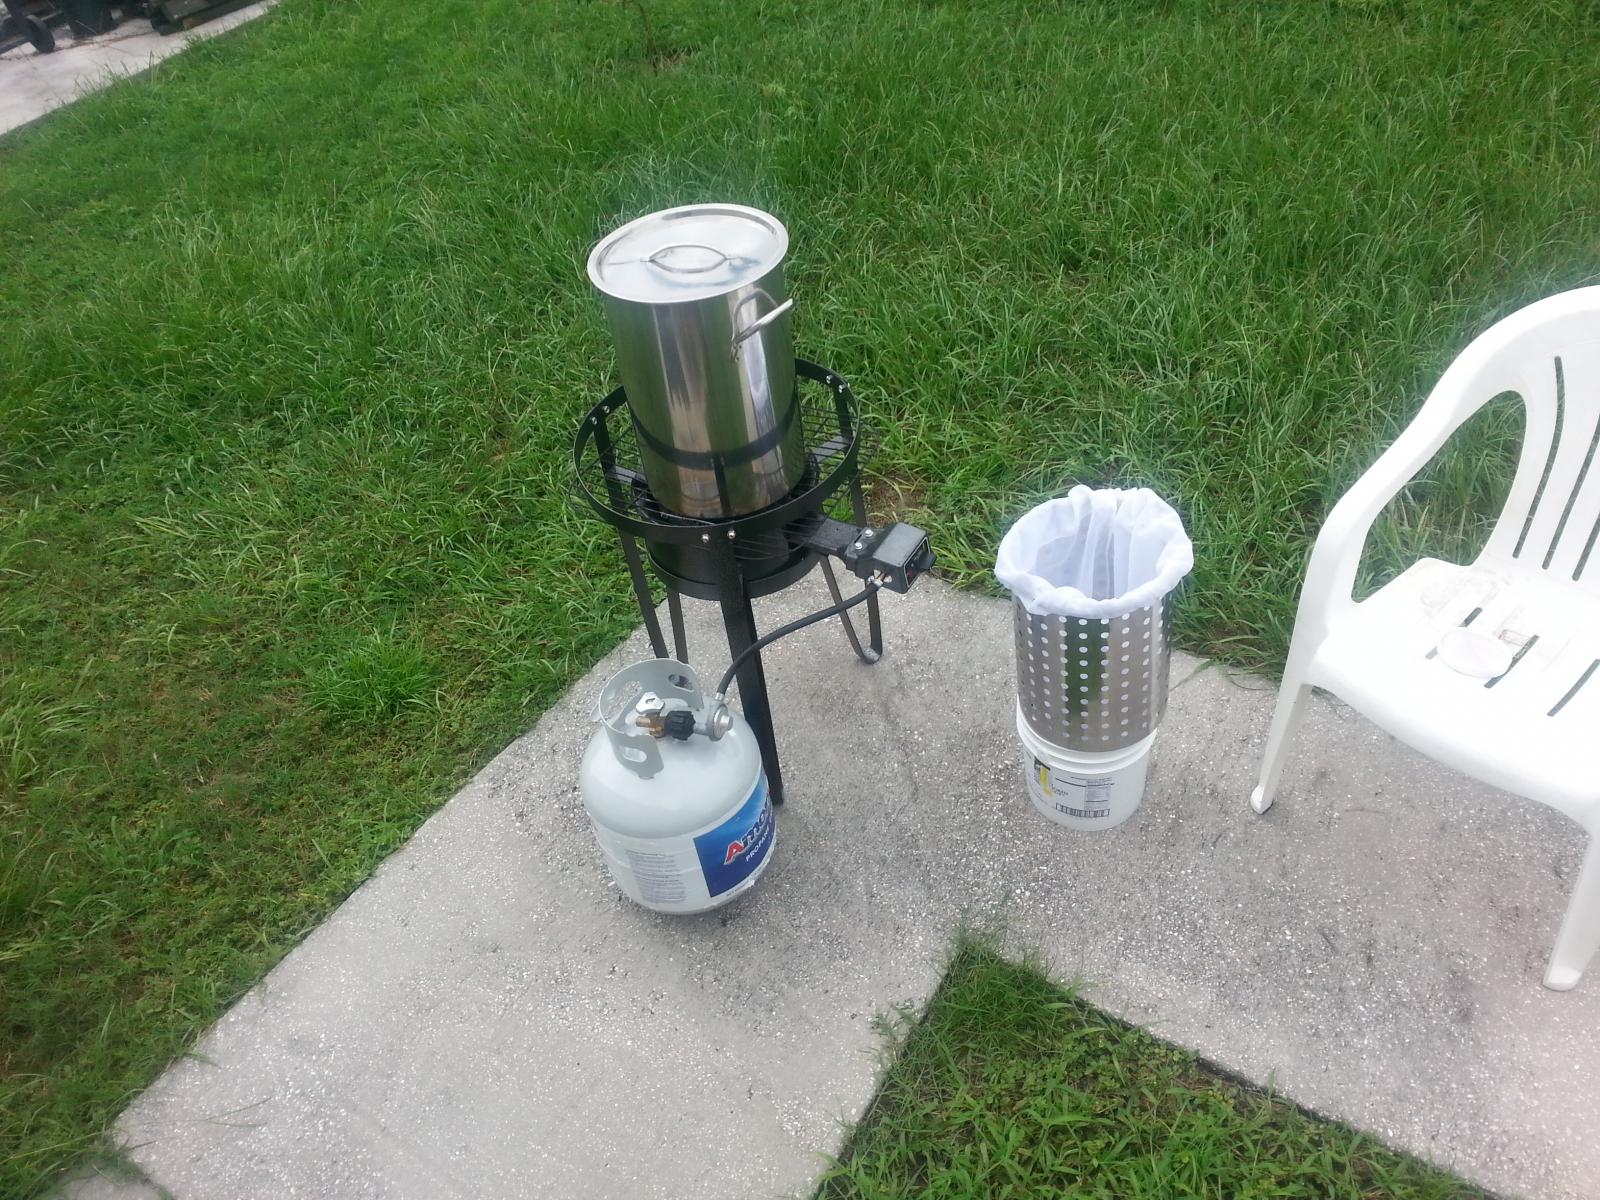
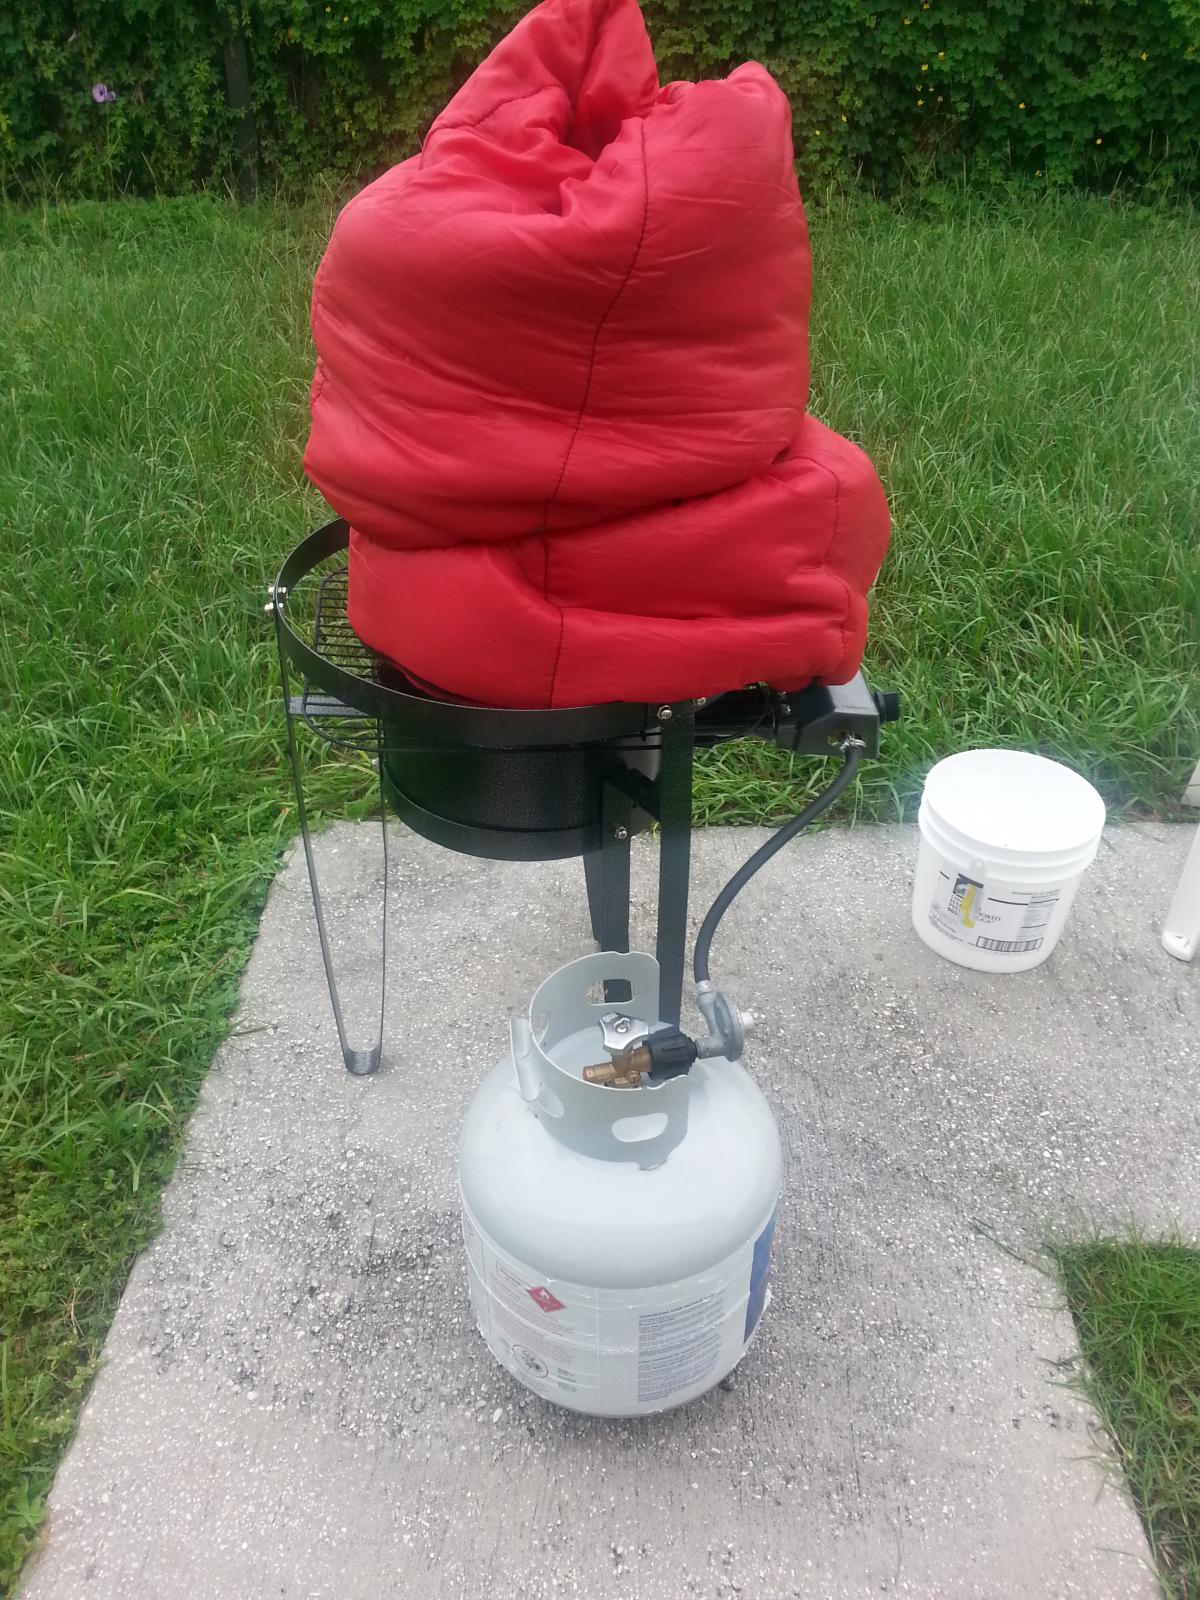
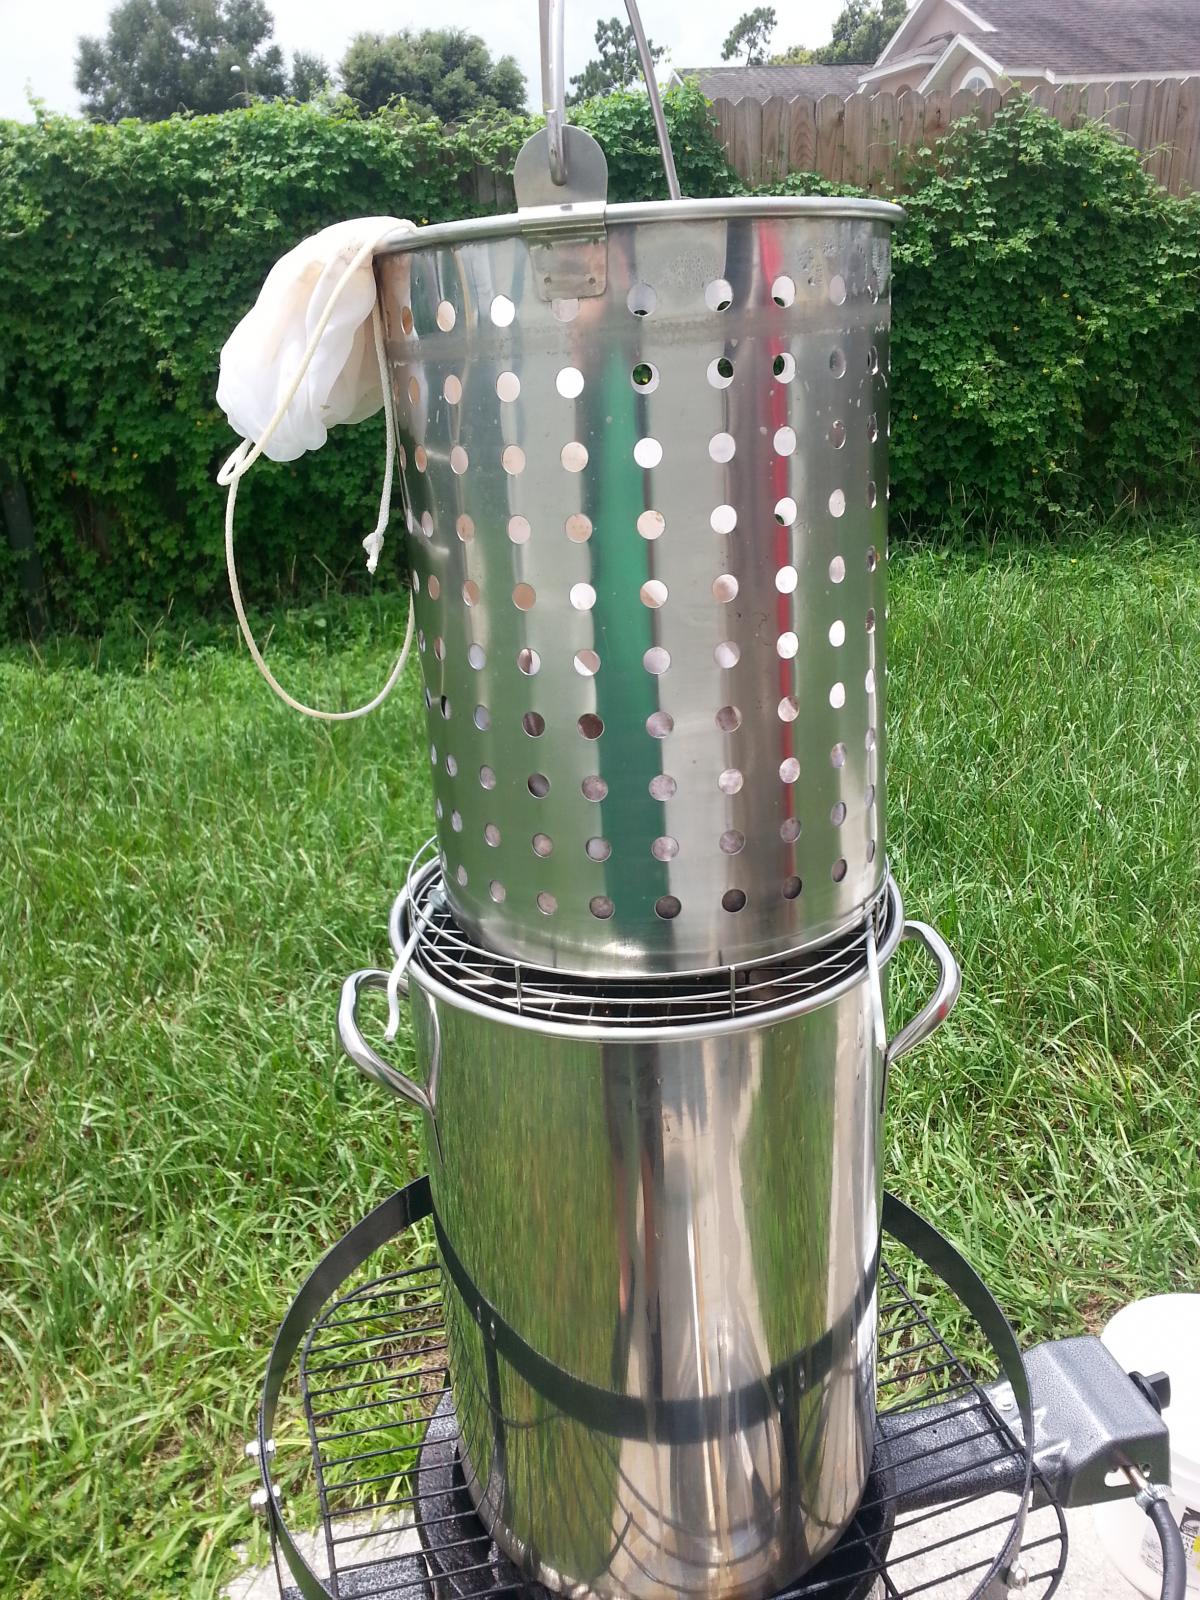
Simple setup. I rigged a grill from a fryer to rest the basket and the bag on top of the kettle to drain and squeeze. Worked very well fro me last brew day.

20150802_113914.jpg


20150802_121339.jpg


20150802_115821.jpg


20150802_125554.jpg
 
Looking good Joe, typically people install the bag up and over the top rim of the kettle, that way any spills out of the basket are contained.

This will also give you more usable volume in your kettle. After the mash, close the bag drawstring and remove basket / mash.
 
Because you like cleaning up more than brewing? :p
There was a reason for my madness. Trying to finish with 10 gallons of high gravity wort. Two 2qt/lb no-sparge mashes combined to get me there. I forgot to get the BIAB pre-boil gravity, but combining that with the run-off from the conventional mash, my overall mash efficiency was 70%, not the 65% I had planned. My English Barleywine won't mind. :D
 
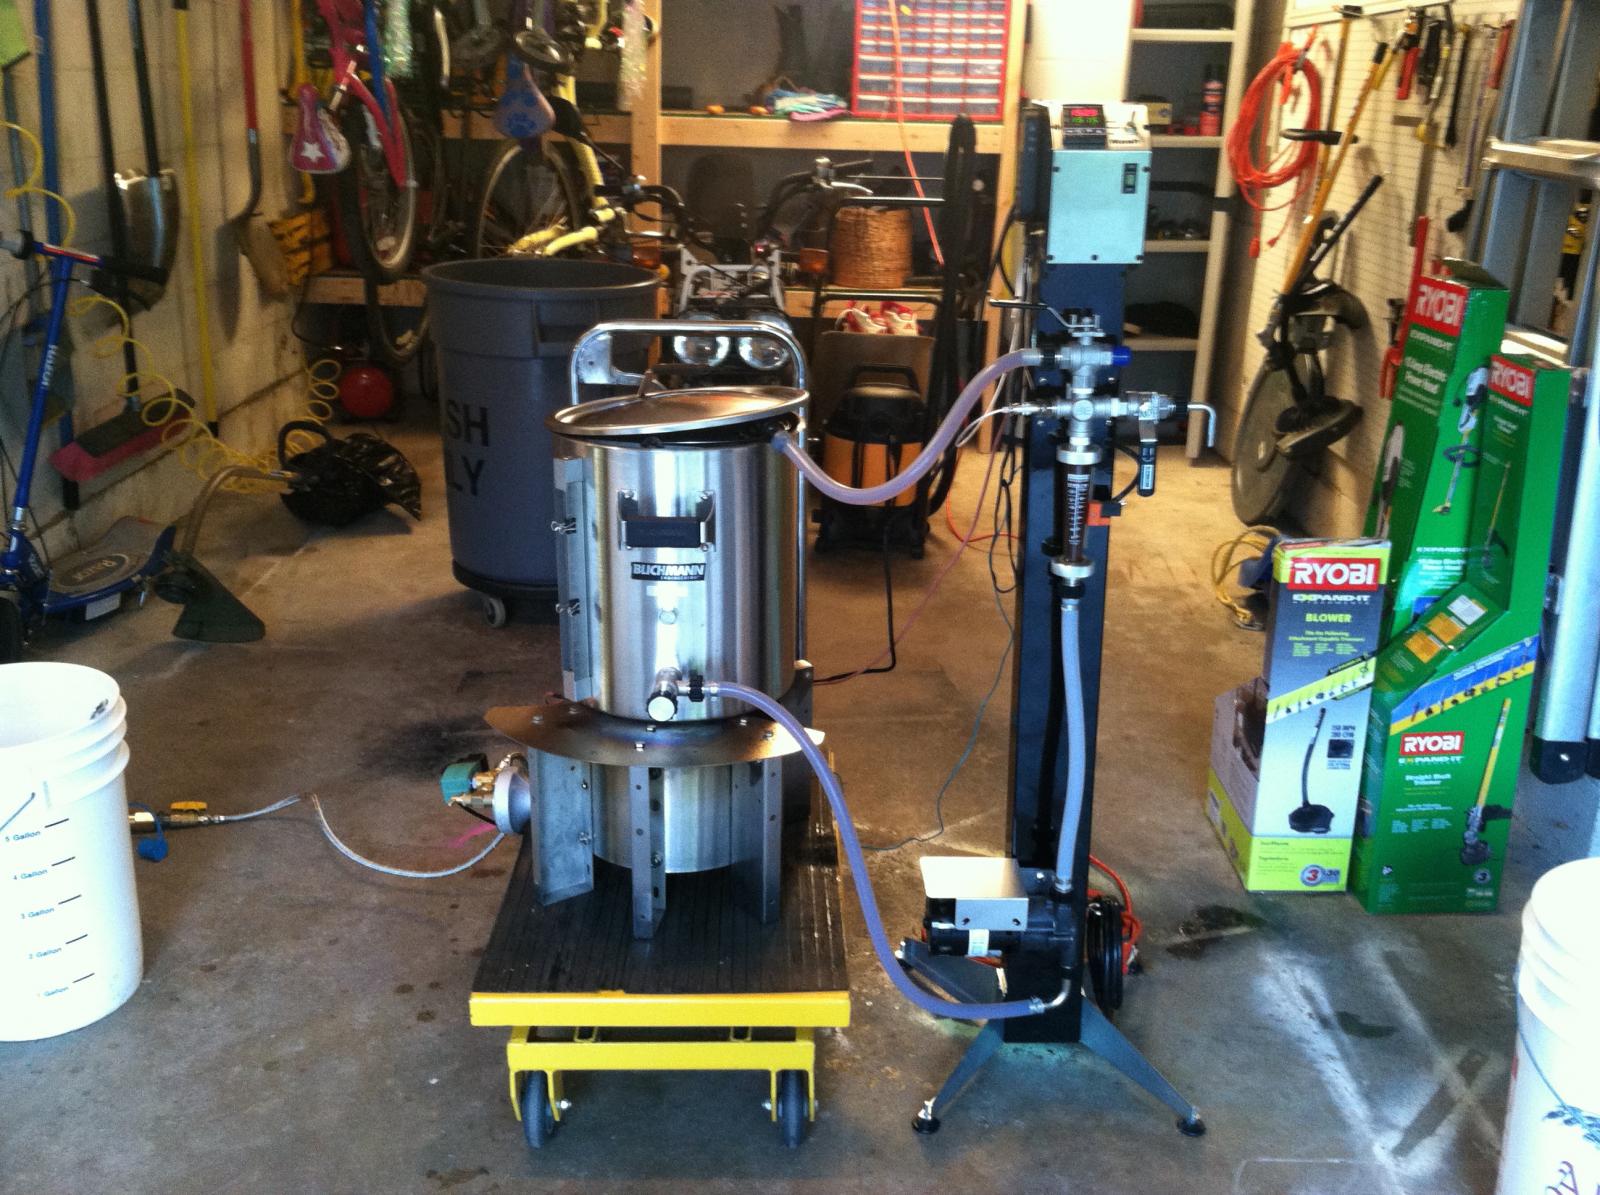
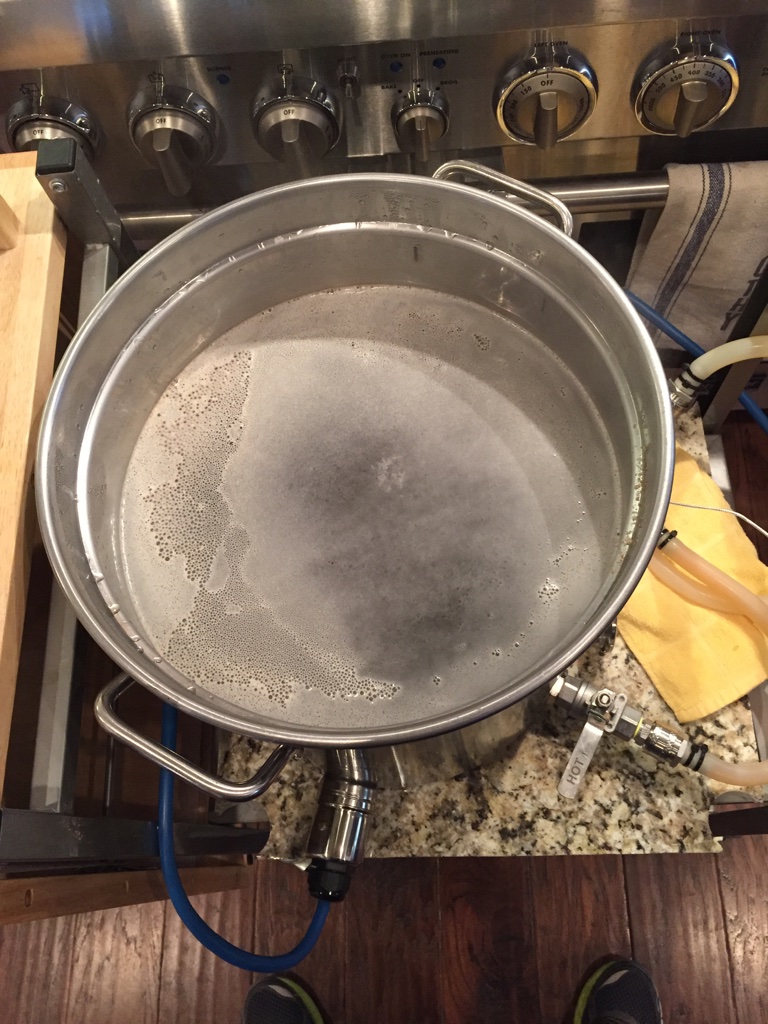
Here's mine. Had my maiden today...went with two back-to-back batches. First brew was a Nut Brown Ale. Second was a Citra Pale. I've brewed both before, but that was on my 10gal 3V system. Sold all that because of back problems and downgraded to a 2.5g BIAB setup. LOVE IT! The basket is from ArborFab. Control panel is a Blichmann Tower of Power gas module.

IMG_2786.jpg


IMG_2787.jpg


IMG_2788.jpg
 
What is that black ring your using hafmpty?
I assume its on the grain bed for recirculation, just never seen one like that before.
Also where did you get it?
 
What is that black ring your using hafmpty?
I assume its on the grain bed for recirculation, just never seen one like that before.
Also where did you get it?

Yeah, I use it for recirculation. I bought it here:
https://www.brewhardware.com/product_p/mashspargering.htm

I like it because the end is open allowing larger pieces of grain to flow out while the liquid is more evenly dispensed over the grain bed. Plus it's flexible so you can adjust it if you wanted to mount it.

Buy individual parts/pieces to suit your own attachment method here:
https://www.brewhardware.com/product_p/loclineparts.htm

Awesome!
Thanks for the links.
I've seen some people use the flexible tubing before but it only had a single output.
Do you see much grain coming through when re-circulating?

I ask only because I have gotten one of those cheap ebay pumps which is much smaller and am concerned about clogs.
 
Do you see much grain coming through when re-circulating?


Well the amount of grain is really dependent upon your system. I crush really loose (.050 vs. .008-.010 in some BIAB systems). So my filter bed is more like a traditional system. With the way I brew I don't get any pieces of grain because of my crush and the 400 micron basket that won't let it through. Hope that helps.
 
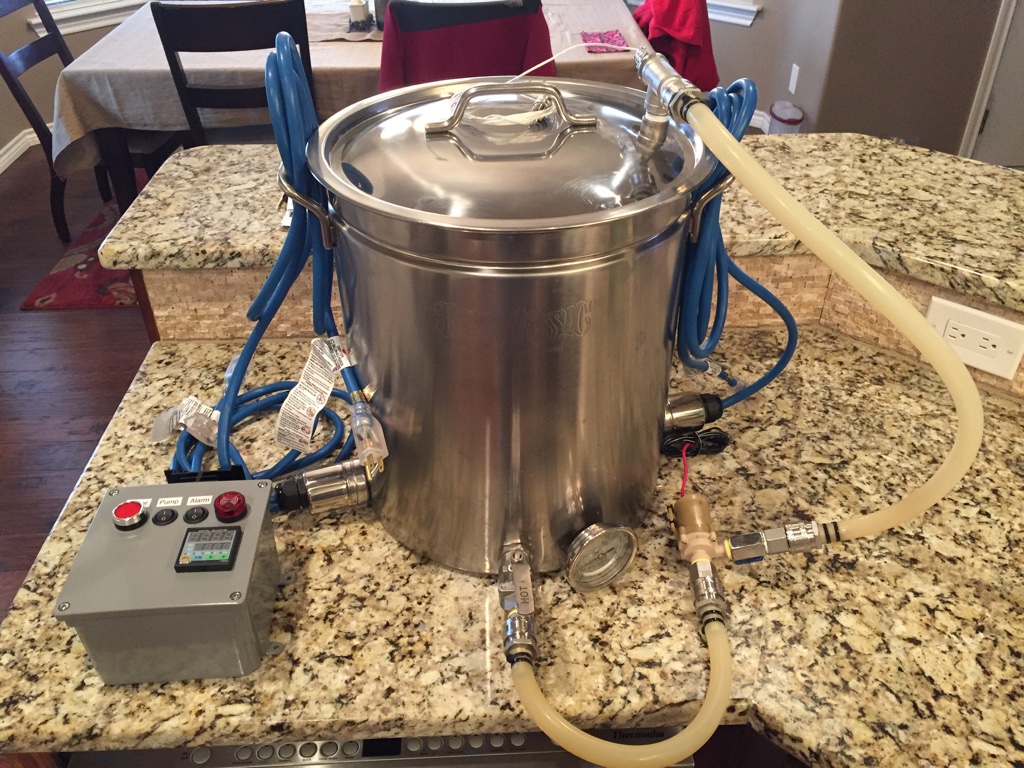
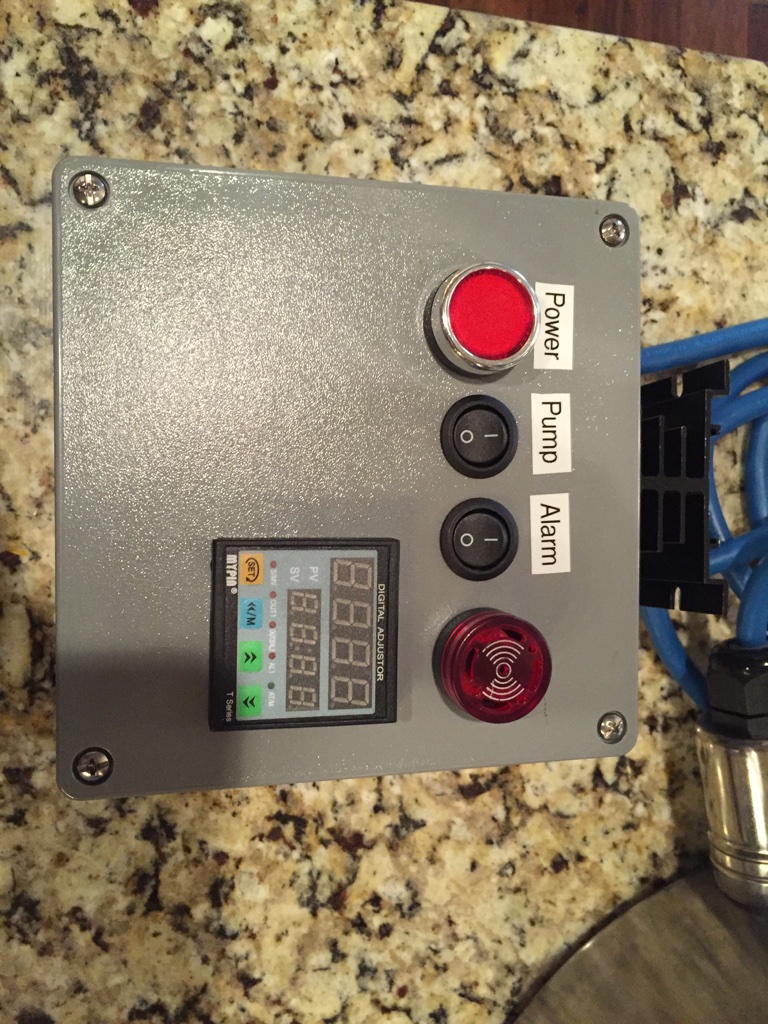
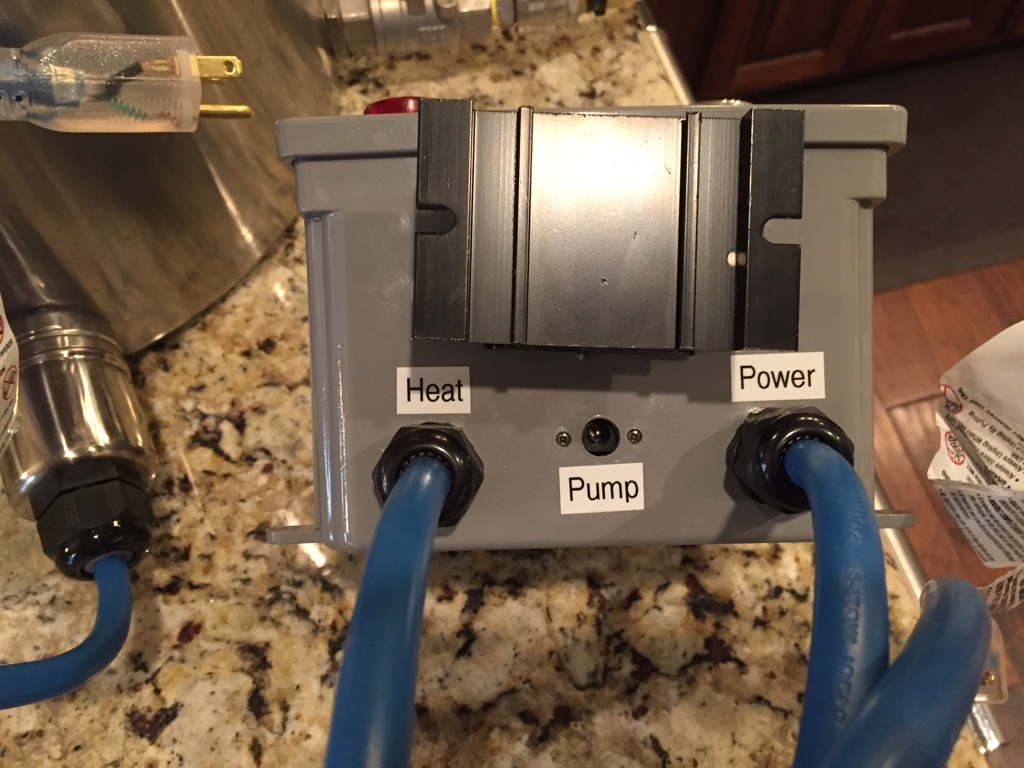
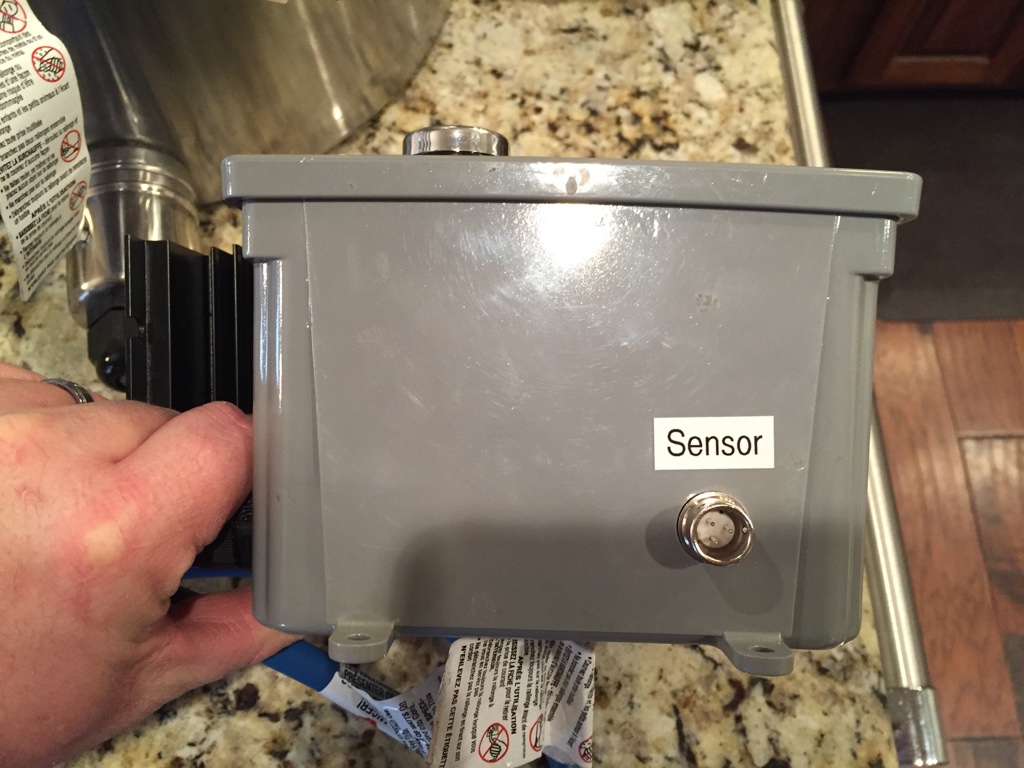
I don't know why I built this system but I did; I already own a 220v 15g BrewBoss setup.

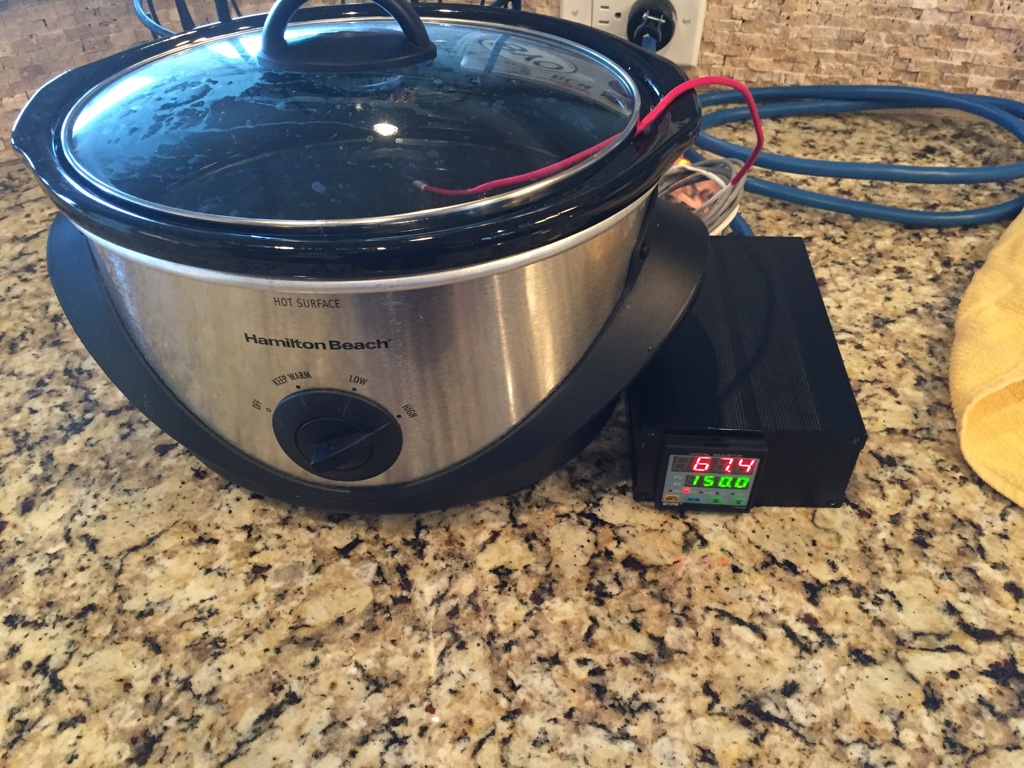
It is a dual 120v system with 1500w heaters 10gal Bayou Classic kettle, modeled after a BrauSupply system. While I was at it built a Sous Vide controller also, I was planning on running a controller for both heaters but realized it was necessary so it became a Sous Vide controller.

EDIT: Added pics of the system in use. A partial mash Session beer.

thumb_IMG_1359_1024.jpg


thumb_IMG_1360_1024.jpg


thumb_IMG_1361_1024.jpg


thumb_IMG_1362_1024.jpg


thumb_IMG_1363_1024.jpg


thumb_IMG_1364_1024.jpg


thumb_IMG_1365_1024.jpg


thumb_IMG_1355_1024.jpg


thumb_IMG_1383_1024.jpg


thumb_IMG_1384_1024.jpg
 
I don't know why I built this system but I did; I already own a 220v 15g BrewBoss setup.

Awesome build! And I agree, it is curious that you built this with a Brew Boss in hand. Is this the system that was giving you the recirculation issues? Notice any performance difference between the false bottom and the basket?

Last question. If I may ask, how much was the total cost?
 
Awesome build! And I agree, it is curious that you built this with a Brew Boss in hand. Is this the system that was giving you the recirculation issues? Notice any performance difference between the false bottom and the basket?

Last question. If I may ask, how much was the total cost?

My wife says I get bored and think up crazy things like this to build, and once I start planning I finish it. It started out as a 2.5-3gal 120v BIAB system and quickly turned into this.

The BrewBoss is the system that gave me recirculation issues, those have been resolved by grain crush mostly then added a false bottom. I have no numbers to back it up but I like the false bottoms better than the baskets. I have less flow issues with the false bottom, easier to clean than a basket, and have less drips/spills.

I've only ran one wet run/programming/boil off run and one Partial Mash through this system. Worked like a champ.

I already had the kettle and false bottom so price wasn't to bad.

Controller
PID/ssr/heatsink $45 http://www.ebay.com/itm/Manual-Auto...444060?hash=item43d8c2a65c:g:uj0AAOSwv0tVZUl~
Thermo $35 http://brausupply.com/collections/plumbing/products/1-5-rtd-pt-100-sensor
enclosure 4x4x2 $15 local hardware store
Alarm $6 http://www.ebay.com/itm/ATI-22mm-12...cator-Light-/221805674839?hash=item33a4a60157
Alarm Switch x2 $7.00 http://www.ebay.com/itm/One-On-Off-...olt-EC-1213-/171412421059?hash=item27e8f9f9c3
cord grips 8.46 http://www.ebay.com/itm/311180311734?_trksid=p2060353.m2749.l2649&ssPageName=STRK:MEBIDX:IT
3- 12ga 15ft extension cords 47.6 http://www.ebay.com/itm/111747323363?_trksid=p2060353.m2749.l2649&ssPageName=STRK:MEBIDX:IT
ac-dc converter 6.29 http://www.ebay.com/itm/161911791453?_trksid=p2060353.m2749.l2649&ssPageName=STRK:MEBIDX:IT
dc male/female power plugs 2.99 http://www.ebay.com/itm/301797603911?_trksid=p2060353.m2749.l2649&ssPageName=STRK:MEBIDX:IT
pushbutton switch 7 http://www.ebay.com/itm/291141763563?_trksid=p2060353.m2749.l2649&ssPageName=STRK:MEBIDX:IT
Total $180

Other
2 - 1500w $31 http://www.ebay.com/itm/321930407926?_trksid=p2060353.m2749.l2649&ssPageName=STRK:MEBIDX:IT
Element Enclosures $52 https://www.brewhardware.com/product_p/hotpod-ewl3.htm
qd female 1/2mpt 2x $7.95 $16 http://brausupply.com/products/copy-of-stainless-steel-quick-connect-female-to-1-2-mpt
qd male 1/2fpt 2x $7.95 $16 http://brausupply.com/products/copy-of-stainless-steel-quick-connect-male-to-1-2-fpt
qd female/barb 4x 11.95 $47.80 http://brausupply.com/products/stainless-steel-quick-connect-female-to-barb-1-2
SS T $4 http://brausupply.com/collections/plumbing/products/stainless-steel-tee-1-2-fpt
SS Nipple $5 http://brausupply.com/collections/plumbing/products/stainless-steel-1-2-mpt-x-1-2-hose-barb
24v pump $22 http://www.ebay.com/itm/Solar-DC-12...r-Pump-3M-F-/400809363445?hash=item5d521987f5
ss coupler $3 http://www.amazon.com/gp/product/B003GSL1V0/?tag=skimlinks_replacement-20
ss elbow $6 http://www.amazon.com/gp/product/B003GSKX82/?tag=skimlinks_replacement-20
ss solder kit $12 http://www.amazon.com/gp/product/B0015H6JYS/?tag=skimlinks_replacement-20
ss 1/2 npt hose barb $5 http://www.amazon.com/gp/product/B00IA7CFMQ/?tag=skimlinks_replacement-20
ss 1/2 mini ball valve $12 http://www.amazon.com/gp/product/B006VE3DPI/?tag=skimlinks_replacement-20
Total $232
Sub Total $412

44qt kettel (already have) $150 http://www.amazon.com/gp/product/B007TVYHXY/?tag=skimlinks_replacement-20
Silicon Tubing (already have) $20 http://www.northernbrewer.com/brewi...pment/tubing/1-2-id-silicone-high-temp-tubing
false bottom (already have) $125 http://www.norcalbrewingsolutions.com/store/False_Bottom_Bayou_Classic_1044.html
Total $295
Grand Total $707


Sous Vide
PID/SSR $33 http://www.amazon.com/gp/product/B0087O6T10/?tag=skimlinks_replacement-20
Wire/plugs/cordgrips Left overs from brew controller
enclosure $13 http://www.ebay.com/itm/121576973487?_trksid=p2060353.m2749.l2649&ssPageName=STRK:MEBIDX:IT
Total $46

I minimized shipping by trying to order from either the same vendors or vendors that had free shipping.
Used 2-3 different wiring diagrams from various posts here on HBT. Working on drawing up the actual one. Wishing I would have taken pictures along the road to illustrate the build.
I also wired all the 120v with 12ga wire to be able to upgrade to 20amp for 2000w elements or for a different kettle.
Now that I have found out how easy it is to solder stainless steel all my kettles will be getting soldered triclamp fittings down the road. I soldered the SS coupler to the lid.
Didn't pay attention, when ordering, but the cords are the one that have the little light in them when powered. So you can tell when the PID/SSR is firing the element. I thought it was a neat little bonus.
 
Last edited by a moderator:
I minimized shipping by trying to order from either the same vendors or vendors that had free shipping.
I try to do the same!

Used 2-3 different wiring diagrams from various posts here on HBT. Working on drawing up the actual one.
Any chance I can get a PM when that diagram is available? ;>)

Now that I have found out how easy it is to solder stainless steel all my kettles will be getting soldered triclamp fittings down the road. I soldered the SS coupler to the lid.
When I used to do appliance repair and refrigeration, I did silver solder all the time. been kind of leery about doing it on SS - any problems/stumbling blocks about Silver soldering SS that you might wish to share?

Didn't pay attention, when ordering, but the cords are the one that have the little light in them when powered. So you can tell when the PID/SSR is firing the element. I thought it was a neat little bonus.
I like that idea, never thought much about it, but that's like saving yourself a light in the control box, and it's right at the heat source!

Thanks for steering me this way - right now my decision rests between using a 240v 30A single element system and a 120v/30A dual element system - which, I think might mean that I'll have to run another #10 wire for my HERMS/Sparge pot anyways. It's a 45' run from the power box to the 'brew-room' but that's not a big deal in the long run (pardon the pun).

IOW, I'll either have to use 3 120v 2000w elements for the entire 2 kettle system, or 2 240v/4500w elements. I know the energy would probably be cheaper with the 240v elements, but I don't know if the 30A GFCI will handle both 4500w elements running at the same time. I've already bought the wire for this project, (#8 wire), but to run 50A I'd have to upgrade to #6, which would waste the long run of the #8 I've already paid for!
BTW, what the heck is a "Sous Vide" ?? I see a crock pot in the pix but I don't know if that is what you're talking about.

Just remembered one more question - How did you get a false bottom for a Bayou Classic that would fit without some space around the edges" I have an 8 gallon which is nominally 12", but with the rim for the basket, I can only get 11 1/2" in there, which will leave a space around the edges. Is your false bottom that flexible?
TIA
MT2sum
 
Last edited:
Any chance I can get a PM when that diagram is available? ;>)

Absolutely, wife gave birth so the diagram got put on the back burner.
Edit: added wiring diagram

pid wiring.png


When I used to do appliance repair and refrigeration, I did silver solder all the time. been kind of leery about doing it on SS - any problems/stumbling blocks about Silver soldering SS that you might wish to share?

Get the right solder/flux, do the proper prep work and heat as evenly as possible. Good video from Brewhardware.com on silver soldering. https://youtu.be/_NkHlDql8EU


BTW, what the heck is a "Sous Vide" ?? I see a crock pot in the pix but I don't know if that is what you're talking about.

Sous Vide is under vacuum water bath cooking. I use a PID to control the crockpot to maintain a set temp, the PID is sitting next to the crockpot. Example: Fill crockpot with water, plug it into the PID, place probe in the water, set my temp at 150 deg, take chicken breasts season them, vacuum seal them, place them in the 150deg water and leave them be for a few hours. Remove and a quick sear, tender juicy, tasty chicken.

Just remembered one more question - How did you get a false bottom for a Bayou Classic that would fit without some space around the edges" I have an 8 gallon which is nominally 12", but with the rim for the basket, I can only get 11 1/2" in there, which will leave a space around the edges. Is your false bottom that flexible?

It's a jaybird hinged false bottom. When you order he will have you get an exact measurement of your kettle diameter and he cuts it so its a tight fit. http://www.norcalbrewingsolutions.com/store/Conversion_Kettle_Bayou_Classic.html

The FB stand I modified to fit, its not perfect but it works. I'd like to get a different stand made down the road.

After it was all said and done and finding out how easy the silver soldering was I wish I would have bought the Triclover Solder radius flange hot pod from Brewhardware.com instead of the weldless/solderless. https://www.brewhardware.com/product_p/etc4s.htm

I want to upgrade all my e-kettles to the triclover hot pods, now.
 
Still a work in process. I need to get a cheap little hoist and I want to mount the pump and CFC somewhere.

20160324_130142_zpsgmti6bsk.jpg
 
Absolutely, wife gave birth so the diagram got put on the back burner.
Edit: added wiring diagram
View attachment 348396

Congrats on the newborn, hope everything is fine and mom & the little one are happy, healthy, and enjoying every minute of each other. We had 3, so I can understand how excited you folks are! :ban:

In the diagram, I only see 1 element (unless you're wiring them in series or series parallel, I forget which now becuz it's been about 40 years) - Is that the case, just showing the 'box' but actually wiring two elements?
With appliance repair, you once had to know and understand all of this electrical schematic/diagramatic stuff, but eventually you become a situation-diagnoser/parts-replacer becuz everything else is done for you!
TIA
 
Absolutely, wife gave birth so the diagram got put on the back burner.
Edit: added wiring diagram

View attachment 348396

I don't see anyway to kill the power to the element in the event of an SSR failure. The most common failure mode for SSR's is "closed," so if your SSR fails, your element will be stuck on.

Brew on :mug:
 
Also, I'd like to put something like this this into the control box to keep track of everything energy-wise - can you give me an idea of where you think that should go, in relation to the rest of the diagram - I'm thinking that it should go just after the stop switch, but that's just me, Any opinion one way or another?
 
Last edited:
I don't see anyway to kill the power to the element in the event of an SSR failure. The most common failure mode for SSR's is "closed," so if your SSR fails, your element will be stuck on.

Brew on :mug:
Seems like some are putting an electromechanical relay right after the SSR, because they fail in an 'open' position. Is that what you're getting at, or am I missing something else? What would be your recommendation?
 
Seems like some are putting an electromechanical relay right after the SSR, because they fail in an 'open' position. Is that what you're getting at, or am I missing something else? What would be your recommendation?

Yes, although I prefer to put the switch prior to the SSR (closer to the power feed.) For 240V systems you need a 2 pole switch, but for 120V you only need a single pole. Switch can be either purely mechanical (the Leviton 3032 series is good for a 240V system, but an ordinary light switch will work for 120V), or you can use an electromechanical contactor (high current relay.)

Such questions fit better in the Electric Brewing forum, where they will likely get more views by folks who can help.

Brew on :mug:
 
Congrats on the newborn, hope everything is fine and mom & the little one are happy, healthy, and enjoying every minute of each other. We had 3, so I can understand how excited you folks are! :ban:

In the diagram, I only see 1 element (unless you're wiring them in series or series parallel, I forget which now becuz it's been about 40 years) - Is that the case, just showing the 'box' but actually wiring two elements?
With appliance repair, you once had to know and understand all of this electrical schematic/diagramatic stuff, but eventually you become a situation-diagnoser/parts-replacer becuz everything else is done for you!
TIA


The second element plugs directly into the wall. I will eventually wire it to an SSR.

Run both elements full bore till I get about 5 deg to strike temp then unplug the direct wired element, and let the PID manage just the one element for the mash. After the mash plug in both elements to reach boil. Once boiling I leave the direct wired plugged in and control the boil with the second element. They are only 1500w each and not enough oomph to maintain a good boil with just one element.
 
I don't see anyway to kill the power to the element in the event of an SSR failure. The most common failure mode for SSR's is "closed," so if your SSR fails, your element will be stuck on.


Brew on :mug:


Thanks, I was wondering why most of the diagrams had switches for the element. I just thought it was a preference thing.
 
View attachment 257005
This is what I'm going to try. My setup is going to be very similar to yours. Just waiting for parts and pumps and such to get to Montana from all over the country and world.


I got one doesn't really do much more than hanging the hose back into the kettle I had higher hopes for it, if anyone wants to try it out I'd sell mine for what I have into it $10.00 shipped
 
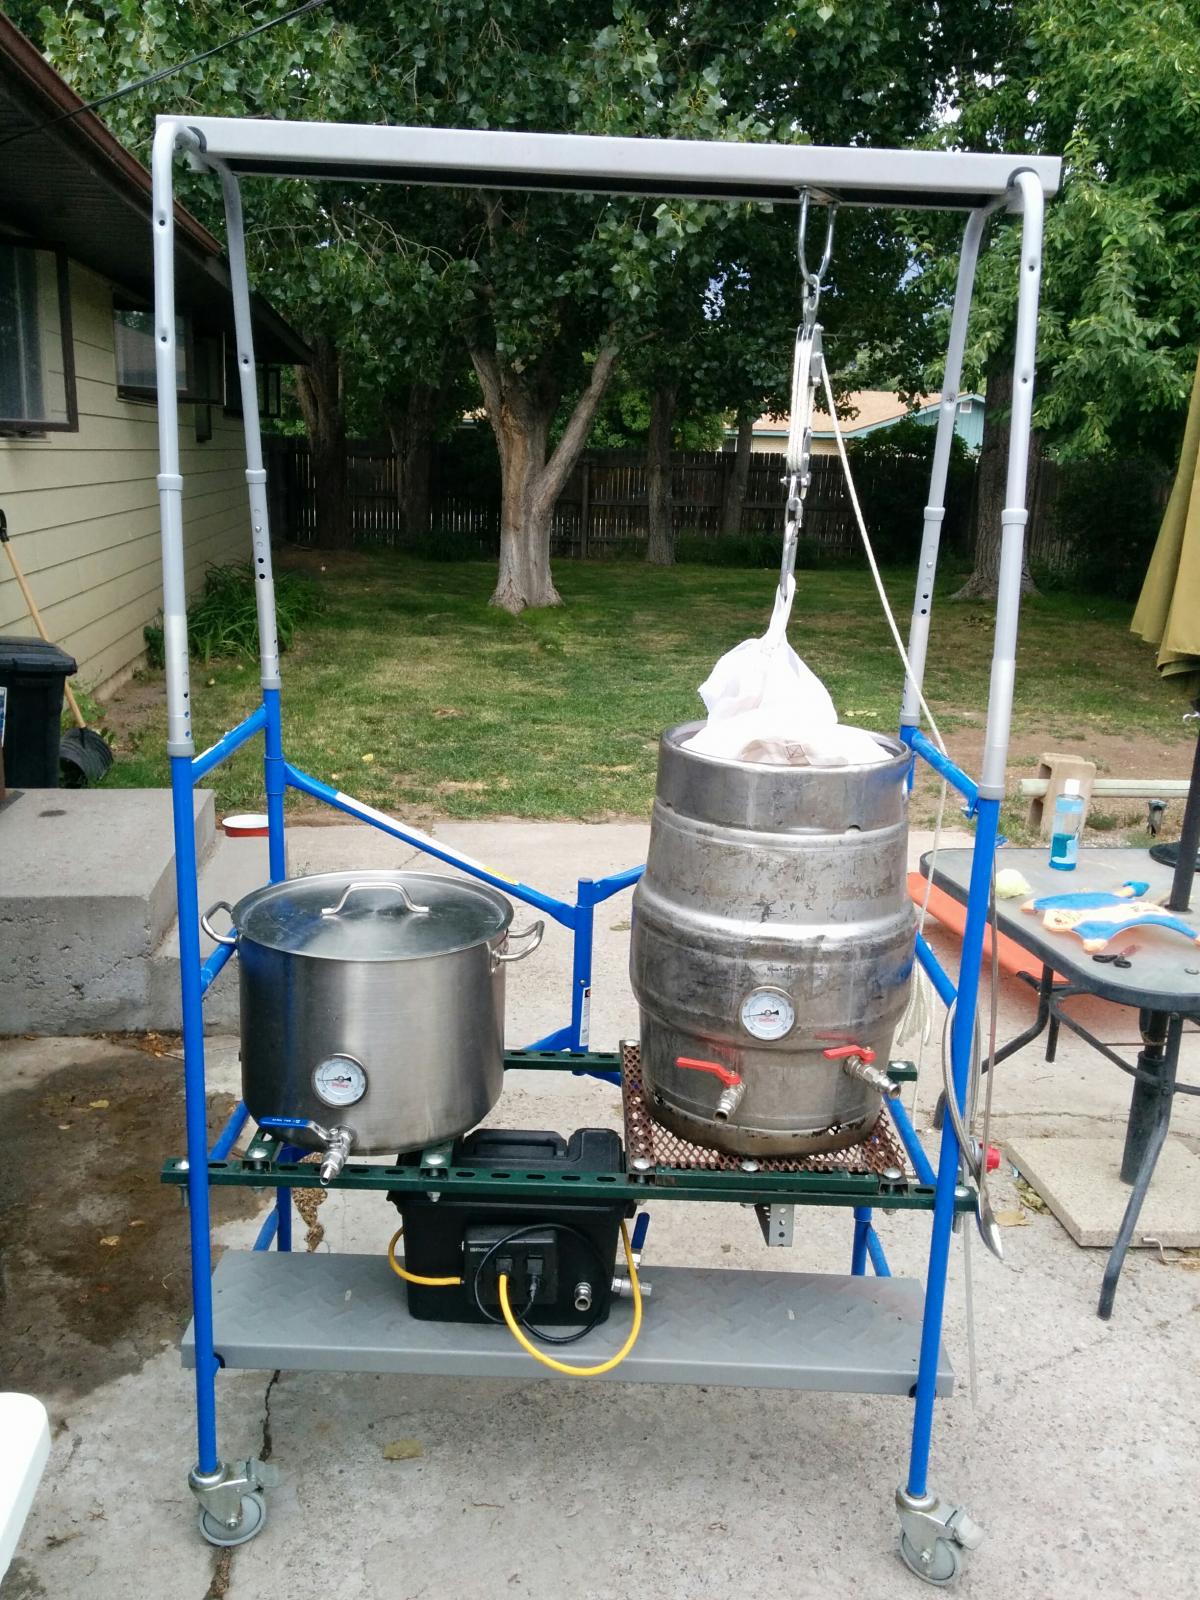
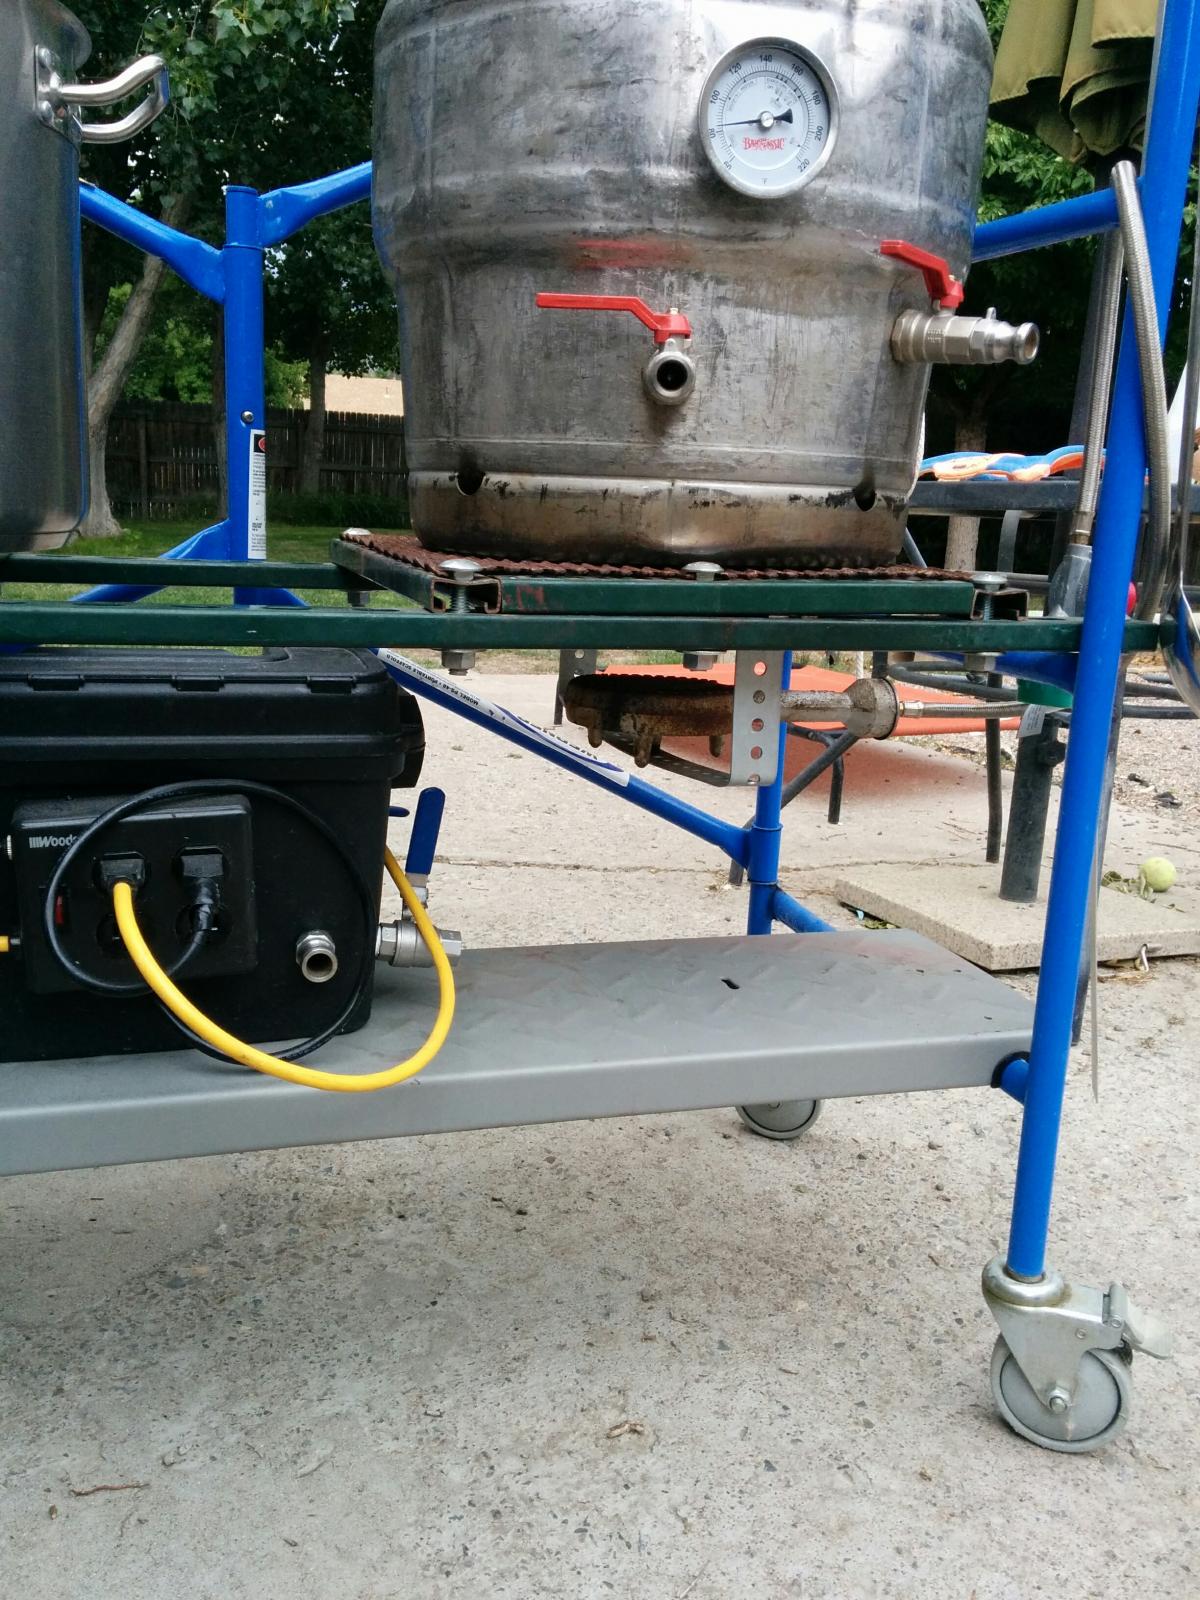
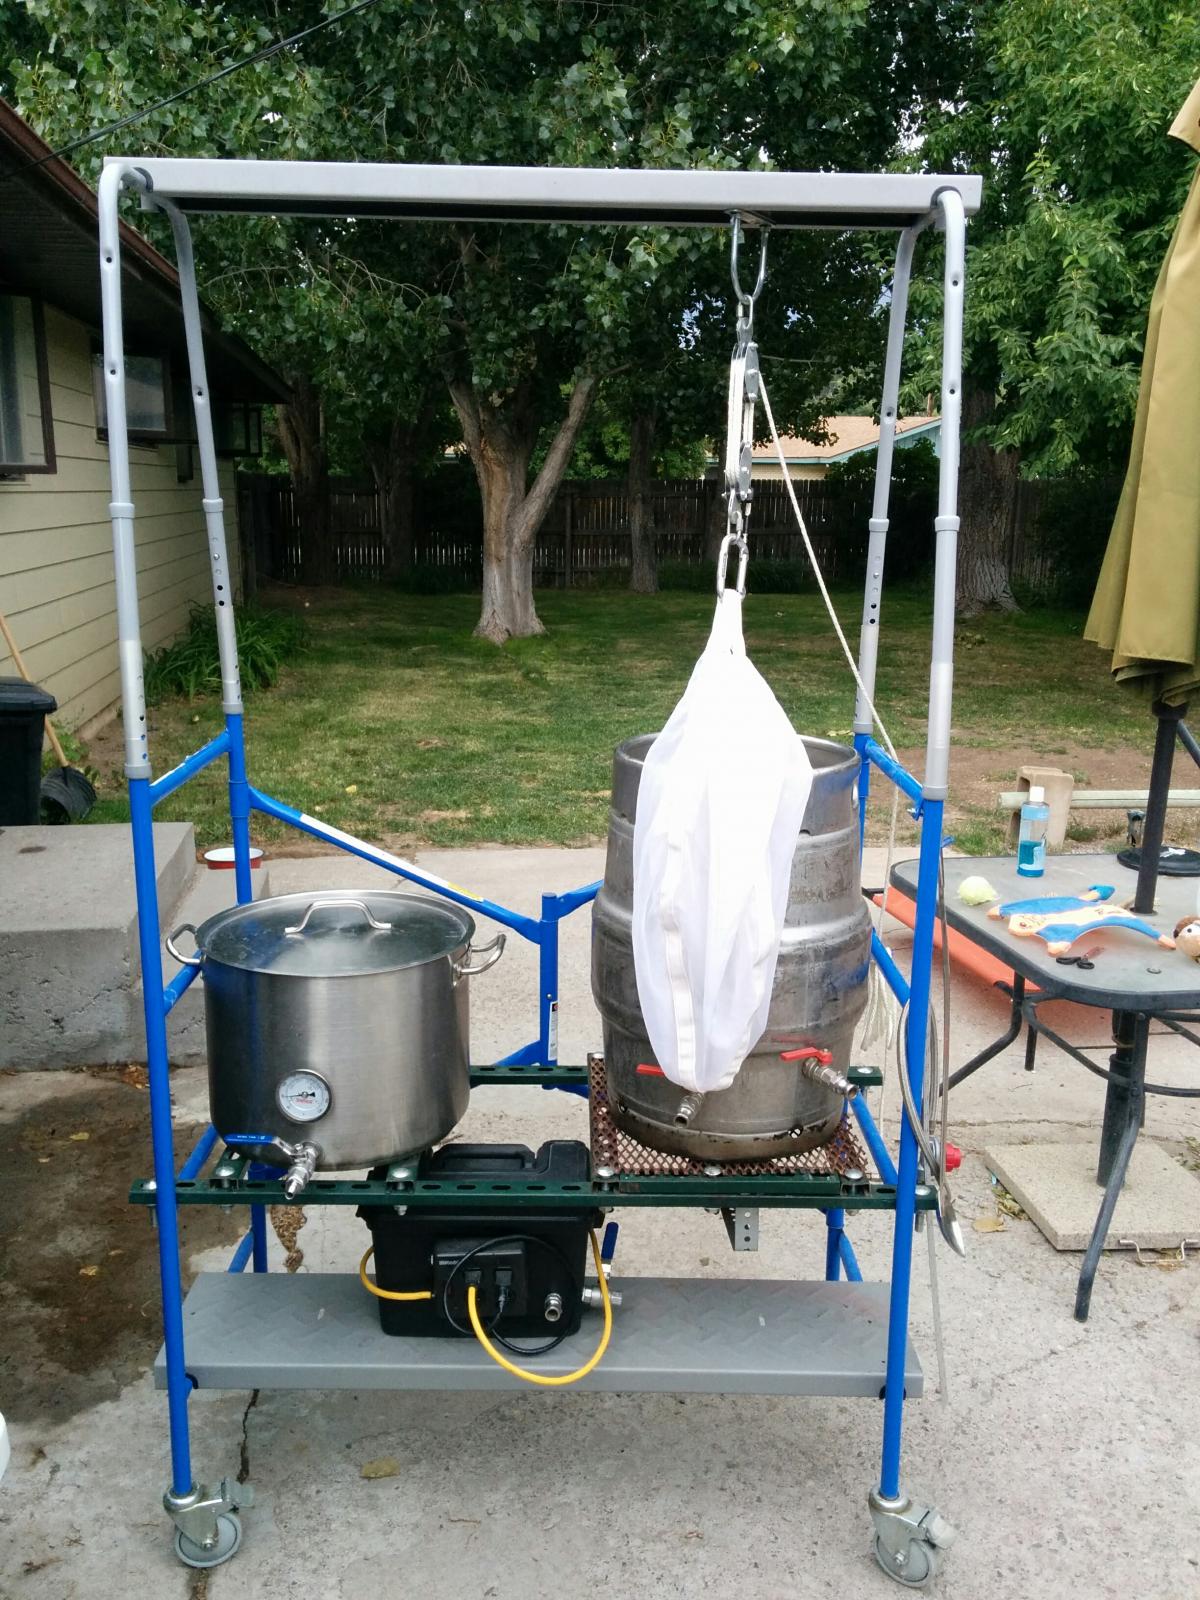
After reading tons of posts and drooling over tons of systems that I don't have the skill to build I was finally struck with a flash of inspiration. I built the strut shelf, burner mount, and pump toolbox a couple of years ago before switching to BIAB in an attempt to simplify my process. I knew I wanted a portable set up with a pulley to hoist the bag up and high enough to gravity drain into a carboy. I had some medical items lying around built out of telescoping tube material that just happened to fit over the top of the scaffold. The small scaffold shelf fit on top allowing me to attach the pulley set up, which can be repositioned over either kettle. I can't wait to brew on this... FINALLY, NO MORE LIFTING!!! If my fermentation chamber wasn't full I'd probably play hooky and brew... Slainte!

IMG_20160801_192532.jpg


IMG_20160801_192546.jpg


IMG_20160801_192619.jpg


IMG_20160801_192655.jpg
 

Latest posts

Back
Top