Noob doing the noob thing.

Homebrew Talk - Beer, Wine, Mead, & Cider Brewing Discussion Forum

Help Support Homebrew Talk - Beer, Wine, Mead, & Cider Brewing Discussion Forum:

This site may earn a commission from merchant affiliate links, including eBay, Amazon, and others.

PashMaddle

Well-Known Member
Joined
Dec 3, 2023
Messages
144
Reaction score
215
I finished my first brew yesterday morning (about 12 hours ago) and I'm not seeing any activity/bubbles etc.
I am well aware that I might just be doing "the thing" and worrying about....well...nothing. But on the off chance that it isn't "nothing", I want to get ahead of it if I can.

What I did...so y'all can tell me what I did wrong:

Made 3 gallons of wort. (whole n'other post about that...it actually went well)

I cooled the wort (with the lid on the system to keep airborne dog hair out... its a thing with my doggos/tile floor combo...) with the wort chiller to around 68 degrees, I remember this because my wife and I stood there and made sophomoric jokes until the temp dropped to 68*. My fermentation temp is 65 but I don't think this would hurt as it is well with in the 59-72 degree range of the yeasties preferred temp.

I'm pretty sure I was good with my sanitation because I sanitized everything in the room except for my wife and the dog (not for lack of trying). There was a significant amount of foam in my fermenter though... but I've been told by pretty much the entire interweb not to fear the foam.

I then, without fear of the foam, pitched a full 11g packet of BRY-97 on top of the foam...no rehydration... just cut it open and pitched them doods. (like a big dummy?)

then I just put it in the fermentation chamber (my fancy name for my raggedy old deep freezer/fermwrap/inkbird combo) set to 65F and went to bed because I was wiped out.

I grudgingly woke up, made coffee and went to the garage and checked the inkbird. The probe is in a thermowell in my bucket lid for accuracy (I have the fanciest 5gal buckets on the block) . It read about 67 point something. I don't know a whole lot about fermentation but I know it generates a little bit of heat so this gave me hope. So, I hopefully lifted the lid of my fermentation system (chamber) to have a look. No activity at all. I pushed on the top of my bucket to see if there was pressure and the liquid bubbled a good bit and, I think, sucked back a bit of sanitizer...lesson learned there
A little while later (30 minutes?) I checked again, it was calm as a Zen monk on a spa day.

Aaaaand now I'm worried.
I apologize for the long post, I'm the only person awake in the house and have nothing better to do than write short stories on a forum about how I may or may not have banjaxed my brew...

My major concerns are:
Not rehydrating my yeast
The fact that I'm using a $5 bucket for a DIY fermenter that might not be airtight.

TL:DR
I'm a noob and didn't rehydrate my yeast and it's not showing activity after 12 hours, tell me to RDWHAHB
 
Buckets leak. If you already got into the fancy shmancy game with a fermentation chamber, do yourself a favour and upgrade to something air tight like a speidel or similar.

Otherwise for this time, you're gone have beer with this brew, you'll be fine.

Bry 97 is about the slowest starting dry yeast I know of. Even after 48h of no visible activity, you'll still probably be fine.
 
RDWHAHB mate, all will be fine. This is the Tilt profile from the first few days of my latest brew. Long stretch from 2PM on the 5th to late on the 6th where fermentation started becoming visible. Unless your yeast dates from the last century or your mash profile was so screwed up that you either only produced unfermentable sugars or no sugars at all, give it time.

Edit to add: This is US-04 yeast, as Miraculix says, BRY-97 is slower.

brewtilt1.jpg
 
Last edited:
Buckets leak. If you already got into the fancy shmancy game with a fermentation chamber, do yourself a favour and upgrade to something air tight like a speidel or similar.

Otherwise for this time, you're gone have beer with this brew, you'll be fine.

Bry 97 is about the slowest starting dry yeast I know of. Even after 48h of no visible activity, you'll still probably be fine.
lol, there's really nothing fancy about my fermentation game, it's just an old freezer my father-in-law
gave us years ago and it still kind of smells like wild game despite me cleaning the H. E. double hockey hell out of it (I hope this doesn't transfer to the beer). The only thing that fits in there because of the shelf molded into the bottom is a 5 gallon bucket, everything else is too tall according to what I've gathered from looking online and repeatedly going to the garage to measure (you'd think I would remember after a few trips lol) right now I'm doing DIY because a) its cheap b) I have a lot of other financial obligations ...family/dogs/bills etc. and c) its cheap. I plan to get gear for yeast farming and water chem (probably/maybe in that order) and I'm hoping to get into kegging eventually so I can transfer/ferment under pressure ...and have kegs of beer that I didn't spend half a day bottling....if I can fit them in my freezer, which would then be a keezer.

Thanks for the words of encouragement... new stuff without anyone to ask about or alleviate your concerns kinda takes the fun out of it. I feel better.

I have done a bit of research into yeasts and whatnot hence me choosing bry97 for this batch but there are things I still don't understand (like how to tell if its slow starting by looking at the info provided on the lallemand app) Thanks for the heads up on that because I thought I had done something dumb (it's very much a possibility when I'm doing anything).
RDWHAHB mate, all will be fine. This is the Tilt profile from the first few days of my latest brew. Long stretch from 2PM on the 5th to late on the 6th where fermentation started becoming visible. Unless your yeast dates from the last century or your mash profile was so screwed up that you either only produced unfermentable sugars or no sugars at all, give it time.

Edit to add: This is US-04 yeast, as Miraculix says, BRY-97 is slower.

View attachment 836163

Thanks! Time it shall have.
Thats a good bit of time, for some reason I expected the yeast to be going nuts in there immediately. So, I'm looking at something like 48 hours?
Lol no, my yeast was in date and according to my handy dandy refractometer, I hit my numbers within .001 on the pre and post boil gravity so they (the yeast) should be well fed.

Those Tilt getups look super rad, I may have to get one once I figure out exactly what I'm doing.
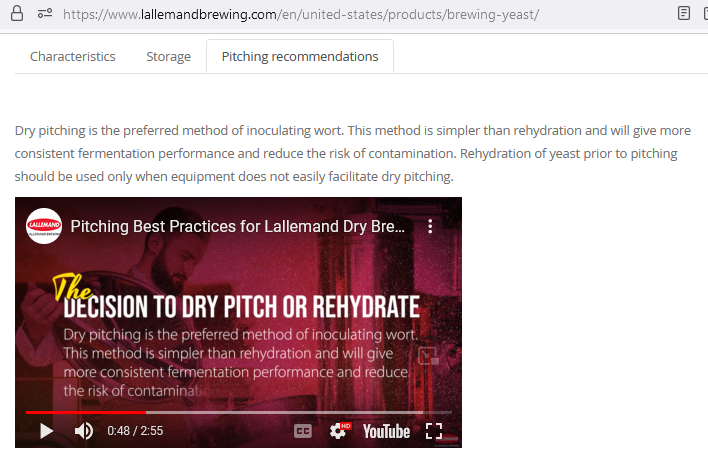
Lallemand has a number of PDFs and videos with current information on how to use their products.
View attachment 836166
I have the Lallemand app on my phone and called myself doing a little bit of research on my yeast but I absolutely did not see that. I did see the rehydration instructions on the back of the packet and that caused a mild panic because...noob...

I also think I may have misread your post earlier because I was very much tired, sleep deprived and had no business communicating with the outside world and I understood it to mean that I should not have dry pitched...oops. I will do a deep dive on yeast because I plan to try yeast ranching at some point and that looks like a good jumping off point. Thanks.
 
Bry 97 is a fine yeast. It just benefits from two packs instead of one. That way the slow start can speed up. Lallemand is not telling you about the slow start, for obvious reasons.

If you want to be on the safe side, next time just use good old us05 for anything American ale. This one is the most used yeast for a very good reason. It's just a reliable work horse yeast that gets stuff done and is very forgiving regarding any possible mistakes.
 
I may do the US 05 thing; it seems like a lot of people use it and can guess that it's for good reason. I also believe that US05 is actually "Chico" strain while BRY97 is not (which makes its name kinda misleading).
 
OK, you have been advised to relax. Do it.

I have rehydrated my yeast, I have sprinkled it on the foam dry, I have put the yeast in the bottom of the fermenter and poured the wort on top. Every time I have gotten beer. However, no matter which way I add the yeast I don't usually see airlock activity for 30 hours and sometimes even more.

When you put the yeast in dry on top of the bubbles it may kill some of the yeast cells. However, yeast only take about 90 minutes to double their numbers so you probably only delayed the fermentation by that much time, not something to worry about with the fermentation likely to take 3 or 4 days.

There are a couple types of airlocks, one a 3 piece that can have its contents sucked back into the fermenter and another that is an "S" shape that does not let its contents get sucked back. There is also the method using a "blowoff tube" that puts the solution in a separate container. These work well if your fermenter is a little small so the krausen will fill the top of the fermenter and spill over but they are also prone to suck back and the quantity they can have sucked back is much larger. The there is my one fermenter that has no airlock at all, just a tiny hole in the bucket lid with some plastic sheet taped on 3 sides covering it. That still allows the excess CO2 to escape but prevents bugs and dirt from falling in.
 
Last edited:
OK, you have been advised to relax. Do it.
Haha okay okay. Done.

I use 3 piece airlocks because I can stick a piece of half inch tubing on them to make a blow off tube... I used to use the S type back in the day but didnt get them now because I thought they were outdated and the 3 piece had replaced them....I was wrong... I also didn't know they weren't likely to allow the sanitizer to suck back in, I'll pick a couple up next time I go to the LHBS.
Thanks again for the info.
 
Last edited:
I have the Lallemand app on my phone and called myself doing a little bit of research on my yeast but I absolutely did not see that.
I had the app on my phone/tablet for about five minutes a couple of years ago. For me, the web site was much easier to use from my laptop.

Brewers with just phones are at a slight disadvantage as product suppliers tend to use full web pages (often best viewed on screens larger than tablets provide) and PDFs for their content.
 
FWIW, ive been brewing for about 5 years and almost exclusively use dry yeast. Ive never rehydrated and I have always had fermentation. Never a stalled ferment or a failure to start. Some lag times are quick, and start up by the next morning (I generally are pitching around 4-7pm because I brew in the mornings and depending on how cool the wort is), but there are some that will take a day or so to start showing those initial signs.

Buckets are frustrating, though. They leak, and to me at least, its enjoyable to actually see the process at work. Watching the Krausen appear and raise, the churning of the wort, and the sound of the airlocks/blowoff going crazy.

And now that I see you used BRY-97, I just used that also for the first time last week. Looking at my tilt chart it looks like it was in fact one of the slower starters for me as well. Then it proceeded to blow off my blow off tube and made quite a nice mess, but that was my own fault...
 
Again, not having read all the posts I will chime in with my experience. I have used Bry97 a few times and I think 12 to 18 hours is nothing to get worked up over. You pitched it maybe a bit cooler, but still in range, so again, nothing to get worked up over. Once that yeast takes off, man you are going to have fun watching your airlock, it is a beast. LOL. With all that said, you mention your 5 dollar bucket fermenter. Does said fermenter have a lid with a rubber gasket in it? Is it sealed up nice and tight? I have two Norther Brewer buckets that were part of their starter kit. They are nothing but buckets with the NB logo, some measuring marks and some conversion charts on the side. They have a spigot drilled into the lower part of the bucket and a red lid with a rubber Oring and a hole drilled in the top for an airlock. I have never shaken when pitching dry yeast. I sprinkle it on the top, maybe give it a little swirl to make sure it gets somewhat mixed in, but it in my mini fridge, set my Inkbird to about 65 to 68 depending on the yeast and let it do it's thing. My last batch with a Cali yeast took almost 30 hours to start, so it is not out of the realm to think it might take a while. With that all said, once again, relax and have a cold one or two. Enjoy the anticipation of the beer you have made and have a couple of more. LOL. All good man, patience is a virtue on this stuff. Take my input for what it is worth, I am only about 2 years into this, so not anywhere near a pro.
 
Make wort, pitch yeast. It will be fine 95% of the time, at least, and -- here's the thing -- the <5% of the time it's not fine, there really isn't anything reasonable you can do to fix things. So the best plan is to pitch and then completely forget about it. Leaving fermentation alone is the best thing you can do, and certainly don't open that fermenter until it's time to package.
 
I had the app on my phone/tablet for about five minutes a couple of years ago. For me, the web site was much easier to use from my laptop.

Brewers with just phones are at a slight disadvantage as product suppliers tend to use full web pages (often best viewed on screens larger than tablets provide) and PDFs for their content.
I have to walk through my “brewhouse” laundry room to get to my office where my desktop pc is so my pc is literally only a few steps away when I’m brewing. I agree that the website is far easier to use but I tend to have a good bit of downtime at work and like to nerd out about stuff like yeast so the app frees up web browser pages for things like por…err.. homebrew forums.
FWIW, ive been brewing for about 5 years and almost exclusively use dry yeast. Ive never rehydrated and I have always had fermentation. Never a stalled ferment or a failure to start. Some lag times are quick, and start up by the next morning (I generally are pitching around 4-7pm because I brew in the mornings and depending on how cool the wort is), but there are some that will take a day or so to start showing those initial signs.

Buckets are frustrating, though. They leak, and to me at least, its enjoyable to actually see the process at work. Watching the Krausen appear and raise, the churning of the wort, and the sound of the airlocks/blowoff going crazy.

And now that I see you used BRY-97, I just used that also for the first time last week. Looking at my tilt chart it looks like it was in fact one of the slower starters for me as well. Then it proceeded to blow off my blow off tube and made quite a nice mess, but that was my own fault...
My DIY bucket is just a 5gal deal I picked up from Walmart for a few bucks and then proceeded to drill a spigot hole in the side of it and a thermowell and airlock hole in the lid. I didn’t check for a gasket on the lid but it was something like $2 at Walmart so I doubt it has one…and I’m sure as somethin’ not gonna open the fermenter to check (or for any other reason) Maybe I can seal it with duct tape or something… or maybe just leave it alone and keep that in mind for next time.

I just checked again a little bit ago and it’s still not doing anything….but I’m going to bed so I’ll check again before I leave for work tonight.
 
... good old us05 for anything American ale. This one is the most used yeast for a very good reason. It's just a reliable work horse yeast that gets stuff done and is very forgiving regarding any possible mistakes.
Historically, that's been my experience as well. I "paused" brewing with it (and S-04) about 18 months ago because I wanted to explore some of the Lallemand strains (BRY-97, Verdant, New England).

US-05 is one of three dry ale strains that I feel I can ferment in the 63-65F range. Nottingham and S-04 are the other two.

BRY-97 ... looks like it was in fact one of the slower starters for me
I stopped using it for a while as the start times were longer than I wanted. At the time I was pitching/fermenting in the 64-66F range.

What I think I'm seeing with BRY-97, Verdant, and New England is that I get good start times when I pitch in the upper 60s, then let the fermentation settle to about 66 or 67. With this approach, it's generally 16 to18 hours from pitch to visible fermentation.

Cali yeast
IIRC, Cali (from morebeer) is in that 'market space' for Chico-like dry strains. Others (I think) include US-05, BRY-97 (?), Apex San Diego, WLP001 (dry), and an MJ strain.

I haven't brewed with Cali, but I have brewed a couple of batches with Apex San Diego and WLP001 (dry). The WLP001 (dry) batch had a very solid flocculation which is plus when bottling from the fermenter. (The flocculation was more solid that I was getting with US-05 a couple of years ago). San Diego seems like a solid strain, I have a couple of pitches of it left that I'll use. It is, however, a crowded market for 'chico'-like dry strains.
 
If this was your first brew, you did pretty well. I remember my first brew when my roommate wanted to put raw pumpkin in it... I was able to avert from that disaster but the beer still didn't turn out that great. Lots of lessors were learned lol. Primary I learned that you should brew batches alone or with someone who knows what they are doing.

From one noob to another I would pick up this book if you don't already have it

Designing Great Beers: The Ultimate Guide to Brewing Classic Beer Styles

913TQSsFWUL._SY522_.jpg
: Amazon.com

It taught me a lot about yeast and there is a chapter for yeast and specifically for "Pitching Rates"(pg 117) which states the following : "As general rule, homebrewers pitch far less yeast to their wort than they should. Evidence of this comes from the standard packages of yeast sold for home brewing use. They generally contain only a small percentage of the total yeast population needed to achieve recommended pitching rates.

On a commercial scale, good brewing practice calls for pitching no less than 10 million yeasts cells per millimeter of wort. That's appox. 200 billion yeast cells in a 5-gallon batch". It continues on about lower pitching rates can be used successfully however the recommended pitch rate is a standard by number of sources.

Now having said that and taken it seriously, I did notice a huge difference when I switched to liquid yeast. 100 Billion cells ( usually just 1 packet) I found to be pretty darn good. Not sure if you will always have that option but try it out on a future batch and let us know how much of a difference it makes.

FYI!!! : If you do this and don't already have one, purchase or create a blow off tube for your future brews. It will help save you a giant mess!
 
Last edited:
"As general rule, homebrewers pitch far less yeast to their wort than they should. Evidence of this comes from the standard packages of yeast sold for home brewing use. They generally contain only a small percentage of the total yeast population needed to achieve recommended pitching rates.

Designing Great Beers (1998), Brewing Classic Styles (2007) and Yeast (2010) are classics with a lot of timeless content.

Active dry yeast is a product that is 'manufactured' (for lack of a better word) and, in 2023, manufacturing processes continue to improve.

A split batch using WLP001 (wet/liquid) vs WLP001 (dry) using their recommended pitch rates might be interesting.

Also there are a couple of topics on WLP001 (dry) from earlier this year that highlighted reasons that White Labs might want to enter the active dry yeast market.

eta: added Designing Great Beers (1998) to the list of books.
 
Last edited:
I have been using the "pro ale" algorithm of 1M cells/ml/°P, and "pro lager" rate of 1.5M cells/ml/°P, for a few years now, and have yet to have a protracted fermentation over that time. That said - other than the notoriously slow start to most Chico strains that still persists - I don't recall having troublesome fermentations using the .75M cell ale rate I started with long ago...

Cheers!
 
If this was your first brew, you did pretty well. I remember my first brew when my roommate wanted to put raw pumpkin in it... I was able to avert from that disaster but the beer still didn't turn out that great. Lots of lessors were learned lol. Primary I learned that you should brew batches alone or with someone who knows what they are doing.

From one noob to another I would pick up this book if you don't already have it

Designing Great Beers: The Ultimate Guide to Brewing Classic Beer Styles

View attachment 836217
: Amazon.com

It taught me a lot about yeast and there is a chapter for yeast and specifically for "Pitching Rates"(pg 117) which states the following : "As general rule, homebrewers pitch far less yeast to their wort than they should. Evidence of this comes from the standard packages of yeast sold for home brewing use. They generally contain only a small percentage of the total yeast population needed to achieve recommended pitching rates.

On a commercial scale, good brewing practice calls for pitching no less than 10 million yeasts cells per millimeter of wort. That's appox. 200 billion yeast cells in a 5-gallon batch". It continues on about lower pitching rates can be used successfully however the recommended pitch rate is a standard by number of sources.

Now having said that and taken it seriously, I did notice a huge difference when I switched to liquid yeast. 100 Billion cells ( usually just 1 packet) I found to be pretty darn good. Not sure if you will always have that option but try it out on a future batch and let us know how much of a difference it makes.

FYI!!! : If you do this and don't already have one, purchase or create a blow off tube for your future brews. It will help save you a giant mess!
I checked the pitch rate calculator on Lallemand’s website and it says that this batch only requires 7.7g of yeast. Technically I guess I over pitched with 11g, which doesn’t make me feel any better about the situation.
I’ll check that book out ( literally) I spend way too much time learning from YouTube and other random internet sources (forums). I probably should read a book or two on the subject. Thanks for the suggestion.

I do indeed have a blowoff tube on standby, now whether I’ll catch the blowoff before it makes a mess in my freezmentator is anybody’s guess.
 
Last edited:
So I went out before I went to bed and taped around the lid of my fermenter…probably didn’t really need to but it gave me peace of mind bumped the temp up to 67°F from 65°. I just woke up, got ready for work and decided to check it and there were bubbles in the airlock! Not a lot of bubbles but there were definitely bubbles. Hopefully it doesn’t get super active and need a blowoff tube while I’m at work… I guess I could talk my youngest daughter through building a blowoff tube and installing it over the phone…

I apologize for my buffoonery, I was just being impatient. Thanks everyone for all of the great information and for telling me to RDWHAHB. This thread may have been unnecessary but it did turn out to be informative.
 
Don't apologize, you're just trying to learn.

I've had zero yeast activity for a couple days then all of a sudden it starts up. I get nervous too even though I know it'll take off. It's a weird thing but the Beer God knows what to do and it almost always works for the best. Be patient.
 
@Kornssj @PashMaddle : as you are reading through some of those older classics, keep in mind a couple of things:
  • many of those authors are active - as podcast hosts, as authors producing newer magazine content (Palmer was writing number of articles for a magazine in Australia in the 2021-2022 timeframe, others write columns for BYO or CB&B), podcast guests, Homebrew Con presentations, Zymurgy Live guests, CB&B videos, ...

  • processes for producing and packaging ingredients has improved, especially in the areas of dry yeast, liquid malt extract, crystal malts (Great Western Caramel Steam), roasted malts (de-bittered black malt), ...

  • As ingredients change, processes for making beer change as well

  • water adjustments are better understood, have been simplified, and some of the techniques can be applied to beers made with "extract".
eta: there are wide opinions on the books in the "Brewing Elements" series. The books are older (2010 - 2014) - and contain a mix of timeless and outdated content. The book "The New IPA" (Janish , 2019) is an excellent follow-on to the book to "Hops". Scott Janish includes a lot of references in the book - so if one is curious about the underlying science (and research), the book is a good snapshot of brewing in 2018-2019.
 
Last edited:
I checked the pitch rate calculator on Lallemand’s website and it says that this batch only requires 7.7g of yeast. Technically I guess I over pitched with 11g, which doesn’t make me feel any better about the situation.
I’ll check that book out ( literally) I spend way too much time learning from YouTube and other random internet sources (forums). I probably should read a book or two on the subject. Thanks for the suggestion.

I do indeed have a blowoff tube on standby, now whether I’ll catch the blowoff before it makes a mess in my freezmentator is anybody’s guess.
There is no such thing as overpitching. Not enough yeast on the other hand, might be problematic in many regards. So you always want to err on the higher end.
 
Unless you're buying bulk yeast, like a brick, just pitch the entire packet of yeast.

I brew ten gallon batches and one 11gram packet works fine. For a big beer I'll add two.
 
With regard to pitch rates /partial packages in smaller (2.5 gal or less) batches, for many years, brewers have stored open packages at refrigerator temperatures for months. One technique is to close the package tightly and secure it with a rubber band or tape.

Lallemand currently has this at their web site:
1702308473688.png

And it's plausible that this approach works for other dry strains as well.
 
Update.
…I learned stuff so I’m sharing.

I checked on my fermentation when I got home from work and there was a whole lot of nothing going on in the airlock… I didn’t panic.. but I am a very curious creature by nature and have the scars to prove it. So I decided that I would just take a small sample and put it on the refractometer and that if it was a lower reading, the yeast was doing what I wanted. Side note: I took about 4 oz of wort and put it in a mason jar before pitching to keep in the fridge… for reasons (?). I checked my “fridge sample” (post boil) and it was 1.056! I either misread the first time (most likely) or being refrigerated has an effect on the gravity but my refractometer has ATC so I doubt that’s it. Anyway I grabbed a shot glass and went and got a sample from the freezmentator in the garage. The first thing I noticed was that it smelled like booze… that’s good… then I checked it and it had dropped to about 1.03 ish. I didn’t do any conversion because I was just checking to see if it had changed and it did…I’ll do that when (I think) I’m ready to bottle.
Apparently my fancy DIY bucket fermenter just leaks…I’m not going to stress about that since there’s nothing I can do about it now. I’m looking at some Fermzilla 3 gallon fermenters that I might get and use in the future but for now I’m just being patient… or trying to…

Btw I tasted the sample and it was decent, it had a graham crackerey quality that I hope sticks around after fermentation. I’m assuming this is from the caramel malt?
 
Last edited:
Mate, can you just please leave your beer alone? You cannot do anything at this stage anyway except introducing unwanted stuff like oxygen or microorganisms. It goes as follows: pitch yeast, see fermentation begin, leave it be till packaging. Pretty simple!
 
Mate, can you just please leave your beer alone? You cannot do anything at this stage anyway except introducing unwanted stuff like oxygen or microorganisms. It goes as follows: pitch yeast, see fermentation begin, leave it be till packaging. Pretty simple.
Literally the only thing I’ve ever done to my beer is look at the airlock and take a sample from the spigot…Unless talking about it qualifies as not leaving it alone, if so there’s gonna be a lot of folks with ruined beer.

Taking a small sample from the spigot seems to be very non-intrusive and as I understand it is the best way to take a sample…and a necessary step…Is that going to let bugs in or oxygenate my beer?
 
Bucket fermenters are widely available. Because I mostly make slightly smaller batches, I use a 5 gallon bucket that I pick up at Walmart but you will need a bigger fermenter for a 5 gallon batch. Your beer only needs to be temperature controlled during the early part of the fermentation when the yeast are really chowing down on the sugars. If your beer is already down to 1.030, that part is over and you can take this batch out of the fermentation chamber and put the next one in. The yeast seem to like warmer temps for the cleanup phase anyway.

Here's a good read on how yeast proceed in the ferment. The Life Cycle of Yeast
 
RDWHAHB mate, all will be fine. This is the Tilt profile from the first few days of my latest brew. Long stretch from 2PM on the 5th to late on the 6th where fermentation started becoming visible. Unless your yeast dates from the last century or your mash profile was so screwed up that you either only produced unfermentable sugars or no sugars at all, give it time.

Edit to add: This is US-04 yeast, as Miraculix says, BRY-97 is slower.

View attachment 836163
What are you using to get those readings?
 
Bucket fermenters are widely available. Because I mostly make slightly smaller batches, I use a 5 gallon bucket that I pick up at Walmart but you will need a bigger fermenter for a 5 gallon batch. Your beer only needs to be temperature controlled during the early part of the fermentation when the yeast are really chowing down on the sugars. If your beer is already down to 1.030, that part is over and you can take this batch out of the fermentation chamber and put the next one in. The yeast seem to like warmer temps for the cleanup phase anyway.

Here's a good read on how yeast proceed in the ferment. The Life Cycle of Yeast
Oh! That’s pretty cool, I was under the impression it had to be controlled the entire time, this opens up lots of possibilities. It’s currently cooler in my garage than in my fermentation chamber … I could just bring it inside (duh!) if I could find a suitable place to put it away from dogs and kids…
I also use the Walmart buckets because I just do 3-3.5 gallon batches …we don’t drink a whole lot but I genuinely enjoy the taste of beer so that is more than enough for me and my wife.
 
I was under the impression it [fermentation temp] had to be controlled the entire time
You do want to keep the temps steady. An (overnight) temp drop could stall the yeast, and it can be very difficult to resurrect it, specially with higher gravity beers. But in general, after the big fermentation event is over, keeping the fermenter(s) in a slightly warmish place (66-74F) is fine to finish up attenuation and slide into conditioning. Conditioning is the 3rd and "last phase" in a fermentation process, where the yeast will clean up fermentation byproducts, and will settle out, leaving clear beer behind.

Since you use buckets, you can "suck siphon" a sample out through the airlock hole, without the need to open the lid. Use a 2' piece of skinny (3/32"-1/8" ID, ~5/32" OD) vinyl tubing, snaked through the airlock hole in the lid, after temporarily removing the airlock.

Rehearse the method using a suitable vessel or another bucket with water. Key is to pull the tubing out in one swift motion when you have enough collected, so the beer doesn't flow back, and possibly contaminate your batch. After taking the gravity reading, you can drink/taste the sample. It's quality control. ;)
 
Update.
…I learned stuff so I’m sharing.

I checked on my fermentation when I got home from work and there was a whole lot of nothing going on in the airlock… I didn’t panic.. but I am a very curious creature by nature and have the scars to prove it. So I decided that I would just take a small sample and put it on the refractometer and that if it was a lower reading, the yeast was doing what I wanted. Side note: I took about 4 oz of wort and put it in a mason jar before pitching to keep in the fridge… for reasons (?). I checked my “fridge sample” (post boil) and it was 1.056! I either misread the first time (most likely) or being refrigerated has an effect on the gravity but my refractometer has ATC so I doubt that’s it. Anyway I grabbed a shot glass and went and got a sampe from the freezmentator in the garage. The first thing I noticed was that it smelled like booze… that’s good… tlhen I checked it and it had dropped to about 1.03 ish. I didn’t do any conversion because I was just checking to see if it had changed and it did…I’ll do that when (I think) I’m ready to bottle.
Apparently my fancy DIY bucket fermenter just leaks…I’m not going to stress about that since there’s nothing I can do about it now. I’m looking at some Fermzilla 3 gallon fermenters that I might get and use in the future but for now I’m just being patient… or trying to…

Btw I tasted the sample and it was decent, it had a graham crackerey quality that I hope sticks around after fermentation. I’m assuming this is from the caramel malt?
If I can make a suggestion. Go to either Northern Brewer or to MoreBeer or any of the beer supply stores and get a bucket that is made for this task. I picked up two plastic 6 or 7 gallon buckets as part of the starter kit. They both have the airlock hole in the lid, spigots at the bottom and a rubber Oring in the lid to seal the lid to the bucket. Fooling around with homemade in this case seems a bit silly as the buckets they sell are not that expensive. Better yet, if you have a Craiglist site close to you, check there. I have seen full setups and all kinds of stuff there that is really cheap. I was looking at another post where a guy is looking to drop 1k plus on a kegerator. I looked at Craiglist in the San Francisco area and they go for anywhere between 100 to 500 bucks depending on if you want a converted minifridge or an actual kegerator. Either way, be patient, it will be fine. I am the worst at looking at my beer and have decided that I would not even look at it, other than to see when fermentation started thru to airlock so I can note it, for at least a week, if not two if I am not dry hopping. Patience is a virtue on this one, trust me, I have been "reminded" many times. LOL.

Edit: I just checked Northern Brewer site and the 6.5 gallon bucket is about $18.00, the Lid drilled for the airlock and an Oring seal is another 6 bucks and the spigot for the bucket is 4. So for less than 30 bucks you can get a bucket fermenter that is made to do what you need it to do. Just saying. Good luck
 
Last edited:
Apparently my fancy DIY bucket fermenter just leaks…I’m not going to stress about that since there’s nothing I can do about it now. I’m looking at some Fermzilla 3 gallon fermenters that I might get and use in the future but for now I’m just being patient… or trying to…

If you suspect a leak in a certain area, just apply duct tape if possible. That stuff is a godsend. I probably use way too much on my carboy, but I have skunked a batch before, and it was personally devastating lol.

I just had to dry hop, having to open the blow off cap for 5 seconds was really nerve recking. However I still have positive pressure as i could see active carbonation and movement still happening.
 
Go to either Northern Brewer or to MoreBeer or any of the beer supply stores and get a bucket that is made for this task. I picked up two plastic 6 or 7 gallon buckets as part of the starter kit. They both have the airlock hole in the lid, spigots at the bottom and a rubber Oring in the lid to seal the lid to the bucket.
Beware, unless the total order is big enough to get "free shipping," these fairly cheap, but large items may end up costing a small fortune, delivered.

Better, if the OP has a local homebrew store (LHBS) he can probably buy them there. Last time I bought 6.5 gallon brew buckets they were around $12, now they're $18 plus $5.50 for the lid (drilled or not).

Although 5 gallon batches are a convenient size (kits and all) one can brew any size of course. Especially when starting out in the hobby, more hands-on experience and smaller batches reduce the amount of ending up with large amounts of so-so beer.
I still often split 5 or 6 gallon batches into two 2.5 or 3-gallon ones to get more variety, such as using different hops or yeasts.

Besides, nothing wrong with 3 or 5 gallon buckets...

Oh yeah, Craigslist (Marketplace, or whatever else is local selling), absolutely!
There are probably as many people entering homebrewing as getting out of it. ;)
 
If I can make a suggestion. Go to either Northern Brewer or to MoreBeer or any of the beer supply stores and get a bucket that is made for this task. I picked up two plastic 6 or 7 gallon buckets as part of the starter kit. They both have the airlock hole in the lid, spigots at the bottom and a rubber Oring in the lid to seal the lid to the bucket. Fooling around with homemade in this case seems a bit silly as the buckets they sell are not that expensive. Better yet, if you have a Craiglist site close to you, check there. I have seen full setups and all kinds of stuff there that is really cheap. I was looking at another post where a guy is looking to drop 1k plus on a kegerator. I looked at Craiglist in the San Francisco area and they go for anywhere between 100 to 500 bucks depending on if you want a converted minifridge or an actual kegerator. Either way, be patient, it will be fine. I am the worst at looking at my beer and have decided that I would not even look at it, other than to see when fermentation started thru to airlock so I can note it, for at least a week, if not two if I am not dry hopping. Patience is a virtue on this one, trust me, I have been "reminded" many times. LOL.

Edit: I just checked Northern Brewer site and the 6.5 gallon bucket is about $18.00, the Lid drilled for the airlock and an Oring seal is another 6 bucks and the spigot for the bucket is 4. So for less than 30 bucks you can get a bucket fermenter that is made to do what you need it to do. Just saying. Good luck
My bucket has all that and a thermowell… and I paid $5 for it.

Seriously, don’t pay extra for buckets just because they have a logo and volume markings on them. I agree that a lid with a gasket is a smart investment but even the morebeer lids aren’t gasketed…I didn’t check NB.

You can go to Walmart and grab a food grade bucket and a step drill for $18 and drill holes in them for $5 a pop for every one after that. Just fine if you’re making 2 - 4 gallon batches. Grommets, airlocks and spigots are cheap too.
DIY till I die.

Edit: I am going to look into getting gaskets or lids with gaskets, thanks for the heads up.
 
Last edited:
Back
Top