
So I have a Frigidaire chest freezer that has been sitting up down in my basement holding all of my bottles of beer and hops /yeast for a few years. The inside of the freezer was starting to rust, so I decided to clean it out. When I took the top off of it, I got hit with an epiphany. I have way too many bottles of beer and empties in storage to continue to keep botting beer. I've been wanting to keg for a while, and never got around to building or buying a home kegging system. I always thought it was too difficult. I did decide to
Wood working runs deep in my family, so I decided to have a go at this... keezer build. It will hold 6 - 5 gallon kegs, my CO2 tank, and a 3 gallon keg (for a total of 7 kegs of beer).
I have questions, but will hold them to the end. Any feedback is greatly appreciated, especially respectful criticism. I've not attached my beer lines yet but I did test fit the top of the keezer and it's nice.
6" x 1 1/2" pine boards, 1" green foam, 1/8" furniture grade plywood for the top, and gorilla glue for the top. I also used a pocket hole jig to attach the boards. I used gorilla glued attach the top plywood to the pine frame and the foam boards to the frame.

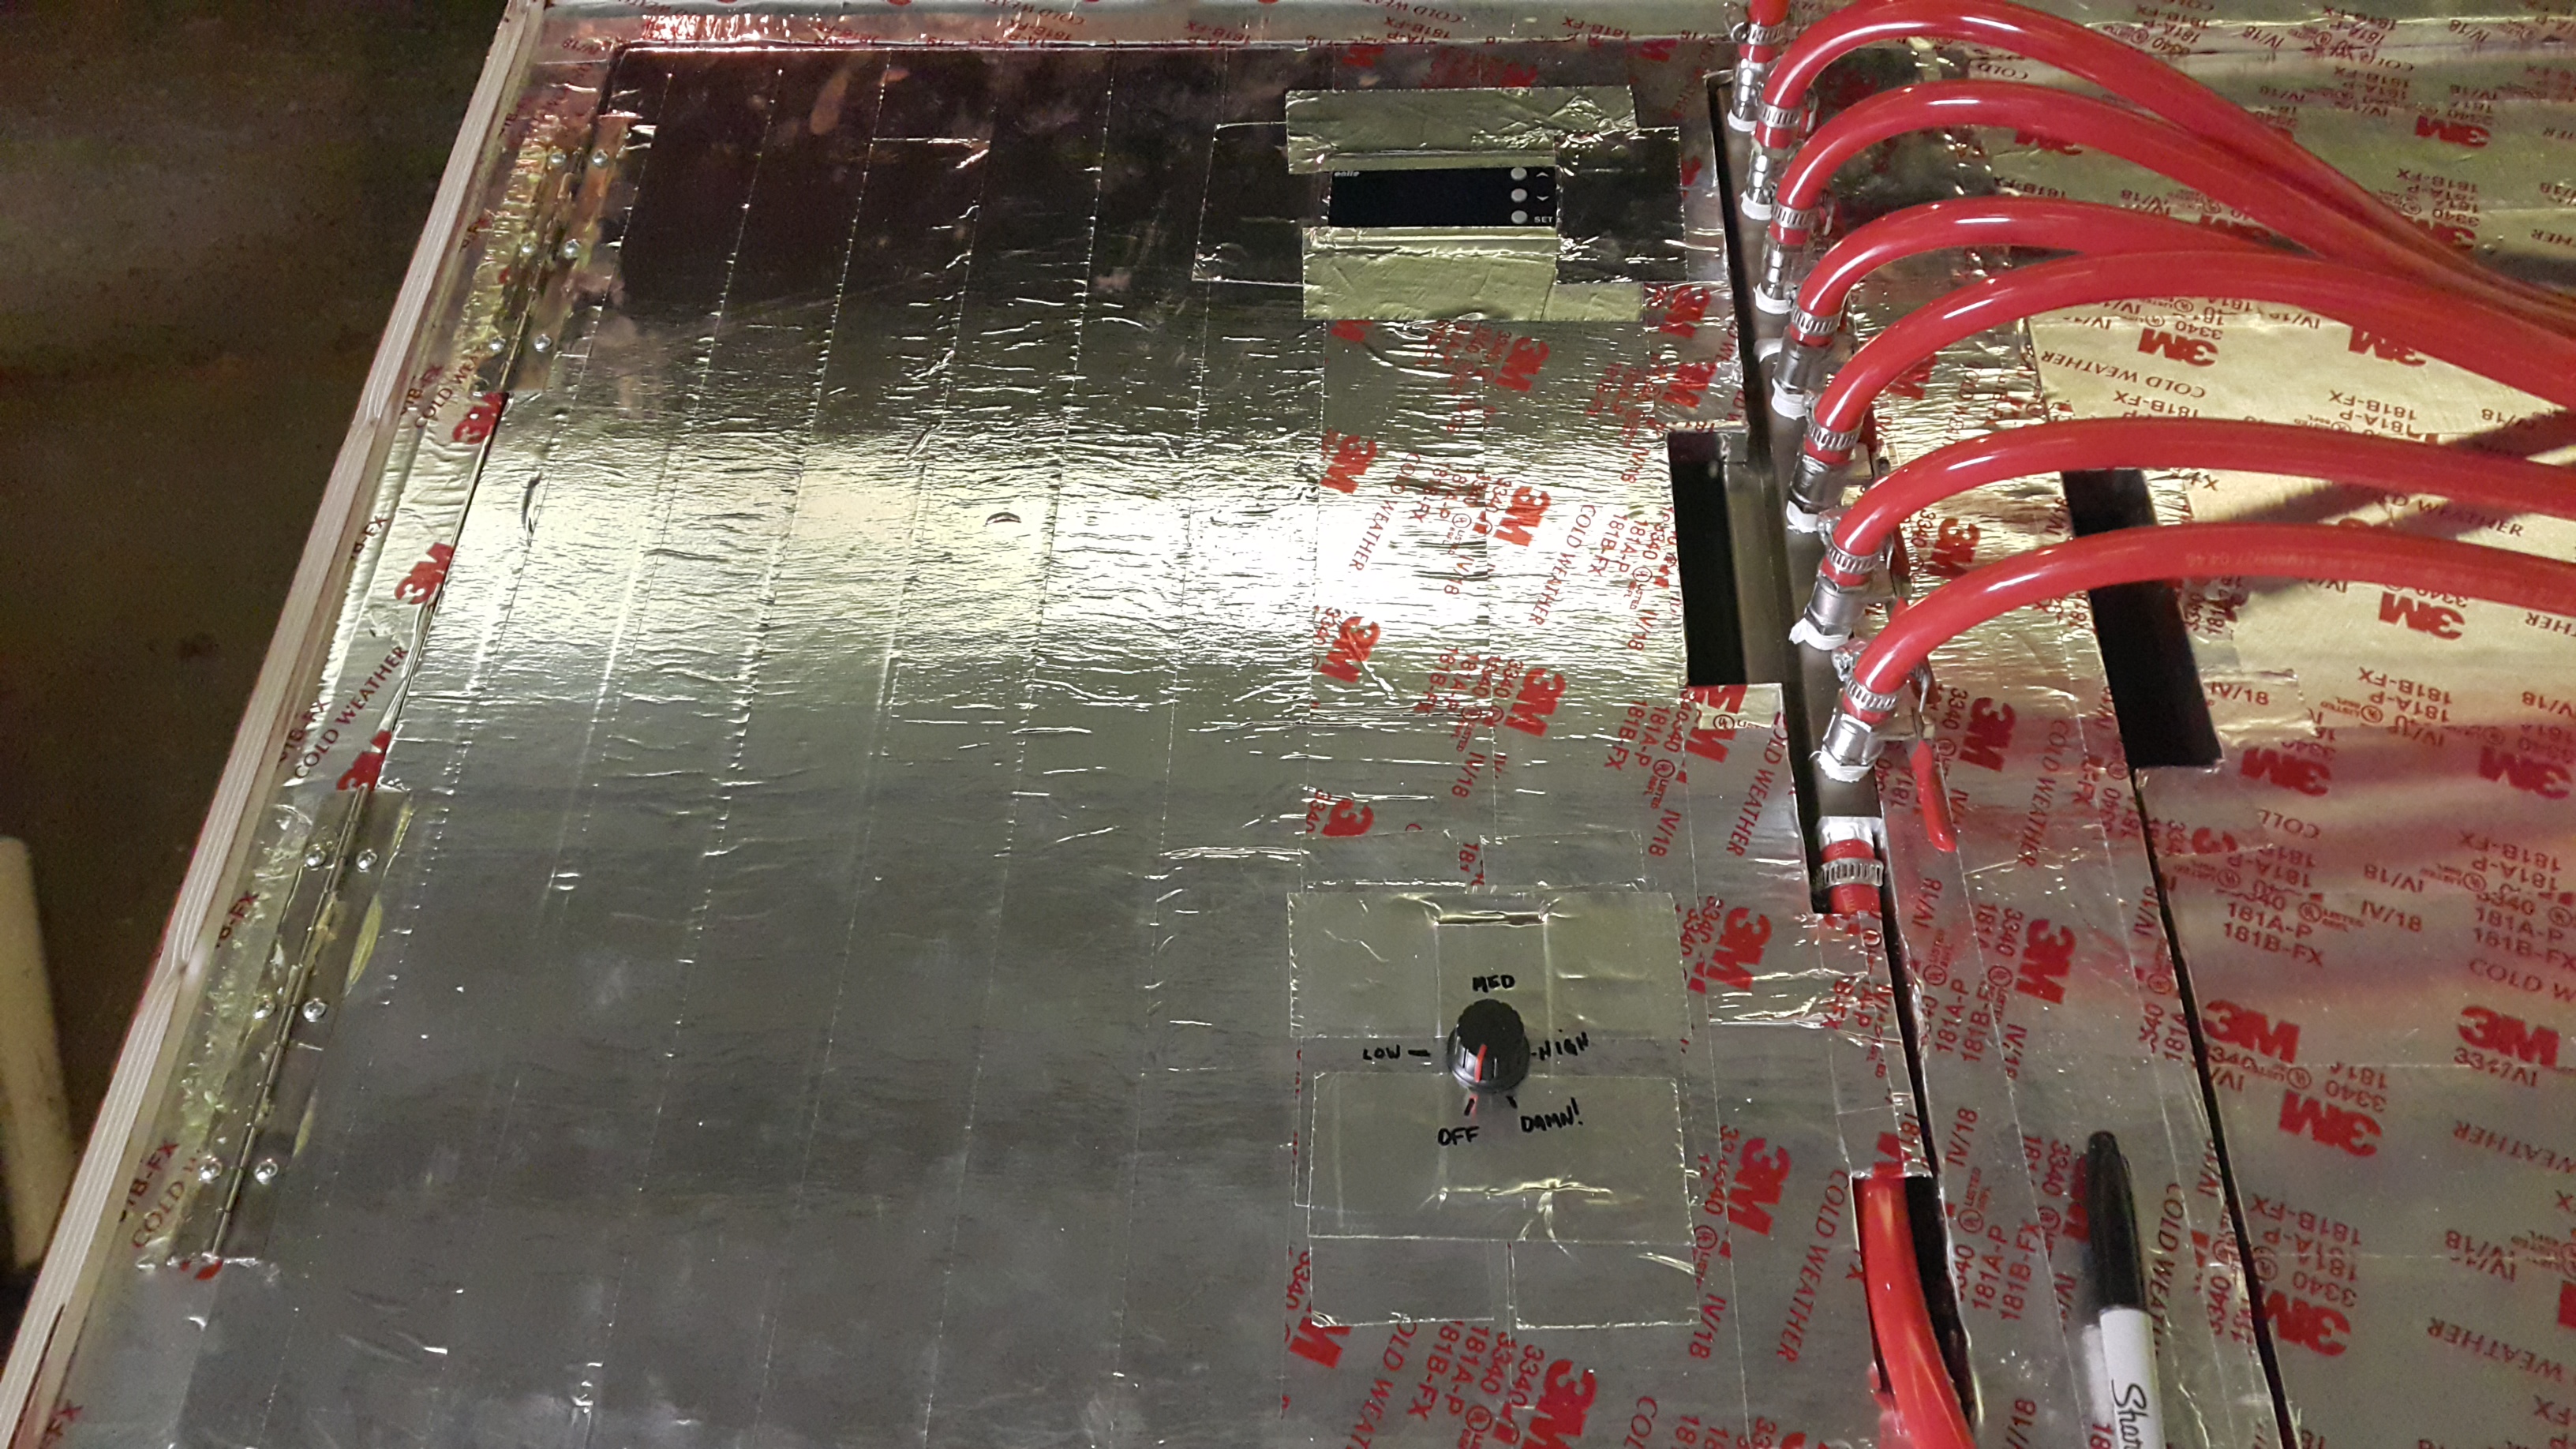
After the top was built, I took 2" aluminized tape, and covered the entire underside of the frame. I also added some weatherstripping and tacked it in place as well once the adhesive was set.

The freezer itself was in good condition but did need some TLC. Rust patches had formed on the inside so I had to clean that up, sand it down a bit, and recoat the interior with white appliance epoxy. Then to give it a little bit more of a change, I coated the outside of it with black appliance epoxy, and highlighted the vent for the compressor with my favorite color... yellow.

Next I added an air movement system so that it will cut down on moisture and cold / hot spots in the keezer. This was fun to figure out. There is no need to glue the PVC pipe together because you are just moving air. I had to get out of the fluid dynamics mindset for this.....

With this being done, the keezer base is complete and ready to go. So I turned my attention back to the top, since that needs the most work and is the most important part of the build. Especially since I tossed the top of the freezer. I didn't like the color of the original boards, so I decided to stain and poly the top, while also slightly rounding out the edges of the top to give it a nice finished and less squared off look.

If you look close at the top, you can see along the upper edges there looks to be some damage, the truth is, since it was plywood, and was cut with a rip saw blade, it did break off small patches of the top layer of wood (which the stain and poly made look really awesome)

4 coats of poly and 4 beer taps later, I was test fitting the top. It looked fantastic in the light. It just glistens!

I had a 4 way tap gas block that I mounted to the center support of the lid. and while I liked it, this was the point I started to think why the hell not.... So I decided to over engineer and add things, and expand (or this could have been done in 1 weekend).

I said screw it and bought another 3 tap gas distribution block, and I had a spare 1/4" NPT brass nipple in my supply from other things I've worked on. I thread taped both ends and linked them together, which created a 7 gas distribution block. They are shaped in the perfect way that I used some spare cut off scraps to attach them. I also mounted them in a way that they will hang straight down from the center of the keezer when the lid is closed, which minimizes hoses laying around and reduces the opportunity of a pinched or knicked gas line. (Plus it looks cleaner).

Wood working runs deep in my family, so I decided to have a go at this... keezer build. It will hold 6 - 5 gallon kegs, my CO2 tank, and a 3 gallon keg (for a total of 7 kegs of beer).
I have questions, but will hold them to the end. Any feedback is greatly appreciated, especially respectful criticism. I've not attached my beer lines yet but I did test fit the top of the keezer and it's nice.
6" x 1 1/2" pine boards, 1" green foam, 1/8" furniture grade plywood for the top, and gorilla glue for the top. I also used a pocket hole jig to attach the boards. I used gorilla glued attach the top plywood to the pine frame and the foam boards to the frame.
After the top was built, I took 2" aluminized tape, and covered the entire underside of the frame. I also added some weatherstripping and tacked it in place as well once the adhesive was set.
The freezer itself was in good condition but did need some TLC. Rust patches had formed on the inside so I had to clean that up, sand it down a bit, and recoat the interior with white appliance epoxy. Then to give it a little bit more of a change, I coated the outside of it with black appliance epoxy, and highlighted the vent for the compressor with my favorite color... yellow.
Next I added an air movement system so that it will cut down on moisture and cold / hot spots in the keezer. This was fun to figure out. There is no need to glue the PVC pipe together because you are just moving air. I had to get out of the fluid dynamics mindset for this.....
With this being done, the keezer base is complete and ready to go. So I turned my attention back to the top, since that needs the most work and is the most important part of the build. Especially since I tossed the top of the freezer. I didn't like the color of the original boards, so I decided to stain and poly the top, while also slightly rounding out the edges of the top to give it a nice finished and less squared off look.
If you look close at the top, you can see along the upper edges there looks to be some damage, the truth is, since it was plywood, and was cut with a rip saw blade, it did break off small patches of the top layer of wood (which the stain and poly made look really awesome)
4 coats of poly and 4 beer taps later, I was test fitting the top. It looked fantastic in the light. It just glistens!
I had a 4 way tap gas block that I mounted to the center support of the lid. and while I liked it, this was the point I started to think why the hell not.... So I decided to over engineer and add things, and expand (or this could have been done in 1 weekend).
I said screw it and bought another 3 tap gas distribution block, and I had a spare 1/4" NPT brass nipple in my supply from other things I've worked on. I thread taped both ends and linked them together, which created a 7 gas distribution block. They are shaped in the perfect way that I used some spare cut off scraps to attach them. I also mounted them in a way that they will hang straight down from the center of the keezer when the lid is closed, which minimizes hoses laying around and reduces the opportunity of a pinched or knicked gas line. (Plus it looks cleaner).
Attachments
Last edited:


