I have been brewing for almost two years now, and I recently decided to take the plunge into building my own brewing setup. This website has some incredibly talented, knowledgeable, experienced, and skilled contributors who have built gorgeous automated systems with all the bells and whistles. Unfortunately, I do not know how to weld (though I did learn how to sweat copper pipe for this project) nor do I know much about electrical wiring. However, I didn't think it was fair that only the incredibly talented, knowledgeable, experienced, and skilled contributors could live the sweet life when it comes to home brewing, so I wanted to see if I could get a taste of it by having a temperature-controlled HERMS system like the big boys. As a result, I got to designing and I figured out how I could build a HERMS system that included on-board water filtration, electronic temperature control, and a pump. All of the parts were off the shelf and available at Home Depot, Amazon, or More Beer. aside from the sparge/recirculation arm, the only special tools that I needed was a circular saw, power drill, hand sander, table vice, and plumber's wrench. A PVC pipe cutter is helpful, but a hacksaw would work fine. For the sparge/recirculation arm, I also used a propane torch, dremel, and a copper pipe cutter (though again, a hacksaw would have worked as well). Aside from those things, the only other tools you might need can be found in a standard tool box. Below, I attached pictures of the final build and explanations of each of the components:
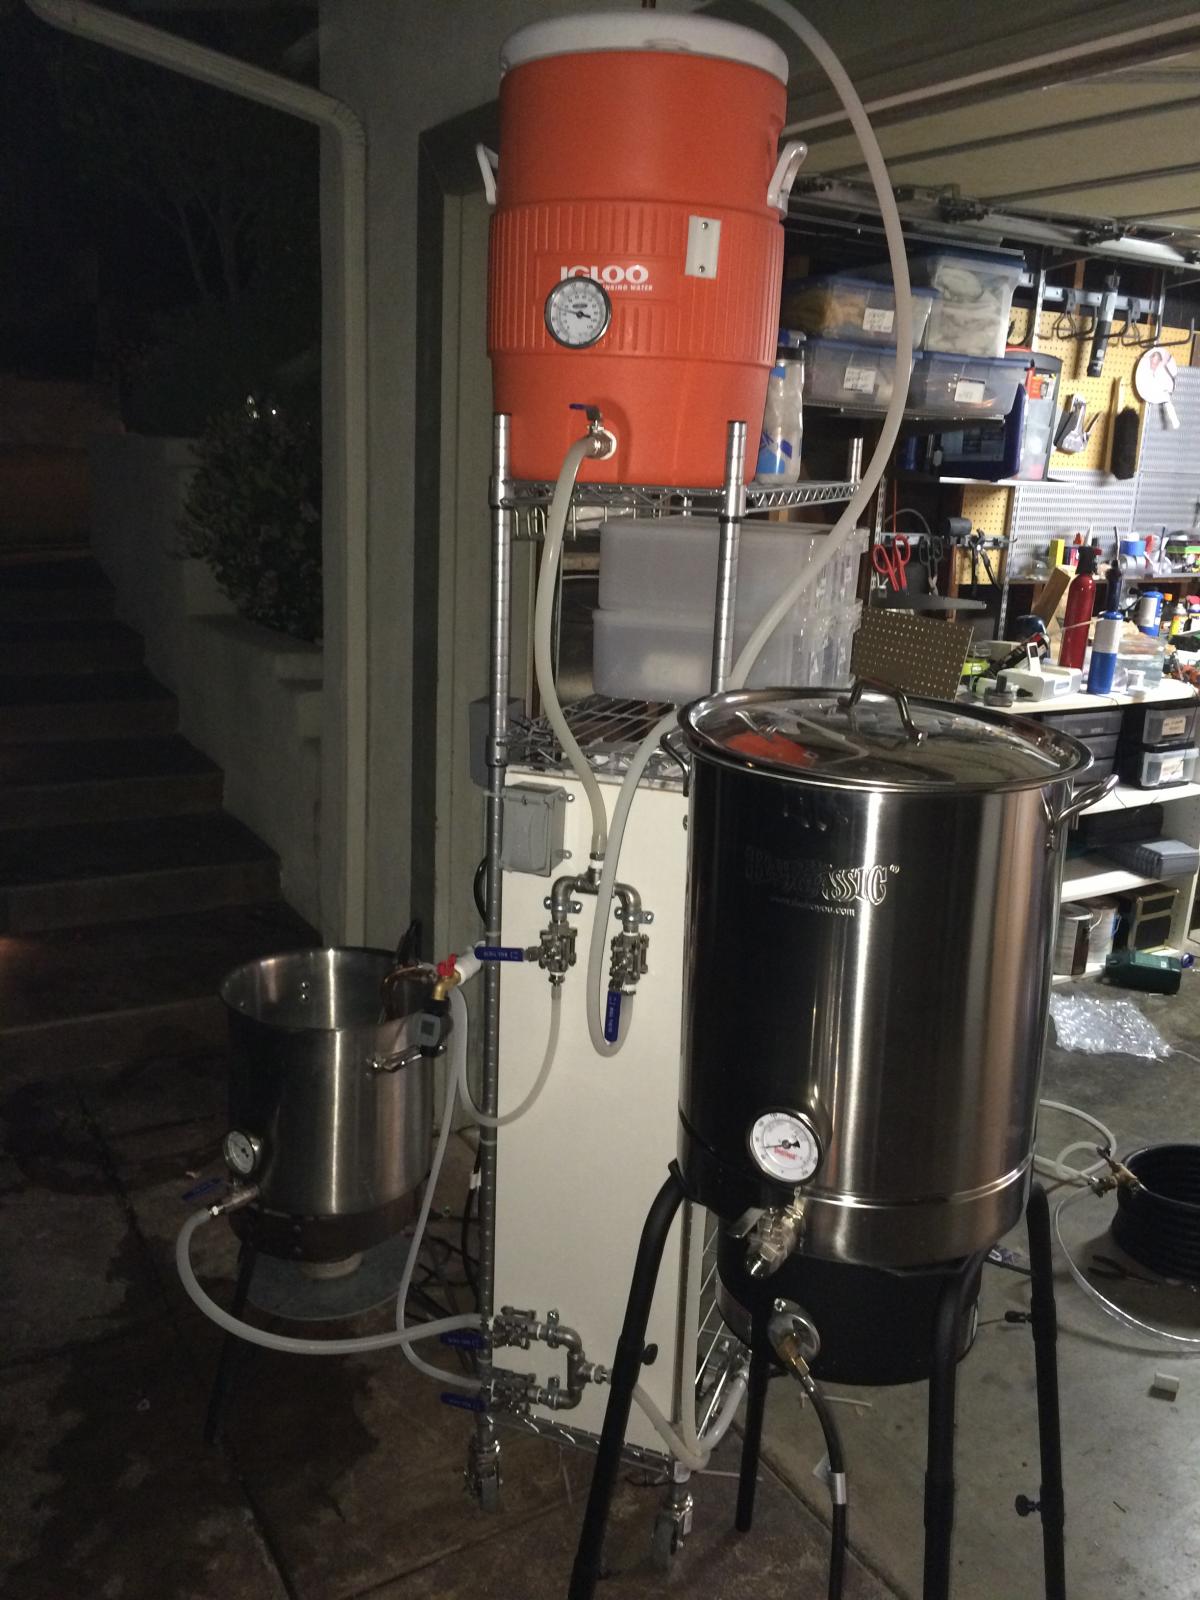
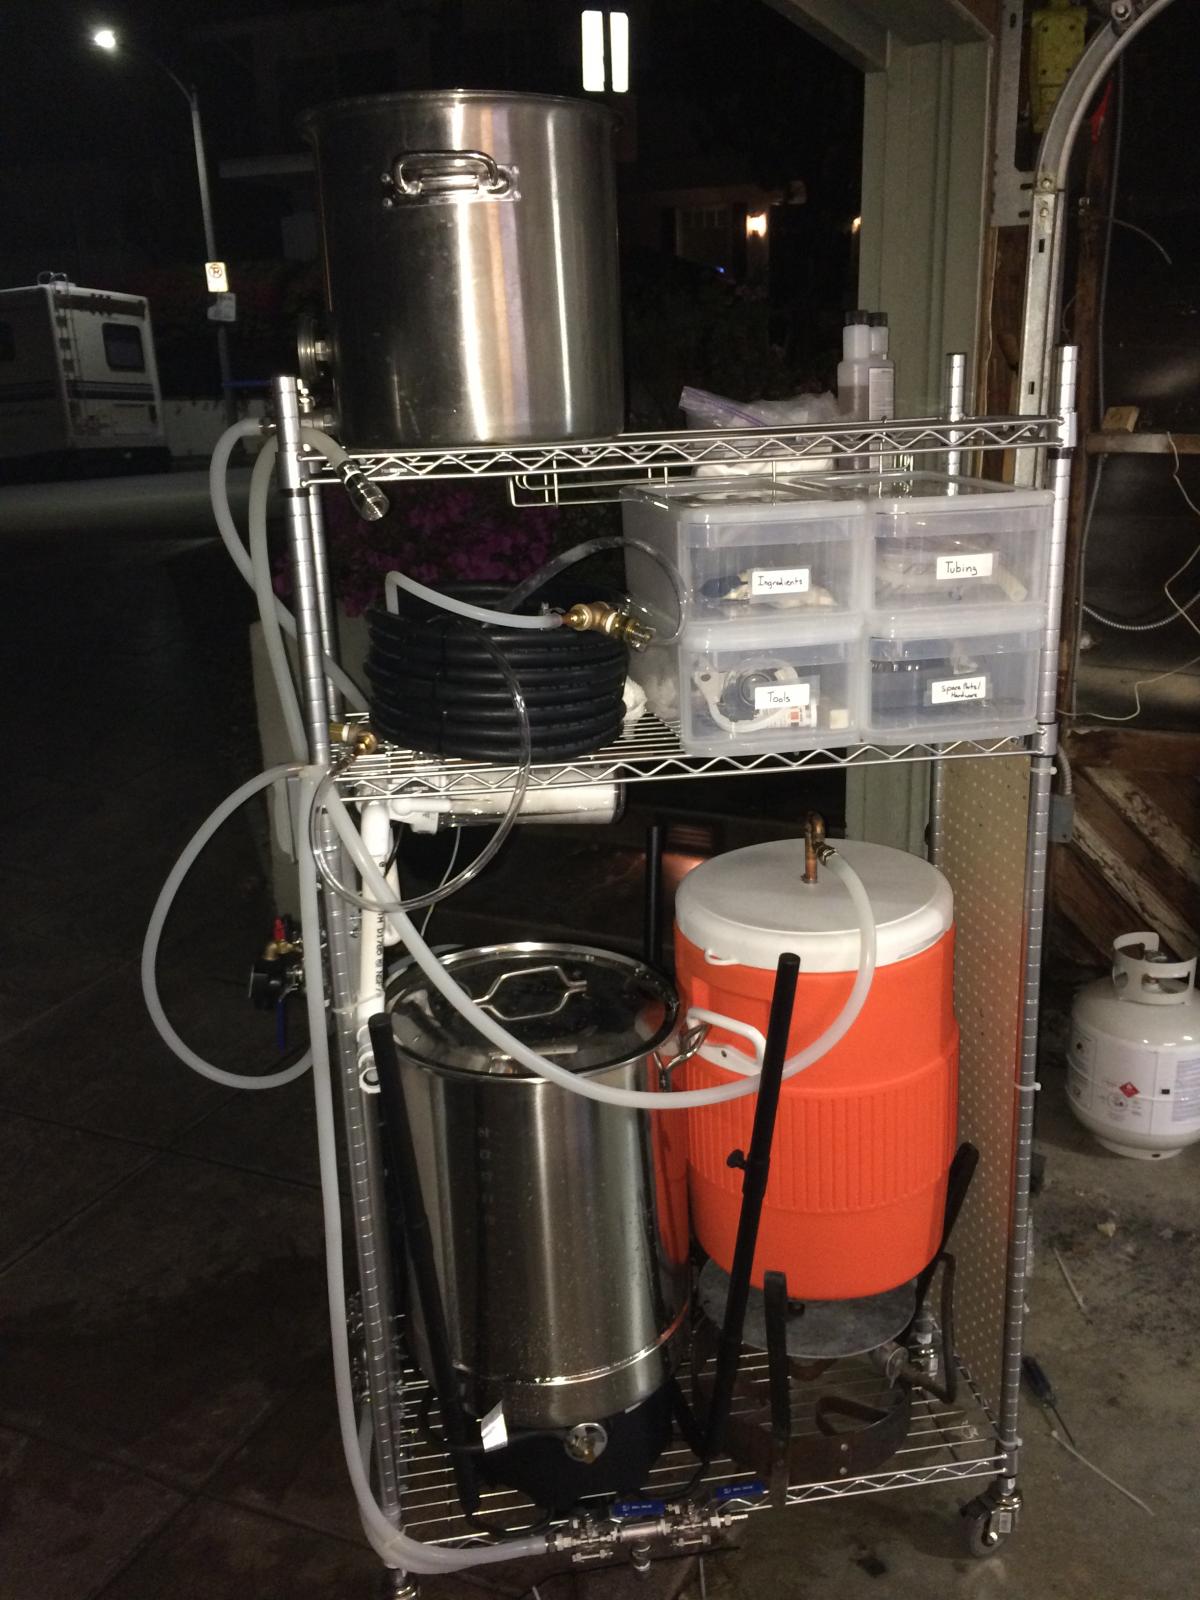
The first picture is the completed build. I used a modular wire shelving system as my frame and affixed all the valves to a piece of particle board that I had laying around in the garage.
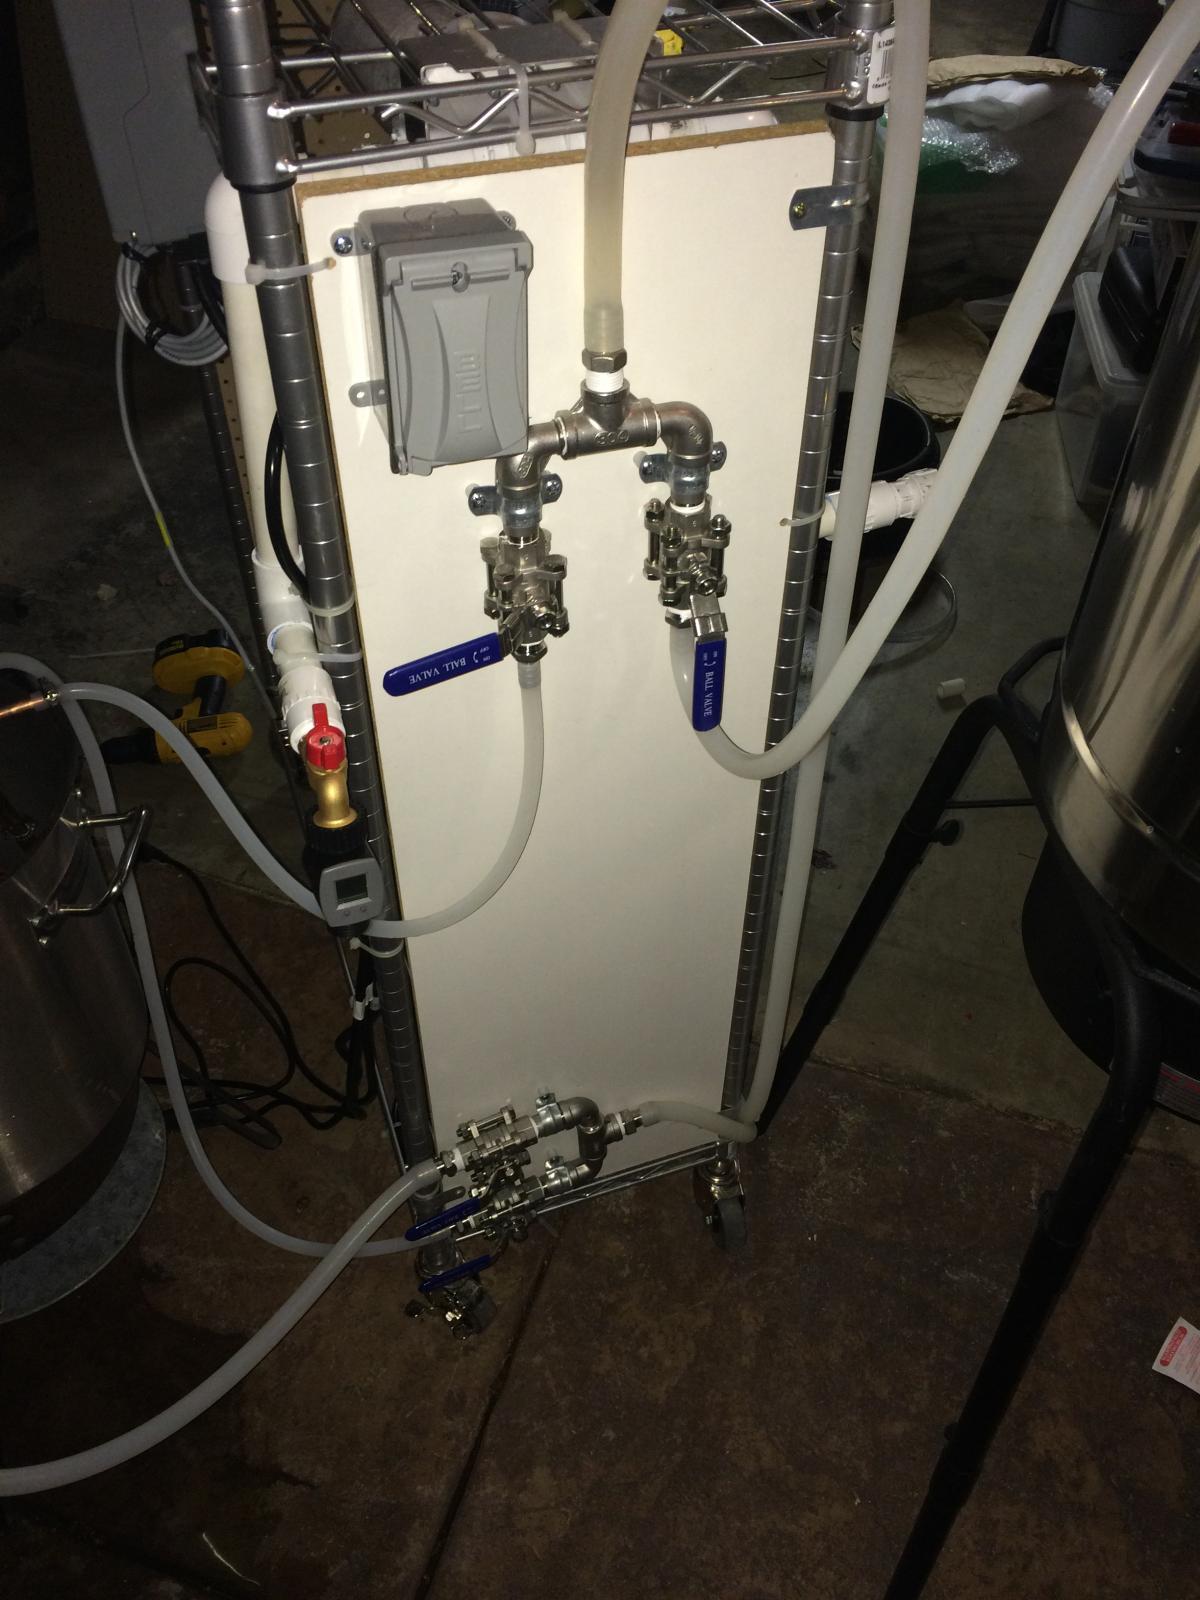
The second picture is a close up of the valve panel. In the top corner, you will see a switch box. This is the only piece of electrical wiring that I did for the project. It is not an essential part of the build, and therefore if someone wanted to replicate this build without any wiring, they could easily do so. However, I wanted a switch for my chugger pump (since for some reason there is not one built in) and as such included it in the final build. For those people who are intimidated by electrical wiring, I can tell you that prior to installing this switch, I had literally zero experience with wiring. Here is a link on this forum that walks you through the wiring of a chugger pump to a switch: https://www.homebrewtalk.com/f11/wiring-chugger-pump-light-switch-help-340149/. The only thing I did differently was that I ran an extension cord rather than the cord on the chugger pump so that I would not have to cut the cord on the chugger pump. Aside from that, I have four stainless steel ball valves in two groups attached to the board. On the top group, the wort from the mash tun drains into the top. From there, the ball valve on the left controls flow into the HERMS coil while the valve on the right controls flow into the boil kettle. The bottom group of ball valves has two ball valves on the left with a tube feeding into the march pump mounted under the bottom shelf. The top ball valve controls flow from the HERMS coil while the bottom one controls flow from the HLT.
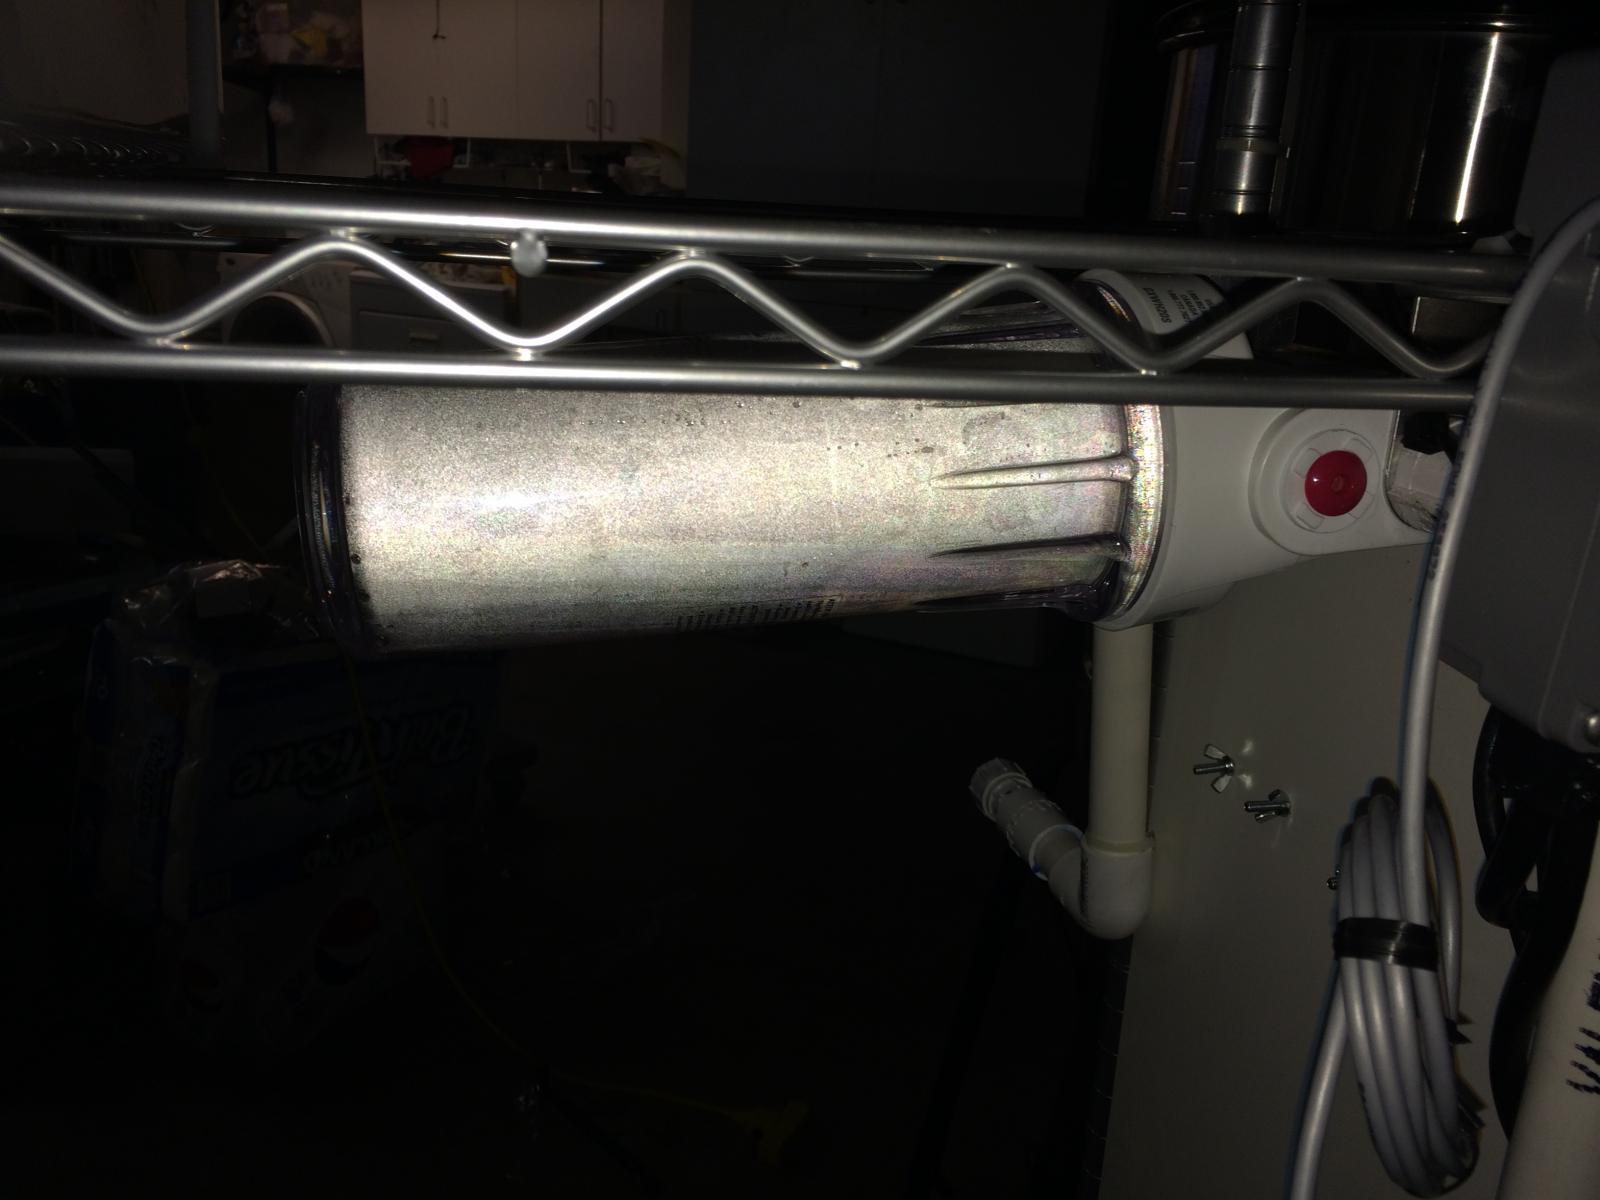
The third picture shows the water filtration system. I gotta give credit where credit is due to Johnsma22 who provided an absolutely incredible tutorial on how he created a water filtration system for his home brewing setup (find it here: https://www.homebrewtalk.com/f256/water-filter-setup-29145/). I mounted it underneath one of the wire shelves and built a PVC pipe rigging with a hose hook-up on one end with a brass faucet on the other that allows me filter water directly from my hose into my HLT.
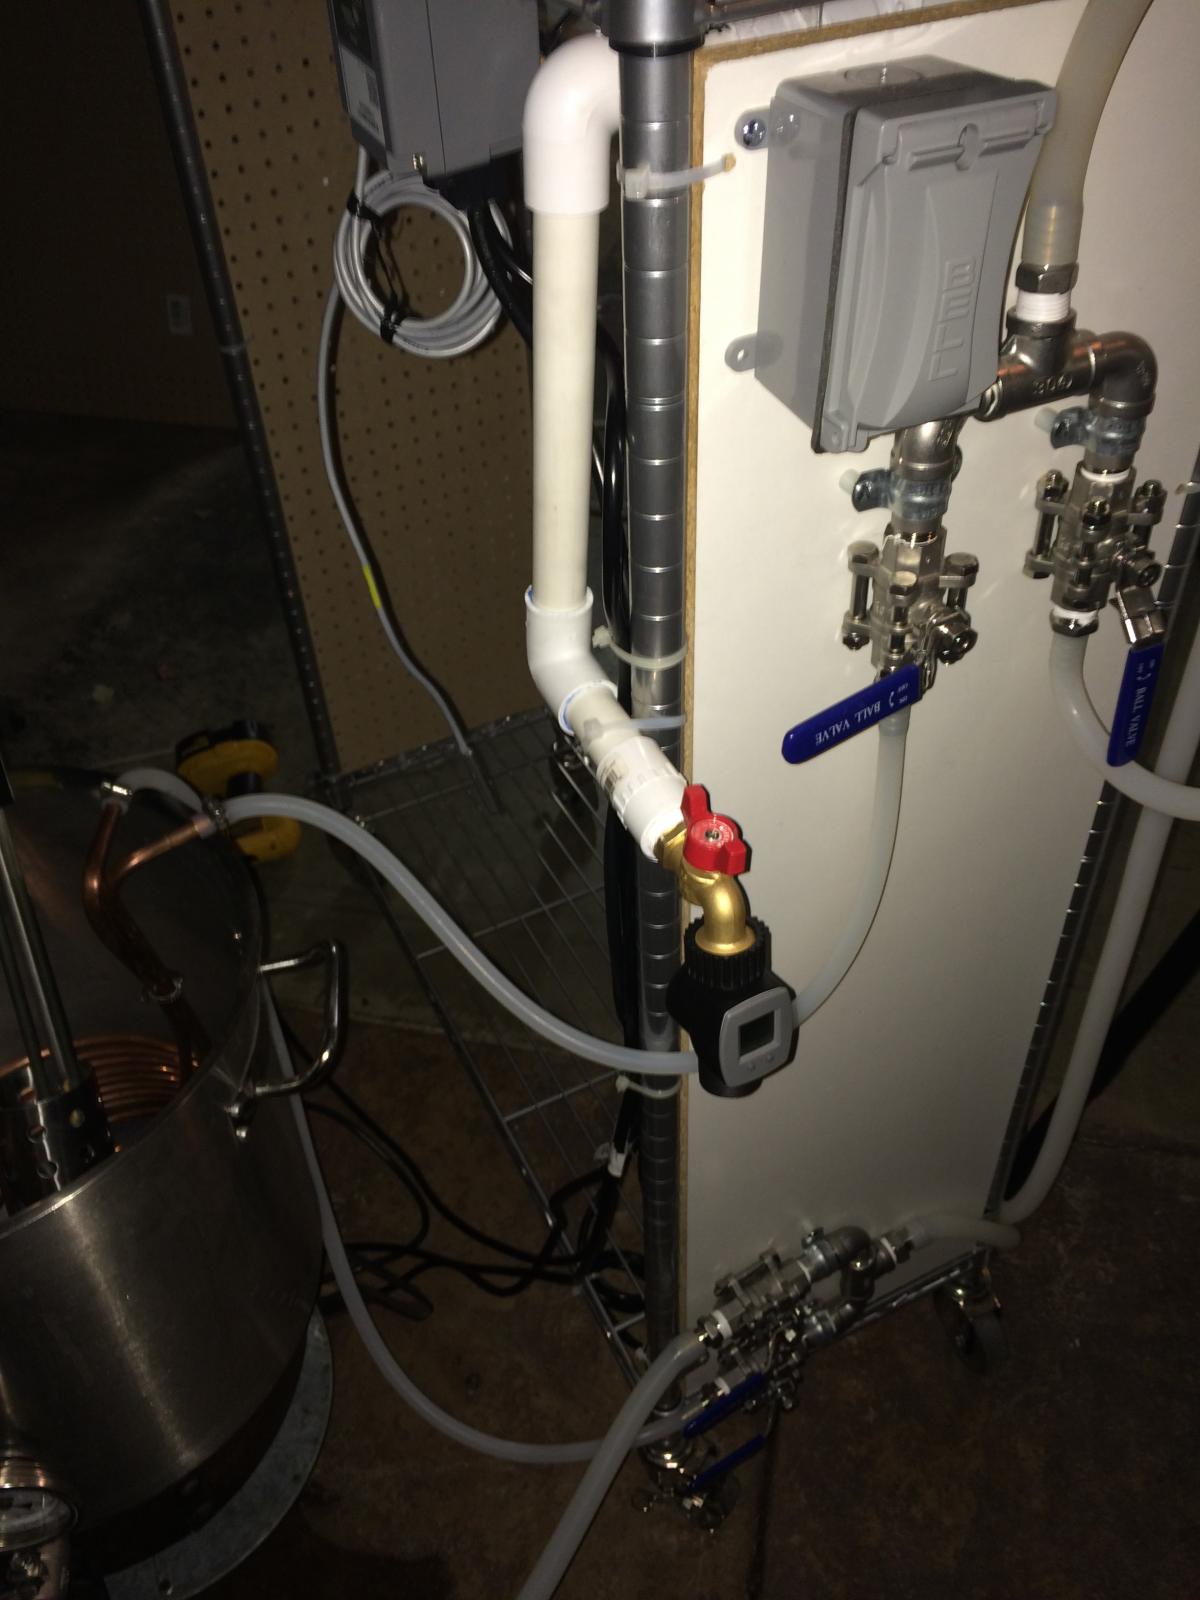
The fourth picture shows the brass faucet. The one thing semi-unusual about this is that I attached a digital water flow meter that I found at Home Depot to the end. Because I do not have a sight glass on my HLT, this is great and is pretty accurate.
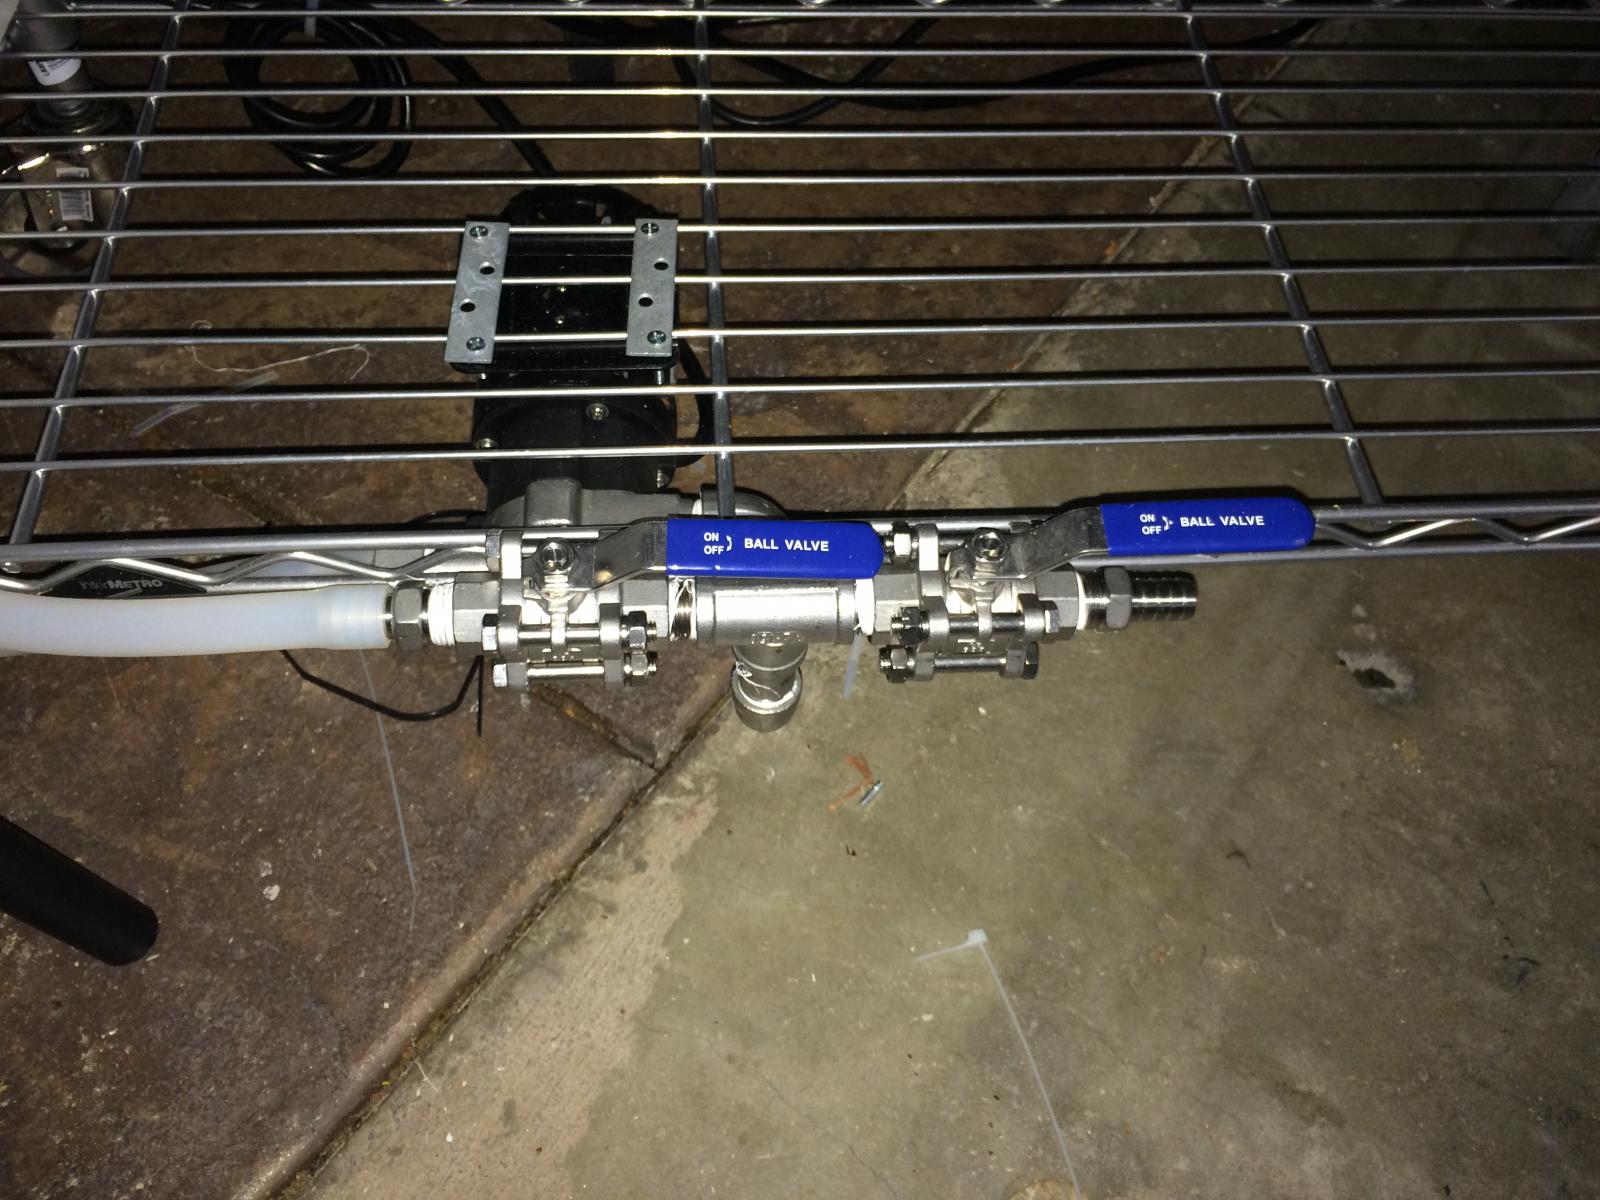
The fifth picture shows my chugger pump mounted underneath the bottom shelf. Attached to this, there are two valves, one that controls flow back into the mash tun, and another that acts as a bleed valve.
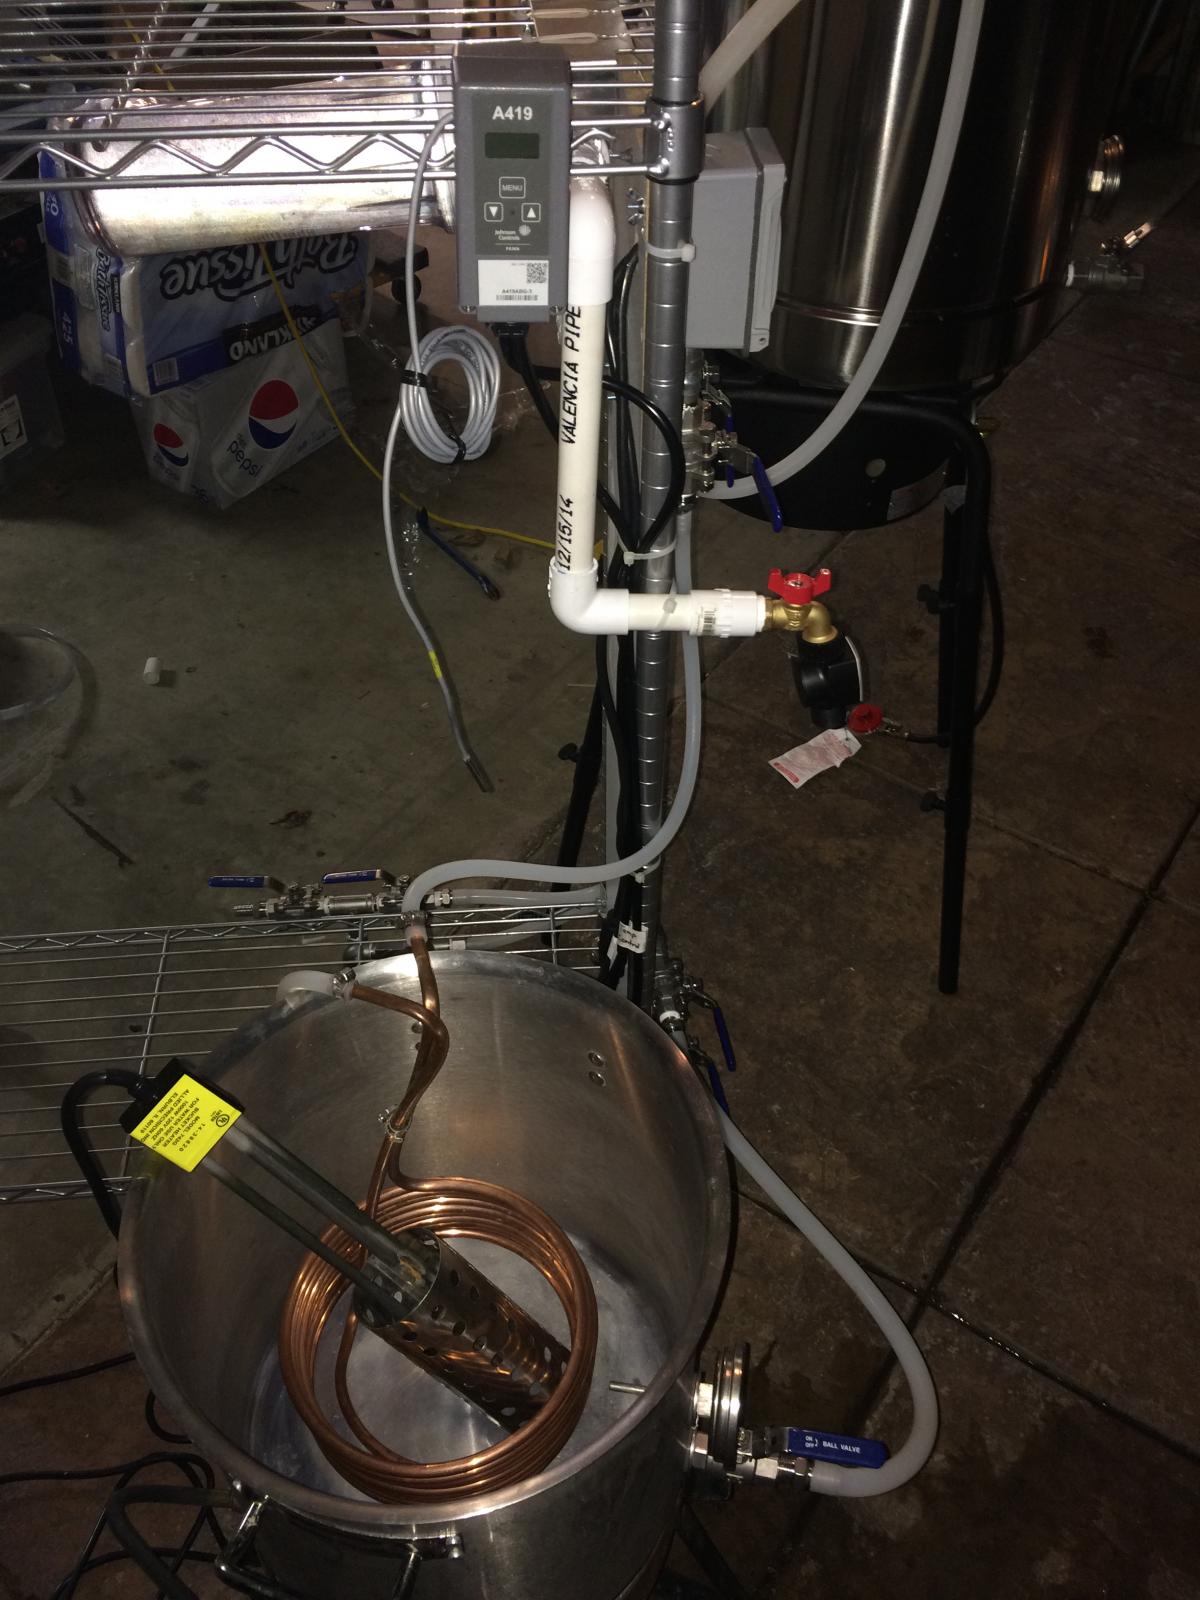
The sixth picture shows the HERMS system. This was what I spent the vast majority of my time trying to figure out how to do. As much as I would like, I cannot rewire my entire garage to support 220v outlets. As a result, the primary way that I heat the water is through propane. However, once I get the water near strike/sparge temperature, I shut the propane off and use a 1000w bucket heater hooked up to a single stage Johnson temperature controller to keep the temperature constant.
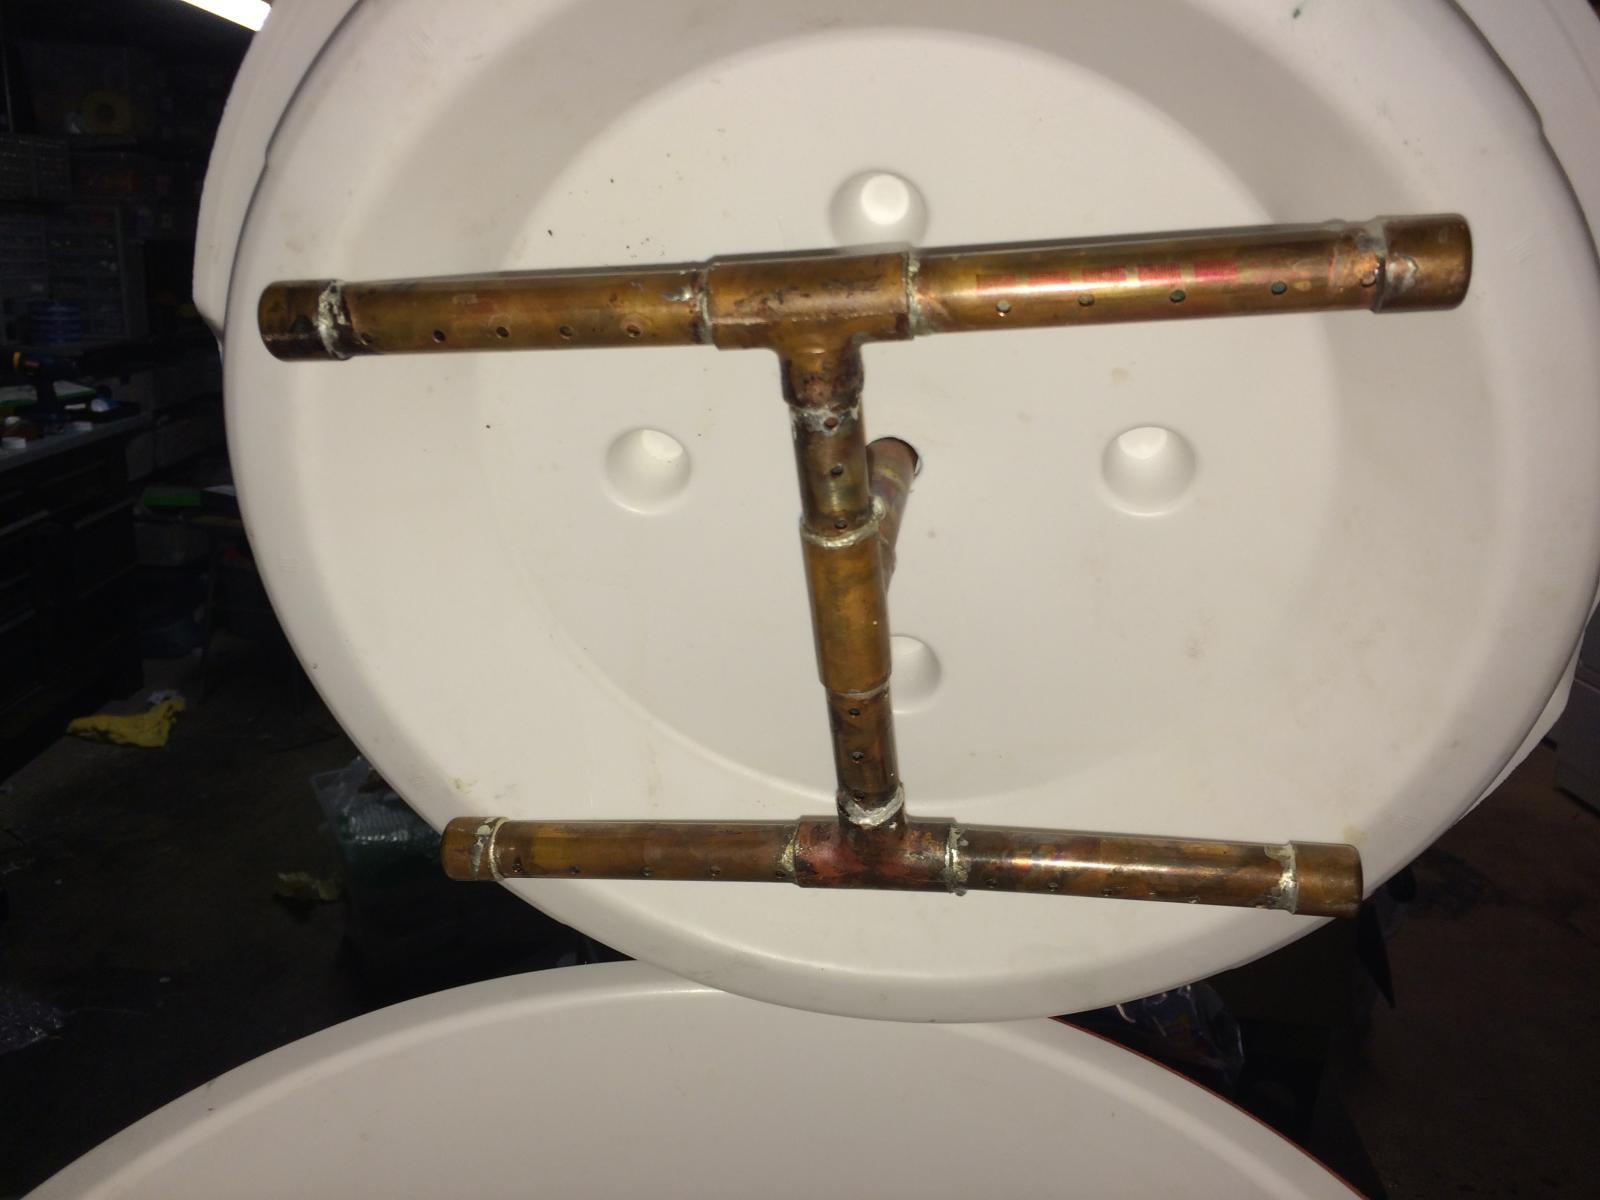
The seventh picture shows my sparge/recirculation arm that is built into the lid of my mash tun. I used 1/2" copper pipe and drilled holes into the bottom that shower the grain bed. I have heard about this design potentially creating problems with clogging.To mitigate this, I drilled 6 large holes in the top of the pipes that act as overflow release points and places that I can get into with a pipe cleaner to clean out anything that might be clogging it. This part is not essential and I could just as easily have run tubing directly into the grain bed.
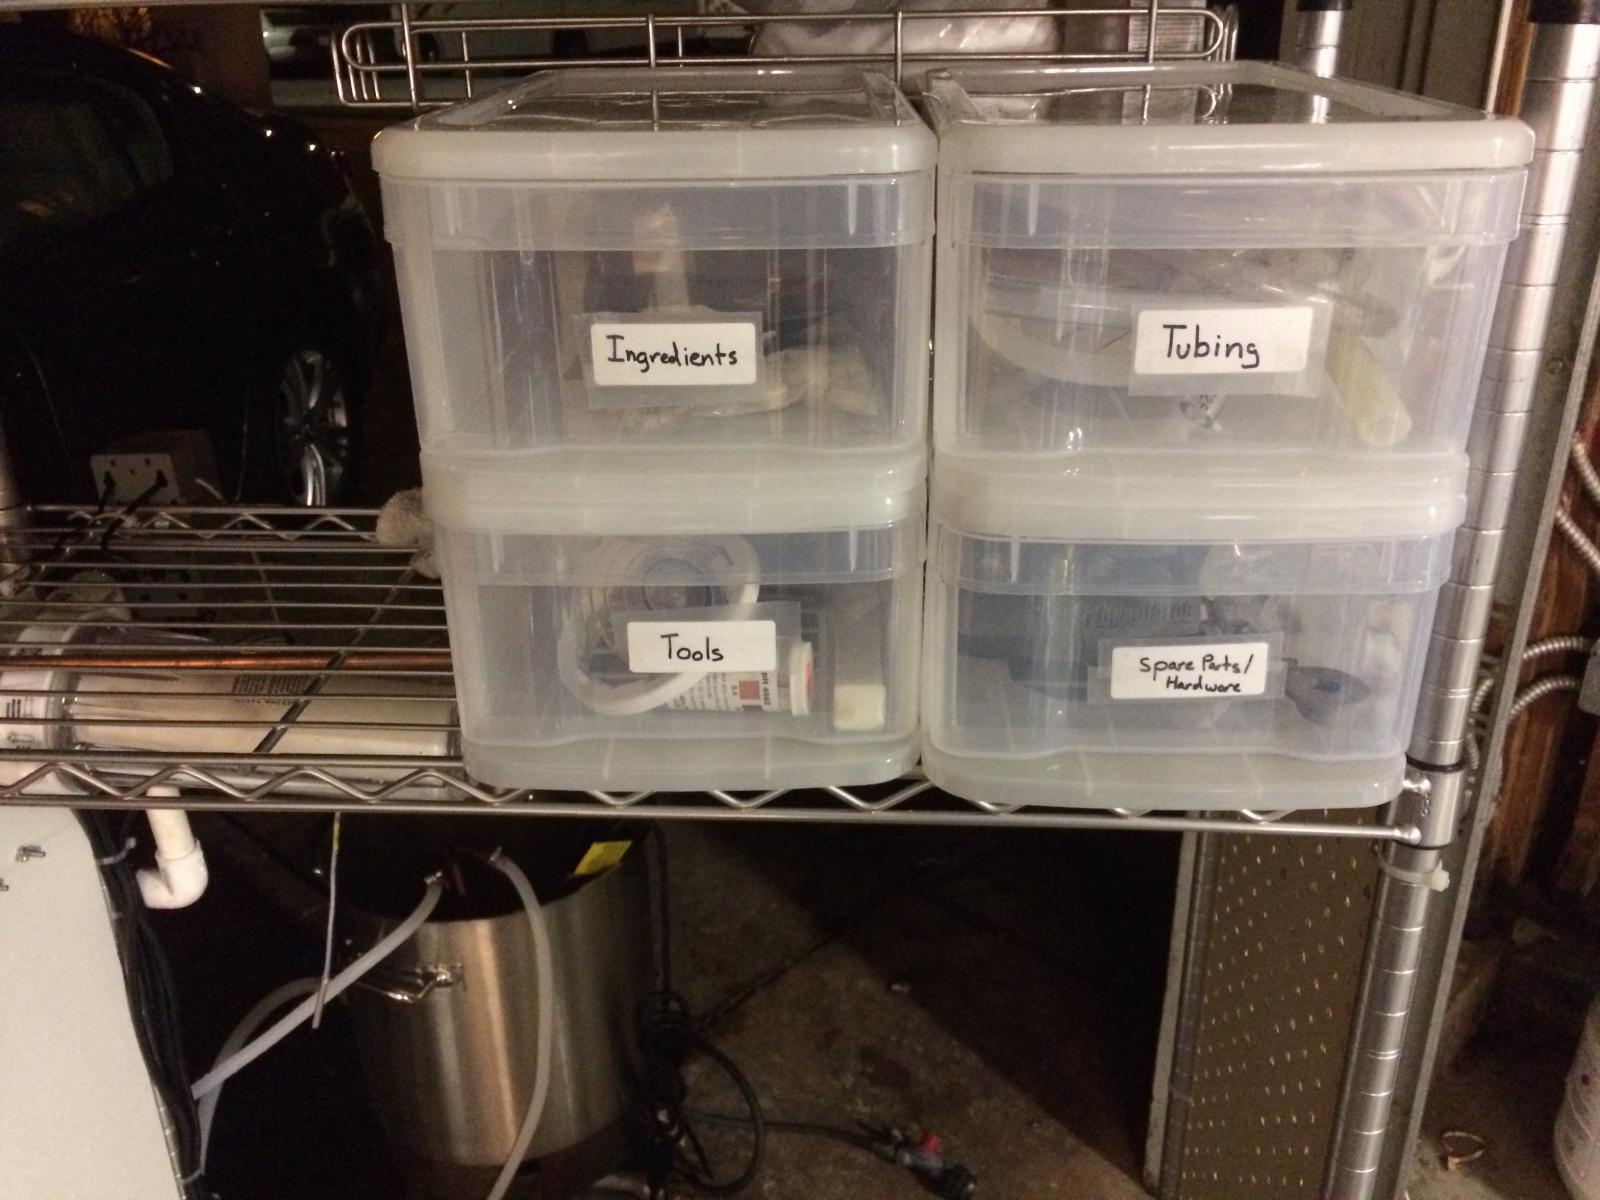
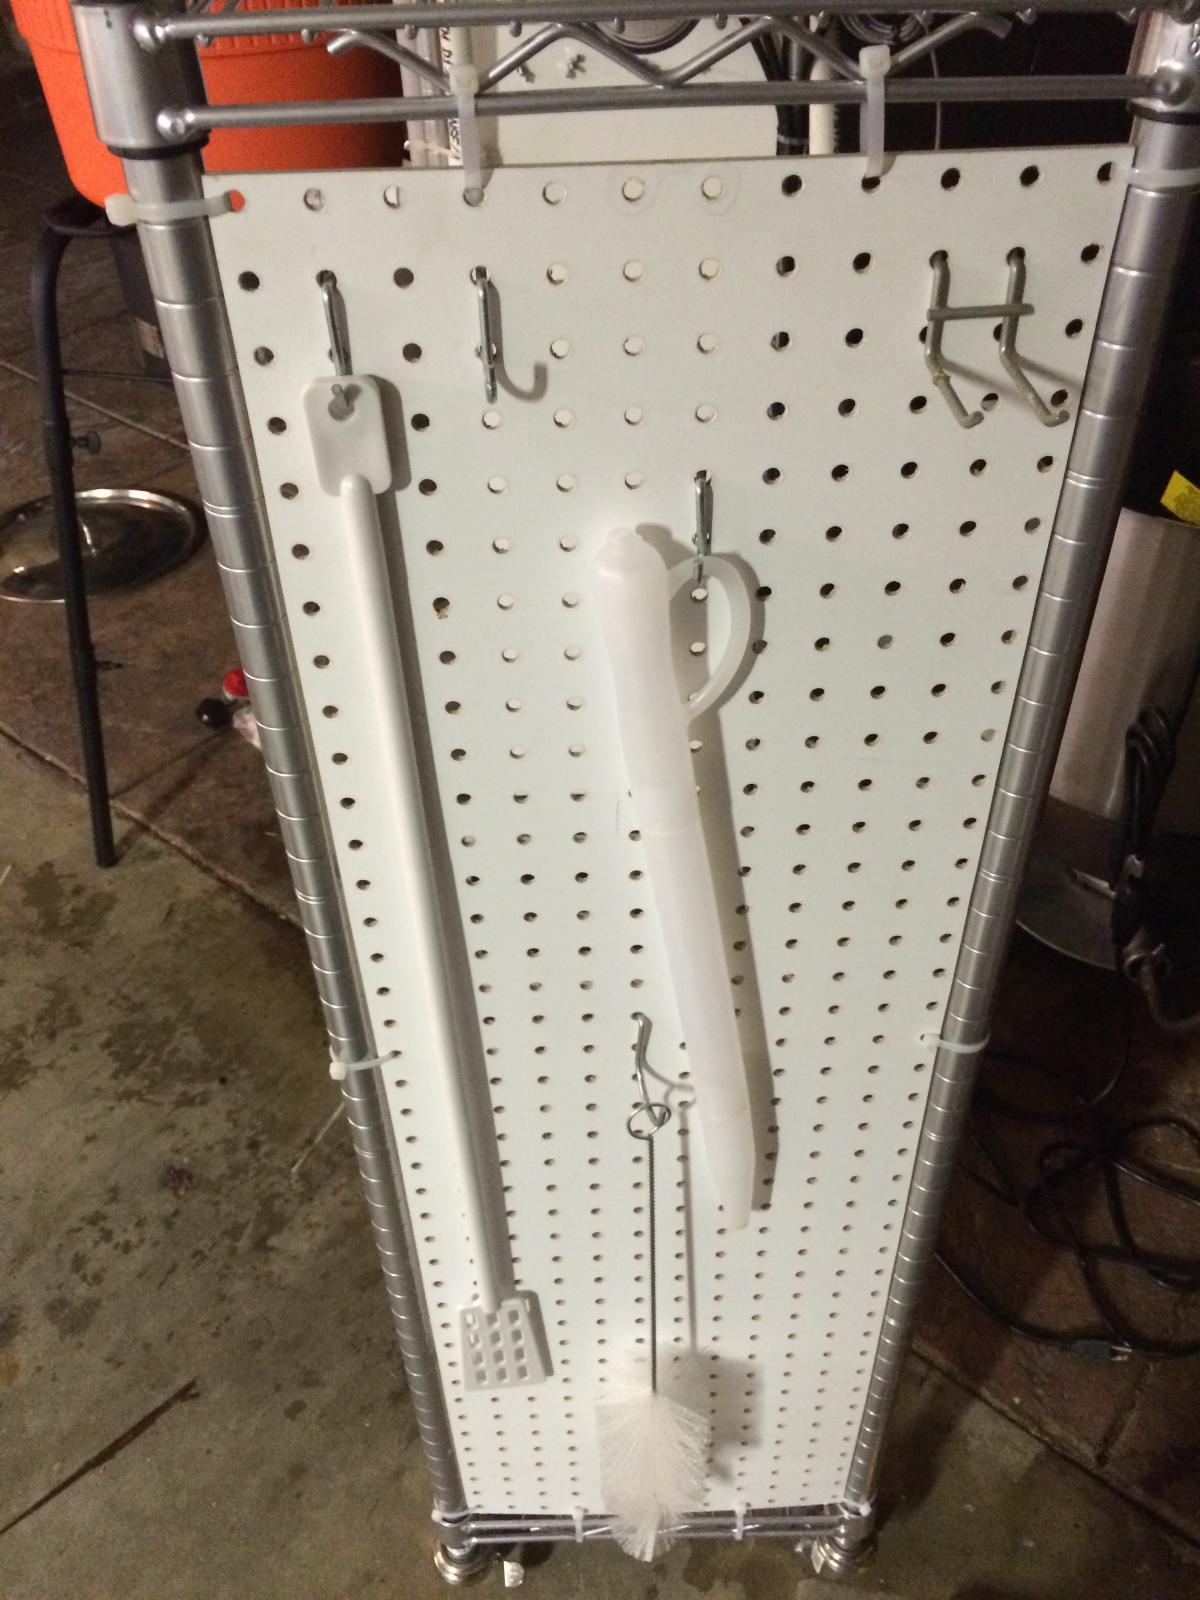
The final three pictures show what is probably my favorite part of my setup. After I am done brewing, the setup doubles as storage space for all of my gear (it is a shelving system after all). I added four drawers for various things such as fittings, tubing, tools (hydrometer, graduate cylinder, ph strips, etc.) and certain ingredients like whirlfloc, yeast nutrient, and DME for yeast starter. Attached to the back side of the cart is also a peg board that holds various other tools such as a mash paddle, auto siphon, bottle brush and wine thief. I also have a small basket mounted on the side of the cart for all of my cleaning and sanitation supplies. Because the whole thing is on wheels, I can move it around to wherever I want.
Anyways, this was a long post. Hopefully this will help some people out there who are thinking about doing what I did. If anybody has questions, comments, or suggestions, please let me know. I would love to hear what you guys have to say. Thanks again!


