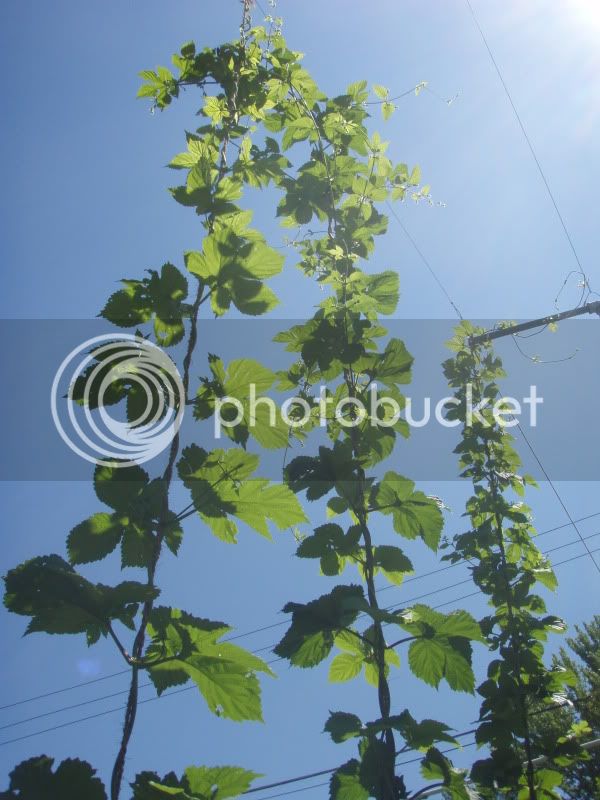
I started growing hops last year, first year harvest was pretty good and the trellis held up pretty well. The trellis that I designed was super easy to take down for the winter and is really durable. After last season I have come up with a few small tweaks to improve the design. I thought that I would share.
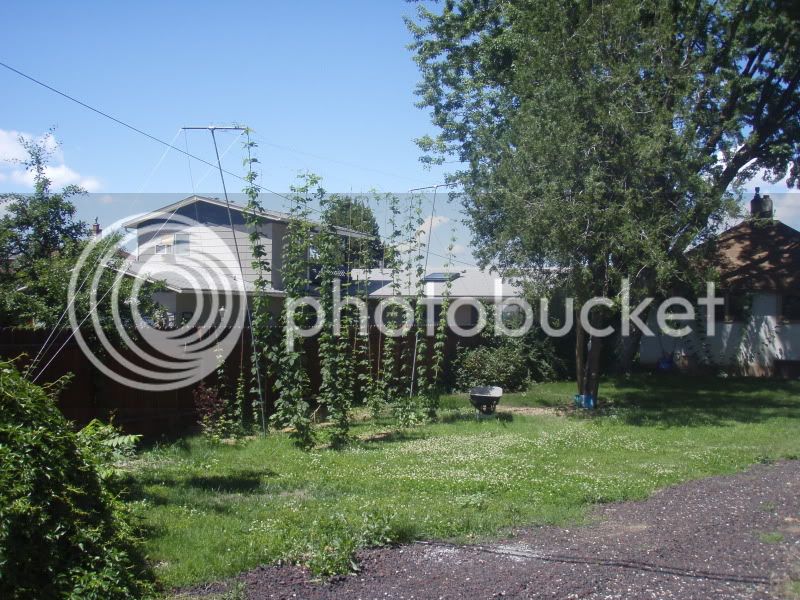
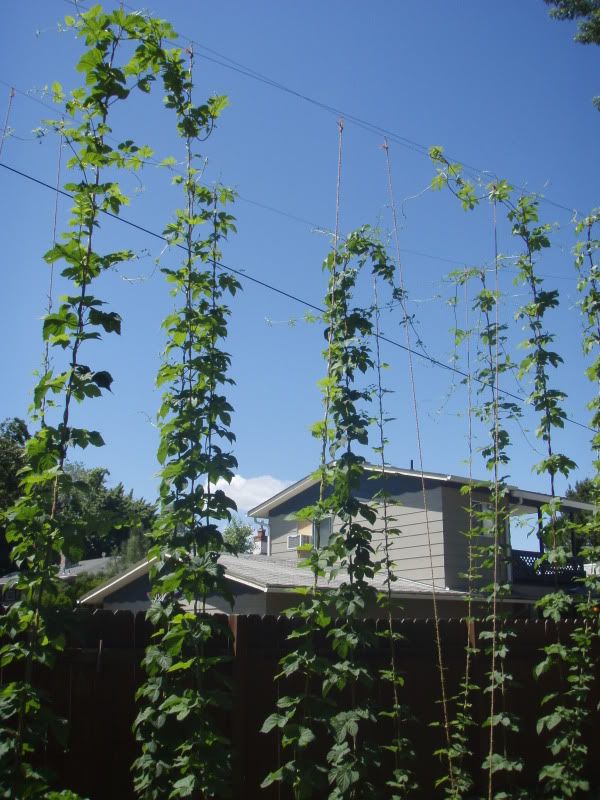
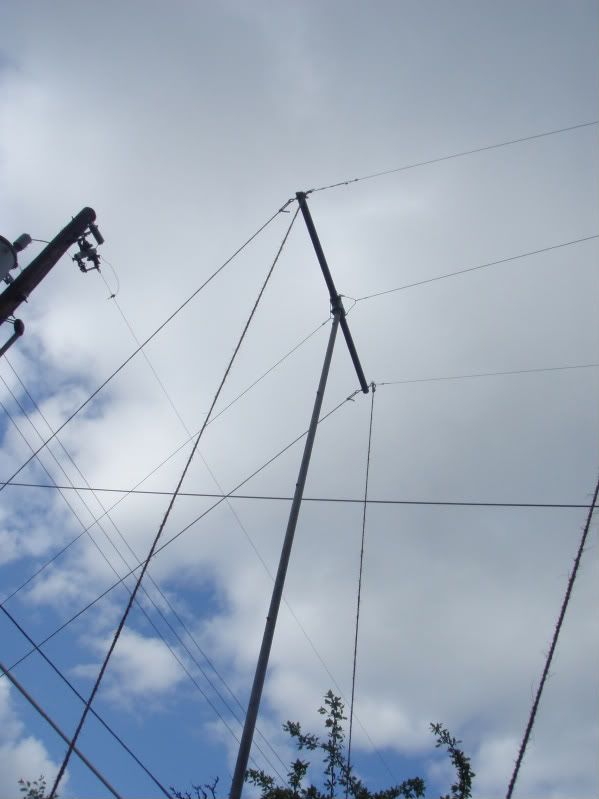
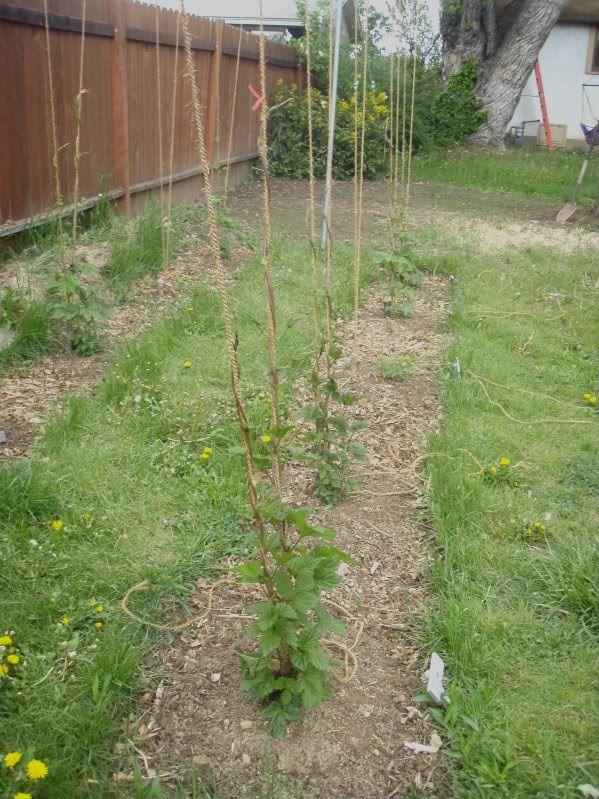
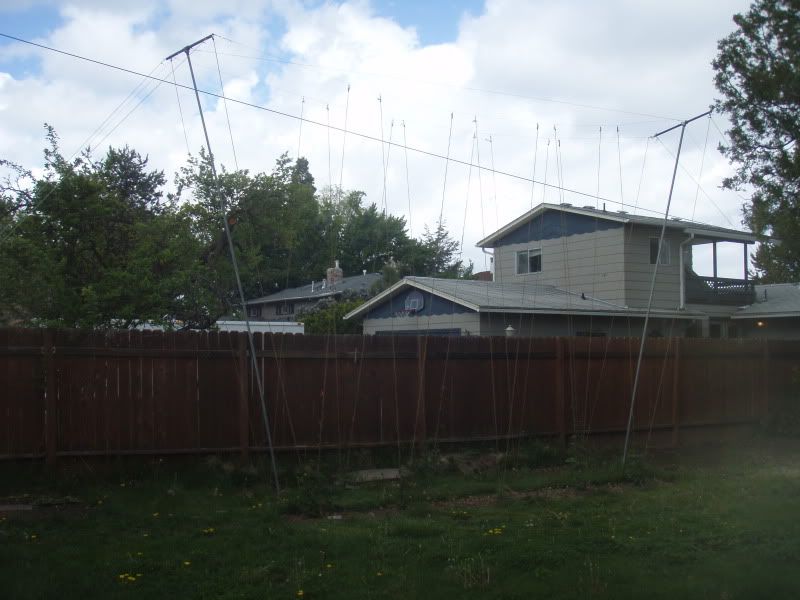
This is the basic side view of the trellis, it looks pretty standard but there are some good details. I grew 10 separate plants on this trellis. I think the vertical dimension is somewhere in the neighborhood of 18', so I wanted it to come down when not needed.

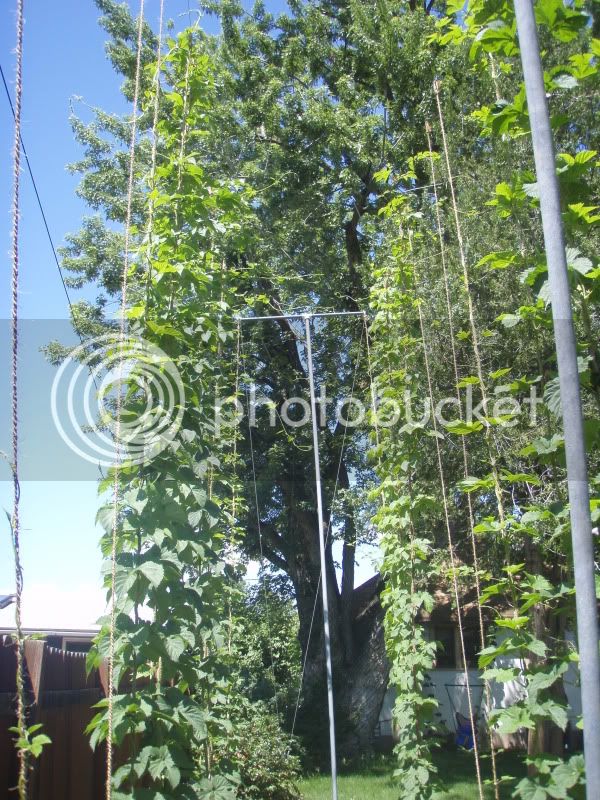
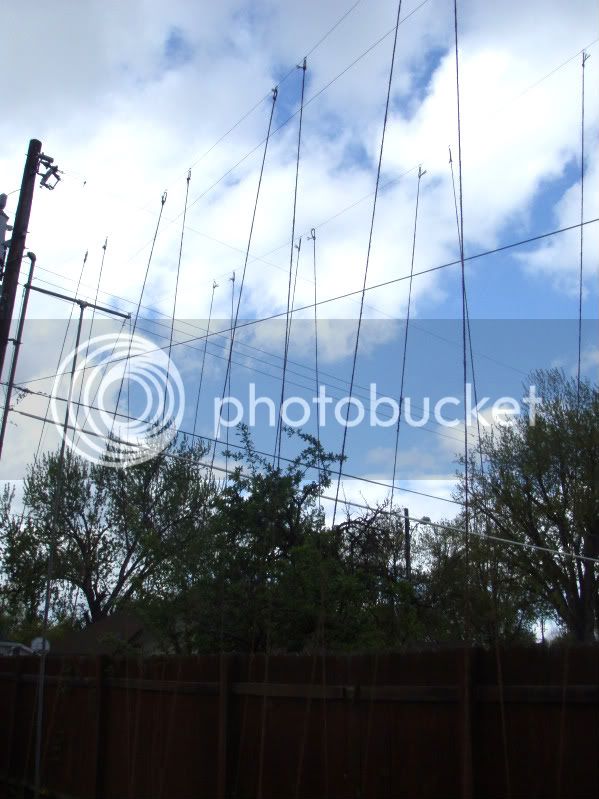
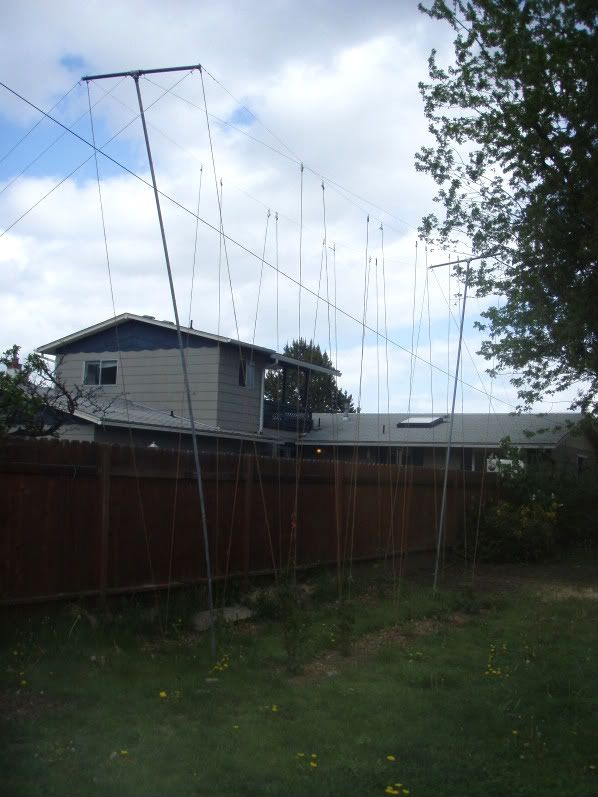
This is the plan view. There is a swath of grass between the two hop beds, it is a nice place to stroll and water from when the vines are 18' tall. The first year I used a length of small gauge cable from the hardware store to run down the center of the structure as a backbone. Although the cable backbone worked well, this year I am replacing all of the others, which were cotton, with cable. I had to periodically tighten them throughout the year.

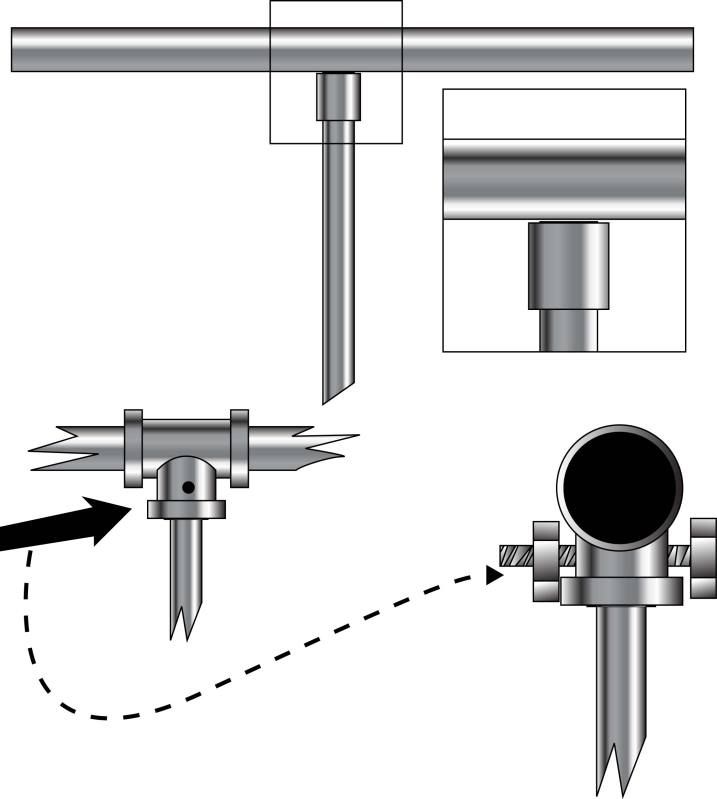
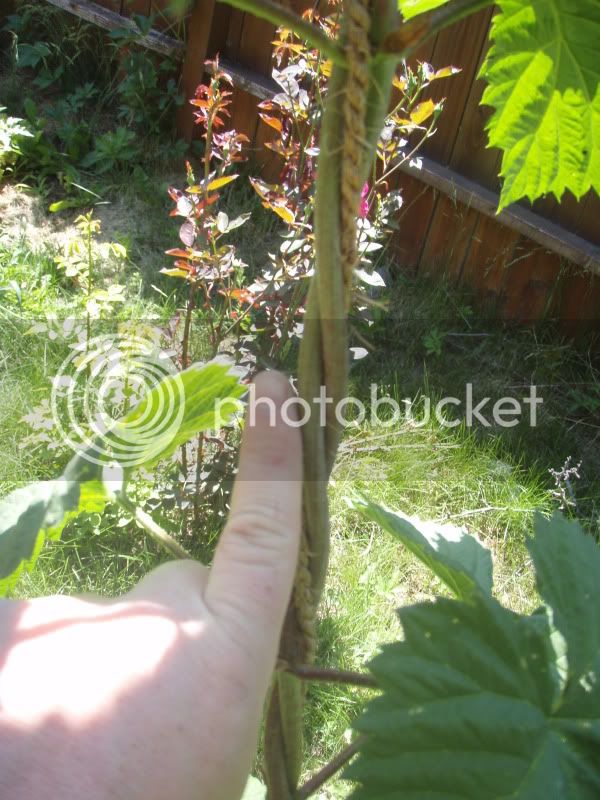
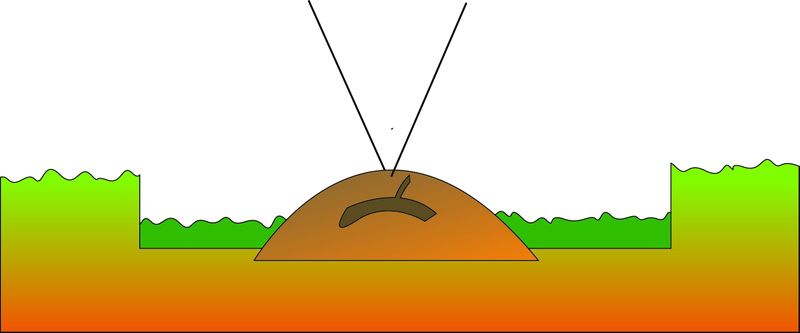
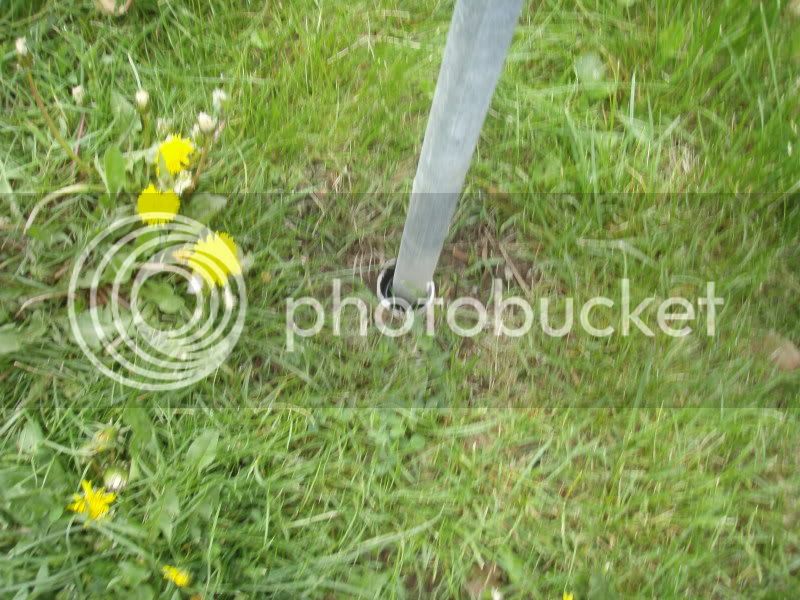
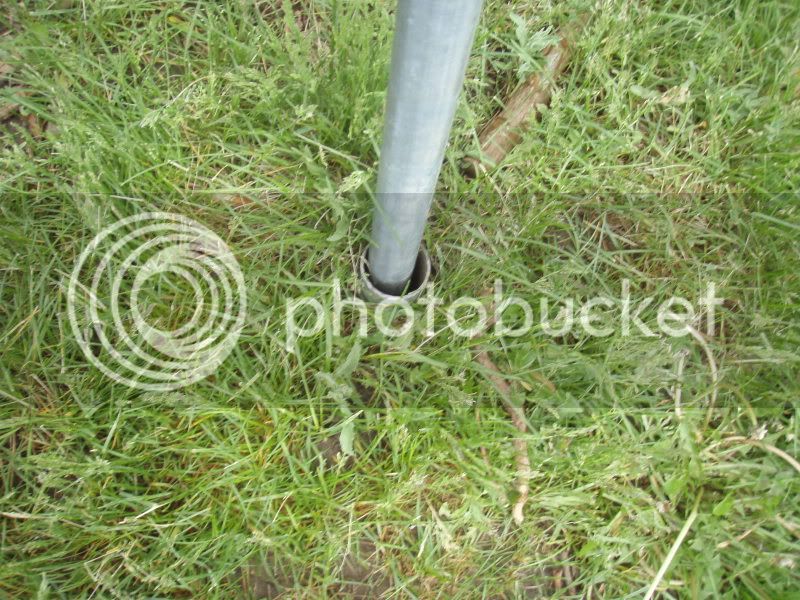
In this picture you can see what makes the design truly removable. I scrounged some parts from an old chain link fence and as it turns out the horizontal top bar of a fence fits nicely inside the vertical piece. I used a post driver to drive the larger diameter piece into the ground about 4-5 inches at a time. I would then pull the piece back out, clear out the soil and go at it again until the piece was even with the ground. This essentially drilled a hole about 3' deep that the outer piece fit into without sticking up. The most important part here is to get an angle of about 10 deg outward.
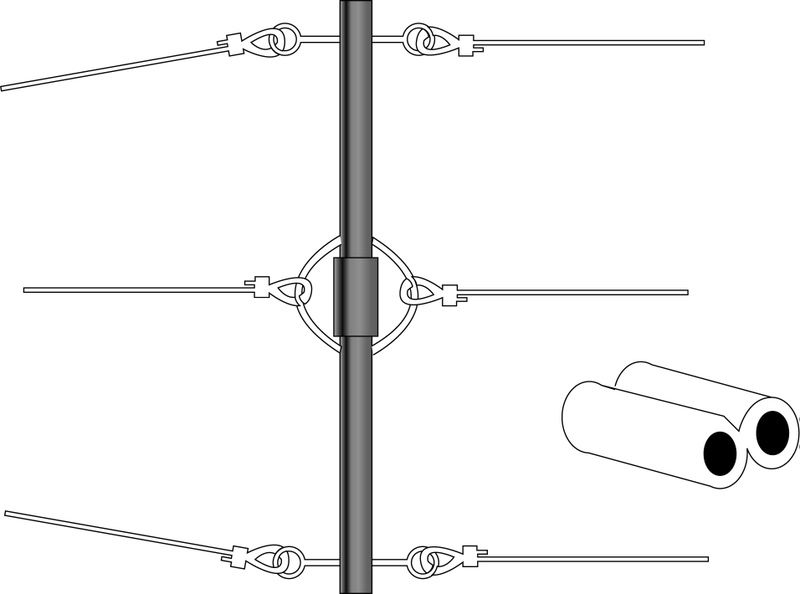
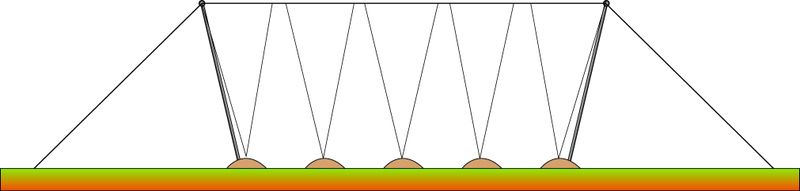
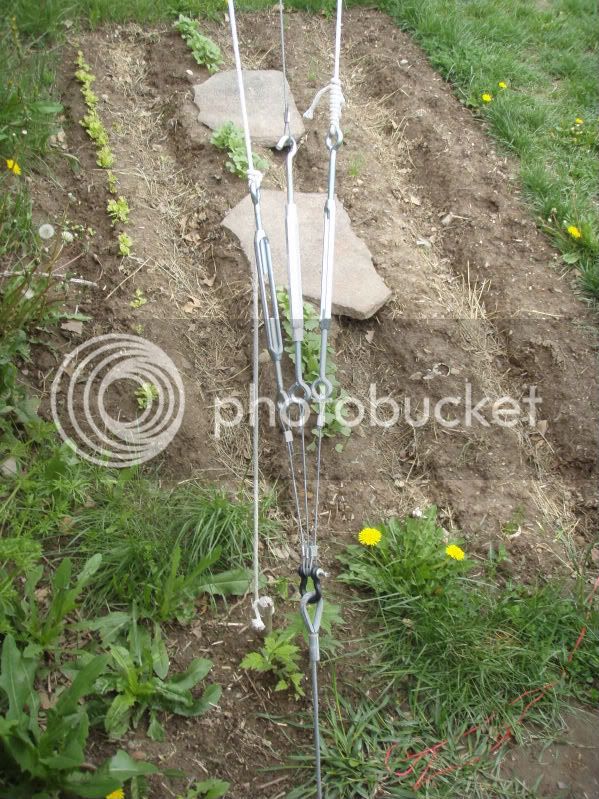
The vertical (narrower) piece was then inserted into this base. At the top of each I used a T-joint from the plumbing store to affix a "T" at the top of each. All of the rigging had to be done on the ground and then flew up. For all of the cable I used a small piece (I forget the actual name) that resembles a pair of binoculars. These parts are super cheap and you impact them with a hammer to crimp them on the cable creating loops in the ends.
This is the basic side view of the trellis, it looks pretty standard but there are some good details. I grew 10 separate plants on this trellis. I think the vertical dimension is somewhere in the neighborhood of 18', so I wanted it to come down when not needed.
This is the plan view. There is a swath of grass between the two hop beds, it is a nice place to stroll and water from when the vines are 18' tall. The first year I used a length of small gauge cable from the hardware store to run down the center of the structure as a backbone. Although the cable backbone worked well, this year I am replacing all of the others, which were cotton, with cable. I had to periodically tighten them throughout the year.
In this picture you can see what makes the design truly removable. I scrounged some parts from an old chain link fence and as it turns out the horizontal top bar of a fence fits nicely inside the vertical piece. I used a post driver to drive the larger diameter piece into the ground about 4-5 inches at a time. I would then pull the piece back out, clear out the soil and go at it again until the piece was even with the ground. This essentially drilled a hole about 3' deep that the outer piece fit into without sticking up. The most important part here is to get an angle of about 10 deg outward.
The vertical (narrower) piece was then inserted into this base. At the top of each I used a T-joint from the plumbing store to affix a "T" at the top of each. All of the rigging had to be done on the ground and then flew up. For all of the cable I used a small piece (I forget the actual name) that resembles a pair of binoculars. These parts are super cheap and you impact them with a hammer to crimp them on the cable creating loops in the ends.


") Nice job. :rockin:
Nice job. :rockin: