jprice
Well-Known Member
Well, here goes nothing. Building a Brutus 10 system mostly based off of Lonnie Mac's plans in the back issue of BYO. Making some minor adjustments in my rig some for cost and some for convenience. I have been compiling parts over the last 4 months, it's a lot of money to shell out all at once.
Welder:Wife found a bunch of Harbor Freight coupons in her normal Sunday Morning routine and I ended up getting this guy for $89!http://www.harborfreight.com/welding/mig-flux-welders/90-amp-flux-wire-welder-68887-8494.html
Plans: http://byo.com/store/byo-special-issues/build-brutus-10-plans
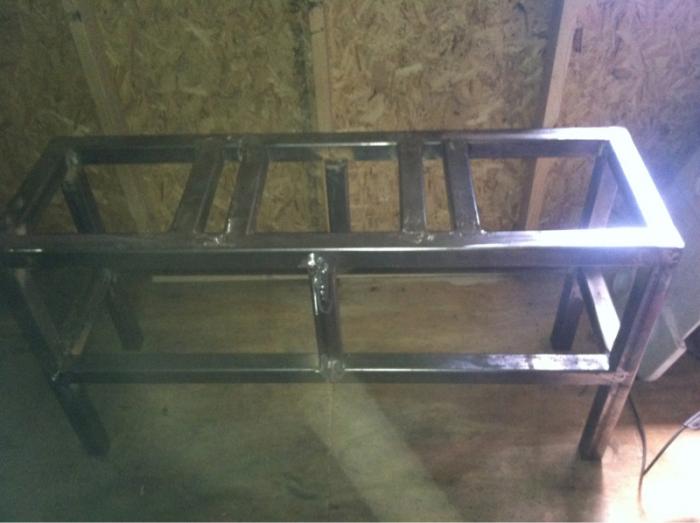
Frame: $75
Decided to make this out of 2x2 12gauge steel instead of Lonnie's frame of 2x2 stainless(saved about $400) Fazzio's in Glassboro, NJ is the ****.
http://metals.shopjfi.com/catalog.aspx?d=Tube&Pipe&c=Steel&s=SquareTube
Burners/pilots: $175
Bought the same burners as in the BYO issue from Top Food Service and they also sell pilots that screw right in for 5 bucks each, IMO it was cheaper/easier than drilling out square plugs.
Burners: http://www.topfoodservice.com/Merch..._Code=KECABJ001&Product_Count=&Category_Code=
Pilots: http://www.topfoodservice.com/Merch...een=PROD&Product_Code=KECAP002&Category_Code=
Gas supply: $160 from Home Depot. Ok, it was my first time welding, and although I considered Lonnie's design of the "Gas Beam" I didn't have the guts to do it and found it safer to use gas pipe to make a manifold.
Solenoid Gas Valves: $70
Don't over think these, if they open with 120v and they use 1/2" fittings they will work.
http://www.ebay.com/itm/1-2-Brass-E...n_0&hash=item43b0091a21#ht_2096wt_907&afsrc=1
Temperature Controllers: $90 As much as I wanted to just buy the $20 ones from amazon or ebay that I used in my Keezer built, I paid for the name brand and it didn't hurt too bad.
http://www.dwyer-inst.com/Product/T...Switches/DigitalPanelMount/SeriesTS2/Ordering
Temperature Probes and Thermowells: $38 Bought the TS-21 Probes and the TS-W Thermowells from Dwyer as well. The probes fit perfect and I plan on mounting these in the Stainless T coming off of the HLT and MT. The original Brutus 10 plans had 1 probe mounted only on the MT, but logically, it makes sense to do the same on the HLT.
http://www.dwyer-inst.com/Product/Temperature/TemperatureSensors/SeriesTS-PROBES/Ordering
Pumps: $300 2 Chugger pumps with stainless steel heads bough from BYOB (Brew your own bottle) in Haddon Heights NJ. Brett, the owner is an awesome guy that really supports the local home brewing scene in the South Jersey/Philly area, anything I can buy locally from him saves me the aggravation of waiting for shipping and helps support his business.
http://brewyourownbottle.com/
Pots: Keggles. Find some kegs + cut the tops off = Brew Pots! I guess if you want to, Bayou kettles seem like the best option, but ill save my $300 and use some keggles.
Enclosure/panel $80 Lonnie calls for a sheet of stainless 8.5x10, but I found this 12x8x8 lockable indoor/outdoor steel project box on ebay similar to what Kal uses in his electric brewery for a reasonable price.
http://www.ebay.com/itm/LOCKABLE-KE...LH_DefaultDomain_0&hash=item5d24793866Threads
Fittings $380
http://www.bargainfittings.com
Plate chiller $180
B3-23a 40plates
http://www.dudadiesel.com/choose_item.php?id=HX2340
Well that's the parts list so far, hope this helps some guys that might be building one of their own! My goal is to have this finished by Labor day as I have acquired about 70% of the parts so far and welded the stand. Pic's will start coming in the next few days, stay tuned!


