Moving to BREW IN A BASKET

Homebrew Talk - Beer, Wine, Mead, & Cider Brewing Discussion Forum

Help Support Homebrew Talk - Beer, Wine, Mead, & Cider Brewing Discussion Forum:

This site may earn a commission from merchant affiliate links, including eBay, Amazon, and others.
If you fire the burner while the grain is in the basket you would certainly risk scorching. Of course, it depends on how hot you fire, etc. In my early BIAB days I did some direct firing. I found that the grain really insulated the wort from the heat. It would get very stratified very fast.

If you are planning to create a RIMS setup, you shouldn't need to fire the burner to control temp. Maybe you are thinking for temperature changes?

This isn't really my wheelhouse, but I would suggest some feet on the basket to get a little circulation below the basket. I would also suggest you figure out how to recirc around the basket if you are going to direct fire so that you can help the wort circulate better as you heat it.
Thanks Neo, good points. I will need the burner only initially, before I get a RIMS temperature controller, to keep mash temperature constant by adding heat minimally, but I think it is prudent to have some feet on the basket, at least 1/2 inch. Since the basket bottom is flat, and the Keggle bottom is concave, the intersection is a circle.....so there is a gap (I'm approximating 1 inch) below the basket. However it is somewhat trapped in that area. I think I can give up 1/2" basket volume and still hold the 20 lbs. of grain I want for a maximum. I need to re run those volume calculations.
 
I'd put some sort of feet on the bottom of the basket, first, to prevent scorching if you accidentally leave the burner firing with the basket and grain in, and second, to prevent dead areas when the RIMS is pumping. If the flow from the far side of the basket is too restricted, it might not maintain an even temperature rise across the grain body.

Absolutely no experience with the Hop Rocket or any other RIMS process unfortunately. Still a Wilser bag on a crane man with a 50L electric hot water urn as my BK. Maybe cross-post into the Electric Brewing forum where the sparkies hang out?

After looking at the Hop Rocket and its partner in crime, the RIMS Rocket, do you mean the RIMS Rocket? The Hop Rocket looks like a hopping tool with filters and no heating, while the RIMS Rocket uses the Hop Rocket body and a ULWD heater for heating? Looks like two separate devices with distinct functions. Comparing the size and shape to the traditional 1.5" or 2" tri-clamp tubes used, I wonder about the potential for dead spots within the system and the internal volume of the Rocket body versus the tri-clamp tubes. You might not be able to recover the wort inside it easily. Again, I reiterate, I have no experience with either system. I would also consider the availability and price of replacement heater elements as they can and do blow.

One thing I have heard regarding RIMS and HERMS is to position the temperature sensor for the controller just beyond the exit port, not deep into the heater unit as you can end up with stratified temperatures and no proper control. The exit port is getting the wort at the maximum temperature point and that is what is getting returned to the kettle.
This is the Blichmann HopRocket that I own. I have only used it once for hopping beer by filling it with hop leaves. Never used the heater element, so far. I hope to use this for RIMS/mash temperature control. Hoping someone has done this and can give me some tips on how to control it.
Blichmann HopRocket.JPG
 
It looks like they split the package into two since you bought it, or someone sold you a combo deal. Inlet is via the side port and outlet via the top port on the dome.

I would say you need a 1/2" female tee to go on the top unit, a 1/2" male thermowell long enough to protrude halfway into the top outlet port through the tee and a 1/2" nipple to convert the tee back to a male. That'll fix the plumbing needs. The controller will have to come from the electric brewing experts. Specs and manuals on the RIMS part of the Rocket are here https://www.blichmannengineering.com/rimsrocket.html to pass to them.
 
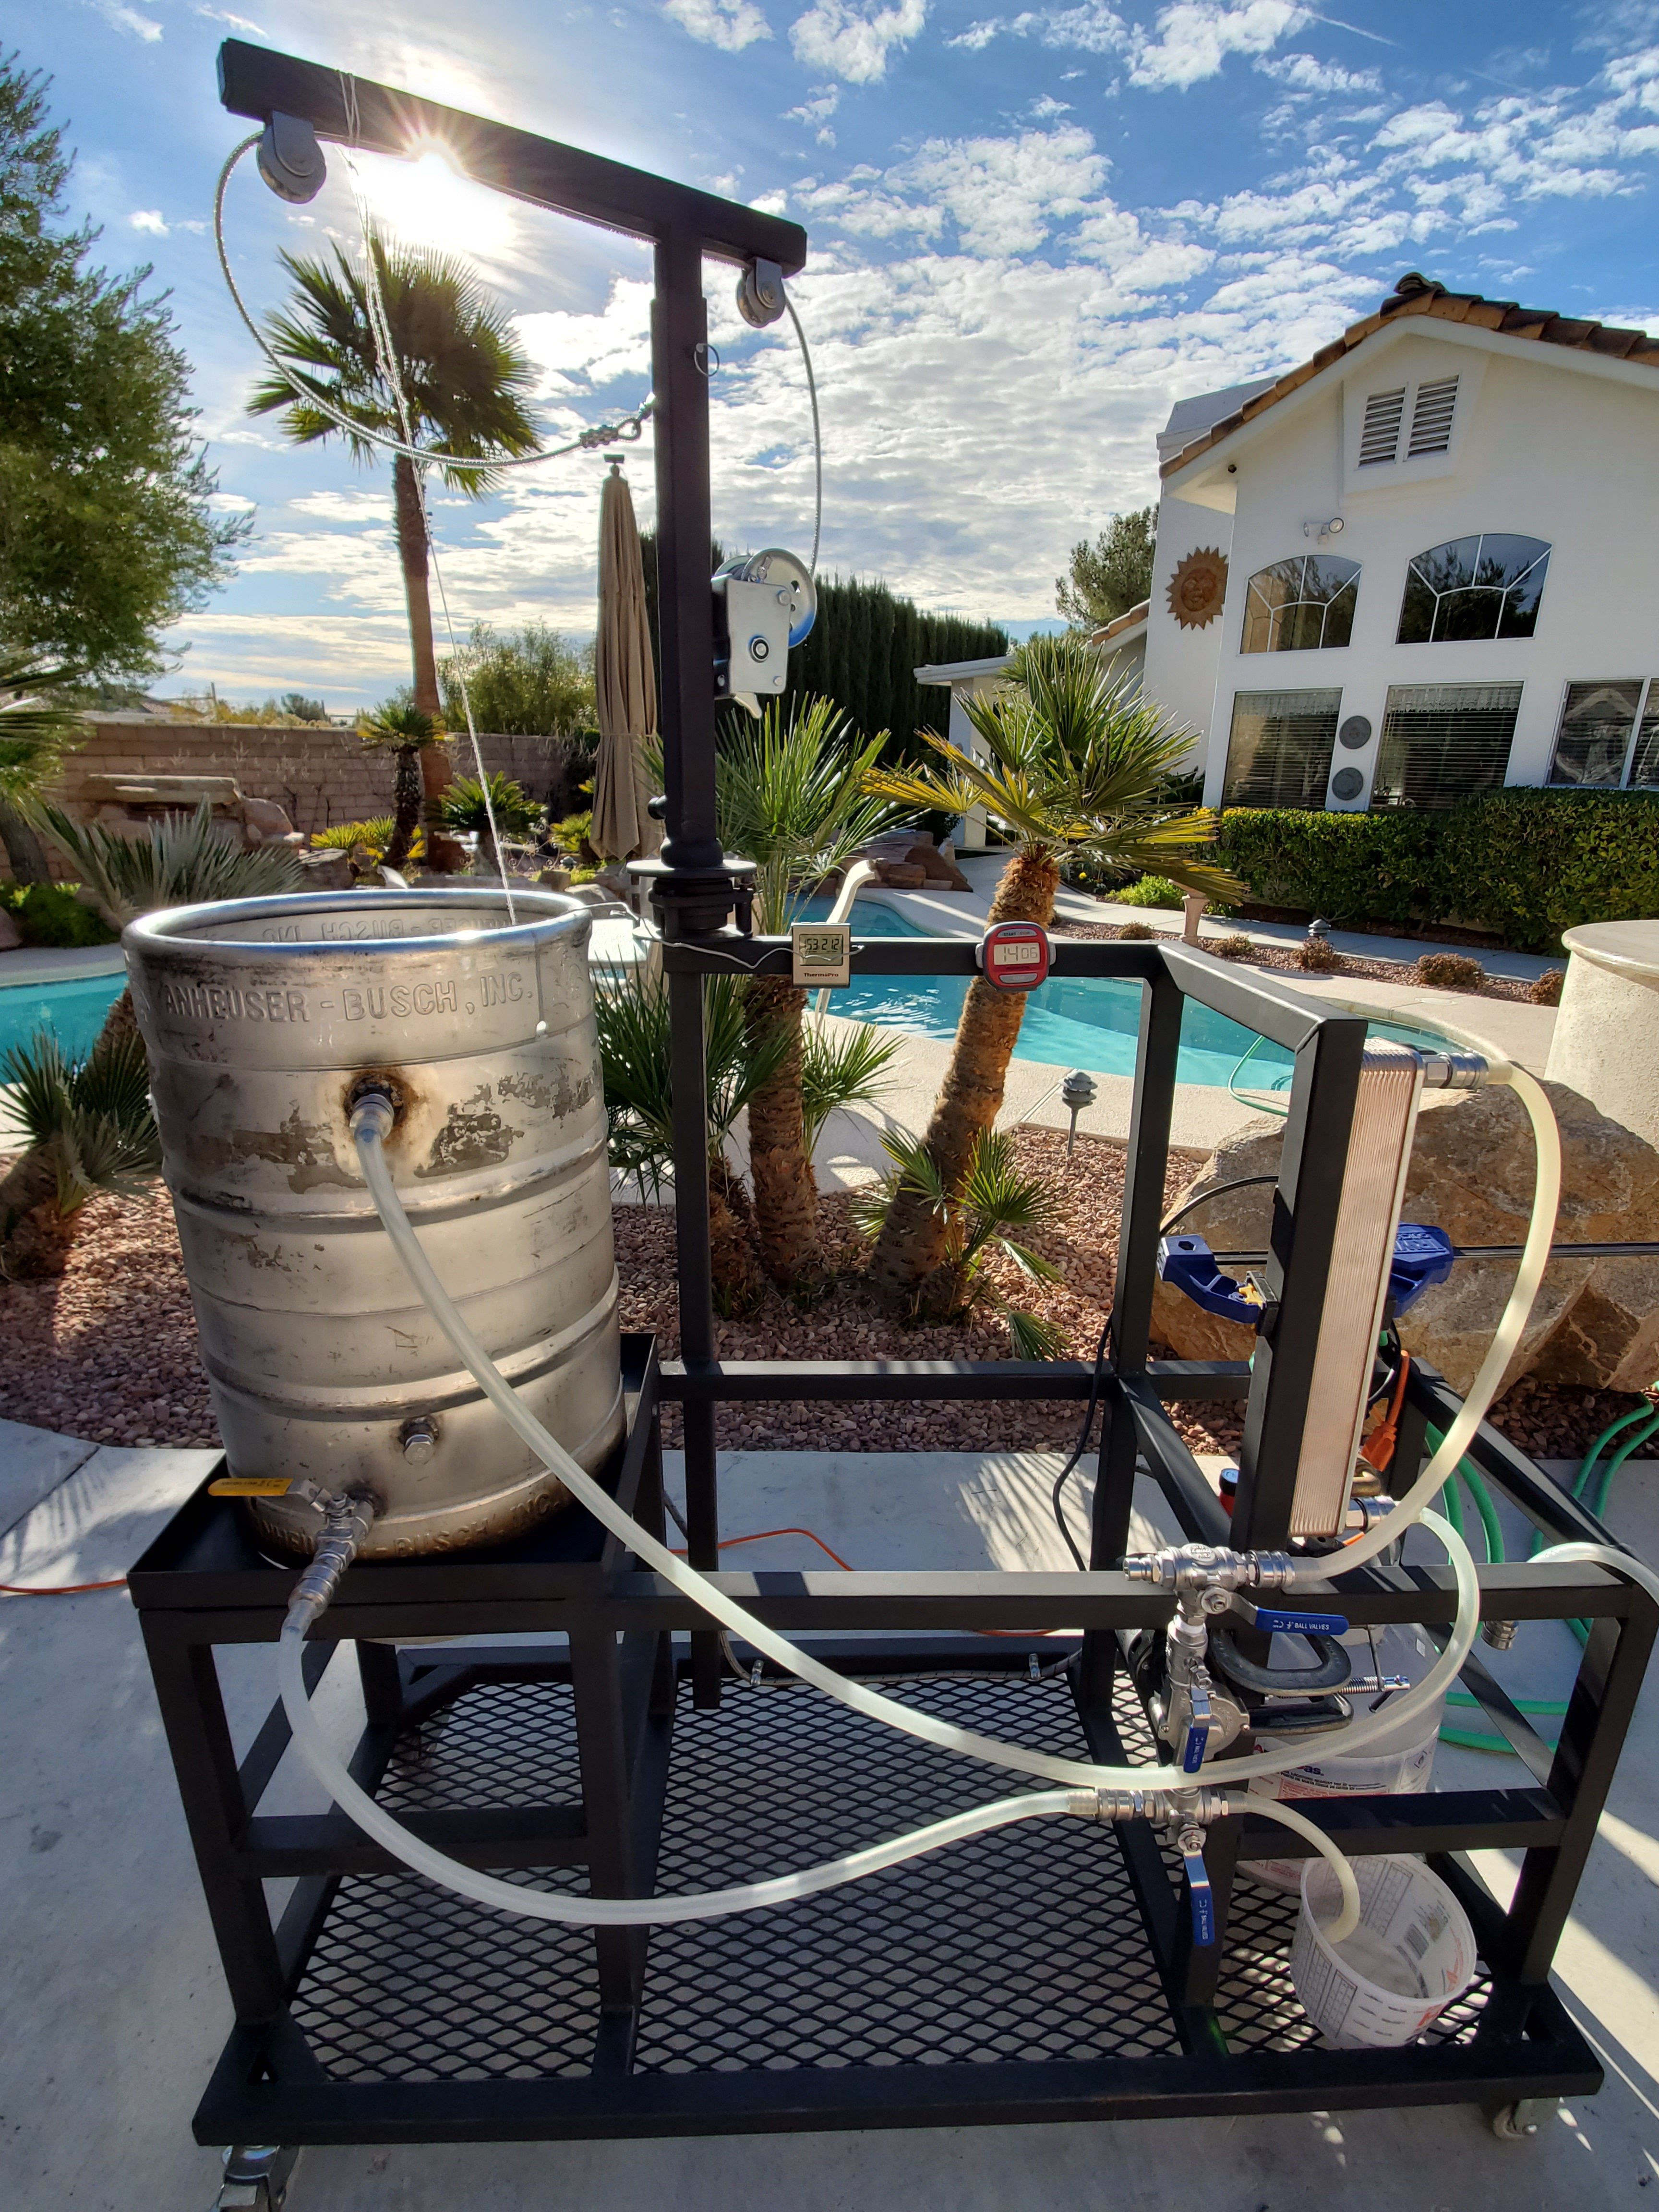
OK I've been doing other things but I'm back on this brew sculpture. Here is a mock up of my plumbing, what do you guys think? The hoses are temporary....I will trim them in length, and the hoses are connected for a recirculating mash with heat applied by the propane burner as required. I'll have a thermometer in the mash. (I'll work on using the Rocket later for adding heat....that is my long term plan) I'll do a cold water test with this soon to see if the pump primes and everything generally works as it should. (Also, note that the strainer basket will be replaced with a custom SS mesh basket). This is, I think, a pretty straightforward setup and should work OK, but I'm asking anyway since this will be the first time I've used a recirculating pump. The output of the pump is facing up to eliminate trapping bubbles. I'm wondering if the pump is far enough below the keggle, and if the chiller is in a good location. Thanks in advance for any ideas, suggestions, potential problems you see.

20200114_133952.jpg
 
Last edited:
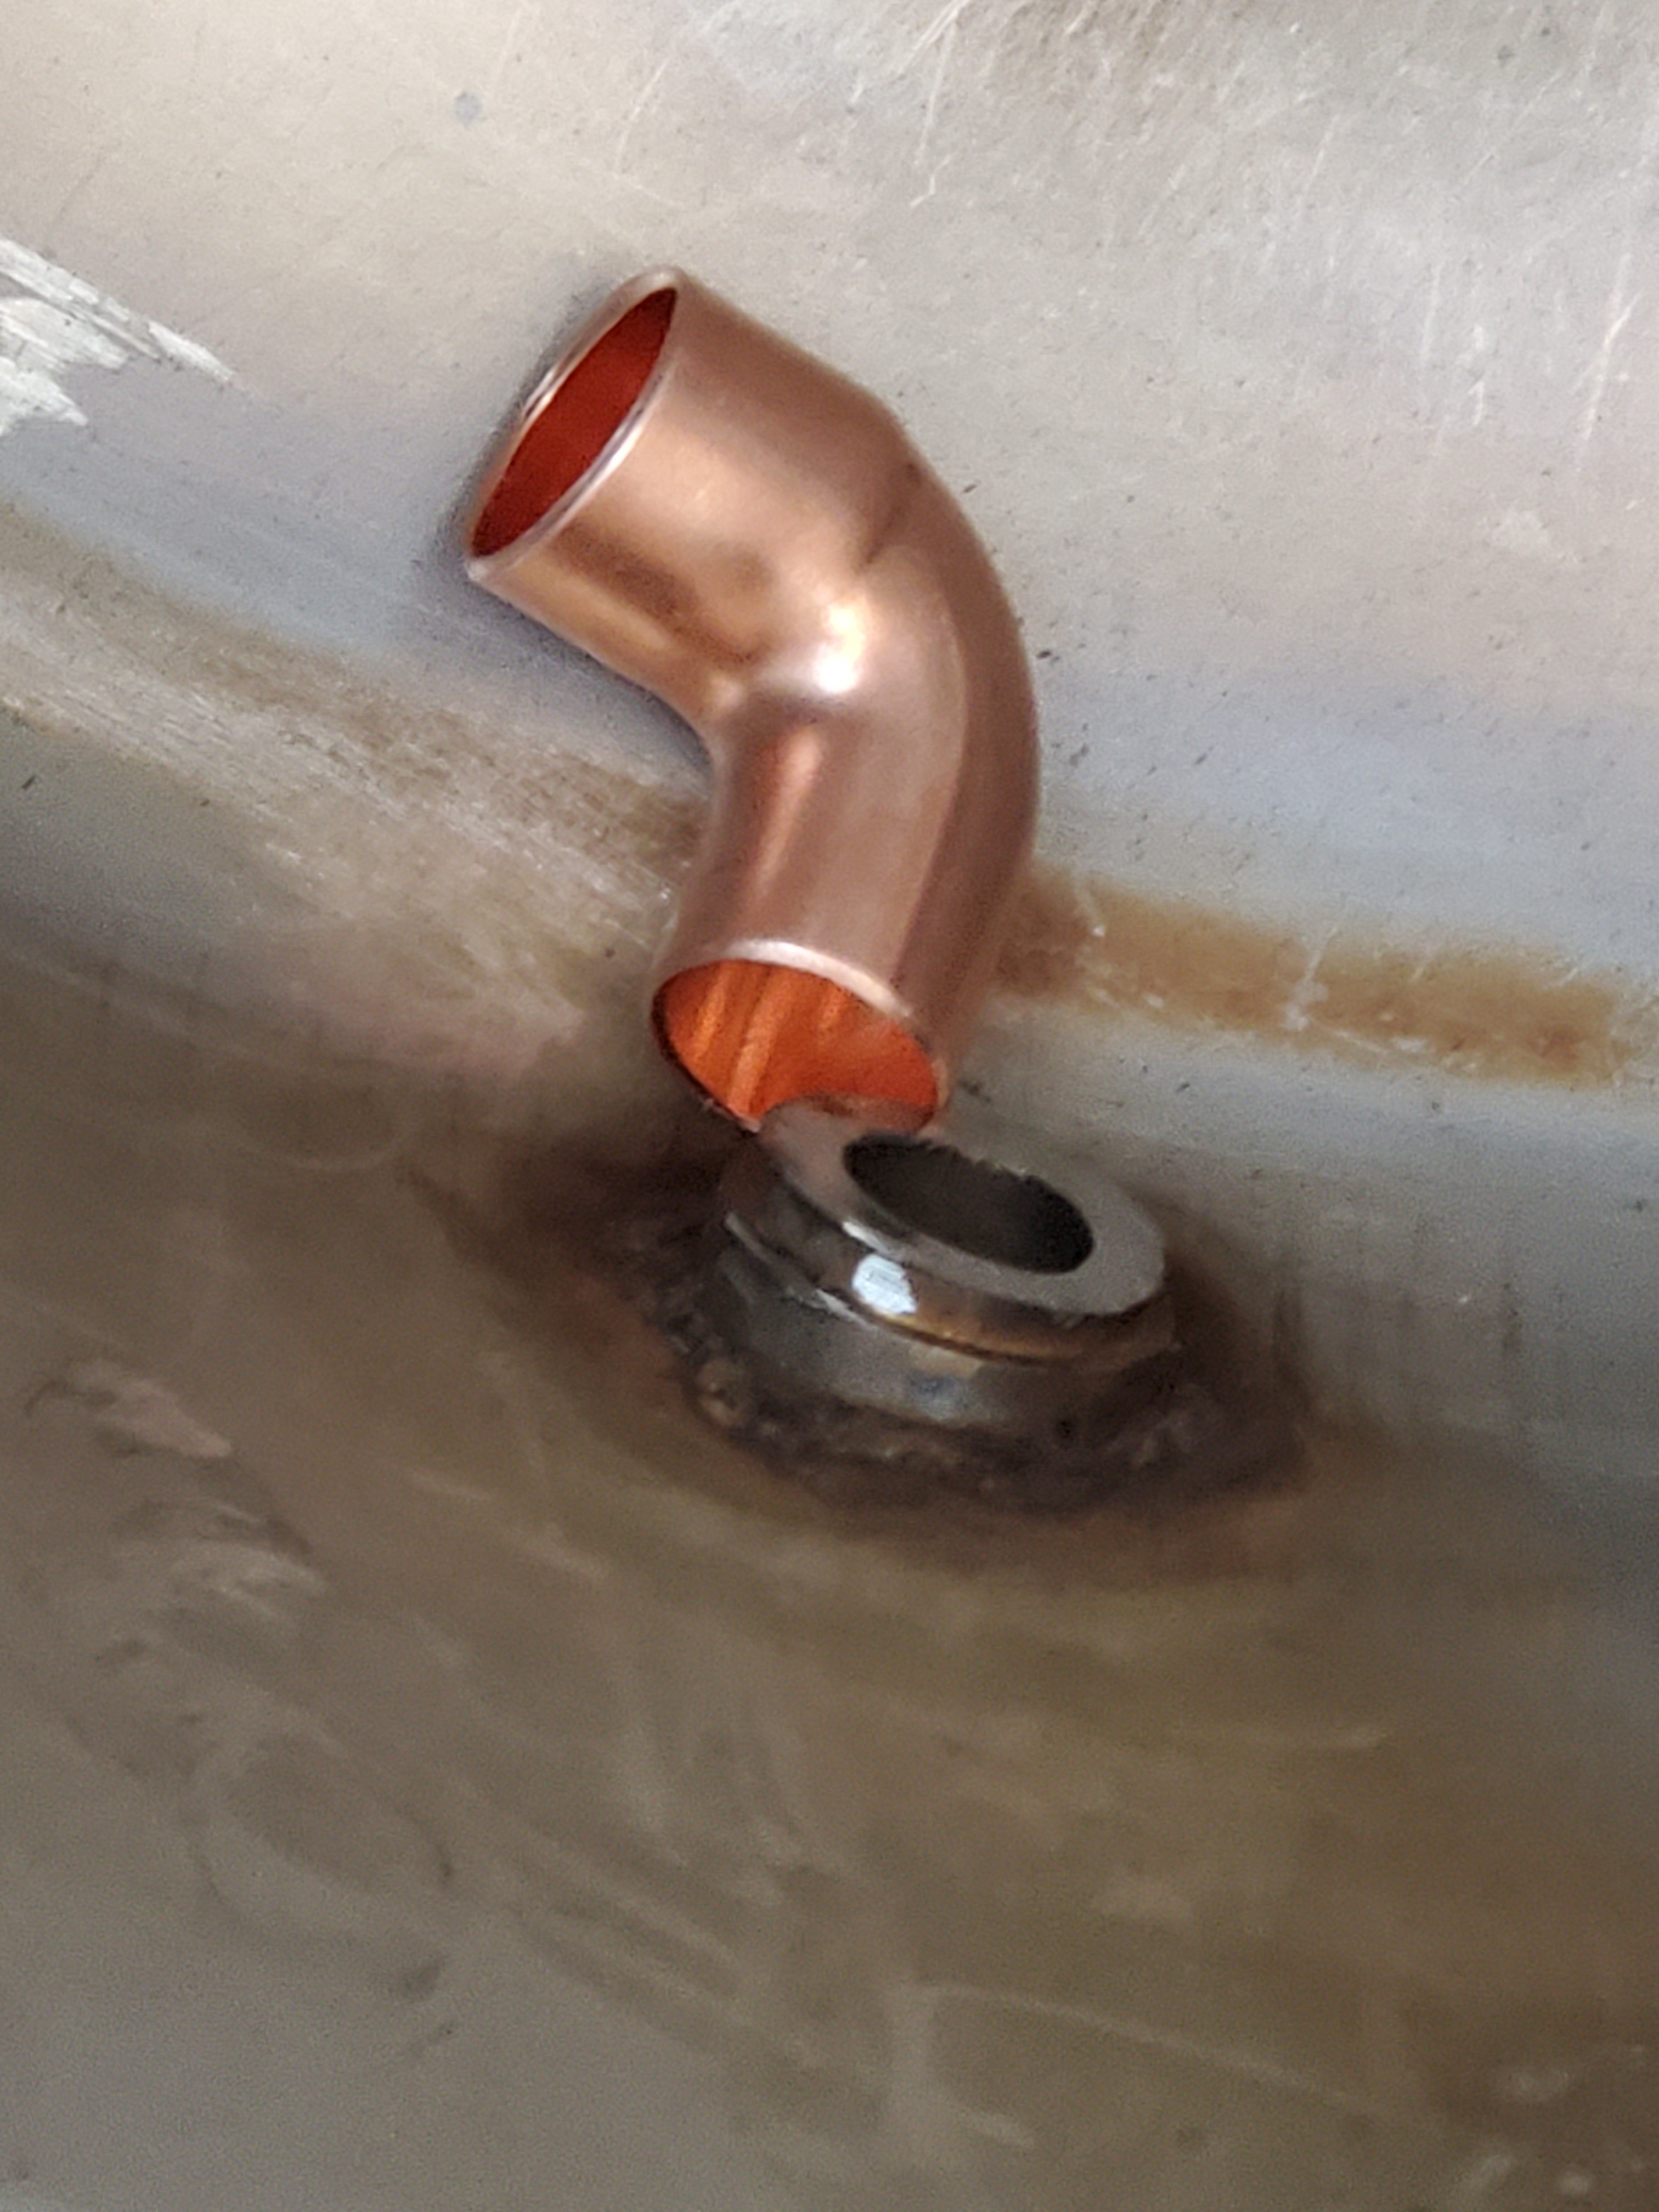
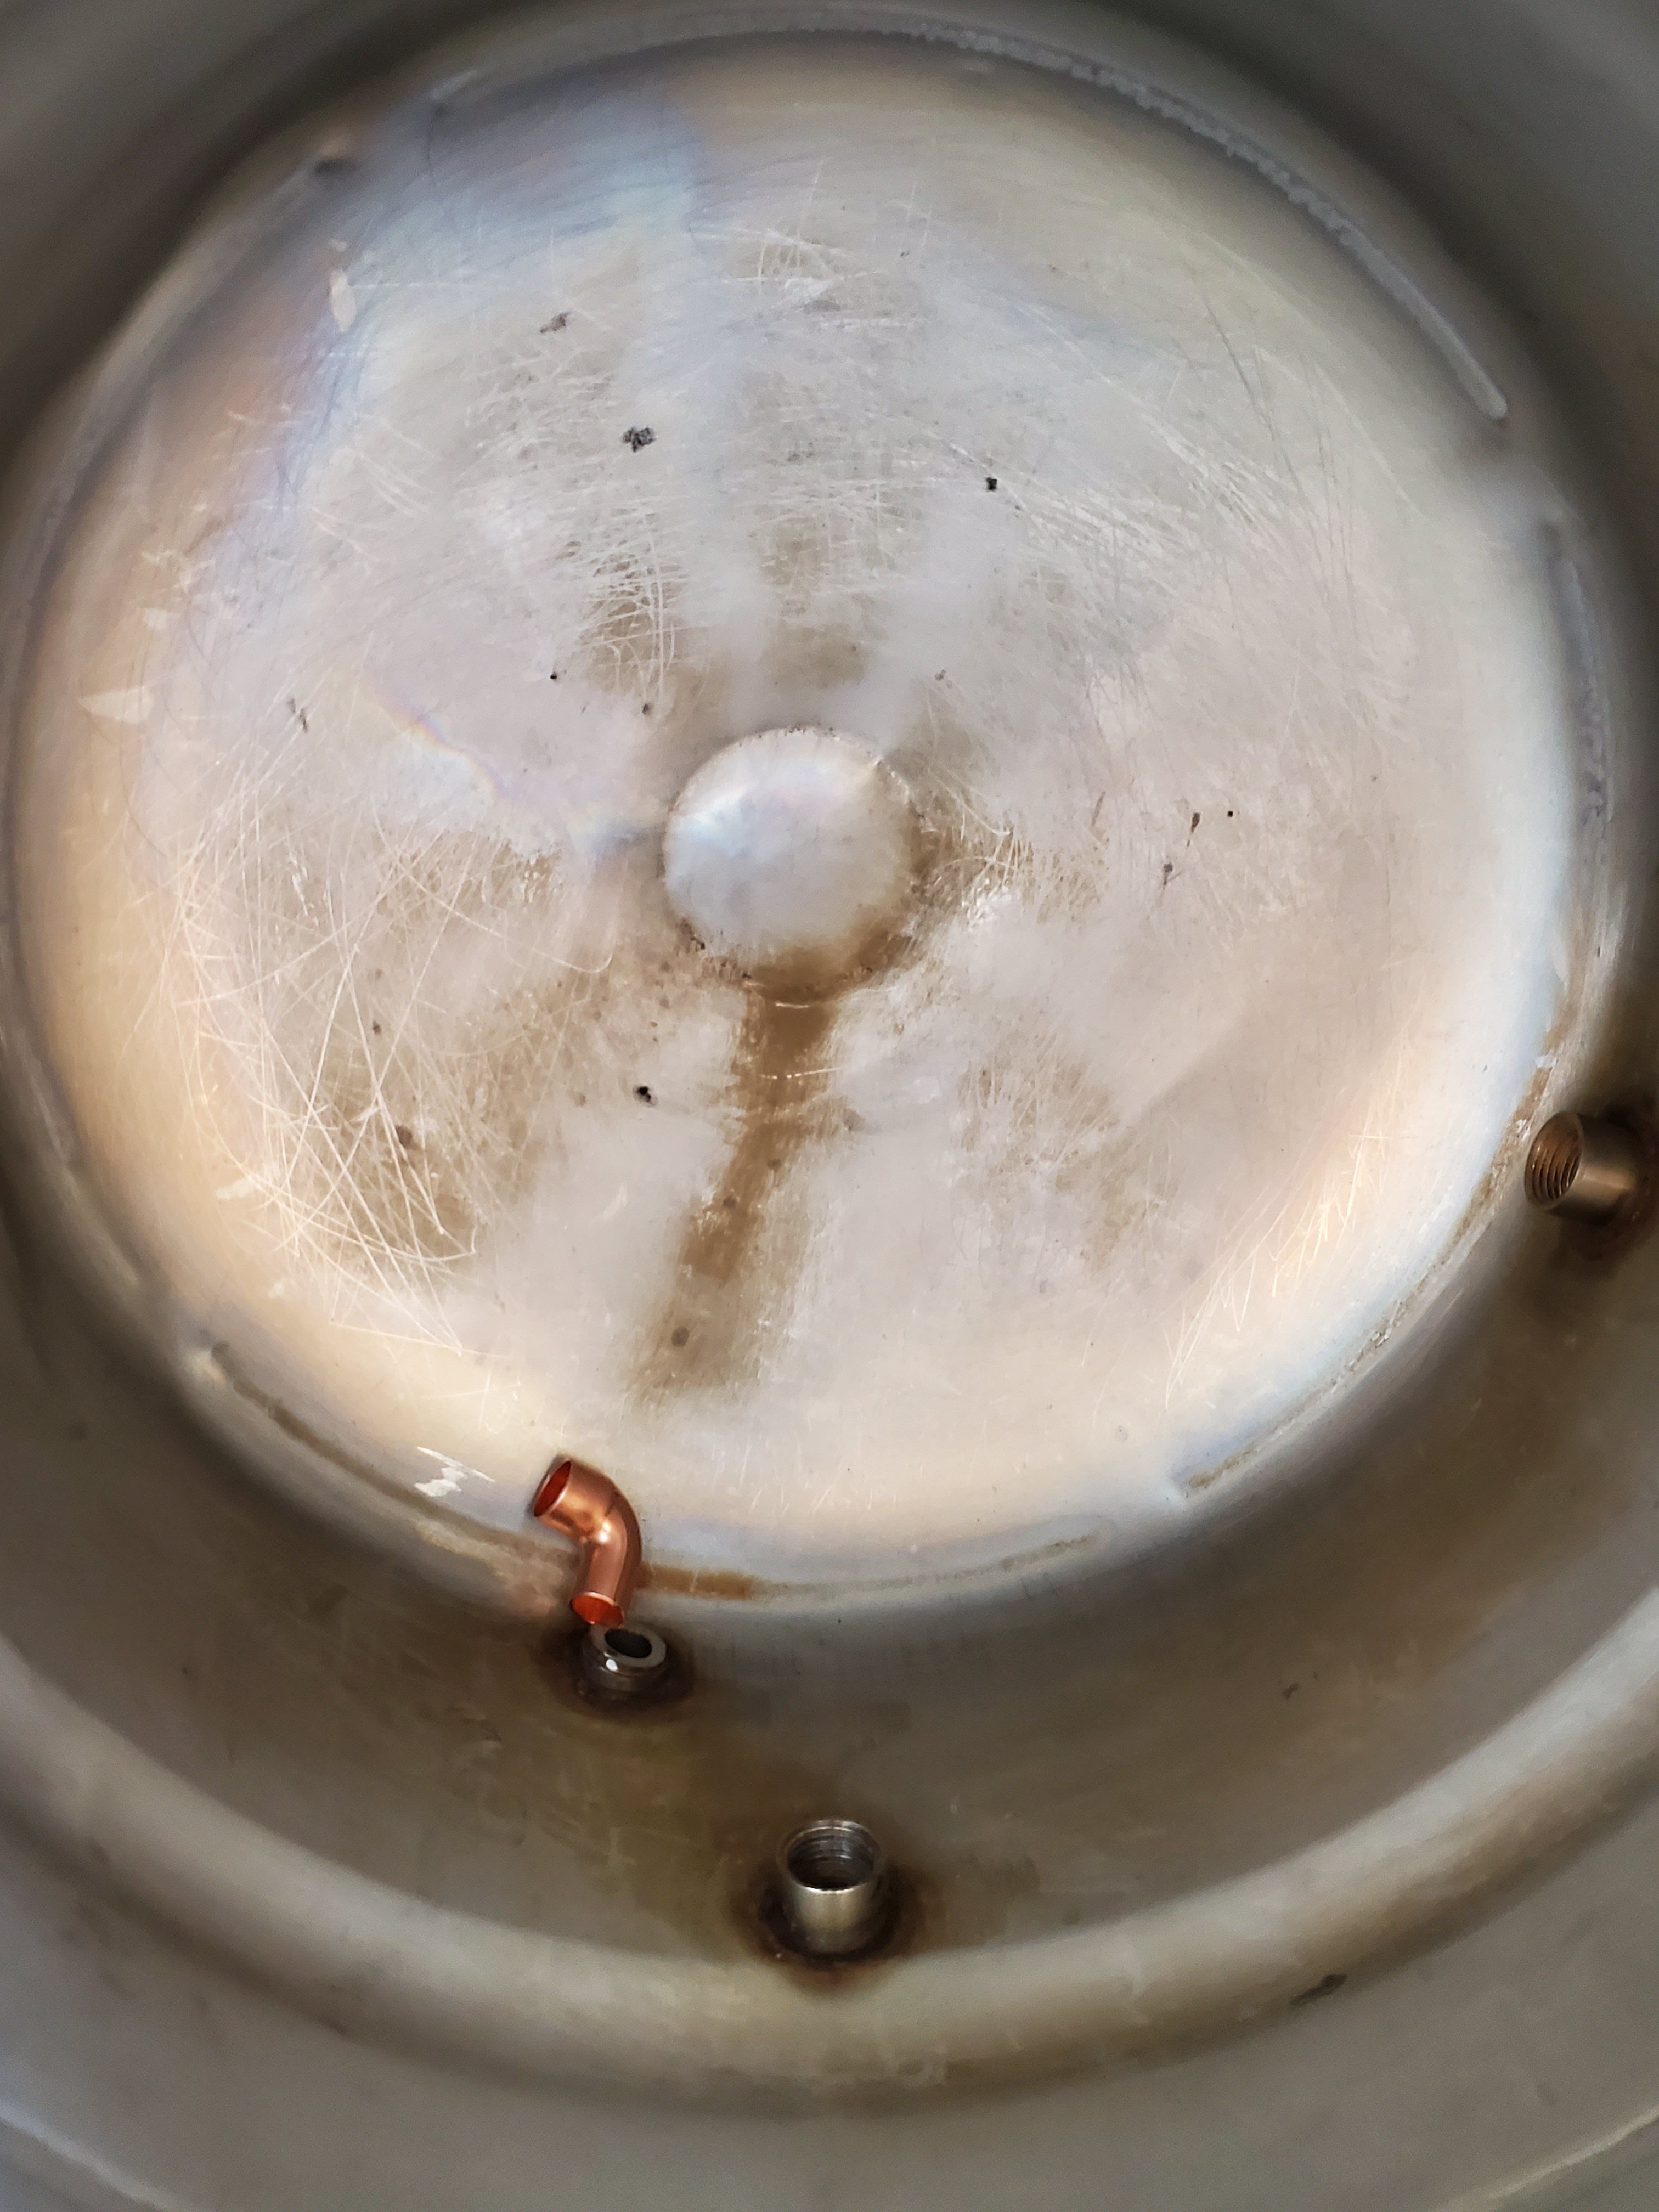
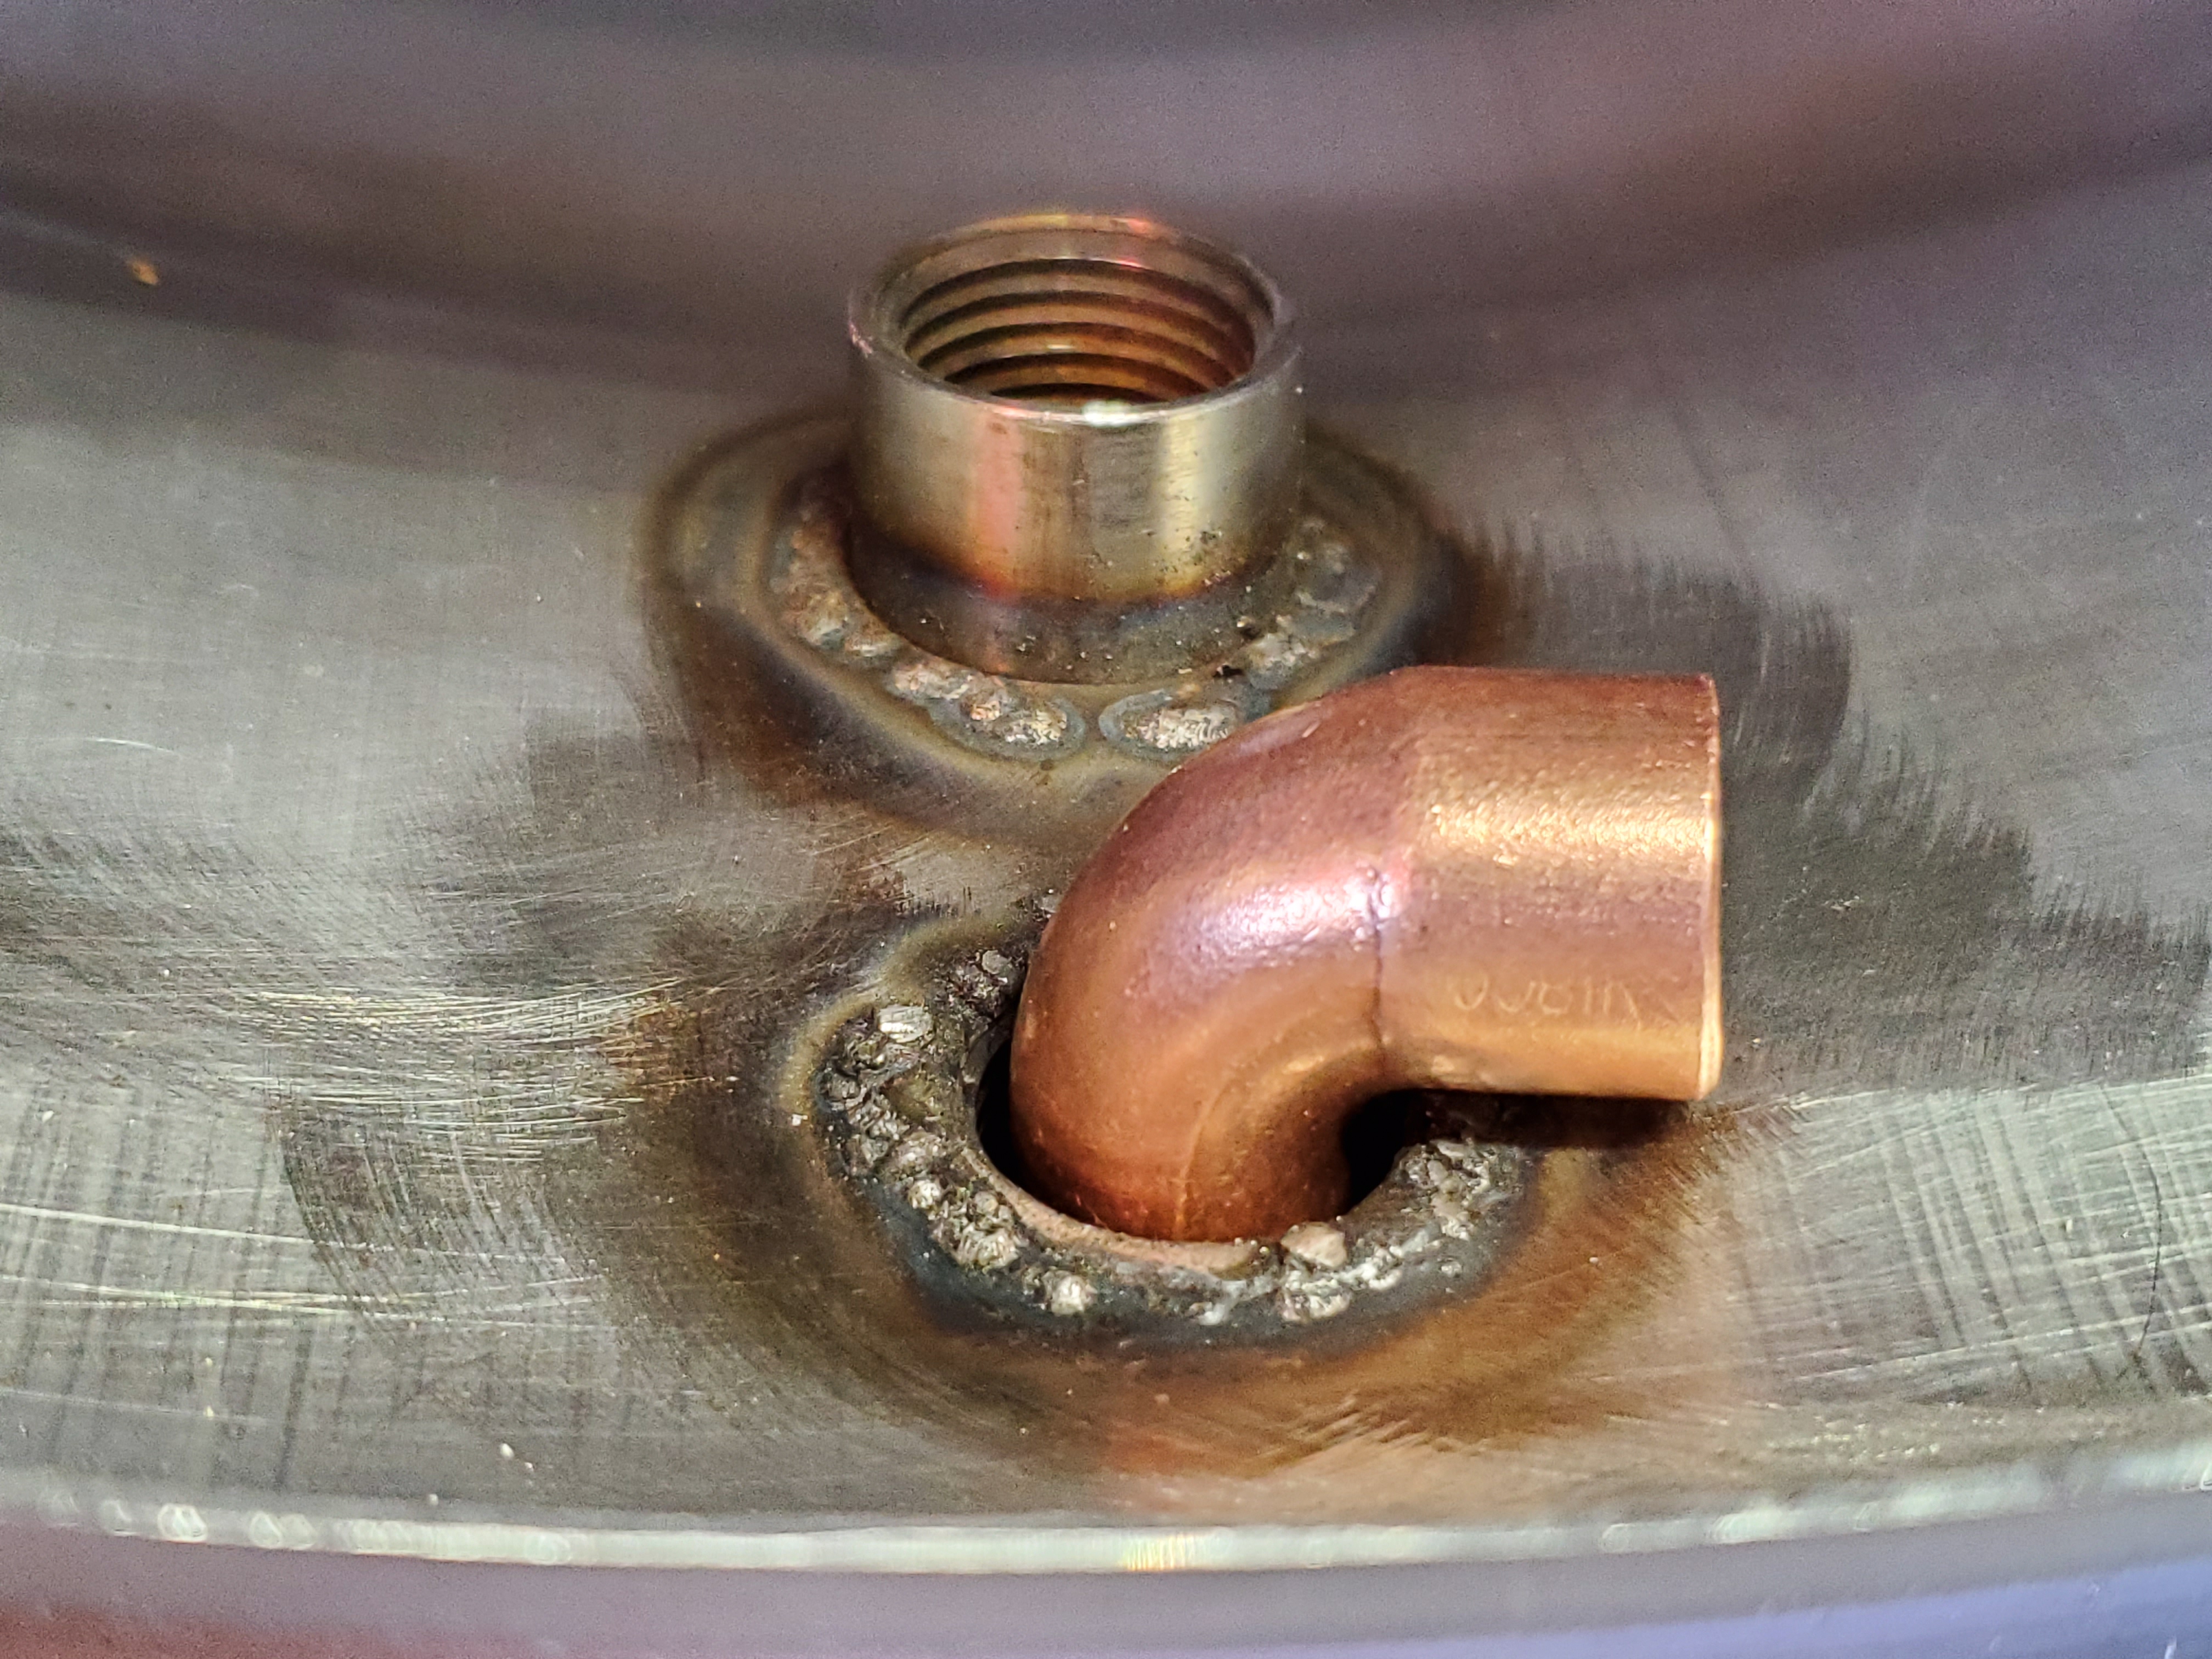
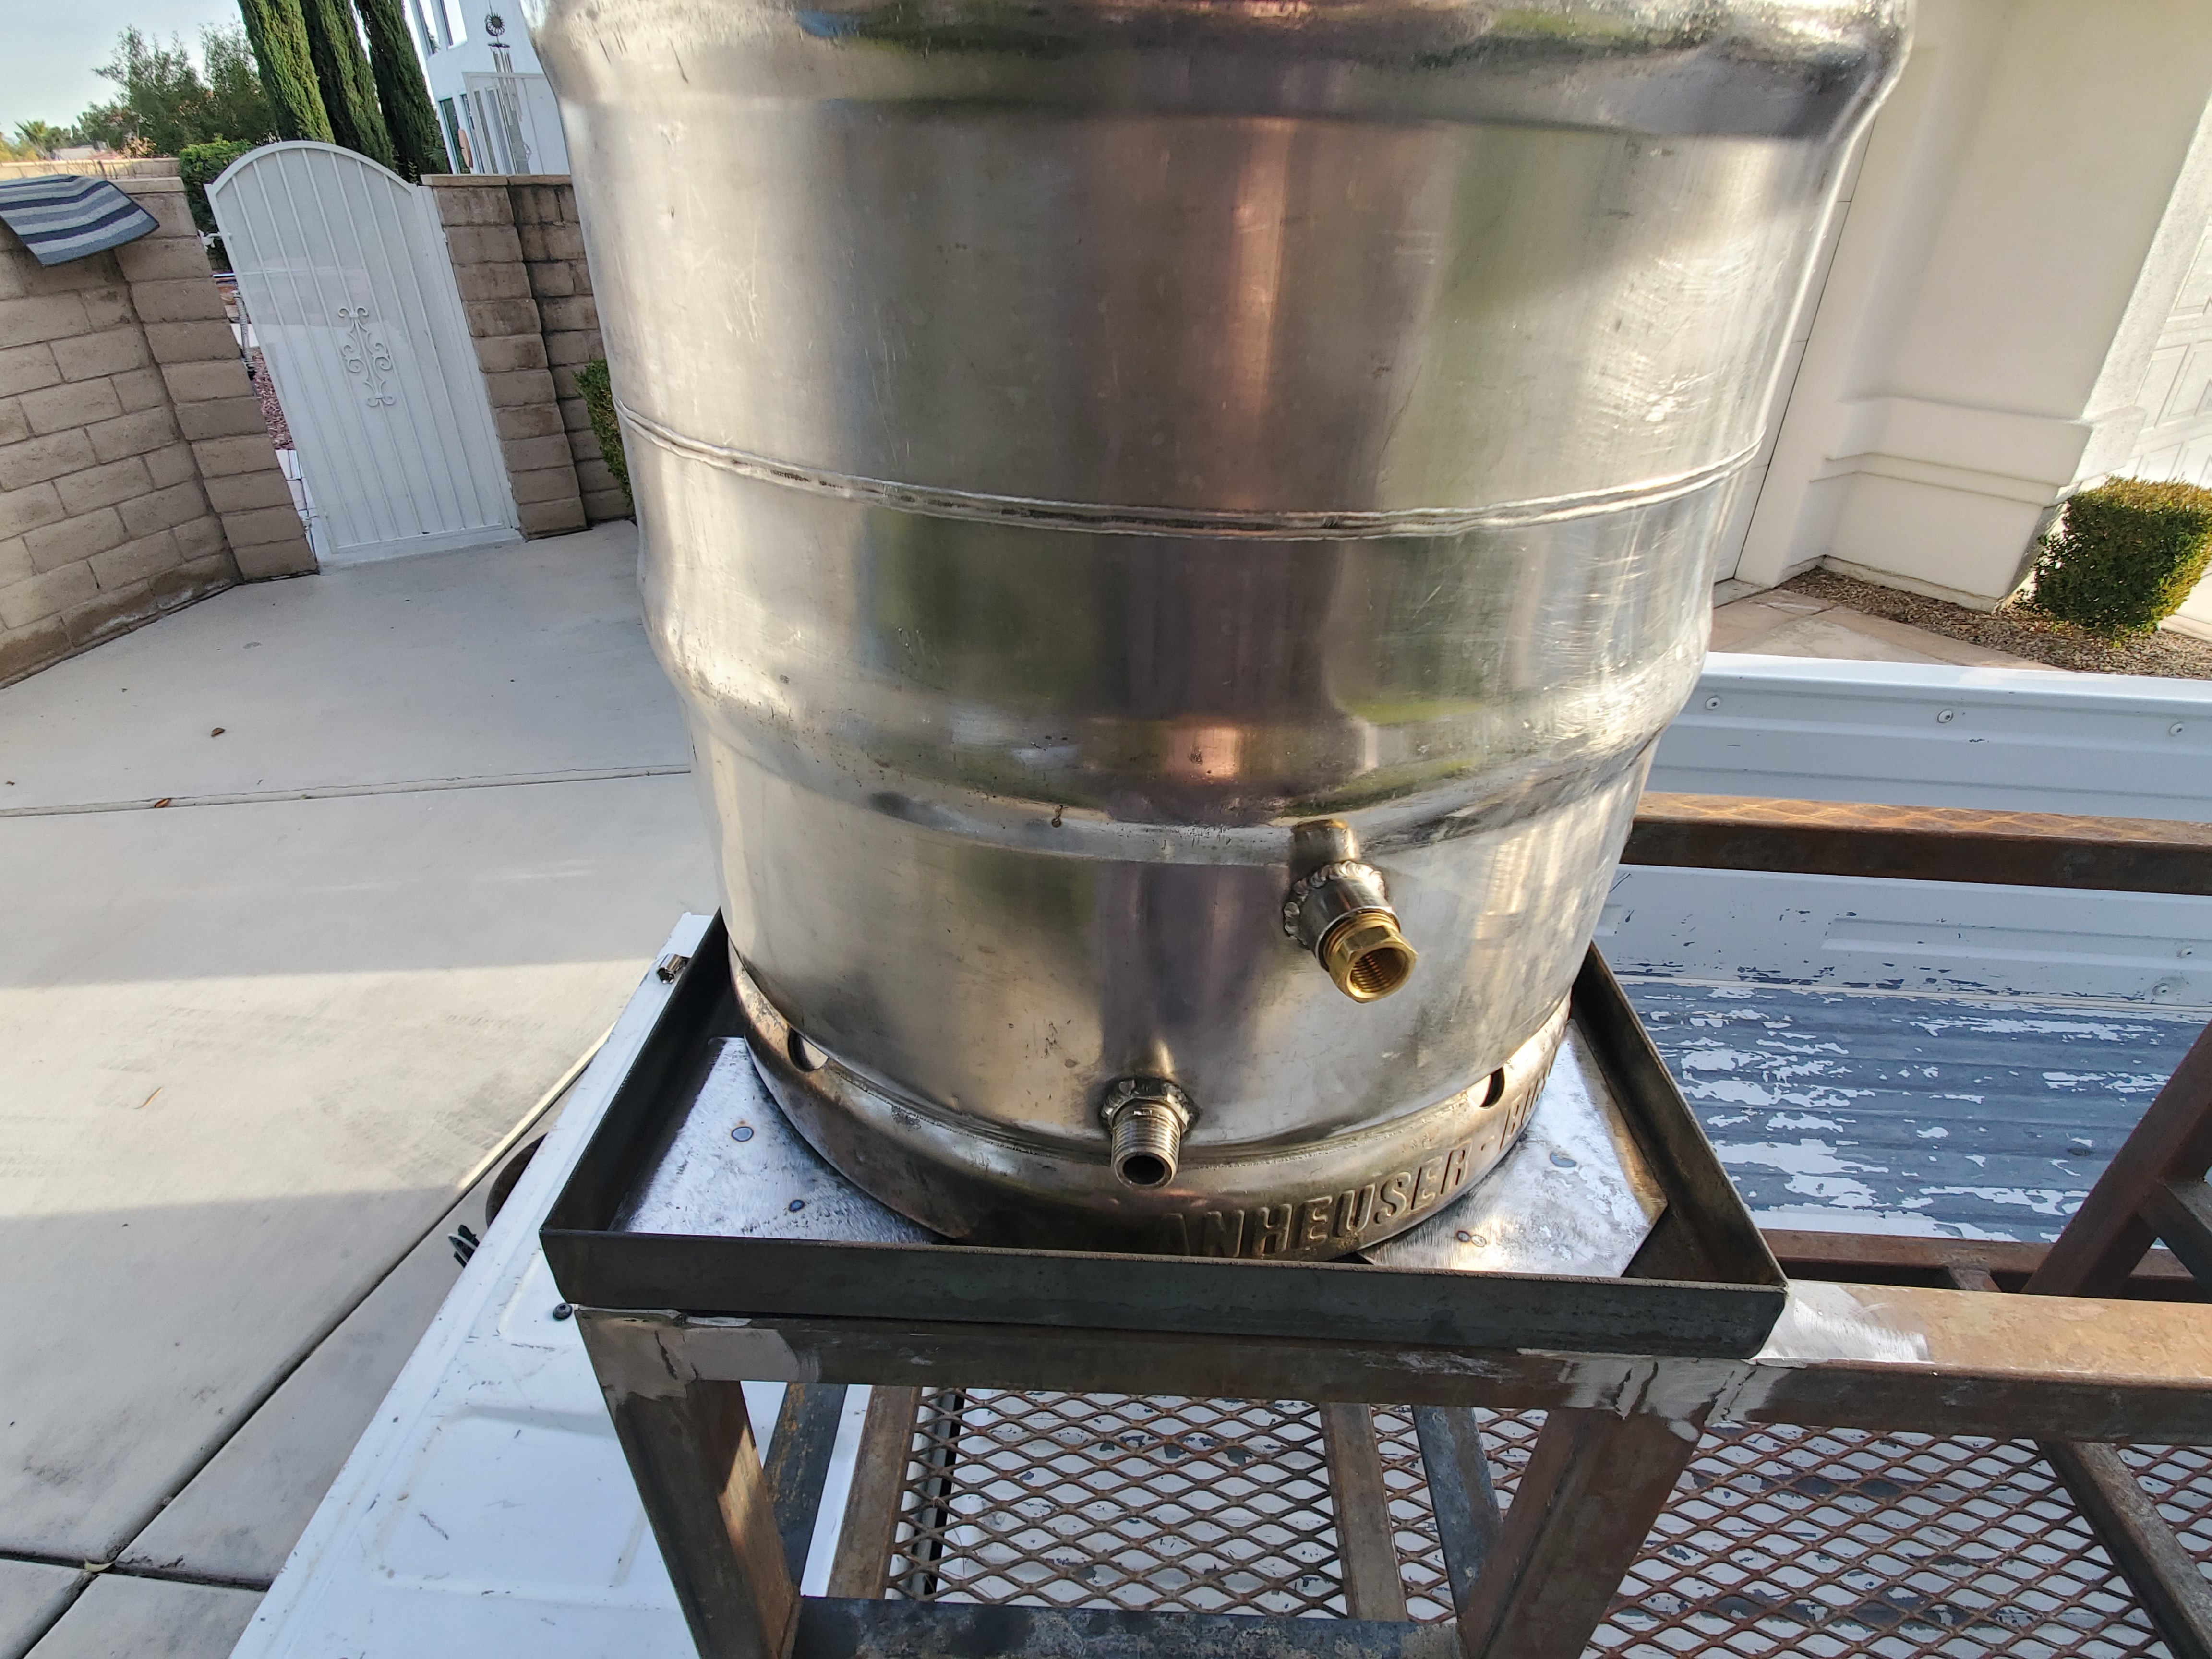
Now, on to my latest "problem". Earlier in this thread I talked about how I was going to solve my dip tube / basket interference issue. I liked the suggestion made by bruce_the_loon, and went that route, which was to solder an elbow to the drain nipple.

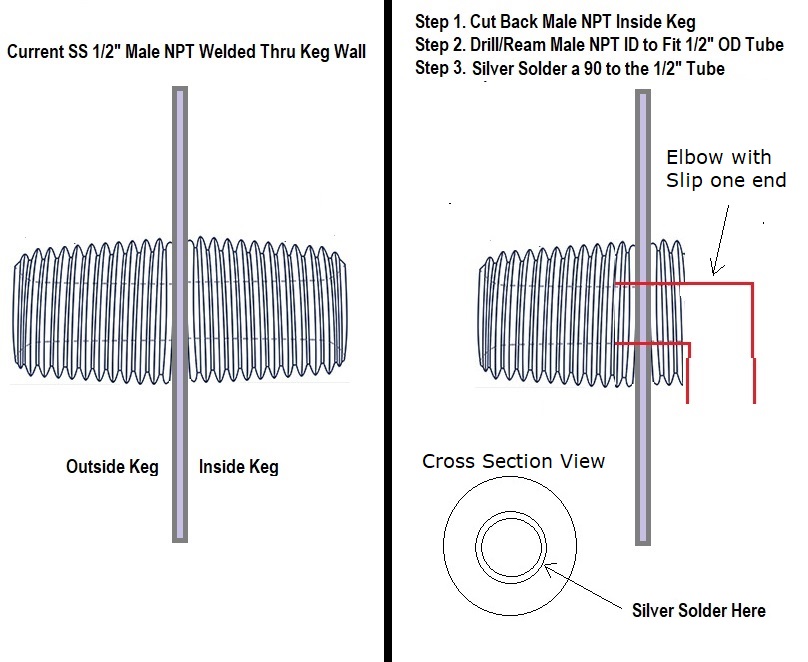
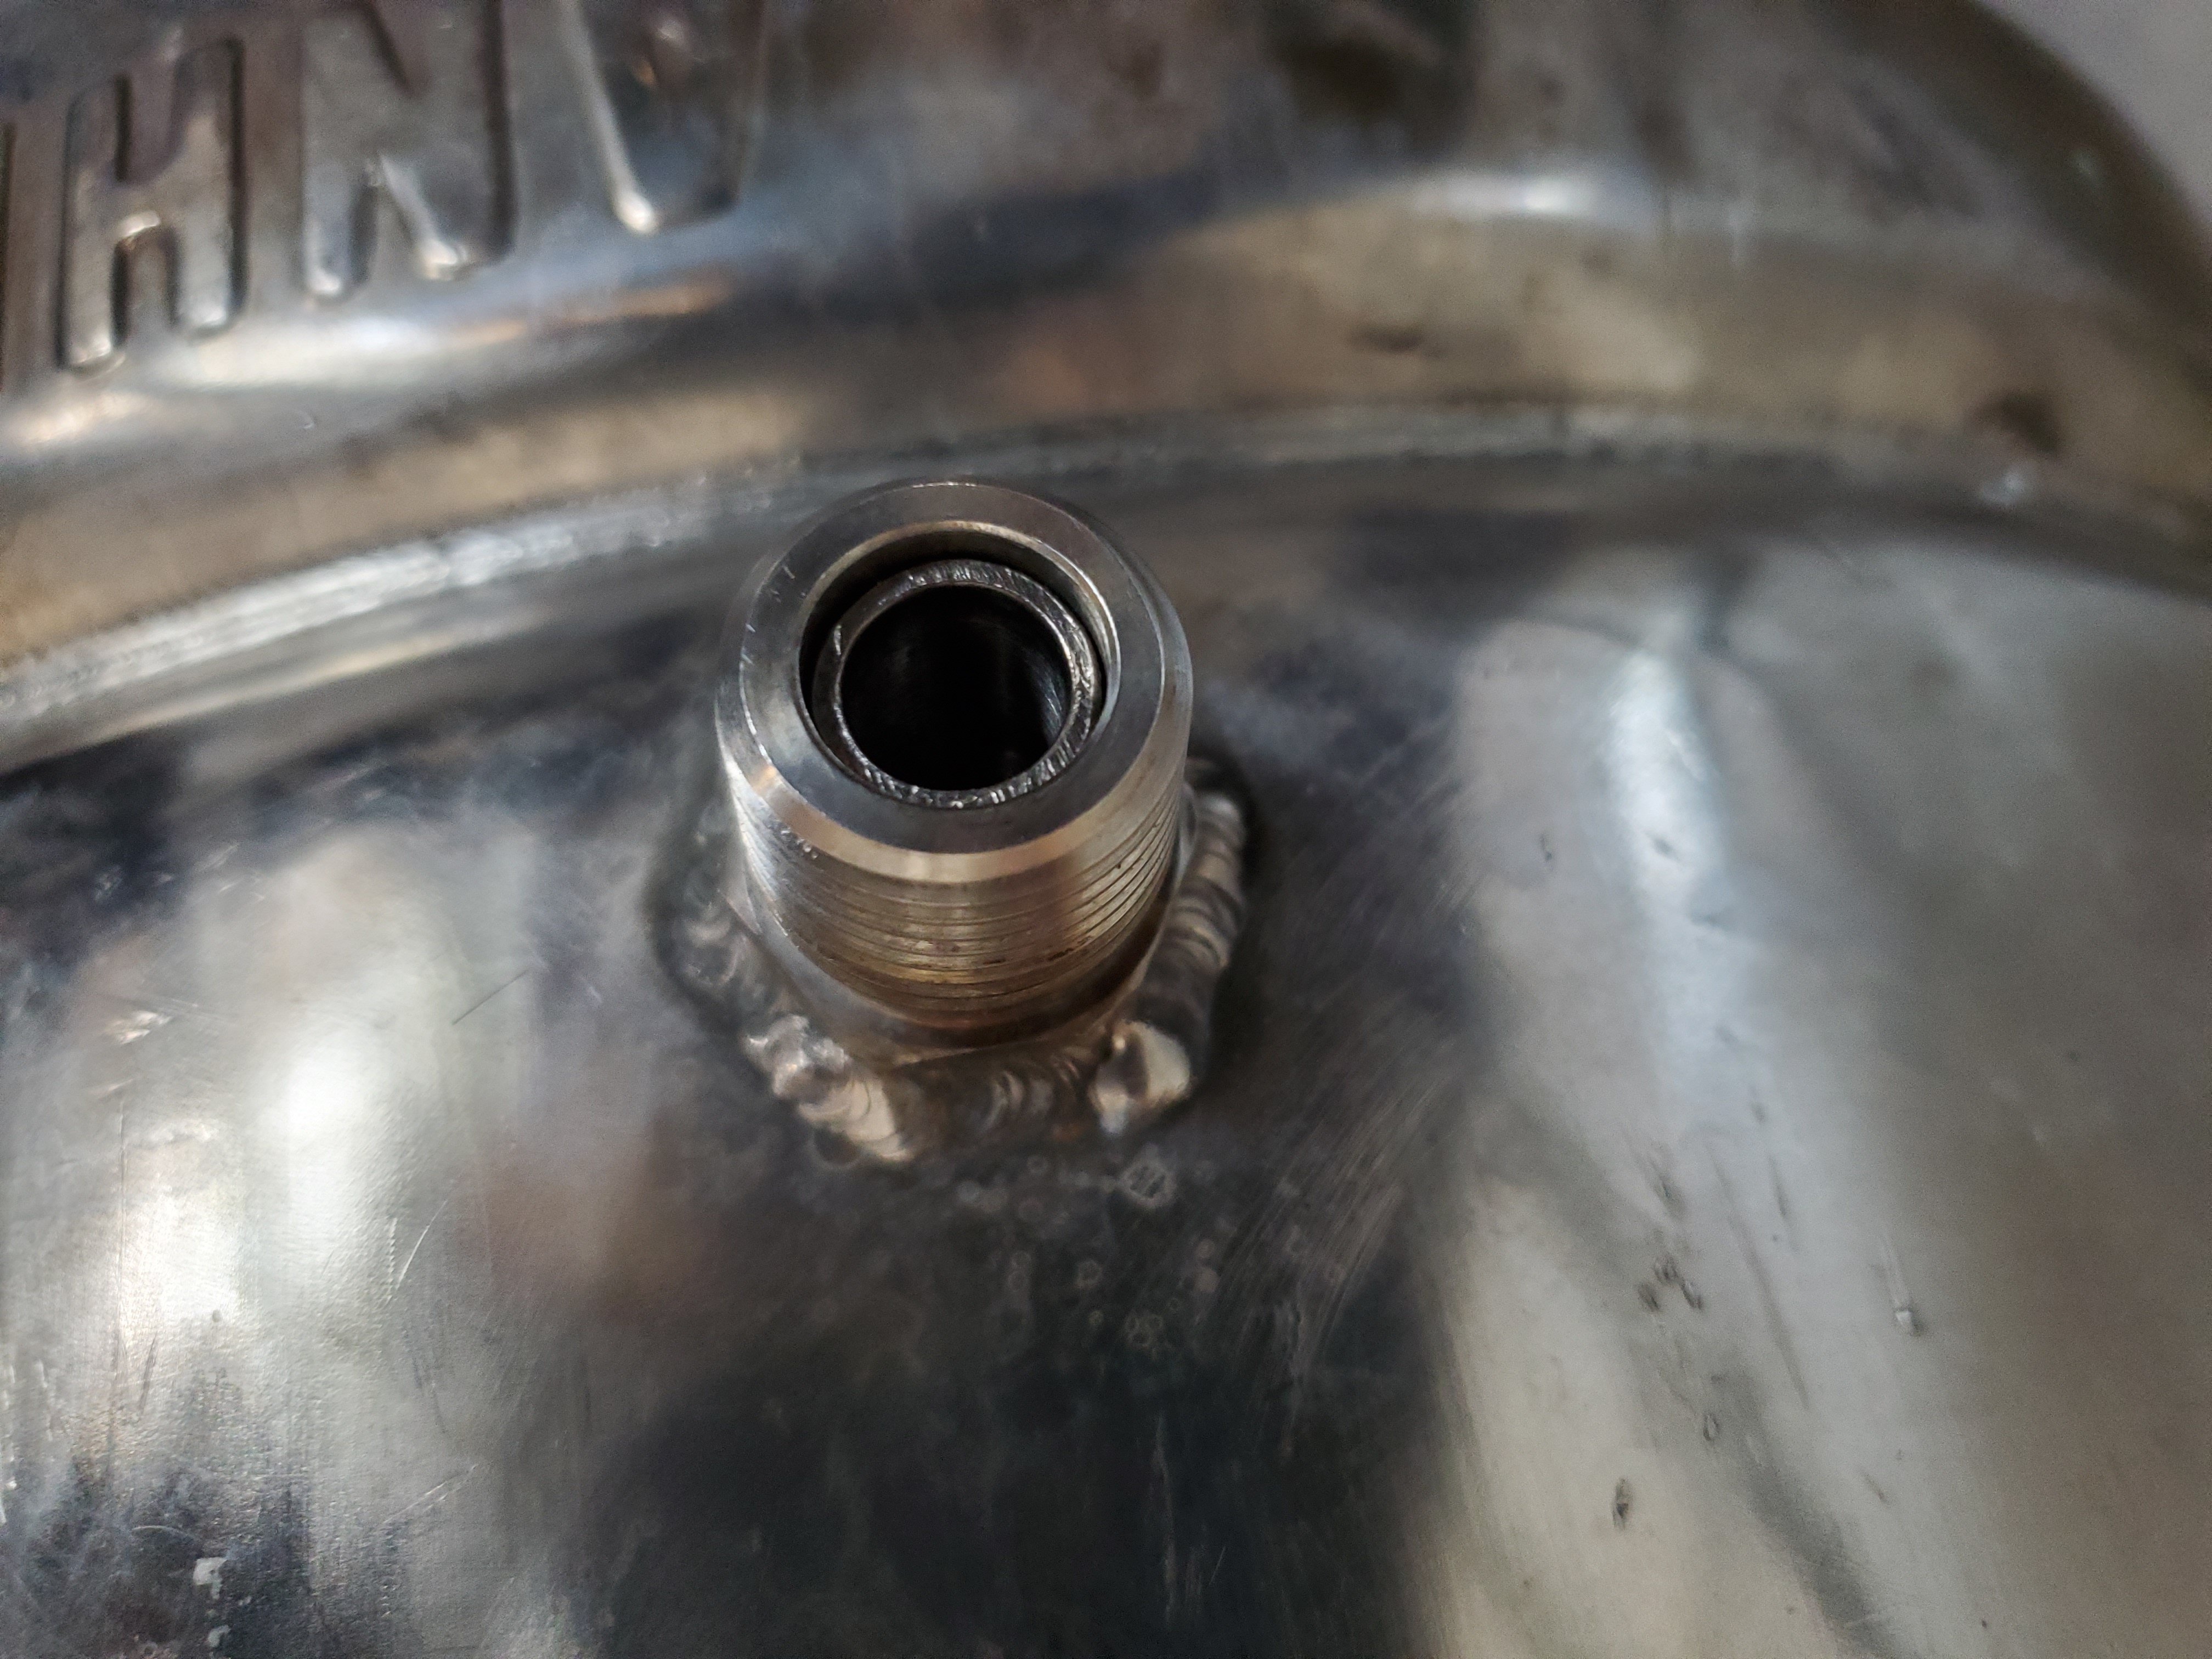
The pictures should help. I decided cut the 1/2" SS nipple (my dip tube connection) as close to the keggle interior wall as I could with a cutoff wheel, which is shown in the pictures. I already did that. Next I will drill out the inside of the nipple to allow inserting the copper elbow flush with the keggle interior wall, and I'll silver-solder the elbow in place. I can then attach another copper elbow/tube to reach wherever I want to drain from, currently in the center of the keggle bottom is my goal. I can then remove and clean that elbow/tube as required. This is my dip tube design, and my goal is to minimize clearance to the keggle interior wall and also the bottom of the keggle. I have attached a diagram of what I am doing at the bottom.

However this leaves me with a question - will there be an issue with the copper soldered inside the nipple in terms of dissimilar metals, or the fact that copper and stainless steel have different expansion coefficients? Would the copper tend to separate over time due to the extreme temperature changes? Maybe I am overthinking this, but if anyone has experience with silver-soldering copper with stainless steel please chime in and tell me what you observed.

I am thinking I should look for a stainless steel elbow instead of copper, which should not pose any problems like copper might
20200116_095509.jpg
20200116_095640.jpg
Elbow Inside Nipple 1.jpg
. Thanks in advance for your comments.
 
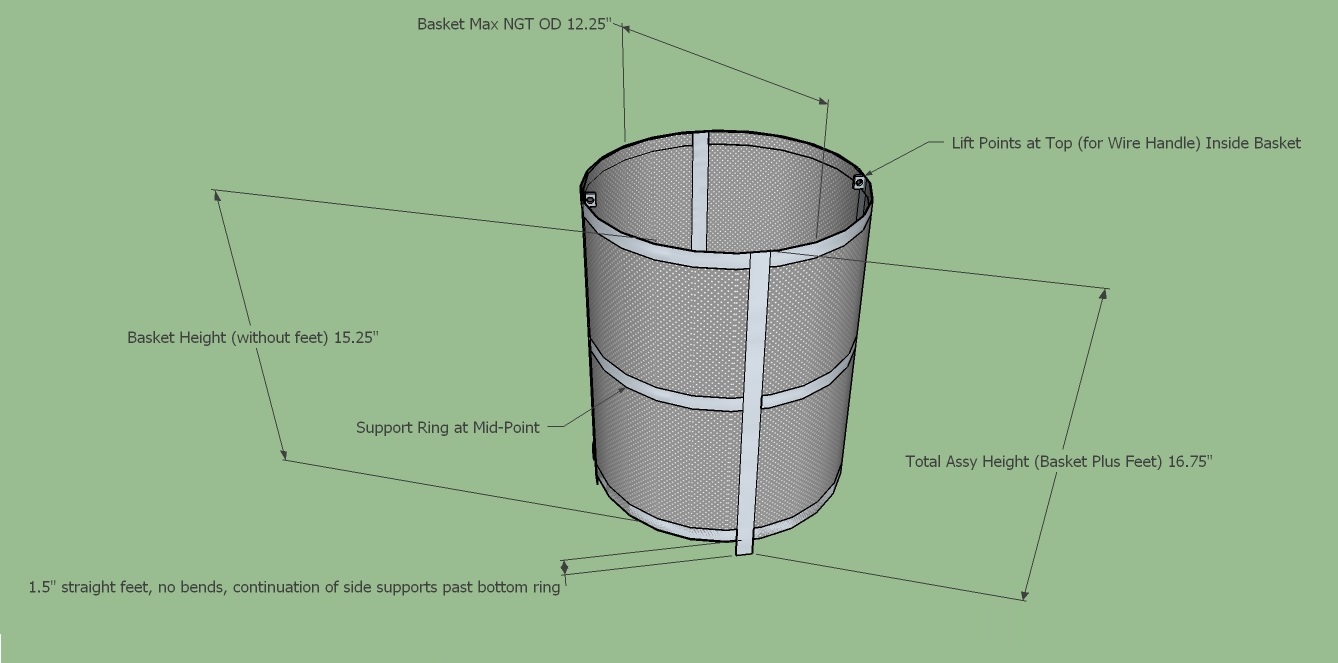
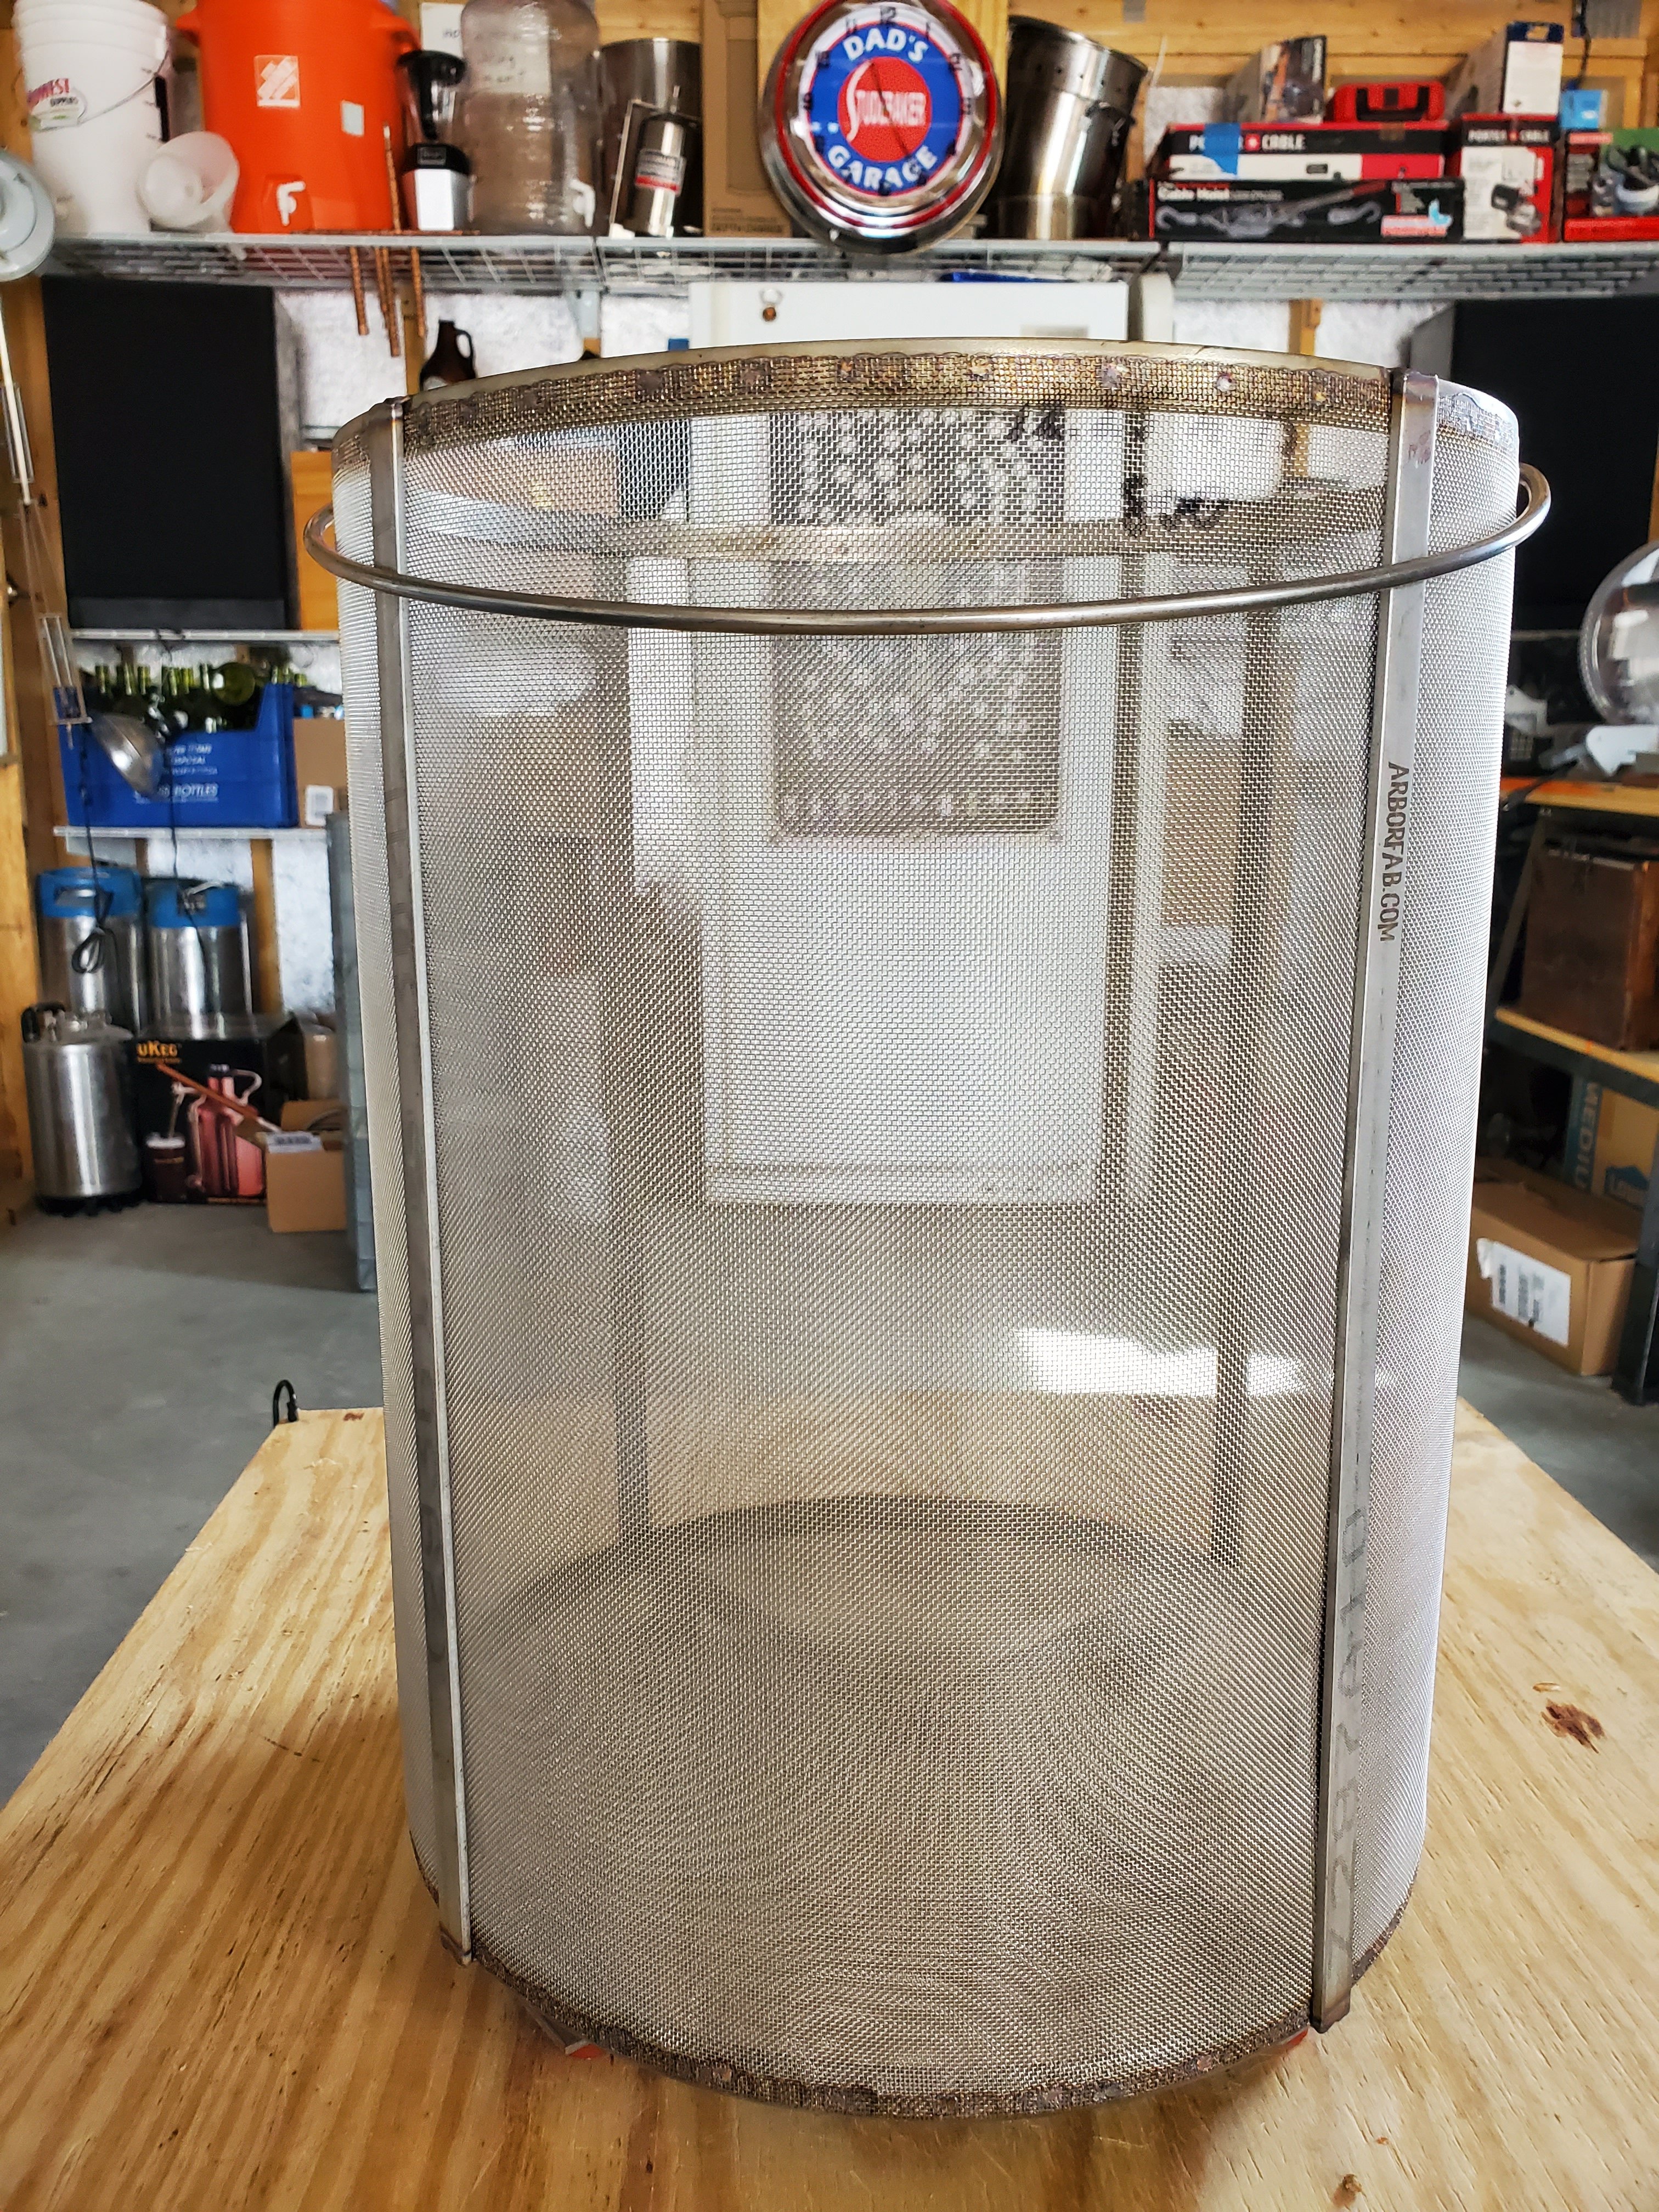
This is my tentative grain basket that I am going to order soon, along with a press plate and a hop filter. Has anyone built a recirculating system like I am? I'm thinking that I need a large mesh size (800 microns) else the mash will overflow the grain basket because the returning liquid cannot exit the basket as fast as it comes in from the recirculation pump?
Basket Final Design.jpg
Grain Basket in Keggle.jpg
 
Last edited:
I am still in the setup phase for my brew rig. Here is how I plan to make beer when this rig is ready. Any comments from you guys with experience is appreciated. Here is my plan.

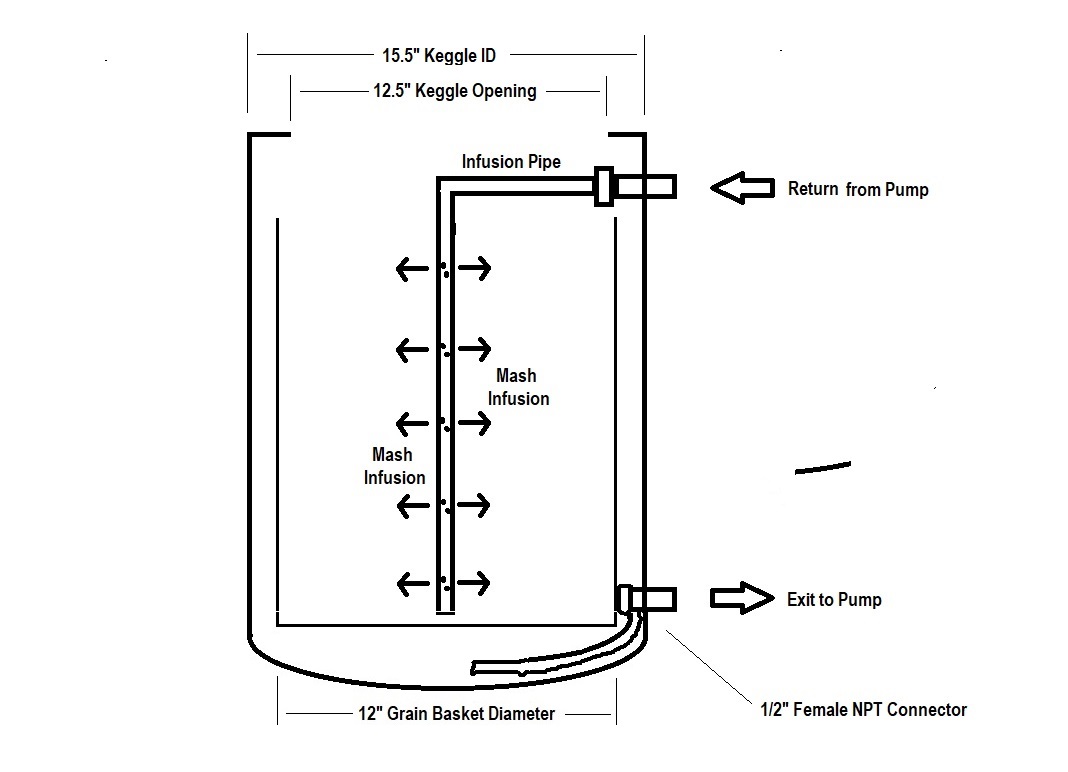
My process would be to mill the grain into the basket, then hoist/lower it into the adjusted and heated mash water (currently I start with distilled water and modify it for the type of beer I am making). The tap water in Las Vegas does not taste good. The grain will be milled somewhere between coarse and medium, but not very fine....I need to zero in on this with some trial runs. I'll check the pH and for dough balls and adjust/stir if necessary, then connect the infusion pipe and start the recirculation. My return for recirculation is an infusion pipe centered in the mash vertically, and has a quick-disconnect fitting at the keggle return connector so I can connect and disconnect easily. Should not be a PITA, at least I hope not. :) Then I'll put the lid on the keggle and monitor mash temperature, adding heat with the propane burner as required. I'll check the pH during the mash and tweak that if necessary. When the mash is done I'll remove the infusion pipe, and raise the basket and press it and allow it to drain into the keggle as I start the burner to heat up to a boil. When it has drained I'll hoist and rotate the basket out of the way. Then I'll put a hop basket in the wort and proceed with hop additions when the wort is boiling. If I see that my wort is very cloudy with trub (I expect it will be because the grain basket will have 800 micron mesh), I'll recirculate as the wort heats up, without the infusion pipe in place, so that some of the trub is collected in the hop basket. The hop basket will have a finer mesh (probably 400 micron, I am still thinking that over) and should catch trub that the grain basket did not. I think I will order a relatively large volume hop basket, still thinking about that too. I have not ever done this method but that is my plan, and I'll adjust it as I learn my setup's strengths and weaknesses. I've tried to make this easier for brew day, and at the same time produce quality beer. We will see. I keep reminding myself it is the journey, not the destination, but I'm trying to make it both haha.
Cheers!

PS: After I get the above process working to my satisfaction I'll move on to automatic temperature control during the mash, and a control box for that and switches to start/stop the pumps. (wort pump and chiller pump).
 
I have another question guys. I have experienced low hop utilization when doing 3 vessel brewing, and I want to eliminate that problem going forward with my single vessel RIMS setup.

Instead of using a hop basket to contain the pellet hops during the boil, why not just put the pellets into the keggle without a hop basket (or any basket), and then at the end of the boil start up recirculation again to catch the hop trub with a 400 micron hop basket. This would give me maximum hop utilization, and trub removal before I route the wort to the plate chiller. Won't the pump, valves, and plumbing pass the pellet hop material during recirculation without clogging? The real problem area with clogging is the plate chiller, but in this way I'm avoiding/minimizing this by filtering the trub out at the end of the boil. Not sure how long it would take to recirculate/filter out trub, but I could recirculate quite a while during the end of the boil if necessary.
 
Somehow the site stopped alerting me to replies to this thread.

I do see tubular stainless steel elbows around on Google, but they seem to be designed for butt-welding to pipes and not for insert soldering like the copper elbow is. It would have to be insert soldering, I don't think doing a butt-weld of an elbow to the cut surface of that nipple would be worth the gymnastics inside the keg to do it.

I don't think the thermal expansion differences between copper and stainless steel will cause any cracking over time, nor would there be electro-chemical problems between the two metals either.

The mockups look good, really good. The pump should be low enough to prime drawing from the lower valve and venting into the keggle via the top port.
Regarding the hops and filtering, I'm a whirlpool and dump chap, if some trub gets into the fermenter, so what. I use an immersion chiller, not a plate chiller and the hops would definitely clog up the plate chiller. The pump and plumbing shouldn't have any trouble with recirculating the hops as the pellets break up into leaf fragments in most cases. You could put a bazooka screen on the intake dip tube to keep the material from ending in the plumbing in the first place.
You could also use an inline filter between the intake and the pump, or the pump and the chiller, with a 400 micron stainless steel filter in it. That would remove the recirculating requirement by using the 400 micron hop basket as a filter.

Thanks Bruce_the_Loon. I found a SS 1/2" elbow, and I have a 1/2" copper elbow also. I did a mockup of them both in a hole in the keggle wall (NOT THE NIPPLE I WILL ACTUALLY BE INSERTING THEM INTO) to show roughly how they will fit, and it turns out they are similar in "turn distance", the distance the tube travels in making the 90 degree turn. Either of these will work. I will probably drill out the entire length of the interior of the 1/2" SS nipple so the 1/2" SS elbow will just fit, and silver solder it in place. I can attach a silicone tube to that to take it the rest of the way to wherever I want it in the keggle bottom. OR, I will use copper tubing if I can find a size that will fit snugly over the 1/2" SS elbow. The 1/2" copper tube does not fit snugly over it.
20200122_101436.jpg
20200122_101513.jpg
 
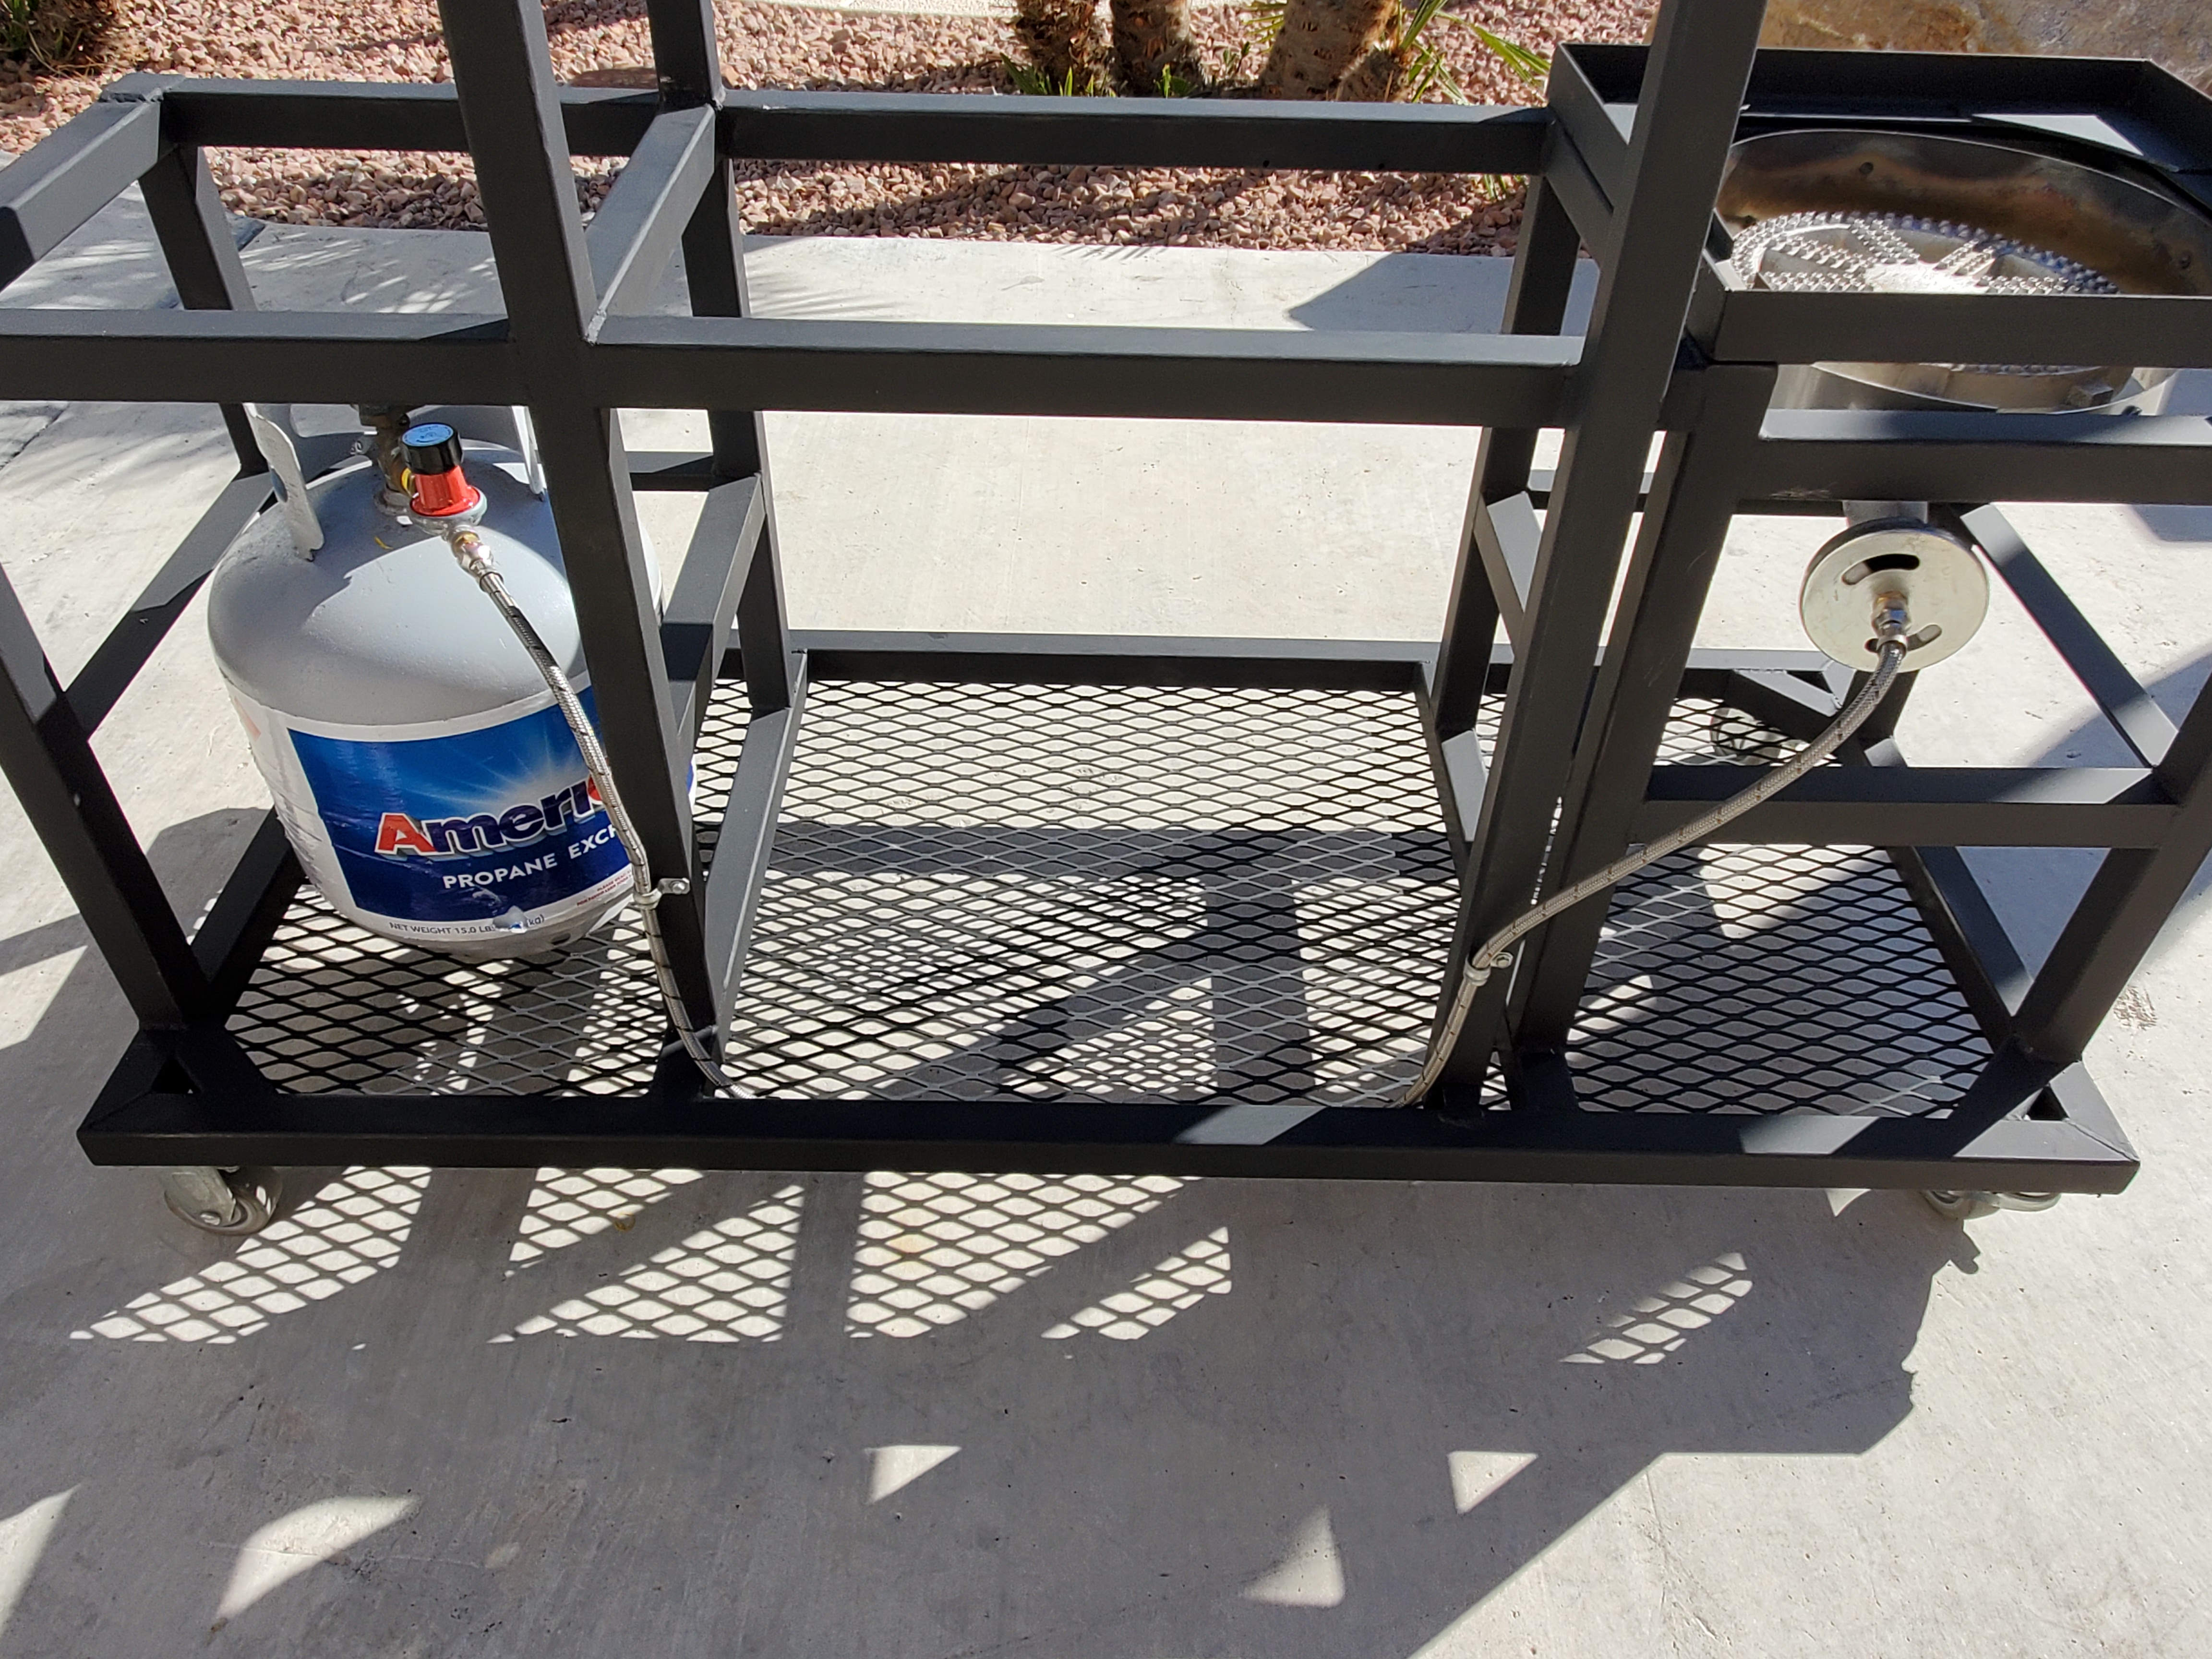
Well I finally installed the gas line between the propane tank and the burner, and cleaned out the burner with pressurized air. Figured that could not hurt anything. I attached a front and rear view of the propane line. Works fine, next step is to see if the burner works OK with the new heat shielding that I added on the front side of the burner. My only concern is will it get enough oxygen....worked great before this added shielding. You can see the unpainted shielding in the third and fourth photos. Next I'll add the keggle, fill it with water, and do that plumbing test I have been talking about forever
20200123_132013.jpg
20200123_132031.jpg

20191217_151301.jpg
20191217_151352.jpg
 
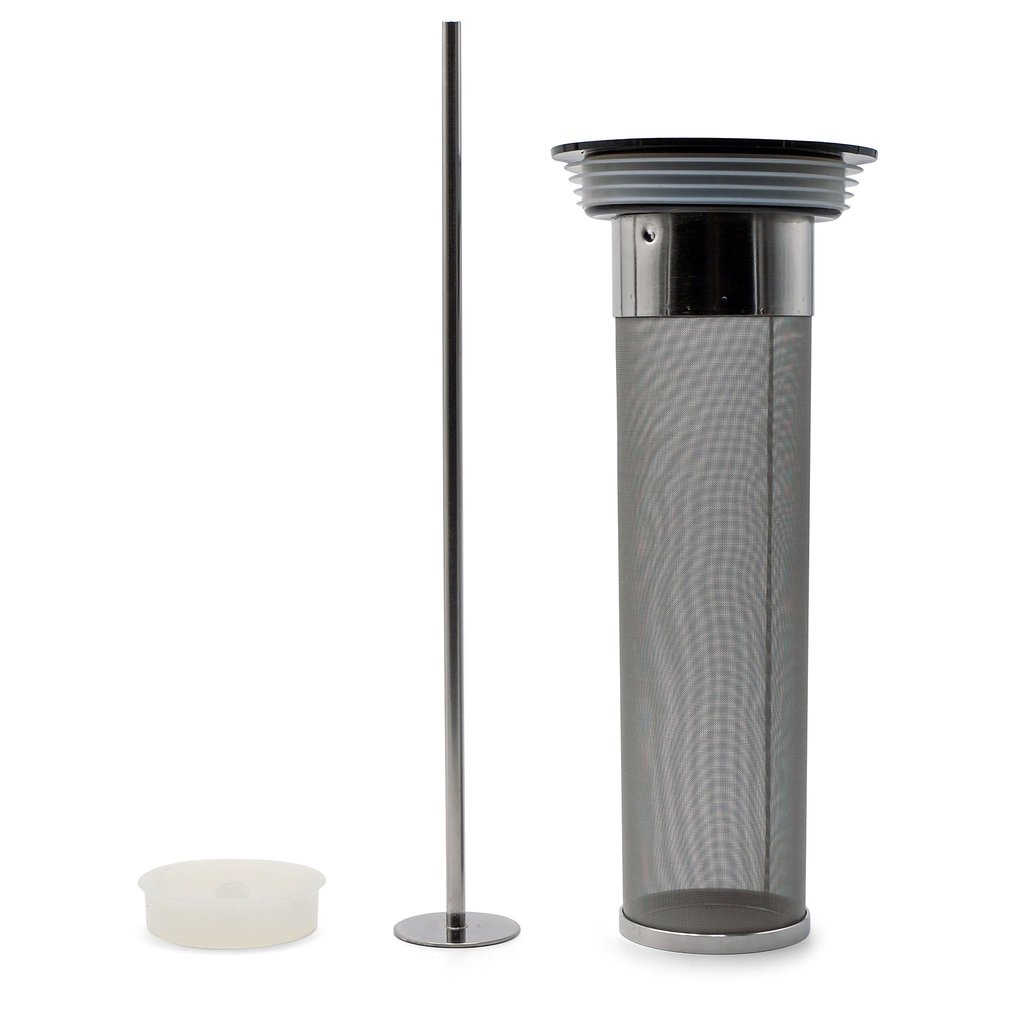
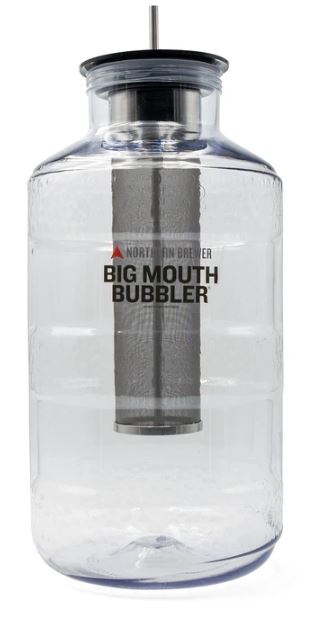
I also saw a brewing vendor with a discount, so I pulled the trigger on a hop basket for my fermentation vessel, and a SS spoon.
43144-Big-Mouth-Bubbler-Depth-Charge_2_1024x1024.jpg
Dry Hop Filter.JPG
 
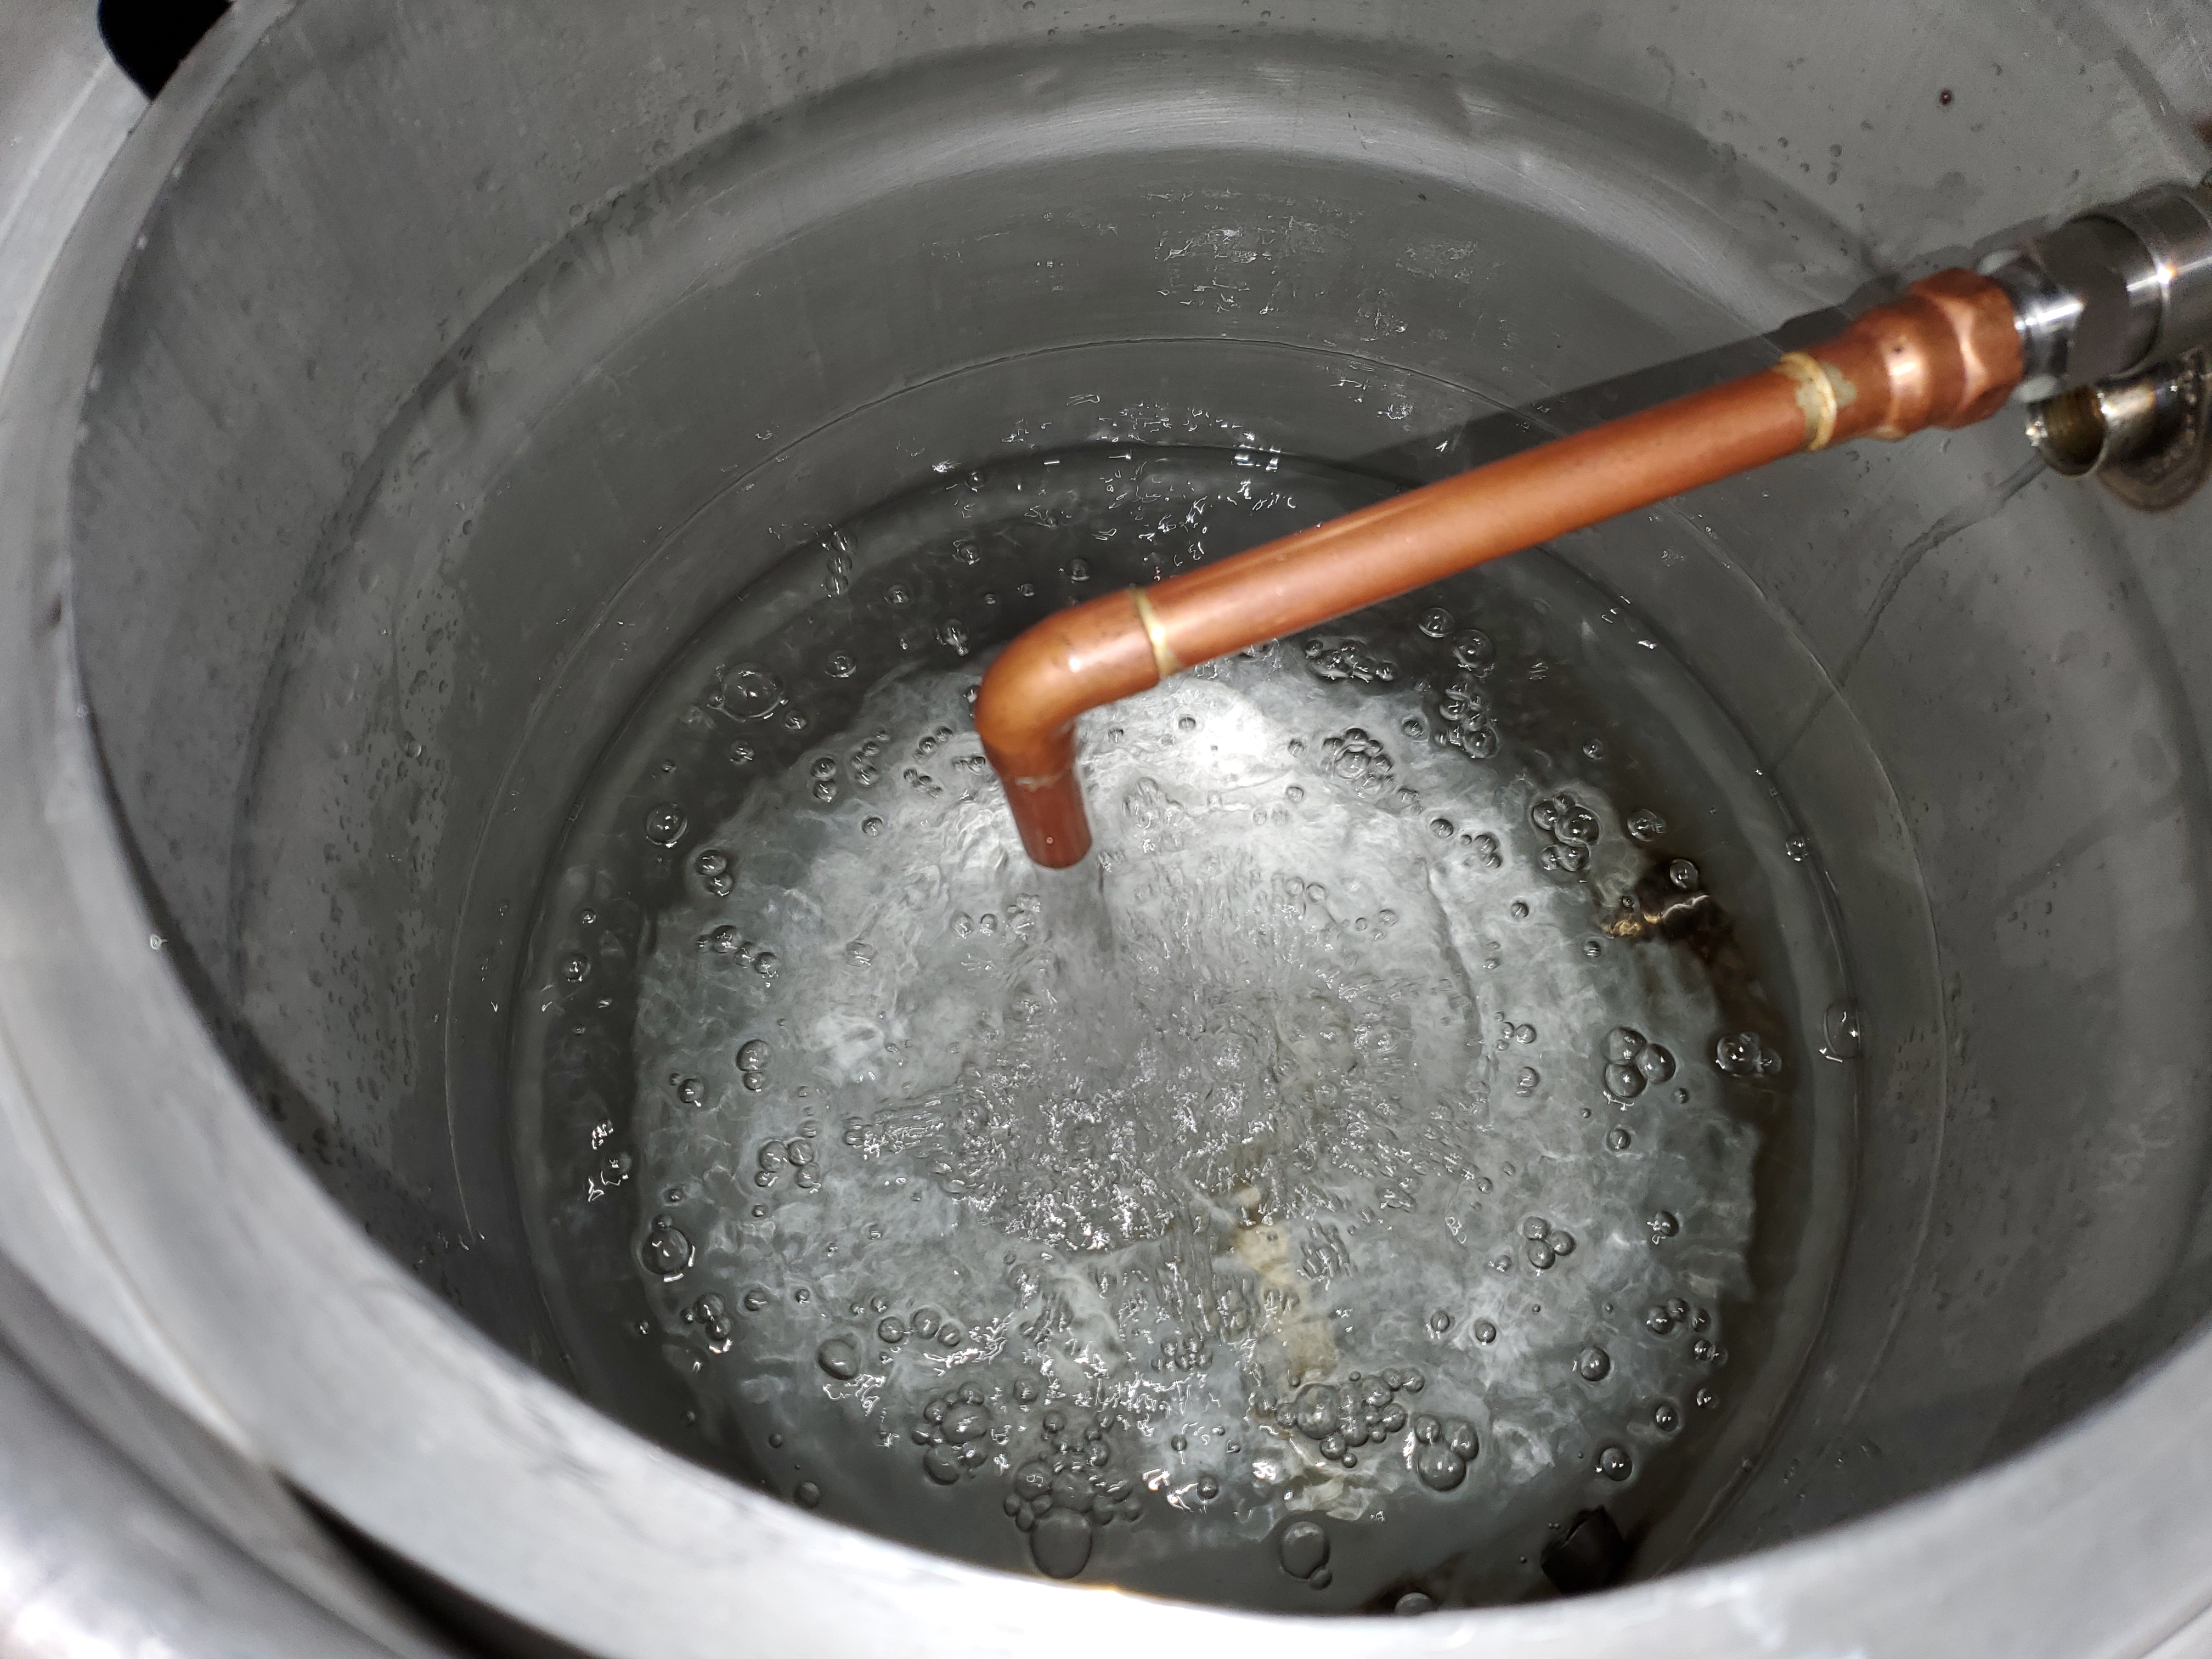
Hooked up the plumbing, added water to the keggle, and tried it out. The pump primed immediately and so far it works as intended. I did not have to manipulate any valves, or disconnect anything, it just primed in the recirculate configuration. The return copper elbow you see in the picture is just a temporary component, I still have to make the final version with holes in it for mash infusion. Flow rate was very strong. Did not hook up the plate chiller yet. So far so good. It got dark outside so I called it a day, and tomorrow I'll play with it some more.
20200123_172220.jpg

20200123_172319.jpg
 
OK, I'm sure this will get somebody's attention, but here goes. I am considering using my 800 micron grain basket as a hop basket/spider. Reminder - my grain basket is 800 micron because I want maximum wort flow during the mash in my RIMS setup. My grain will be a bit coarse also.

It is not common, but there are 800 micron hop baskets for sale out there, so somebody must be using them to get better hop utilization. (I know that 300 and 400 micron mesh is the most common sizes used for pellet and leaf hops).

I realize I will have more trub, but not enough to clog my pumps and valves (I hope). The 800 micron size mesh will force me to filter out some of the trub before I use the plate chiller, but I was planning to do that anyway with a cheaper 400 micron filter.

Comments/feedback/opinions please?
 
Filtering trub can be difficult, many attempts have failed miserably as trub is part sticky gelatinous protein, think egg drop soup w hop matter mixed in makes a perfect plug ...
While hops can form a filter bed, pellet hops won’t.
Ymmv

Also, fwiw your recirc wort path doesn’t make sense to me,
Why use a center infused return w/ a bottom draining basket,
Imo wort will take the path of least resistance and mostly exit at the bottom of the perforated return pipe and exit the bottom of the basket, creating channeling of sorts...or drain vertically adjacent to your return pipe, or maybe it will work brilliantly for no apparent reason as some things do...
:)
 
Last edited:
Filtering trub can be difficult, many attempts have failed miserably as trub is part sticky gelatinous protein, think egg drop soup w hop matter mixed in makes a perfect plug ...
While hops can form a filter bed, pellet hops won’t.
Ymmv

Also, fwiw your recirc wort path doesn’t make sense to me,
Why use a center infused return w/ a bottom draining basket,
Imo wort will take the path of least resistance and mostly exit at the bottom of the perforated return pipe and exit the bottom of the basket, creating channeling of sorts...or drain vertically adjacent to your return pipe, or maybe it will work brilliantly for no apparent reason as some things do...
:)
Yes wilserbrewer it is true this might not work as planned, and I'll find another way, but I decided to see it through. I'll be posting my results as I go. I should have my 800 micron grain basket in about 4 weeks, and I'll fill it with medium/coarse milled grain and try this out. The combination of the large mesh and coarse/medium milled grain should result in a good flow radially from the vertical pipe through the grain and out the sides, and some will travel down through the bottom of the basket, therefore achieving a good efficiency in extracting malt. At least that is my theory, we will see. I might have to play around with the size of the milled grain, and/or the number and size of the holes in the vertical infusion pipe, and the returning wort flow rate. But then I am retired now and have plenty of time to mess around with this. Cheers!
 
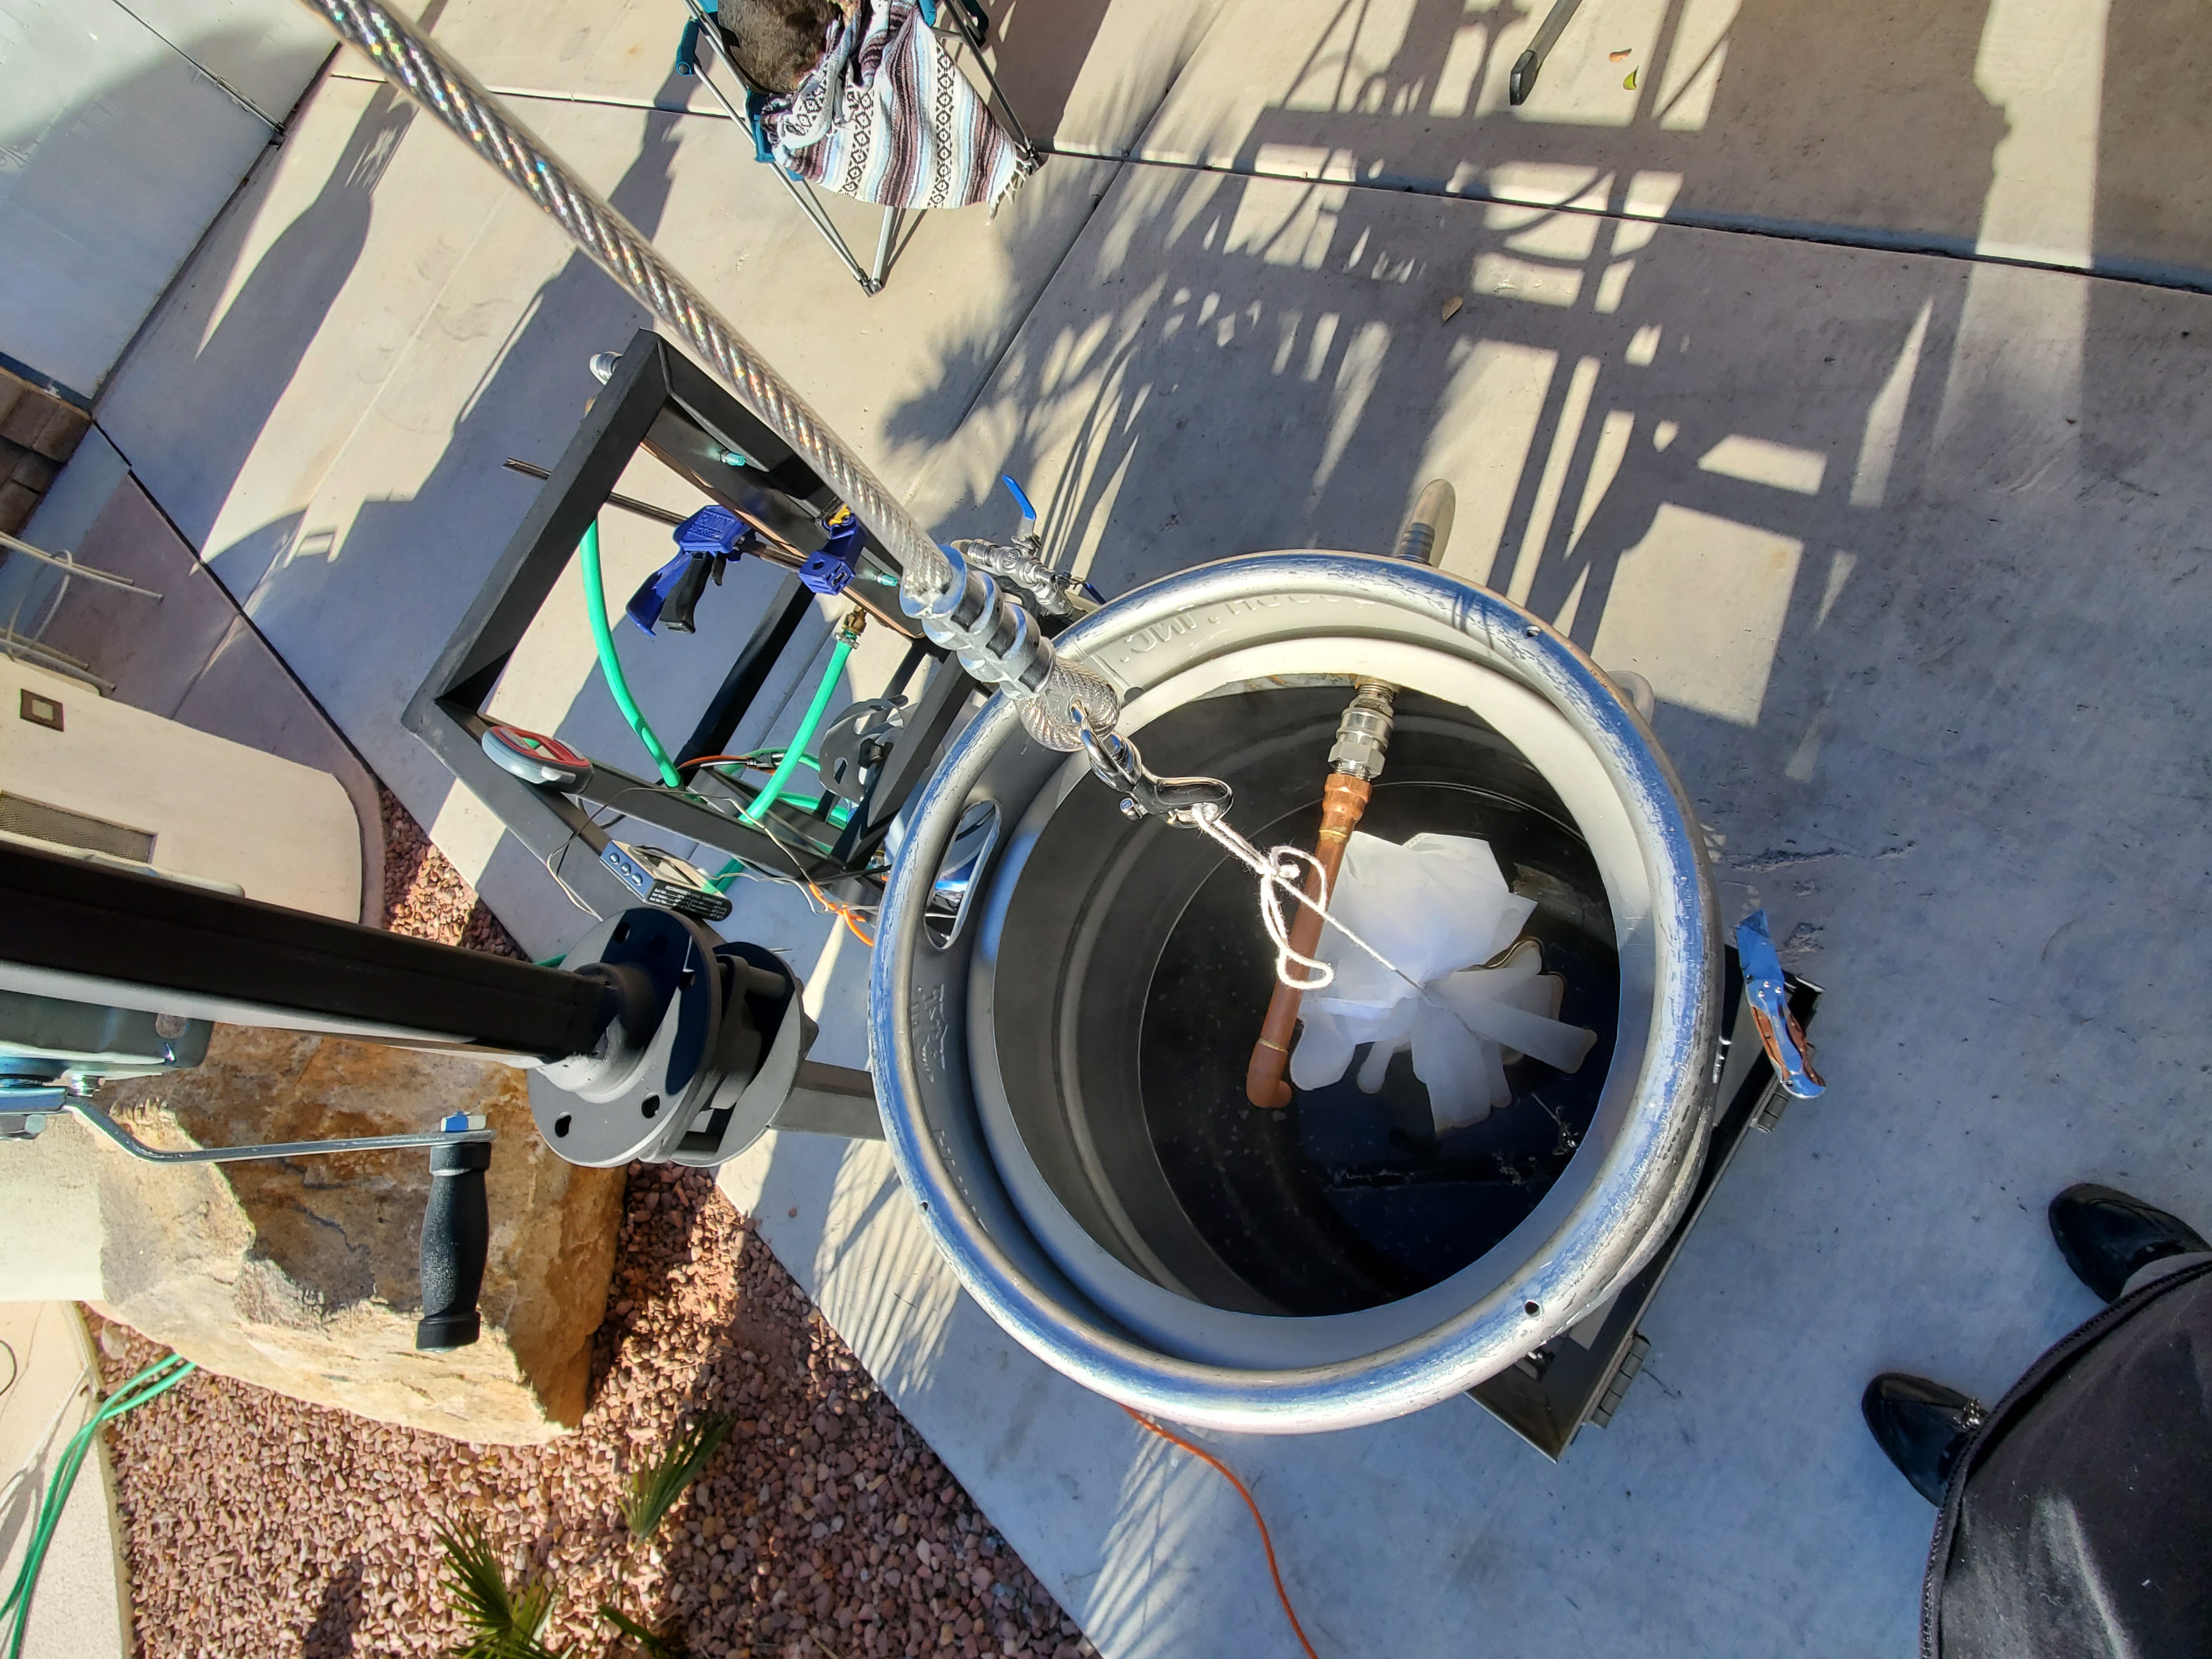
OK it has been a while, so here is an update. I've used my brew rig, still in development, twice for extract brews. I have ordered the 800 micron grain basket from Utah Biodiesel, should have that in a few weeks. Below I show a picture of it configured for extract brewing until I get that basket. I'll post my final build when I get there.

Meanwhile I learned a couple of things.

1) My system will recirculate pellet hops without clogging. I threw 2 ounces of pellet hops directly into the Keggle, and recirculated near the end of the boil and was able to capture almost all of the hop material by catching it at the return connector at the top of the Keggle (I used a nylon mesh bag). Took about 10 minutes to get enough so the plate chiller would not clog. At the 2 ounce level the system does not clog....had a momentary problem with flow reducing and a quick stir indicated it was at the dip tube. I'm not sure how many ounces it will tolerate before clogging.

2) I don't think I need an automatic heater for my RIMS system. My original plan was to, as a final step, incorporate a heater with PID control for my RIMS setup. I'm going to hold off on that step because I noticed when I turned off my propane burner (when my "mash" temp was 150F) the temperature rose another 6 degrees due to thermal heat storage in the keggle and the supporting steel frame, and it very gradually dropped to 152 over the next 30 minutes with no applied heat....and I was recirculating during about half that time. Based on this I think I can just apply heat with the propane burner, which has a valve on it with very fine control of the gas, to maintain mash temperature and/or even for step mash temperatures down the road. I'm going to go this route for at least a few brew batches and see how that goes, before I drop a couple hundred bucks on a controller. My base motivation for redesigning my brew rig was to simplify my brew day without sacrificing brew quality. The controller is starting to look like an unnecessary complication. (If you are wondering, when I say mash here...this was one of those partial mash recipes where you steep grains for 30 minutes and then the rest is extract brewing).

Sorry about the duct tape on the Big Mouth Bubbler. An eyesore - I need to devise another, prettier, means of holding that lid on.


Bison Tears 3 (1).jpg
Bison Tears 3 (2).jpg
Bison Tears 3 (3).jpg
 
Somehow the site stopped alerting me to replies to this thread.

I do see tubular stainless steel elbows around on Google, but they seem to be designed for butt-welding to pipes and not for insert soldering like the copper elbow is. It would have to be insert soldering, I don't think doing a butt-weld of an elbow to the cut surface of that nipple would be worth the gymnastics inside the keg to do it.

I don't think the thermal expansion differences between copper and stainless steel will cause any cracking over time, nor would there be electro-chemical problems between the two metals either.

The mockups look good, really good. The pump should be low enough to prime drawing from the lower valve and venting into the keggle via the top port.

Regarding the hops and filtering, I'm a whirlpool and dump chap, if some trub gets into the fermenter, so what. I use an immersion chiller, not a plate chiller and the hops would definitely clog up the plate chiller. The pump and plumbing shouldn't have any trouble with recirculating the hops as the pellets break up into leaf fragments in most cases. You could put a bazooka screen on the intake dip tube to keep the material from ending in the plumbing in the first place.

You could also use an inline filter between the intake and the pump, or the pump and the chiller, with a 400 micron stainless steel filter in it. That would remove the recirculating requirement by using the 400 micron hop basket as a filter.
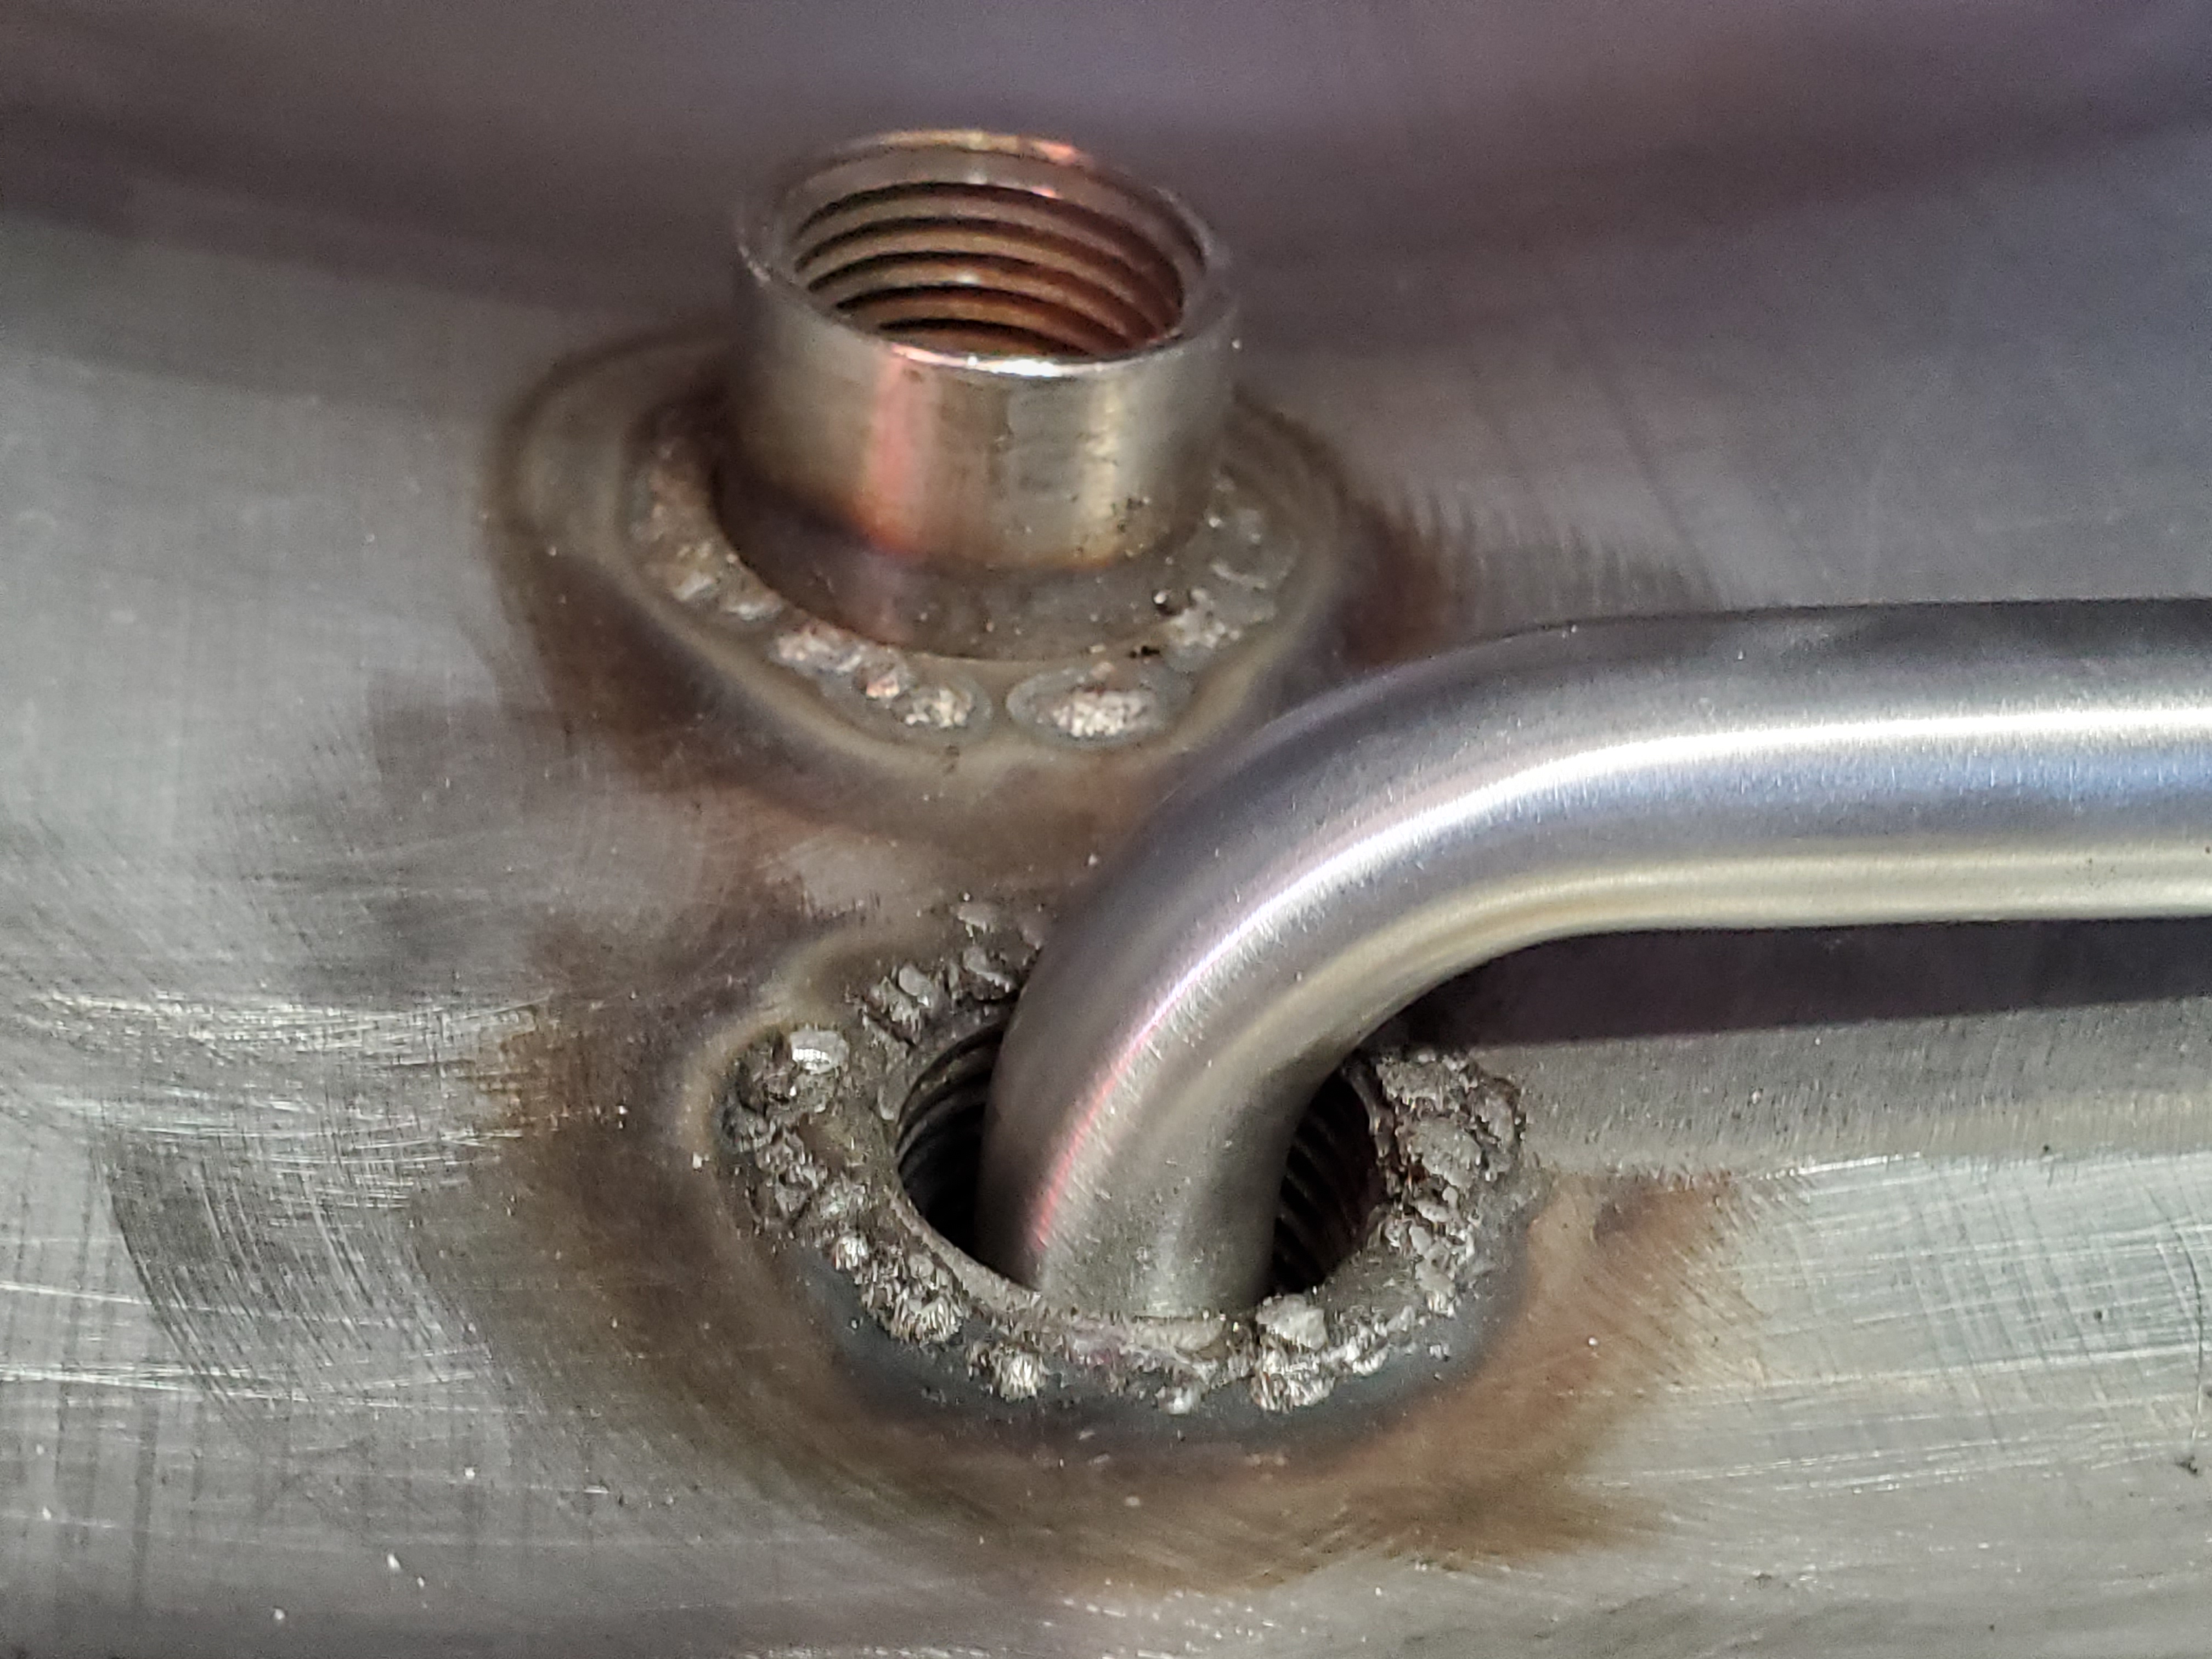
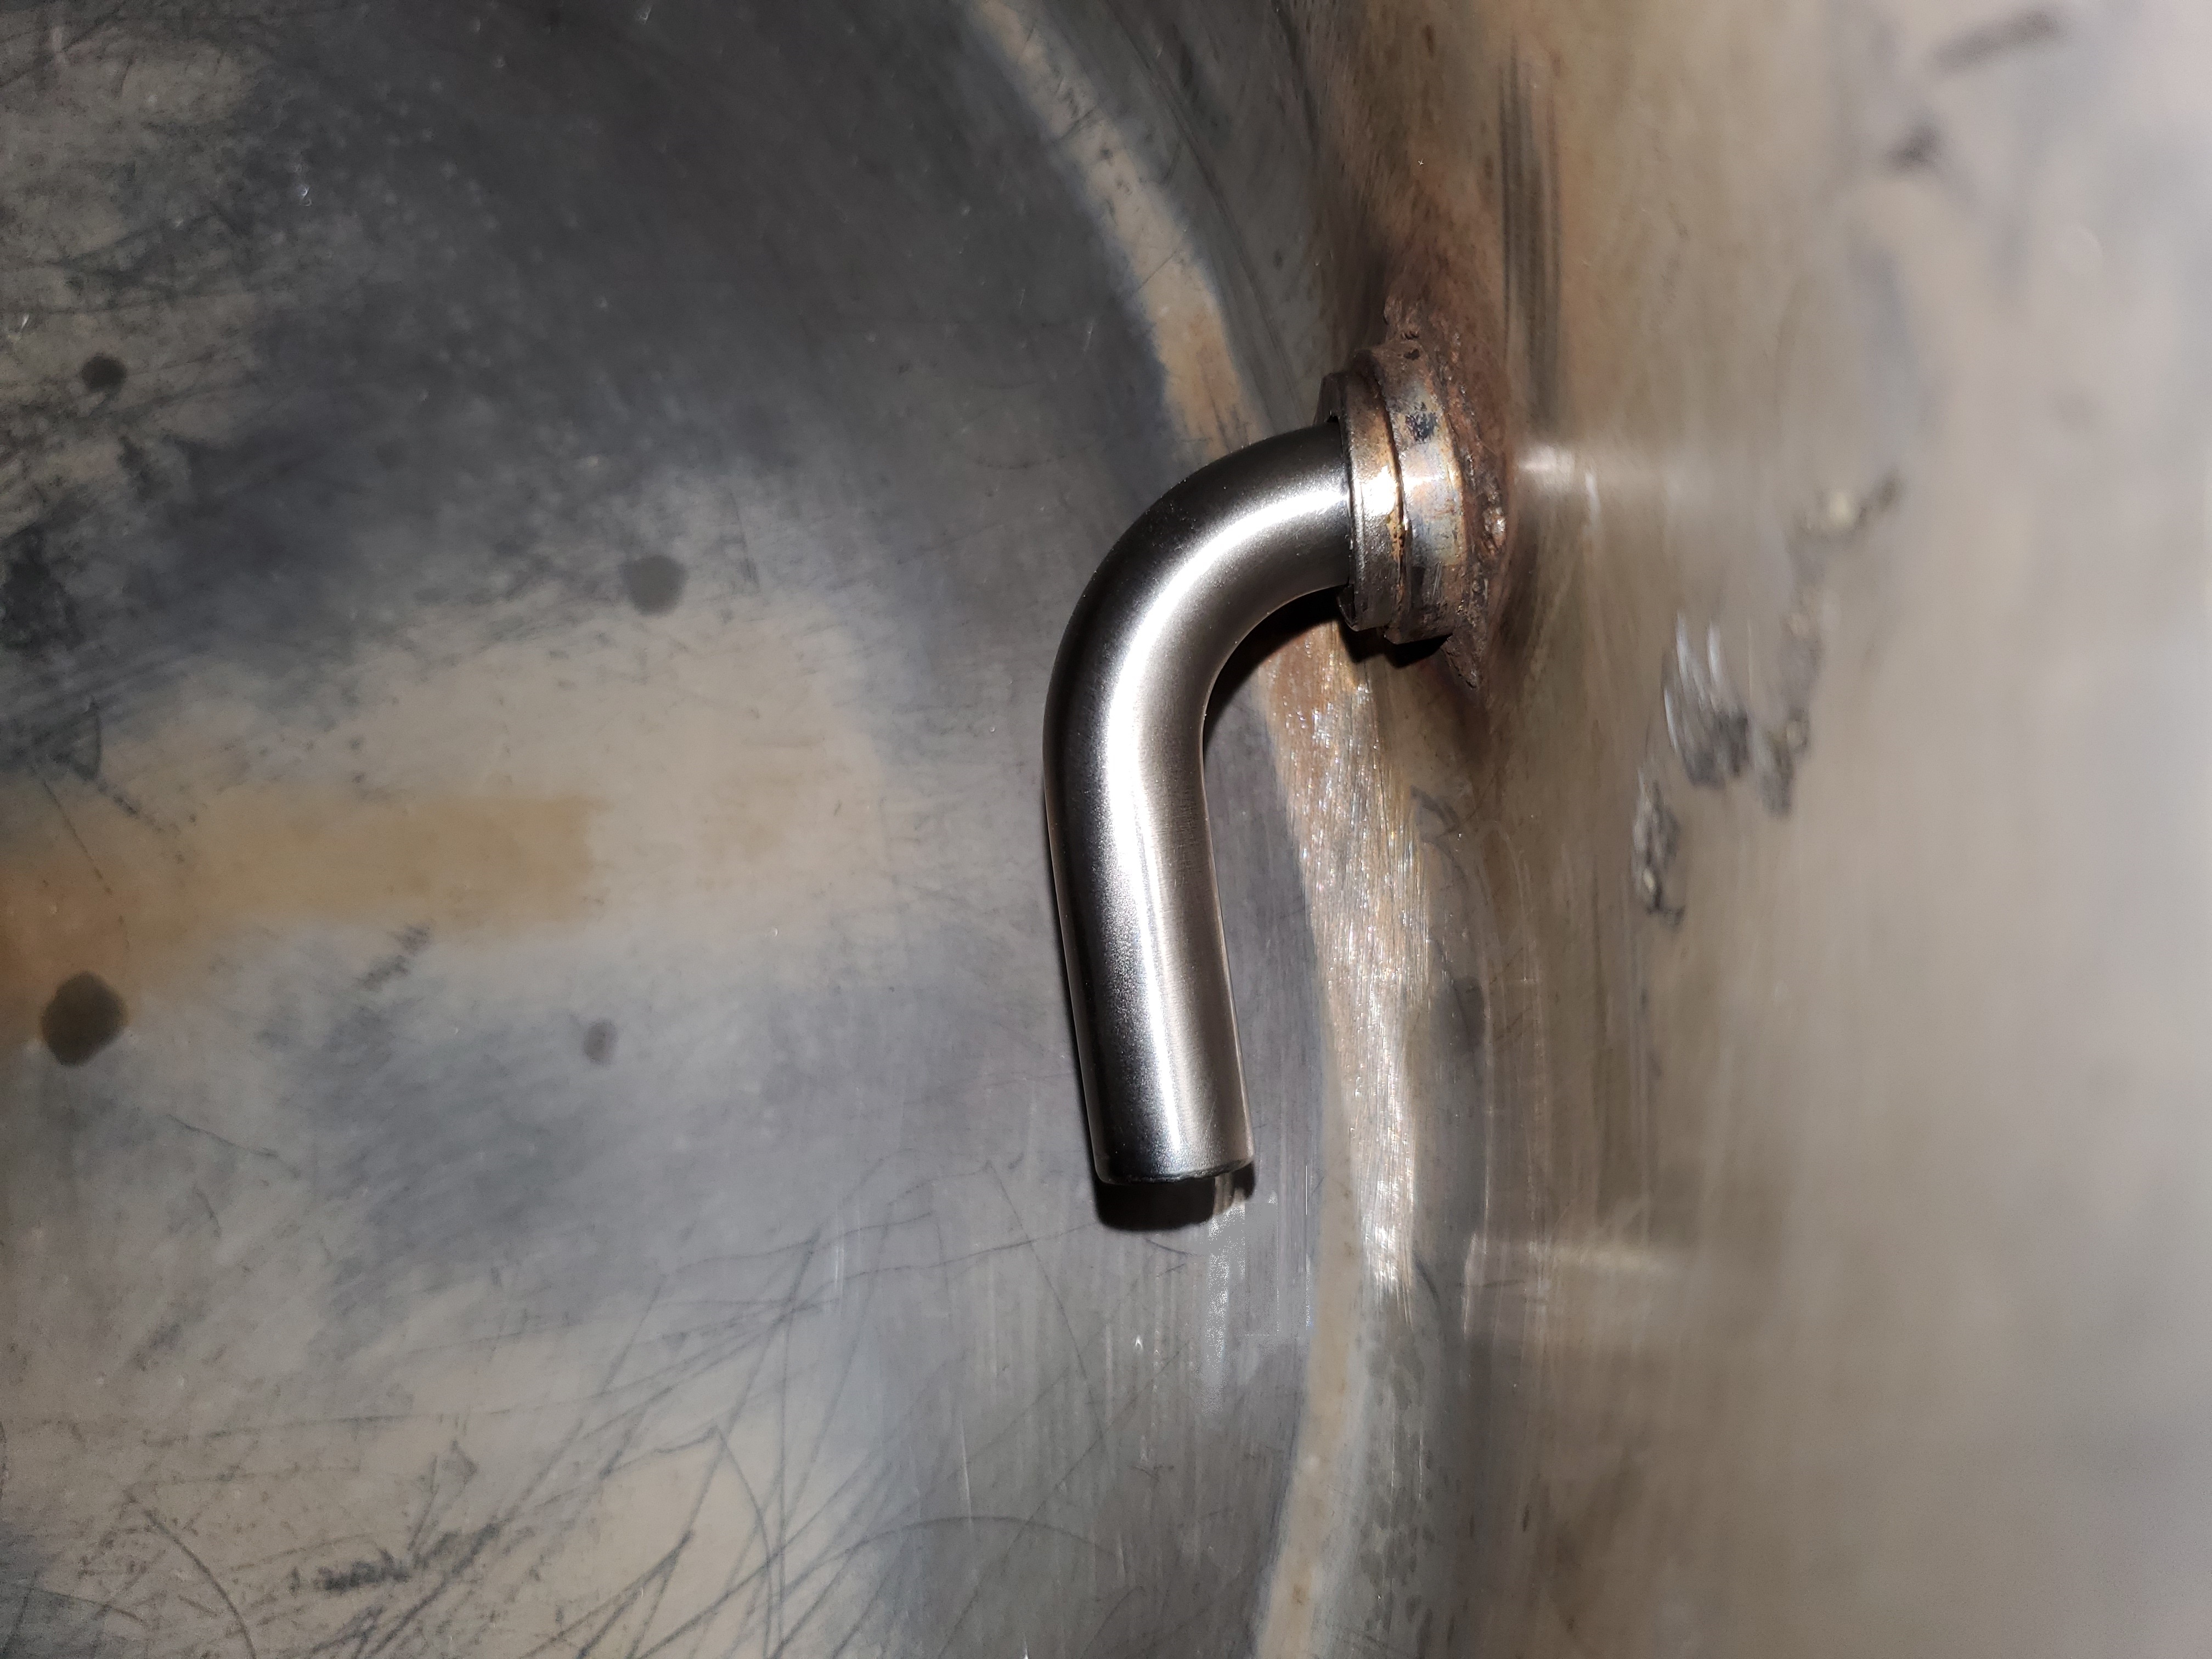
Well I finally got around to installing the stainless steel elbow as a dip tube. Here are the pics. The SS nipple ID was 0.5" and the SS elbow OD was 0.5", but not quite round (we are talking very small variations here) so it would not fit into the nipple. I drilled out the nipple with a 1/2" drill bit, and now the SS fits nice and tight and I'm going to leave it that way. It is not quite an interference fit, but pretty close, I had to tap it gently to get it to seat fully in the nipple, but I can work it out by hand if I need to. Did not need to solder after all. I forget what the SS elbow ID is, but it is larger than my system silicone tubing, which is 3/8", so I did not compromise the flow rate I currently have, which is very good. I am very happy with this result. I can attach a piece of silicone tubing as an interface if I want to run a tube the rest of the way to the center bottom of the Keggle, or if I end up whirlpooling this dip tube will work fine for that.

Dip Tube Interference Fit 1.jpg
Dip Tube Interference Fit 2.jpg
 
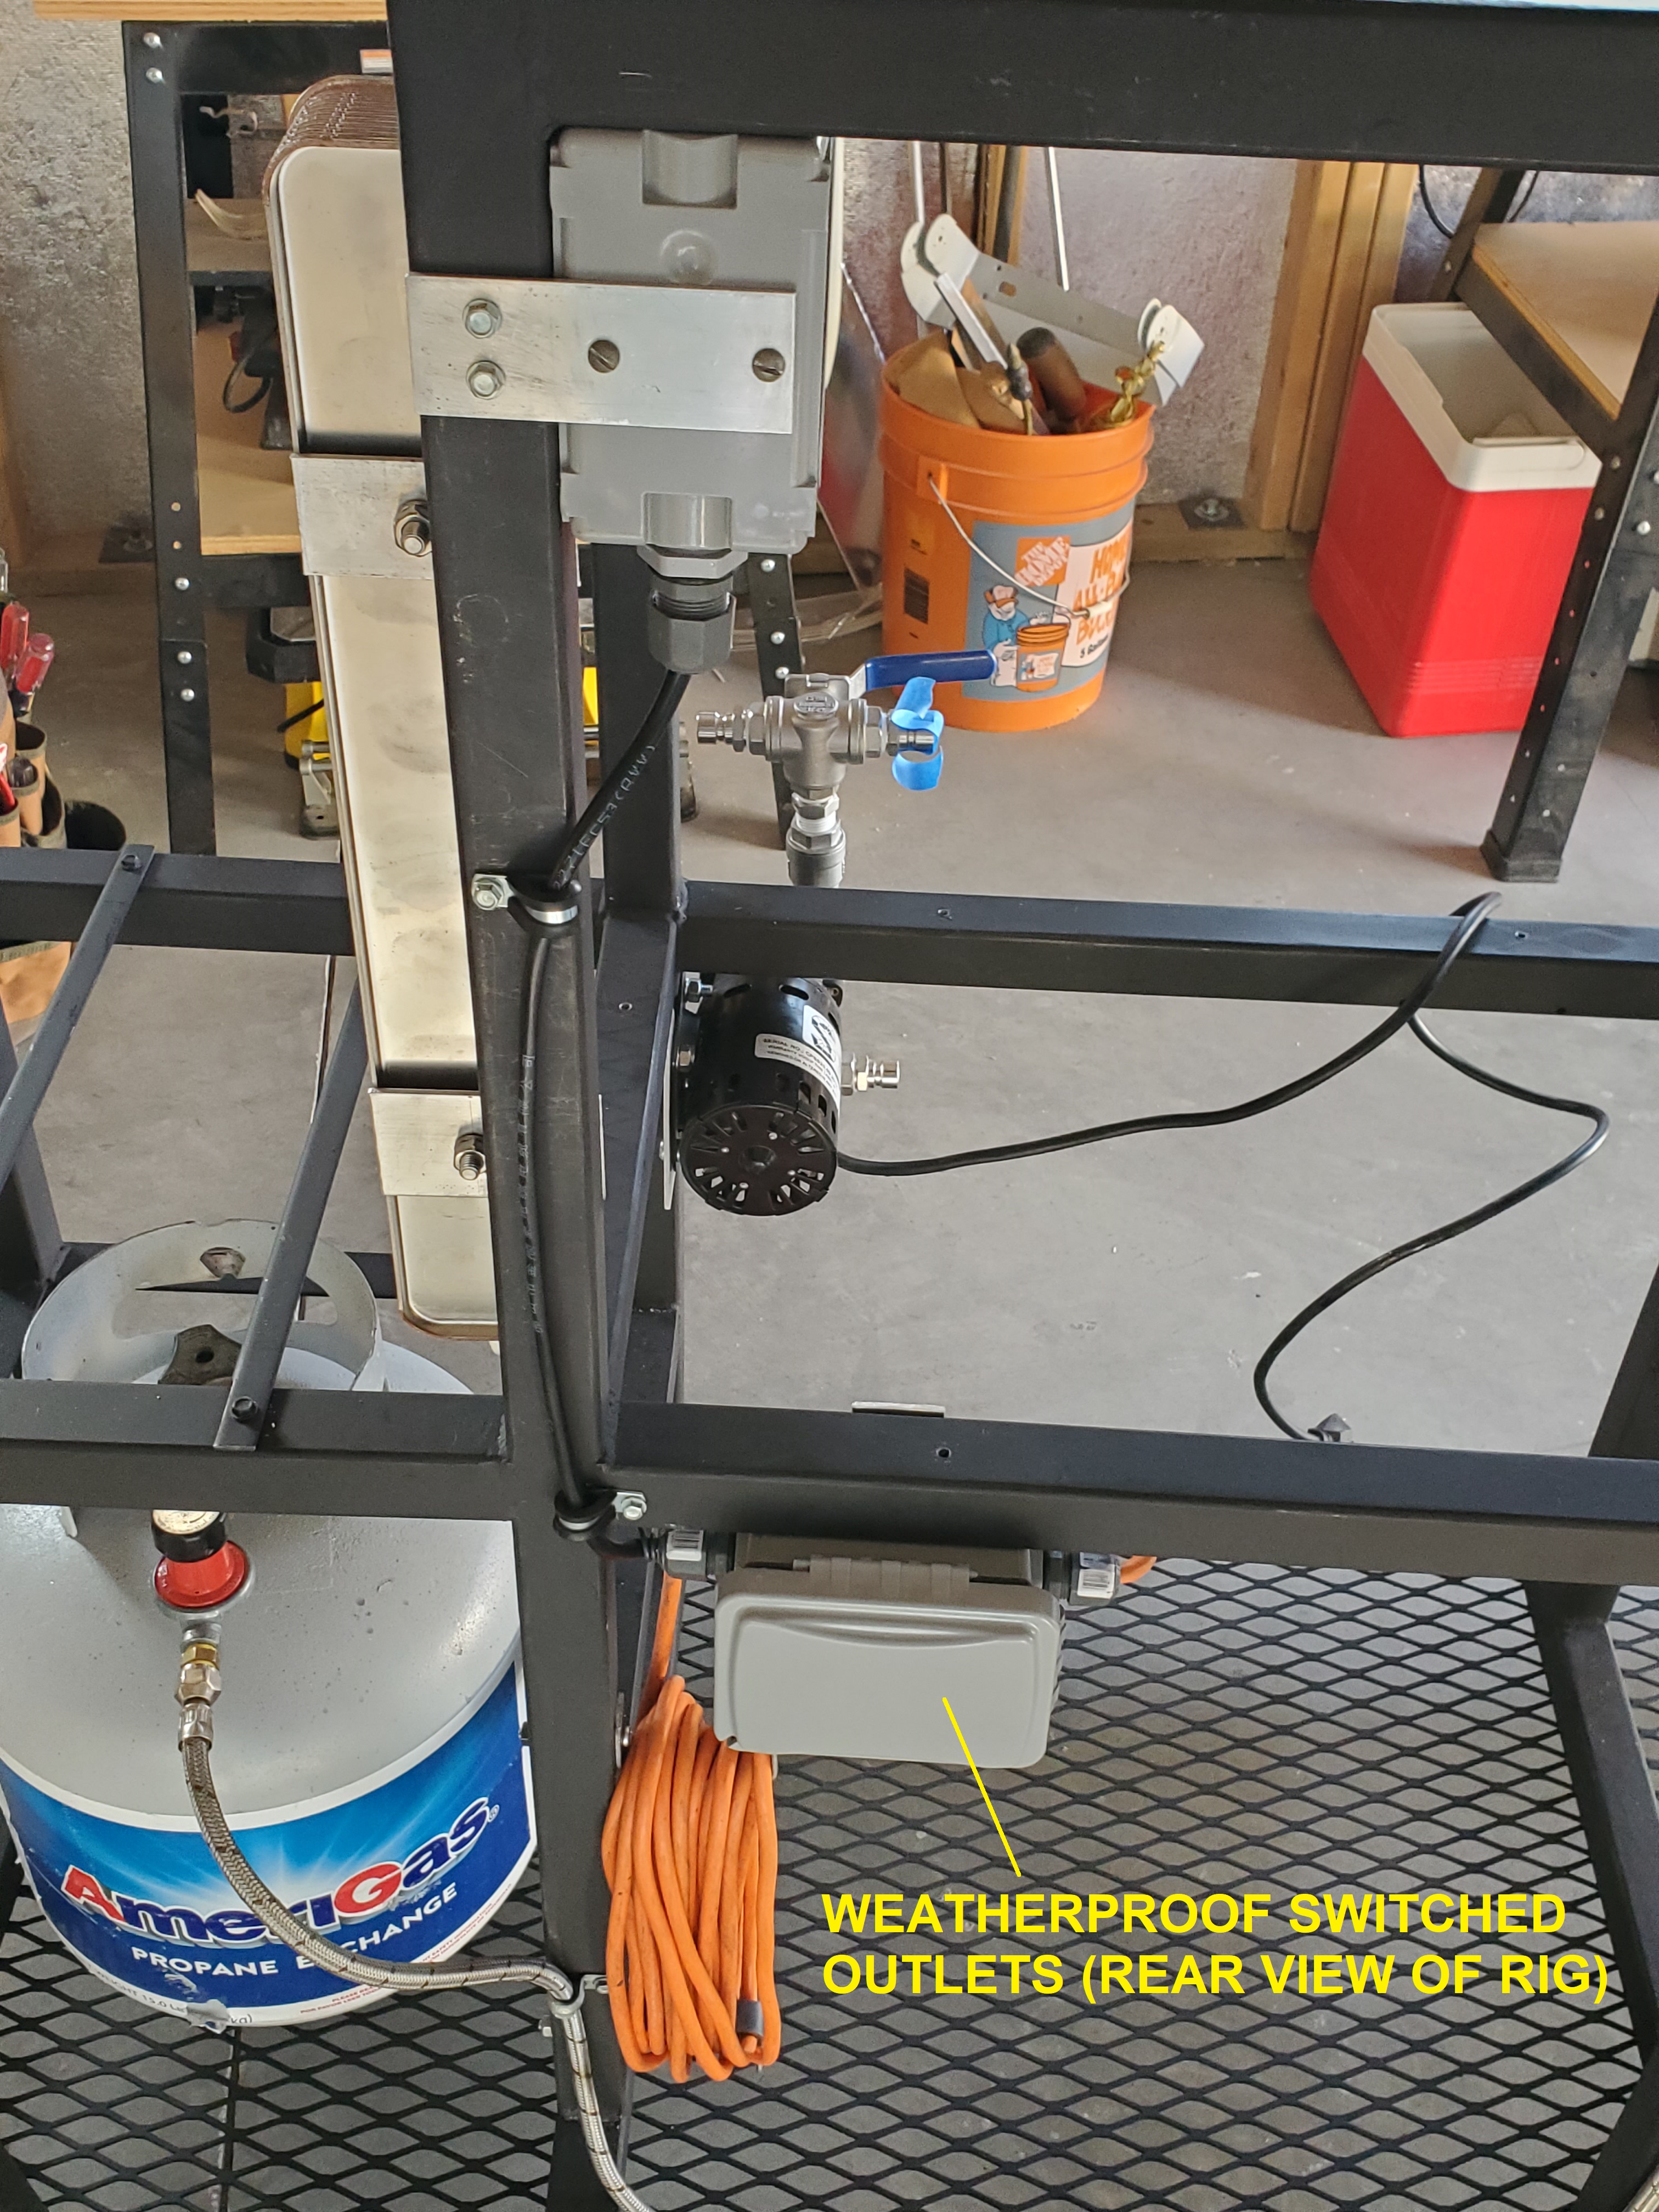
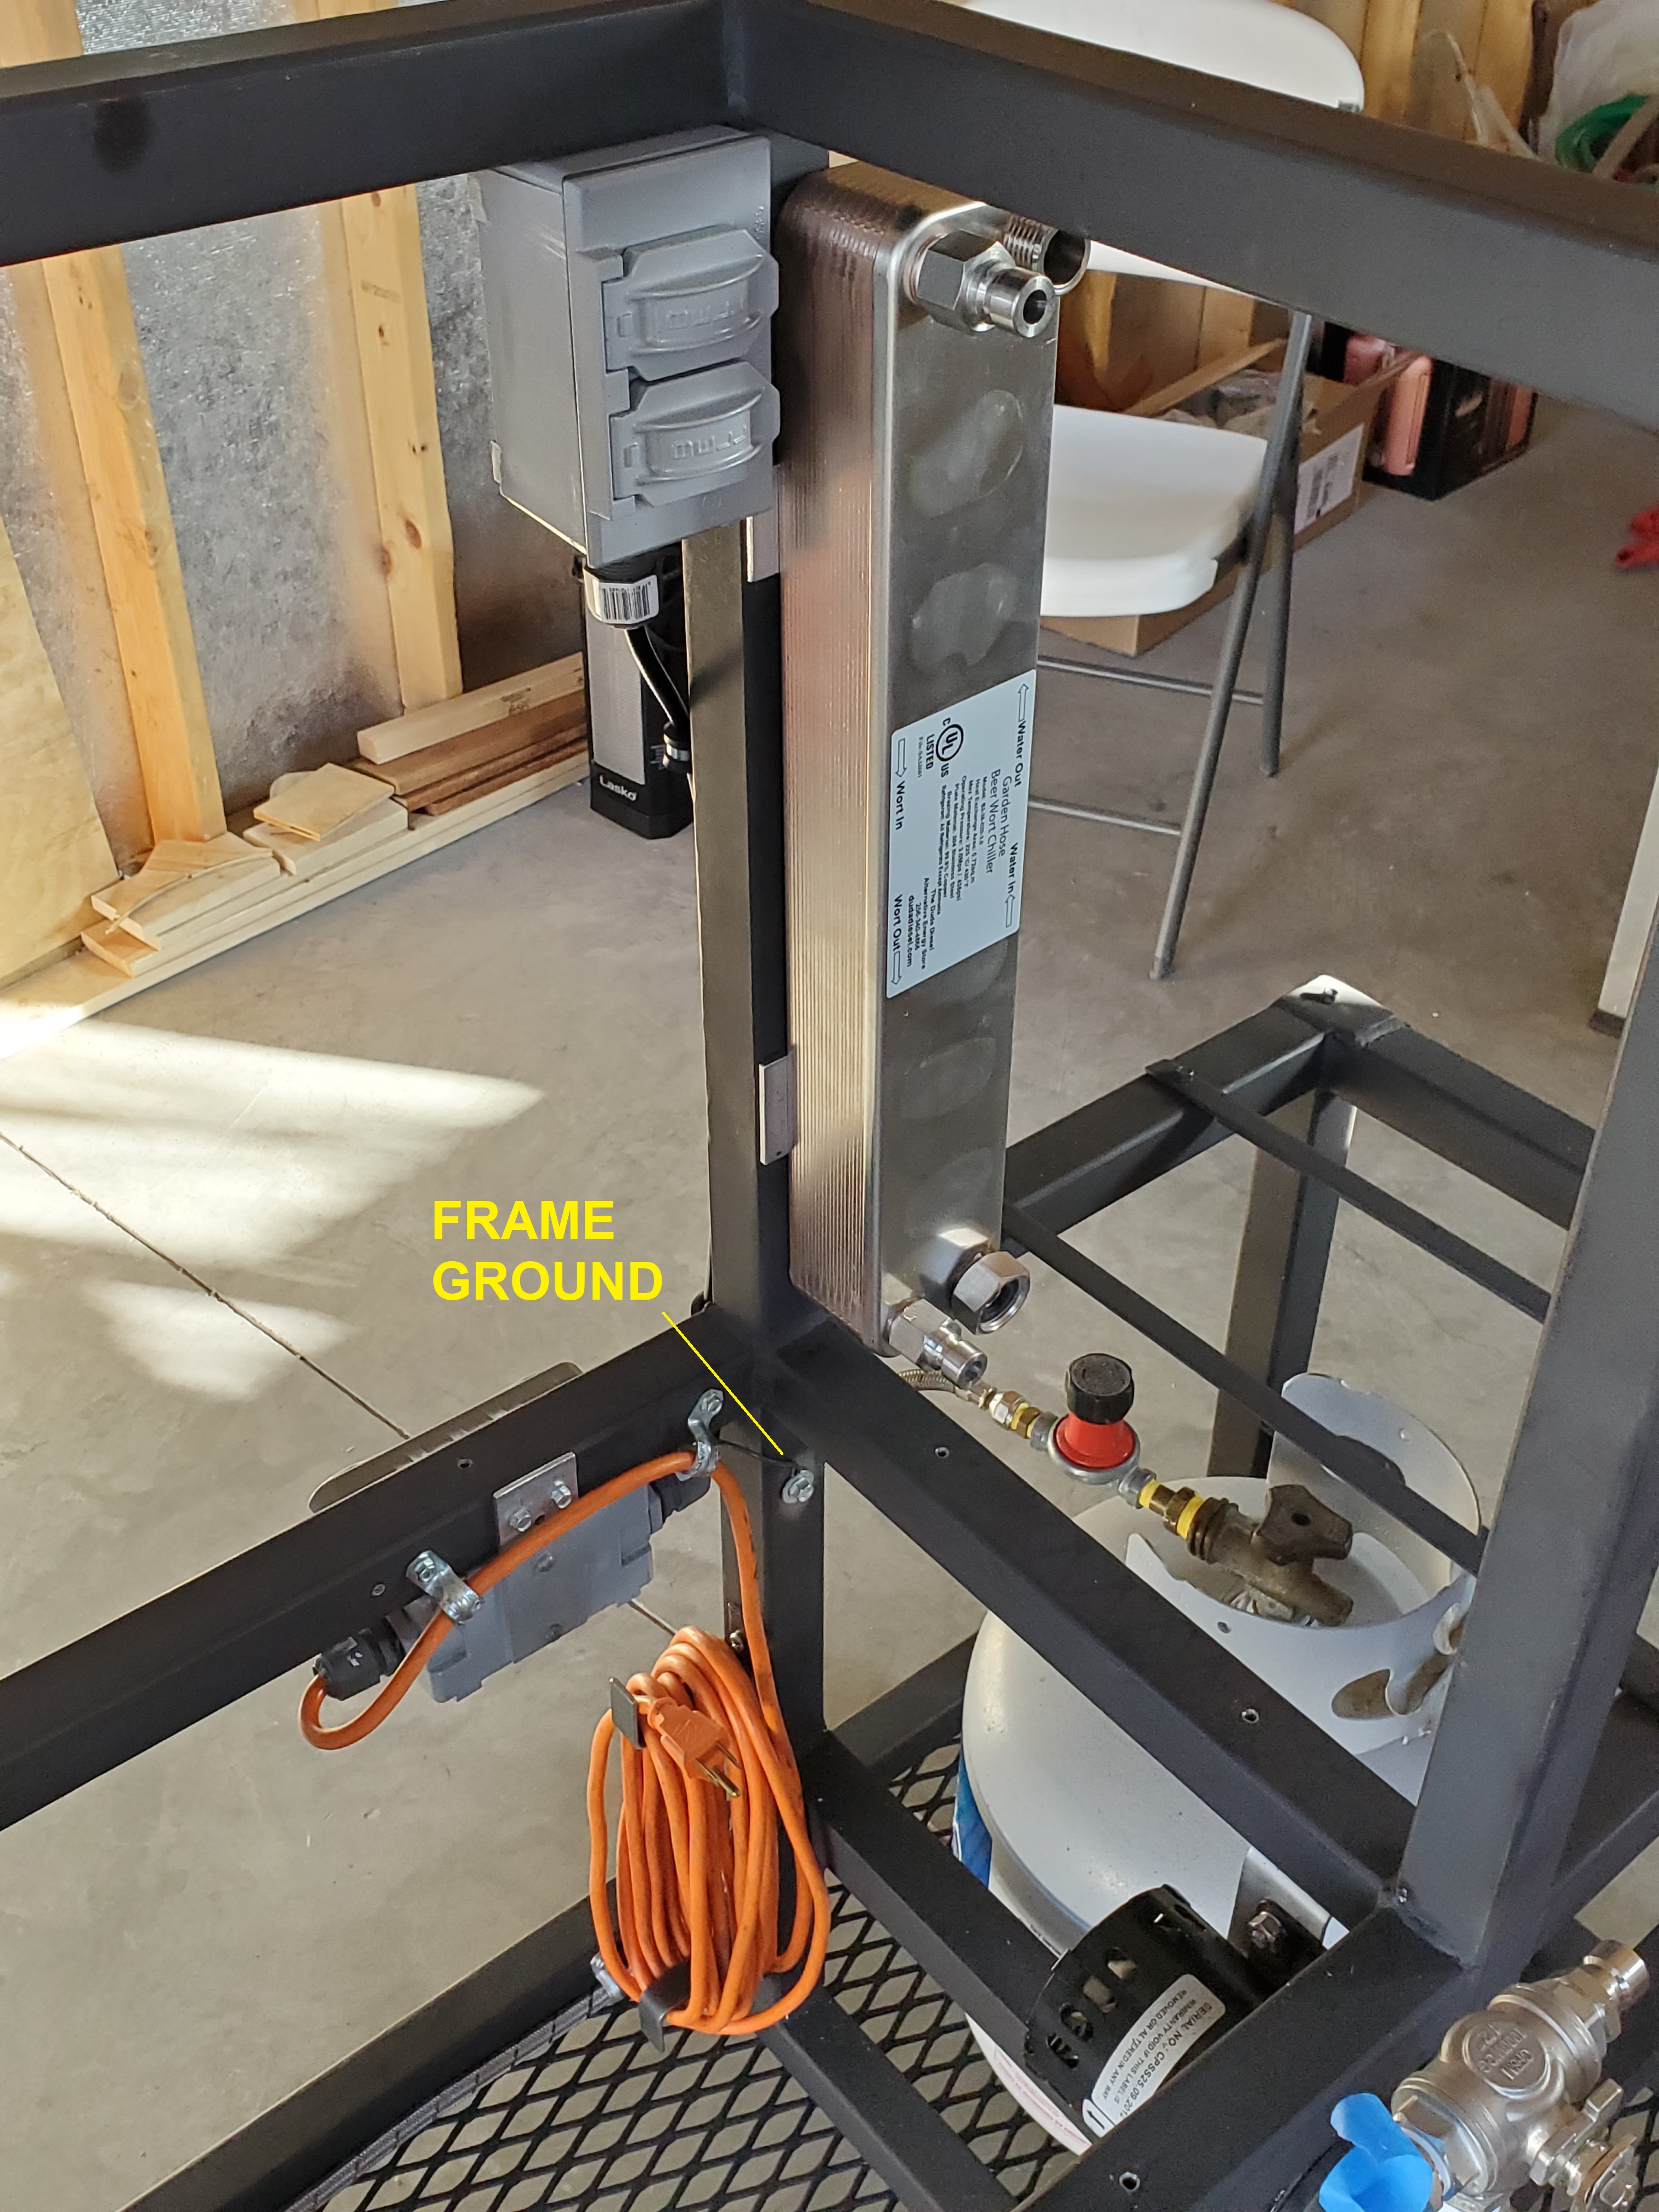
OK the pump power control part of my build is done. Works great...........I have two "switched" outlets one for the recirculation pump and the other for the chiller pump. The toggle switches and the outlets are behind weatherproof covers with water tight connections so I can spray the whole rig down with a garden hose if I need to, without power applied of course. I grounded to the frame directly as shown in the picture. The rig power cord is orange, and about 25' long. I'm trying my best to keep this rig neat and tidy, I'll be looking at it for a long time. Next I need to add the chiller garden hose somehow so it can be stowed when not in use, and not an eyesore. I might coil it up on a spool of some kind, or coil it in a bucket, dunno yet but it needs to look good and be functional both, that's just me. I am still waiting on the custom grain basket I ordered.
20200220_081153.jpg
20200220_081206.jpg
Pump Control Circuit.jpg
 
Somehow the site stopped alerting me to replies to this thread.

I do see tubular stainless steel elbows around on Google, but they seem to be designed for butt-welding to pipes and not for insert soldering like the copper elbow is. It would have to be insert soldering, I don't think doing a butt-weld of an elbow to the cut surface of that nipple would be worth the gymnastics inside the keg to do it.

Regarding the hops and filtering, I'm a whirlpool and dump chap, if some trub gets into the fermenter, so what. I use an immersion chiller, not a plate chiller and the hops would definitely clog up the plate chiller. The pump and plumbing shouldn't have any trouble with recirculating the hops as the pellets break up into leaf fragments in most cases. You could put a bazooka screen on the intake dip tube to keep the material from ending in the plumbing in the first place.

You could also use an inline filter between the intake and the pump, or the pump and the chiller, with a 400 micron stainless steel filter in it. That would remove the recirculating requirement by using the 400 micron hop basket as a filter.
Thanks Bruce_the_Loon. As you may recall I ended up with drilling out the SS nipple in the bottom of my Keggle, and inserting a SS 90 degree tube, which fits very tightly and does not leak. I did not need to solder it, the interference fit is just right, and I can remove it by hand with a little tugging. I attached a picture here.

I may still employ whirlpooling, and since you are a whirlpool fan, could you help me out with how to do that? I've never done it. I know that the idea is to stir the wort so the trub collects in the bottom center of the Keggle, and the clearer wort exits through the SS tube. Is this tube is oriented correctly, and how close to the bottom of the Keggle should it be? Should the wort be stirred in the direction the tube elbow is facing? Should the elbow be pointing slightly downward? How much liquid will I leave behind using the whirlpool technique? Thanks, and Cheers!
Dip Tube Interference Fit 2.jpg
 
Progress report on my ongoing
BIABasket build.

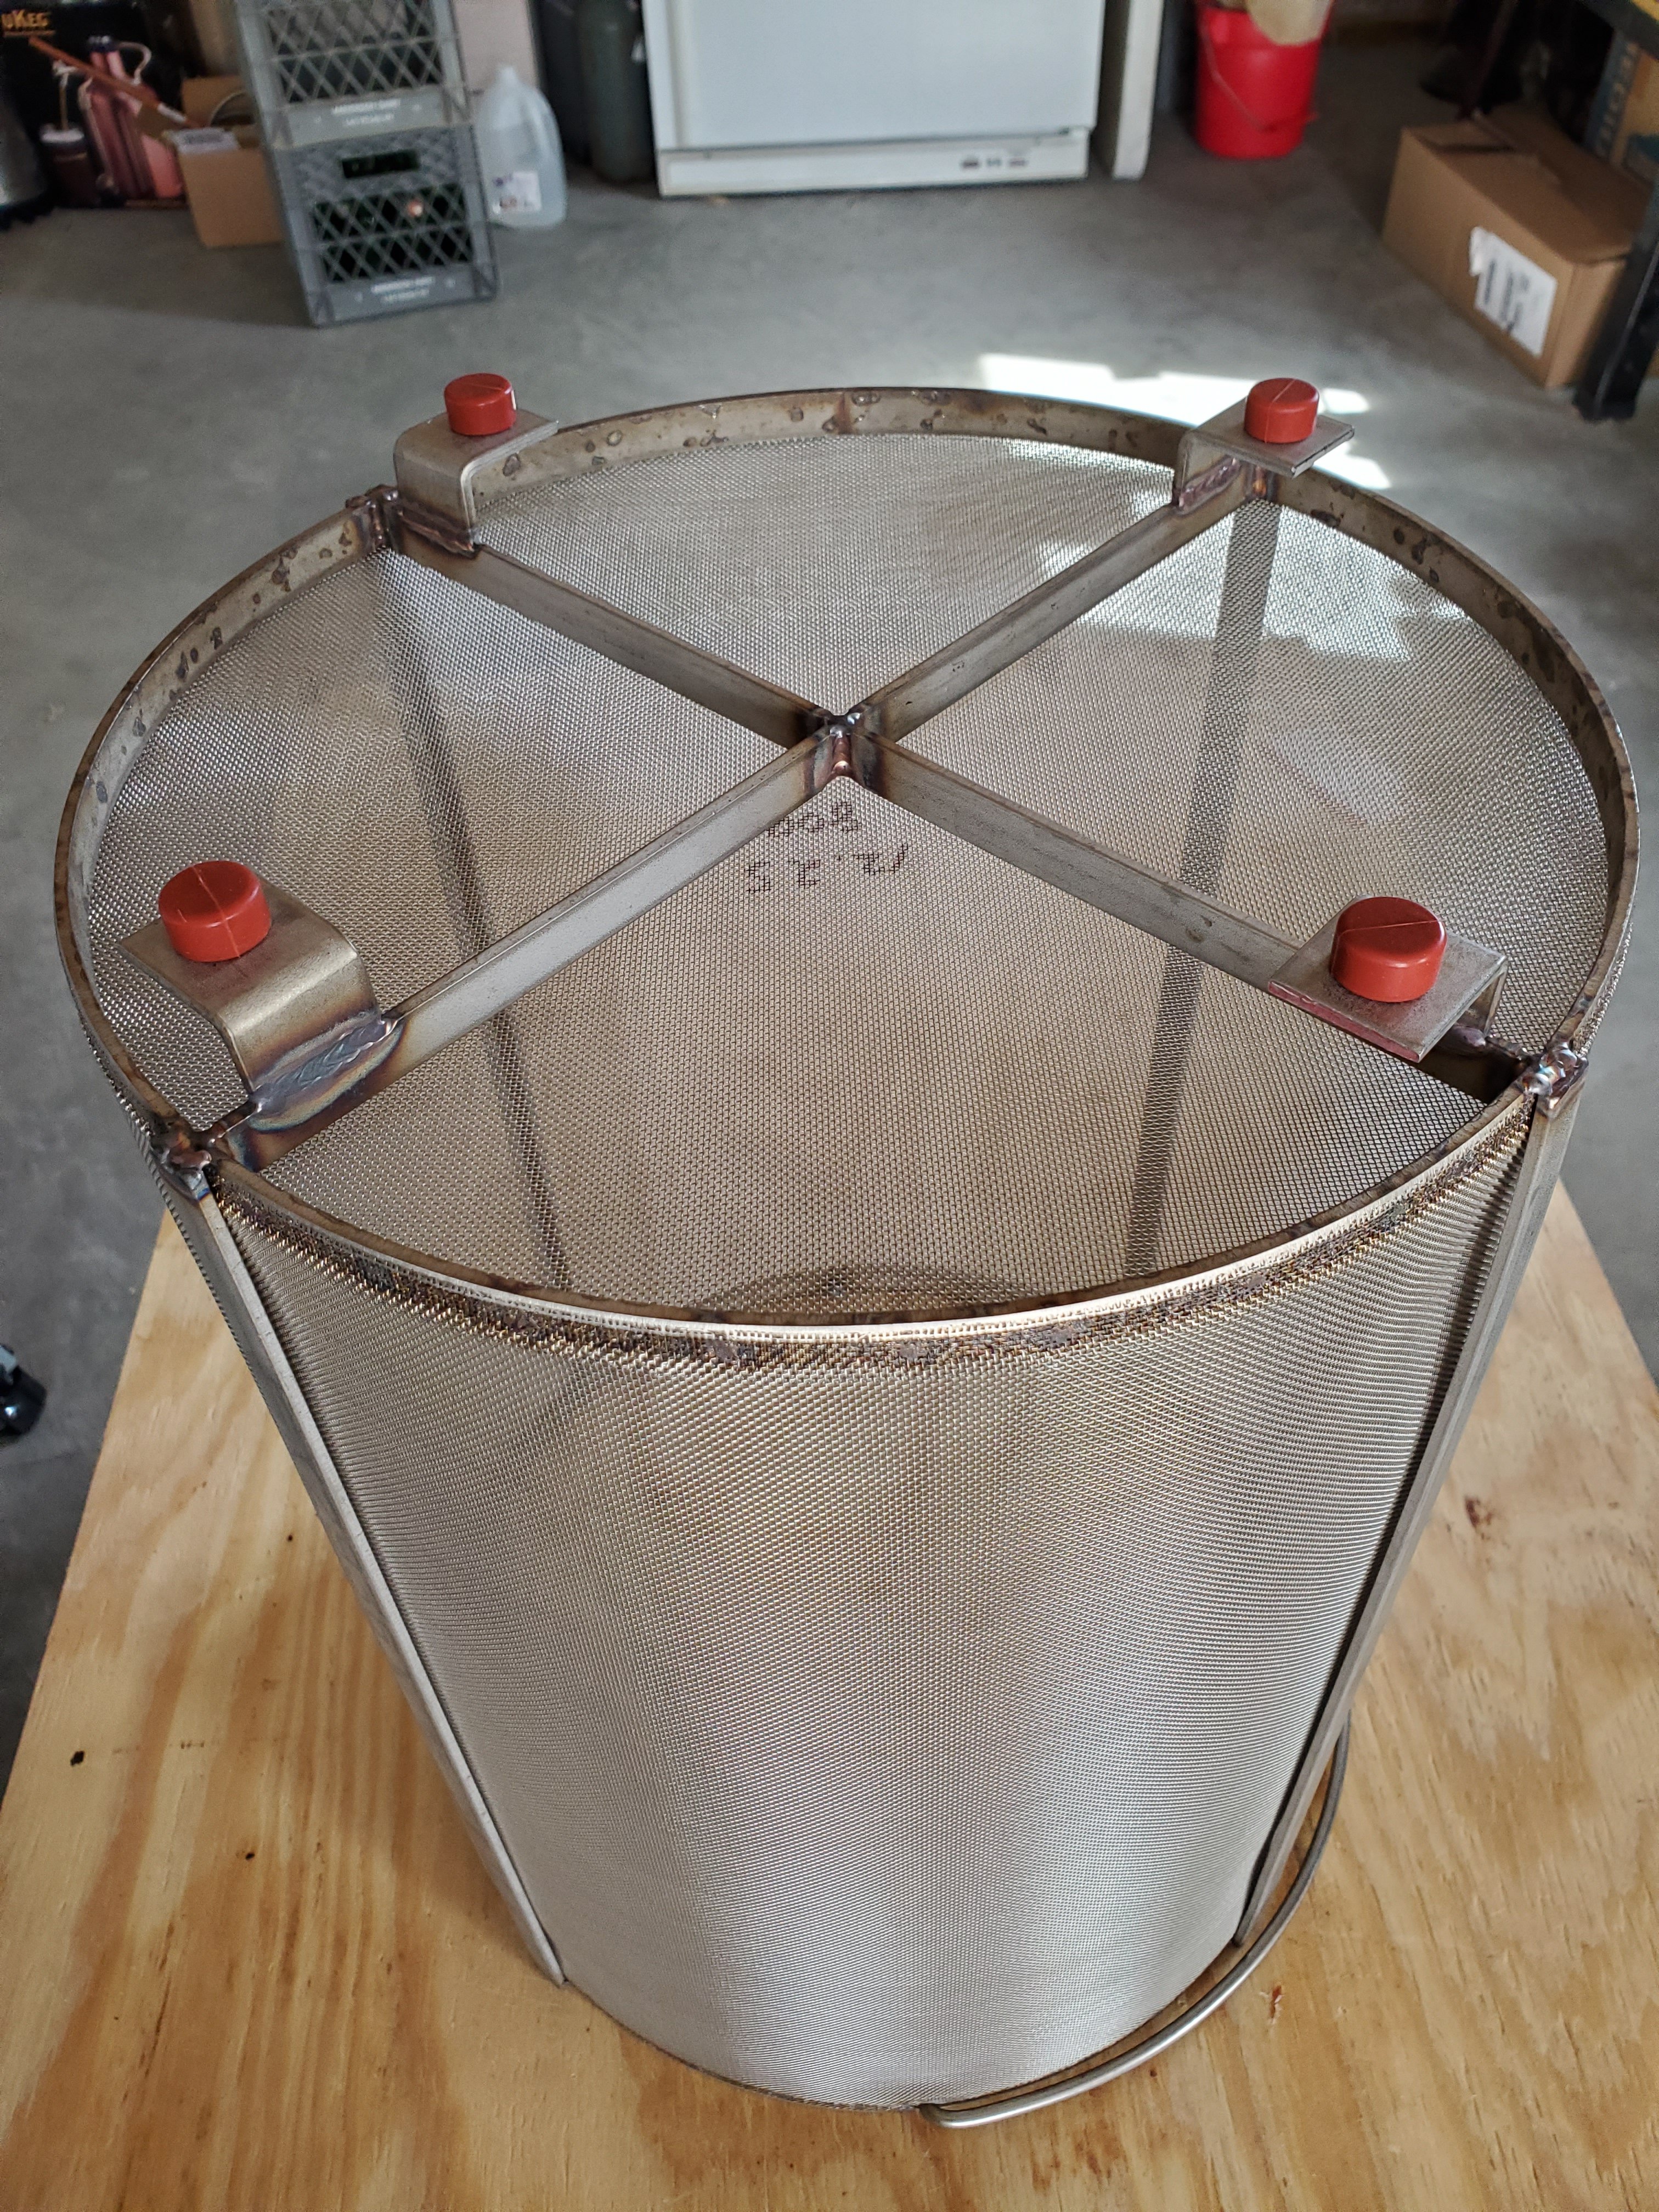
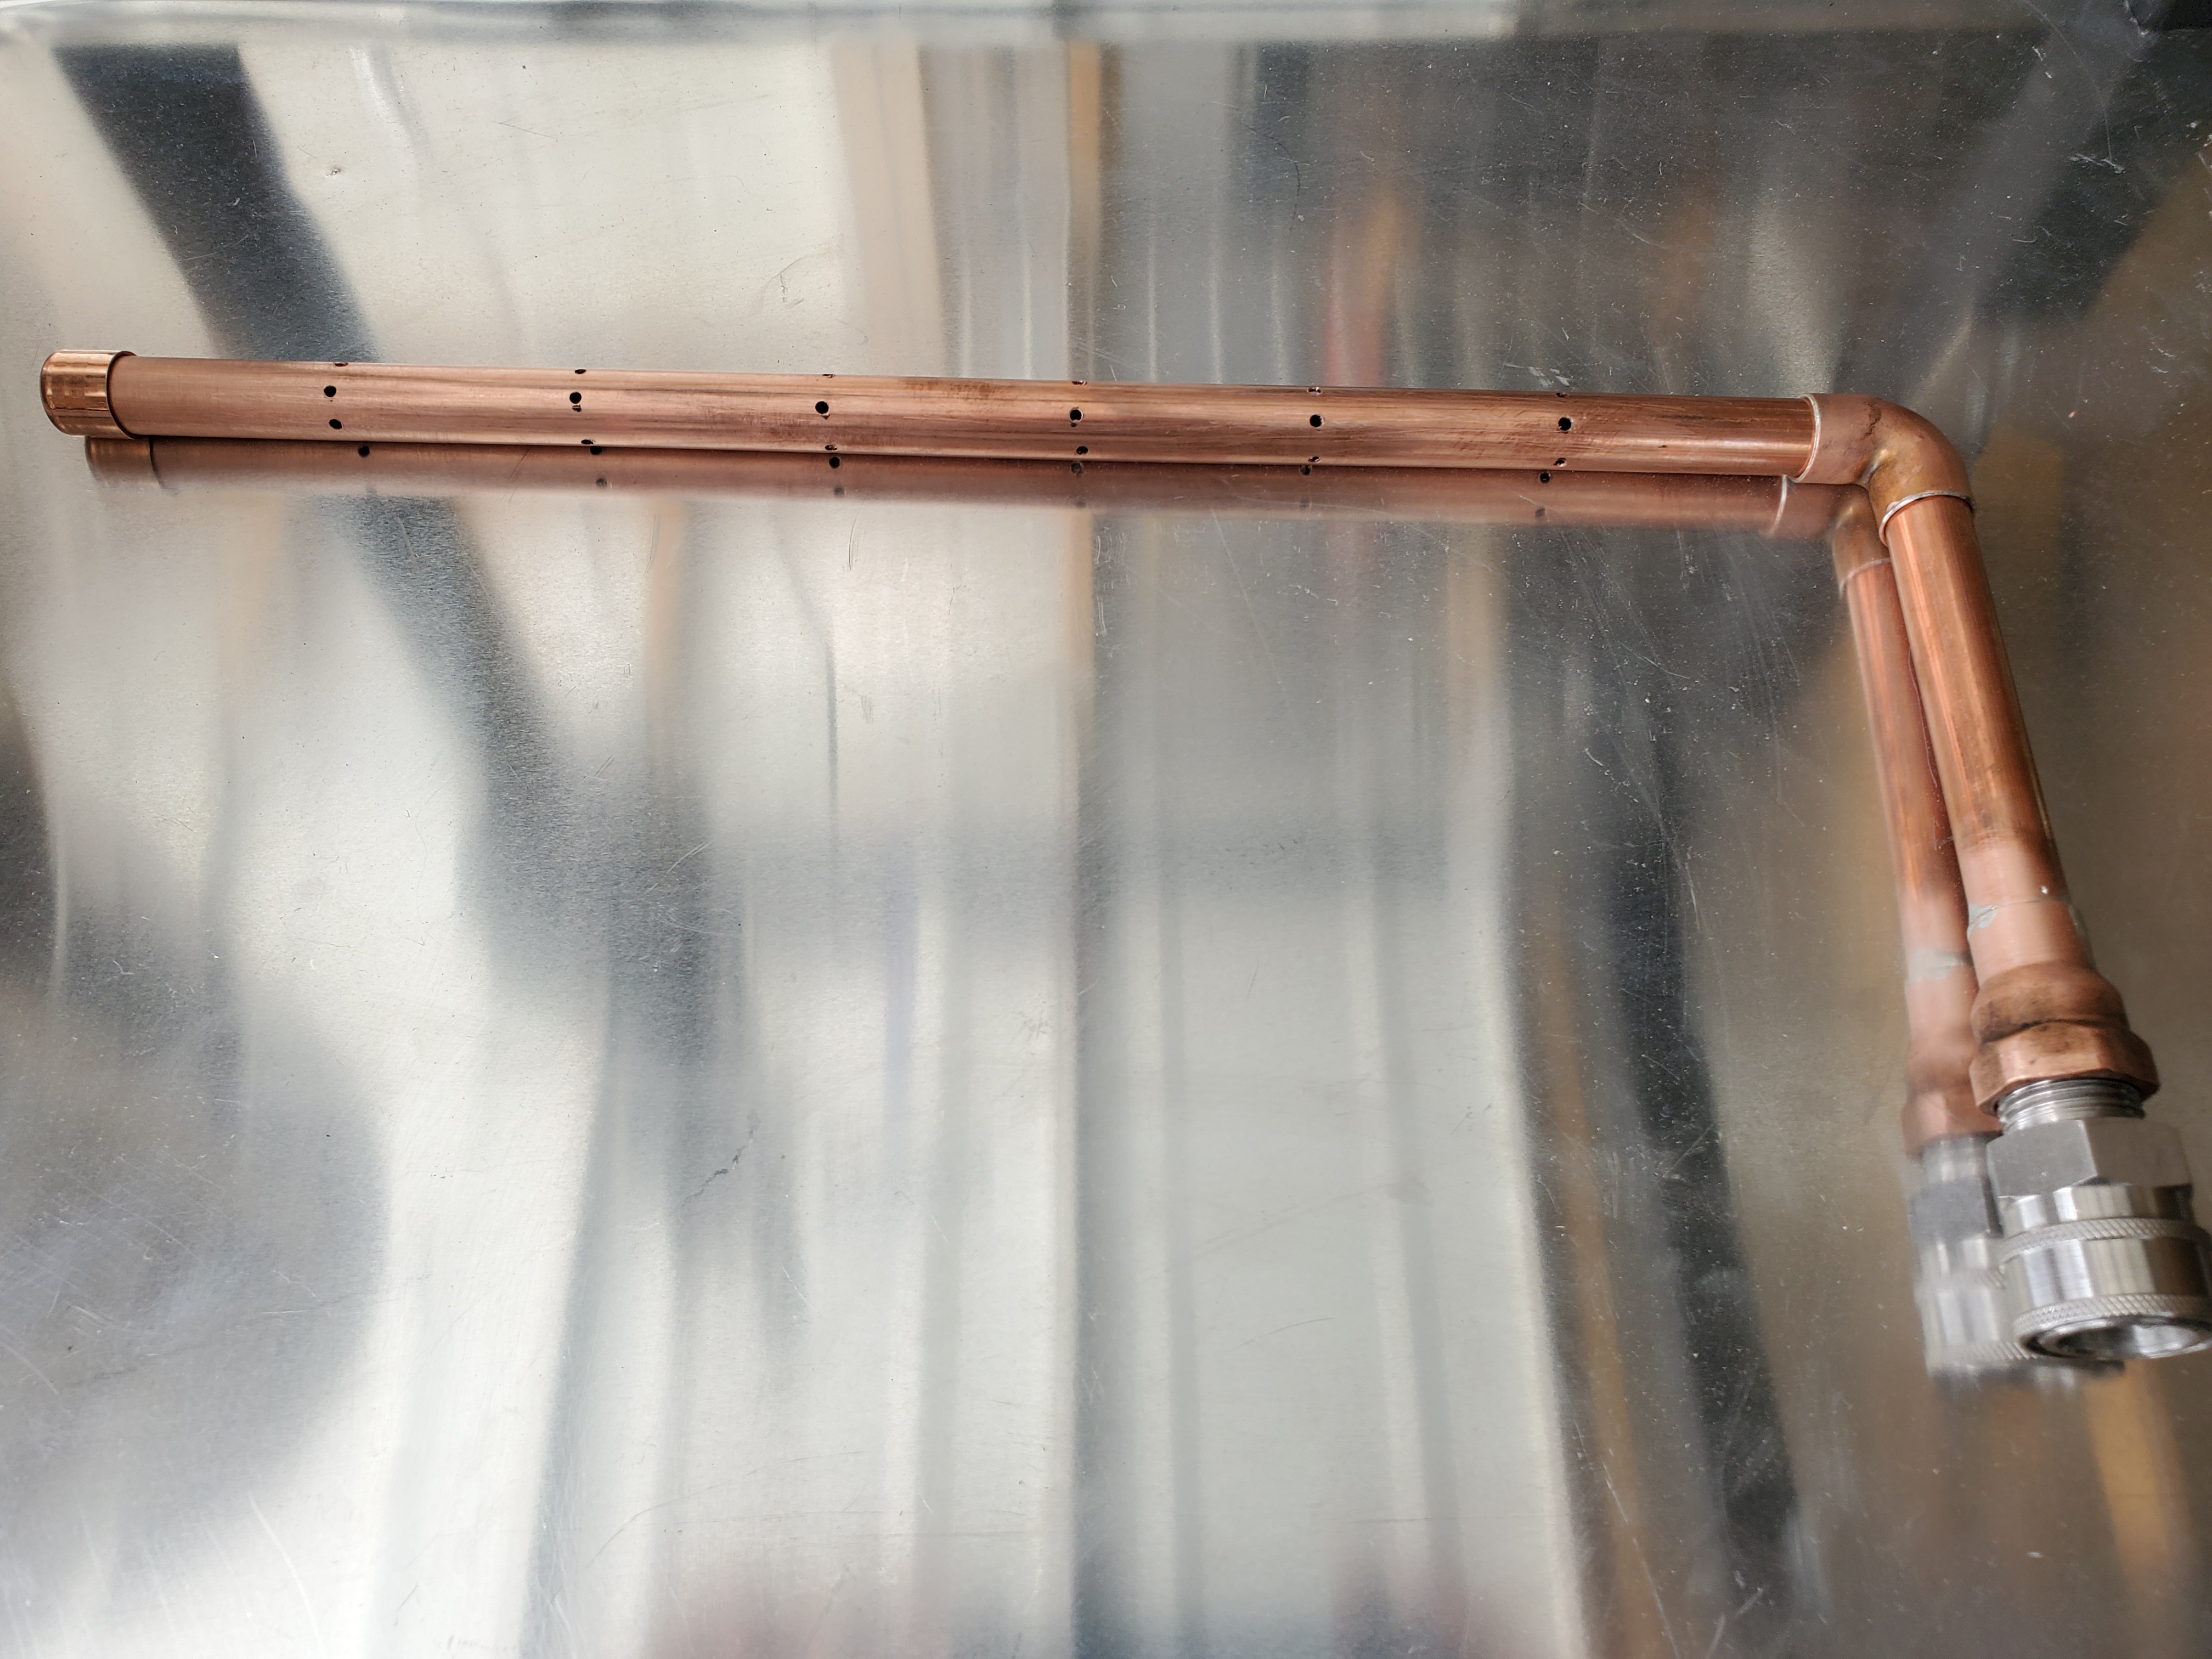
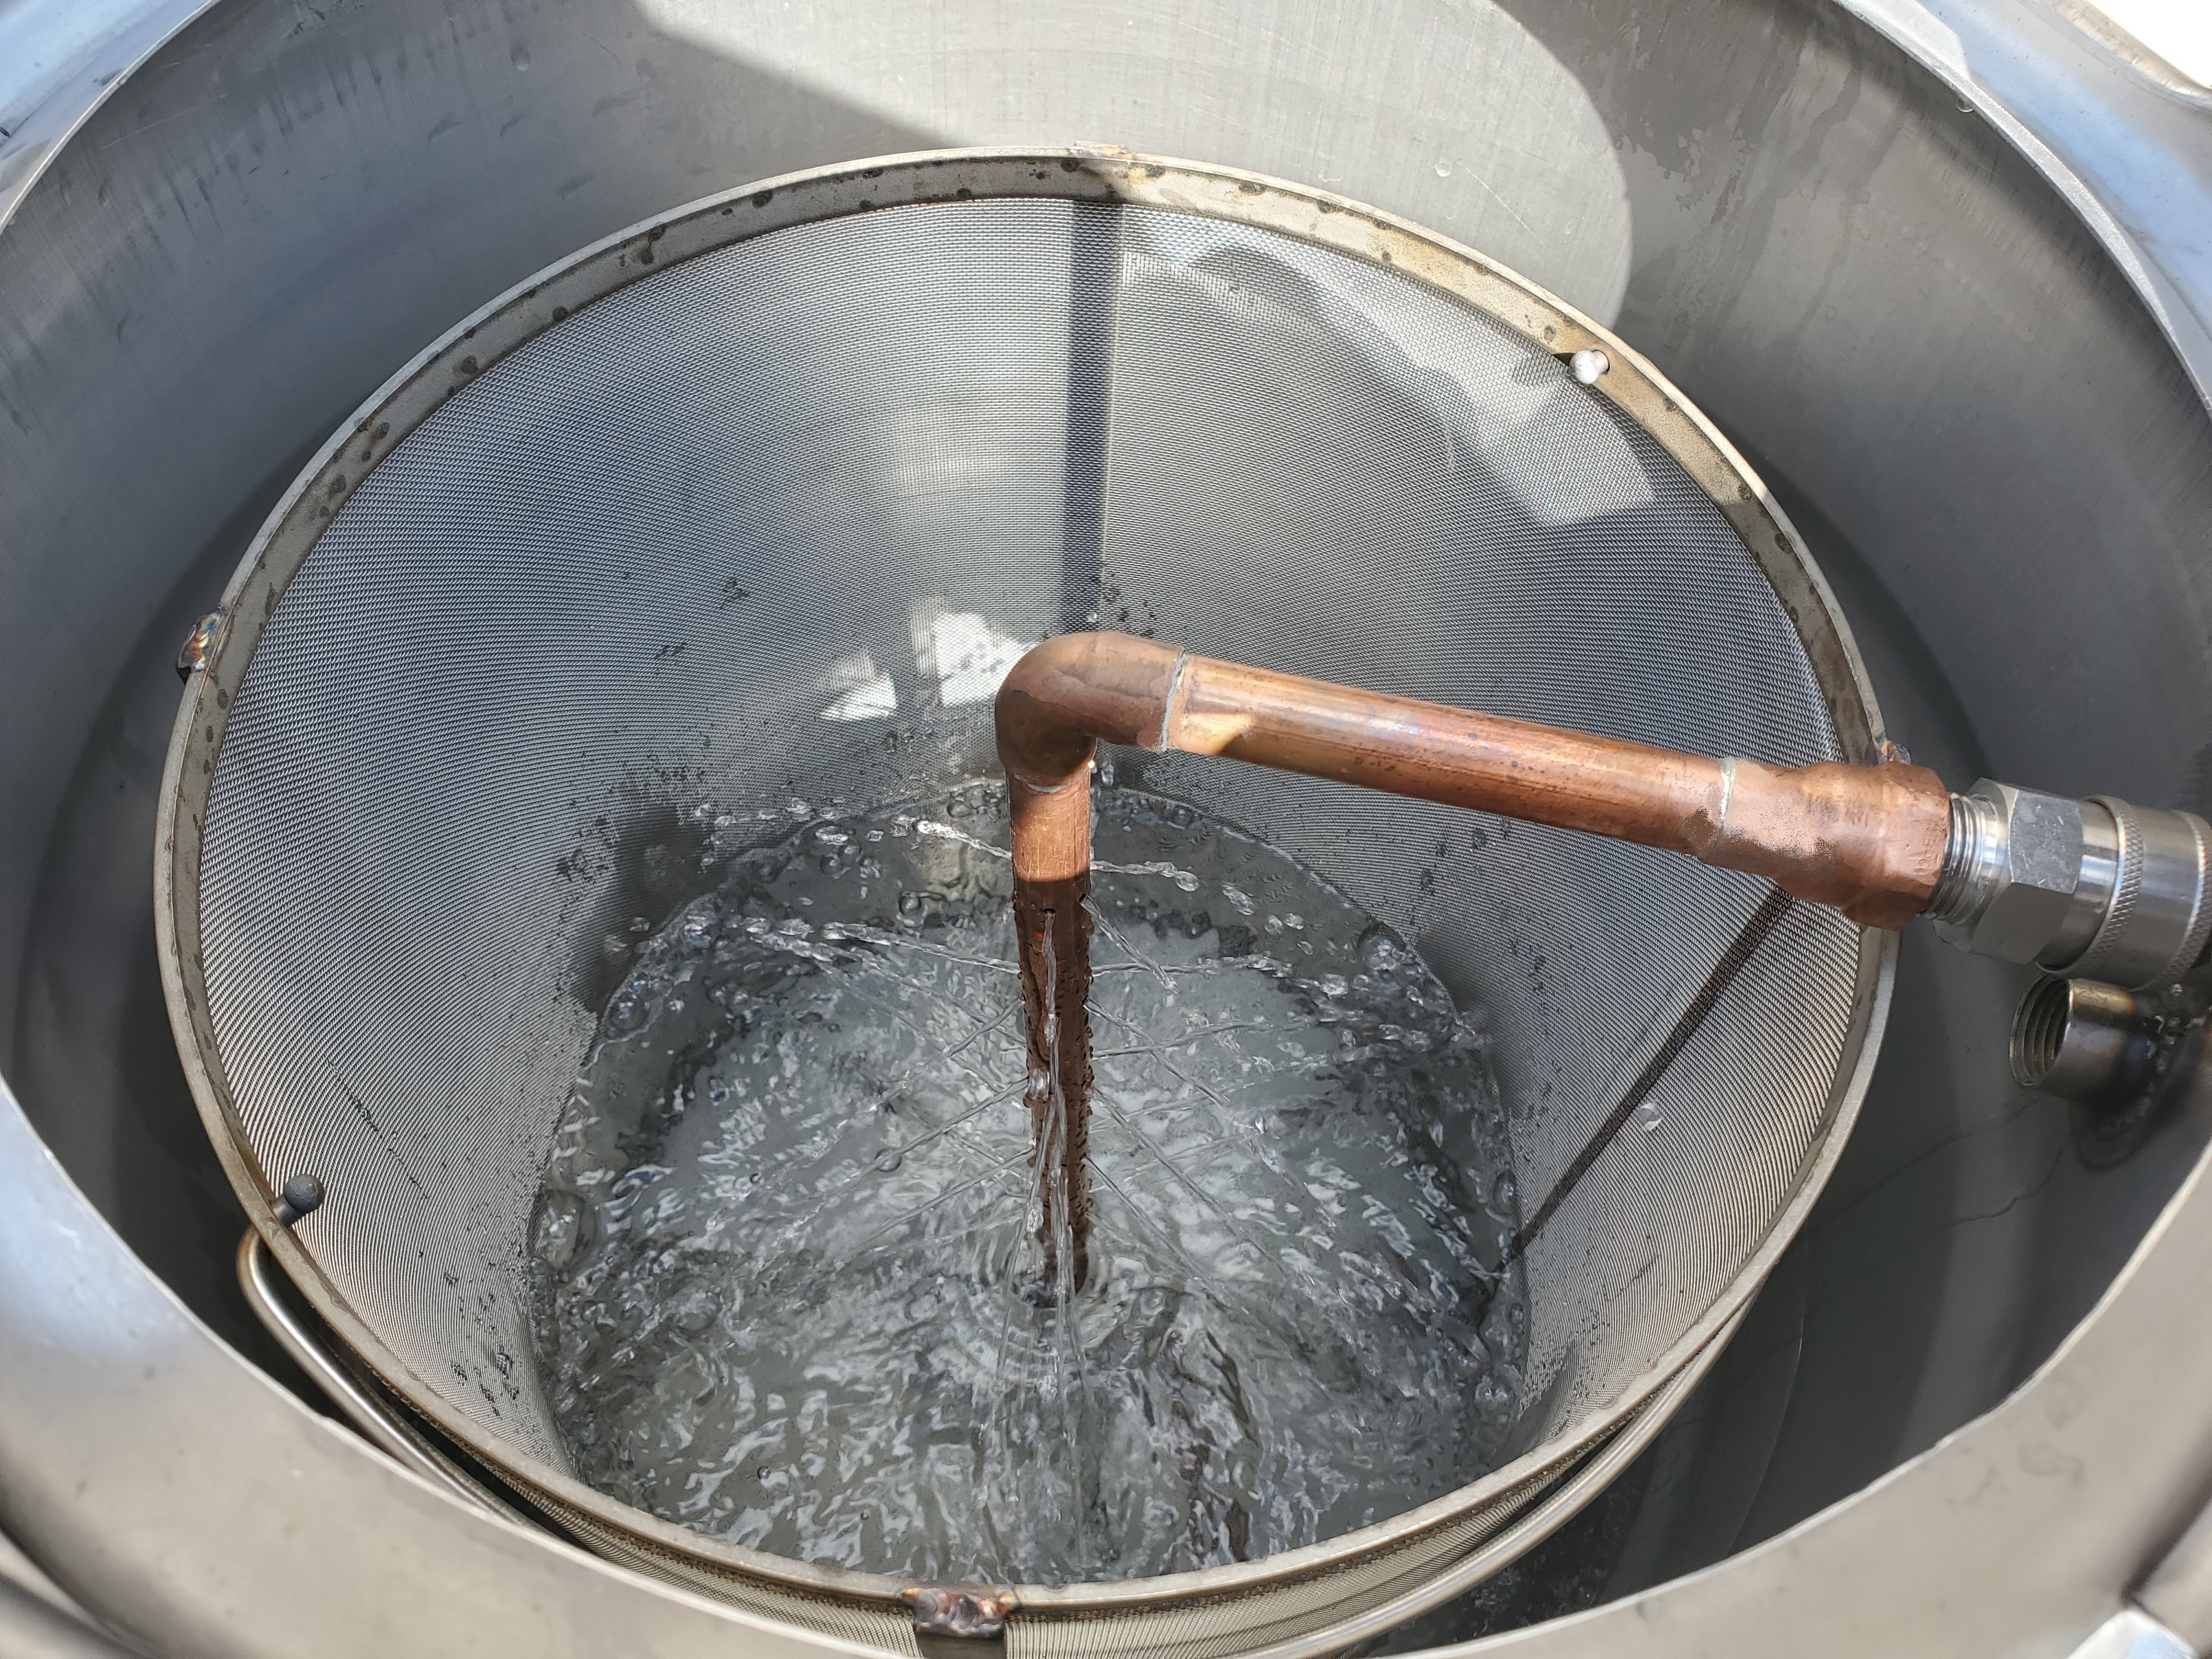
I received the custom grain basket, and it fits perfectly. I made the mash infusion tube so that is done (In the first image below the holes were not yet drilled in the tube). My approach to the holes; the total area of all the small drilled holes is approximately equal to the ID of the copper tube. That way I don't introduce any additional flow restriction. Still a few things left to do before I can fire this up and make beer, but I'm getting close. To be honest this has been fun and I'll be a little sad when I'm done, but then again I can always make adjustments forever and ever, right?
20200306_121838.jpg
20200306_112344.jpg
20200306_112609.jpg
20200307_132623.jpg
 
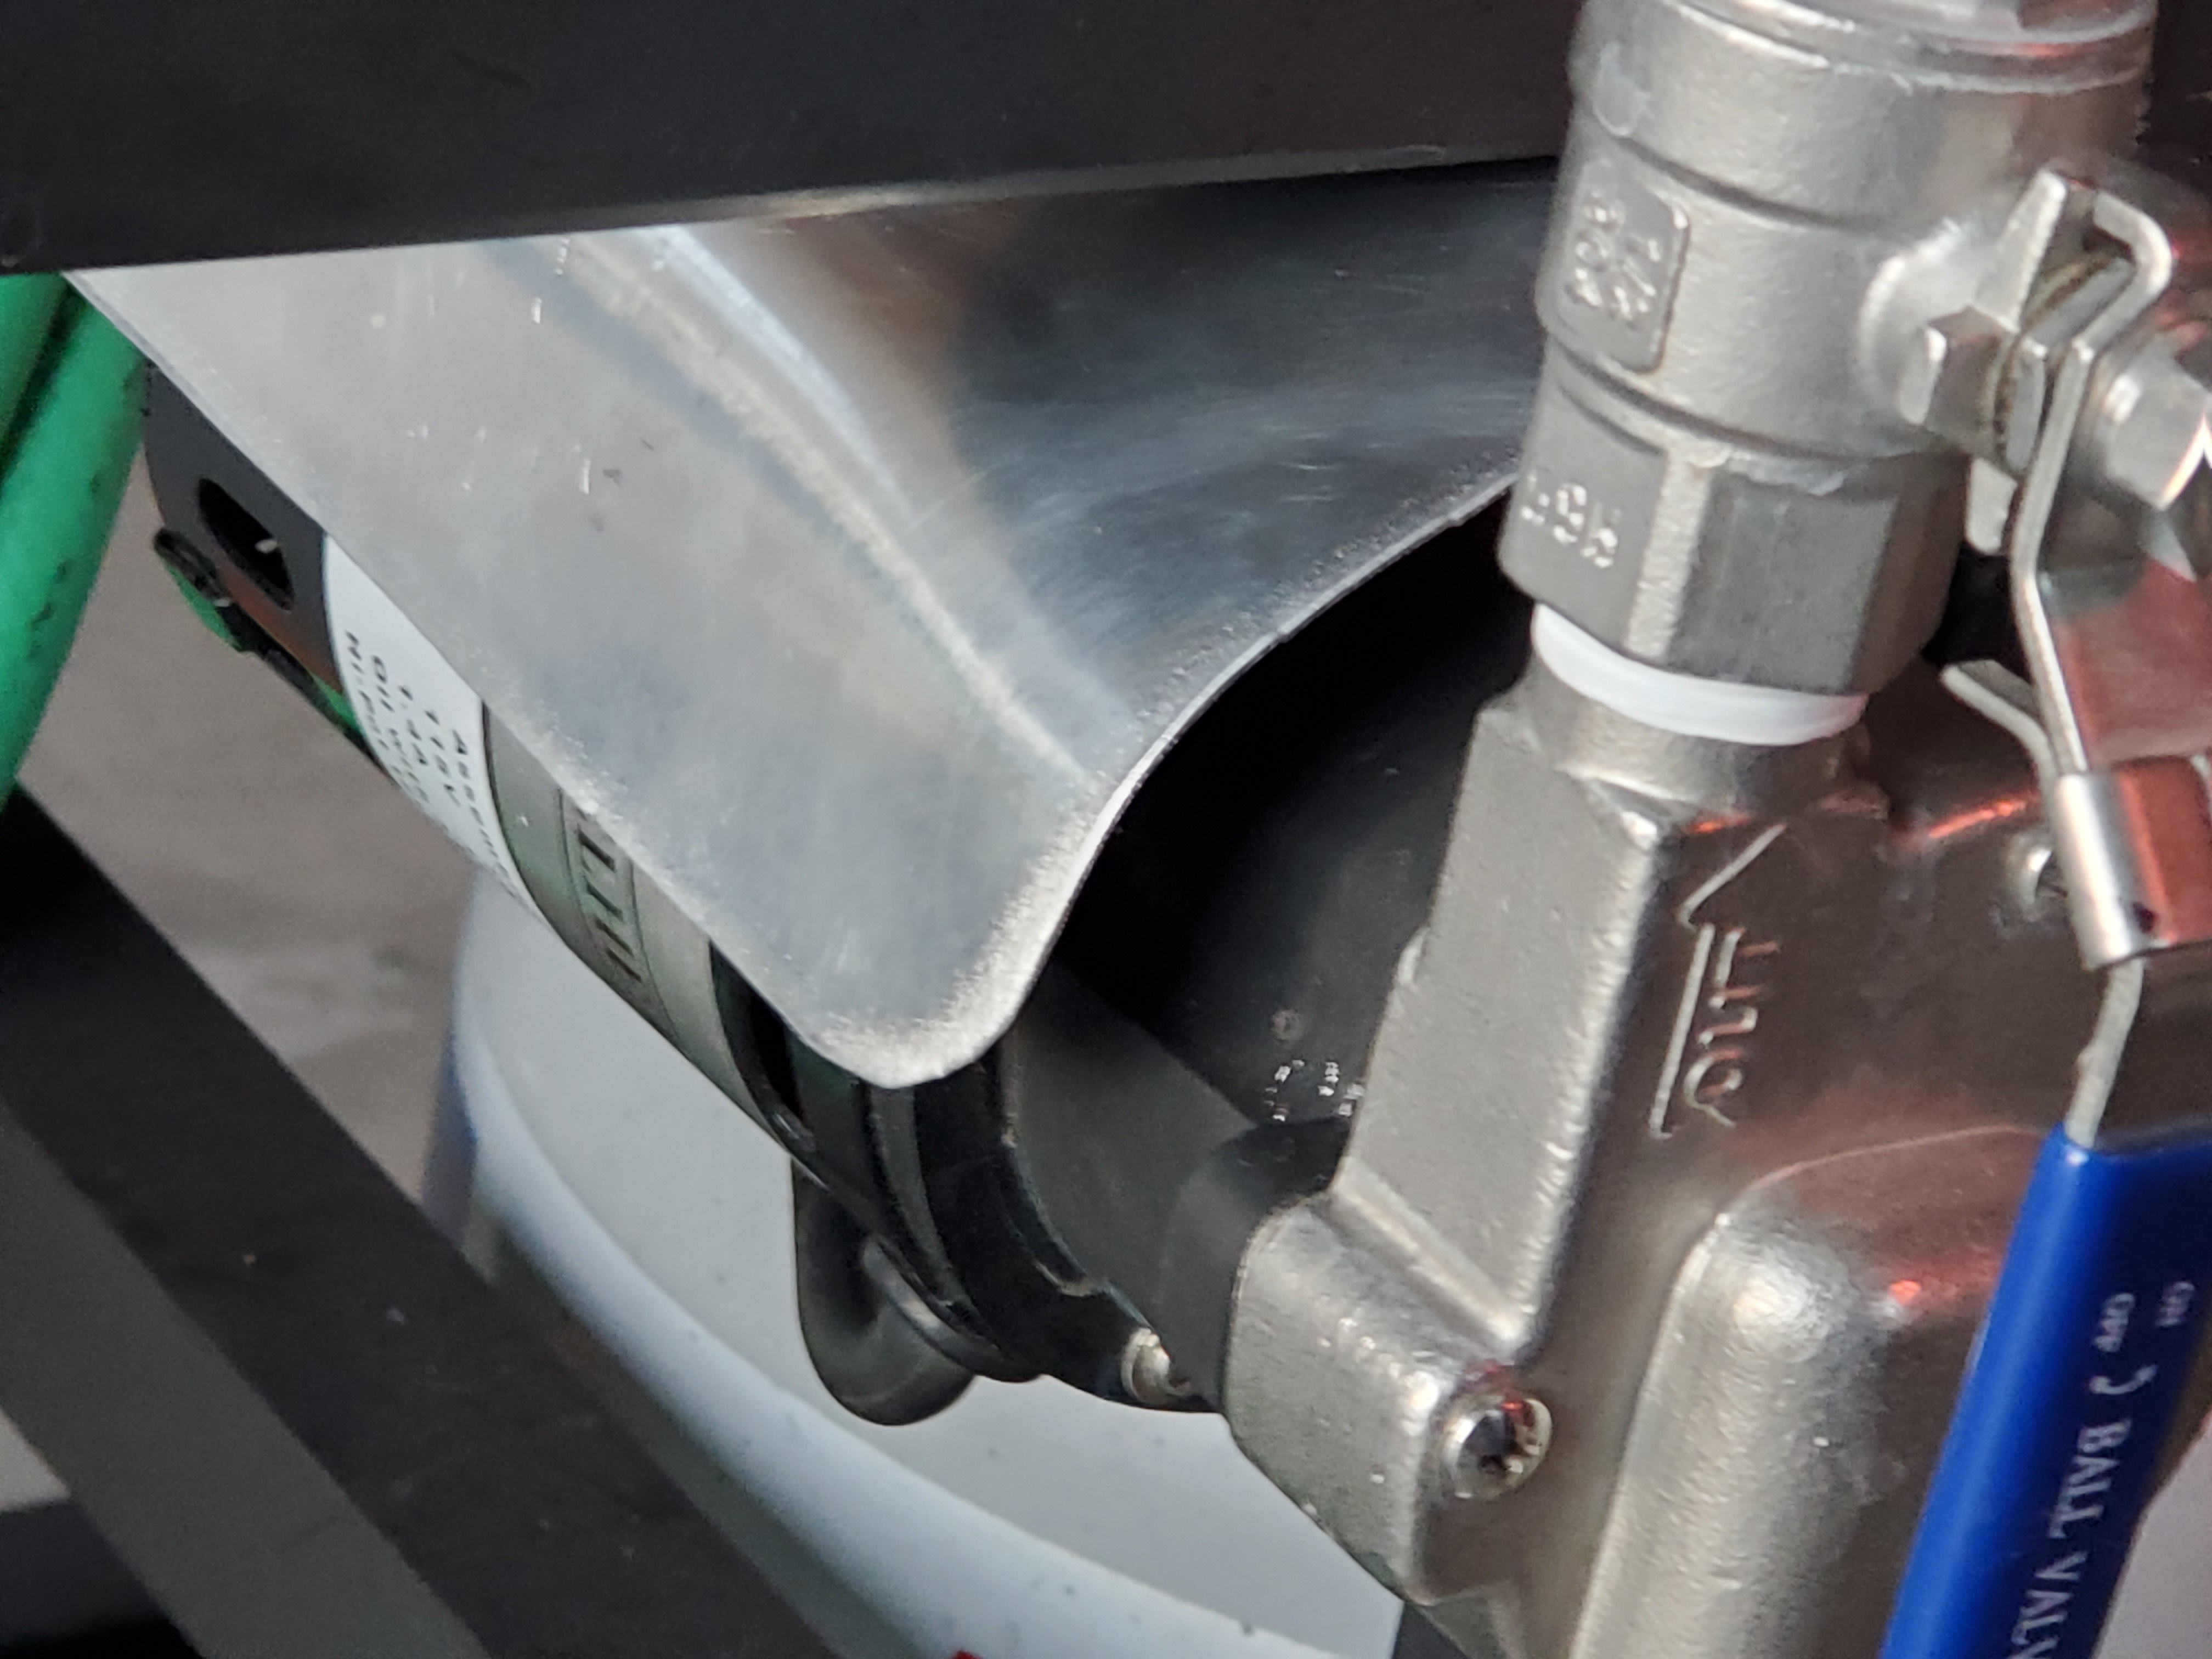
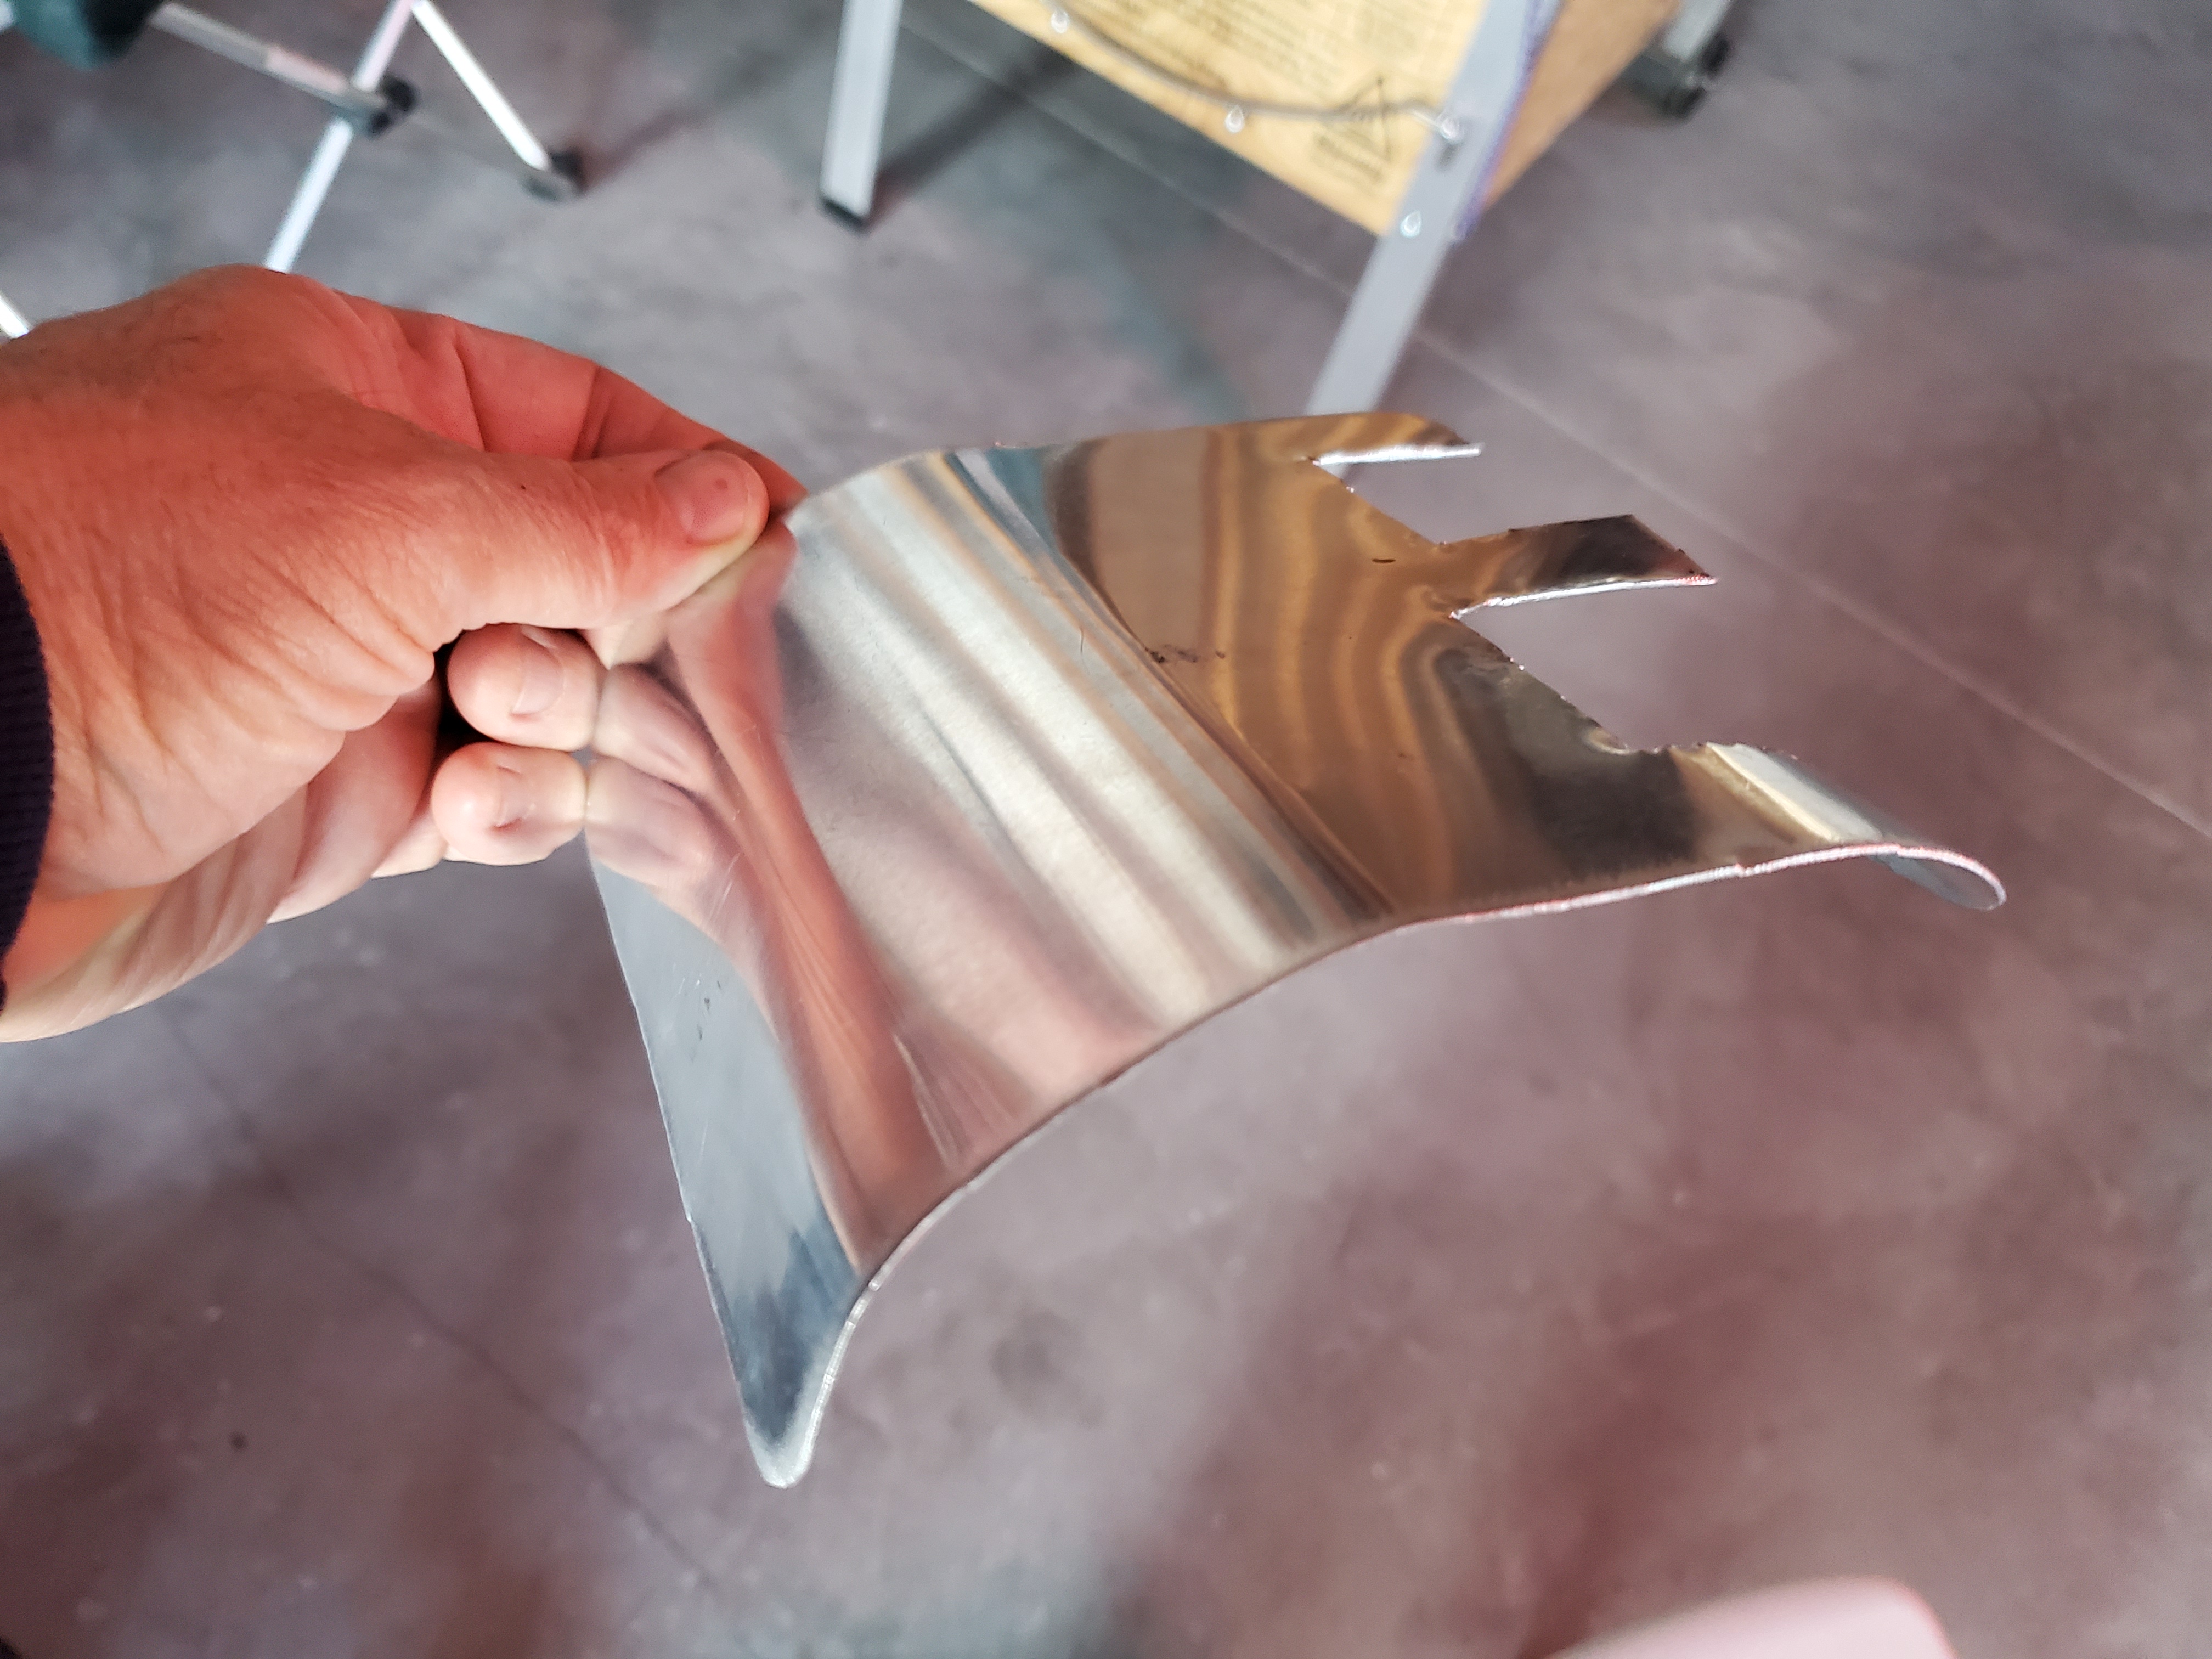
In addition to a custom work surface made from cookie sheets, I fashioned a shield for the pump motor to keep water out of it. It is made from scrap from the cookie sheets. The work surface is above the pump, but I wanted additional protection. In the first picture the work surface is removed so I could access the pump. I want to be able to spray the entire rig down if necessary (unplugged of course).
20200304_171944.jpg
20200304_171955.jpg
20200304_172025.jpg
 
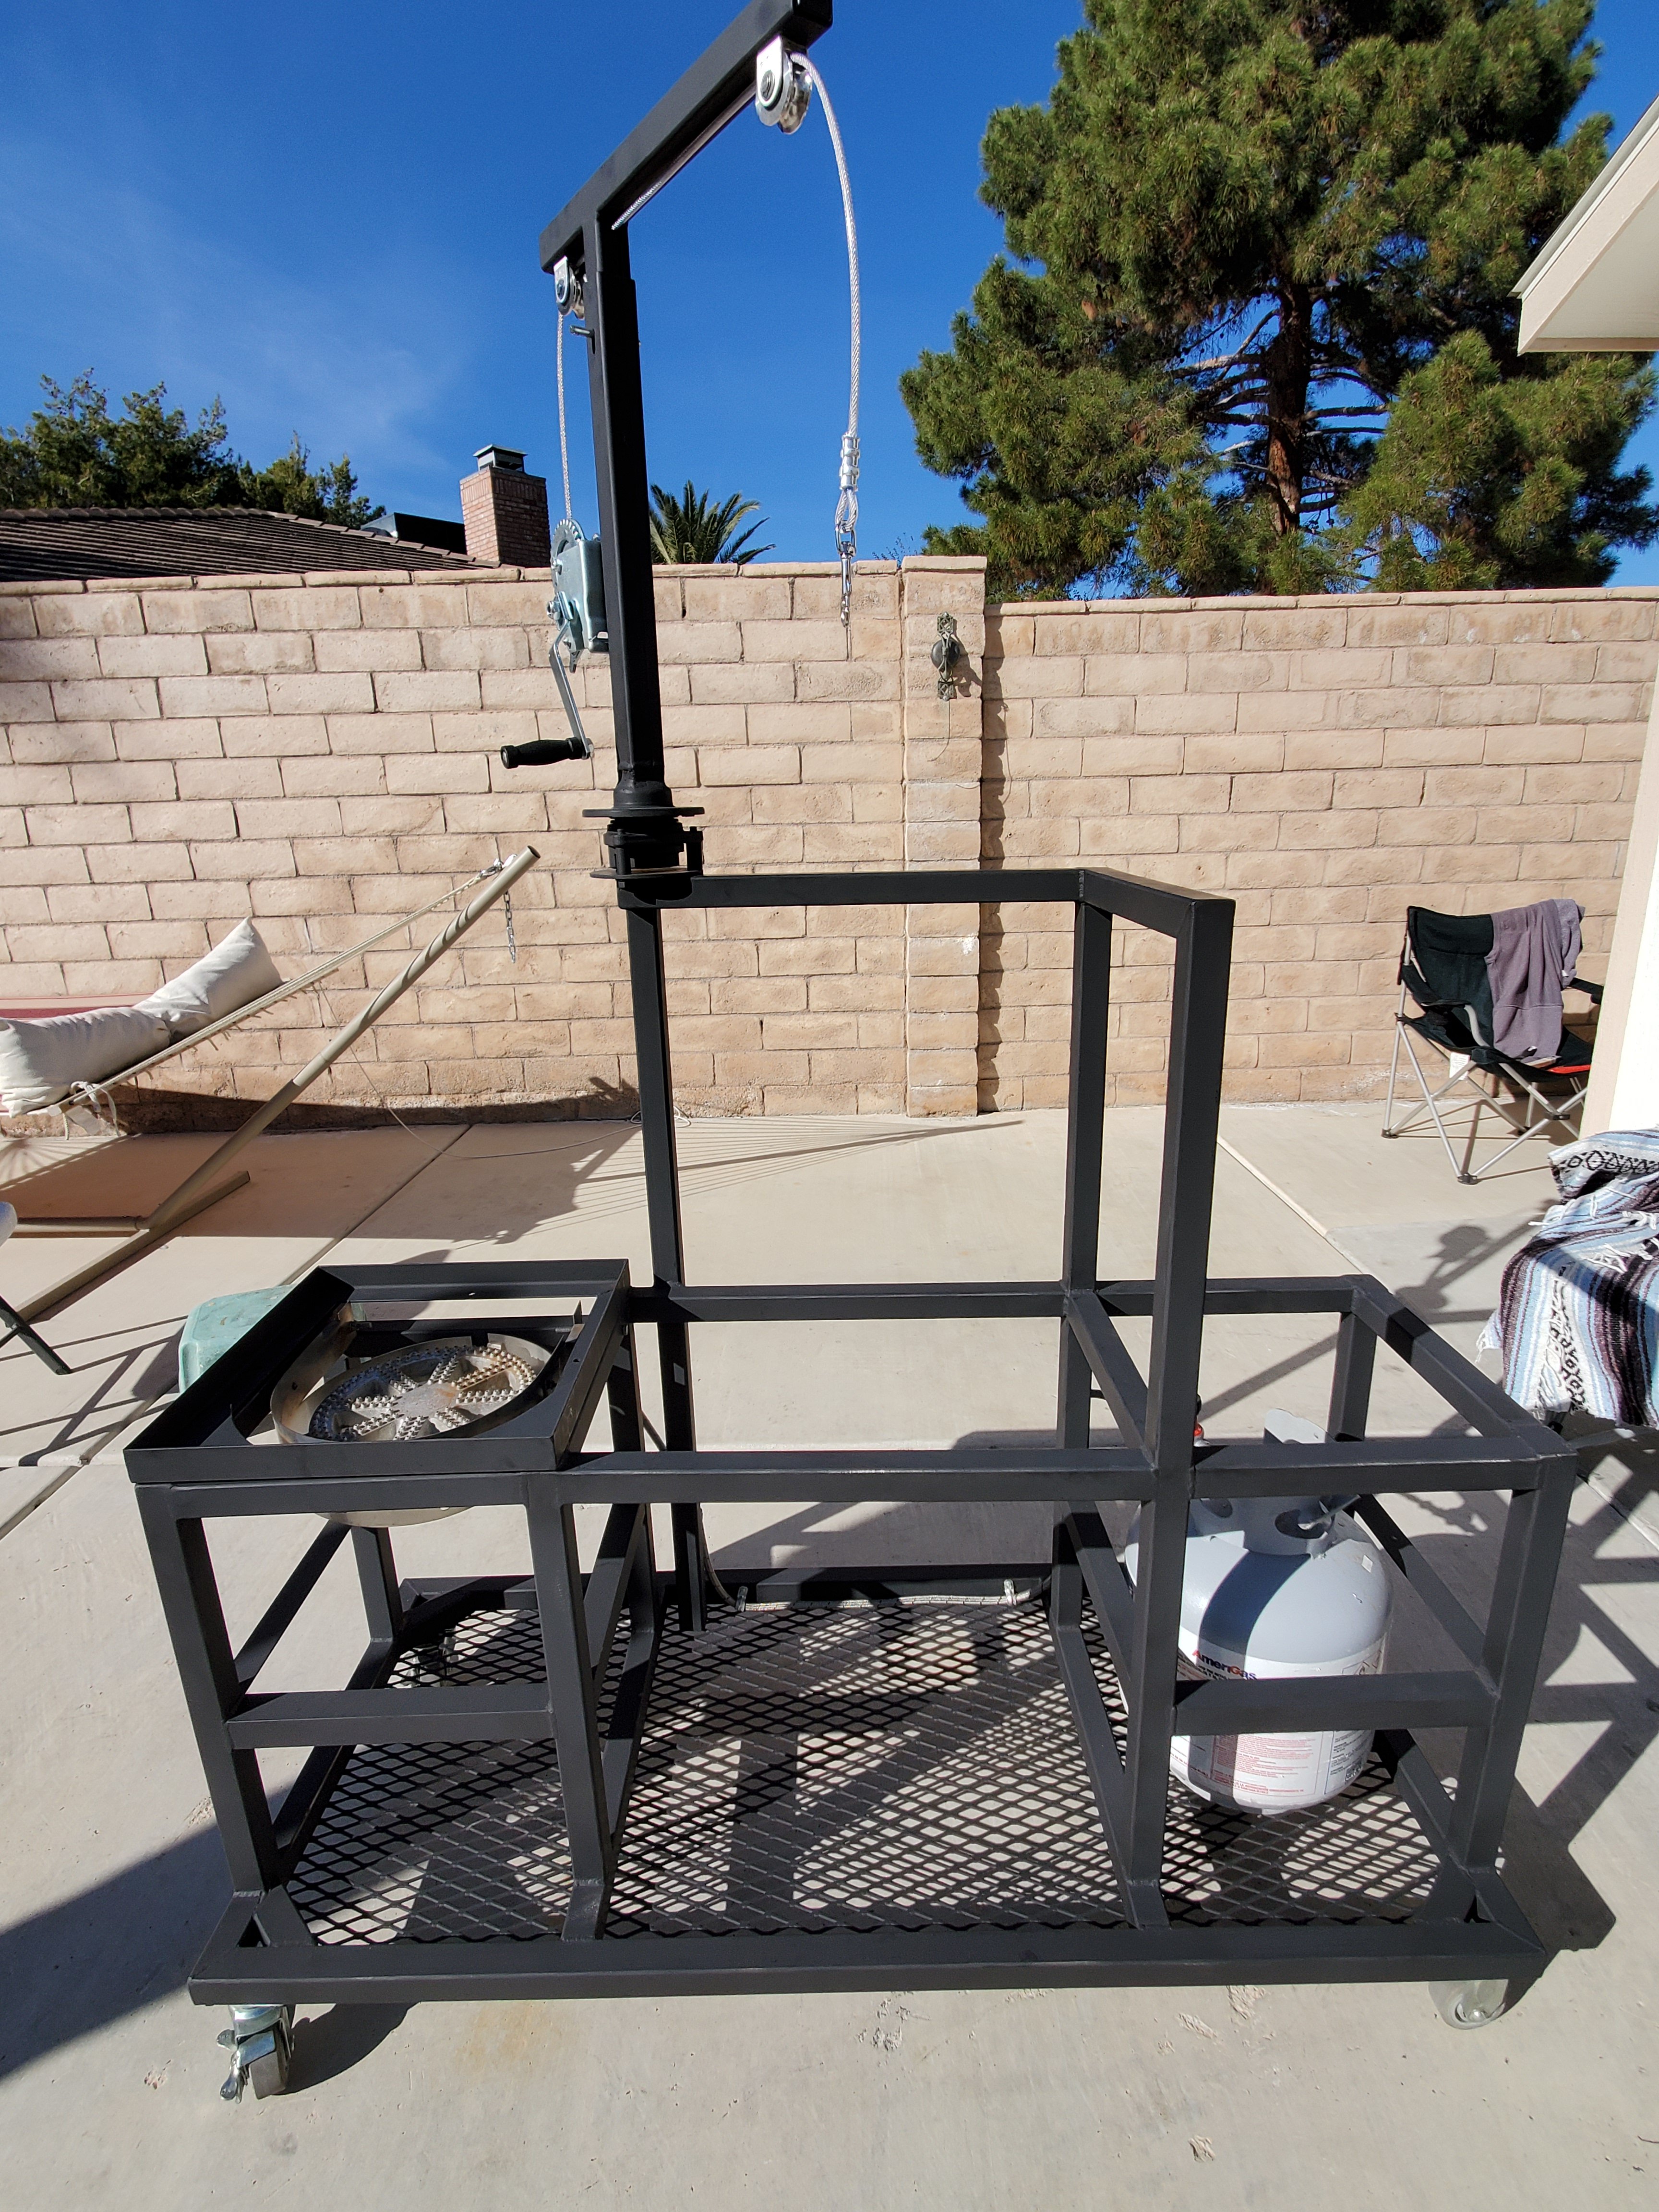
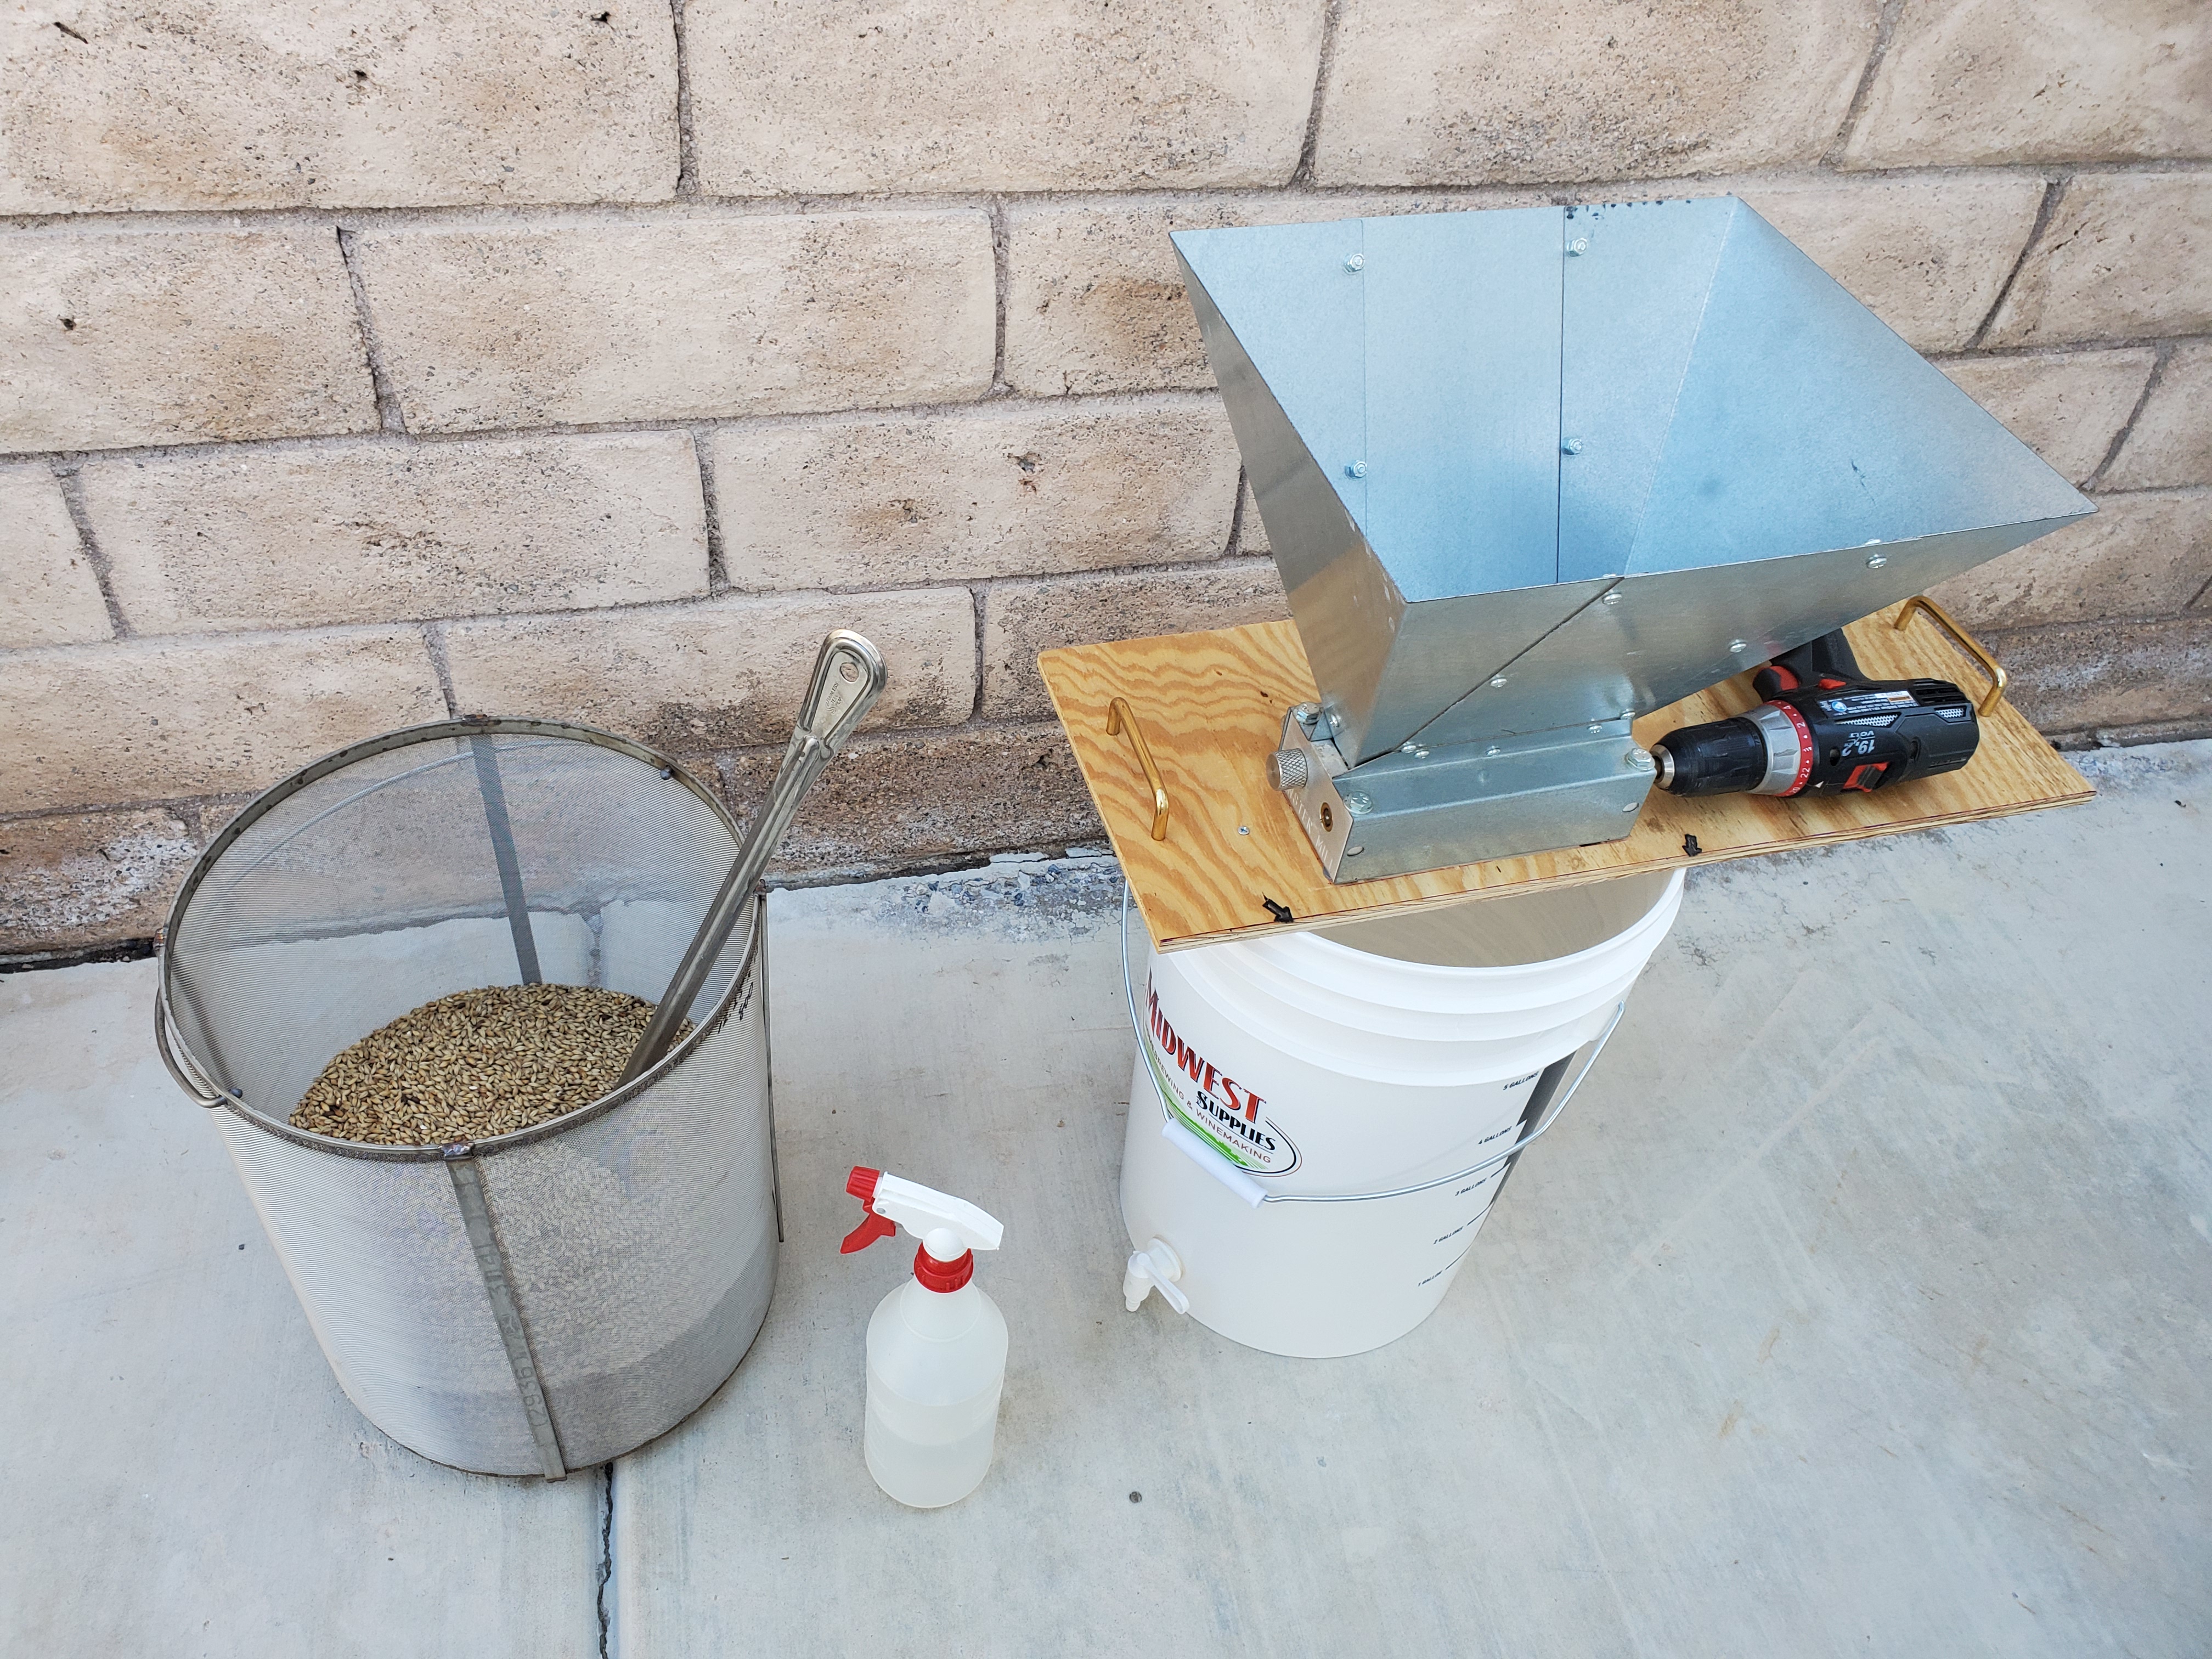
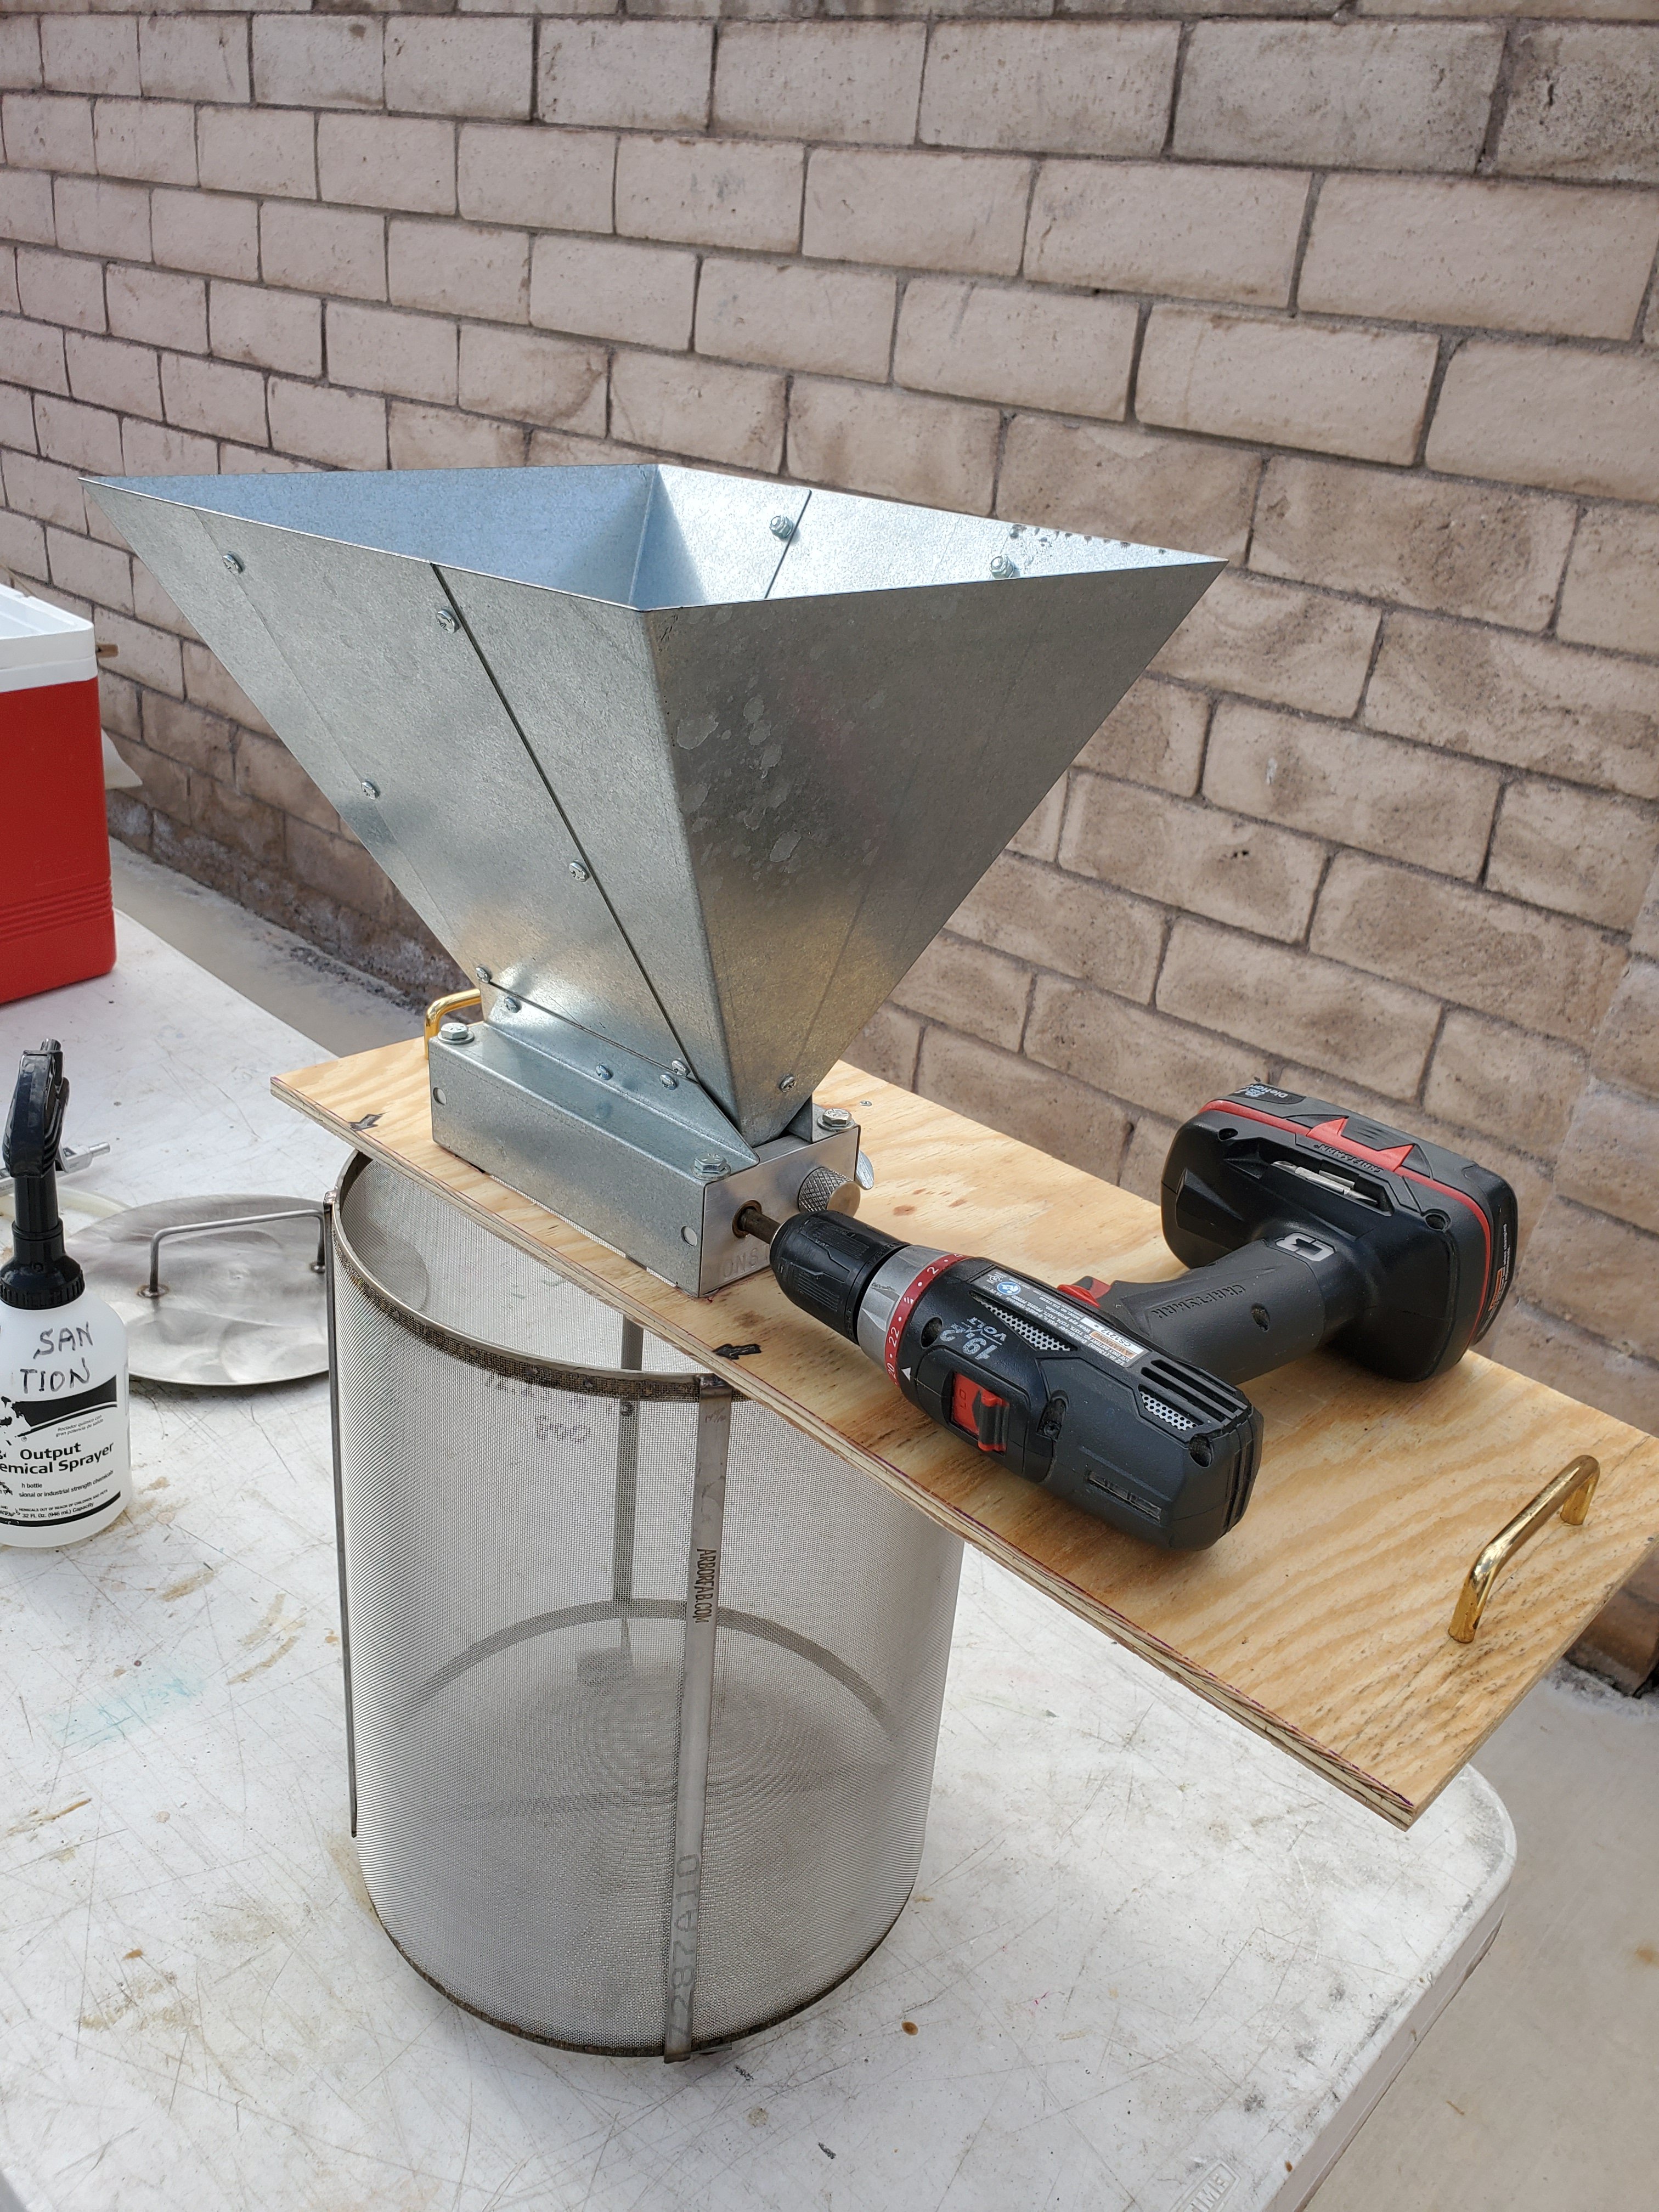
Been busy doing other things, but finally got back to this...….here is my finished BIABasket rig, and a platform for my grain mill. Everything works...…..so tomorrow, unless it rains, I am brewing my new recipe, Mike's Wicked Ale, a variation on Pete's.
20200321_115343.jpg
20200321_123350.jpg
20200321_143250.jpg
20200321_155107.jpg
 
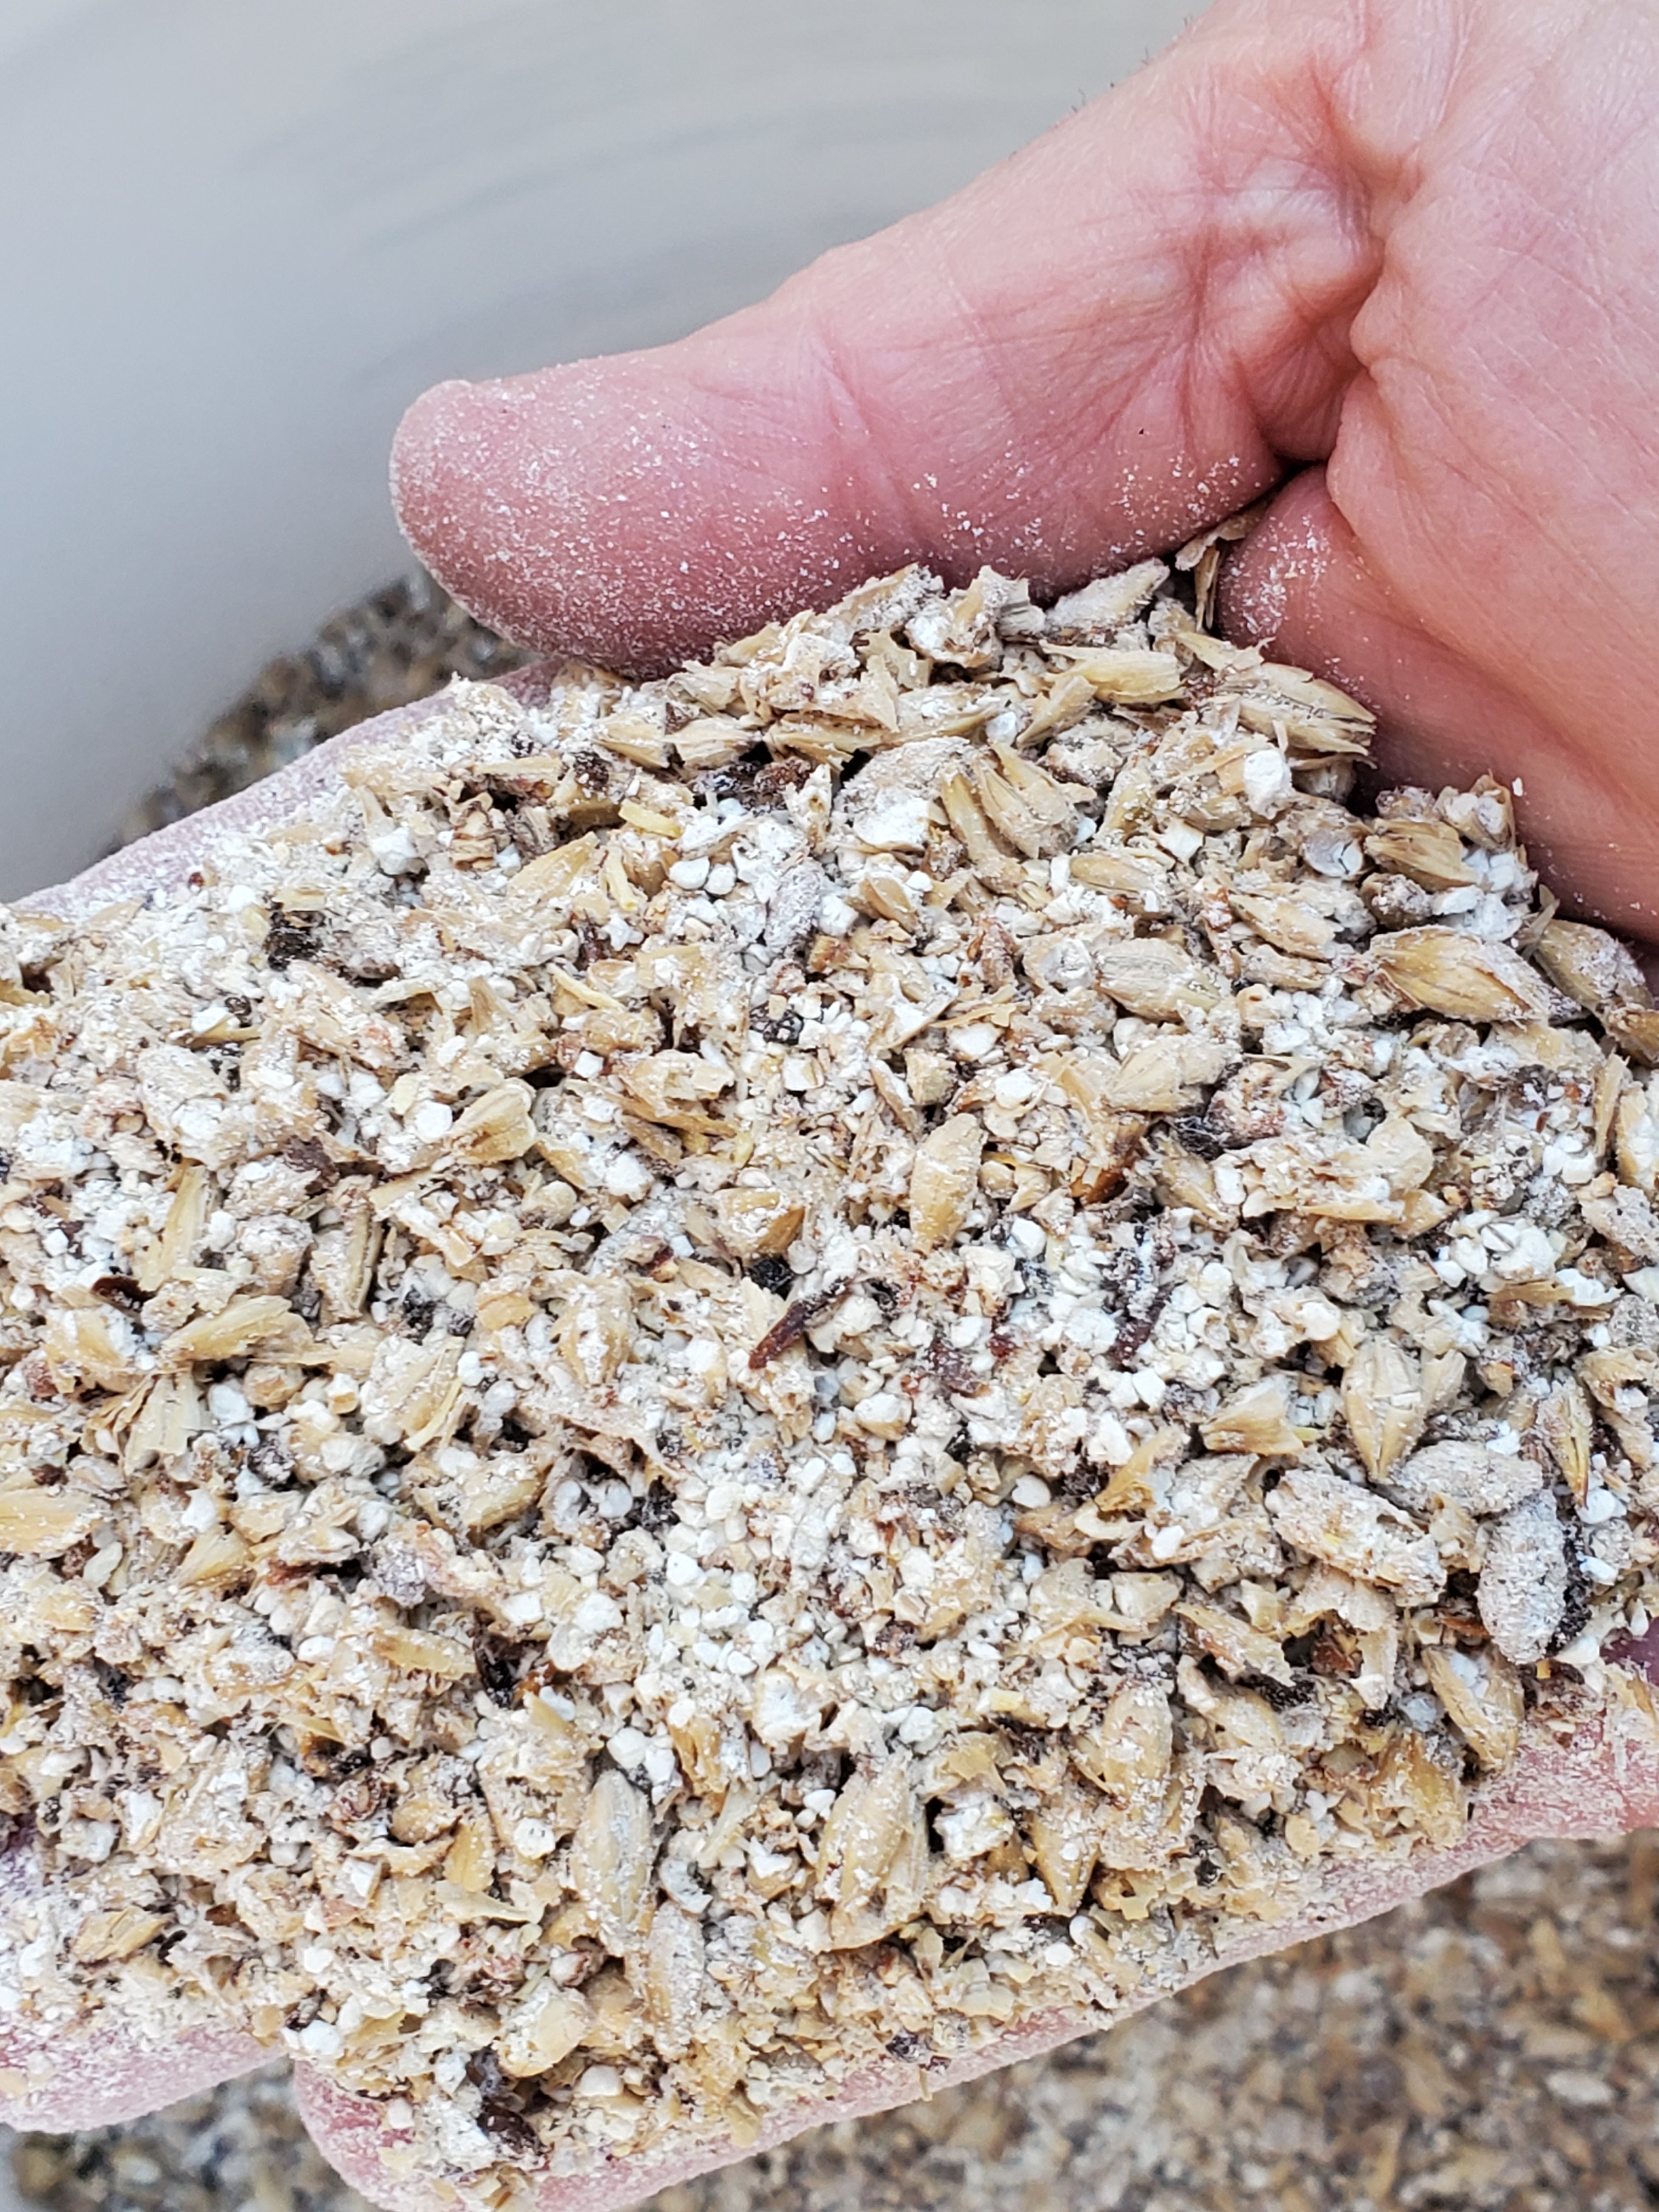
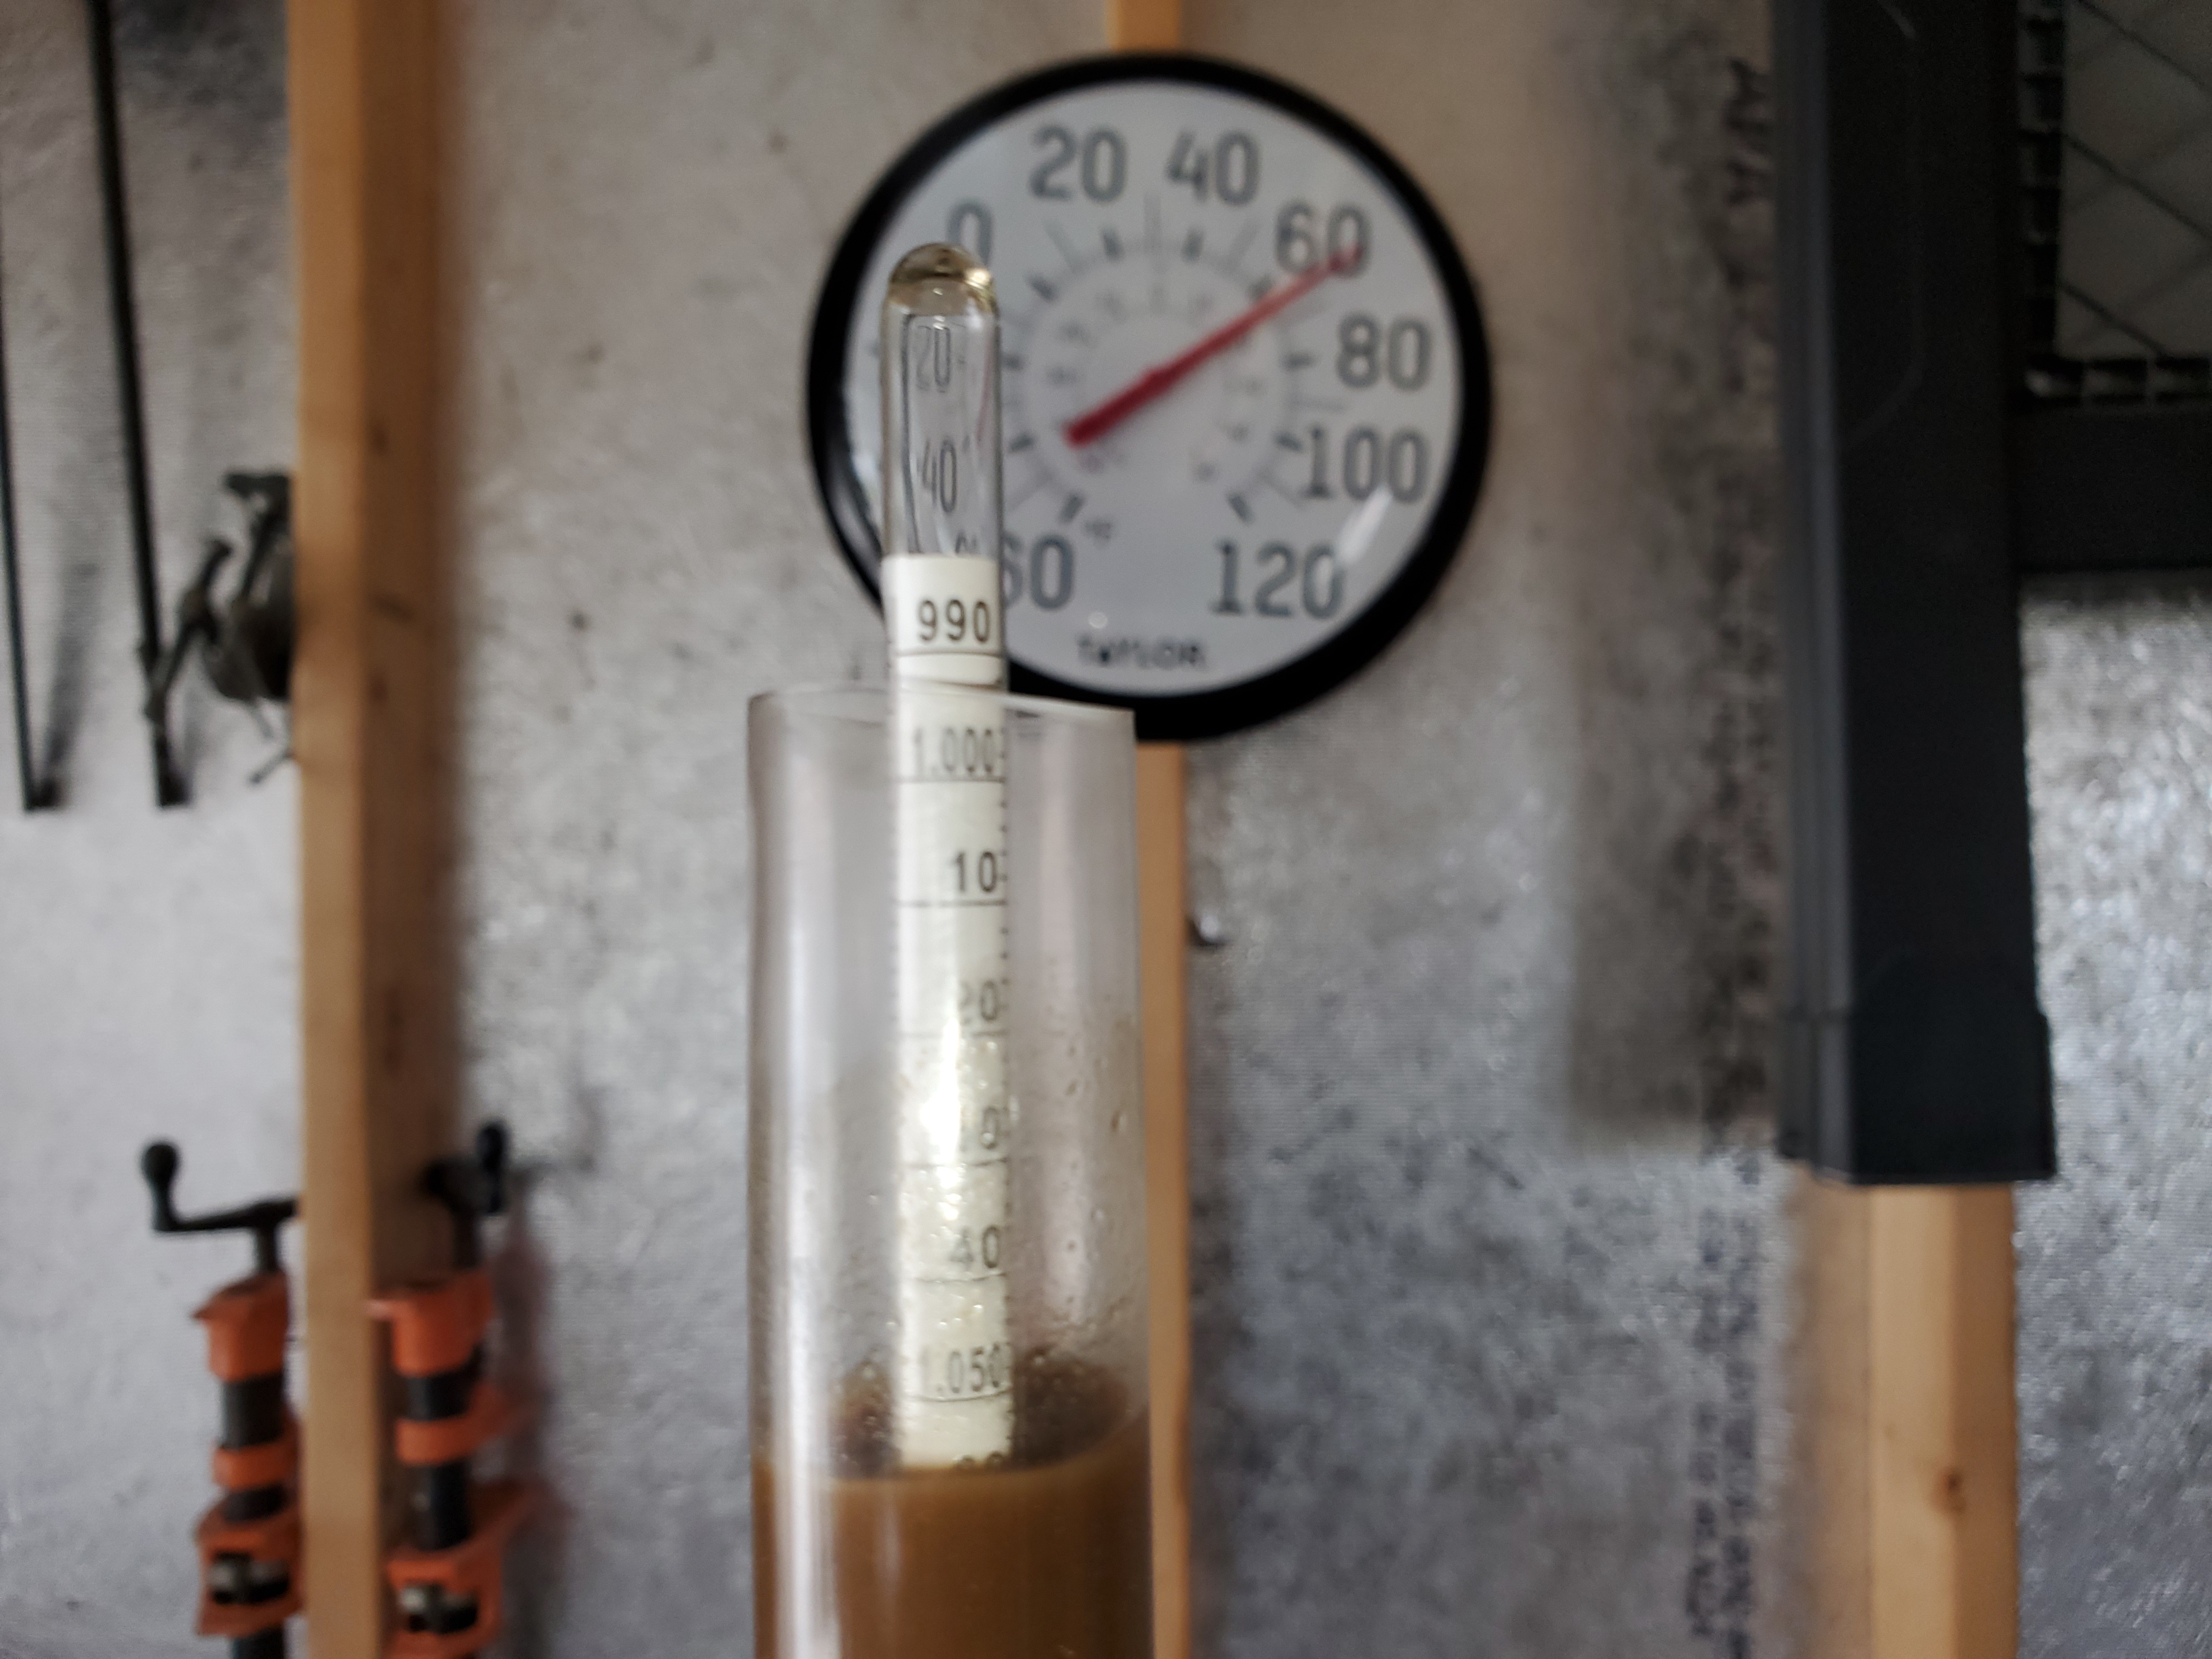
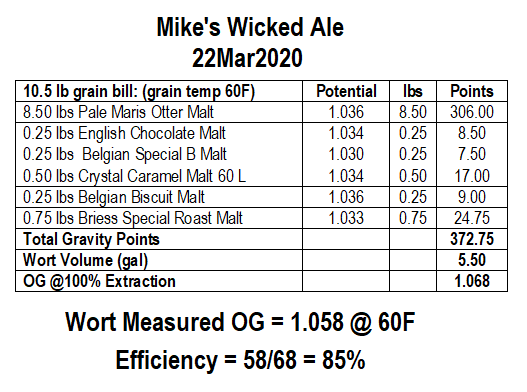
OK here I am with results of my 1st brew day with my new BIABasket rig. I think it was a huge success actually. I conditioned and milled the grain at a 0.035" gap, and it looked good so I did not run it through the mill a second time. The mash was done in 40 minutes according to the iodine test, but I let it go 60 minutes. I had to apply a little propane heat every 20 minutes or so to keep it at 153F. The handful of trub is the material that got past the 800 micron grain basket, which I caught with a 400 micron hop filter. The recirculation worked well.....the injection pipe kept the wort moving throughout the mash. No problems with clogging at any time during the mash, or through the chiller. After 60 minutes I caught the bittering hop trub with the 400 micron filter, chilled the wort to 170F and did a 20 minute hop stand. I recirculated during the hop stand and the temperature dropped to 162F by the time it was done. Then I filtered out the hop trub again and chilled the wort to 65F into my fermentation vessel. I measured the cooled wort OG at 1.058, and came up with an efficiency of 85%. I am very happy with how this turned out.
Addendum of Lessons Learned;
1) I did not account for the water loss during the time heating to mash out temperature, and for the hop stand, which together totaled about 40 minutes. Although not at boiling temperature, there was still some loss, which explains why my volume into the fermenter was 5.25 gallons versus the goal 5.5 gallons. I plan to top off the fermenter to 5.5 gallons. This would also mean my OG value would decrease some, and my efficiency. I think I am probably still better than 80% on efficiency.
2) I added 48F grain to 163F water with a resulting mash temperature of 158F....too hot. Some stirring and fanning got it down to 153F in about 10 minutes. I'm sure this happened because my setup has a lot of mass (heavy duty burner frame and SS keggle), so there is a lot of thermal energy storage. Next time I'll use a lower water temperature, depending on grain temperature of course.
3) I have more sediment than I am happy with, which I am pretty sure is grain flower, in my end product. I believe I caught most of the hop trub with the 400 micron filter. I recirculated during the mash at full pump flow, resulting in little or no filtering of the grain bed. Next time I will slow down the recirculation rate near the end of the mash so that I can catch some more of the grain flour trub before mashing out.

20200322_074344.jpg
20200322_075014.jpg
20200322_082326.jpg
20200322_101847.jpg
20200322_125434.jpg
Mikes Wicked Ale OG.png
 
Last edited:
Back
Top