Mini-fridge Fermentation Chamber

Homebrew Talk - Beer, Wine, Mead, & Cider Brewing Discussion Forum

Help Support Homebrew Talk - Beer, Wine, Mead, & Cider Brewing Discussion Forum:

This site may earn a commission from merchant affiliate links, including eBay, Amazon, and others.

ChiknNutz

Well-Known Member
Joined
May 3, 2020
Messages
391
Reaction score
213
Location
Advance, NC
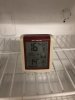
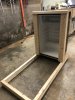
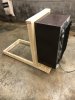
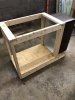
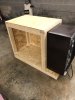
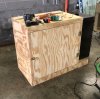
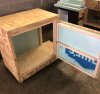
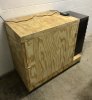
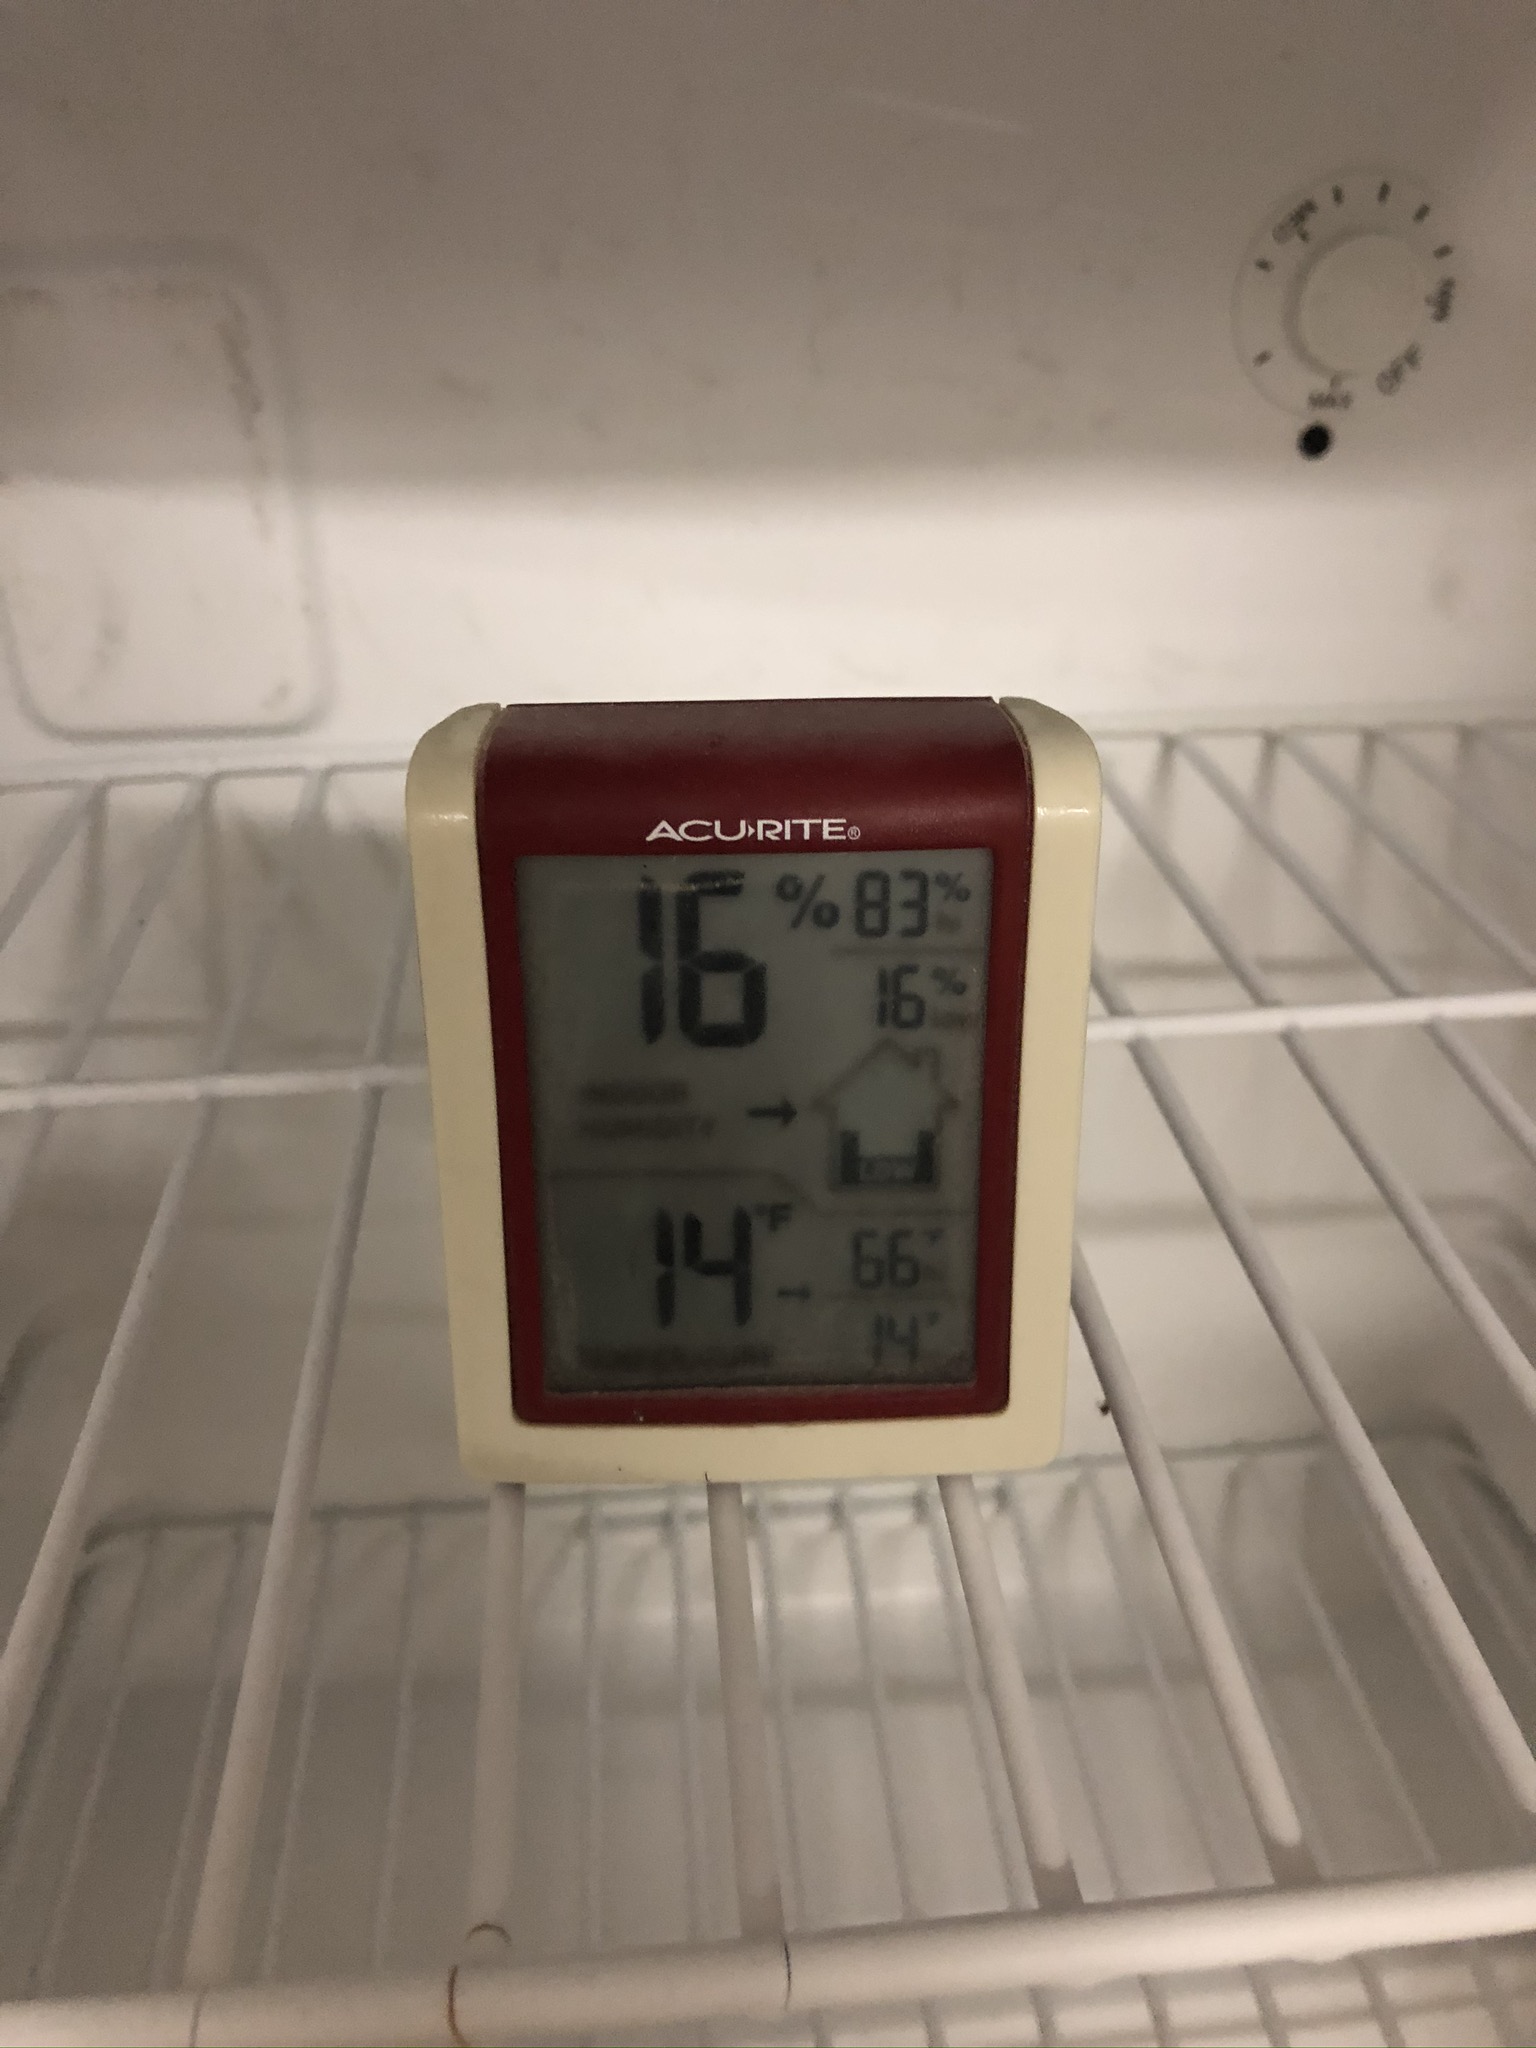
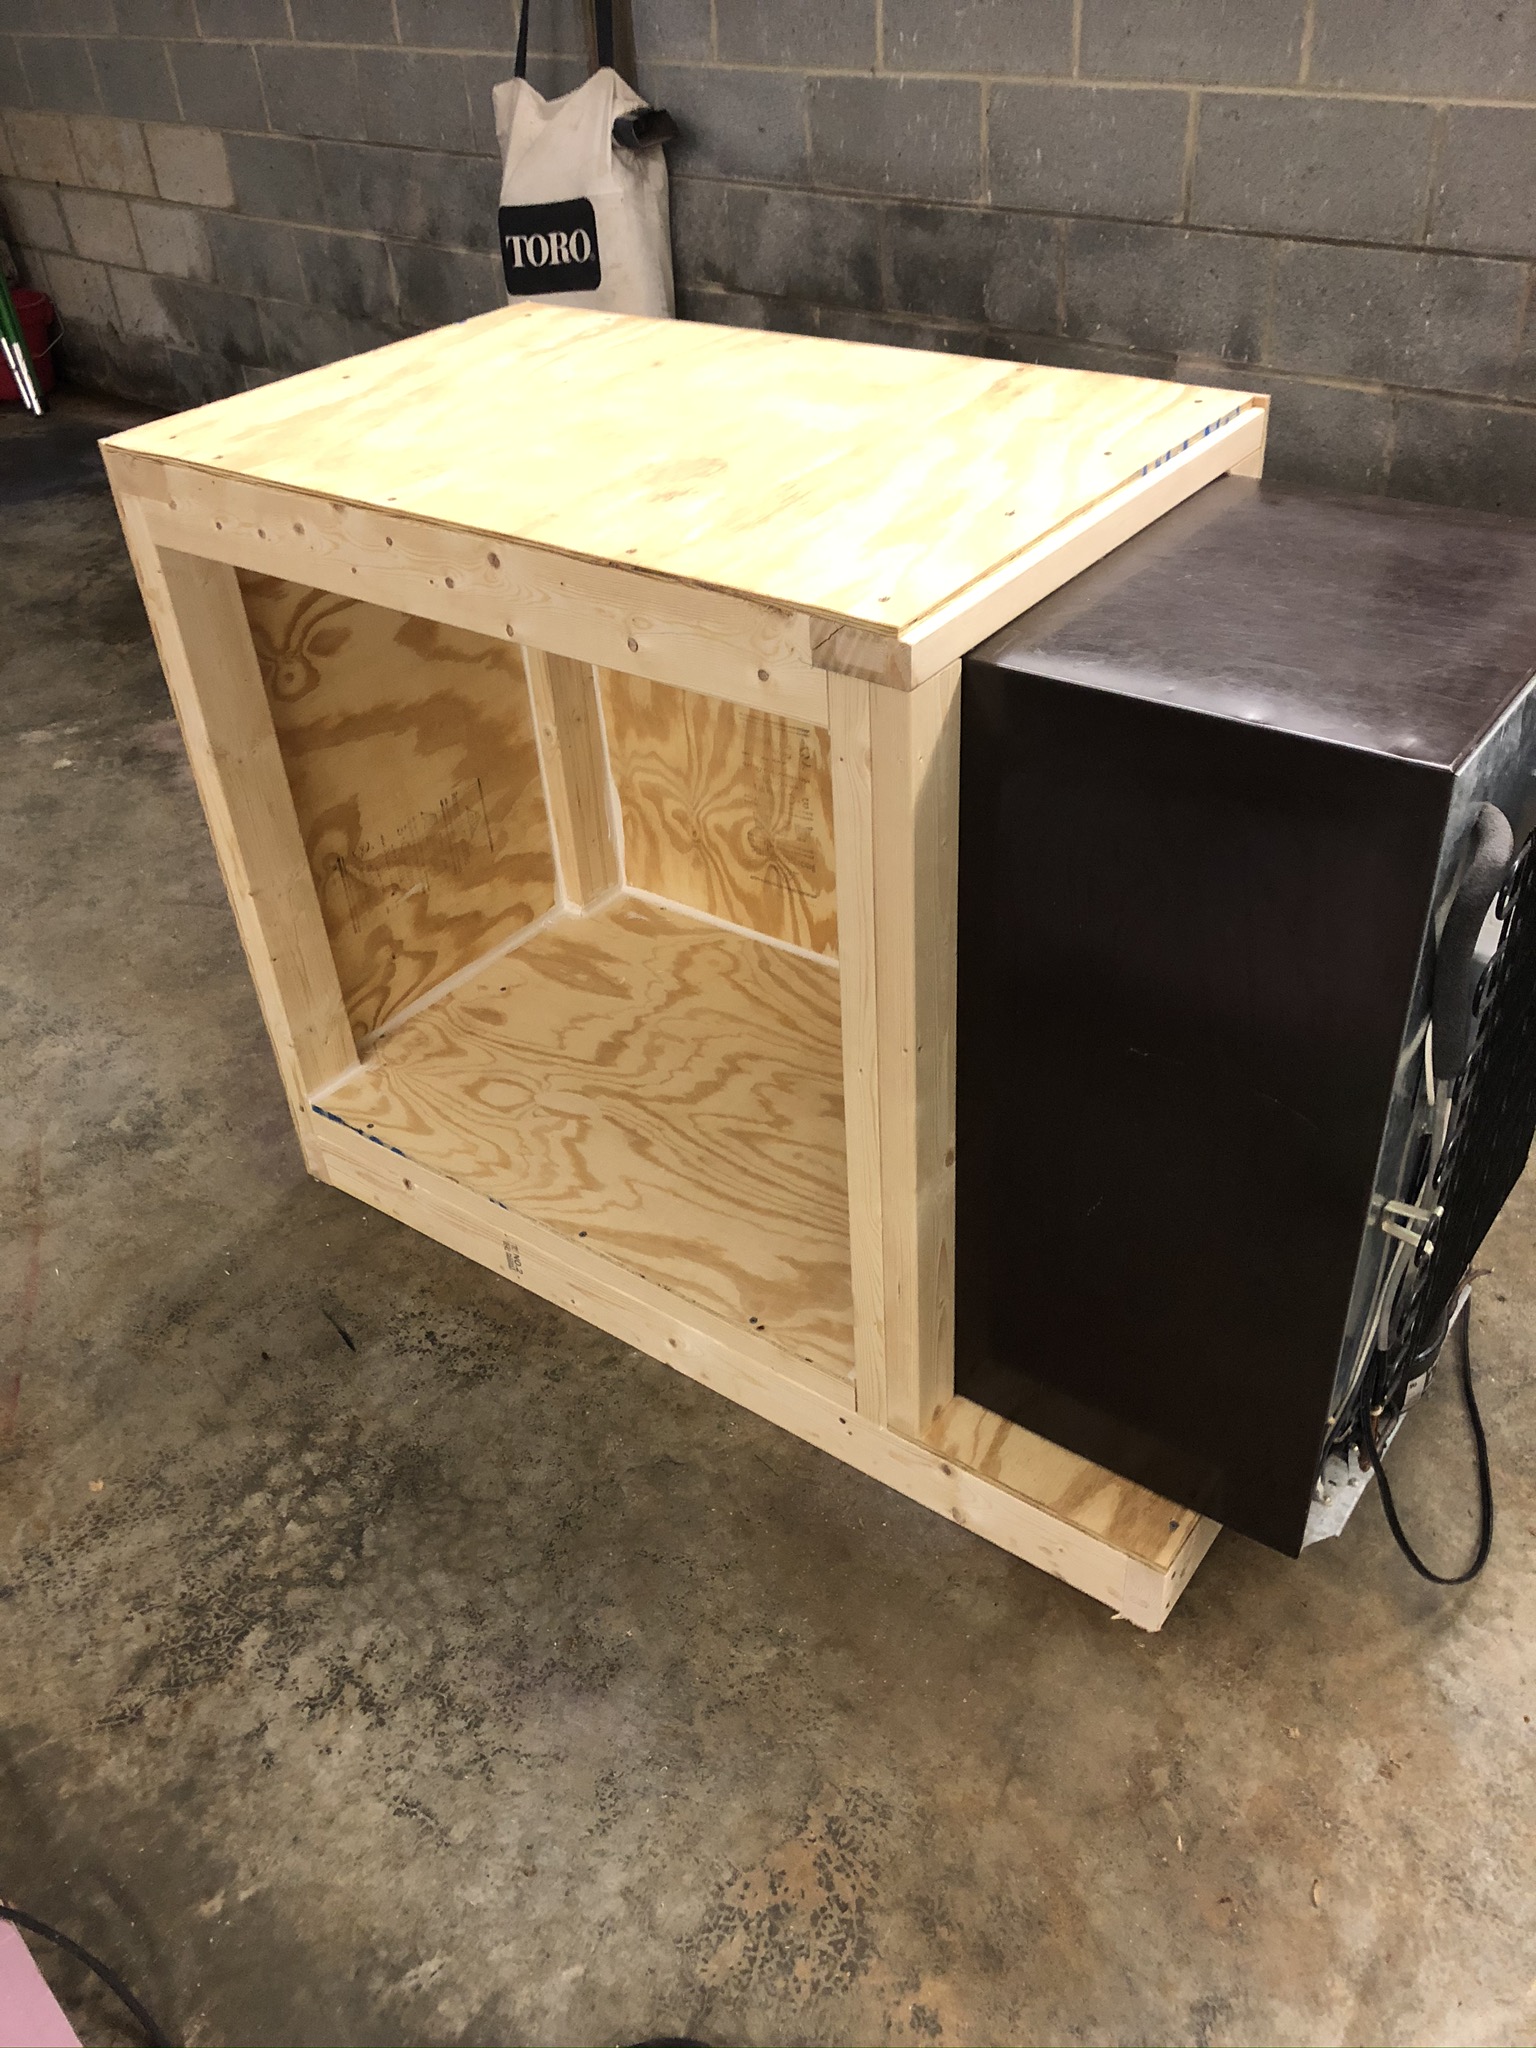
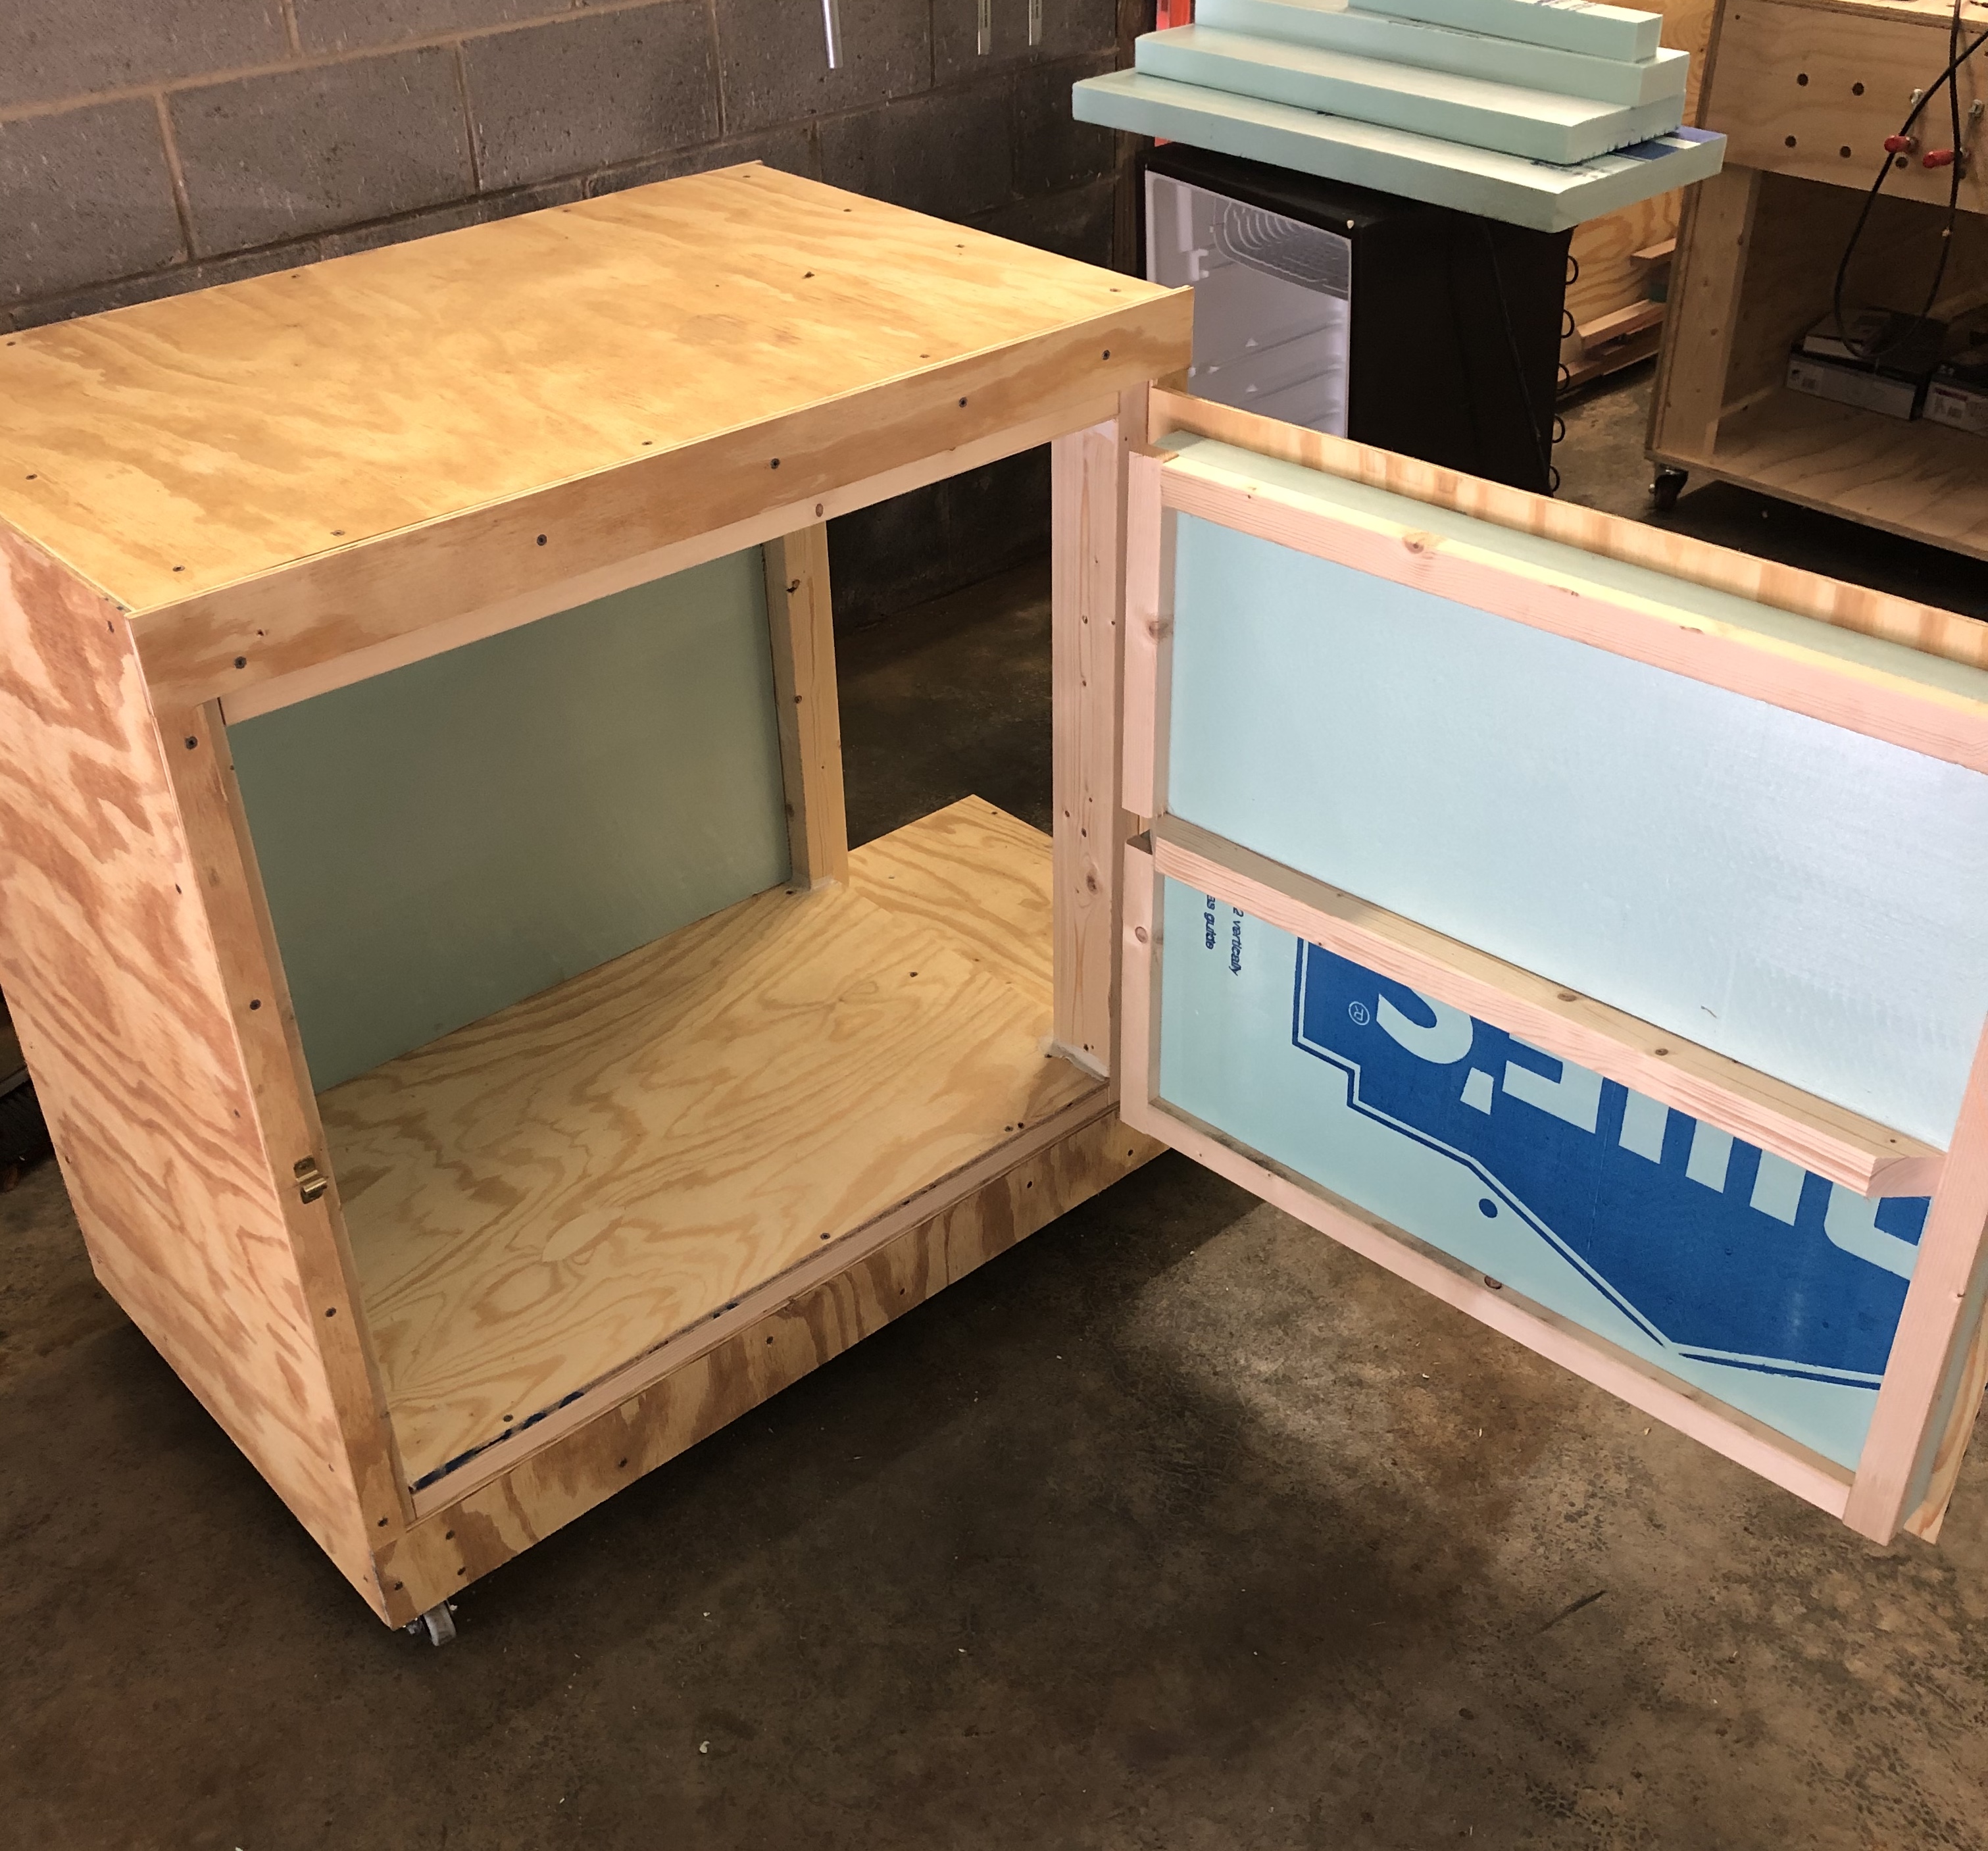
After getting advice on controlling fermentation temps as being a primary next goal, I set off to build an FC. After striking out on inexpensive chest freezers and then deciding that a front load apparatus would be preferable, I went ahead and built one using a used mini fridge. The first pic shows the temp it got down to after setting it to the max and leaving it for a few hours. As you will likely note, it is highly overbuilt, structurally. That's just how I do things. I find it hard to scale back to a 2x2 when a 2x4 is there and I don't have to rip it down, so on and so forth. Anyway, I used 2" rigid foam (which is actually 1-3/4" thick). The only real challenge was adjusting for the difference in height between the floor of the fridge and where the floor of the FC landed. It wasn't overly difficult, just something I had to adjust for thru the build. Overall, it is 4' long x about 2' deep x about 3' tall. Inside it is right about 18" deep and so allows for 1" front to back between my new Kegmenter, which I plan to use as my main fermenter. I made it long enough so it could hold two of those if I wanted, but only have the one for now. It is heated with a fermentation heat pad off of Amazon and controlled via an Inkbird 308 WiFi controller. I don't envision needing the heat but it's there nonetheless.

Question...the default setting for the Inkbird allows for a 3 degree delta, I think I've seen others change this to be 1 degree...is that what most do for these? Any other things to note or change about the Inkbird?

One thing I left out, was a small computer fan. I had planned to put one in, then forgot to order it and went off on the build anyway. Easy enough to add later of course, just something I saw on another build, but not sure how necessary it is.
 

Attachments

  • IMG_1748.JPEG
    IMG_1748.JPEG
    436.8 KB · Views: 214
  • IMG_1749.JPEG
    IMG_1749.JPEG
    754.1 KB · Views: 217
  • IMG_1750.JPEG
    IMG_1750.JPEG
    776.5 KB · Views: 202
  • IMG_1751.JPEG
    IMG_1751.JPEG
    723.6 KB · Views: 204
  • IMG_1752.JPEG
    IMG_1752.JPEG
    716.4 KB · Views: 197
  • IMG_1753.JPEG
    IMG_1753.JPEG
    1.6 MB · Views: 206
  • IMG_1756.JPEG
    IMG_1756.JPEG
    1.8 MB · Views: 211
  • IMG_1757.JPEG
    IMG_1757.JPEG
    593 KB · Views: 205
  • IMG_1759.JPEG
    IMG_1759.JPEG
    2.8 MB · Views: 212
  • IMG_1760.JPEG
    IMG_1760.JPEG
    2.7 MB · Views: 214
Last edited:
Looks like a solid build! I believe you’ll find the fan will be very important, but should be a simple add.
As for the controller, the tighter the better, but you may want your fermenter to tell you how small the differential can be. Once you get it down to temp (hopefully with fan installed), see how often the compressor cycles with the 3 degree differential. Begin reducing the differential and see if there is a point the compressor cycles much more often, then back it off some. If you can manage 1 degree, great, but 2 or 3 degrees may be preferable versus ruining a compressor. Another safeguard, especially if a small differential is used, is to ensure the compressor lockout is enabled on your Inkbird controller (model?).
 
You did a good job! That is a pretty big space you added on, I built something similar and I had a hard time getting the temp low enough in a timely manner, like it would take 24+ hours to get to temp. You will need to add at least 1 fan maybe 2, I have seen some guys put a fan right in the freezer part to blow cold air out.

I left mine set at 3 degrees and haven’t had any issues doing that.

Have you tried to see how low you can get it to go yet?

I haven't tried it since the build. I did add a fan which friction fits perfectly in the freezer compartment, seems like this will do a good job of getting the coldest air moving quick. While I can see using this for cold crashing or lagering at some point, it's primarily intended for typical ale fermentation temps, so don't see it having a hard time maintaining 60's to 70's. How low were you using yours that it wouldn't keep up?
 
Cool build! Hope it works out for you. I agree with you that ale temps should be no problem. Some air circulation would probably be needed to get down to lager temps. Everybody want to do lagers! :) At least crash cooling/cold conditioning...
 
I had a hard time getting to 65, well it would but it take forever, dropping a fermenter 20 degrees in the summer could take awhile and I would have to wait to pitch.

I would take a few fermenters and fill them with water at 85-90 degrees and see how long it takes to cool them. It also could have been the fridge I have but it looks to be about the same size as yours.

I hope it works for you, I was just letting you know to try it out before you brew because I didn’t and it was very frustrating to try and work out the bugs on the fly.
 
I tried it last night with my kegmenter, filled about 3 gallons-ish. Temp at start was 97. Took 7-1/4 hrs to get to set temp of 67. That's certainly warmer than I would normally start it at for pitching yeast.
 
Looks like a solid build! I believe you’ll find the fan will be very important, but should be a simple add.
As for the controller, the tighter the better, but you may want your fermenter to tell you how small the differential can be. Once you get it down to temp (hopefully with fan installed), see how often the compressor cycles with the 3 degree differential. Begin reducing the differential and see if there is a point the compressor cycles much more often, then back it off some. If you can manage 1 degree, great, but 2 or 3 degrees may be preferable versus ruining a compressor. Another safeguard, especially if a small differential is used, is to ensure the compressor lockout is enabled on your Inkbird controller (model?).

I am using the Inkbird ITC-308 WiFi controller. In the settings, there is a "Refrigeration Delay" in minutes...but not a specific compressor lockout function that I see. Default is 0, I just set it to 2 minutes as a best guess for now.
 
I am using the Inkbird ITC-308 WiFi controller. In the settings, there is a "Refrigeration Delay" in minutes...but not a specific compressor lockout function that I see. Default is 0, I just set it to 2 minutes as a best guess for now.
That’s it, and 2min should be fine for a small compressor like that. Three min is a typical minimum, but that’s a one size fits all number. The goal is really just to prevent short cycling (think kids flipping a light switch on and off....)

Have you fired it up yet?
 
That’s it, and 2min should be fine for a small compressor like that. Three min is a typical minimum, but that’s a one size fits all number. The goal is really just to prevent short cycling (think kids flipping a light switch on and off....)

Have you fired it up yet?

Yes I have, see post #8. I had turned it on and off a few times prior just to ensure it worked, but not a full on test until last night.
 
Sorry, I missed that. That is a lot of thermal mass to condition with very little BTUs, but since it appears to be insulated well, it’s possible that you will find it’s very stable once you finally get there. Cold crashing may be out with that curve in mind though, and a little foreword planning will be required to get it to temp a day or two before it’s needed.
 
That sounds pretty good, did you put a fan in yet? If that was without the fan then it will should be a faster drop with air circulating. Keep us posted with your results, I’m interested to see how it works.
 
Ya that looks very similar, mine does seem to be pretty old but works well, I think it uses R22 which hasn't been used in production for a while now. But hey, we all have our +'s and -'s, I just happen to be good at building things and have a nice shop full of good tools to help me out.
 
I'm interested in this stuff, because I built a somewhat anemic solid state beer cooler, and I keep telling myself that I could always switch to a fridge or aquarium cooler or convert a window A/C unit, and get tons more cooling power. So, I'm very interested in real world cooling power numbers.
Since the OP already was so kind to provide the numbers, I tried to compute the net cooling power from that information; I am getting 30W, which seems low. I'm not trying to criticize the build, it looks very nice, but I'm trying to get a feel for what cooling power is achievable, how much attention one has to pay to insulation, etc.

Here's my math:
3 gallons * 3.79L/gallon * 30 degree Fahrenheit * 5/9 degree Celsius / degree Fahrenheit gives 190 kcal heat removed from the water.
That is 190 * 4.18 kJoule = 800 kJ or 800 kWs (kilo Watt second). This happens in a bit over 7 hours: 800 kWs / 7.25 hours / 3600 s/hour = 30 W. This sounds wrong. Shouldn't a fridge, even a small one, deliver quite a bit more cooling power?

Just for comparison, 1 horsepower is 745 W. 3500 BTU/hr, which is a really small air conditioner (5000 BTU/hr seem to be the smallest you can buy), is about 1 kW. So this fridge has 1/25th HP or 100 BTU/hr cooling power; can that be right?
 
Last edited:
I'm interested in this stuff, because I built a somewhat anemic solid state beer cooler, and I keep telling myself that I could always switch to a fridge or aquarium cooler or convert a window A/C unit, and get tons more cooling power. So, I'm very interested in real world cooling power numbers.
Since the OP already was so kind to provide the numbers, I tried to compute the net cooling power from that information; I am getting 30W, which seems low. I'm not trying to criticize the build, it looks very nice, but I'm trying to get a feel for what cooling power is achievable, how much attention one has to pay to insulation, etc.

Here's my math:
3 gallons * 3.79L/gallon * 30 degree Fahrenheit * 5/9 degree Celsius / degree Fahrenheit gives 190 kcal heat removed from the water.
That is 190 * 4.18 kJoule = 800 kJ or 800 kWs (kilo Watt second). This happens in a bit over 7 hours: 800 kWs / 7.25 hours / 3600 s/hour = 30 W. This sounds wrong. Shouldn't a fridge, even a small one, deliver quite a bit more cooling power?

Just for comparison, 1 horsepower is 745 W. 3500 BTU/hr, which is a really small air conditioner (5000 BTU/hr seem to be the smallest you can buy), is about 1 kW. So this fridge has 1/25th HP or 100 BTU/hr cooling power; can that be right?

I haven't worked out the math yet, but another factor that *could* be at play is if fermentation has begun during this time, that is adding heat since it is an exothermic reaction. To further add some complexity to the equation, I can say that during fermentation of ~5 gallons, I was able to see how long it took for it to rise from 67 to 70...before the compressor kicked on again (as my controller setting was 3 degrees). On average, that took about 7 or 8 hours. Now to really have some baseline data, I'd need to do the same experiment with an empty chamber so we can see how effective or ineffective the insulation is, coupled with the ambient air temp (which in this case it was about 72 degrees).

In any case, your assumption that BTU output is far too low falls in line with my thinking as well.
 
It is possible that this might be all due to insulation, that is maybe you have 200W cooling power, and 170W is lost to the environment. Do you know what R value your insulation has? Last time I tried to look stuff like this up, I got burned by the difference between metric and imperial/US customary R values (yes, they are quite different), but maybe one can figure it out.

The energy gained by converting a few pounds of sugar is not really that high. I estimated that before for one of my fermentations, and it turned out I had a malfunctioning temperature sensor... I'll add the numbers to this post once I find them.
 
Probably in US/imperial units, so degree F per square foot per BTU/hr. But it turns out one can't really compute the ambient heat gain with the data you have, because on your cooldown the interior of the fridge most likely spent some time above and some time below ambient, so your net loss/gain to the environment could be anything, and might be close to zero.

But if we knew the lowest temperature your box can reach at a given ambient temperature, then we can compute the ambient heat gain and the cooling power. Just assuming (probably not true) 65F is as low as it will go:
your box is 50 square feet, R is 10, let's assume ambient is 80F, so BTU/hr are 50 sq.ft times 15 F temperature difference divided by 10 (R) gives 75 BTU/hr loss to ambient, and maximum cooling power at this temperature (the fridge engine will also become more efficient when it can dump heat at a lower temperature). That would still be disappointing, but on the other hand, if true, it would mean that adding two more inches of the same insulation would get you to 50F.
 
Before building the box, it went down to 14 degrees, which I thought was pretty impressive. I have not tested it to max cooling since building the box. Not sure I want to as it might be too taxing on it.
 

Latest posts

Back
Top