Heyo fellow HBT'ers!,
Thought I'd document my keggle build process seeing as that's what all
the cool kids are doing these days.
They're eventually going on a three tiered gravity feed rack, once it's
built. I currently brew using a single pot BIAB, and plan on continuing to
use a bag in the MLT once I move into using the keggles so there won't be
any false bottoms or crazy amounts of ports. Just a drain for each,
temperature gauges, liquid volume gauges and a 50' stainless coil in the
boil keggle for cooling.
So without further ado, here's what I got done on the weekend...
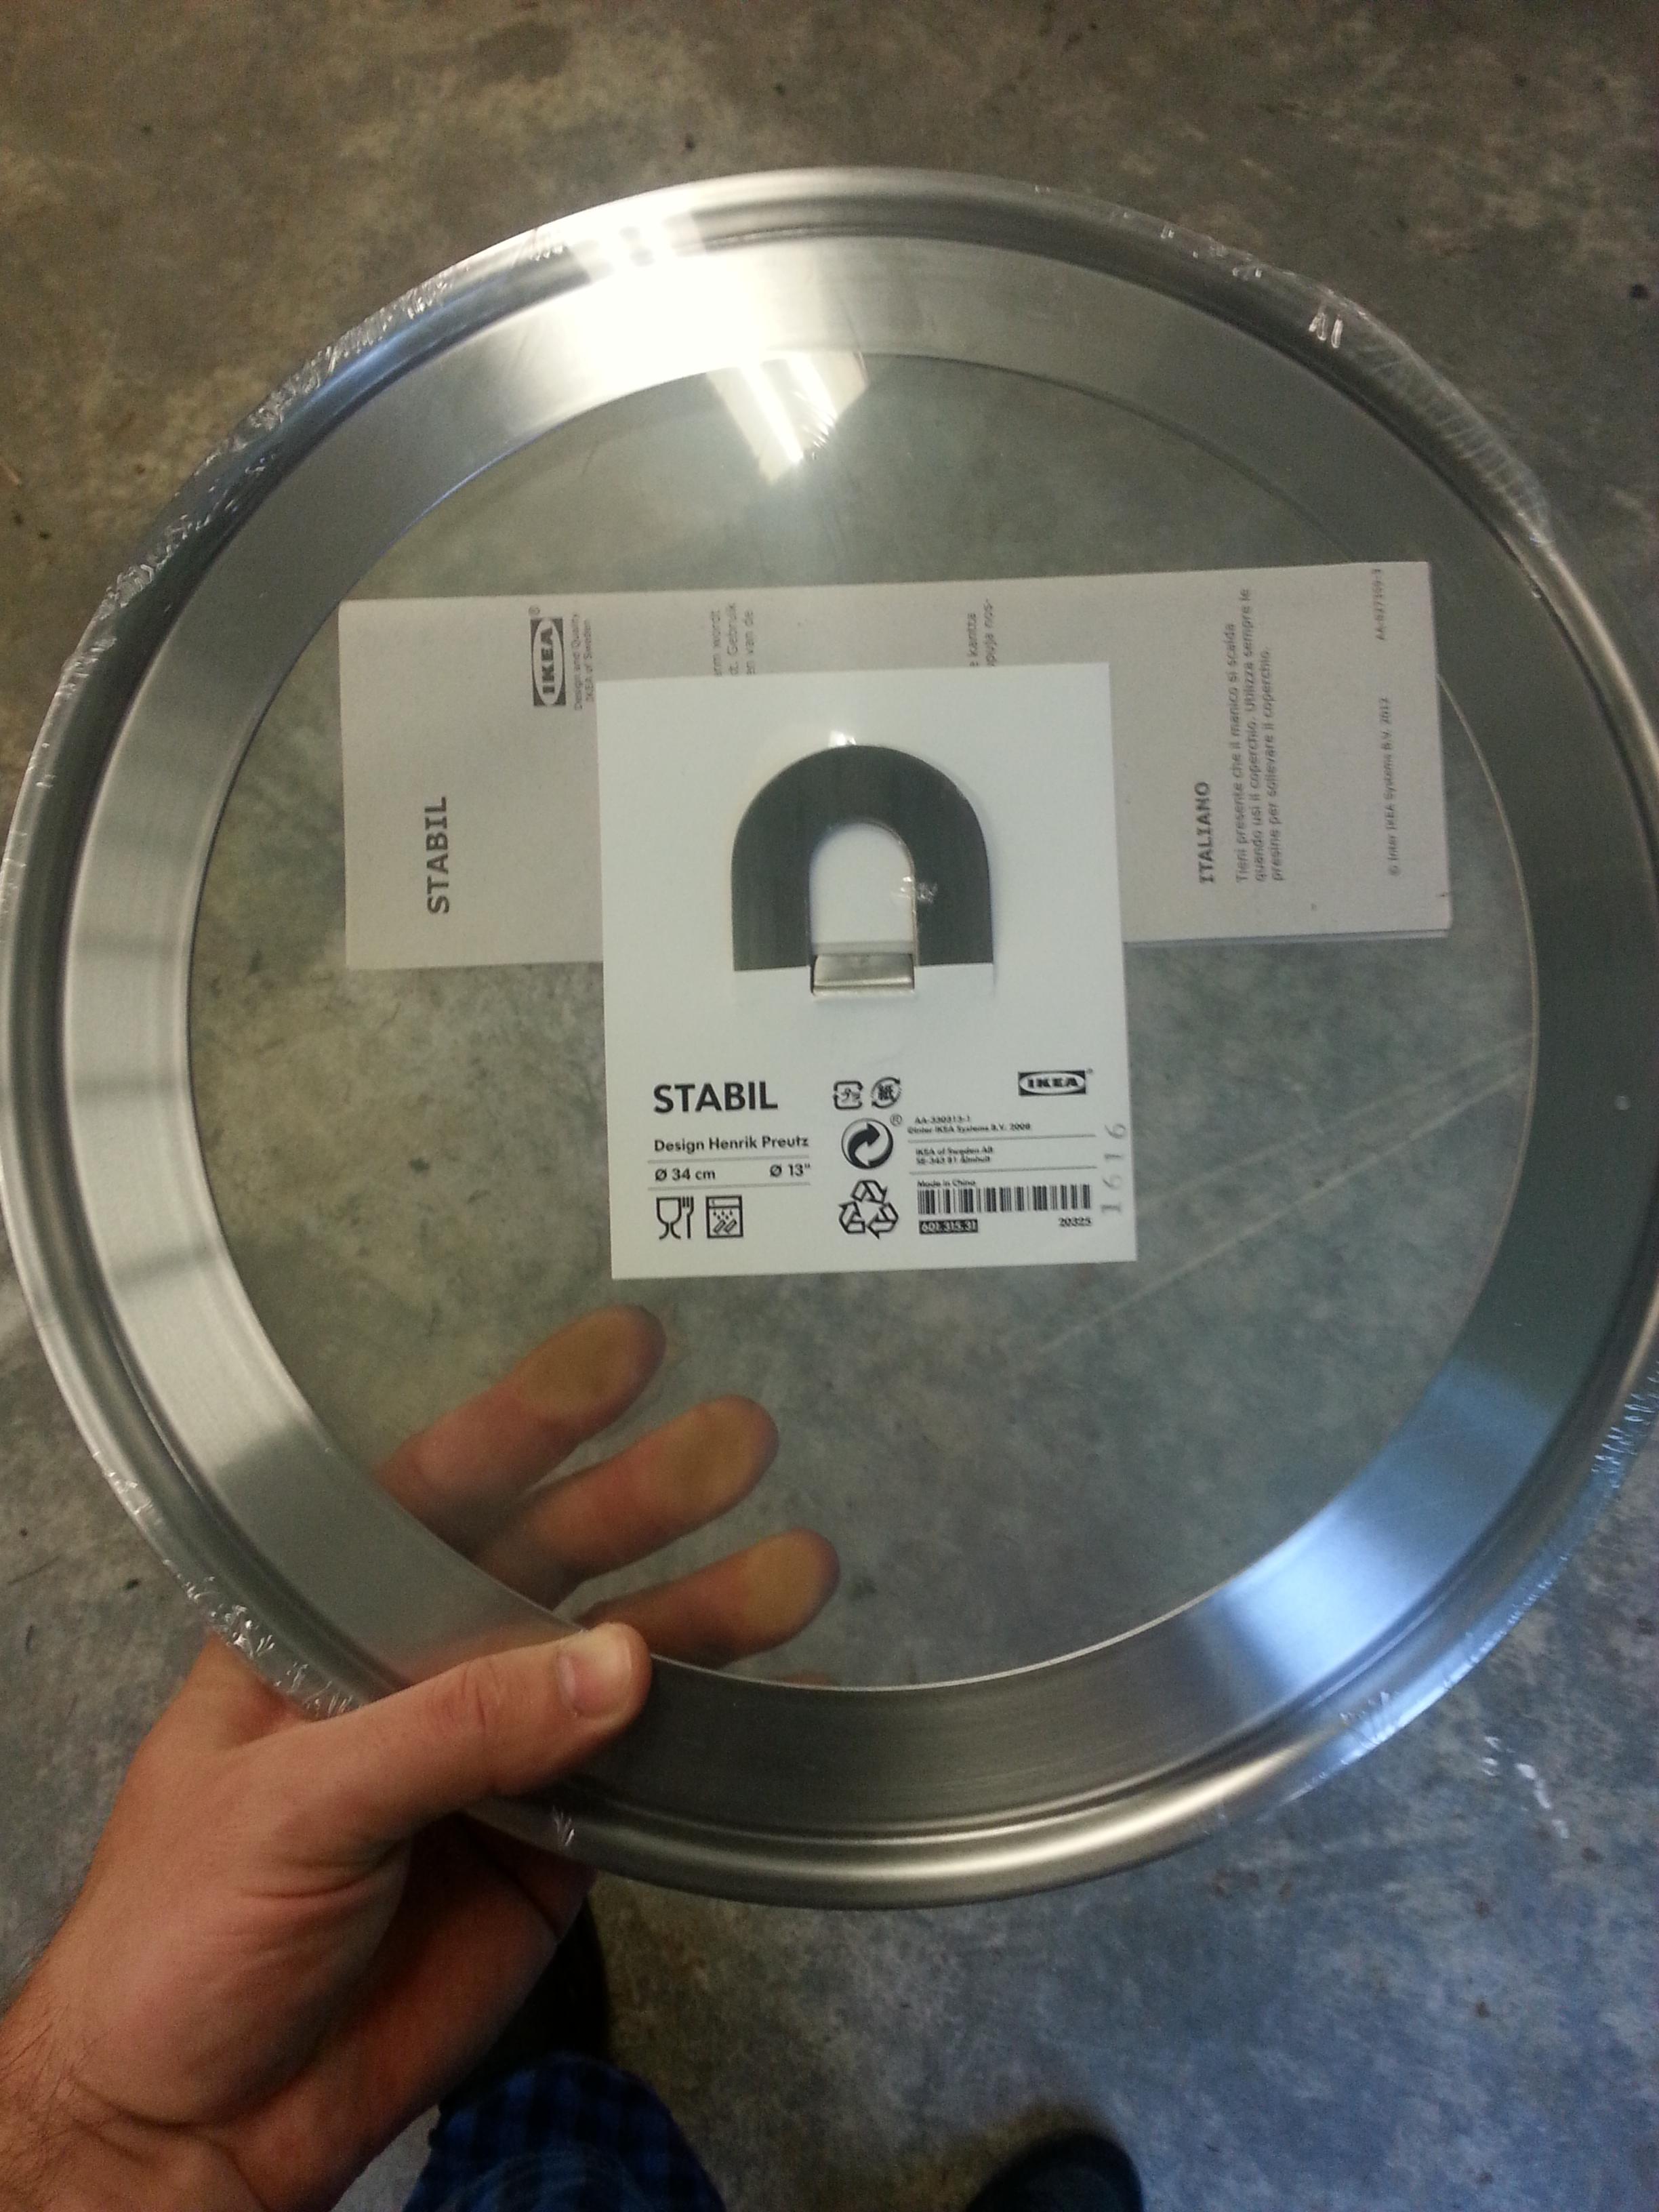
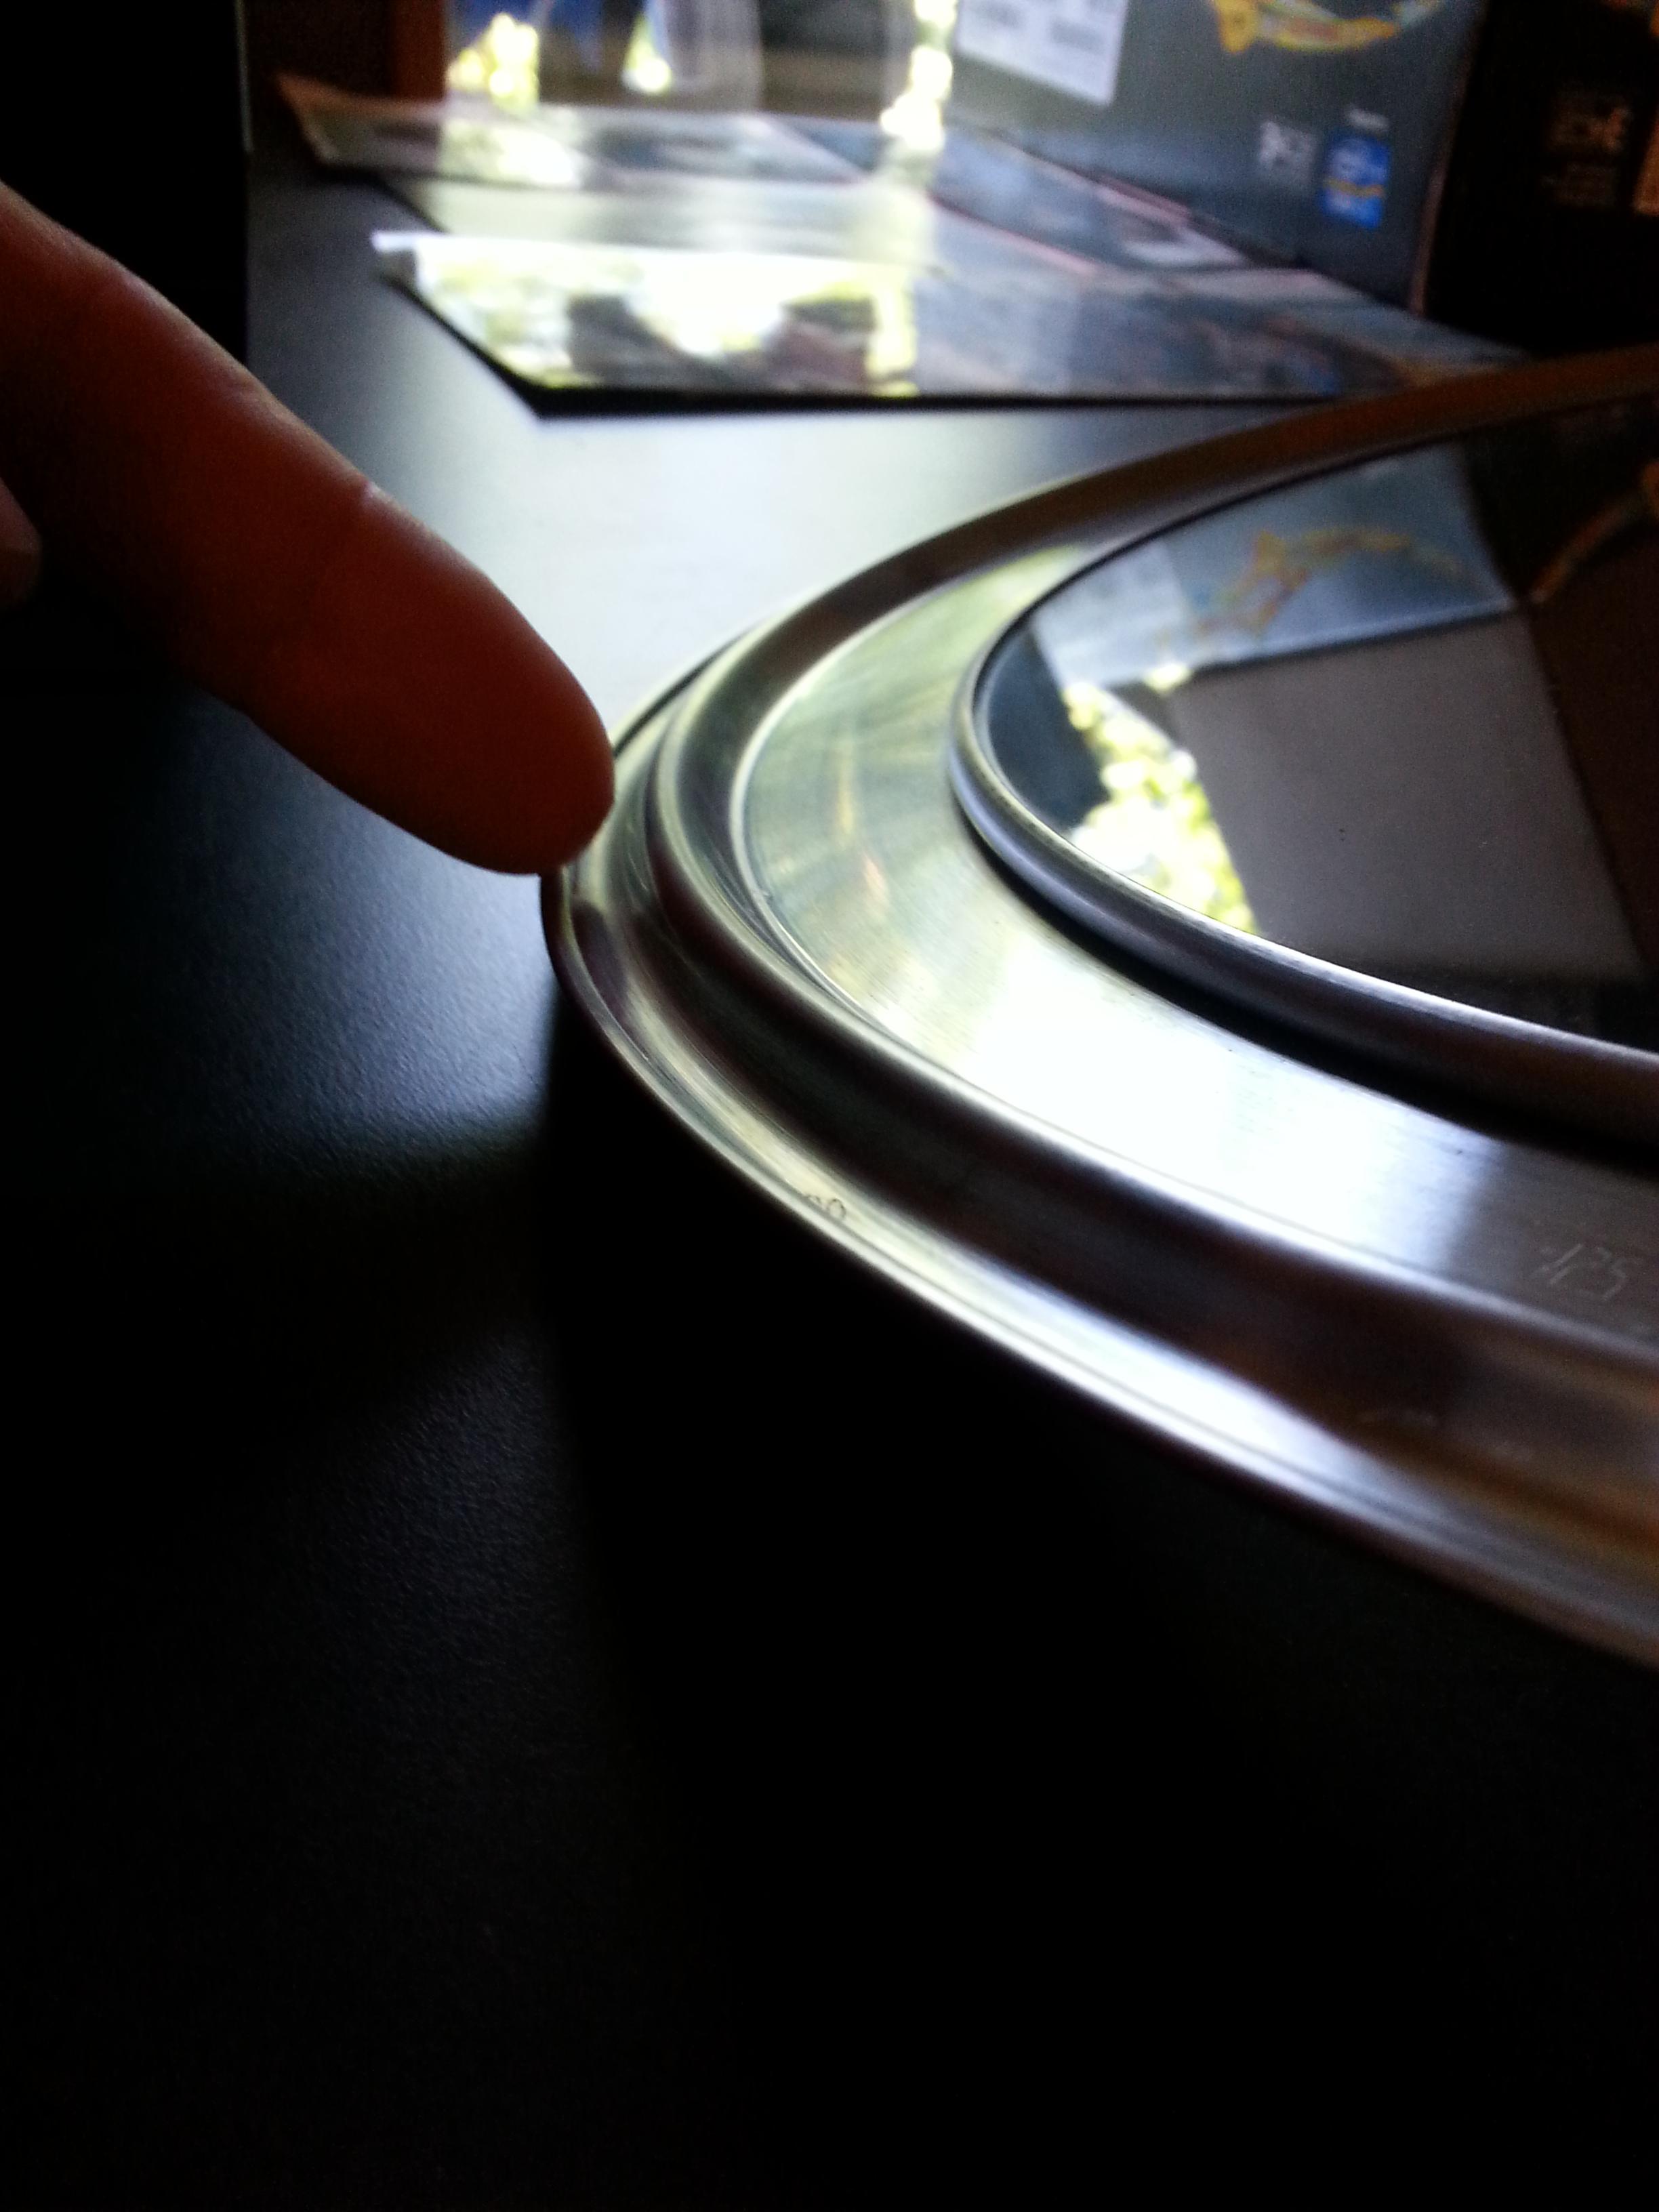
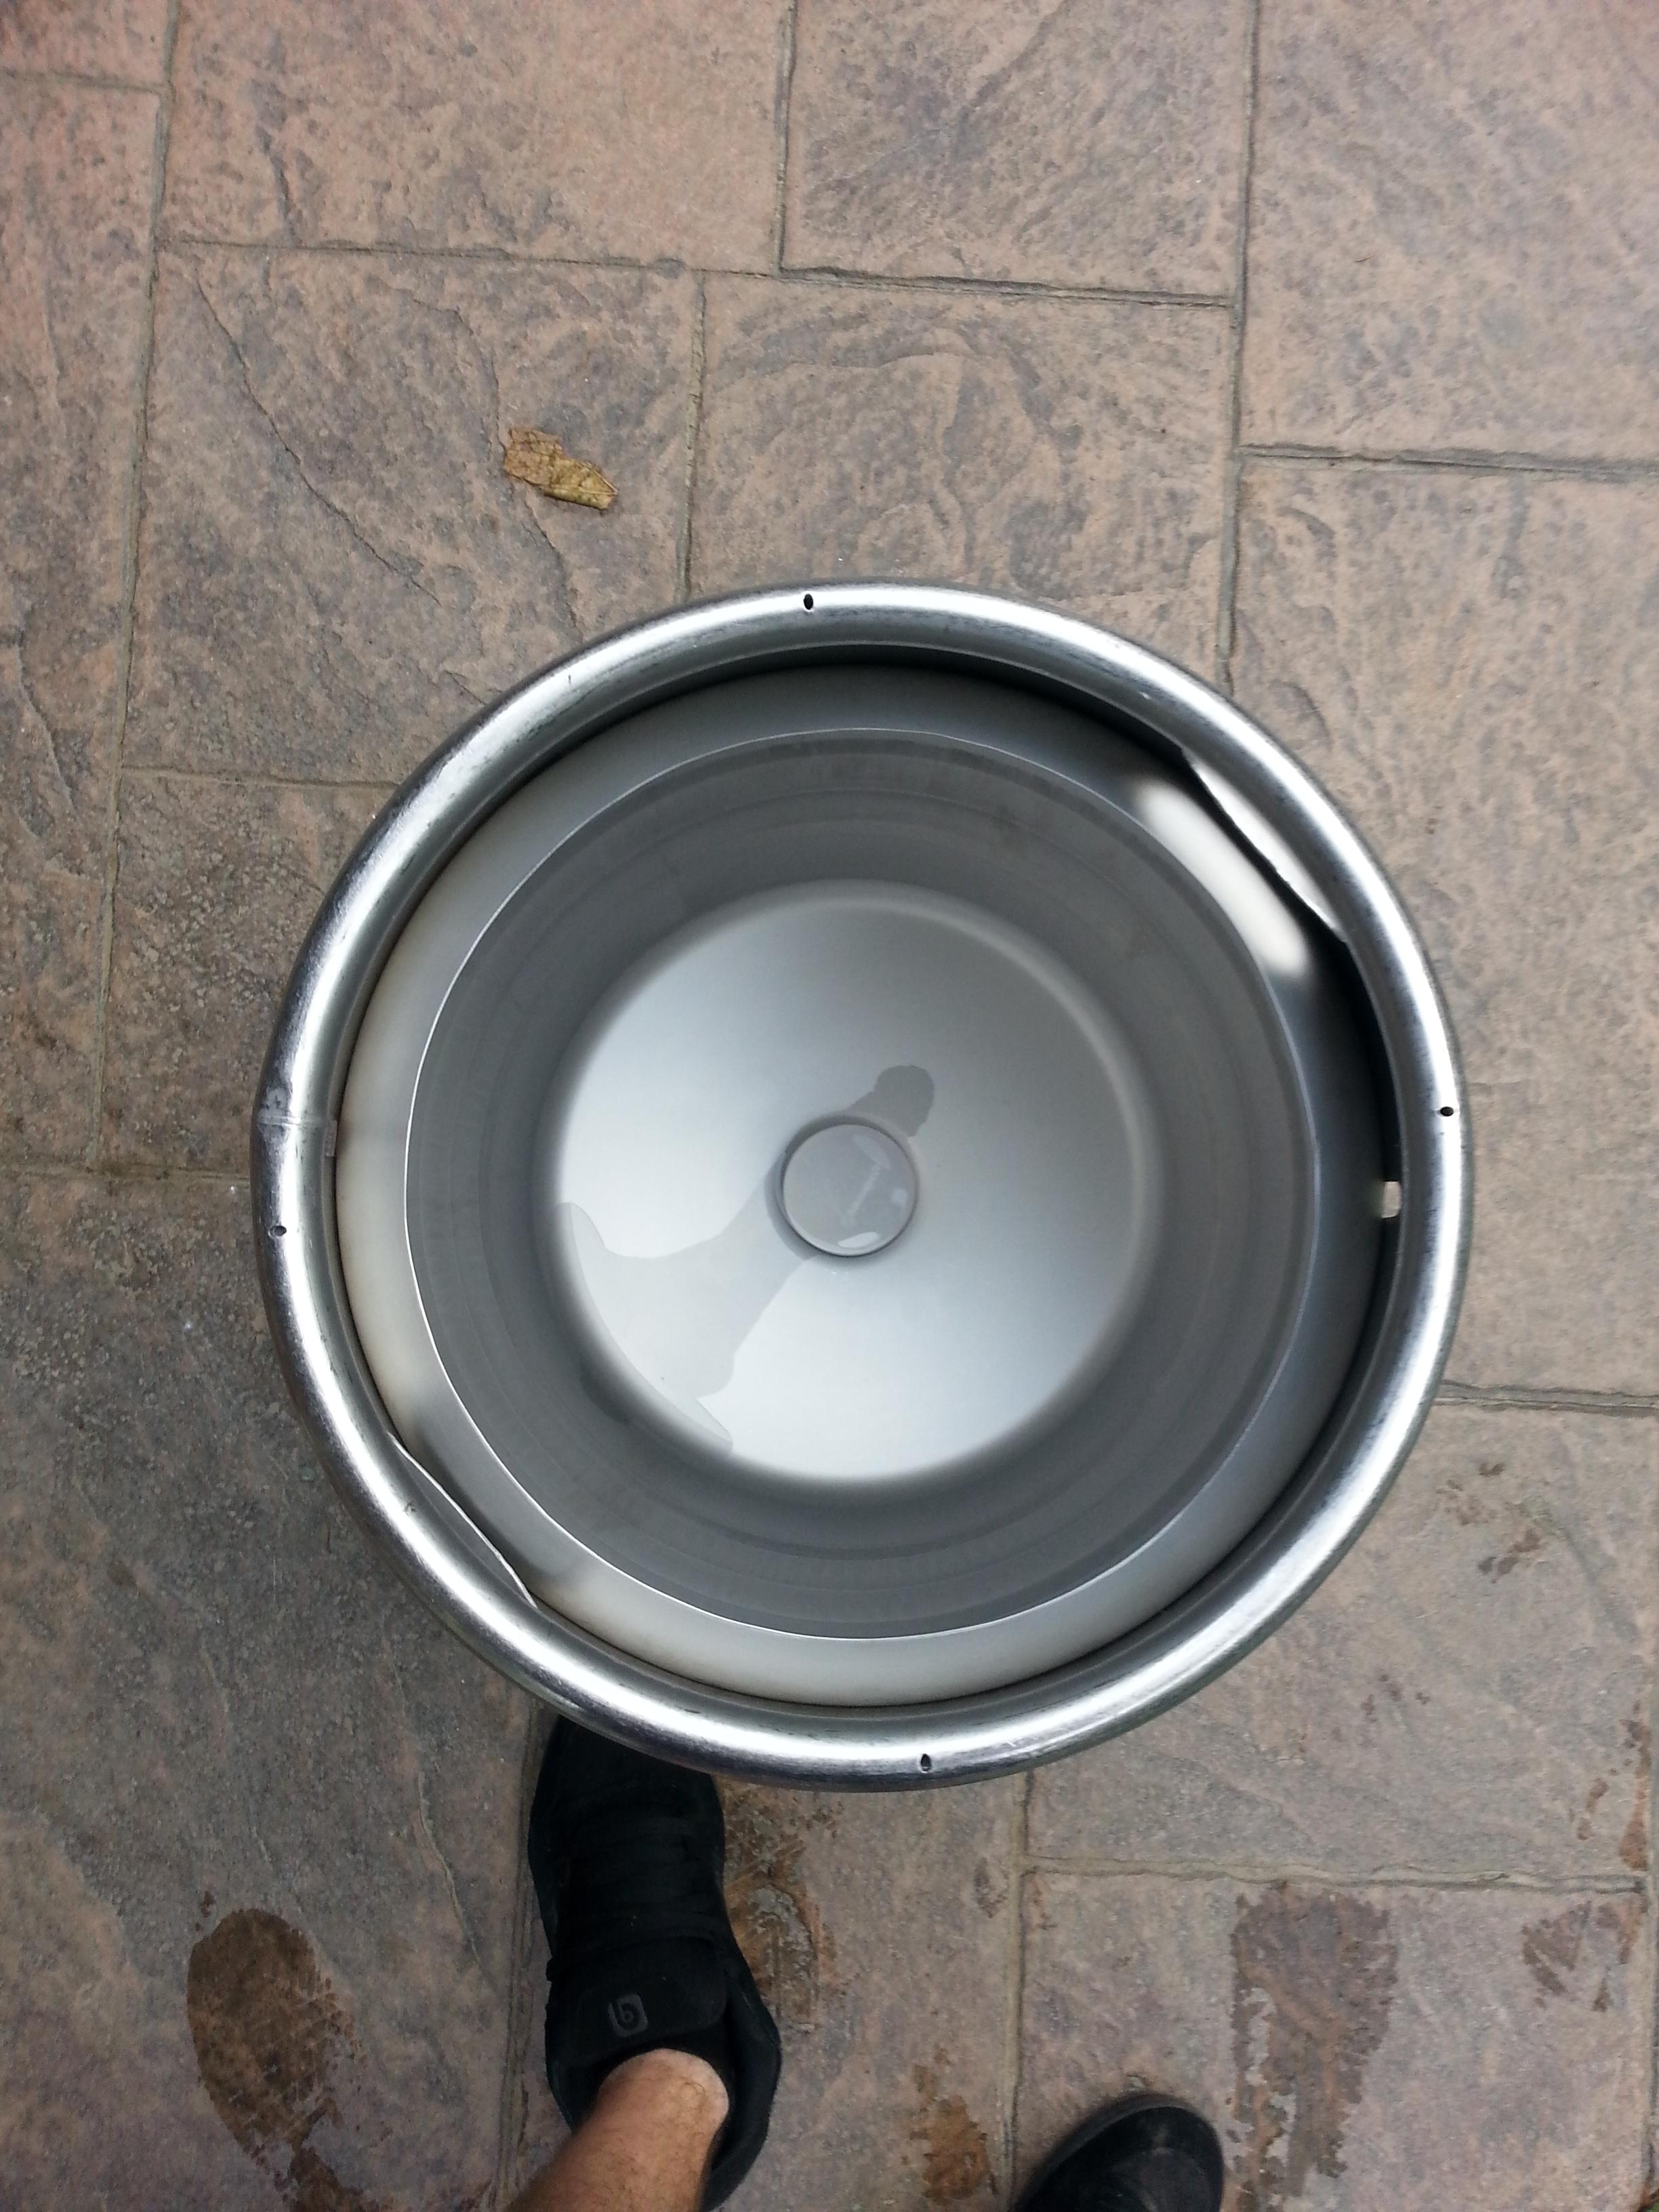
No self respecting keggle is complete without a lid, and I didn't want
aluminum, so I spent some time looking around for an ideal stainless lid.
Turns out Ikea has *awesome* thick stainless lids with glass! Just under
13" in diameter, for $13 each. Sold!
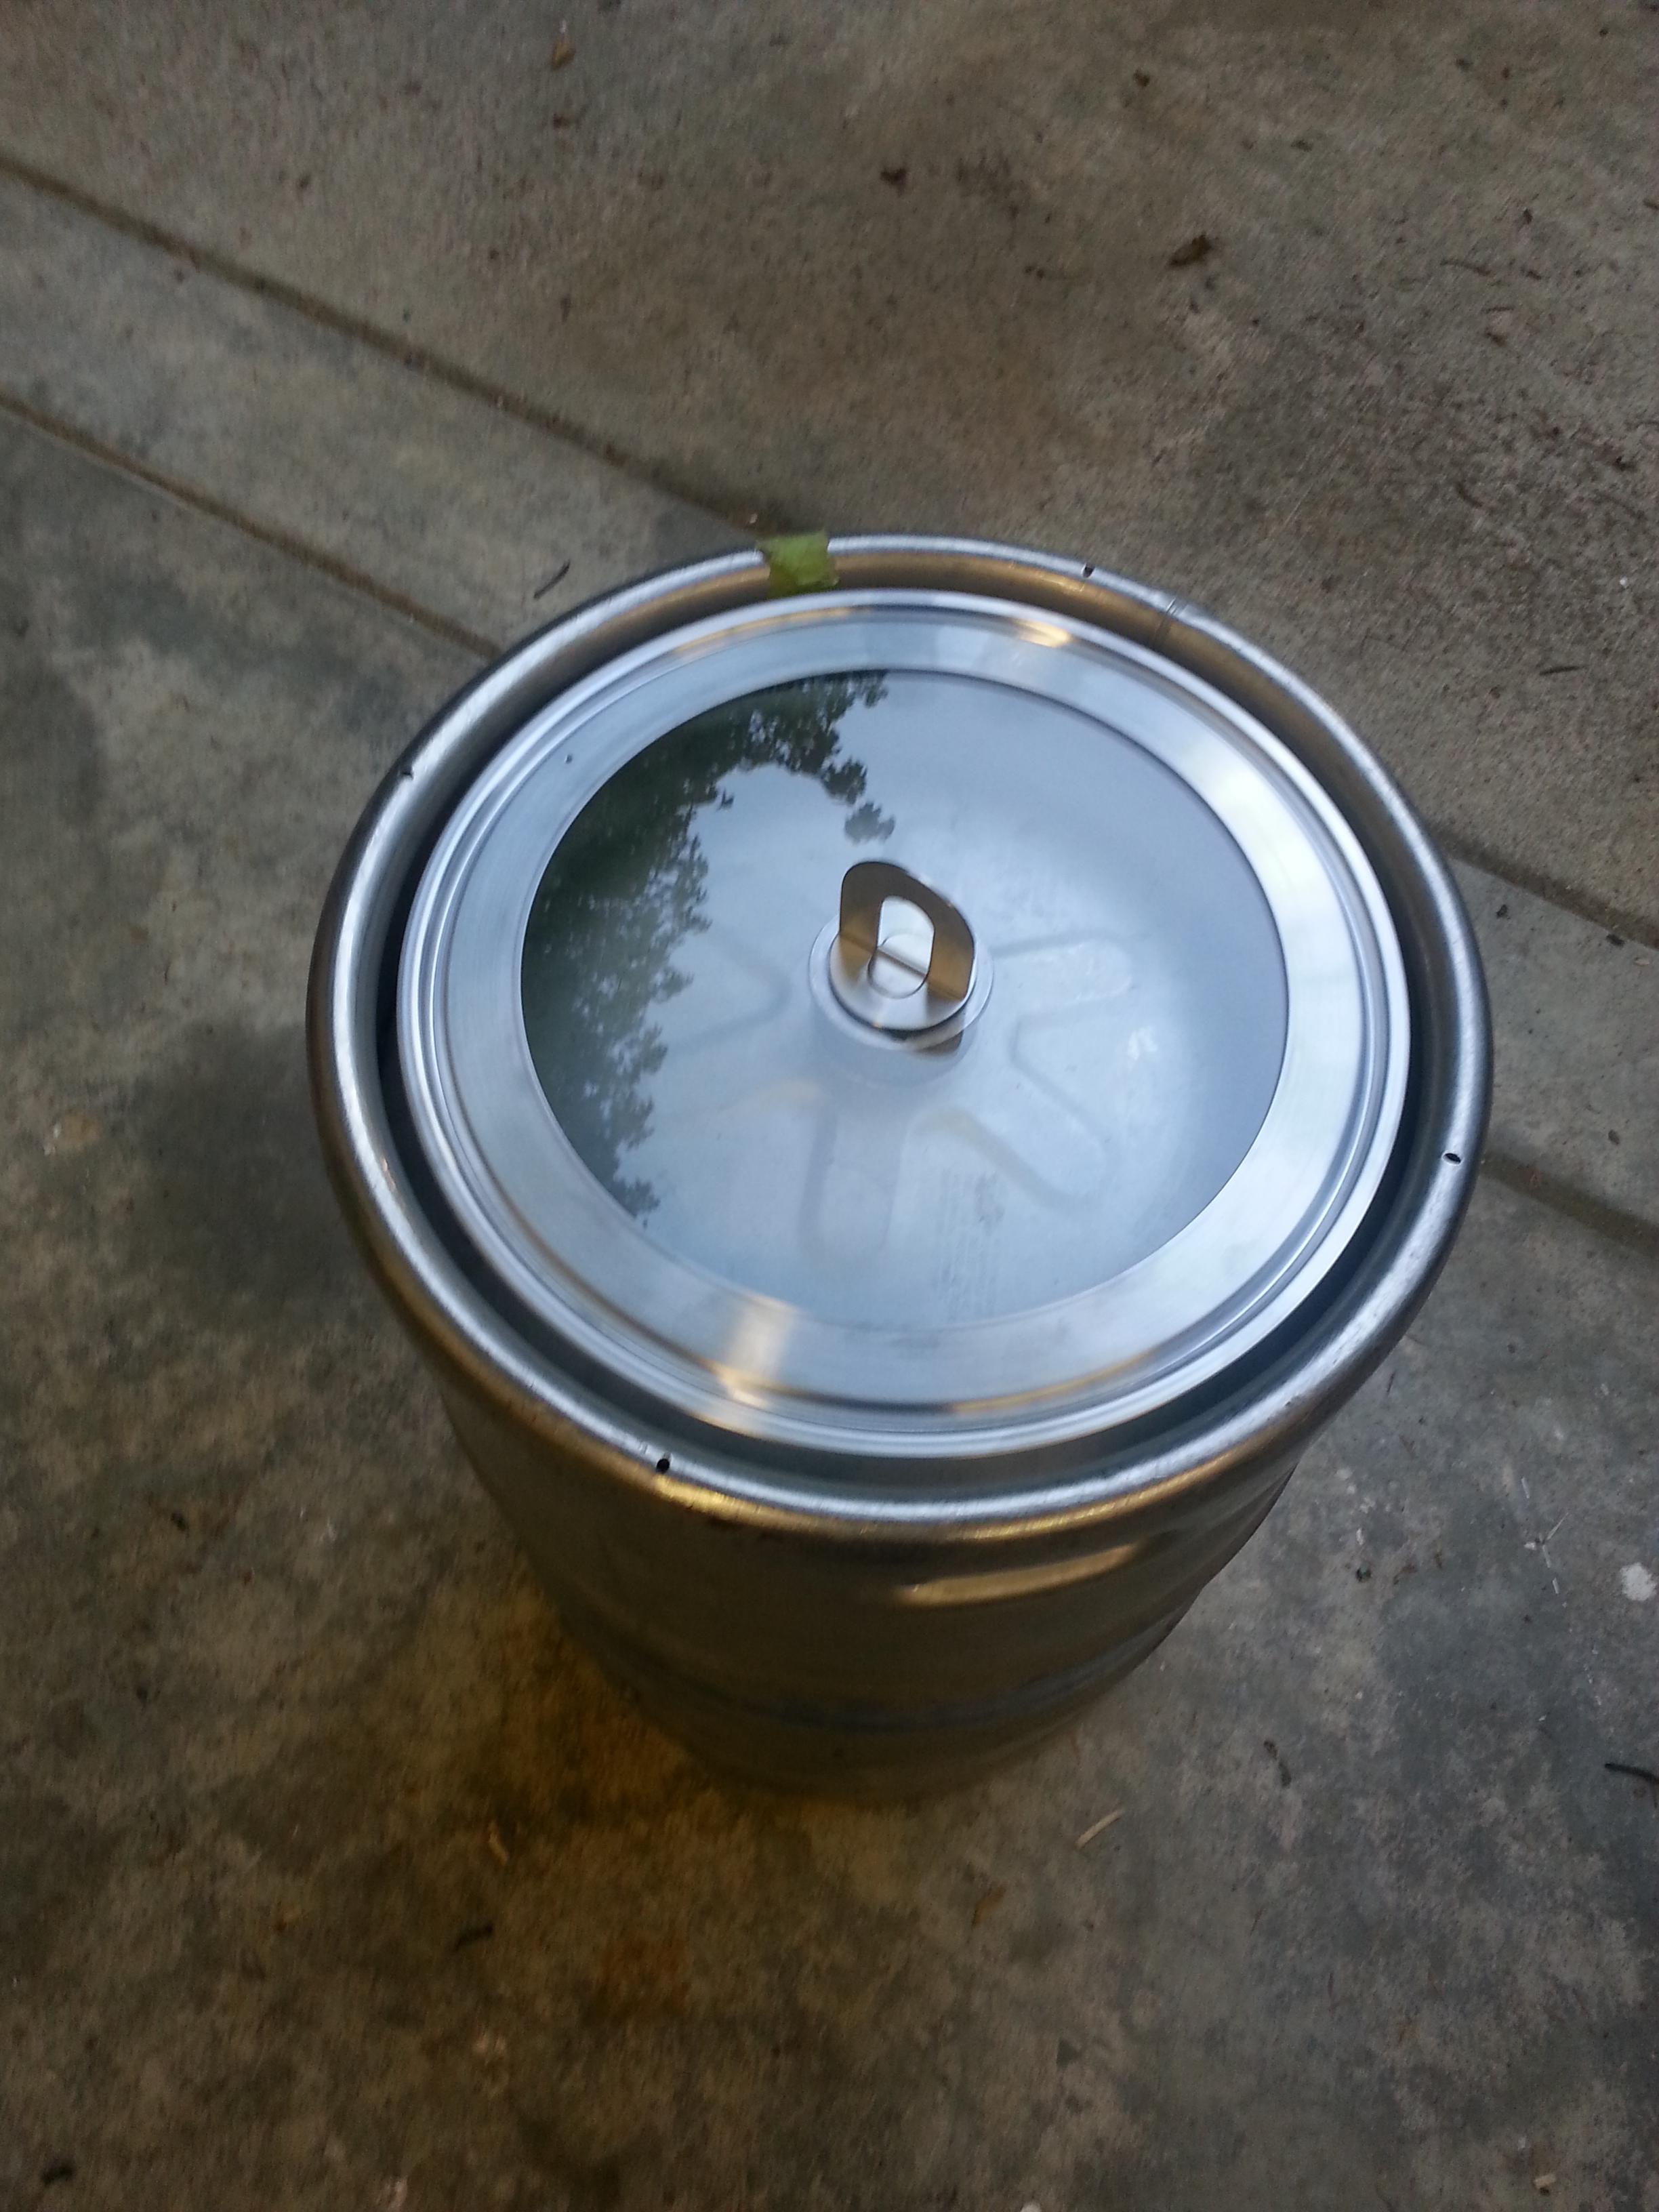
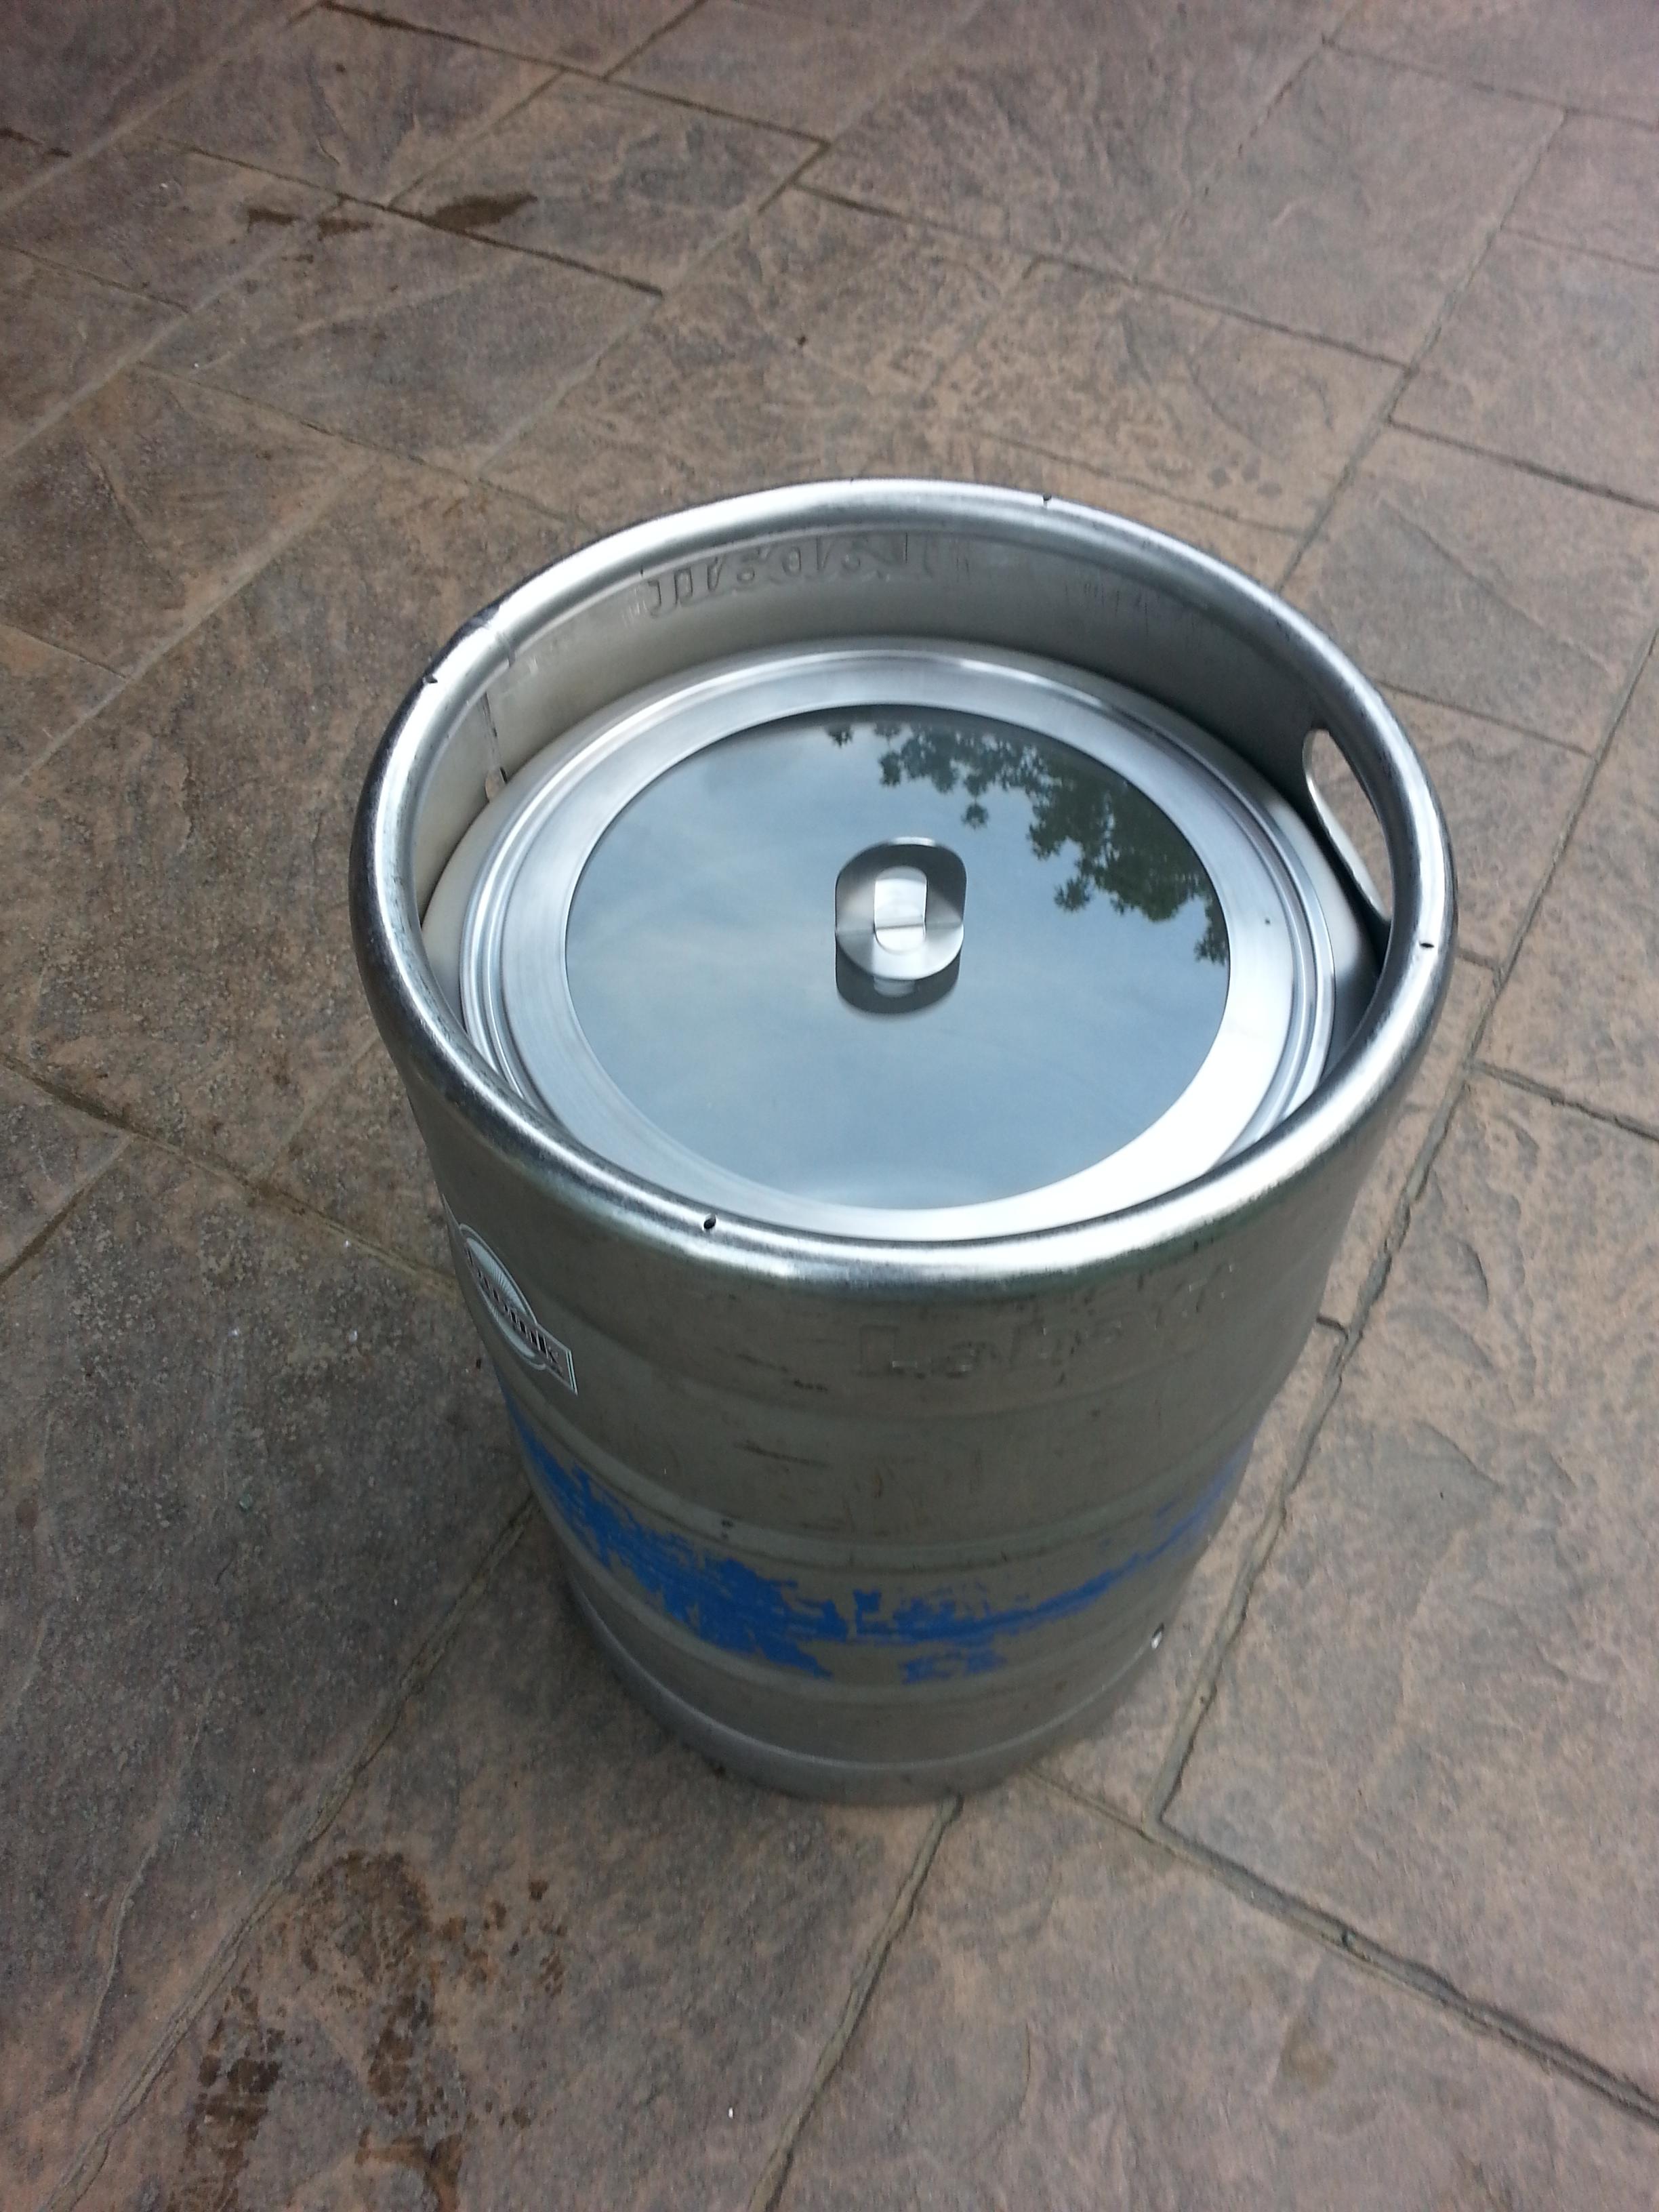
There are tons of How-To's and Youtube videos on cutting the tops of kegs,
so I'll skip my process and just show the mockup and end result. I will
say it was much easier than some people make it out to be; just go slow,
make multiple passes and let the disc do the cutting. I used a single disc
to do all three kegs and about three quarters of the disc is still left!
Flapper disc makes for super easy and beautiful looking cleanup of the
rough edges.
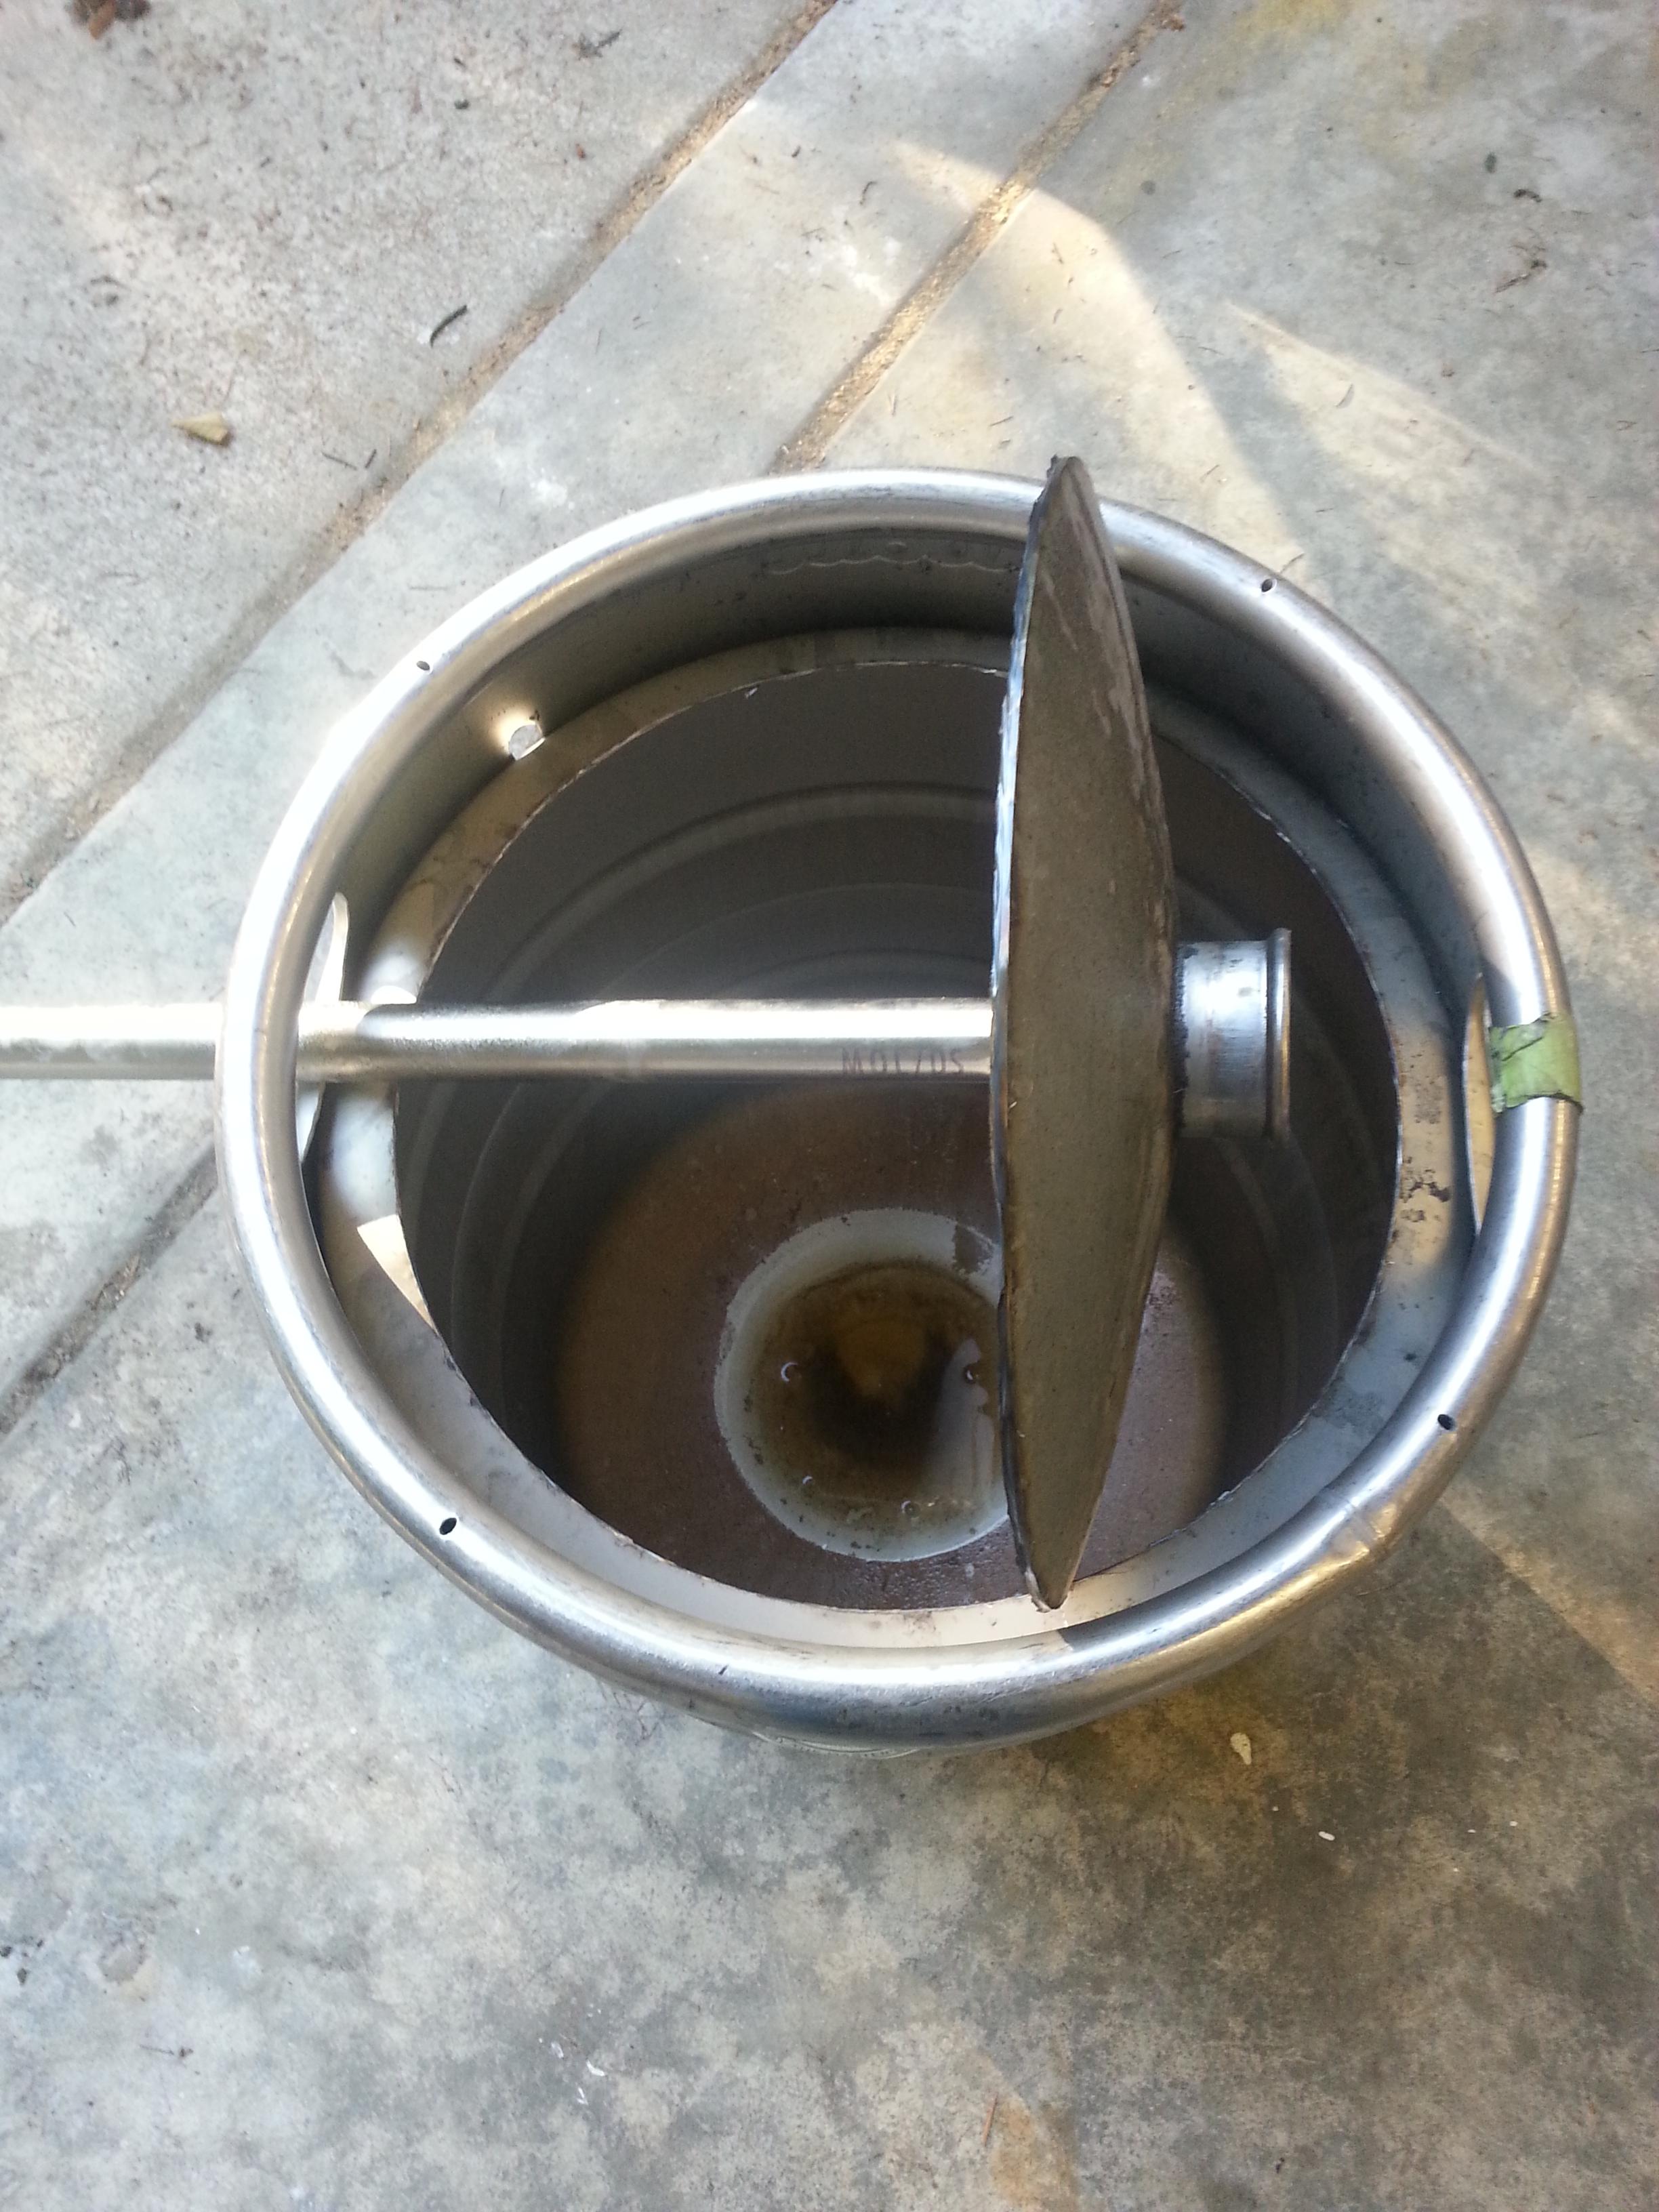
Make sure there's some fluid in the keg. There was old beer still in mine,
so that worked for me. You can remove the spear to add water before
cutting, but I highly suggest reinstalling it so the lid is supported once
you've cut through all the way.
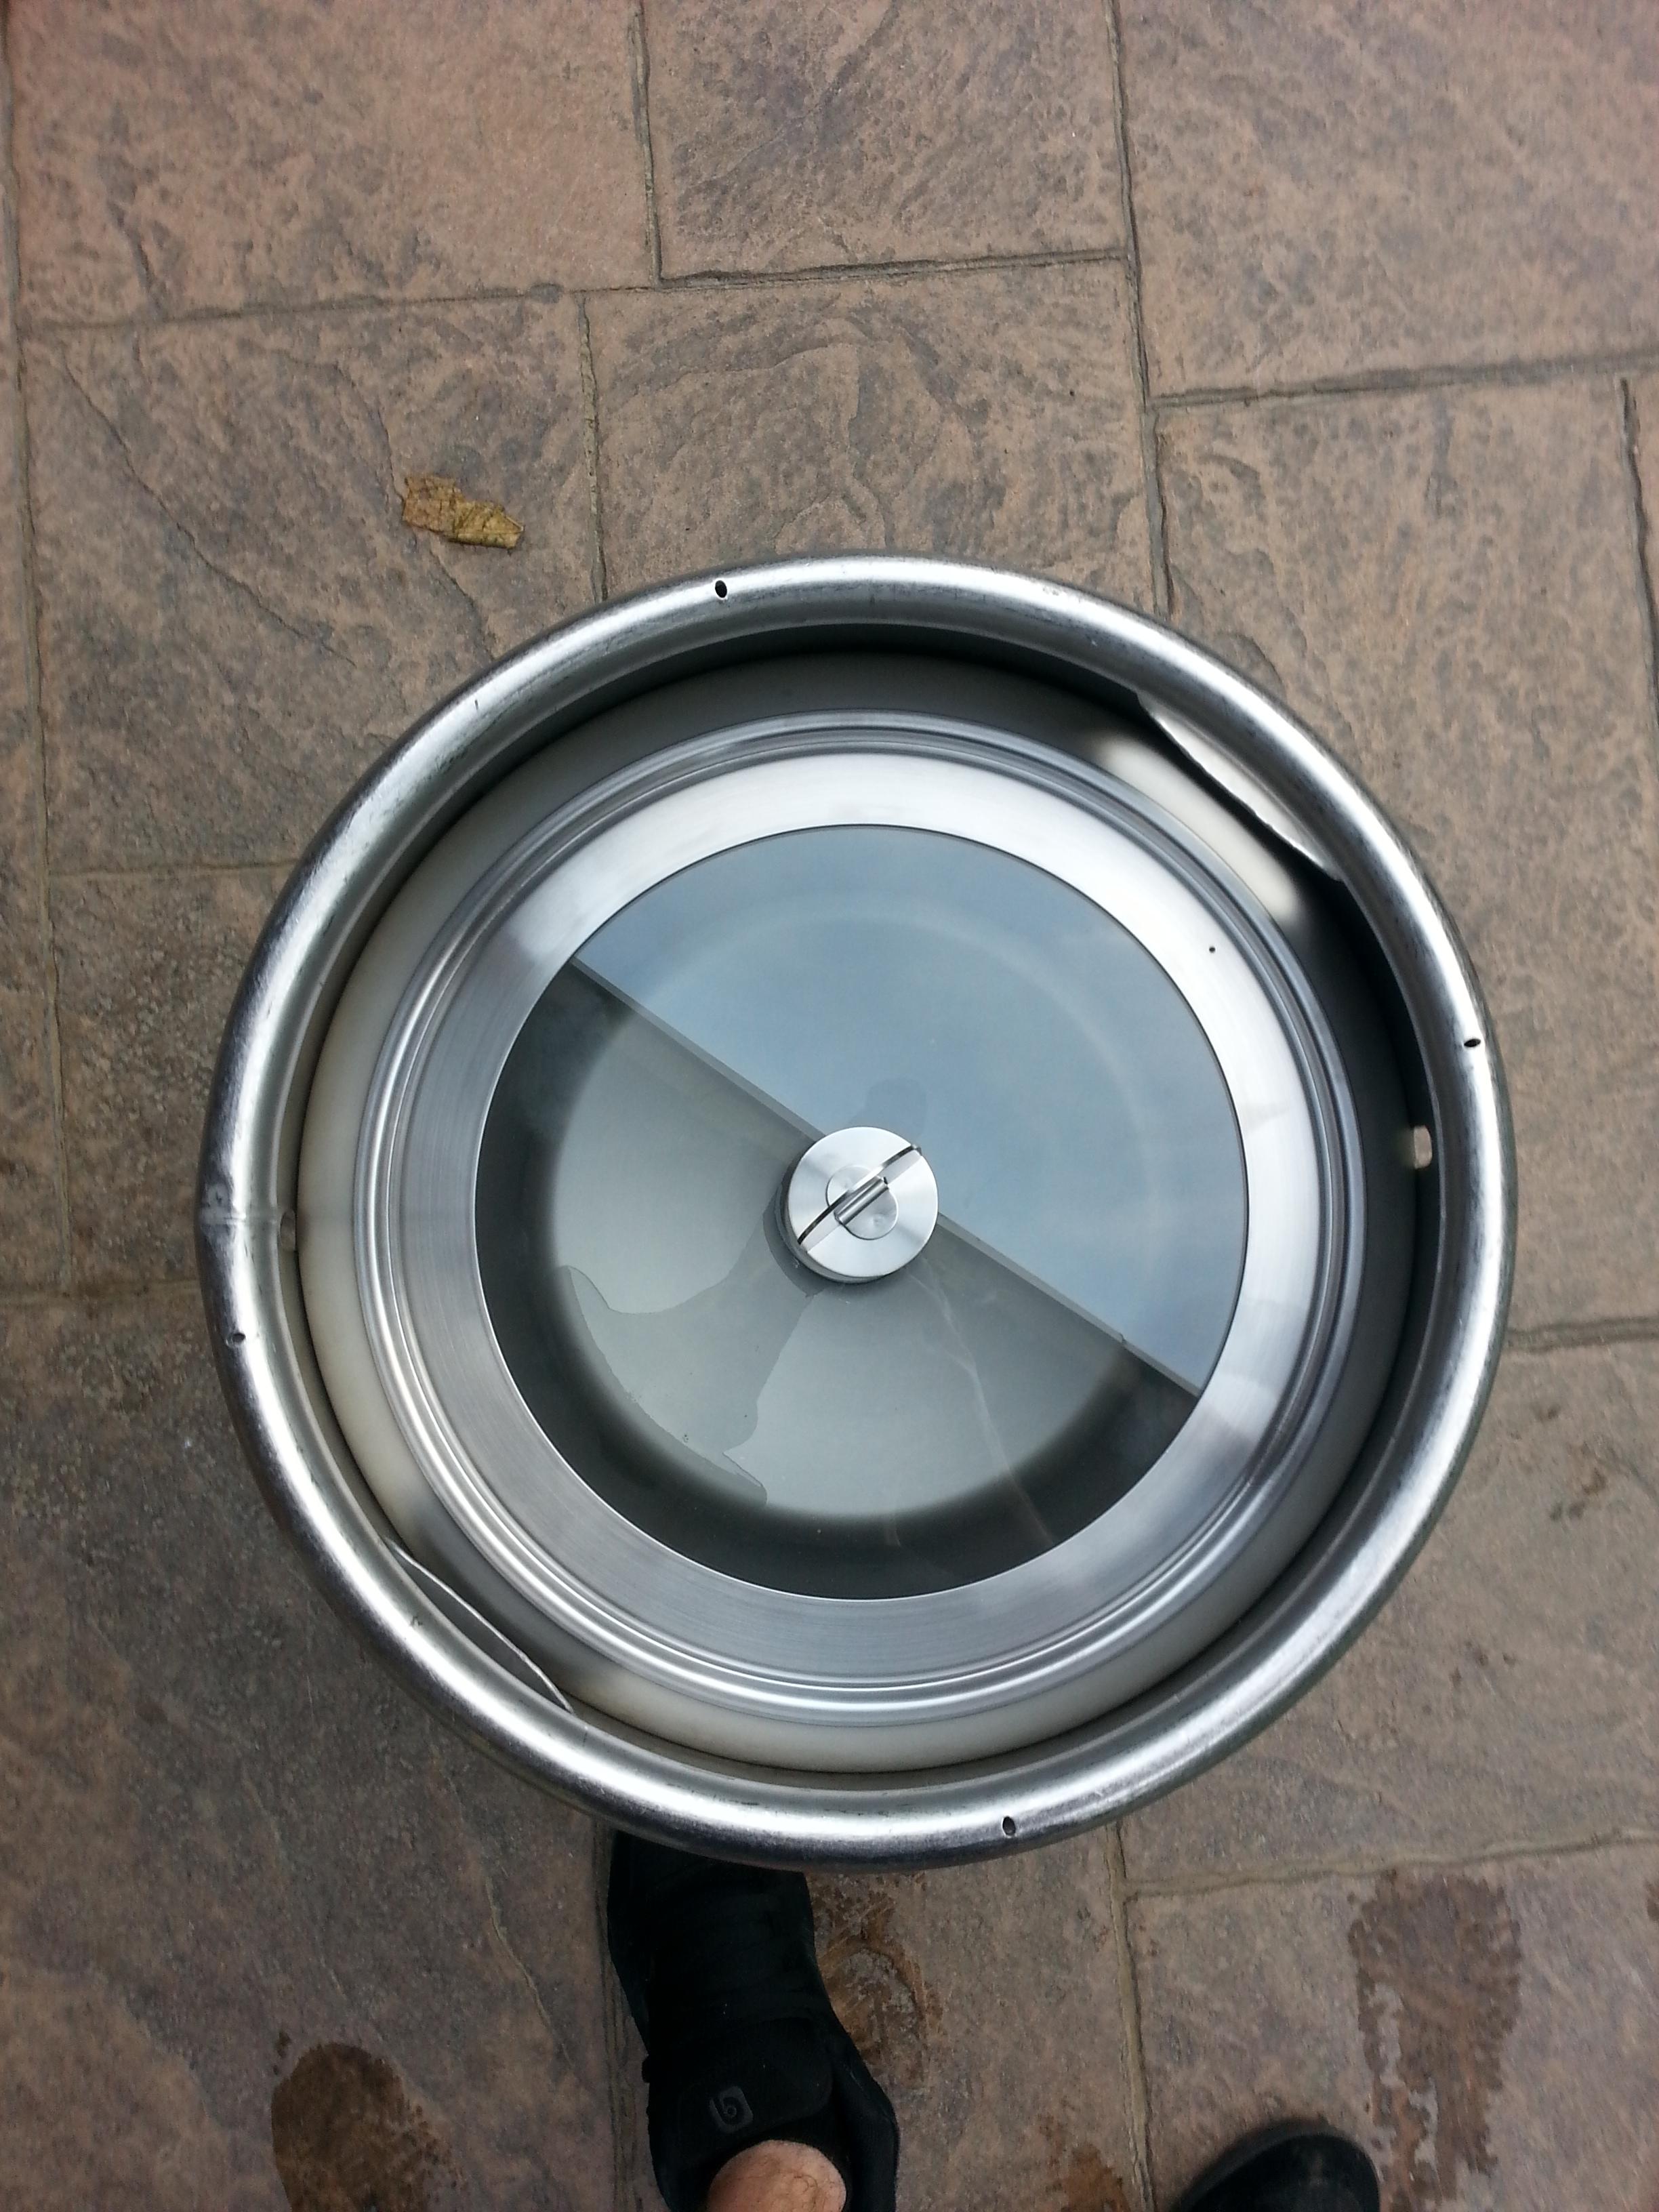
Edges cleaned up, keg soaked in PBW and warm water for a few hours
took nearly everything off on it's own. I used a scrubby specifically made
for stainless to remove the stubborn stuck on stuff. Lid fits perfectly!
Really happy with it.")
That's all for now, will update as progress happens.
Thought I'd document my keggle build process seeing as that's what all
the cool kids are doing these days.
They're eventually going on a three tiered gravity feed rack, once it's
built. I currently brew using a single pot BIAB, and plan on continuing to
use a bag in the MLT once I move into using the keggles so there won't be
any false bottoms or crazy amounts of ports. Just a drain for each,
temperature gauges, liquid volume gauges and a 50' stainless coil in the
boil keggle for cooling.
So without further ado, here's what I got done on the weekend...
No self respecting keggle is complete without a lid, and I didn't want
aluminum, so I spent some time looking around for an ideal stainless lid.
Turns out Ikea has *awesome* thick stainless lids with glass! Just under
13" in diameter, for $13 each. Sold!
There are tons of How-To's and Youtube videos on cutting the tops of kegs,
so I'll skip my process and just show the mockup and end result. I will
say it was much easier than some people make it out to be; just go slow,
make multiple passes and let the disc do the cutting. I used a single disc
to do all three kegs and about three quarters of the disc is still left!
Flapper disc makes for super easy and beautiful looking cleanup of the
rough edges.
Make sure there's some fluid in the keg. There was old beer still in mine,
so that worked for me. You can remove the spear to add water before
cutting, but I highly suggest reinstalling it so the lid is supported once
you've cut through all the way.
Edges cleaned up, keg soaked in PBW and warm water for a few hours
took nearly everything off on it's own. I used a scrubby specifically made
for stainless to remove the stubborn stuck on stuff. Lid fits perfectly!
Really happy with it.
That's all for now, will update as progress happens.
Last edited: