Wow. I live the clamp over the element, and especially the soldered lug. Very very nice.
You are using an out of date browser. It may not display this or other websites correctly.
You should upgrade or use an alternative browser.
You should upgrade or use an alternative browser.
Keg to ekeggle conversion pics
- Thread starter kevink
- Start date

Help Support Homebrew Talk - Beer, Wine, Mead, & Cider Brewing Discussion Forum:
This site may earn a commission from merchant affiliate
links, including eBay, Amazon, and others.
hatfieldenator
Well-Known Member
- Joined
- Sep 15, 2010
- Messages
- 493
- Reaction score
- 18
That is ridiculously awesome
Nice work.
Thanks, guys. I just started on my mash tun which is going to be a rectangular cooler. I made a bulkhead out of stainless steel plate and a stainless steel nipple. I had a bag of silicone o-rings left over from the keggle element which I decided to put to good use here. I machined a groove in the plate to accept the o-ring which is designed to seal against the inside wall of the cooler.
 [/IMG]
The ~.250" thick plate turned down into a washer shape with a hole bored and a groove machined into it.
 [/IMG]
Welded to the nipple:
 [/IMG]
Installed in the cooler:
 [/IMG]
Next up is the manifold. I think I'm going to use copper pipe.

The ~.250" thick plate turned down into a washer shape with a hole bored and a groove machined into it.

Welded to the nipple:

Installed in the cooler:

Next up is the manifold. I think I'm going to use copper pipe.
I really need to learn how to weld and make better friends with my buddy who has a machine/welding shop. Your stuff is gorgeous.
slakwhere
Well-Known Member
I really need to learn how to weld and make better friends with my buddy who has a machine/welding shop. Your stuff is gorgeous.
nothing says "i love you" with subtle undertones of needing machine work like homebrew.

Thanks, jtkratzer. If you want to weld, definitely just jump in and get yourself a welder. Once you have it, you'll attempt projects that you wouldn't have even thought of before owning one.
I just built a simple copper manifold for my mash tun. I based the design on John Palmer's research which seemed sound to me. It will definitely work for batch sparging, but it should work for whatever method we decide to try.
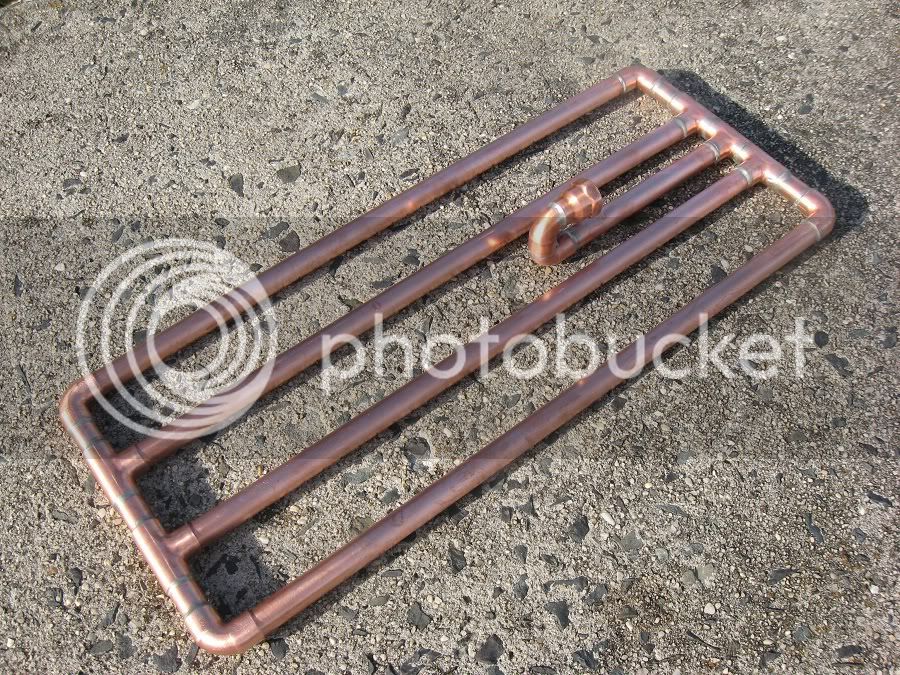
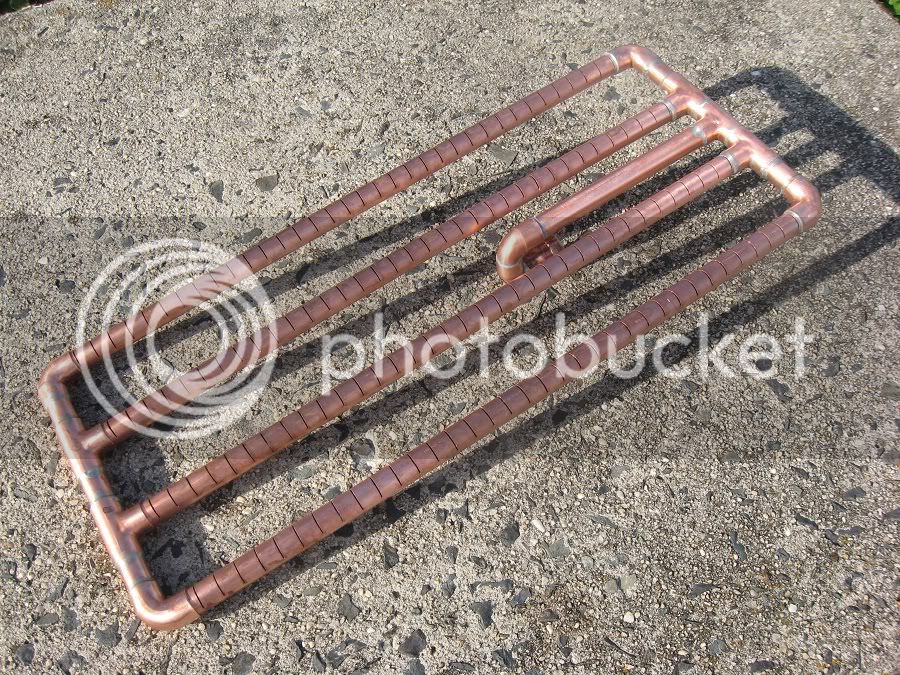
I just built a simple copper manifold for my mash tun. I based the design on John Palmer's research which seemed sound to me. It will definitely work for batch sparging, but it should work for whatever method we decide to try.


I love seeing what a machinist can build. This is an amazing build. I am going to build a cutting tool like yours for my next keg conversion, looks so much better then my hack job with a plasma cutter.
Thanks, lazybean, but I'm not a machinist (not even close). I just like to make stuff. As for building a cutter like mine to cut the top off of your next keg, check out some of my posts on the first page of this thread. I had some other ideas that might work better. I really like the idea of using an air powered cut off tool mounted to a similar rotating arm.
I just took a few more pictures of the manifold during a test. I tested the mash tun by adding 5 gallons of 170 degree water and checking it 15 minutes later to see how much heat the cooler (and air inside of the cooler now that I think about it) sucked out. The water at the end of the test was 7.3 degrees lower, which seems about right as compared to other peoples' tests. I then siphoned the water out and was amazed that the manifold siphoned virtually everything. Sweet.

Here you can see four flats that I milled onto the bulkhead to make it easy to hold when tightening fittings. The silicone tubing makes the manifold really easy to remove for cleaning. The right side of the manifold, as seen in the picture above, is unsoldered to also ease cleaning.
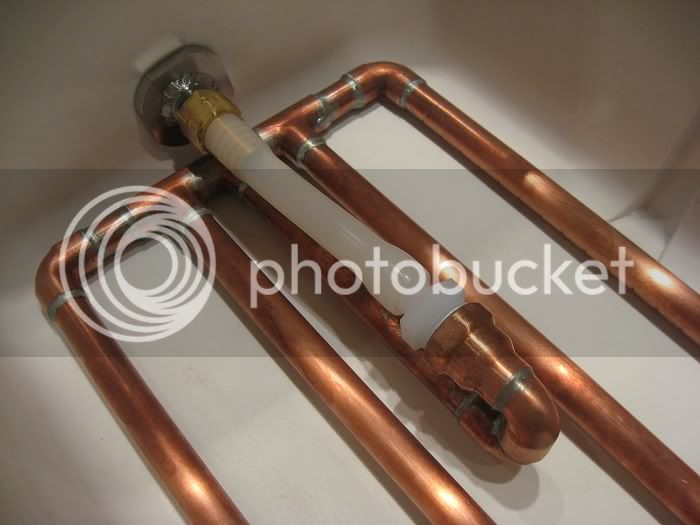

Here you can see four flats that I milled onto the bulkhead to make it easy to hold when tightening fittings. The silicone tubing makes the manifold really easy to remove for cleaning. The right side of the manifold, as seen in the picture above, is unsoldered to also ease cleaning.

El_Cabrito
Member
Adamcanfly,
If I ever do this again, I may just mount an air powered cut off tool with an abrasive disc to the cutter instead. As the disc wears, the whole assembly can be lowered by turning the nuts that are sandwiching the cutter. It was a LOT of work for SWMBO to hold the keg still and a LOT of work to turn that cutter. I have a newfound respect for 304 stainless steel now... lol. I was sweating like crazy by the end. The screeching noise was unbearable. The cutting oil I used was actually smoking from the heat. It was not as elegant of an operation as the pics might suggest, but I did end up with a perfectly round hole in the keg!
pretty hi-tech. looks good too. if u want real simple, you can use about $1.25 in pvc couplers and a angle grinder. if i remember correctly, a 1 1/4" stepped coupler and a 1" t-junction cut in half. hose clamp angle grinder handle to t-junction, place junction in coupler, place coupler in bung. angle grinder naturally wants to spin, and coupler/t-junction forces circumferential motion at your set radius. takes about 5-7 min to cut thru top with 1 cutoff wheel. then de-burr after.
nice element housing. wish i had a machine shop in the basement.
Kevin,
Follow-up question to your hop stopper screen.
Do you find that hops get up in to the crimped edges? In other words, since you folded the mesh screen around the hoop and crimped it up underneath, there might be some little areas that aren't sealed well and hop bits could get in there.
I'm wondering about cleaning and long-term use about it getting gunked up in the seams.
Thx,
K
Kellzey,
The crimp is so tight that the space between the folds of the crimp are around as small as the holes of the mesh. There was nothing in the fold after I tested it with hops only (details earlier in the thread) or the inaugural brew (also detailed earlier). That brew didn't have a lot of pellets, though. Most of the hops were whole leaf. I'm brewing a Firestone Walker Union Jack IPA clone this weekend that has a pretty big hop bill and I'm using all pellets, so I'll let you know how it goes. I don't foresee any problems, though. Just blast it off with a hose. Even if you don't clean it well and a trace amount of hop material is left on the screen, it's no biggie. By the time they dry out and shrink (think drying herbs) they will probably fall right off. If they don't, they just get boiled anyway.
That being said, the real test will be in how well it can be cleaned after this next brew. I'll give an update after that.
Thanks Kevin,
I'm about 75% done with the build (had a 2-month hiatus due to other projects).
I'm about to punch holes in the keggles (spent dozens of hours polishing 3 keggles to a mirror finish).

I'm about to finish the build out (drywall, metal wall panels, A/C, and venting).
And I have about 5% wiring left on Kal's control panel.
Then it's off to brewing!
Thanks for all of you detailed input on this thread!
Karl
I'm about 75% done with the build (had a 2-month hiatus due to other projects).
I'm about to punch holes in the keggles (spent dozens of hours polishing 3 keggles to a mirror finish).

I'm about to finish the build out (drywall, metal wall panels, A/C, and venting).
And I have about 5% wiring left on Kal's control panel.
Then it's off to brewing!
Thanks for all of you detailed input on this thread!
Karl
sils13
Well-Known Member
That's looks awesome!!
Looks great! I did 2 of mine (insulated mash tun doesn't need it).
Burn any of that wood last night? Man, we had a cold night. I swear there was frost on the ground this morning.
Burn any of that wood last night? Man, we had a cold night. I swear there was frost on the ground this morning.
cyclogenesis
Well-Known Member
Very neat! What did you use to make the cuts?Thanks, jtkratzer. If you want to weld, definitely just jump in and get yourself a welder. Once you have it, you'll attempt projects that you wouldn't have even thought of before owning one.
I just built a simple copper manifold for my mash tun. I based the design on John Palmer's research which seemed sound to me. It will definitely work for batch sparging, but it should work for whatever method we decide to try.


Very neat! What did you use to make the cuts?
SWMBO and a hacksaw!
KitB
Well-Known Member
Thanks Kevin,
I'm about 75% done with the build (had a 2-month hiatus due to other projects).
I'm about to punch holes in the keggles (spent dozens of hours polishing 3 keggles to a mirror finish).

I'm about to finish the build out (drywall, metal wall panels, A/C, and venting).
And I have about 5% wiring left on Kal's control panel.
Then it's off to brewing!
Thanks for all of you detailed input on this thread!
Karl
How in the world did you make that keg shine, like that???
cyclogenesis
Well-Known Member
SWMBO and a hacksaw!
Have not yet been able to install a SWMBO in the workshop
Kellzey,
The crimp is so tight that the space between the folds of the crimp are around as small as the holes of the mesh. There was nothing in the fold after I tested it with hops only (details earlier in the thread) or the inaugural brew (also detailed earlier). That brew didn't have a lot of pellets, though. Most of the hops were whole leaf. I'm brewing a Firestone Walker Union Jack IPA clone this weekend that has a pretty big hop bill and I'm using all pellets, so I'll let you know how it goes. I don't foresee any problems, though. Just blast it off with a hose. Even if you don't clean it well and a trace amount of hop material is left on the screen, it's no biggie. By the time they dry out and shrink (think drying herbs) they will probably fall right off. If they don't, they just get boiled anyway.
That being said, the real test will be in how well it can be cleaned after this next brew. I'll give an update after that.
Kellzey,
I brewed this weekend and the hop stopper was really easy to clean. I started in the sink, but there wasn't enough water pressure to remove all of the hop debris. The garden hose took care of the rest with only about a minute of spraying. I was surprised at how quickly everything came off. No hop debris was visible inside the hop stopper or in the folds.
Unfortunately, I had a not so great time siphoning from the keggle, through the counterflow chiller, and into the carboy. The flow was pretty low and at one point it stopped. Raising the keg an additional ~16" helped, so I think the stopped flow might be because I didn't have the keg high enough. It also might have something to do with the huge flame out addition that this recipe has. The pellets didn't have any boil time to break down and as a result immediately sank, so maybe the larger chunks were clogging around the pickup tube instead of just flowing into it. I did note a lot of larger chunks while cleaning. I'm tempted to use a hop bag in addition to the hop stopper during the next brew, but I would like to test this thing out some more to find out what's going on.
I found this interesting. During the last 10 minutes of the boil, I siphoned wort from the keg to sanitize my chiller. The wort discharged from the chiller was crystal clear, so I guess the hop stopper was acting as a huge filter. I was not expecting that.
I'll post a few pictures later.
EarthBound
Well-Known Member
I'll post a few pictures later.
I am on the edge of my seat.
I am on the edge of my seat.
Still there?
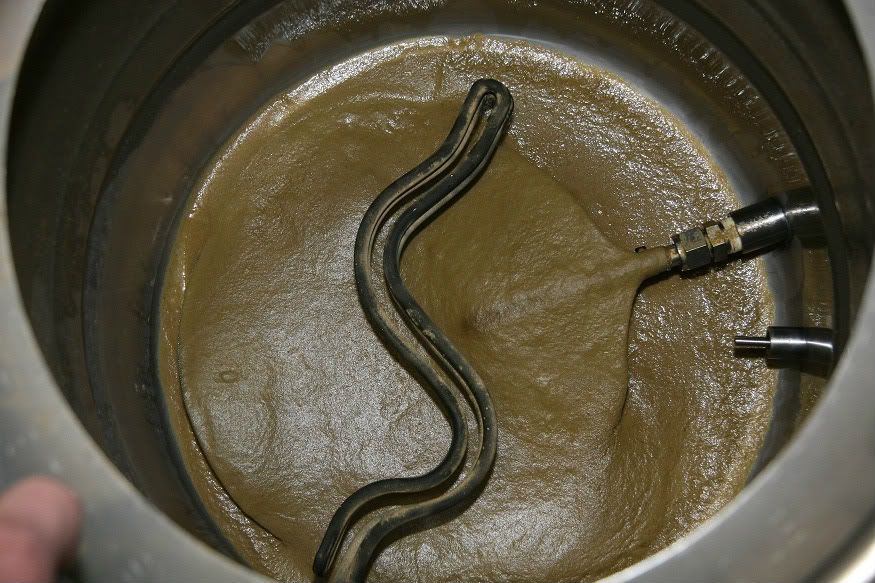
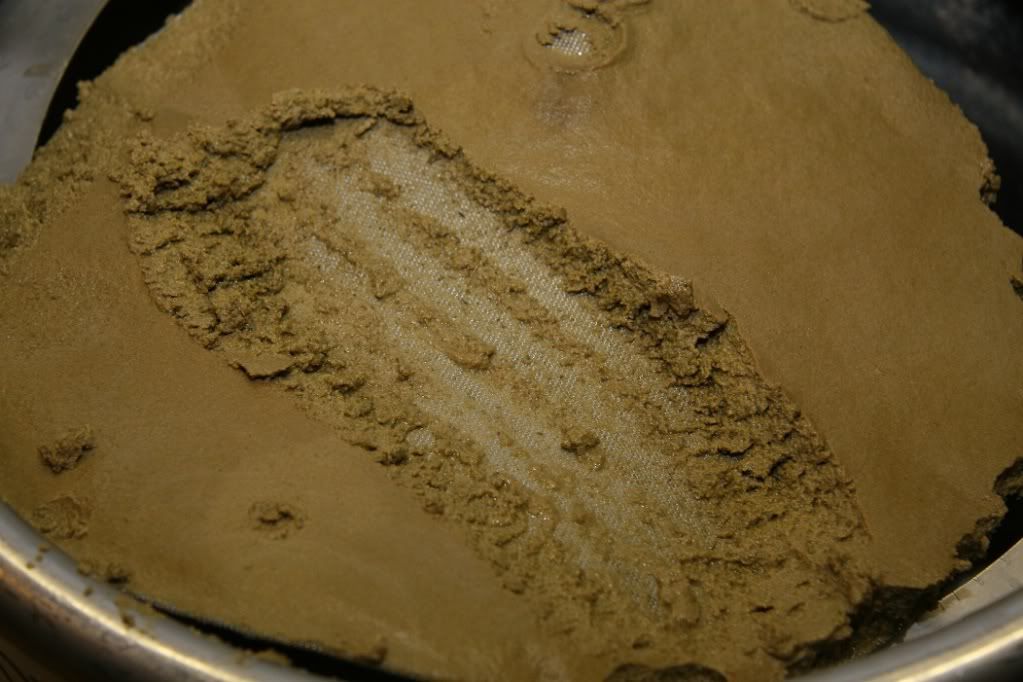
I can totally see why the flow was low during siphoning. The hop debris is very, very fine. I don't care what mesh hopstopper you have, the wort isn't getting past that dense mat of hop material very quickly.
pvtschultz
Well-Known Member
I'm guessing more of that is break material and not hop debris.
EarthBound
Well-Known Member
Still there?
I can totally see why the flow was low during siphoning. The hop debris is very, very fine. I don't care what mesh hopstopper you have, the wort isn't getting past that dense mat of hop material very quickly.
Thanks for postin pics. It's nice to see evidence of a hopstopper working for 100% pellet hops.
Do you plan on using a hop bag of some kind in addition to the hop stopper?
nathon
Member
`zlo\3fr
Airplanedoc
Well-Known Member
KevinK
Where did you find the polycarb tube for your sight glass? Was it something you ordered or were able to procure locally?
Where did you find the polycarb tube for your sight glass? Was it something you ordered or were able to procure locally?
pvtschultz
Well-Known Member
McMaster-Carr is where I got mine.
AgingHopster
Well-Known Member
Great thread. Awesome workmanship!
KevinK
Where did you find the polycarb tube for your sight glass? Was it something you ordered or were able to procure locally?
I got it from McMaster. Part number 8585K51. I ordered it but picked it up at McMaster. Shipping might have been expensive because they make you buy an 8 foot length.
AgingHopster- thanks!
I just did another brew on the system but used a large nylon paint strainer for all of the hops except for the 2oz flameout addition. I still had about a half gallon of wort in the keg after siphoning. I don't think the hop stopper was clogged, so now I'm thinking that I need to raise the keg higher to get a stronger siphon. That might be the only problem!
Very nice build. Beautiful work.
Thanks, Yambor!
I use a counterflow chiller and was sick of holding a thermometer in the stream as it discharged into the carboy, so I made this little thing. It's a nylon ferrule that goes in place of the stainless ferrule in a 1/4" Swagelok compression fitting. I already had the Swagelok fitting, the reducing bushing, the nylon, and the thermometer, so all I had to do was make the ferrule. I copied the angle of the stainless ferrule but made the ID a tight fit with the thermometer. I still have to test it at boiling temps to see how it holds up and add the assembly to my chiller, but that should be easy.
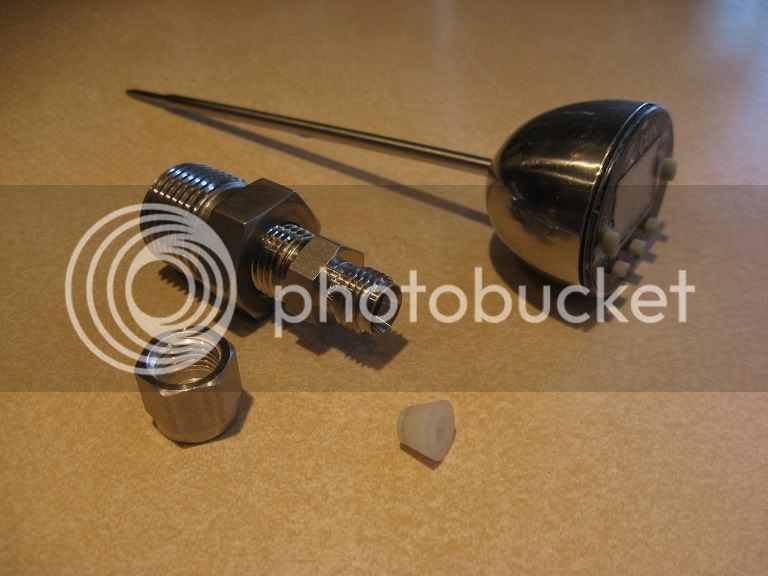
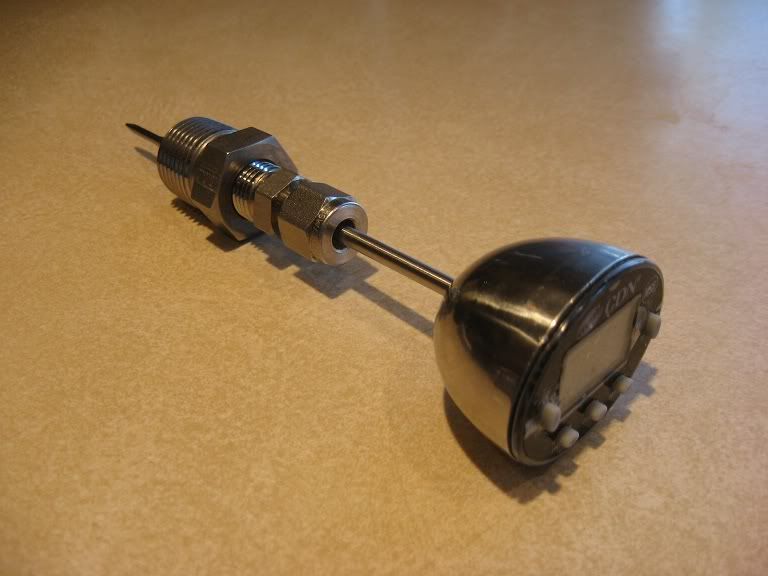
I use a counterflow chiller and was sick of holding a thermometer in the stream as it discharged into the carboy, so I made this little thing. It's a nylon ferrule that goes in place of the stainless ferrule in a 1/4" Swagelok compression fitting. I already had the Swagelok fitting, the reducing bushing, the nylon, and the thermometer, so all I had to do was make the ferrule. I copied the angle of the stainless ferrule but made the ID a tight fit with the thermometer. I still have to test it at boiling temps to see how it holds up and add the assembly to my chiller, but that should be easy.


This system has been cranking out some beers for a while now with no serious problems. The only issue I have is low flow through the hop stopper, but it's actually not a problem because my tap water, which is in the mid 60s, isn't cool enough (at this time of year, anyway) to let me push the wort through my counterflow any faster than the hop stopper allows.
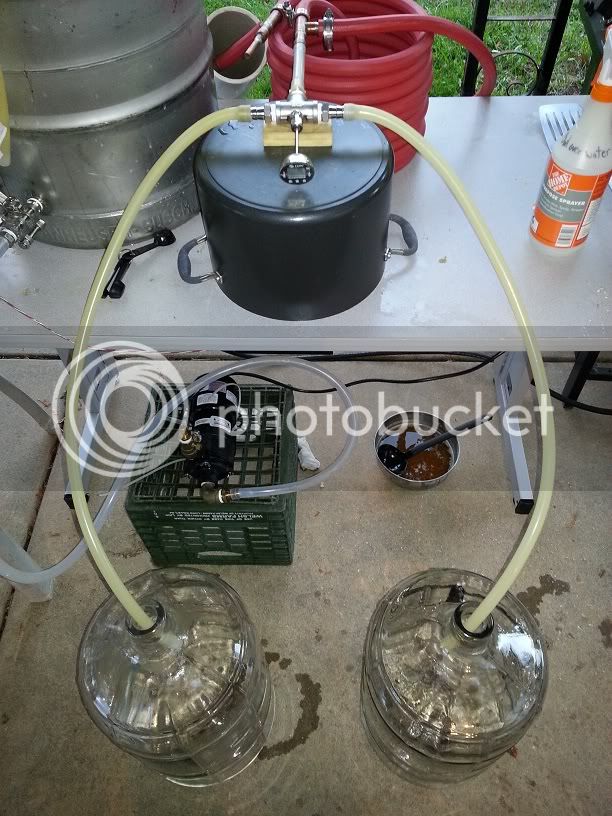
The only recent changes were adding a Little Giant 3-MD-HC pump, a 70 quart Coleman Xtreme mash tun, and a T at the outlet of the counterflow so we could fill two carboys simultaneously to make sure the exact same wort is in each one. This is important because we strap a temperature probe to only one carboy during fermentation. We just did our first 10 gallon batch on the system and it was a success.
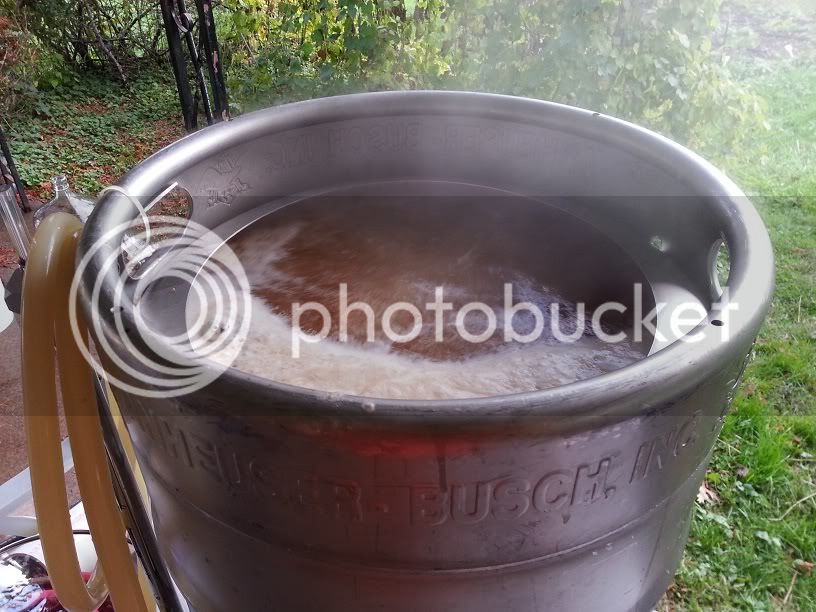
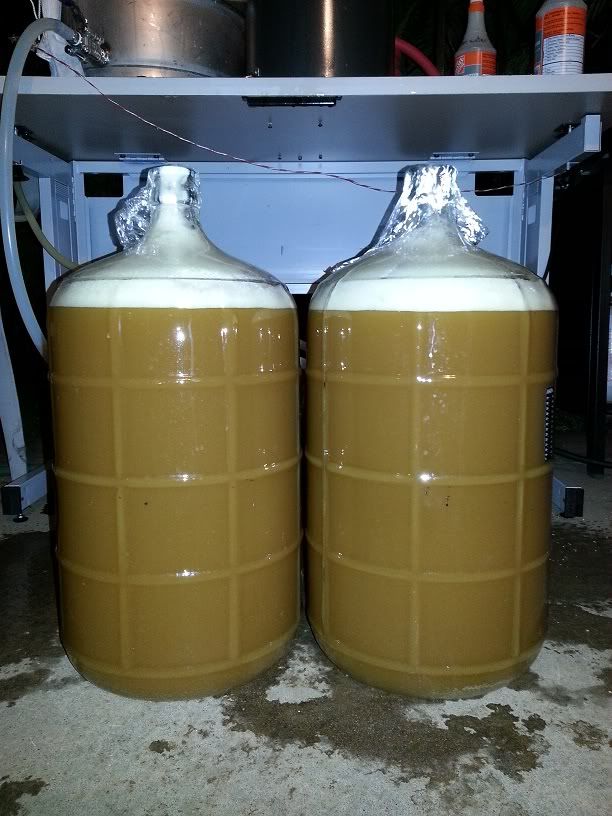
Amarillo IPA fermenting away at 63 degrees.
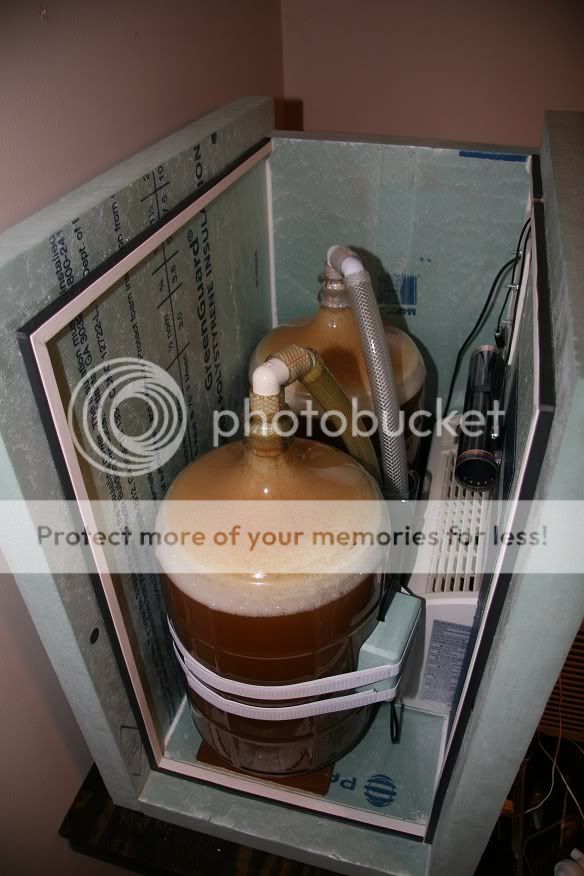
The only recent changes were adding a Little Giant 3-MD-HC pump, a 70 quart Coleman Xtreme mash tun, and a T at the outlet of the counterflow so we could fill two carboys simultaneously to make sure the exact same wort is in each one. This is important because we strap a temperature probe to only one carboy during fermentation. We just did our first 10 gallon batch on the system and it was a success.


Amarillo IPA fermenting away at 63 degrees.

Nice to get an update on this thread, and I like how you split the output of the CFC to both carboys at once. Great idea! Think I'll be "stealing" that one in a few months after my system comes on line!
Keep posting the updates!
Keep posting the updates!
Similar threads
- Replies
- 1
- Views
- 199
- Replies
- 25
- Views
- 1K
- Replies
- 17
- Views
- 1K
- Replies
- 8
- Views
- 817

