HOWTO - Make a BrewPi Fermentation Controller For Cheap

Homebrew Talk - Beer, Wine, Mead, & Cider Brewing Discussion Forum

Help Support Homebrew Talk - Beer, Wine, Mead, & Cider Brewing Discussion Forum:

This site may earn a commission from merchant affiliate links, including eBay, Amazon, and others.
Status
Not open for further replies.
I had trouble getting cron working on my new install.

Found this and it is a better solution.

https://community.brewpi.com/t/brewpi-process-as-service/1004
The challenge with that (the way I read it, not tried it) is you lose the control from the web page. Maybe that's not a concern for some but at least for me while I'm testing/running it on my bench I use that feature a lot.

It sounds like if you go that direction, systemd may be worth a look.
 
The challenge with that (the way I read it, not tried it) is you lose the control from the web page. Maybe that's not a concern for some but at least for me while I'm testing/running it on my bench I use that feature a lot.

It sounds like if you go that direction, systemd may be worth a look.

I can still configure devices via the web page and I can control the temperature settings.

But if you stop the script, it restarts straight away.

I am running a non-graphical debian on my PC and don't want the script blocking me making changes to the computer via command line because I have to stop it to work on the PC.
 
So i got my fancy BrewPi enclosure from Stevereno30, thanks man!

Im dying to put it all together but my BrewPi is in the middle of a brew so i have to wait until next week some time to take it all offline and put it in the enclosure. Im not even going to show you my current setup because ill loose all credibility I may have gained in this thread ;)

BrewPiBox.jpg
He made a new file thats available here

http://www.thingiverse.com/thing:360709
I don't know how many people have tried this case. I had one printed and I thought I would share a few things:

There's not enough room in the case to mount/secure one of those barrier strips or euro connectors. So if you use this you are left with splices and/or wire nuts. If I was a crafty person (I am not) I would re-jigger the design to give another 1/2" to 3/4" behind the Arduino to allow for a barrier strip to be mounted. I think a barrier strip is easier to use than wire nuts, especially given the pull-up resistor that needs to be used. Maybe that's just me.

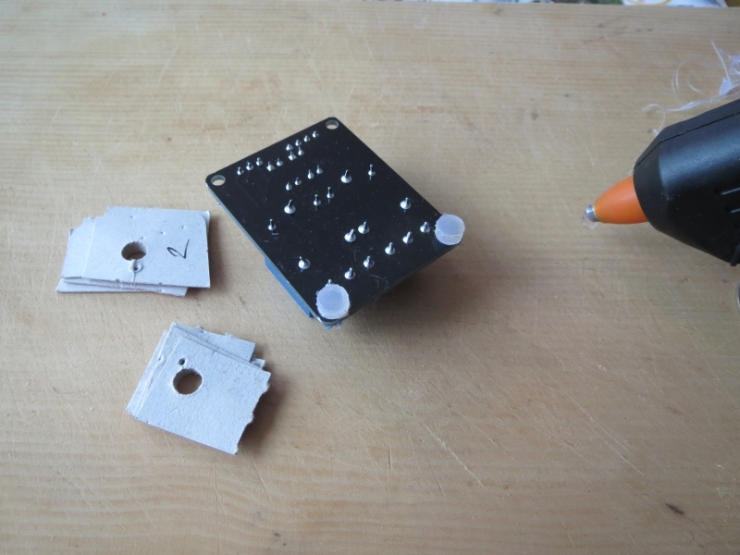
The original post mentions 3mm screws. The case as printed will need to have the holes drilled out to fit a 3mm screw. I used a 1/8" bit which is 0.125" compared to 3mm which is 0.11811". If 0.00689" matters in plastic I'll eat my Arduino.

I have an assortment of them here and it takes an odd size (that I don't have). You will need M3x14mm screws in order to get through the case and use a nut on the back side as designed. At that length they will protrude ever so slightly, so some rubber "feet" on the bottom of the case may be a good idea. This is the only source I have found for them so far (no affiliation):

http://www.metricscrews.us/index.php?main_page=product_info&cPath=98_7_332&products_id=942

Matching nuts:

http://www.metricscrews.us/index.php?main_page=product_info&cPath=81_91&products_id=274

Another thing about the screws: You will only get three screws into the Arduino. The one closest to the USB port is way too close to the riser to allow for a screw head to fit flush:

S9FCwgfYm1fO8V3Ia63Q6upIIs42bDEhYvVx27mBlm3zG-eSPkWKbqHpEyhcuOu_plhajYahyK2cgg=w1920-h1080-rw-no


A good re-design idea might be to make that mounting pedestal into a post to help locate the board but not need/allow a screw.

Next; you will only get two into the relay board. This is an important safety point! If you screw in the two next to the relays the heads will push in/impinge upon where the wires screw down. This means that the screw heads will AT BEST be a scant millimeter away from a bare line voltage wire. At worst it will be a dead short to the outside of the case. I don't see any good reason to use these mounting holes; there's no mechanical load on the mounting of the relay.

LbPcBV2co1MjXRgltbxpCJM1YivQ9XZfMQfLn9EmVyoAiGkEem3RLKgOdTIrHQaZwfrM32KZqe0DGw=w1920-h1080-rw-no


As with the screw in the Arduino; a good re-design idea might be to make those two mounting pedestals into posts to help locate the board but not need or allow screws.

Thanks to @Stevereno30 for making this available to us!

Finally, as we discussed in another thread if you use telephone wire/connectors for your One-wire, you only need one cable coming out of the box. You can use a phone splitter inside the fermentation chamber to split it off to your chamber and beer probes. You also have one wire left so you can use that for the door switch making it a very clean install.
 
I fixed the problem with the relay board (screw holes too close to terminals) by moulding two support pillars using hot glue.

I made a 'mould' by punching holes in some card using an office hole punch. Then I glued three layers of card together and clamped them over the screw holes.

Finally I injected hot glue into the screw hole (through the PCB) and filled the mould. When I removed the cardboard I had a support 'peg' under the board held in place in the screw hole.

construction-of-hot-glue-support-pillars.jpeg


I could have used nylon screws, of course.
 
For 1-wire I used several splitters to build my network. However, I now have one five-way splitter. The inlet is connected to the single RJ-11 output on my controller box (running Fuscus software, no Arduino). The five outlets go to ambient, fridge, and beer sensors, and the door switch. This leaves one free for my experimental 1-wire bubble counter.
 
Now what have I done wrong?

I followed all if the instructions for a multi chamber install. Or at least I thought I did. Yet this is what I get.

Sorry and thank you for any help you can provide.

Screenshot_2016-08-21-17-31-18.jpg
 
Unless you provide a strict path, the current Raspbian will default in-bound web requests to /var/www/html.
That can be changed, or you can live with it and root your instances below that folder, then use the instance folder name.

eg: http://ipaddress/brewpi1 will go to /var/www/html/brewpi1 to find the index.php file for that instance...

Cheers!
 
For 1-wire I used several splitters to build my network. However, I now have one five-way splitter. The inlet is connected to the single RJ-11 output on my controller box (running Fuscus software, no Arduino). The five outlets go to ambient, fridge, and beer sensors, and the door switch. This leaves one free for my experimental 1-wire bubble counter.

Could you detail the 1-wire door switch? I know it's prolly simple but my brain is recovering from RIS.

Cheers
 
Could you detail the 1-wire door switch? I know it's prolly simple but my brain is recovering from RIS.

Cheers

Ah, it's not a 1-wire device. It's just one of the four wires in the RJ11 plug allocated to this function. I use pin 4, and if it's shorted to ground (pin 3) then that indicates the door is closed. Because all of my RJ11 plugs and sockets are wired in parallel then this function appears on all of the sockets, but the switch is only wired into one of them.
 
Finished the first full fermentation with the BrewPi setup last week. Wanted to say a huge thanks to FuzzeWuzze for all the time and passion put into this thread, Mikmonken for the software help and everyone else who helped take so much trial and error out of this build. Made the days of the old Johnson 419 seem almost laughable. Thanks again!!!


Thanks again FuzzeWuzze and Mikmonken for the help on the install. Got everything boxed up this evening and tested. Working great, although just holding final temp on a Belgian Blonde that's just about finished, so haven't run it though its full paces yet. Really looking forward to the next fermentation. Even though I had an externally mounted heat/cool switch on my Johnson 419 I still had to physically change the mode and plug in the heat or cool.... not to mention compensate for the overshoot and outside temp... really a drag. Hopefully all of that is behind me... and I can control the BrewPi from anywhere.... amazing! Thanks again!!
 
I managed right through to programming the Arduino Uno when it went wrong, I got a message to install arduino-core.

I used :- 74 KBbrewpi-arduino-uno-revA-0_2_10.hex is this the correct file?

I did that and it totally crashed brewpi and I could no longer connect to it, I tried waiting then rebooting but to no avail.


Any help would be much appreciated.


Atb. Aamcle
 
No shield, I just followed the diagram it seems simple enough. :)


Aamcle
 
Awesome. And welcome!

Use the hex file I pointed to and assuming you didn't pooch the bootloader on your Arduino you should be up and running...

Cheers!
 
In case anyone's looking to buy some DIY electronics for a BrewPi or other controller, Arrow Electronics is running a promo for a free RPi3.

Spend $100 on Arrow.com and we'll ship a FREE Raspberry Pi 3 anywhere you want.

For 3 days only you get a free Raspberry Pi 3 when you spend $100 or more on Arrow.com. We just launched our new partnership with Indiegogo and the Raspberry Pi 3 is the perfect platform to start building your next project.
 
I've run the "programme controller" function, how do I know if it was successful and the Arduino is functioning?

atb. Aamcle
 
I have my BrewPi all mocked up on a test board. Software appears to be working properly. The problem is the outlets don't seem to function properly.

I have an LED wired inline to light up when one of the outlets is powered.

So right now, one outlet should be working.

When nothing is plugged into the outlet, the LED IS NOT lit, but the outlet reads 120V.

When I plug something into the outlet, the outlet then reads approximately 13V and the LED lights, but whatever is plugged into the outlet doesn't function.

WTF??? Has this happened to anyone else?
Can you post a picture of the wiring? Faulty wiring would be my first guess
 
[...]I have an LED wired inline to light up when one of the outlets is powered.[...]

If you literally mean you have the control signals to the relay board passing through LEDs, that's your problem right there. You can't do that.

Attach the cathode of each LED to its control signal, connect the anode through a 200-300 ohm 1/4w resistor to 3.3 or 5V, and allow the two relay controls to directly connect to the relay board inputs...

Cheers!
 
I can't post a pic today, but I can tomorrow. However, I literally followed the wiring diagram on the BrewPi page. But no, my LEDs were wired in line with the 120V wires feeding the outlet. The LEDs are rated for 120VAC.
 
I can't post a pic today, but I can tomorrow. However, I literally followed the wiring diagram on the BrewPi page. But no, my LEDs were wired in line with the 120V wires feeding the outlet. The LEDs are rated for 120VAC.

The LEDs (if they are mains-rated) should be wired across hot and neutral, not in-line. That's probably your problem.
 
The upload functionality isn't working at the moment, so my pic won't upload. But I'm sure your answers will solve my problem. I had the LED's wired in-line through the red wires feeding the hot side of the outlet. Here are the LEDs. I'm certainly not an expert at electronics, saying the LEDs need to be wired via hot and neutral makes perfect sense now. I will try that! The BrewPi system definitely works when I removed the LEDs completely.
 
Last edited by a moderator:
Shutting down the Pi?

I seem to be all set up and Intend to run headless via wifi which is fine for the BrewPi software but how do I remotely shut down the Pi and Arduino?


Many thanks aamcle
 
You can SSH into the Pi and issue a shutdown command:

sudo shutdown -h now

You don't shut down the Arduino, just pull the power. If your Arduino is powered by the Pi then it will lose power when you remove power from the Pi.

If you like, you can hook up a pushbutton to the Pi GPIO pins and write a small program that monitors the button and initiates a shutdown when the button is pressed. There are many options.
 
One really needs to invest in Putty and WinSCP for long-term care and feeding of these wee computers.
I have 6 of these little dudes doing various tasks (as mundane as camera service) but only one of them (the tap list display atop my keezer) requires an actual monitor...

Cheers!
 
One really needs to invest in Putty and WinSCP for long-term care and feeding of these wee computers.
I have 6 of these little dudes doing various tasks (as mundane as camera service) but only one of them (the tap list display atop my keezer) requires an actual monitor...

Cheers!

I set my Wheezy box up to be open to the web. I set up UFW so only SSH and HTTP were open and limited the number of connections that can connect.

I can now ssh into it from my mac anywhere.

I have already found this handy.
 
I'm having a problem with a multiple chamber install and I'm sure it is user error.

I have an instance working perfectly, set up under the directories of /var/www/brewpi and /home/brewpi That instance is communicating over bluetooth, via dev/rfcomm0 I believe.

I then tried to install another instance to be hooked directly to the Pi via usb. I installed the files to /var/www/chamber1 and, where I think I may have made a mistake, under /home/brewpi/chamber1, so the second instance is under the directory of the first instance.

When I go to my pi and go to the chamber1 instance, I get the website loaded perfectly but it doesn't receive info from the script. I can't start the script nor program it via the maintenance panel.

I followed the instructions for the changes to the udev rules and here's what I have in the rules file. I didn't do anything to reference the rfcomm0 port for the bluetooth instance.

SUBSYSTEM=="tty", KERNEL=="ttyACM0", KERNELS=="1-1.3", SYMLINK+="chamber1"


When I go to /home/brewpi/chamber1 and type python autoSerial.py, I get this:

pi@raspberrypi /home/brewpi/chamber1 $ python autoSerial.py
All ports:
/dev/ttyS1 - n/a, VID:None, PID:None
/dev/ttyS0 - n/a, VID:None, PID:None
/dev/ttyACM0 - ttyACM0, VID:2341, PID:0043
/dev/ttyAMA0 - ttyAMA0, VID:None, PID:None
/dev/rfcomm0 - n/a, VID:None, PID:None
Compatible ports:
('/dev/ttyACM0', 'Arduino Uno')
Selected port: ('/dev/ttyACM0', 'Arduino Uno')

I get that same output whether i run the command in the /home/brewpi folder or the /home/brewpi/chamber1 folder.

Final bit of information - i hooked up my arduino to an external power supply when I first tried to fire the second instance up. Through a wiring error, I had the polarity of the power to the Uno reversed. I figured that out and fixed the polarity. I believe that the Uno has a diode that would protect it from idiots like me, but I wanted to provide that info in case the Uno got fried and that's my problem. I don't think it is because it is recognized in the above response from autoSerial.py

So, did I screw this up by installing the second instance under the first instance's /brewpi directory and that is the issue? Should I have edited the udev files to include the brewpi instance and the rfcomm0? Did I fry the Uno bootloader? Something else I'm not thinking of?

Edit: one more piece of information - the error log on the chamber1 instance only says the following over and over again:
Aug 26 2016 11:11:03 Another instance of BrewPi is already running, which will conflict with this instance. This instance will exit
 
Redo the install while fixing the directory structure. you can hook up the arduino to your pc and open up a serial window and enter l and it will return the current lcd readout. If you cannot connect to the arduino then it's probably fried. if the little light is blinking every couple seconds then it's probably still working. you may just need to reflash the arduino.
 
I agree, it would be a wise move to fix the broken structure so the instances are peered and not hierarchical.

Beyond that, if you have an Uno hooked up over Bluetooth, you need to tell BrewPi the virtual port to use - it can't figure that out on its own.
If you're using rfcomm0, you need to modify the config.cfg file to tell it that.

Eg: Here's the config.cfg file for one of my instances - in this case, the second of four on this RPi2B host.

Code:
$ sudo nano /home/brewpi/brewpi2/settings/config.cfg

scriptPath = /home/brewpi/brewpi2/
wwwPath = /var/www/brewpi2/
port = /dev/rfcomm0
altport = /dev/null
boardType = uno

The third and fourth BrewPi Uno "minions" use rfcomm1 and rfcomm2. Their respective config.cfg files are edited accordingly.

Also, this is totally normal:

"Aug 26 2016 11:11:03 Another instance of BrewPi is already running, which will conflict with this instance. This instance will exit."

BrewPi sets up a cron task that checks to see if BrewPi is actually running. It seems it actually launches itself, then checks to see if there's already a running task, then shoots itself in the face if it finds the code already running.

Weird, but Elco probably found a reason to do it that way...

Cheers!
 
BrewPi sets up a cron task that checks to see if BrewPi is actually running. It seems it actually launches itself, then checks to see if there's already a running task, then shoots itself in the face if it finds the code already running.

Weird, but Elco probably found a reason to do it that way...
Lacking a true daemon/service control, this is how it works. Every minute cron will kick off an instance of BrewPi and it will first look to see if one is running. If it is, the new one will quit. If it is not it will look to see if it is supposed to be running. If it is not it will quit. If it passes those two tests it assumes it needs to run and will start up.

It would be better to have a real service control for it, but it's work that nobody has done yet and I guess in the list of things that need done, this is low on the list.
 
Hi guys

I followed the advice in this thread (and day_trippr's excellent LCD thread) and built my brewpi earlier this year. It has been performing beautifully ever since, until recently I have run into an issue.

It seems that something is going wrong with brewpi script on a very intermittent basis, although it is becoming more frequent. Every so often I will log into the web interface and see that the graph stopped updating suddenly at some point since I last looked. If a profile was running, the temperature will have stalled at whatever the temperature was at that time. If I reboot the pi, things things pick up again and I get a straight line in the graph for the time things were not running. To my knowledge, this firmly points the finger at the script being the culprit.

I have looked at the stderr, and there seem to be no clues there as to what is going on. At the time that the data stopped recording there is the final "INFO" message, any "new day" file creation messages, and then the reboot can be seen. For example:

Code:
 Aug 21 2016 23:38:31   controller debug message: INFO MESSAGE 12: Received new setting: beerSet = 16.23
 Aug 21 2016 23:41:14   controller debug message: INFO MESSAGE 12: Received new setting: beerSet = 16.24
 Aug 21 2016 23:43:55   controller debug message: INFO MESSAGE 12: Received new setting: beerSet = 16.25
 Aug 21 2016 23:46:38   controller debug message: INFO MESSAGE 12: Received new setting: beerSet = 16.26
 Aug 22 2016 00:00:00   Notification: New day, creating new JSON file.
 Aug 23 2016 00:00:00   Notification: New day, creating new JSON file.
 Aug 24 2016 00:00:00   Notification: New day, creating new JSON file.
 Aug 25 2016 00:00:00   Notification: New day, creating new JSON file.
 Aug 25 2016 16:11:27   Opening serial port
 Aug 25 2016 16:11:27   Notification: Script started for beer 'Munich Madness'
 Aug 25 2016 16:11:37   Checking software version on controller... 
 Aug 25 2016 16:11:37   Found BrewPi v0.2.10 build unknown, running on an Arduino Uno with a revC shield on port /dev/ttyUSB0

 Aug 25 2016 16:11:39   controller debug message: INFO MESSAGE 12: Received new setting: beerSet = 18.0
 Aug 25 2016 17:18:17   controller debug message: INFO MESSAGE 17: Positive peak detected:  23.6, estimated:  23.9. Previous heat estimator:  2.773, New heat estimator:  2.279.
 Aug 25 2016 18:45:03   controller debug message: INFO MESSAGE 18: Negative peak detected:  20.8, estimated:  21.6. Previous cool estimator:  4.102, New cool estimator:  5.014.
 Aug 25 2016 19:30:22   controller debug message: INFO MESSAGE 18: Negative peak detected:  19.7, estimated:  20.2. Previous cool estimator:  5.014, New cool estimator:  6.090.

The fact that the new files are being created shows that the script is running, but clearly there is some issue with communication with the arduino? Can anyone suggest any further troubleshooting I can do? I suppose I could try manually restarting the script next time it crashes? How would I go about doing that? Any help gratefully received!
 
Status
Not open for further replies.
Back
Top