Rivenin
Well-Known Member
- Joined
- Dec 13, 2010
- Messages
- 3,258
- Reaction score
- 342
so i thought i would post on this because short of finding posts writing how to change your plumbing. i haven't been able to find anything on how to hook a chiller to your "pull out" style faucet.
So in the beginning i just went to my LHBS and bought a garden hose adapter which did NOT fit at all (the threads were the wrong size). but since it was like $3 i just hung onto it for later usage. For that night of chilling i just shoved both together and hung on... which... let me tell you, was UNCOMFORTABLE. close to freezing water on my hand while i'm squeezing onto some hoses was not great... So! right after that chilling session i decided to dig through my bucket o spare parts and put this together (which worked wonderfully, btw).
so the extensive parts list...
- around 1' of 3/8" silicone tubing
- garden hose adapter
- 1 small hose clamp (i use a vice grip... it's what i had handy and it's in the "junk drawer" next to the sink"
As we all love/hate these faucets that have to deal with them... this is the same exact one in my apartment..

so, what you would want to do is unscrew the head piece and put the small gasket that is between the hose and the head to the side (don't drunkenly lose this, or your sink will leak pretty badly) along with the head piece.
Now you will have the small threaded piece which you'll want to block from going down the hole under the sink (it dropped down there once.. that wasn't fun) so once thats unscrewed i just take a bit of tape and tape that piece up so it doesn't drop... easy cheesy)
So now you will have the hose end, which looks similar to this (the left part, the one with the lip around the edge)

- take the hose clamp and put it over the lipped piece.
- take the silicone tubing and shove (doesn't look like it'll fit, but it'll go on just fine) it onto the lip and back about 1/2" down past the lip.
- take the hose clamp and clamp the silicone tube down.
--- i did not do this once and it seperated and sprayed my kitchen... my wife laughed pretty hard as i walked out pretty damn soaked. i learned my lesson quickly") .
.
- take the other end of the silicone tubing and shove it through the center of the garden hose adapter and pull through so it's about 4-5" in (or until its sealed against all the edges) and then pull it back out until there is about 1/2" sticking through the end.
- take the garden hose adapter with the 1/2" of silicone sticking out and thread it onto the immersion chiller.
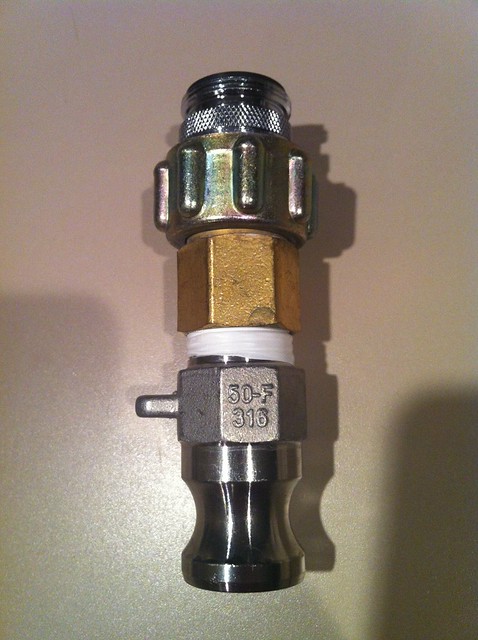
this is the hose adapter i have, YMMV.

i'm sure there is an easier way of doing this, but this is the stuff i had just laying around, if you go to lowes or home depot i'm fairly sure they'll have a garden hose to 3/8" adapter.
if needed once i go home (i'm at work) i can put this all together and grab actual pictures and somewhat of a step by step process if you would like!
 Hope this helps someone!
So in the beginning i just went to my LHBS and bought a garden hose adapter which did NOT fit at all (the threads were the wrong size). but since it was like $3 i just hung onto it for later usage. For that night of chilling i just shoved both together and hung on... which... let me tell you, was UNCOMFORTABLE. close to freezing water on my hand while i'm squeezing onto some hoses was not great... So! right after that chilling session i decided to dig through my bucket o spare parts and put this together (which worked wonderfully, btw).
so the extensive parts list...
- around 1' of 3/8" silicone tubing
- garden hose adapter
- 1 small hose clamp (i use a vice grip... it's what i had handy and it's in the "junk drawer" next to the sink"
As we all love/hate these faucets that have to deal with them... this is the same exact one in my apartment..
so, what you would want to do is unscrew the head piece and put the small gasket that is between the hose and the head to the side (don't drunkenly lose this, or your sink will leak pretty badly) along with the head piece.
Now you will have the small threaded piece which you'll want to block from going down the hole under the sink (it dropped down there once.. that wasn't fun) so once thats unscrewed i just take a bit of tape and tape that piece up so it doesn't drop... easy cheesy)
So now you will have the hose end, which looks similar to this (the left part, the one with the lip around the edge)
- take the hose clamp and put it over the lipped piece.
- take the silicone tubing and shove (doesn't look like it'll fit, but it'll go on just fine) it onto the lip and back about 1/2" down past the lip.
- take the hose clamp and clamp the silicone tube down.
--- i did not do this once and it seperated and sprayed my kitchen... my wife laughed pretty hard as i walked out pretty damn soaked. i learned my lesson quickly
.- take the other end of the silicone tubing and shove it through the center of the garden hose adapter and pull through so it's about 4-5" in (or until its sealed against all the edges) and then pull it back out until there is about 1/2" sticking through the end.
- take the garden hose adapter with the 1/2" of silicone sticking out and thread it onto the immersion chiller.
this is the hose adapter i have, YMMV.
i'm sure there is an easier way of doing this, but this is the stuff i had just laying around, if you go to lowes or home depot i'm fairly sure they'll have a garden hose to 3/8" adapter
.if needed once i go home (i'm at work) i can put this all together and grab actual pictures and somewhat of a step by step process if you would like!
Hope this helps someone!