How to make immersion chiller rigid?

Homebrew Talk - Beer, Wine, Mead, & Cider Brewing Discussion Forum

Help Support Homebrew Talk - Beer, Wine, Mead, & Cider Brewing Discussion Forum:

This site may earn a commission from merchant affiliate links, including eBay, Amazon, and others.

verbhertz

Well-Known Member
Joined
Oct 8, 2011
Messages
166
Reaction score
8
Location
St. Paul
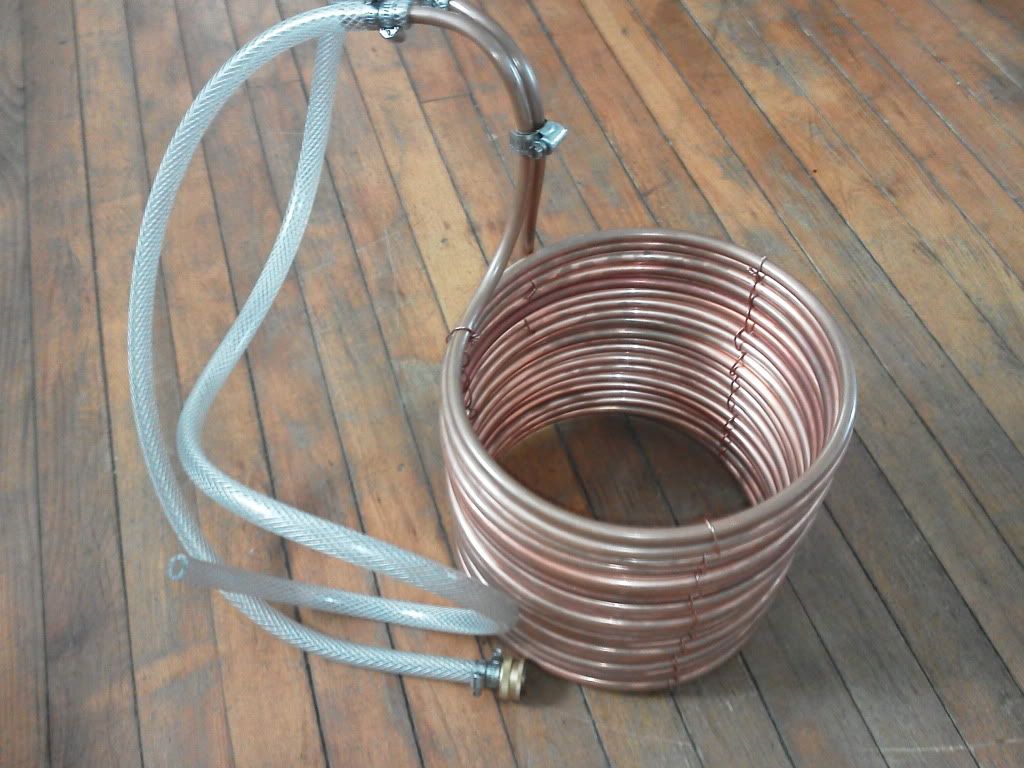
Attached is a picture of the chiller I soldered the other day. No leaks!! Woohoo! Anyways it isn't pretty, but I want to make it a little more rigid. I have a few extra feet of soft 1/2" copper I could use and solder, just wondering if anyone has any good ideas.

edit: also I need to figure out a way to rig it into my kitchen sink so I don't have to haul hot wort from my garage to my basement during the MN winter. But that is another thread...

ImmersionChiller.jpg
 
"Isn't pretty"?? You haven't seen some of the spaghetti bowl jobs that have popped up here! Yours looks like a Renoir by any comparison :) Good job!

Some folks take some solid copper wire and weave it around the riser(s) and through the loops of the coil to bind them. Others solder copper straps to the loops, other solder the loops directly to the riser. Finally, some don't bother doing anything, as none of it will really change the performance much...

Cheers!
 
I soldered 12 or 14 gauge copper ground wire between each coil. i separated the coils slightly and wrapped the wire around each coil 180 degrees away from the inlet. I then soldered the tube that goes to the bottom to each coil. It works great, allows wort to flow between the coils and I aerate with the IC during the last 1/2 of the cooling time.
 
Thanks haha. I'm probably worrying over nothing. I feel like if I grabbed the uprights to pull it out of chilled wort, one of the joints would snap. Or am I not giving solder enough credit?
 
i used zip ties to bind a few of the loops together - now I have a plate chiller so i no longer care about a limp immersion chiller
 
Solder the vertical tube from the bottom to the top and bottom coils, that's what I did and it worked great.
 
Thanks haha. I'm probably worrying over nothing. I feel like if I grabbed the uprights to pull it out of chilled wort, one of the joints would snap. Or am I not giving solder enough credit?

Your not giving solder enough credit. I soldered the loops to the riser and had no issues with it. I also took a piece of 1/2 inch copper and soldered it to the far side from the riser. Just put a little flux and then use a metal clamp to hold it together until the solder cools.
 
I got some copper wire and weaved it upward around the tubes in three areas. Then I twisted the ends of each weave and bent them inward and out of the way.
Wort-chiller.jpg
 
Take the copper ground wire out of a length of Romex cable. (House wiring) and weave it in and out and twist the ends together at the top.

I did 3 lacings around on mine, two 20' coils, and they are very stable.

Just like in beninan's pic.
 
I like that idea, going to run with it! Thanks all!

One more questions... Can I keep the vinyl tubing connected when I drop the chiller into the boiling wort? Or should I connect it after boil? I'd think I would burn myself on hot copper doing the latter.
 
From what I have found, the copper doesn't get really hot unless it's actually in the boil. I can grab onto the portions of copper sticking out of the boil with my bare hands, so I've always left the tubing on. You just have to be careful when initially dunking the wort chiller into the boil. If there's any residual water in the coils, it sometimes has a tendency to shoot out of the hoses at boiling temps due to rapid expansion. So aim the connections away from yourself when dropping in the chiller.
 
I used a copper ground wire and spaced my tubes a little apart so I had more available surface exposed to the wort. My chiller is stainless so soldering or brazing is kind of out. I just twisted the wire, and move up to the next coi, twist it three or four turns and continued to the top. Kinda ghetto, but it looks OK and works fine.
Bob
 
You should trim the top coil so that both vertical tubes are close together (touching). You can then put two tacks of solder to hold them together or just use zip ties or hose clamps. Once those are mated, the whole thing will feel quite rigid without messing with the coils.
 
beninan said:
From what I have found, the copper doesn't get really hot unless it's actually in the boil. I can grab onto the portions of copper sticking out of the boil with my bare hands, so I've always left the tubing on. You just have to be careful when initially dunking the wort chiller into the boil. If there's any residual water in the coils, it sometimes has a tendency to shoot out of the hoses at boiling temps due to rapid expansion. So aim the connections away from yourself when dropping in the chiller.

Good to hear. During tests I had small leaks on the threaded connections that hook the tubing to the chiller. It would be a pain to have to attach/detach every time because of the length and weight of the hoses getting in the way of turning. I'll use more thread tape and twist them on tight with a wrench.
 
Hey Bobby I think I saw your video which inspired me to solder the elbows rather than bend. Thanks for that! I bought an extra elbow too so that isn't out of the question.
 
I got some copper wire and weaved it upward around the tubes in three areas. Then I twisted the ends of each weave and bent them inward and out of the way.
Wort-chiller.jpg

All I had to do is put a hose clamp on just like beninan's, and it made mine pretty rigid. Mine is a bit of a "spaghetti bowl" job (as mentioned above).. One thing that might be in my favor is the fact that I double coiled mine. It has an inner and outer coil...
 
Back
Top