Help with stout faucet repair.

Homebrew Talk - Beer, Wine, Mead, & Cider Brewing Discussion Forum

Help Support Homebrew Talk - Beer, Wine, Mead, & Cider Brewing Discussion Forum:

This site may earn a commission from merchant affiliate links, including eBay, Amazon, and others.

camonick

Mediocre brewer... Expert drinker
HBT Supporter
Joined
Oct 25, 2018
Messages
5,011
Reaction score
31,658
Location
Northeast CO
Hello all,
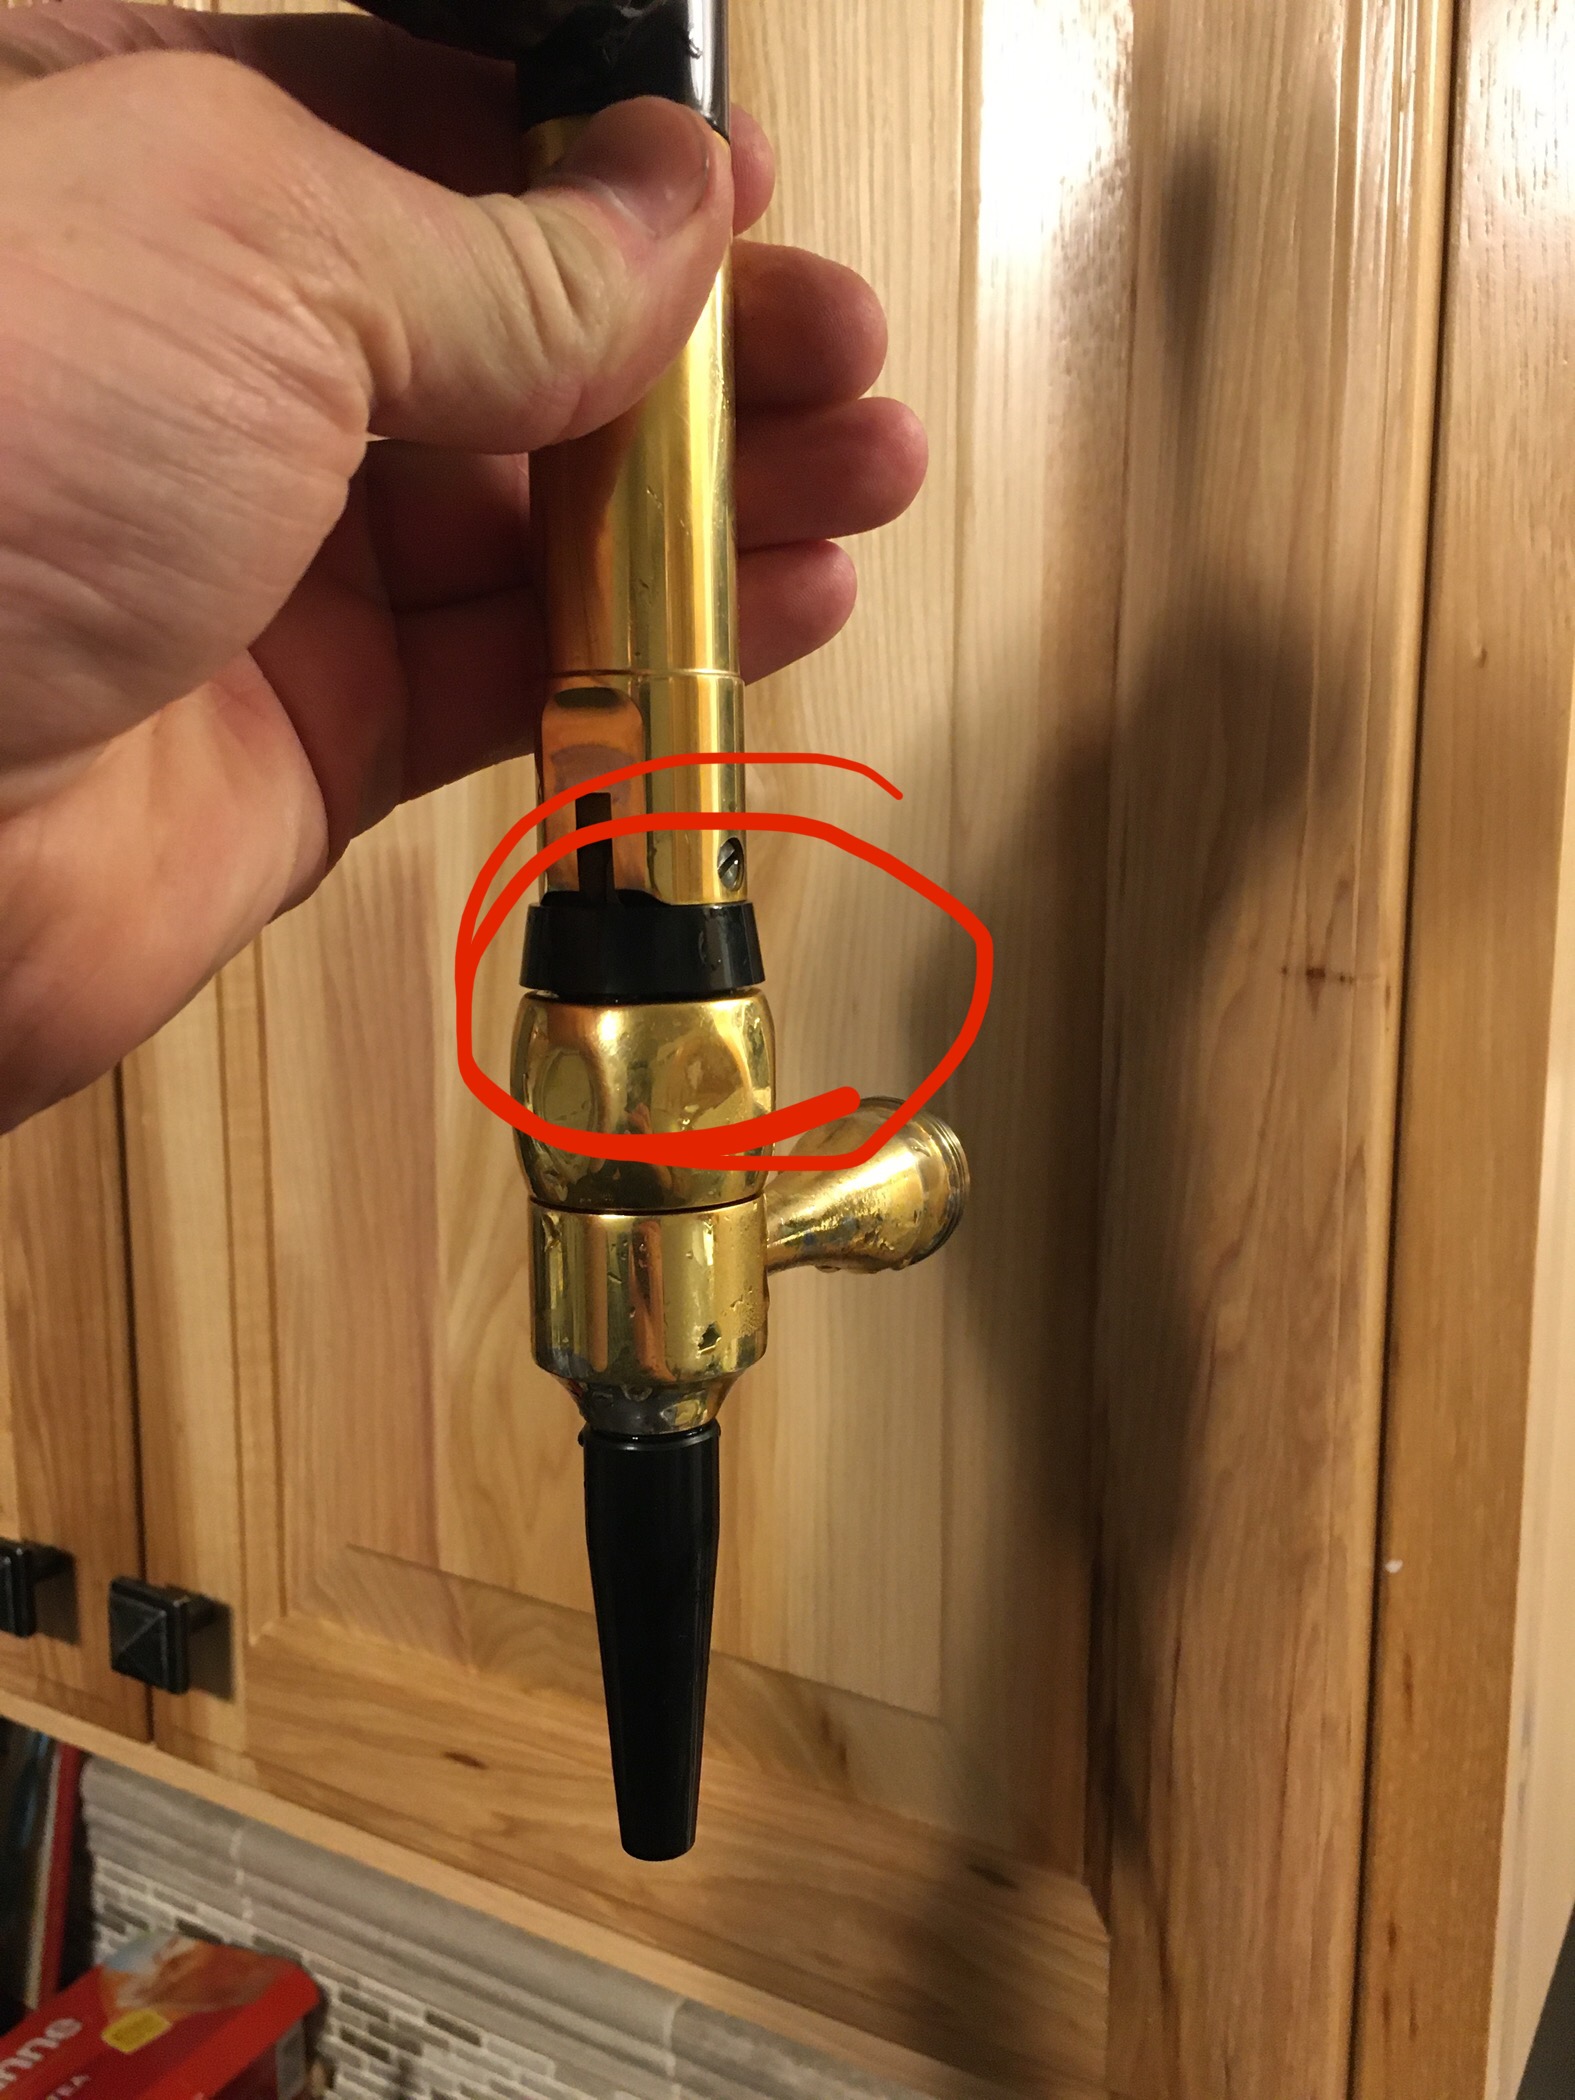
My stout faucet is in need of repair and I want to know if anyone could tell me how to disassemble this ED46C8AE-0528-4161-B070-CC7513D87A78.jpeg to replace the rubber diaphragm on the bottom?
It’s a Micromatic faucet and the assembly in my hand consists of these 3 parts...
35E370E4-2A5E-4DC1-BBD6-D00665729B62.png 5E5D8A86-21DA-4C30-B257-2CDAAADF0227.png 9BE5A060-10E3-49F4-8C21-62DF1D71BD9E.png
I don’t want to horse on it and break something. I soaked the rubber part in near boiling water but that didn’t seem to do anything. This is a fairly old faucet and my metal spindle assembly looks slightly different than the above photo. I ordered the diaphragm and a couple of other parts but hope I don’t have to replace the spindle assembly. Thanks for any help.
 

Attachments

  • 415A08FB-A0DF-45FB-9612-74848459BAD4.jpeg
    415A08FB-A0DF-45FB-9612-74848459BAD4.jpeg
    578.5 KB · Views: 37
Just an update if anyone comes across this later. After I verified that my replacement parts looked correct, I used a small flat blade screwdriver and pried the rubber diaphragm off the spindle. It was so old and brittle that it actually tore as it came off. I reinstalled the new collar (red) and diaphragm and reassembled the rest of the faucet. The new parts did the trick and I’m pouring stouts again.
6F1B8D0F-7BE6-4071-B120-EC8D9BE7E2C4.jpeg
 
Thanks for that - but I'm confused.
Looking at the original pictures, how does whatever that thing is at the rubber end here:

35e370e4-2a5e-4dc1-bbd6-d00665729b62-png.670755


end up looking like the last picture with the red collar and the pointy end?

Cheers!
 
Ah! Awesome - thanks! I could not visualize how those three bits fit together so cleanly.
But...that's the craziest thing I've seen in awhile. Imagine coming up with that conglomeration as a "solution" to "How do I seal this high pressure stout faucet?" :D

Cheers! (and thanks again)
 
Ah! Awesome - thanks! I could not visualize how those three bits fit together so cleanly.
But...that's the craziest thing I've seen in awhile. Imagine coming up with that conglomeration as a "solution" to "How do I seal this high pressure stout faucet?" :D

Cheers! (and thanks again)
I was quite confused myself until I got the courage to use a little force and basically tear off the lower rubber diaphragm. Once it was disassembled, it made perfect sense. This area circled is a very hard plastic that is inserted into the softer rubber plunger-
6671F02E-C709-404D-9480-ADA2EA4376B3.jpeg
 
Last edited:
Nice. It's amazing these Micro Matic stout faucets work at all, right? :D

btw...I am curious what inspired the overhaul. Like, is there a "heads up" symptom?

There was a Micro Matic notice that went around that said "Don't pull the faucet lever to the [natural] 90° position lest one damage the diaphragm". Which - considering I have been operating my faucet that way for years - I found curious.

I just poured my nitecap the same as always. It sure doesn't feel like I'm "pouring on the edge" of anything untoward...

Cheers!
 
btw...I am curious what inspired the overhaul. Like, is there a "heads up" symptom?
After pouring a pint the other night it started spewing beer everywhere FB29BFEC-3019-4A02-A4A9-6894C1FAAE46.jpeg when the handle was released to the “neutral” position. I would also guess that my faucet could easily be 20+ years old or older since I bought it used on eBay over 15 years ago.

”Don't pull the faucet lever to the [natural] 90° position lest one damage the diaphragm".
That is a strange statement since every video on YouTube shows that technique for operating a stout faucet.

I also bought all the replacement parts directly from the Micromatic website fwiw.
 
Great information, I have the same faucet and stopped using it because of the same leaking issue. Can you tell me what part numbers you replaced and how much they were?
 
Great information, I have the same faucet and stopped using it because of the same leaking issue. Can you tell me what part numbers you replaced and how much they were?

Assuming nothing else is wrong with your faucet and you don't break anything, the only piece you really need to fix the problem is #12 ($4.39 + shipping) I would also recommend #13 just because it's cheap ($0.49) and is another place that could potentially leak when you put everything back into service.
 
Having finally experienced the dreaded breach in the funky faucet packing inside my old Micromatic stout faucet that resulted in the foretold stout geyser a few years ago, I planned on replacing it with a faucet using a conventional plunger type action. Lost track of time but a recent thread revived my memory and I ordered a new fully stainless steel Taprite stout faucet which arrived Friday.

My old Micromatic war club. With the long shank the spout lines up with the Perlick 525SS faucets.

stout_faucet_swap_1.jpg


The thing is a total beast of a faucet...

stout_faucet_swap_2.jpg


New faucet is taller and slimmer - much less chunky than the old Micromatic. Much shorter shank, too. Micromatic released a short-shank version of their faucet years after I bought the long shank version...

stout_faucet_swap_3.jpg


With the much shorter shank on the new faucet, the spout ends up around 3/4" in from the back edge of the tray. Nbd.

stout_faucet_swap_4.jpg


Blingy! I love the appearance...

stout_faucet_swap_5.jpg


All set for another couple of decades 😉

stout_faucet_swap_6.jpg


Cheers!
 

Latest posts

Back
Top