
WilliamWS
Well-Known Member
A few months ago, thanks to a 3 alarm fire in my building and the resulting layer of greasy soot on EVERYTHING, I tossed pretty much all of my plastic brewing equipment, including my cooler mash tun (that nasty chemical/smoke smell just doesn't seem to come out of plastic). Now that I'm finally settled in a new, permanent, place I've started rebuilding my brewery.
I've always used a round beverage cooler style mash tun (was on my third) and have had great results with them: I loose on average about 1-1.5*F/hr of mash, I get high 80's efficiency, etc. The only thing that I've never really liked about any cooler style mash tun is that they are plastic. They're not really designed to hold hot liquids, the liners distort and (though it never happened to me) sometimes crack. And, despite never experiencing or even hearing of any off flavors coming from prolonged hot-side contact with the plastic liners in coolers, I was never 100% confident that there wasn't a little something that I might not want to drink leaching into my wort.
With that in mind, I was a bit intrigued by a thread a while back where a forum member had lined a cooler with a stainless pot. At the time I had a nearly brand new mash tun that I was happy with and I wasn't so keen on the excavation process shown in the thread which looked like a pain (the OP had to cut out a lot of plastic and cut off the top of the cooler to get the pot to fit...and with the top gone, so went the lid).
Now that I was starting from scratch, I decided to do something similar though I knew from the start that I didn't want to go through the excavation process. I had a few somewhat complicated ideas that might have been workable but before getting bogged down in any of that I pulled out my old first brew kettle. It was a 9 gallon, fairly flimsy stainless pot that came with a turkey fryer kit about 8 years ago. I took the pot's measurements (16 1/2"H x 12 1/2"D with a 12 7/8"D lip) then got online to check the inner dimensions of the various 10 gallon coolers. My preference would have been an Igloo cooler since they hold temperature better but the interior of Igloos are tapered and wouldn't work. When I checked the Rubbermaid, though, I was pleasantly surprised. It was listed as 18.375"H x 12.875"D with no taper-the interior diameter was exactly the same as the lip of my old pot. I ran down to Home Depot to grab a cooler, got it home and confirmed: a perfect fit.
This is what followed (it took under an hour):
1. Cut off kettle handles with a hack saw and filed the sharp edges.
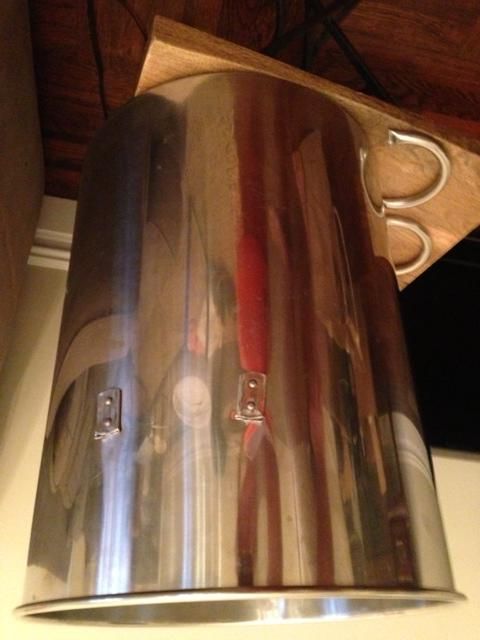
2. Checked the fit (perfect) and marked the location for the hole in the kettle/liner.
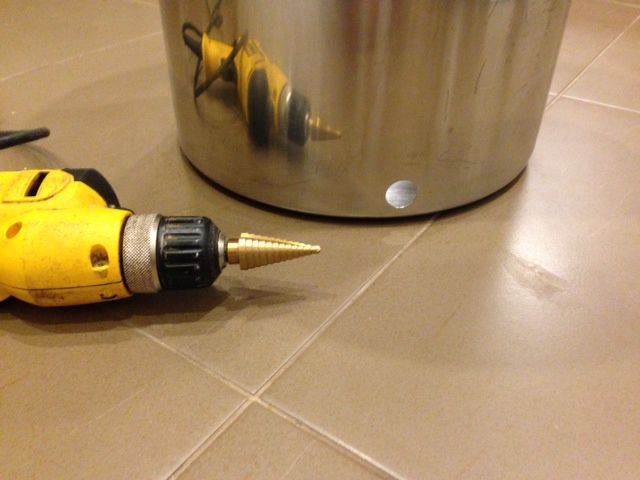
3. Drilled the hole for the bulkhead.
4. Dry assembled and marked top of the stainless liner.

5.Roughed up the underside/outside of the lip of the pot as well as the corresponding area just underneath the line I marked on the cooler interior. I also covered the interior of the hole with tape.
6. Assembly.
Sorry, no pics here. I was alone and had my hands full.
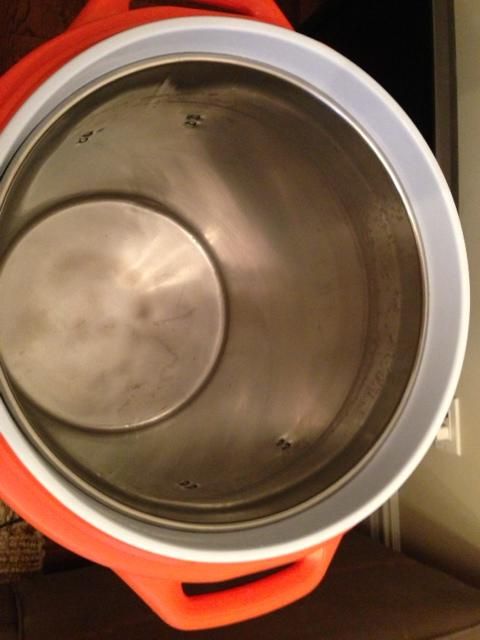
Basically, I mixed up some JB Weld and ran a bead along the roughed-up area of the interior of the cooler, just below the line I marked. I then coated the floor of the cooler and the bottom 1/3 or so of the side wall of the interior of the cooler with polyurethane spray foam. I carefully began to lower the pot down and, when about 2/3 of the way home, stuck the long nozzle of the spray foam in the space between the pot and the cooler and filled as much of the remaining space as possible (just about all of it so far as I can tell) with foam.
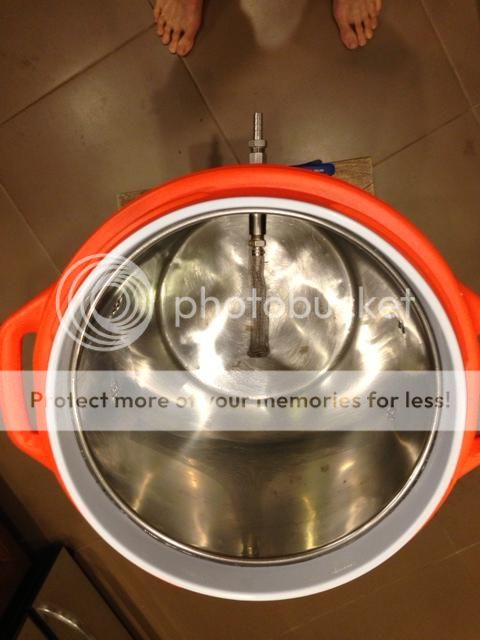
I then pushed it all the way down (had to really put some weight into it to displace the foam on the bottom), lined up the holes, pulled the tape, and inserted the bulkhead.
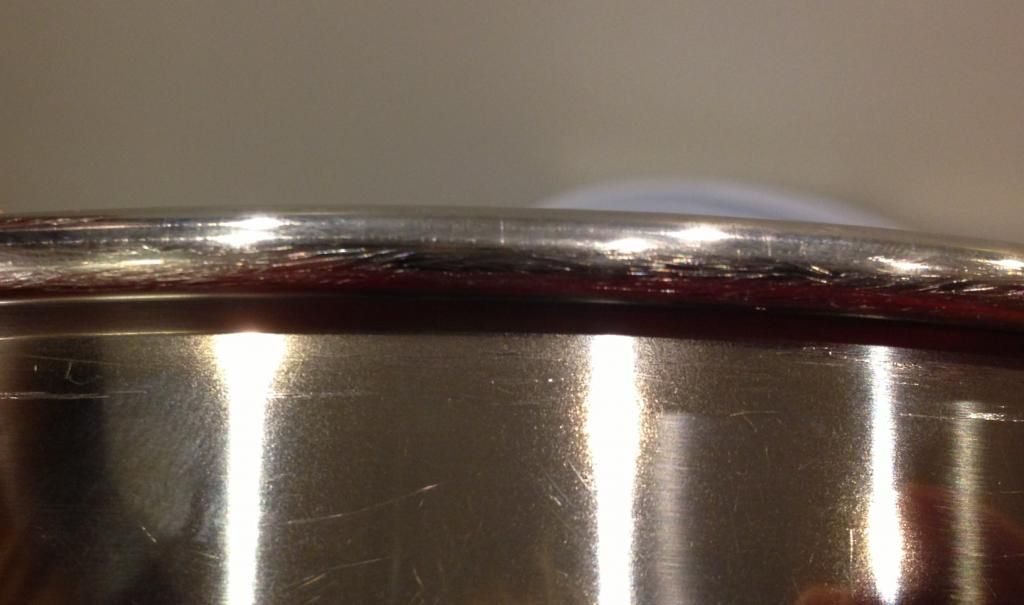
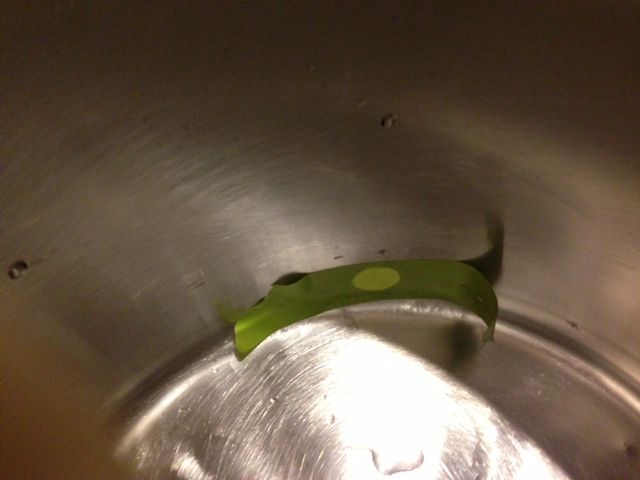
The lip seated nicely in the JB Weld as evidenced by the neat, thin line of squeeze-out. It's mostly there to ensure things are water-tight and nothing seeps down between the liner and the cooler during cleaning. 9 gallons of mash tun is plenty to meet my needs so my wort should never touch it but if it does, JB Weld is food safe after it's cured and good up to 550*F.
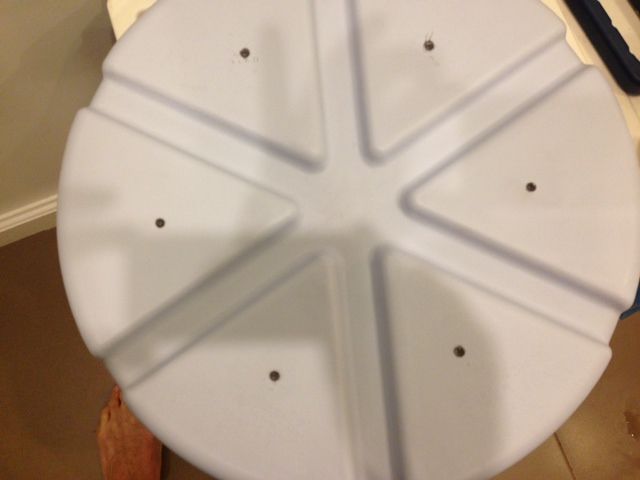
Since I had some spray foam left over, I decided to address one of the causes for Rubbermaids not holding their temp as well as Igloos, namely that the lids are not insulated.
I drilled a few holes in my lid, just big enough to fit the foam nozzle, and pumped it full of foam. After the foam began to set I trimmed the excess and sealed the holes with JB Weld. Hopefully this will help.
I realize this is useless to anyone else unless I know the make of the pot. Since it was part of a kit I purchased more than eight years ago I can't be 100% positive but after looking around I think this may be the pot-it looks a lot like it:
http://www.ebay.com/itm/360991963254?_trksid=p2060778.m1438.l2648&ssPageName=STRK:MEBIDX:IT
The seller gives "approximate" dimensions and, to an ebay seller, 12.875" may very well be approximately 13". Again, I'm not positive but it might be worth an inquiry if anyone else is interested in making something like this...Or if you happened to have bought the same model generic turkey fryer years ago then all the better.
I hope someone finds this useful.
I've always used a round beverage cooler style mash tun (was on my third) and have had great results with them: I loose on average about 1-1.5*F/hr of mash, I get high 80's efficiency, etc. The only thing that I've never really liked about any cooler style mash tun is that they are plastic. They're not really designed to hold hot liquids, the liners distort and (though it never happened to me) sometimes crack. And, despite never experiencing or even hearing of any off flavors coming from prolonged hot-side contact with the plastic liners in coolers, I was never 100% confident that there wasn't a little something that I might not want to drink leaching into my wort.
With that in mind, I was a bit intrigued by a thread a while back where a forum member had lined a cooler with a stainless pot. At the time I had a nearly brand new mash tun that I was happy with and I wasn't so keen on the excavation process shown in the thread which looked like a pain (the OP had to cut out a lot of plastic and cut off the top of the cooler to get the pot to fit...and with the top gone, so went the lid).
Now that I was starting from scratch, I decided to do something similar though I knew from the start that I didn't want to go through the excavation process. I had a few somewhat complicated ideas that might have been workable but before getting bogged down in any of that I pulled out my old first brew kettle. It was a 9 gallon, fairly flimsy stainless pot that came with a turkey fryer kit about 8 years ago. I took the pot's measurements (16 1/2"H x 12 1/2"D with a 12 7/8"D lip) then got online to check the inner dimensions of the various 10 gallon coolers. My preference would have been an Igloo cooler since they hold temperature better but the interior of Igloos are tapered and wouldn't work. When I checked the Rubbermaid, though, I was pleasantly surprised. It was listed as 18.375"H x 12.875"D with no taper-the interior diameter was exactly the same as the lip of my old pot. I ran down to Home Depot to grab a cooler, got it home and confirmed: a perfect fit.
This is what followed (it took under an hour):
1. Cut off kettle handles with a hack saw and filed the sharp edges.
2. Checked the fit (perfect) and marked the location for the hole in the kettle/liner.
3. Drilled the hole for the bulkhead.
4. Dry assembled and marked top of the stainless liner.
5.Roughed up the underside/outside of the lip of the pot as well as the corresponding area just underneath the line I marked on the cooler interior. I also covered the interior of the hole with tape.
6. Assembly.
Sorry, no pics here. I was alone and had my hands full.
Basically, I mixed up some JB Weld and ran a bead along the roughed-up area of the interior of the cooler, just below the line I marked. I then coated the floor of the cooler and the bottom 1/3 or so of the side wall of the interior of the cooler with polyurethane spray foam. I carefully began to lower the pot down and, when about 2/3 of the way home, stuck the long nozzle of the spray foam in the space between the pot and the cooler and filled as much of the remaining space as possible (just about all of it so far as I can tell) with foam.
I then pushed it all the way down (had to really put some weight into it to displace the foam on the bottom), lined up the holes, pulled the tape, and inserted the bulkhead.
The lip seated nicely in the JB Weld as evidenced by the neat, thin line of squeeze-out. It's mostly there to ensure things are water-tight and nothing seeps down between the liner and the cooler during cleaning. 9 gallons of mash tun is plenty to meet my needs so my wort should never touch it but if it does, JB Weld is food safe after it's cured and good up to 550*F.
Since I had some spray foam left over, I decided to address one of the causes for Rubbermaids not holding their temp as well as Igloos, namely that the lids are not insulated.
I drilled a few holes in my lid, just big enough to fit the foam nozzle, and pumped it full of foam. After the foam began to set I trimmed the excess and sealed the holes with JB Weld. Hopefully this will help.
I realize this is useless to anyone else unless I know the make of the pot. Since it was part of a kit I purchased more than eight years ago I can't be 100% positive but after looking around I think this may be the pot-it looks a lot like it:
http://www.ebay.com/itm/360991963254?_trksid=p2060778.m1438.l2648&ssPageName=STRK:MEBIDX:IT
The seller gives "approximate" dimensions and, to an ebay seller, 12.875" may very well be approximately 13". Again, I'm not positive but it might be worth an inquiry if anyone else is interested in making something like this...Or if you happened to have bought the same model generic turkey fryer years ago then all the better.
I hope someone finds this useful.


