Designing a Spike kettle

Homebrew Talk - Beer, Wine, Mead, & Cider Brewing Discussion Forum

Help Support Homebrew Talk - Beer, Wine, Mead, & Cider Brewing Discussion Forum:

This site may earn a commission from merchant affiliate links, including eBay, Amazon, and others.

specialkayme

Well-Known Member
Joined
Jul 26, 2015
Messages
430
Reaction score
164
Location
Central North Carolina
After much pondering, I think I'm going to order a custom Spike kettle in order to turn it into a one vessel eBIAB system. I've never had, or used a kettle with ports on it (I've always just used standard kitchen pots), so I was hoping I could get some insight and help on designing the kettle.

My design is to use the kettle as both the mash tun and the kettle with an electronic heating element. I have no plans to go fully automated, or use a temp controller, or a HERMS or similar system. I was hoping to do no sparge batches moving forward. So I was considering going with a 15 gal kettle size, in order to allow me to do full volume no sparge, high gravity batches. I assumed a 10 gallon kettle, with 7.5 gallons of water (for the odd 90 min boil) and 15 lbs of grain won't go over too well space wise. So the 15 gallon kettle will give me a little more flexibility (even though I realistically speaking don't ever plan on doing 10 gallon batches).

I'm also considering putting 4 ports on the kettle. Three down on the bottom and one on top. One bottom port will be for the valve, one bottom port will be for the 220v heating element, one bottom port will be "extra" and the top port will be "extra" as well. The extra bottom port is for the odd case that I can't get the 220v heating element to work and I can hook up two 110v heating elements, or if I want to set up a pump in the future to do some type of re-circulation (I have no plans at the moment, but I'd rather pay the extra $40 for it now and have the ability to do it than not have the option later), or to just use as a thermometer port. The top port will be for the return of any re-circulation, or whirlpool like function. All ports in TC fittings.

Keeping that in mind, a few questions that I was hoping to get some insight on:
1. Do you think the 15 gallon kettle is overkill?
2. Where would you orient the valve bottom port (both left to right and vertical, such as 1.5" or 2" off the bottom)?
3. Where would you orient the other two bottom ports (both left to right and vertical)? Staggered in height, or not?
4. Where would you orient the top port?
5. Should I be looking at going for 1.5" or 2" TC ports?
6. What type of 220v heating element should I be looking for? I can do wiring myself, but welding is not in my ability.
7. Should I be considering getting a false bottom? I don't have any experience with these.
8. What type of pickup tube should I be considering?
9. Is there anything else I should be considering? I.e. what would you do differently if you were to build your kettle all over again?

Thanks for the thoughts and help.
 
Happy you made this post because I have all the same questions. Except I don’t want ports for recirculating. I’ll just follow yours.
 
Did you end up ordering your kettle, if so, can you share what you went with?
 
Sure.

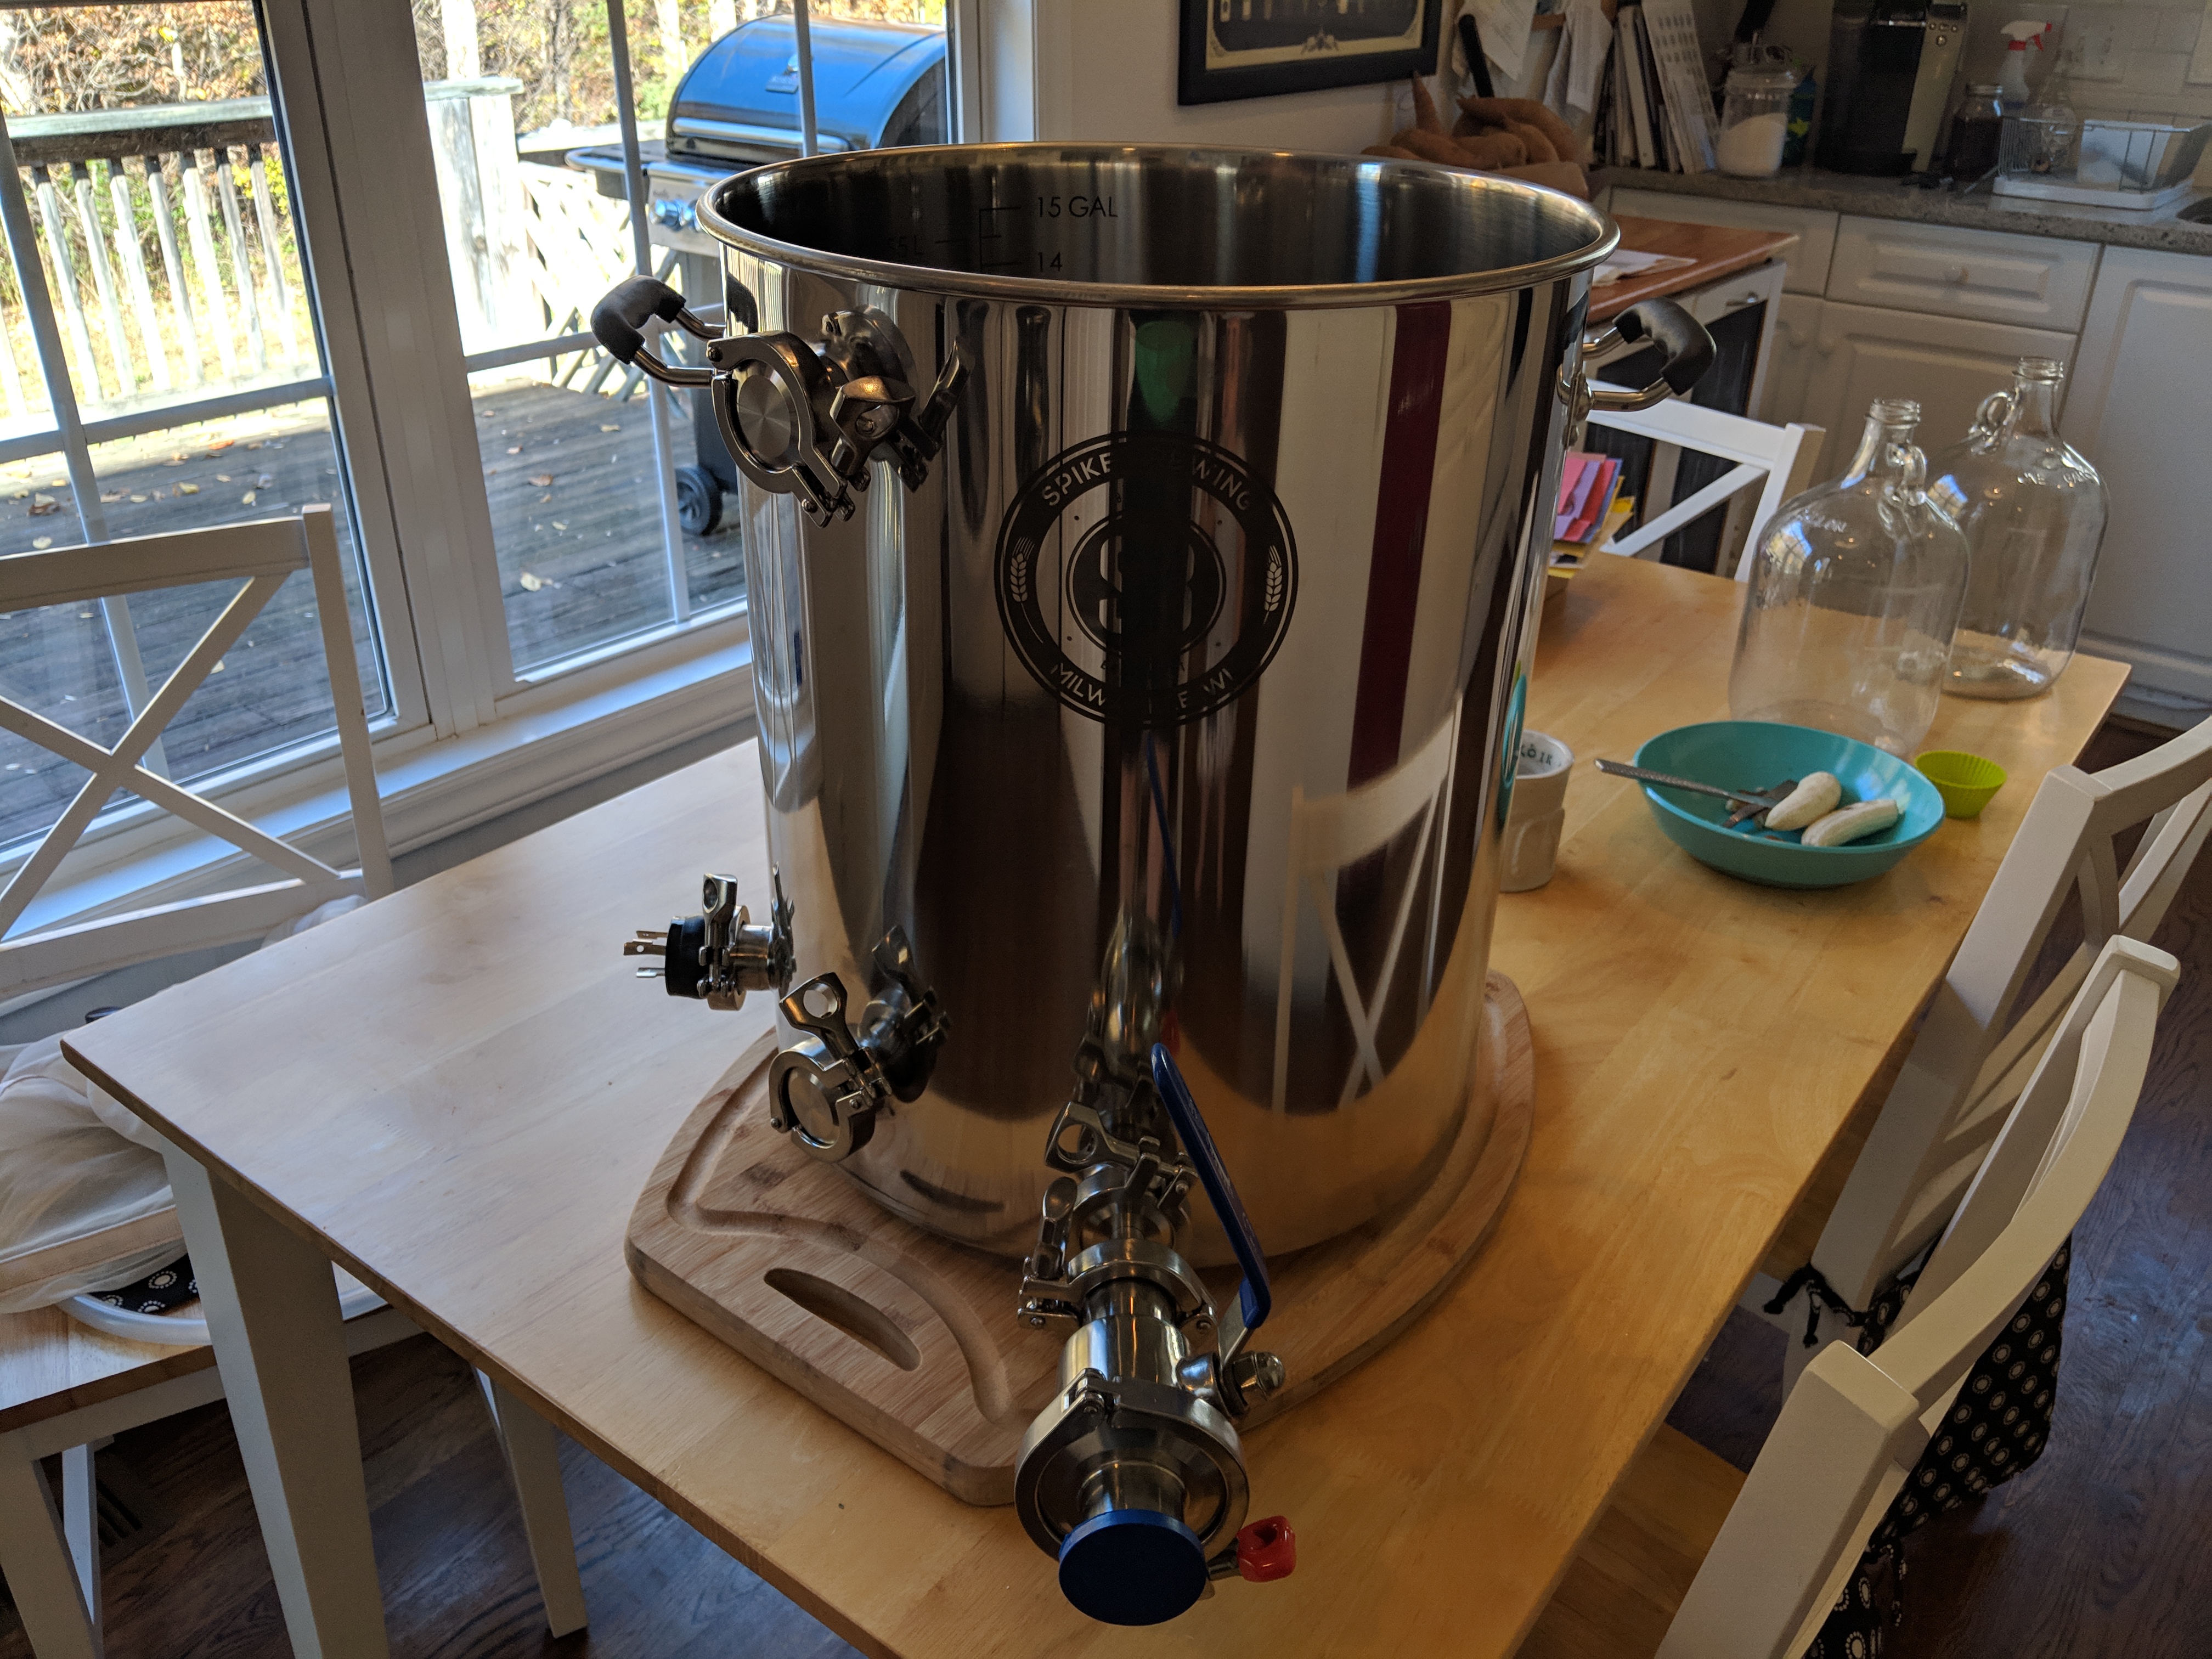
I went with a 15 gallon kettle with 4 1.5" TC ports. Three down near the bottom and one near the top.

IMG_20181110_100005.jpg


The first port is dead center on the bottom, 2" off the bottom. It houses the ball valve and exit port. The second is directly under the left handle, 2" off the bottom, and houses the heating element.

The other two ports I got "just in case". The first is inbetween the other two bottom ports, 3" off the bottom, and the second is above that one, 2" from the top. The theory was that the bottom one could be used for a thermometer (if I wanted to later), and the top could serve as a port for a steamslayer, or return whirlpool, or something similar (again, if I wanted to later).

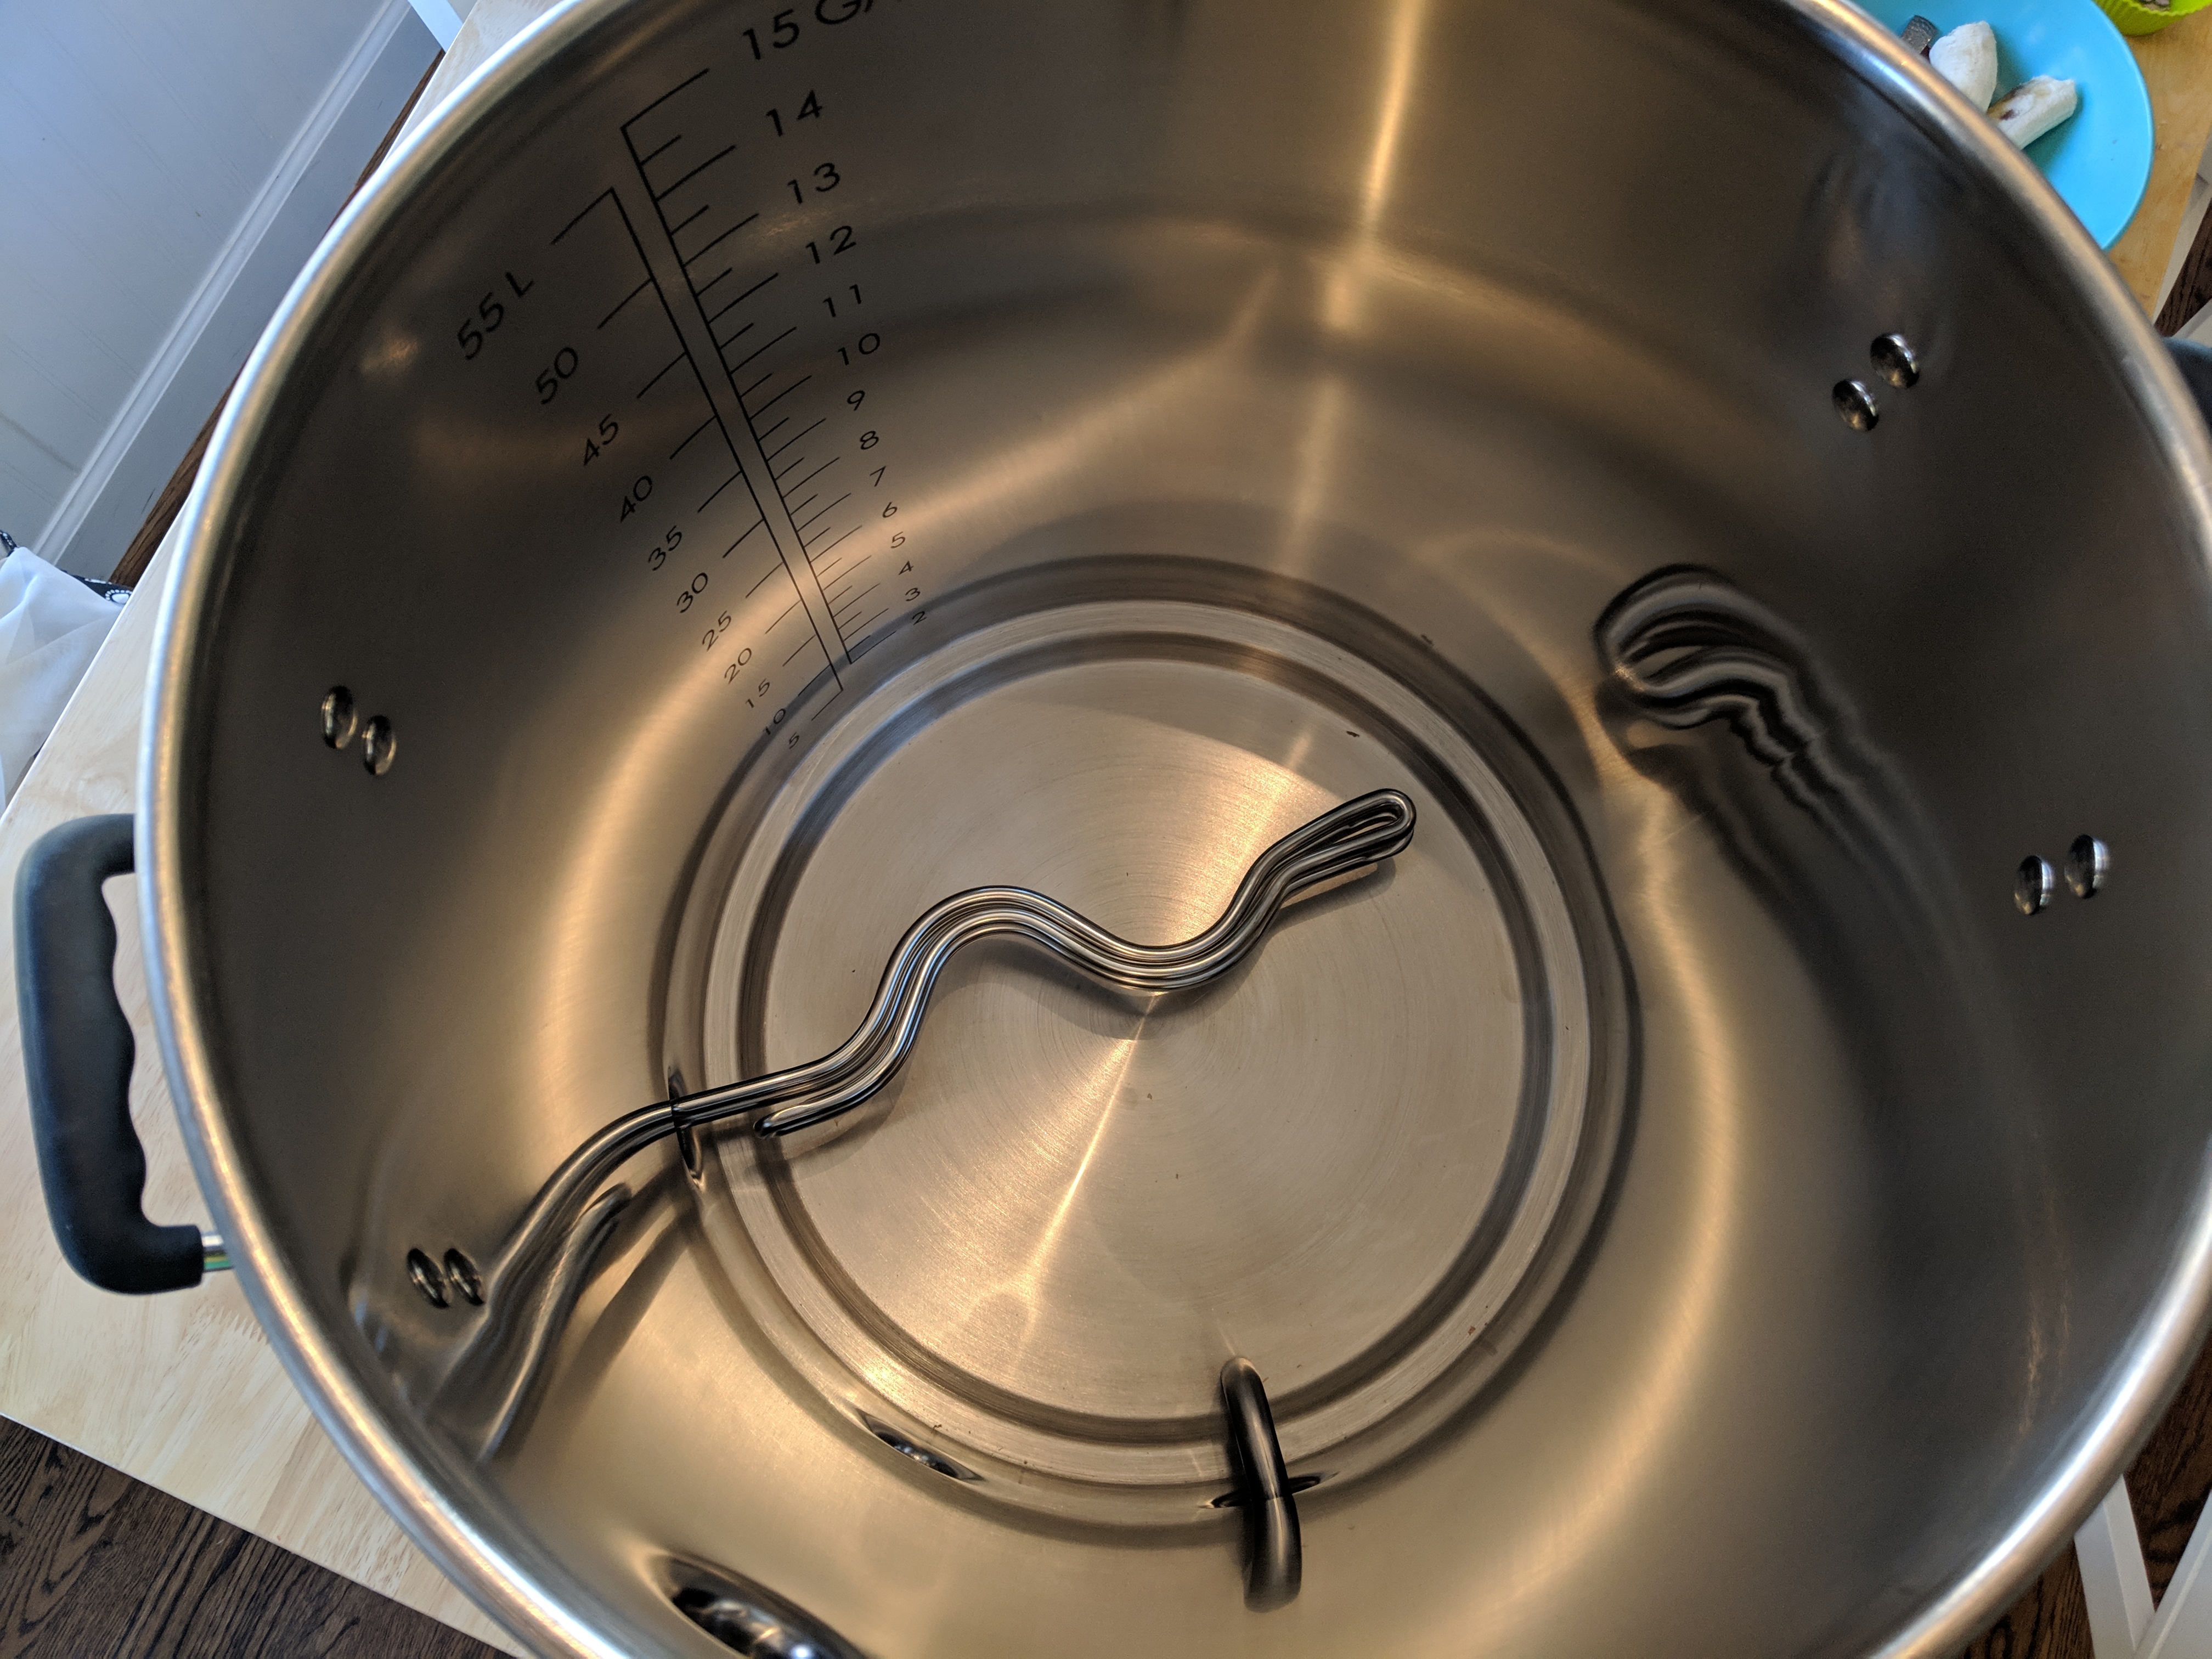
The heating element I went with was a 5500w 240V unit.

IMG_20181110_100012.jpg


I'm glad I went with the more powerful heating element, rather than a 120V option. I can heat up water 5 degrees a minute, which is very helpful.

I'm also very glad I went with the ports that I did. The TC ports are a breeze to clean, and a breeze to install. While I got the kettle with two ports that I knew I wouldn't use, it looks like I'm going to have to start using one of them.

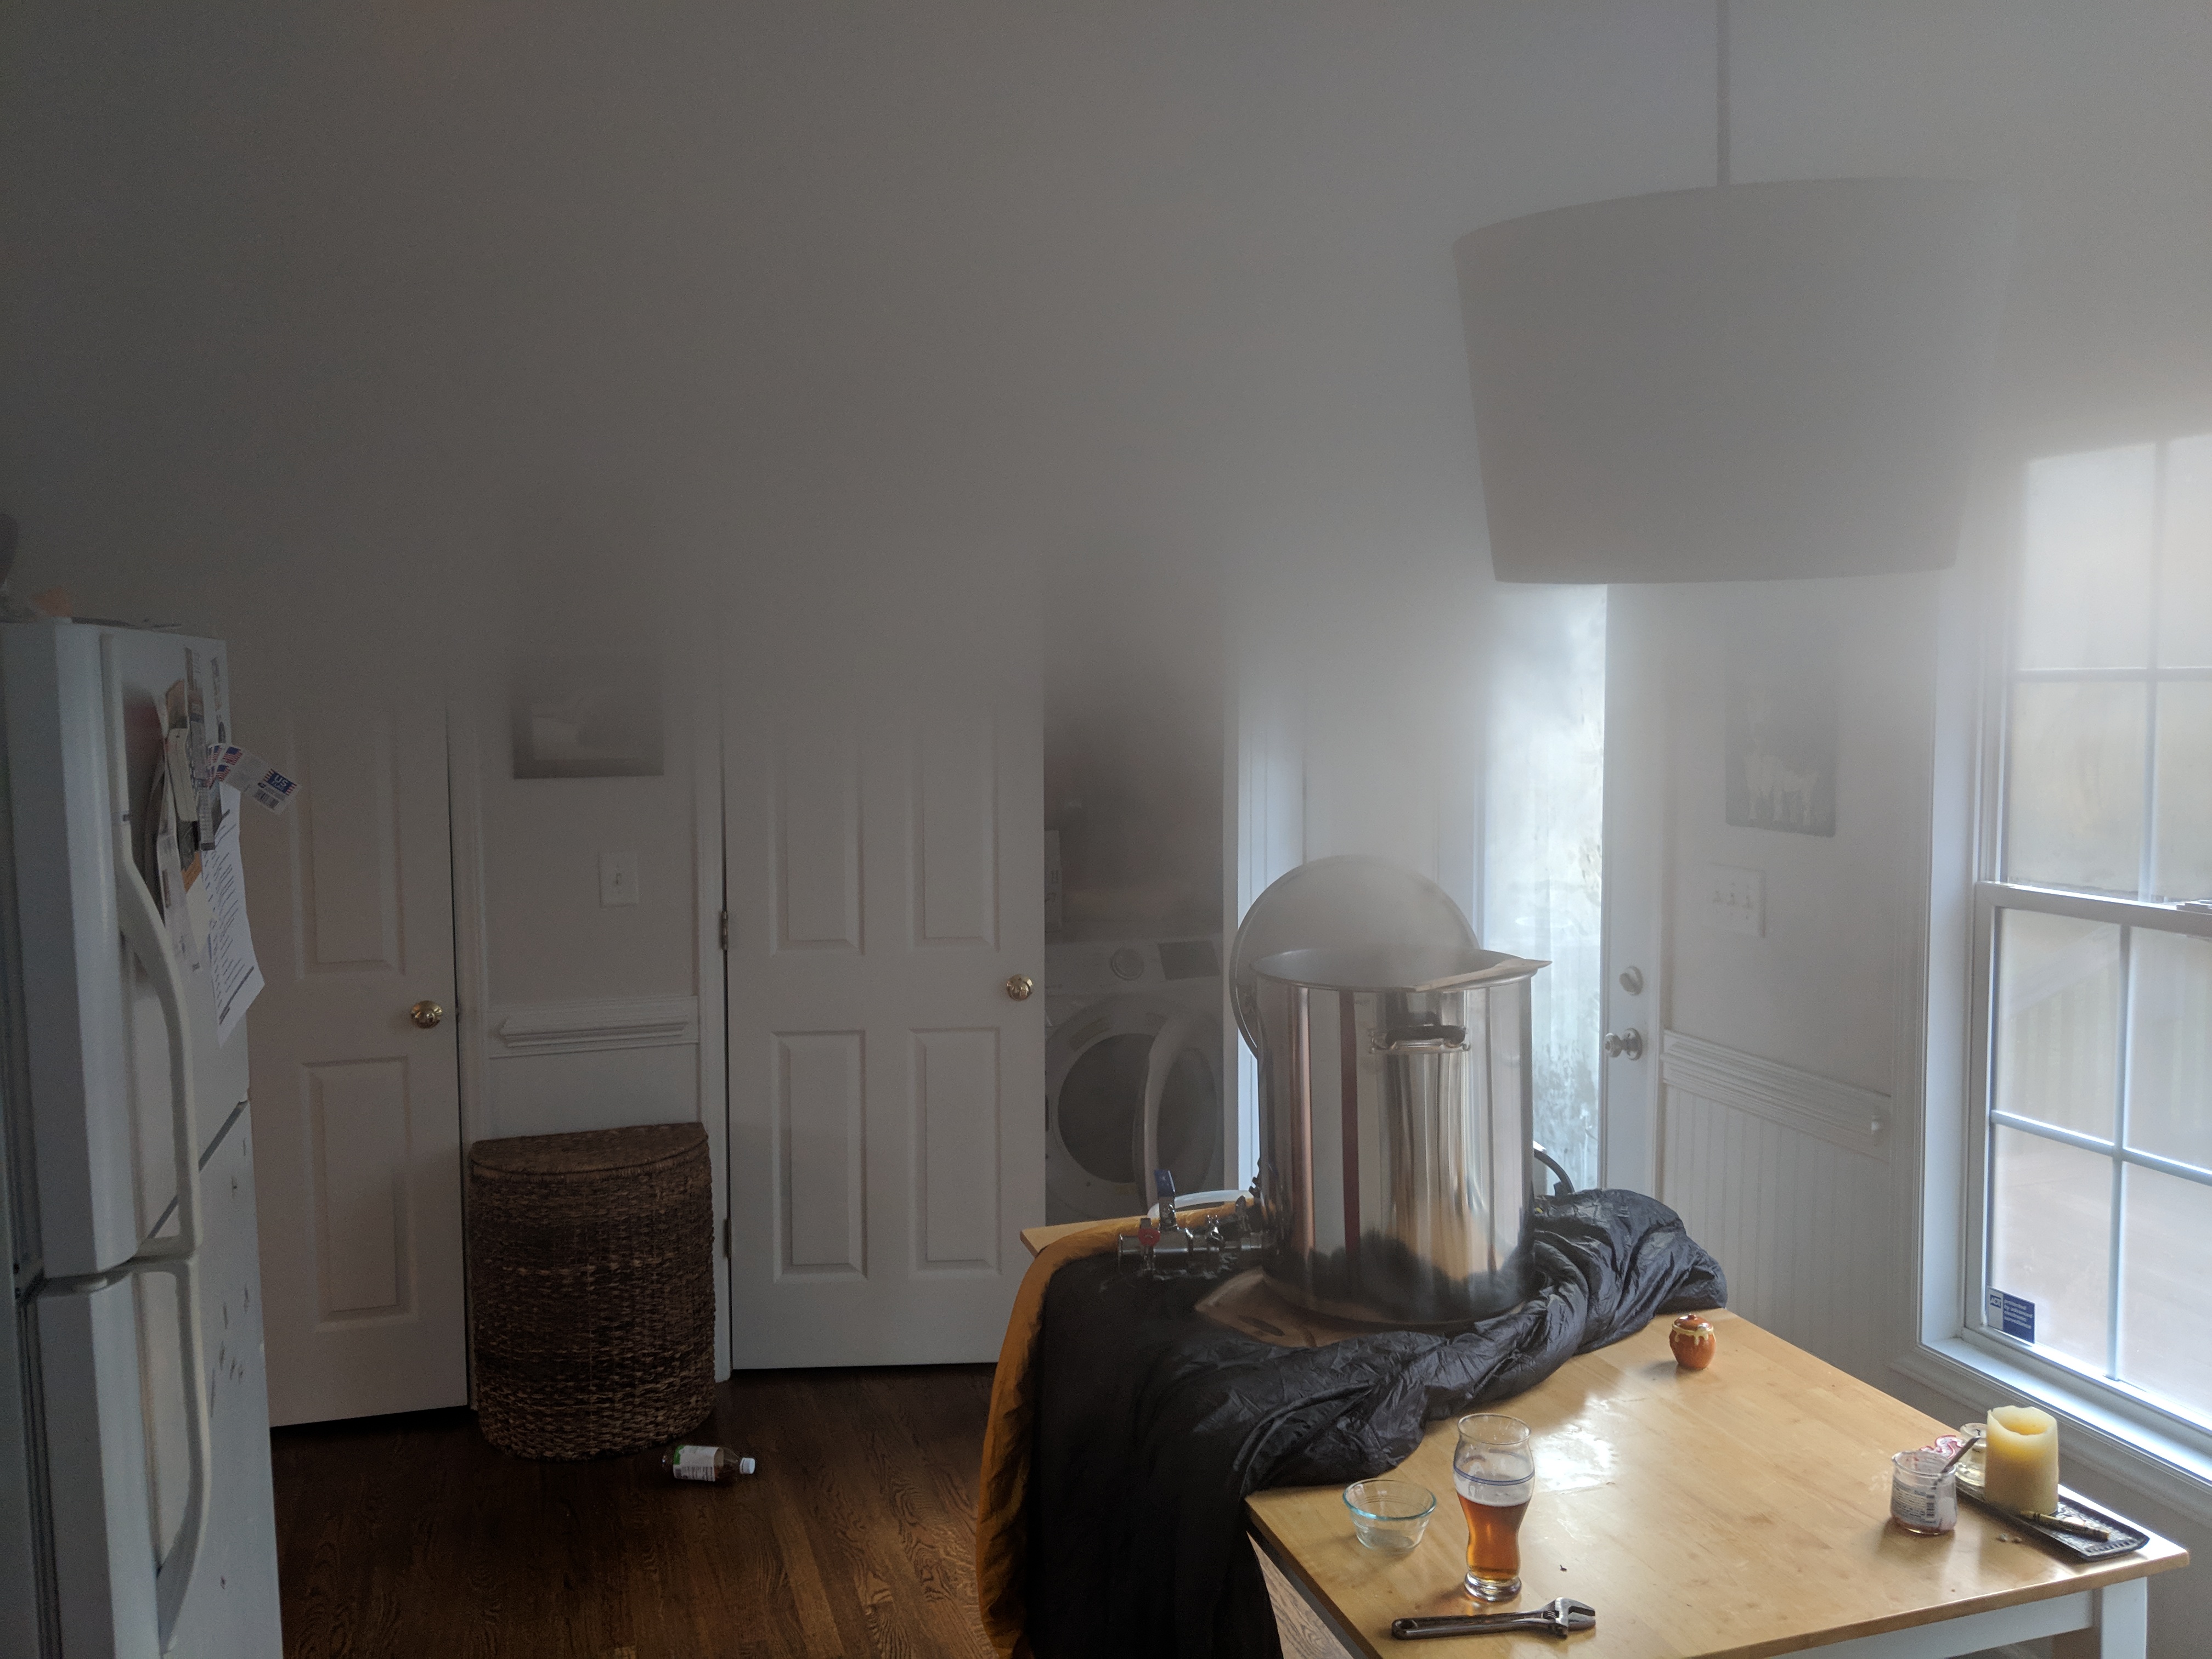
I did my first brew on this system yesterday. On a 90 min boil, it THREW OFF SOME STEAM!!!!

IMG_20181111_164842.jpg


You can't see my ceiling in this photo. It was extreme.

Now to try and figure out a steamslayer type option . . . Thank goodness I have a forgiving and understanding wife.
 
I figured it would be worthwhile for me to answer all of my own questions, based on my end results and the first brew. I can't say all my answers are "right" but it's what I went with.

1. Do you think the 15 gallon kettle is overkill?
A: I didn't need 15 gallons. I could have gotten away with 10 gallons. But I'm glad I have the extra space. I had to put ~8 gallons of water in the pot to do a no-sparge BIAB batch given my tested boil off and grain absorption rates. If I had a 10 gallon kettle, I would have been in trouble and run out of space with the grains.

2. Where would you orient the valve bottom port (both left to right and vertical, such as 1.5" or 2" off the bottom)?
A: I went with center, 2" off the bottom. It fit perfectly with the Spike pickup tube.

3. Where would you orient the other two bottom ports (both left to right and vertical)? Staggered in height, or not?
A: I decided to keep all bottom ports within 90 degrees of each other. In the event I need to push the kettle against a wall, or in a corner, I could. I also wanted to make it easier on cleaning and carrying. I think having 3 ports in 90 degrees is a little tight, but I think it works well. I also decided to try and keep one port as low as possible for the heating element, and went with 2" off the bottom. I could have, and probably should have, gone lower. It takes about 3 gallons to cover the heating element. The other port (the 90 degree one), I decided to stagger a little bit higher, and went with 3" off the bottom. The theory was I didn't want probes or various heating elements to interfere with each other. Since I haven't actually used that port, I don't know if my design was good or not.

4. Where would you orient the top port?
A: Spike suggested directly above the 45 degree port. I don't know if it's good or not, as I haven't used it yet.

5. Should I be looking at going for 1.5" or 2" TC ports?
A: I found it easier to get 1.5" parts. But I've heard many say the 2" ports are better for the heating element. I decided to go with all 1.5" ports for interchangeability. I have no issue getting the heating element in and out.

6. What type of 220v heating element should I be looking for? I can do wiring myself, but welding is not in my ability.
A: I went with the highest 220v, ULWD I could find. $52 off ebay.

7. Should I be considering getting a false bottom? I don't have any experience with these.
A: I didn't get much feedback on this, either from Spike or on the forum, but I didn't push the issue. I didn't go with it.

8. What type of pickup tube should I be considering?
A: I went with the normal pickup tube, i.e. not the shorty. It really doesn't leave much liquid in the kettle. Most of the trub is in the center anyway. But, I thought the shorty would leave a half a gallon and the regular would leave about a quart in the kettle. Had I known almost all the liquid would be coming out with the regular, I probably would have gone with the shorty.

9. Is there anything else I should be considering? I.e. what would you do differently if you were to build your kettle all over again?
A: I don't know if I can comment on this yet, but I probably would have looked for some lighter ball valve options. The ball valve almost weighs as much as the kettle. The kettle itself is fairly light, in comparison. Not that it's a problem, but I don't think it provides much insulation when using as a mash tun. FWIW.
 
The hood doesn't move enough air to eliminate the steam. When I was using the stove, the hood didn't move enough air to entirely eliminate the steam from the low boil I had going then. I couldn't maintain a boil on a full 6 gallons with the lid off, so I had to alternate with the lid on and the lid off. The house still got a little steamy, but mostly on the windows, even with the lid partially on for most of the boil and the hood going full blast, but nothing like it is with the eBIAB setup. With the increased boil vigor the way the boil is SUPPOSED to be done, that little hood doesn't stand a chance.

Plus, my 240v power cord isn't long enough. I have it hooked up to my dryer outlet, which is probably 20-25' away from the range. Not to mention that my wife would really like to use the stove while I'm brewing beer, which is why I began the journey of switching to electric. It's somewhat like our family homesteading events. Putting the pot back on the stove somewhat eliminates that.

So it's either:
1. Spend ~$50 on a longer power cord, have it drape across the kitchen with a 2 year old running around (not safe) and a range hood that doesn't adequately move air and a somewhat disappointed wife, or
2. Move outside, which somewhat defeats the benefits of going electric, and doesn't fully eliminate the power cord issue, or
3. Spend ~$120 on a steamslayer.

I'm not a fan of getting even more equipment, but it seems like the condenser is the wiser solution.
 
Great, thanks so much for sharing. I’m working with spike to order mine, and I’m getting almost exactly what you got, but with a little different port placement. My valve and element port are going to be the same as yours ( 6 and 9 o’clock) my thermometer port will also be at 3” but at 4 and a half o’clock (is that the right way to say it lol?) and then a port near the top, but on the back of the kettle at 1.5 for a steam slayer. I decided to go with 1.5 so it, and the hoses are out of the way from the front of the kettle.

I’m also thinking 240 is probably the best route at this point. What kind of controller option did you go with?
 
I’m also thinking 240 is probably the best route at this point. What kind of controller option did you go with?

I spent SIGNIFICANTLY more time thinking about 120v vs 240v than I should have. Luckily @mongoose33 and @Wizard_of_Frobozz set me straight (https://www.homebrewtalk.com/forum/...omemade-dryer-cord-splitter-extension.657127/) and I went with 240v. I'm very glad I did.

For the controller, I went with a cheaper DIY option at StillDragon (https://www.homebrewtalk.com/forum/...troller-wiring-questions.657519/#post-8427677). It's basically like a dimmer switch. It works great for me. I couldn't justify the more expensive options, because I don't have (and don't want) any pumps or circulation options at this point in time.
 
Solidifies my plan then. I’m going that route as well. I will refer to your wiring post as well. Thanks again.
 
Hopefully you can do your wiring, crimping, and soldering better than I did.

I ran the controller for 90 min straight yesterday, and while the cover was noticeably warm, it wasn't hot. Warm as in "left in the sun for a few hours" but not warm enough to cause concern. So I decided I didn't need a fan or further ventilation. YMMV.
 
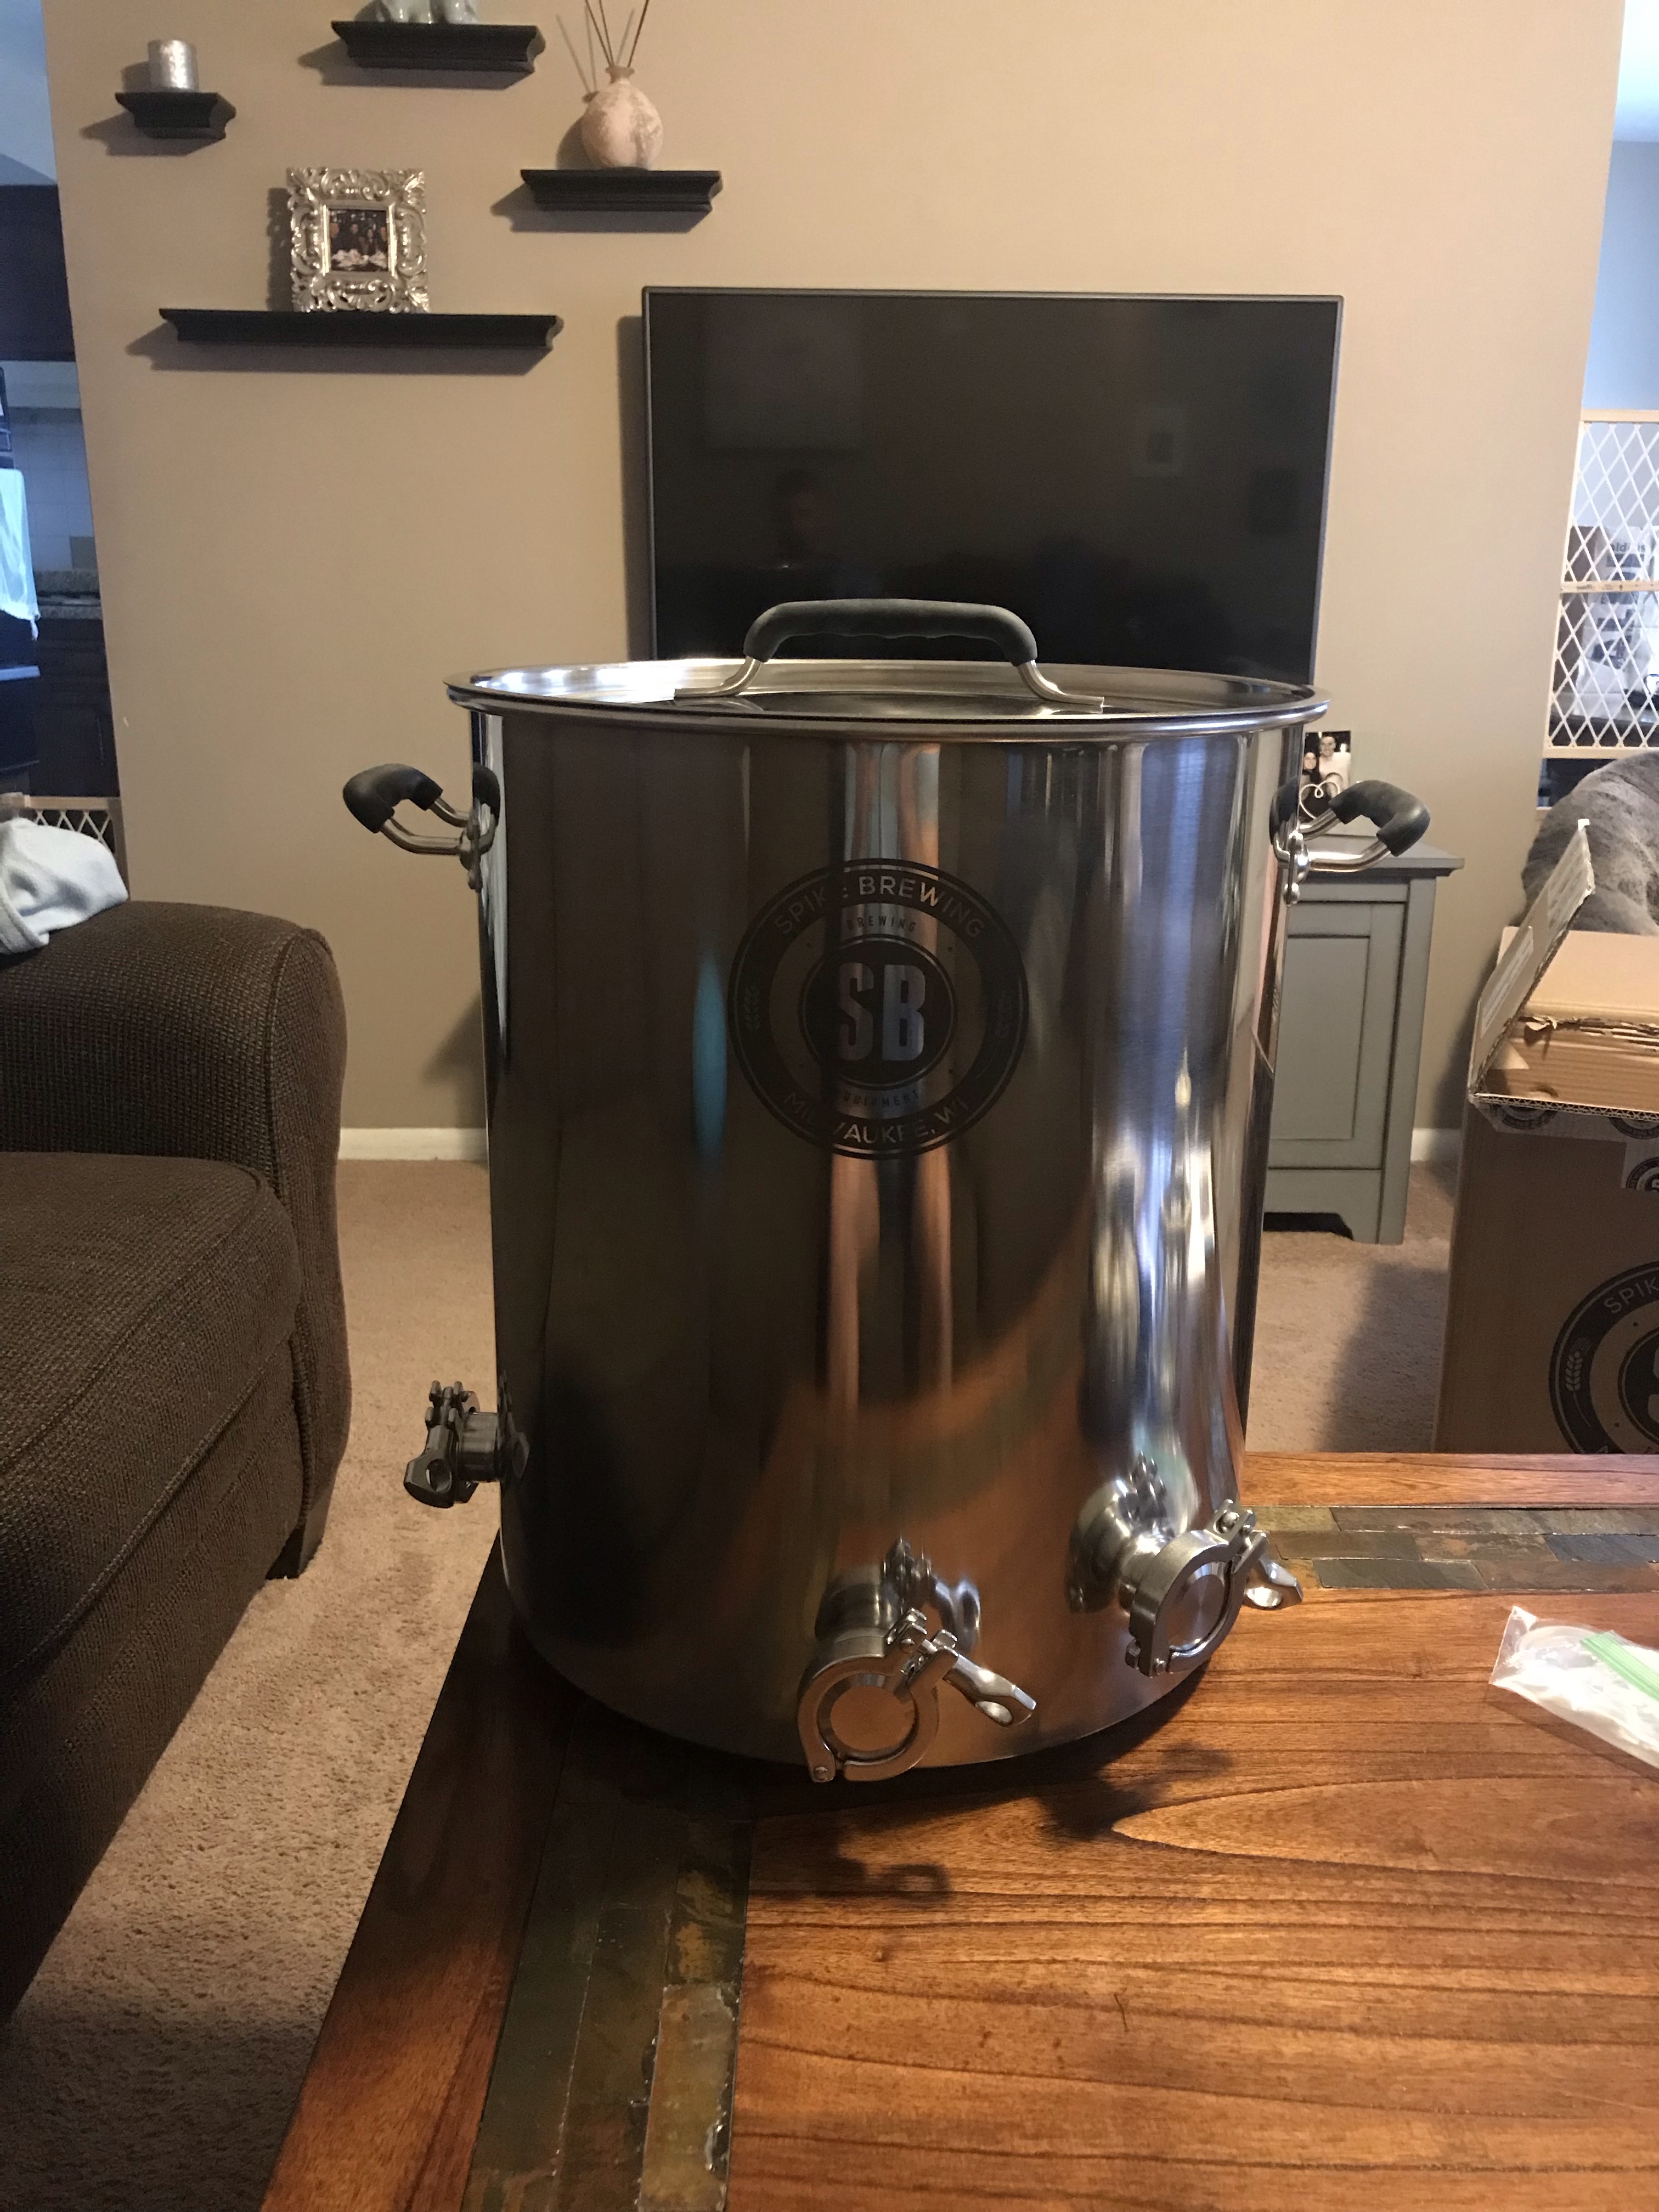
This just came today! Have you had the chance to play around with the dragon still controller a bit more? Still happy with it? I need to get that going ASAP.

IMG_1366.jpg
 
Congrats!

Yes on the dragon still controller. No complaints, it works as advertised. I had a little bit of an issue figuring out putting it together, but it was me and not the kit. After doing a test (to determine boil off rate), a 90 min boil Vienna Lager, and a second test (going on right now to test the new dragon slayer), I'll be doing another batch hopefully tomorrow (Blonde). The controller works great on all three so far. No overheating issues.

I did have some issues today with my heating element. Every time I plugged it in, the GFCI Spa Panel would trip. Took me forever to figure out what was wrong. Somehow a bunch of water got in behind the plug of the heating element, and couldn't make it out. No idea how that happened, but it caused a short instantly. Super glad I got the GFCI put in place. Going to have to be more careful on that moving forward.

What do you have planned for your new kettle?
 
Pretty much the same as you. I don’t have access to any 240 lines currently though so I’m on hold until my father has some extra time to come help me wire it. But yeah a 5500 watt element, probably a dragon still controller as well. I still need to get a valve and a drain piece set up.

I will probably get a steam slayer as well because I will be brewing in my basement.

I put 7.5 gallons of water in it and on the stove. It was a fail as far as the boil goes though. It was over two burners as well. I did notice a few freckles of rust on the inside of the kettle after draining though which was kind of disappointing. I know after some time that is to be expected but I just received it today lol
 
Did you get the large controller or small? As far as the gfci, is that in the 30 amp receptacle? Or did you somehow build that in?
 
I got the large controller. I honestly don't know what the difference between the two are though.

As far as the gfci goes, there really isn't much of an "easy" solution. You can get a gfci breaker on an extension cord, but most are around $150 (https://www.amazon.com/dp/B00OZY2Y4C/?tag=skimlinks_replacement-20) and usually don't have the plugs you need, so you're self wiring anyway. Many others put a gfci breaker into their breaker box. However, a 30 amp gfci breaker usually runs you around $100 by itself, and then you're doing your wiring to put the right three prong outlet in the wall that runs off the breaker.

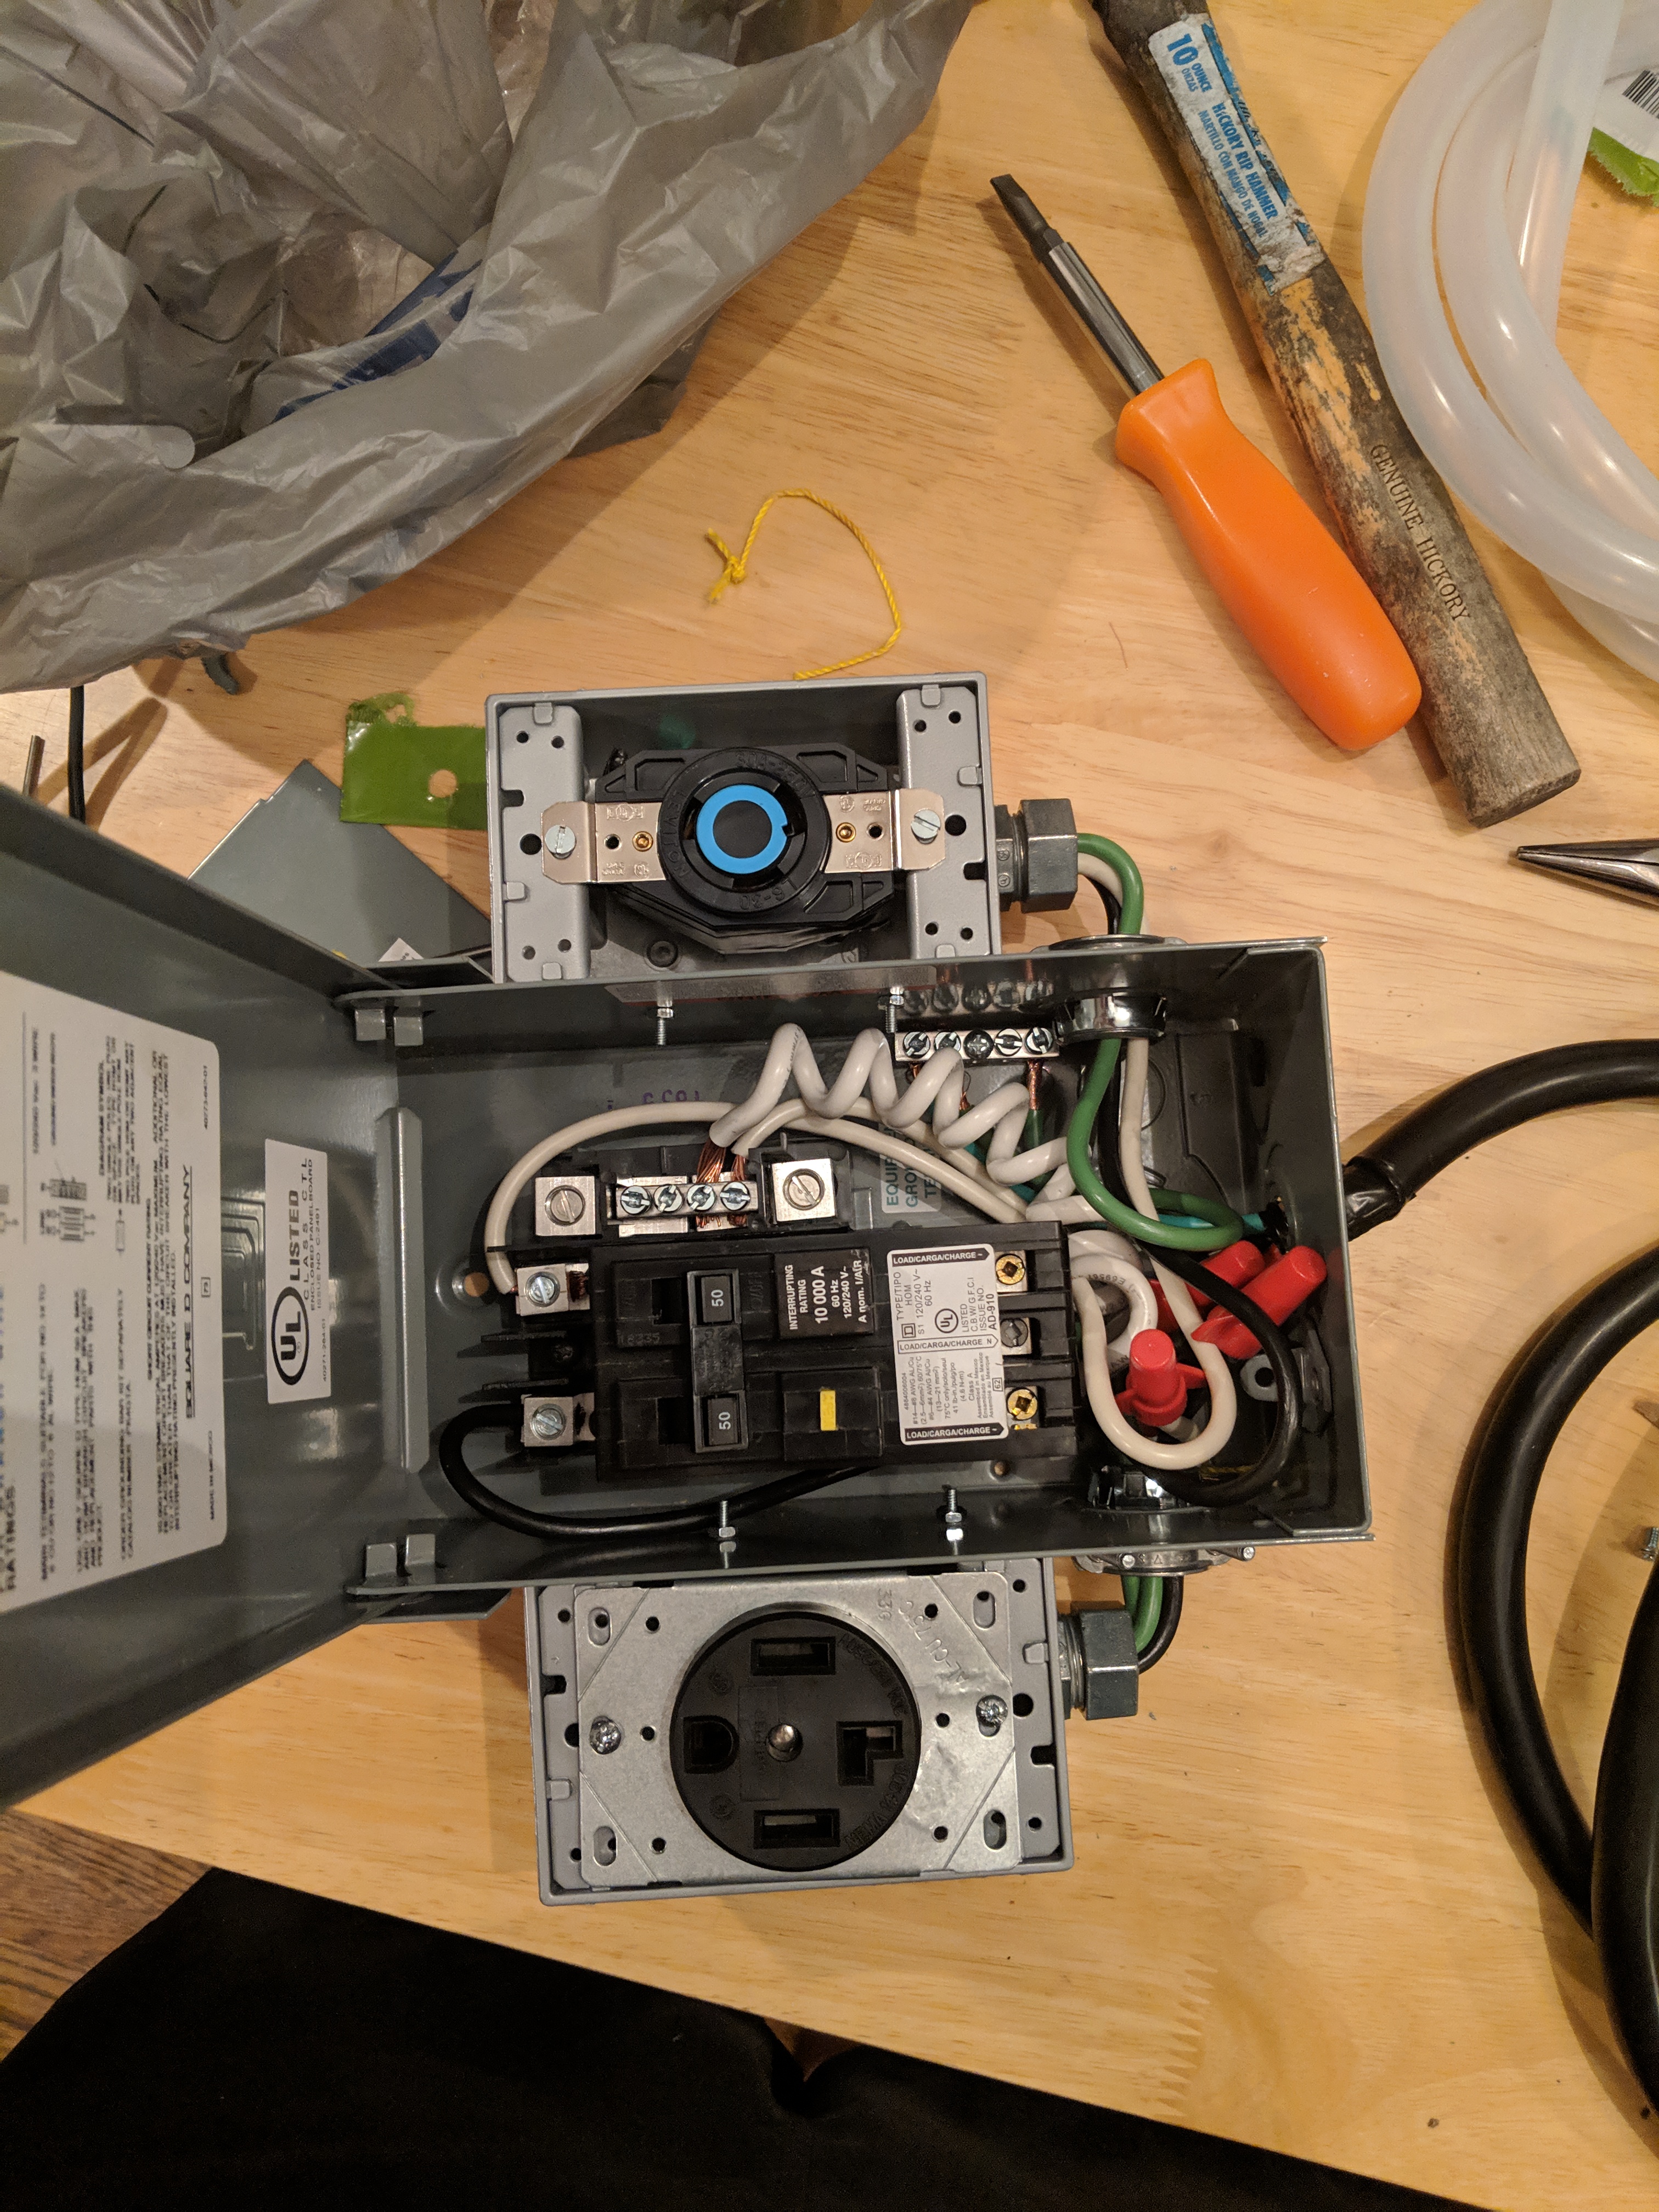
Many on here chose to install a spa panel box. It comes with a 50 amp gfci breaker, and runs about $75. You then have to wire the outlet itself. That's what I chose to do. https://www.homebrewtalk.com/forum/...omemade-dryer-cord-splitter-extension.657127/

IMG_20181026_192652.jpg


I only had one dryer outlet that ran off 240v. I didn't want to dig into the wall to create another outlet, and I don't have room in the breaker box for another breaker. So I had to find a way to split the current outlet between the dryer and the kettle.

The end result isn't "code compliant" but it isn't unsafe. And it works. And I just plug it into a standard dryer outlet and I'm good to go. So if I move, or want to brew at a friend's house, I can. The downside is I can't use the dryer when I use the kettle. Not really much of a downside to me.

I think it would have cost me probably $500-1,000 to have an electrician install the outlet in the wall with the GFCI breaker. It would have cost me ~$250 and probably 6 hours to do it myself. I built the spa panel for probably $150, and probably 4 hours of work. So it worked fine for me.

YMMV though.
 
I found this.
IMG_1369.jpg

But I’m kinda confused now. So, from my panel, I will have 2 hots a neutral and a ground coming out. The still dragon only accounts for the 2 hots and a ground, and the l630 plugs are three pronged. Where does the neutral come in. Am I missing something?
 
The heating element takes two hots and a ground .No neutral.

Read the thread I linked above. It has it all in there (or search for another, there are about a dozen or so that probably explain it better than me).
 
Back
Top