Deep Six Brew Monitor

Homebrew Talk - Beer, Wine, Mead, & Cider Brewing Discussion Forum

Help Support Homebrew Talk - Beer, Wine, Mead, & Cider Brewing Discussion Forum:

This site may earn a commission from merchant affiliate links, including eBay, Amazon, and others.

John Beere

Deep Six Brewing Co.
HBT Supporter
Joined
May 31, 2006
Messages
2,033
Reaction score
71
Location
Valdosta, GA
A little over 8 years ago, I made this thread (https://www.homebrewtalk.com/showthread.php?t=79435). While, I did take a hiatus, my rig has been running strong all these years. I've recently decided to dive back into it and rebuilt it using newer technology and hardware. After analyzing the UI, I still really like it - so it has not been rewritten, only updated. It has also been fully verified to run on Windows XP - Windows 10.

Years ago, I passed on the ideas of distributing my solution. Now, I am considering it as technology has made this much more affordable. I am unsure where this leads me, but if there is interest, I am considering making it available as some sort of kit or something similar. There is a *lot* left to do, but I thought it would be interesting to document the process.

This version of the app will specifically be built around the idea of a HERMS setup, but I could easily adapt it to other configurations if there is any demand.

In short, the app is currently coded to manage the following:
1) Unlimited recipes through unique configuration files
2) Fully managed step mashing
3) Dough-in compensation for temp drop
4) Float switch to protect against heating a HLT that isn't full
5) Flow meter to monitor the mash is recirculating
6) Up to 8 configurable labeled auxiliary relay switches
7) Santiation Mode (configurable heat and recirculation)
8) Temperature probe calibration
9) Preheat command to bring the system up to dough-in temp
10) Configurable splash screen and background
11) Email alert system
12) Specifically designed to fit and function remotely on an iPad
13) Managed brew schedule for hop additions

Here is a screenshot of a splash screen I was toying around with:
10-02-16A.gif


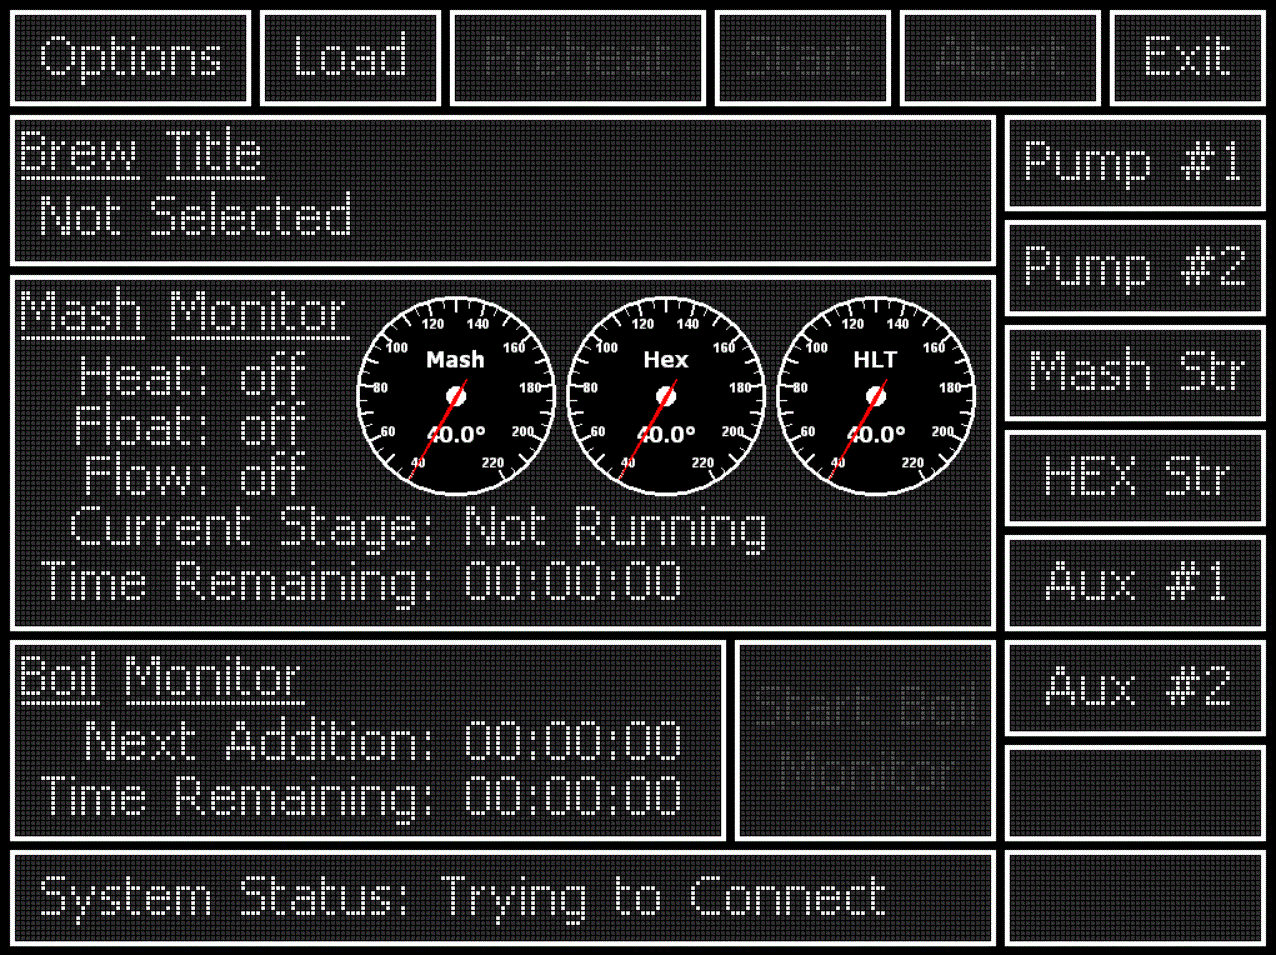
Here is a screenshot of the updated interface.
10-02-16B.jpg


So please leave feedback - even if you aren't interested. What all am I missing? How many of you guys would be interested in taking your systems to this level of extreme?
 
All sounds good. Glad to see this restarted. Regarding the iPad: will there be any Android based device development?
Cheers! and keep up the great work!
 
All sounds good. Glad to see this restarted. Regarding the iPad: will there be any Android based device development?
Cheers! and keep up the great work!

The application must be constantly connected to the hardware. Due to this, it runs from a Windows PC connected to the hardware. Years ago, I worked with the developers of one of the slickest Remote Desktop apps (JumpDesktop.com) for both iOS and Android to add in a special mode for my application to run as if it was connected to a touchscreen monitor. This is what I was referring to when I said "function remotely".
 
So I'm still waiting on sample boards to arrive from Taiwan. I don't initially intend to have anything custom created for this and instead use off the shelf boards. This may change depending on interest. In the meantime, I am steadily working on enhancing the application.

I am also taking some time to redesign my brewing rig - so I should have some photos of that soon as well.
 
Parts are finally arriving. The relay board is rated for 10A - enough for the 8 switches, but not enough for the heating element. I'm really digging this particular arduino board - it is going to make wiring a snap!

10-22-16A.jpg


10-22-16B.jpg
 
Quick update: It's taken me longer to prototype the case for all the hardware than expected, but I believe I am finally happy with it and will be able to post some photos soon.. I'm anxious to get my rig back up and running so I can begin real world testing the updated code.
 
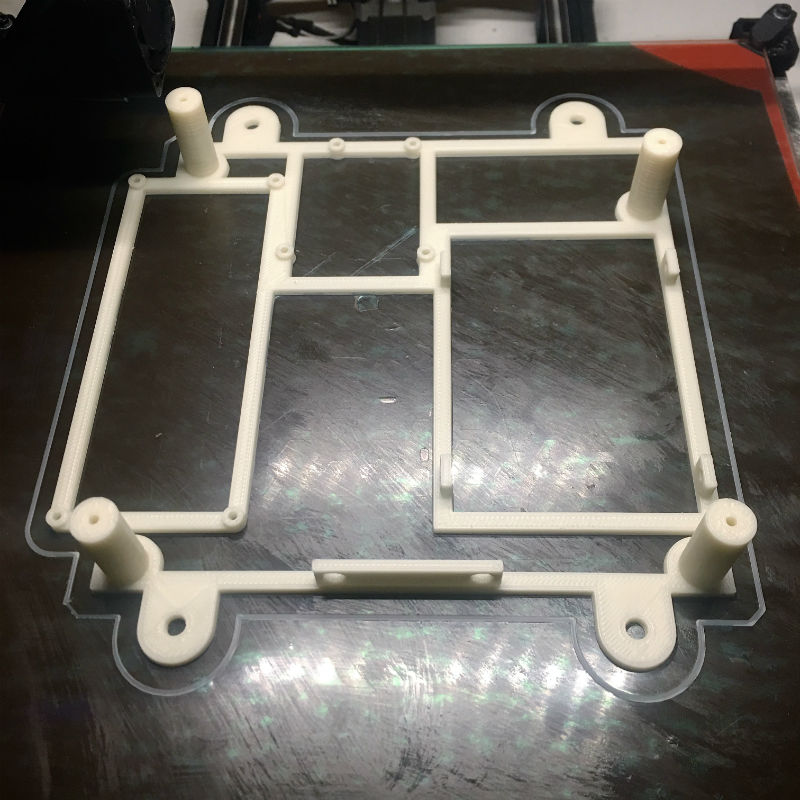
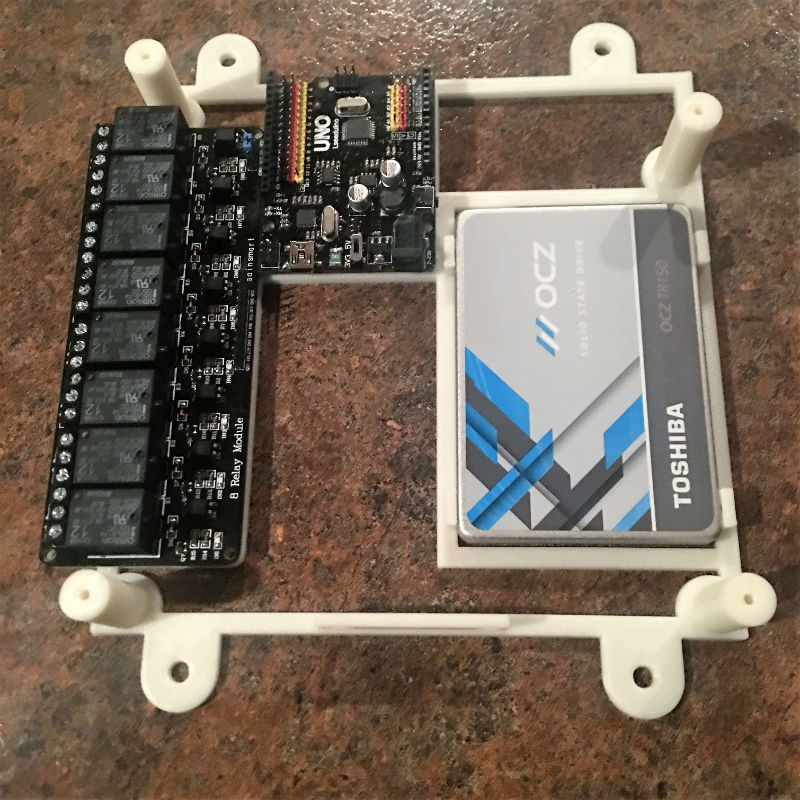
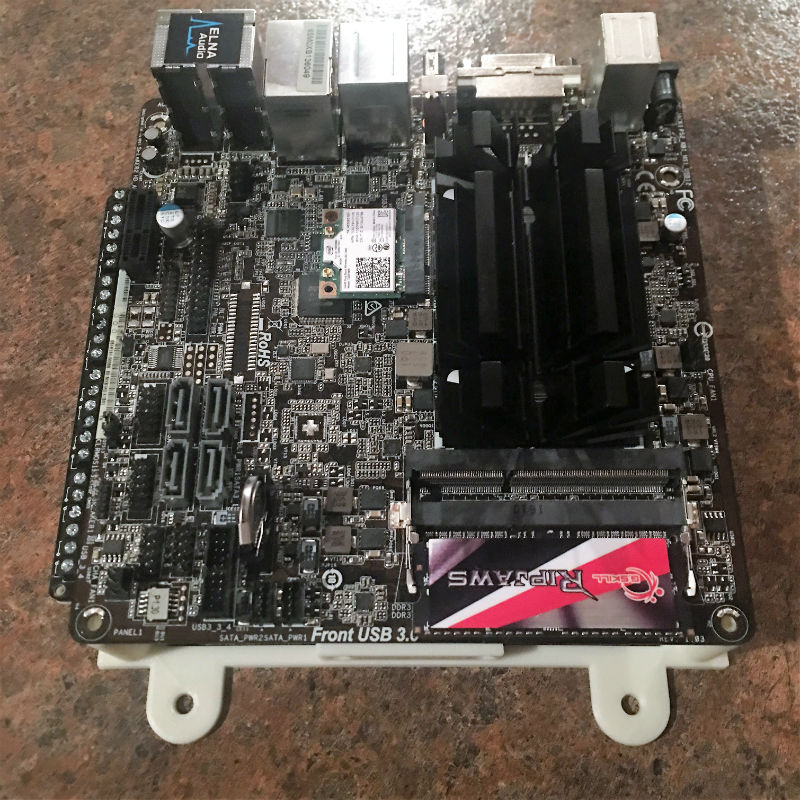
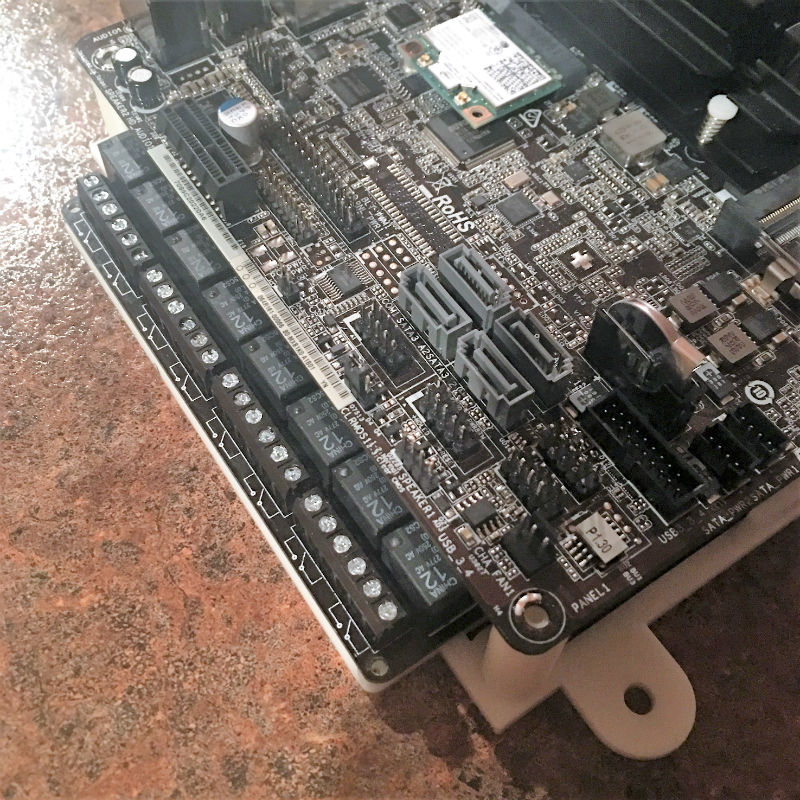
So I finally have something to show for my efforts. This is just a prototype, but I am pleased with how it is coming together. For clarification, this will fit inside a larger control panel with the rest of the wiring, etc. This does not include the relay for the heating element as that will need it's own heatsink. I'll design that next.

Prototype #7
Js39O0M.jpg


With Arduino, Relay Board, and Hard Drive
Kb9ujHU.jpg


With Mini ITX motherboard stacked on top
HwsLvSf.jpg


Side view to show access to the relays
1AVCqAo.jpg
 
Very cool!! If you need some help lifting on the software, please reach out. This could be a fun side project!
 
Hi,
I was looking at your project as I'm working on something similar. I'm just wondering why you need the PC on it? It takes a lot of space and it's expensive. If you really want a fancy interface you can probably use the ODROID-XU4 for example.
I'm using the particle Photon on my project with built-in Wifi and cloud access, it can Log and Notify both in the App and Email.

It's looking really nice. Good luck.

For reference, that is a mini-itx motherboard. It is ~6.7" square and I'd consider it very compact. It will fit in my enclosure with ample room to spare. "Expensive" is relative - especially in this hobby - but for reference, I have about $300 in the hardware. This includes the motherboard / CPU combo, SSD, Arduino, Relay Board, and copy of Windows 10 Home edition.

I do agree there are certainly many ways to "skin a cat", and my solution is likely not for everyone. In fact, if it is only every installed on my machine, I'm fine with that. It has been running stable for over eight years now on an old Atom based, Windows XP setup. The software is very solid and, quite frankly, I could likely never port the entire application and UI to another language to run from some other hardware like the Raspberry Pi.

I have quite a bit of experience with the Proton. In fact, I was an original backer of the Spark Core (it's predecessor) on KickStarter. My humble opinion is that while Cloud Computing can be extremely powerful, I certainly wouldn't want to use it for my solution. I could name several reasons, but primarily, speed and reliability. My software is polling the Arduino five times every second for the voltage of all temperature probes, the state of each relay, the current operating voltage (it can and does vary), float switch, and flow meter. Outside of the emergency abort logic, all programming is handled in software - the Arduino is solely acting as a DAQ.

Please don't let any of this discourage you in any way.. this is how I chose to tackle the challenge years ago and, after a code review, decided to move forward with enhancing the system instead of starting from scratch.
 
Good on you, that sounds that you have a very clear idea of the final result. I was just making sure that you knew the options available.

I'll try to update my set up when ready.
 
I've added another feature to the software - timed delay preheat. The system will stay active in a sleep state and then preheat the HLT and Mash Tun at a specified time. It will then hold the system in this state for a configurable amount of time (default is 4 hours). This is something I've wanted to add for a long time so I can prep the system the night before and allow it to be ready and waiting for me to dough-in the next morning at my leisure.

I've also updated the UI a bit - I'll replace the image in post #1 when I have time over the weekend.
 
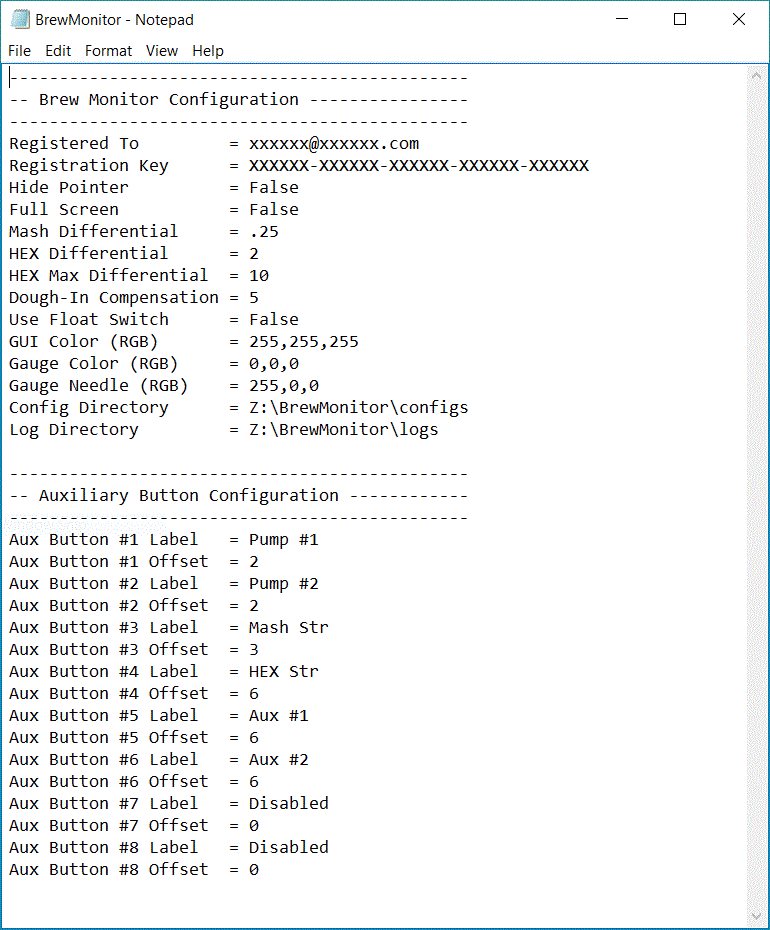
Here is what I believe is the final UI for the application. The colors can be modified in the system configuration - photo below. Notice two of the buttons are disabled. You can see how this was set in the configuration file as well as the other available options.
aLAt1Bh.gif


And here is the configuration file. The offset values for each button label are to allow the custom labels to be centered within the button.
WjQcsAH.gif
 

Latest posts

Back
Top