Chris' Home Bar Build

Homebrew Talk - Beer, Wine, Mead, & Cider Brewing Discussion Forum

Help Support Homebrew Talk - Beer, Wine, Mead, & Cider Brewing Discussion Forum:

This site may earn a commission from merchant affiliate links, including eBay, Amazon, and others.

Ckalnasy

Member
Joined
Feb 13, 2018
Messages
9
Reaction score
7
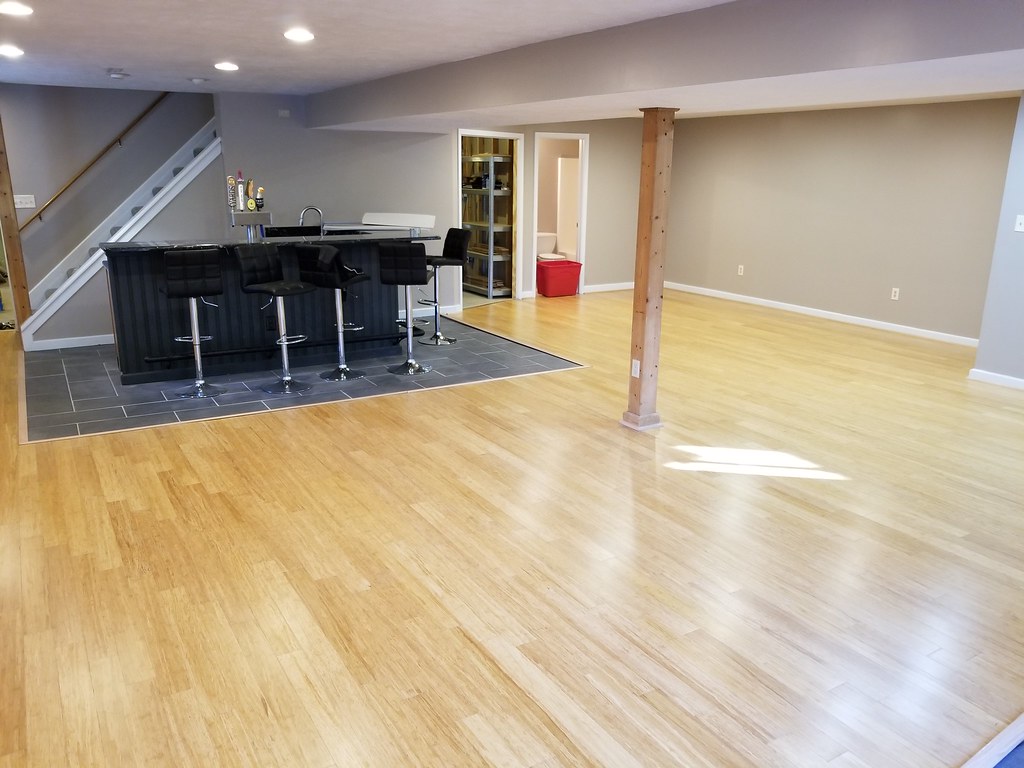
Hey guys, new to the forum and I figure I would share my bar build for the new house my wife and I bought end of last year. The basement had a pretty large rec room (close to 30x30) with a bar already in it. Plan was to update the bar, flooring, and new paint. We still have yet to paint the room and decorate everything and then move everything into the rest of the room. When finished the room will have the bar, a pool table area (previous owners left the pool table per my request), a couch/tv area, and a music area (I have a large drumset and lots of buddies who play guitar and we jam often).
Now to the bar…...
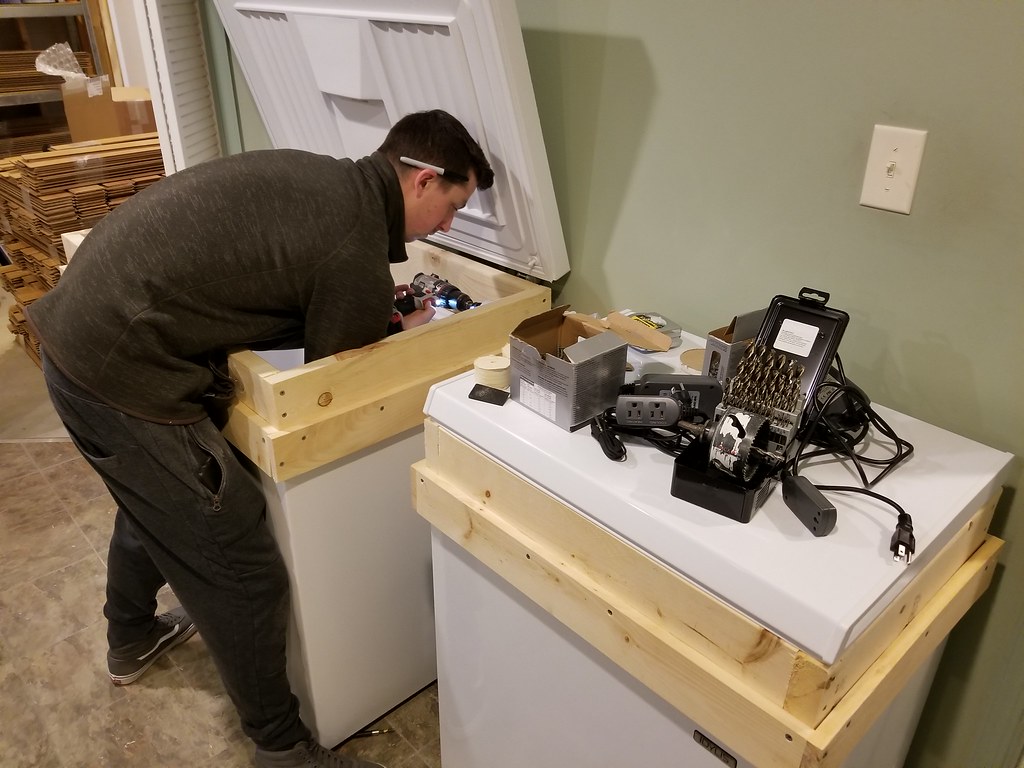
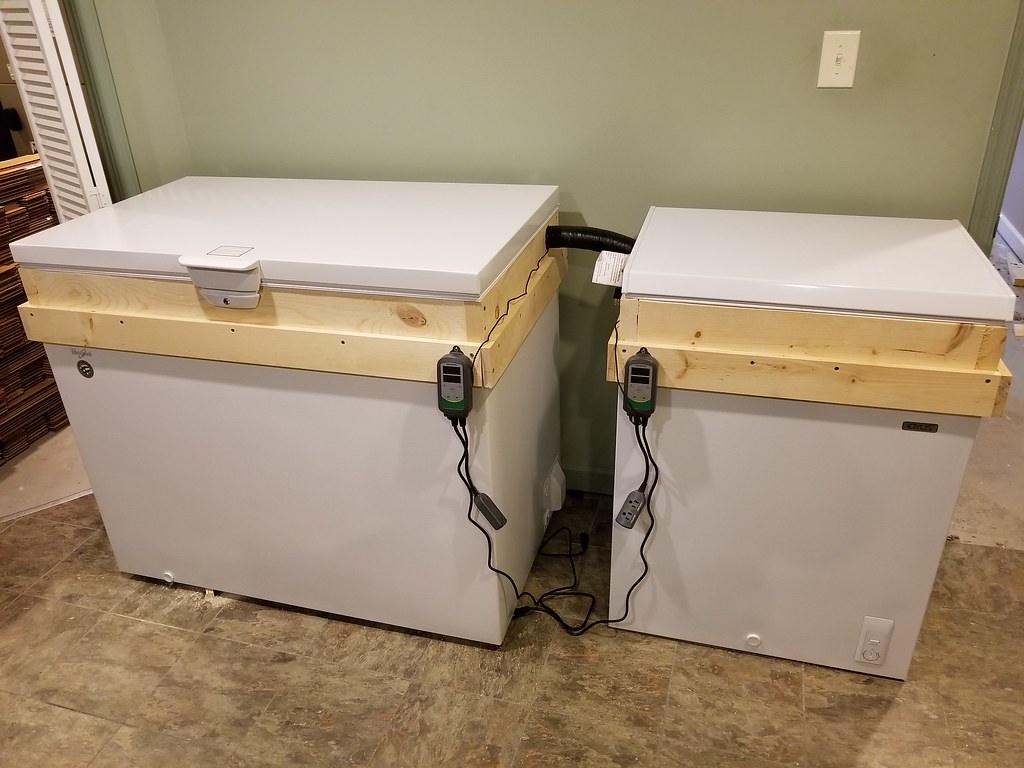
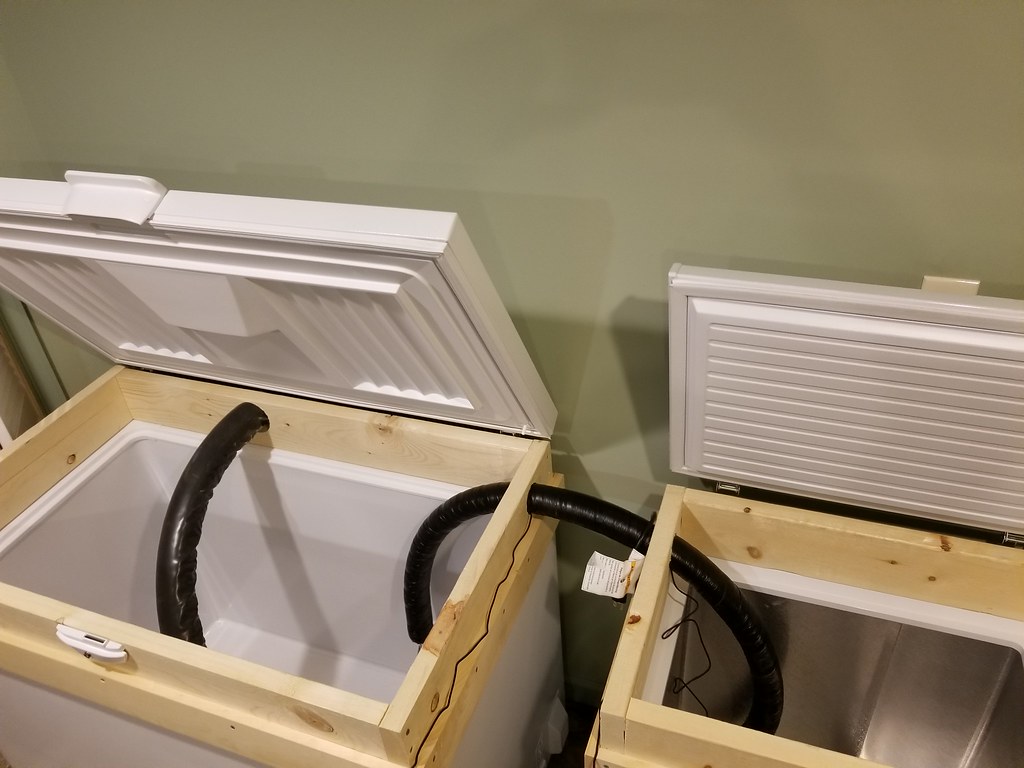
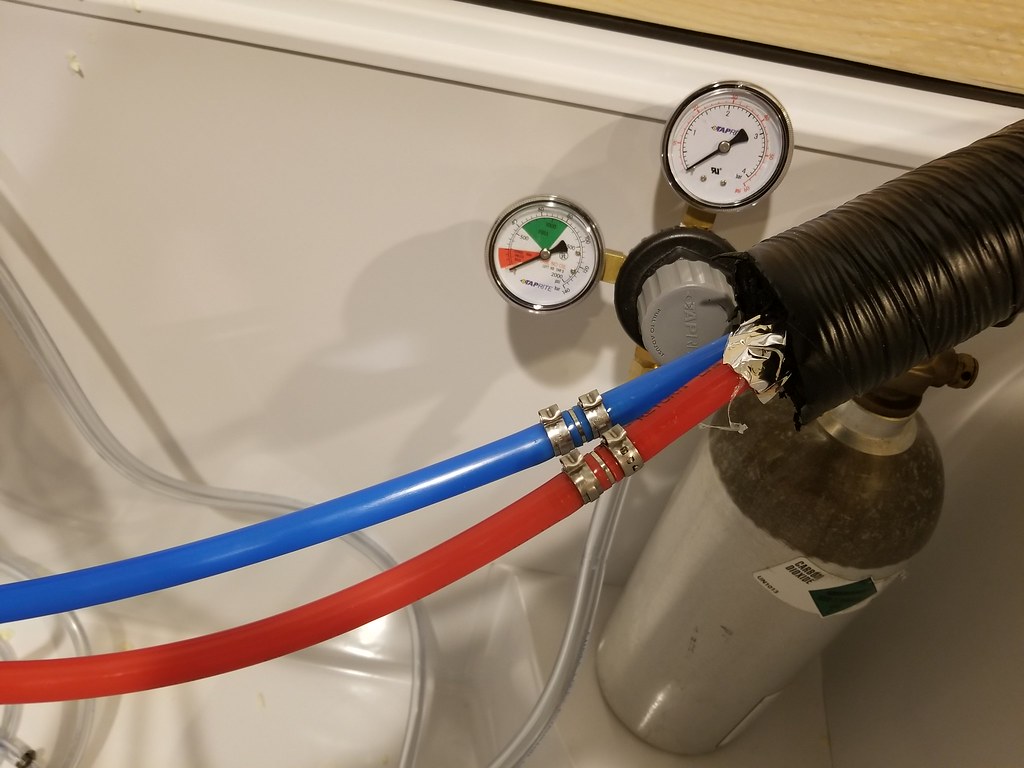
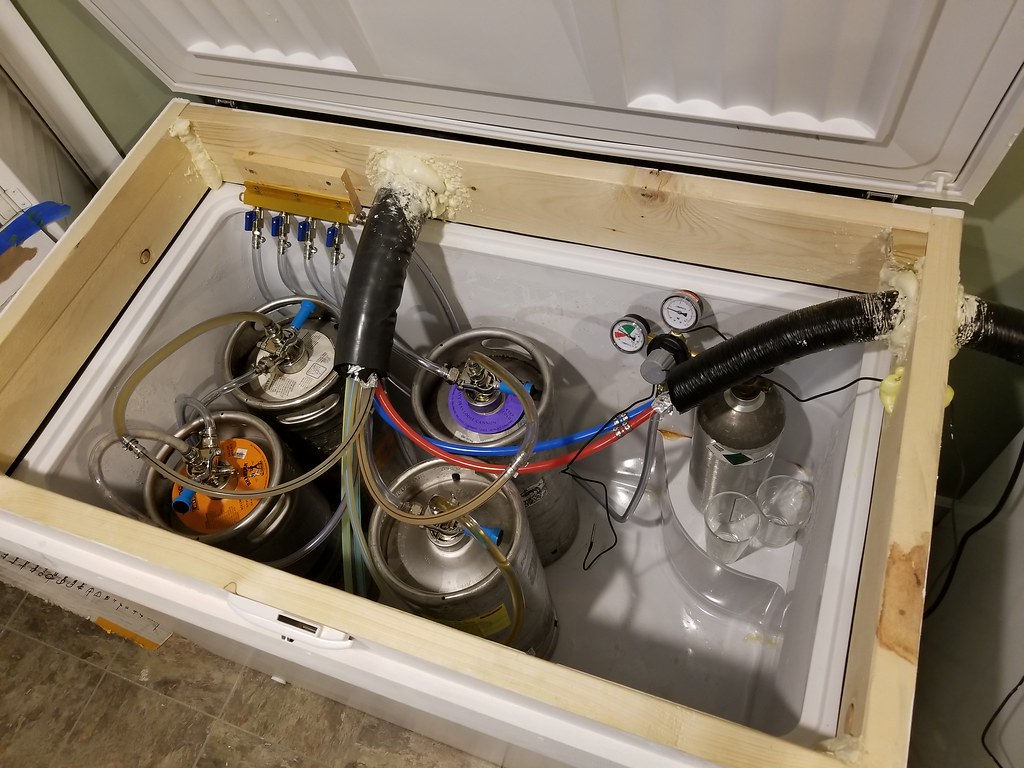
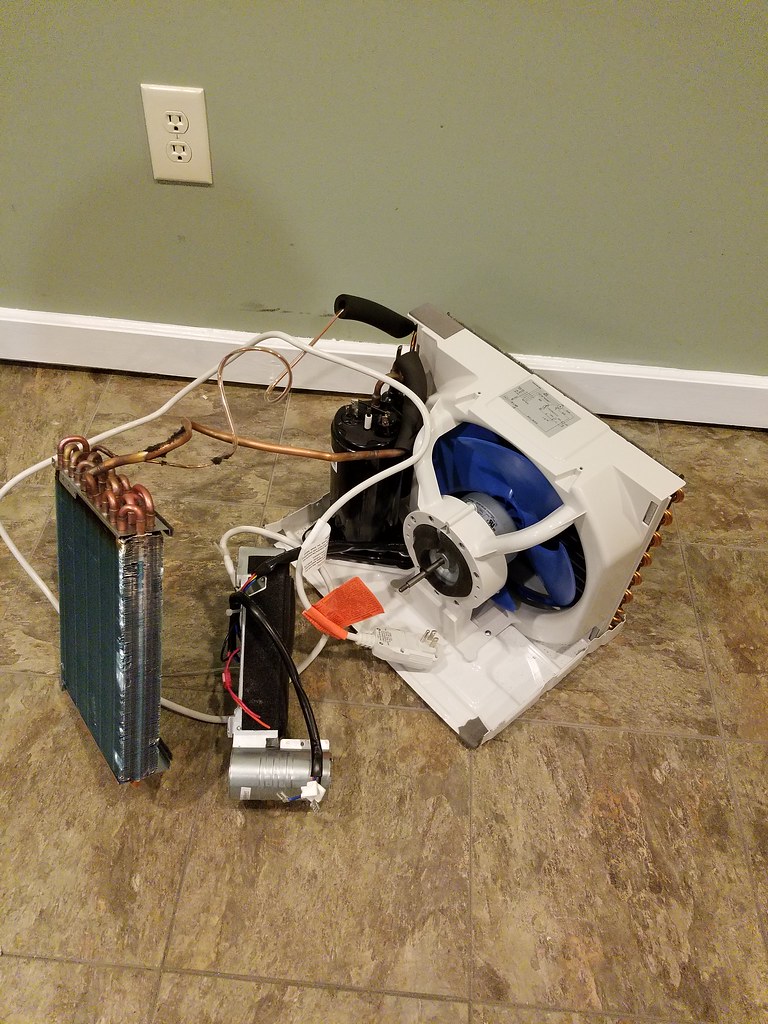
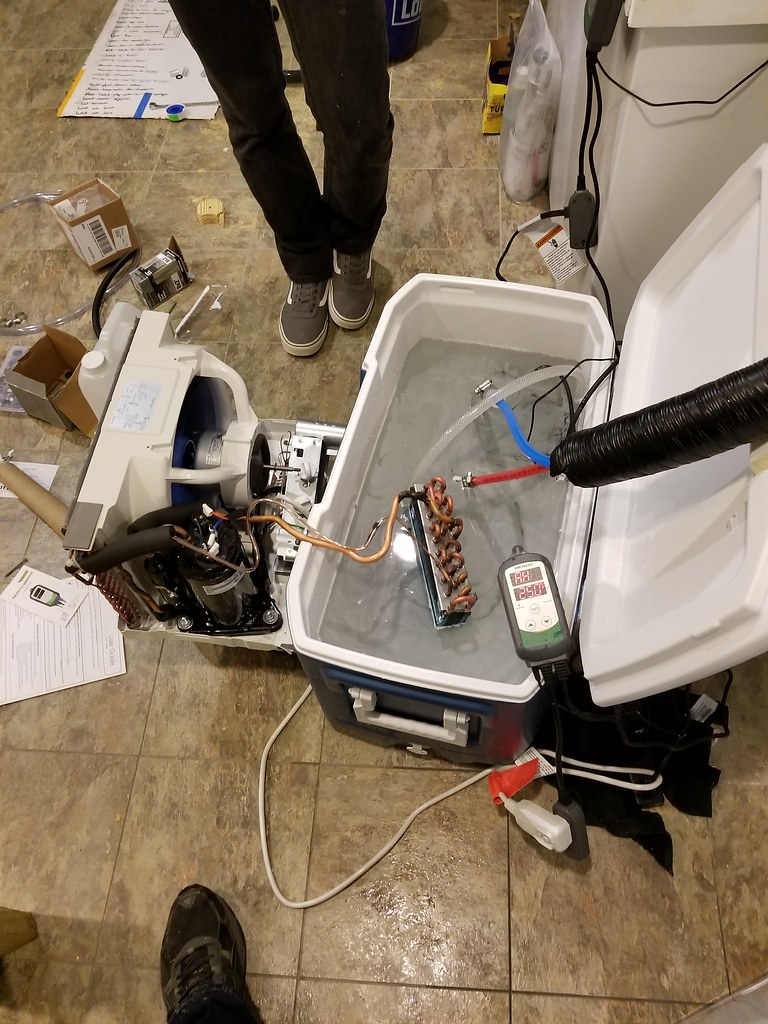
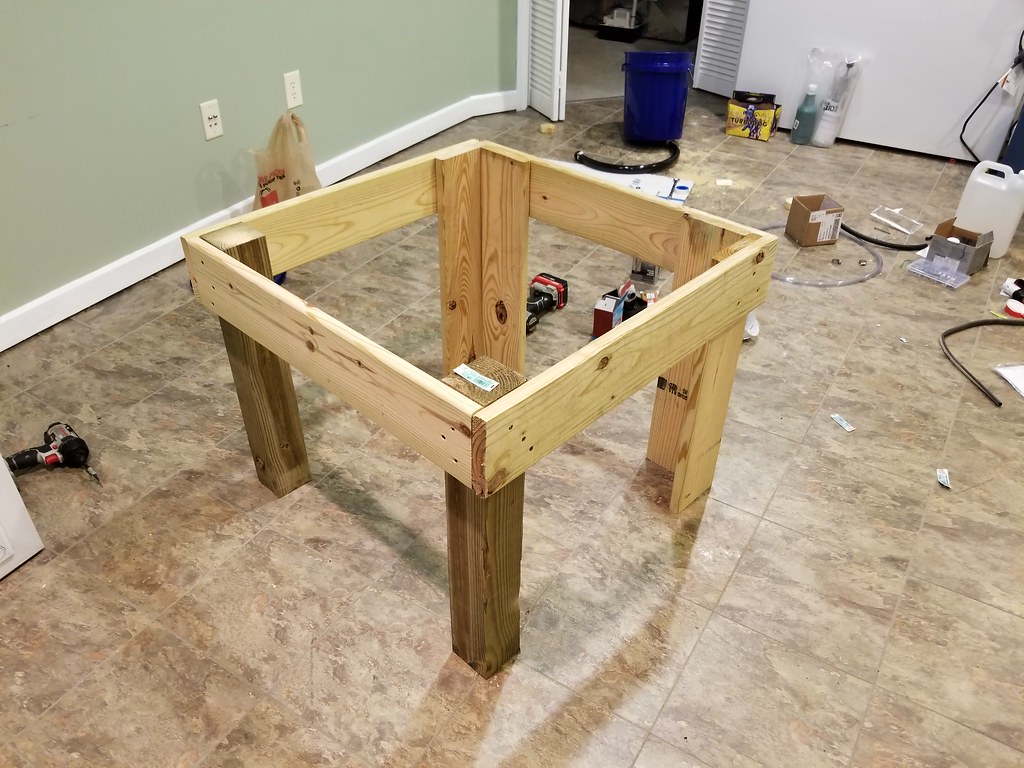
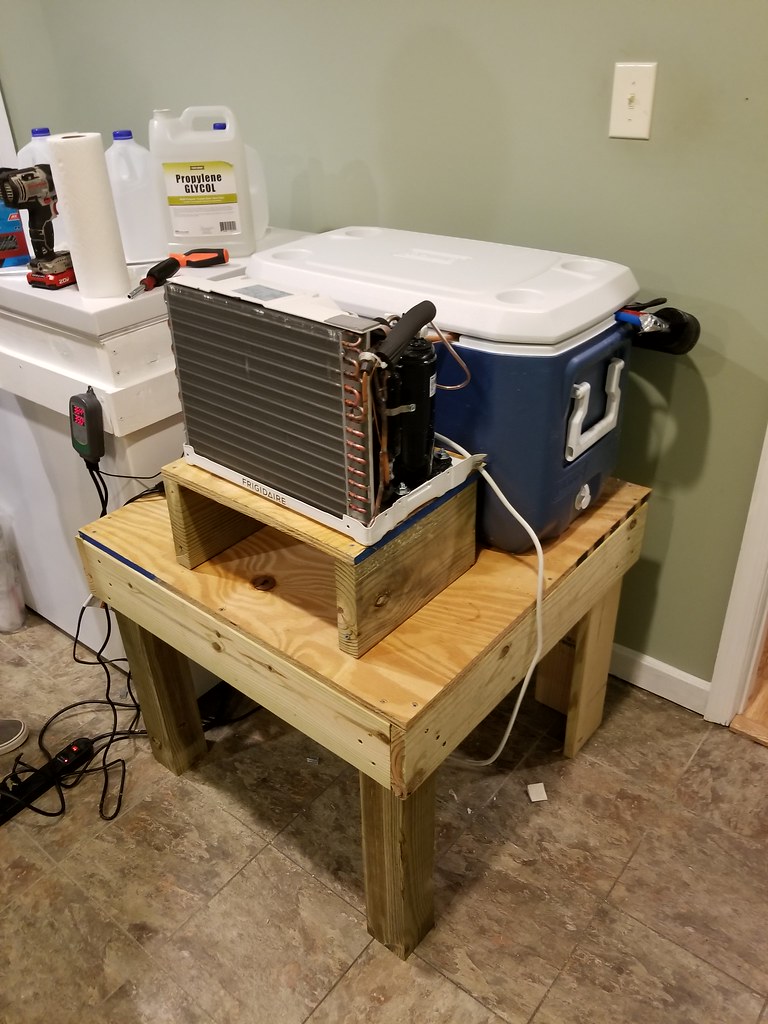
Originally we just wanted to replace the counter tops and that was going to be it, but the mini fridge area under the bar was small, so either cut up cabinets or stick a large fridge in the room off of this rec room. Quickly after having a pow wow with my brother, he dropped the idea of a kegerator system. Now, I already have a garage fridge that was converter into a double kegerator, so I knew the basics of what I was getting into. But, it quickly grew into a remote keezer system with a large trunk line and glycol, etc etc. Lets get to some pics!

39532362134_95e80ac0eb_b.jpg

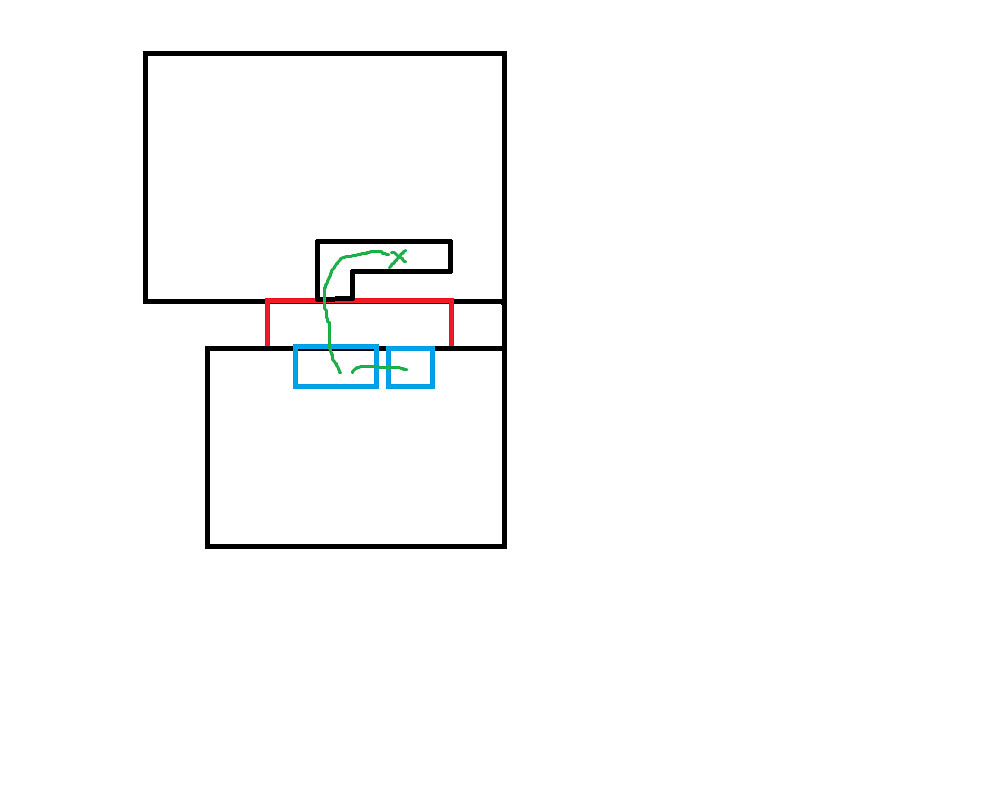
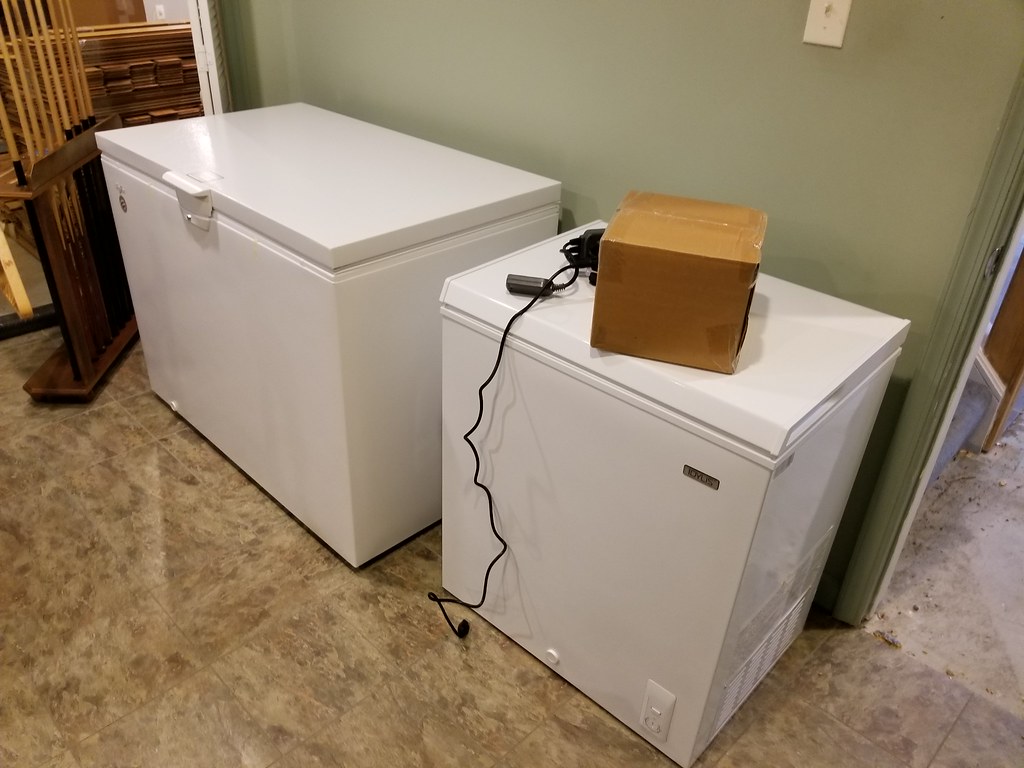
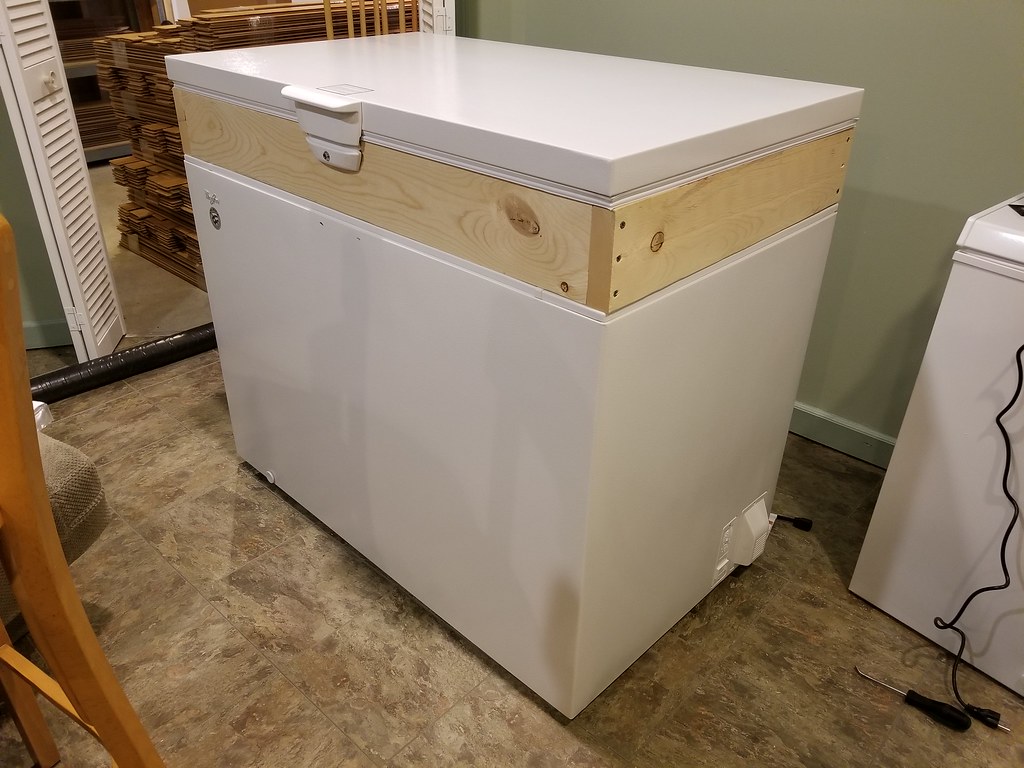
Here is a quick paint sketch I made of the area. The upper room is the rec room. The lower room is the extra storage room off of that. The black ‘L’ shape is the bar itself. In red is the staircase coming down into the basement and is also an unfinished room between the two that has the a/c system and is where the trunk line runs through. In blue is the keezer with the kegs and also the glycol freezer. And finally in green are the trunk lines. This should give you guys an idea of the layout.

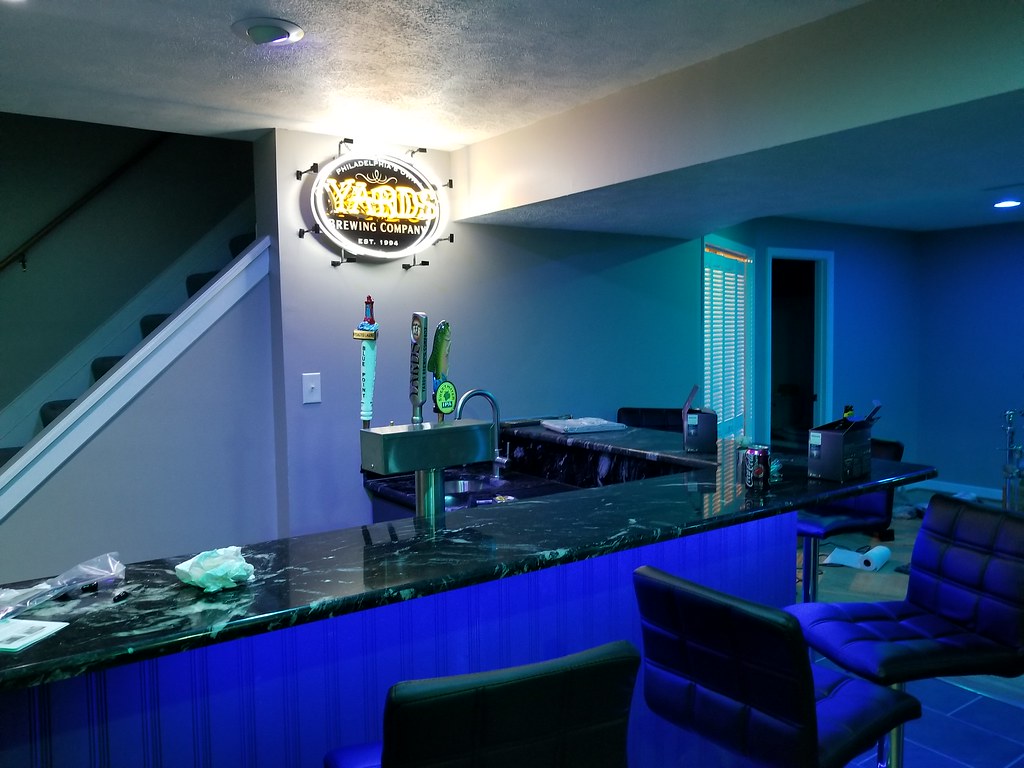
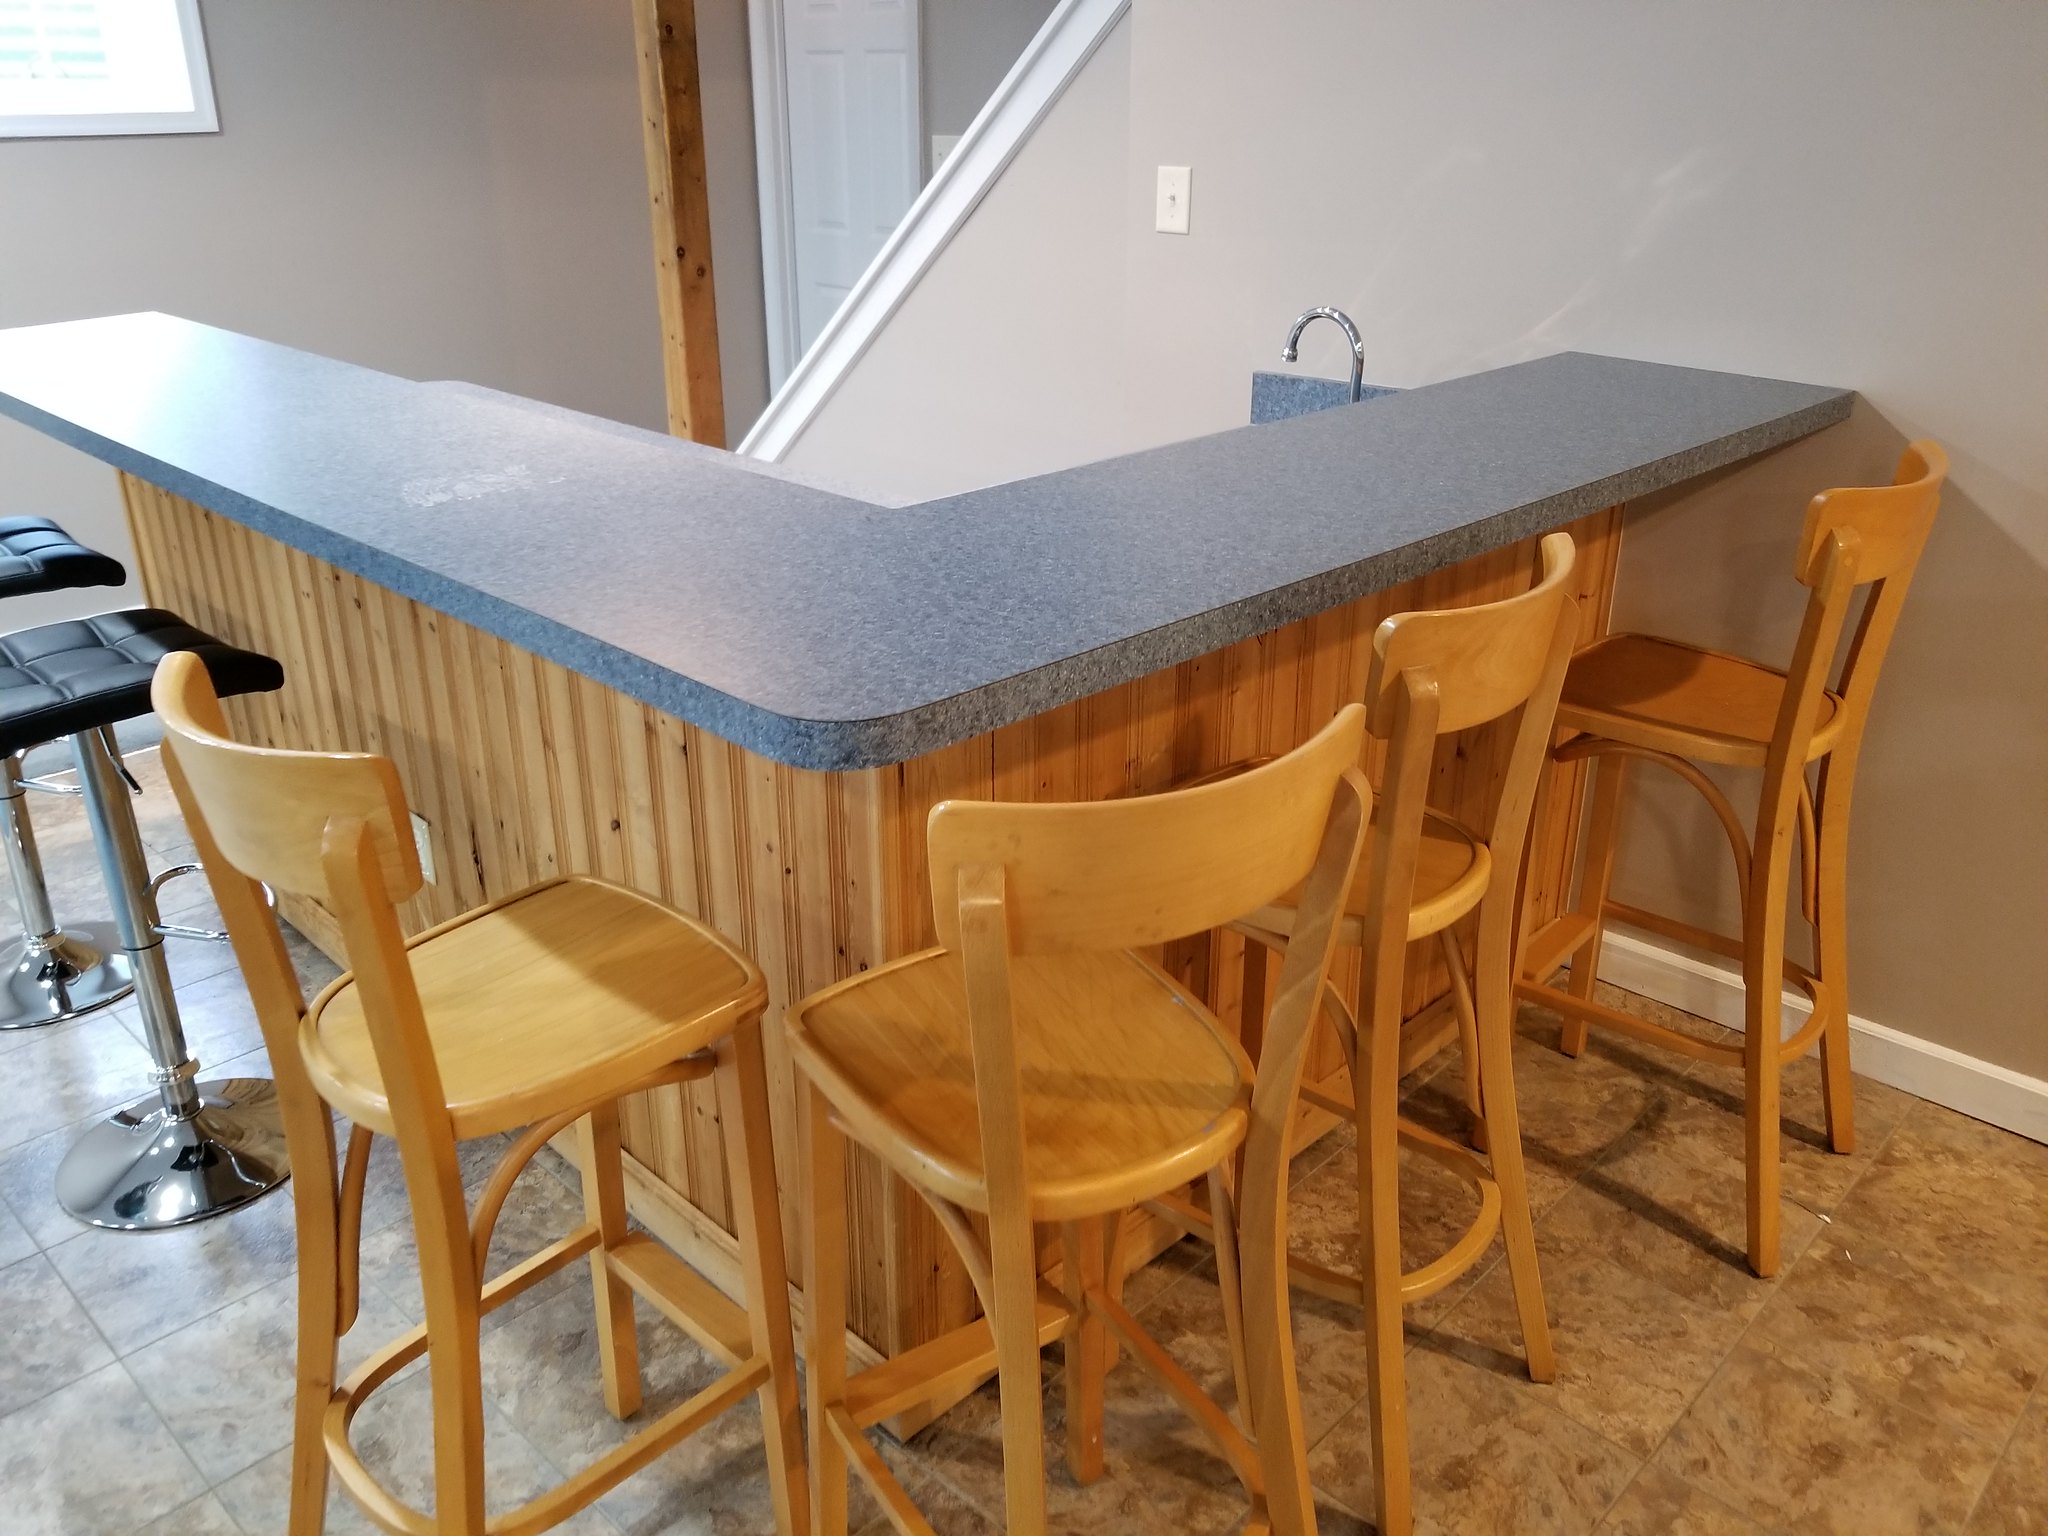
Pictures of the bar area before demo….

40243223061_afe049808e_k.jpg

25371962517_7d4e008bd4_b.jpg

40243218911_58ab1737e1_k.jpg


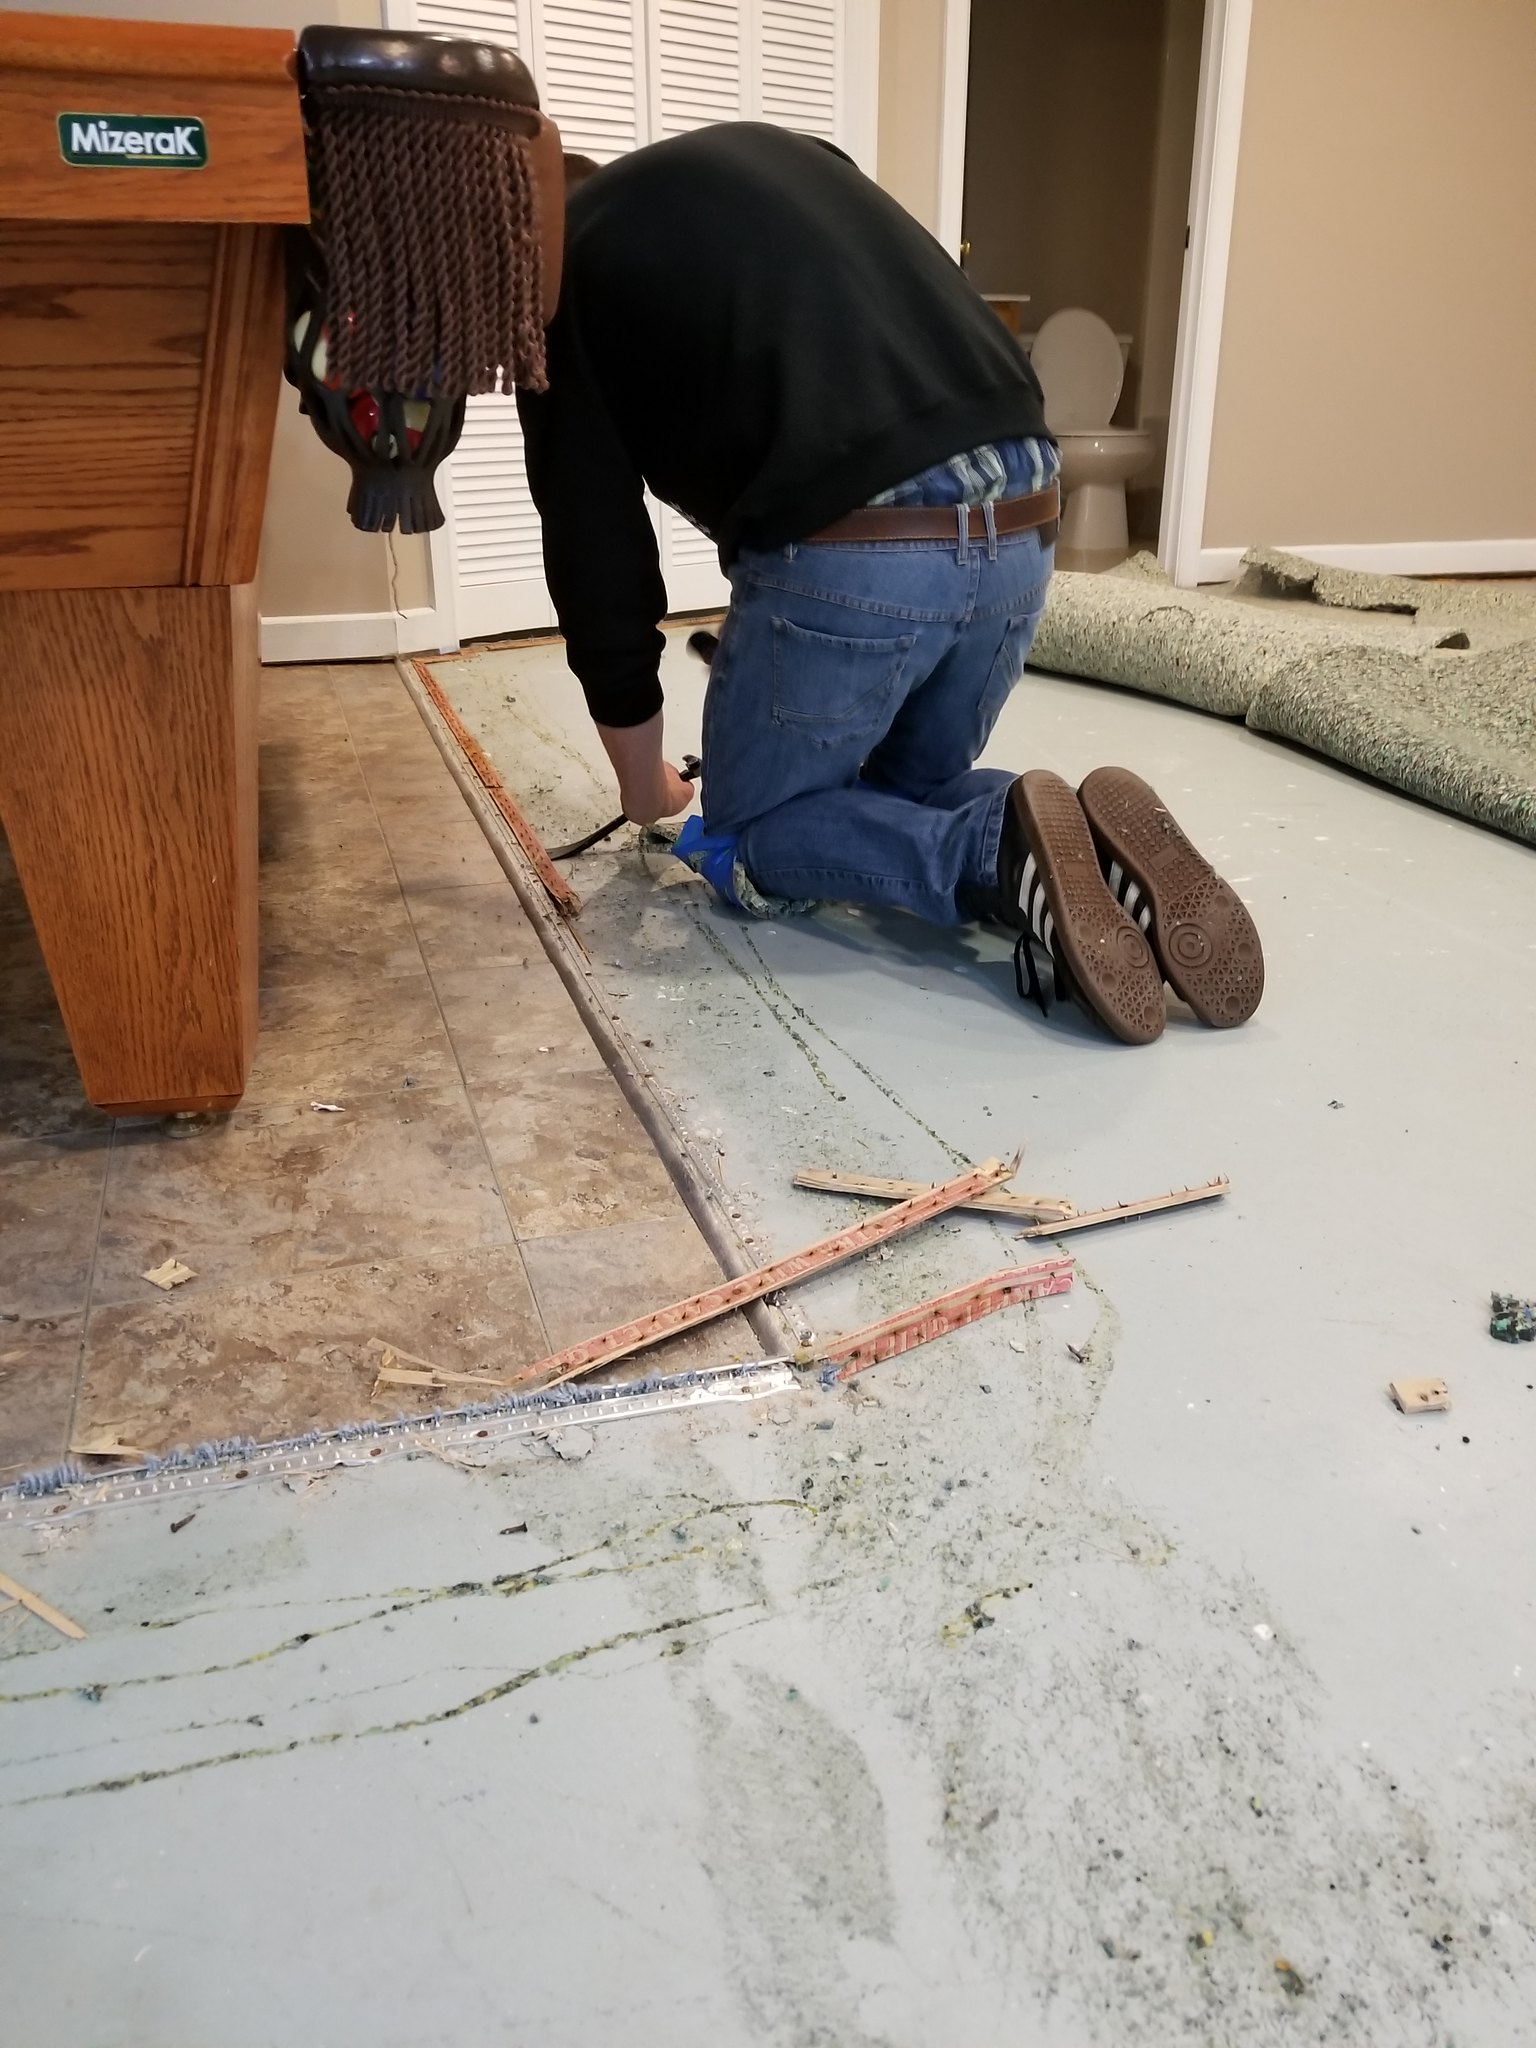
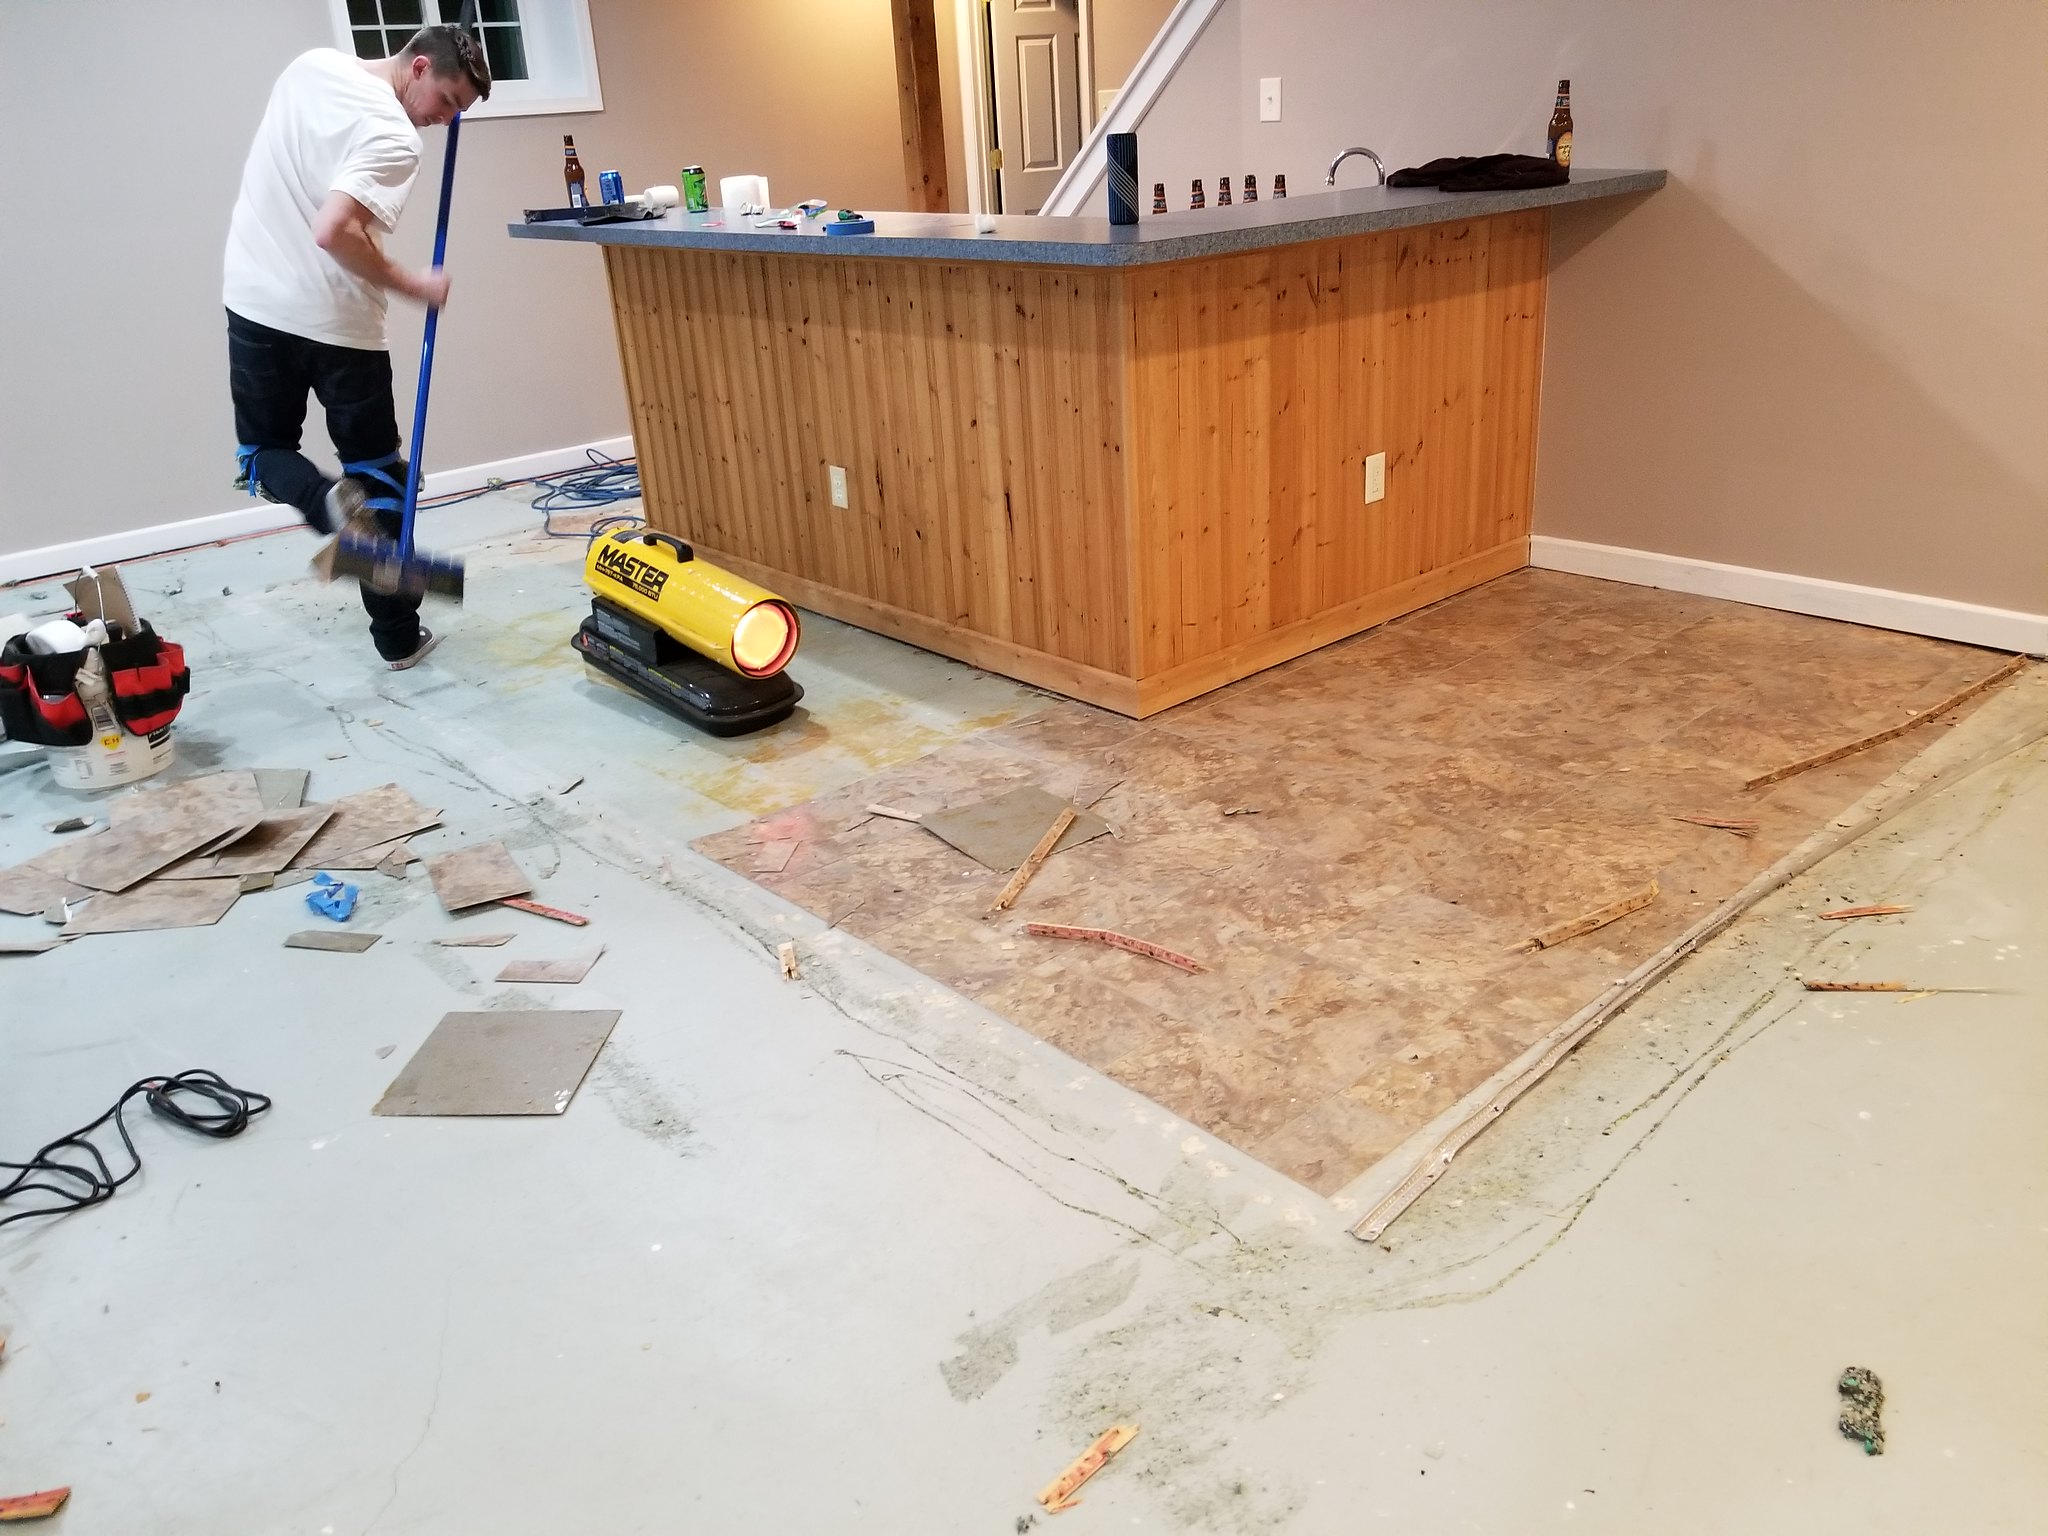
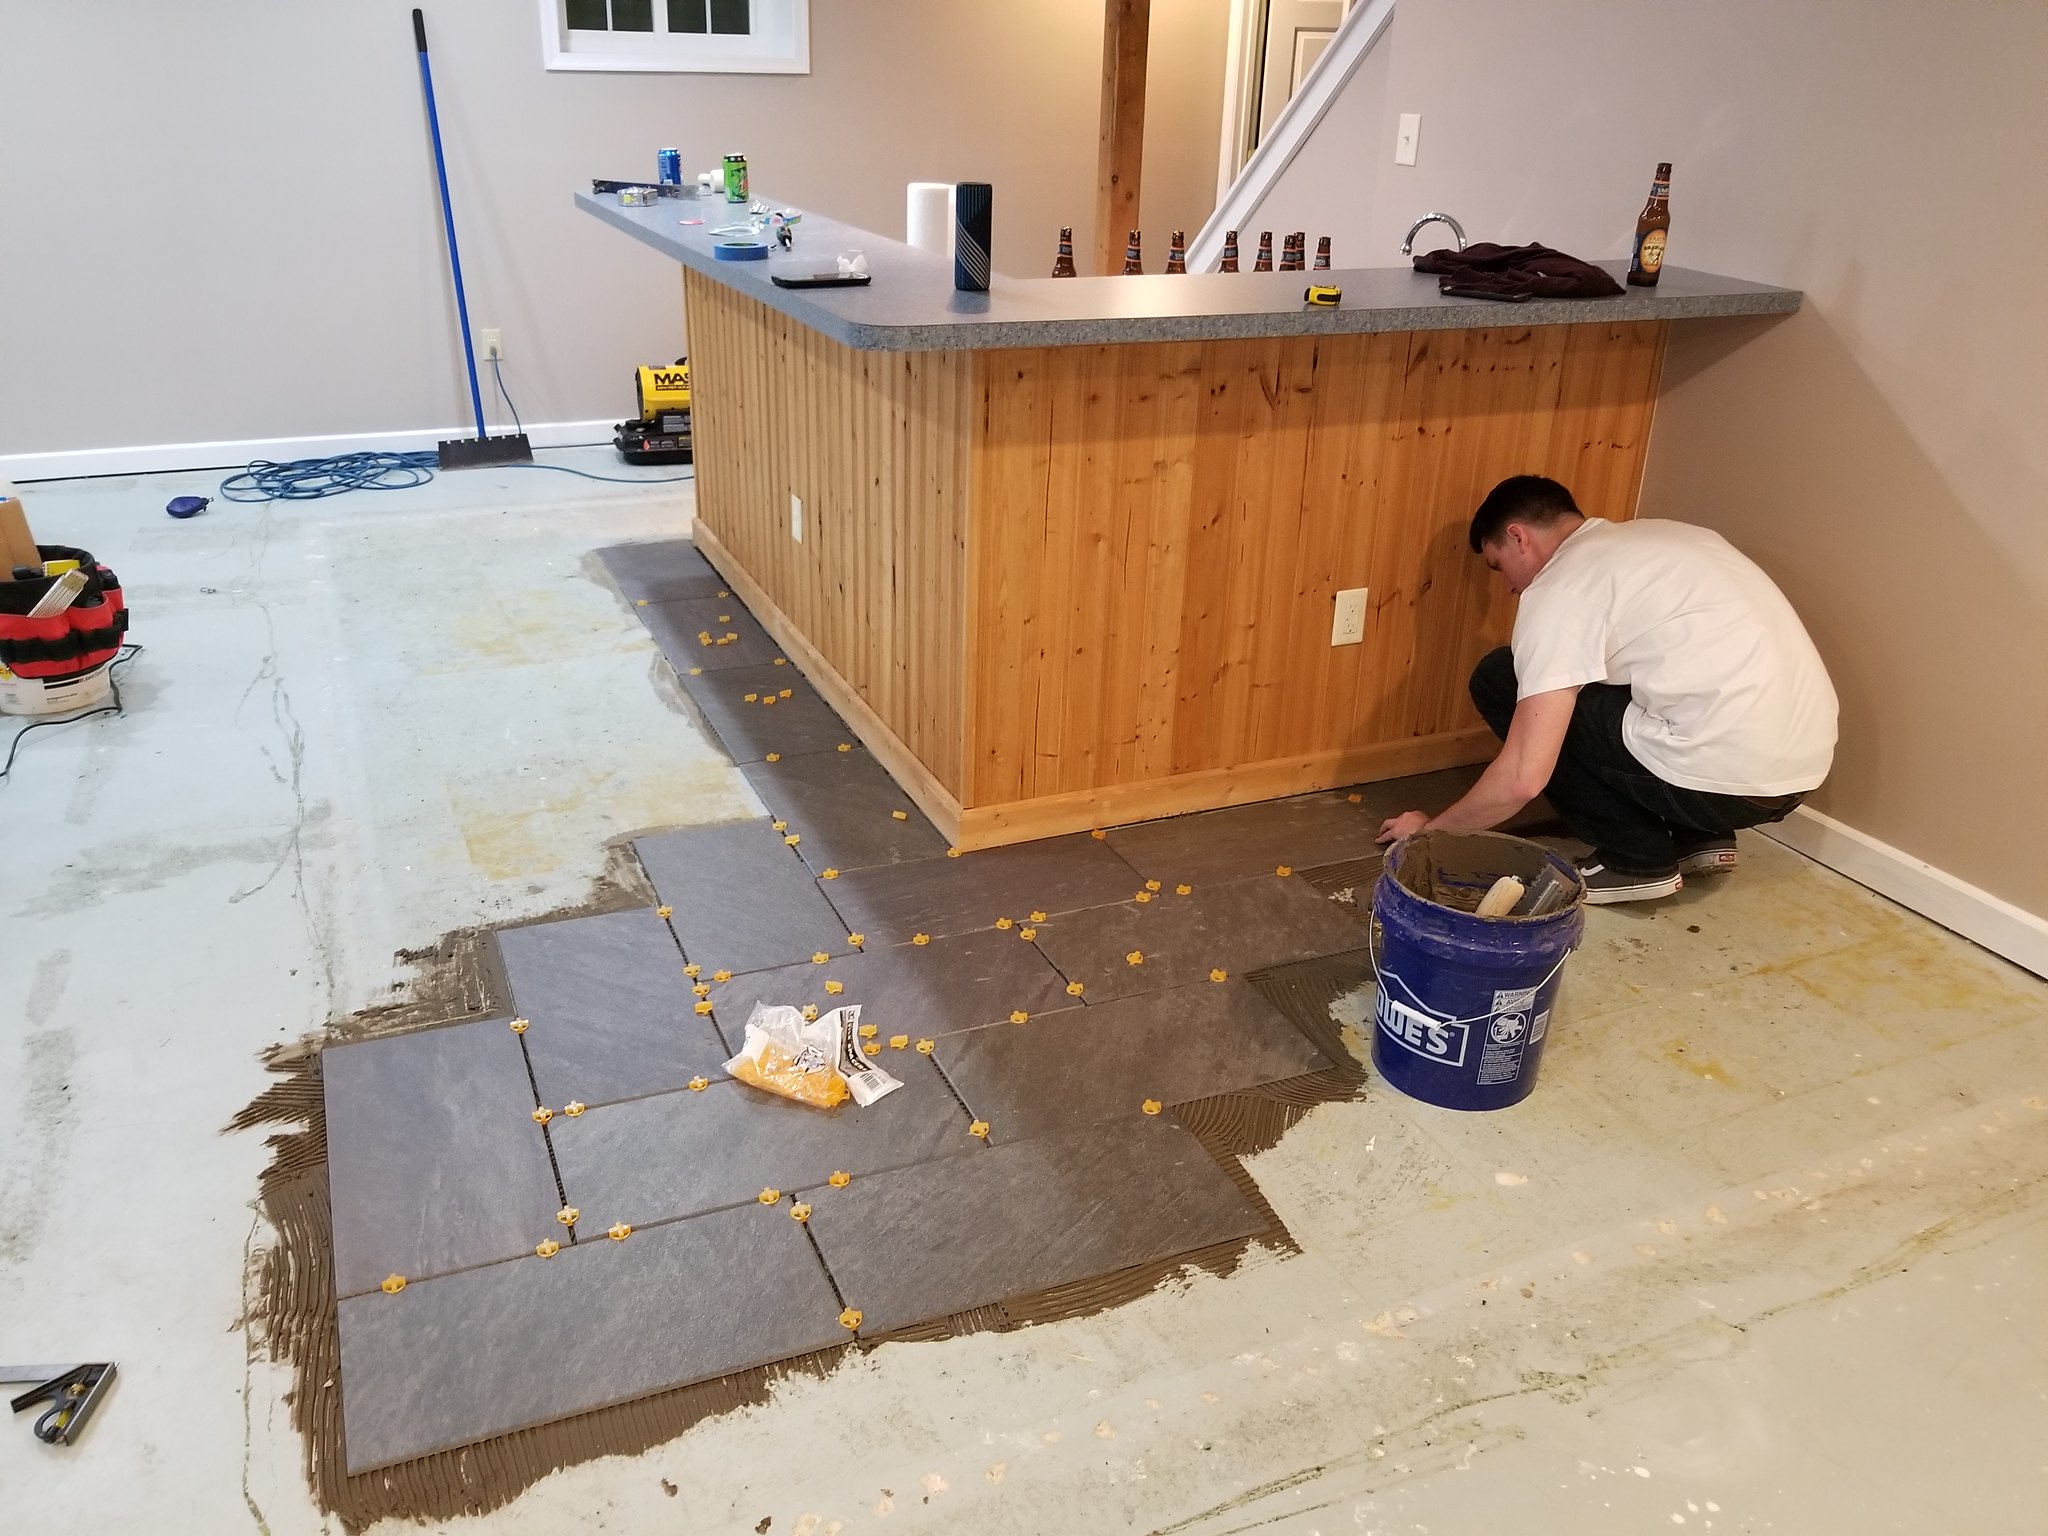
So we started with getting the carpet up in the room as well as all of stick down tile. The stick down tile was an absolute pita to get up, so I used my torpedo heater to heat the tiles up, my buddy used a floor scraper to start getting it to come up and I will pull it the rest of the way.

25371960727_6f52c16d48_k.jpg

40243216831_f8e864d292_k.jpg

25371958967_0dd879cdb6_k.jpg


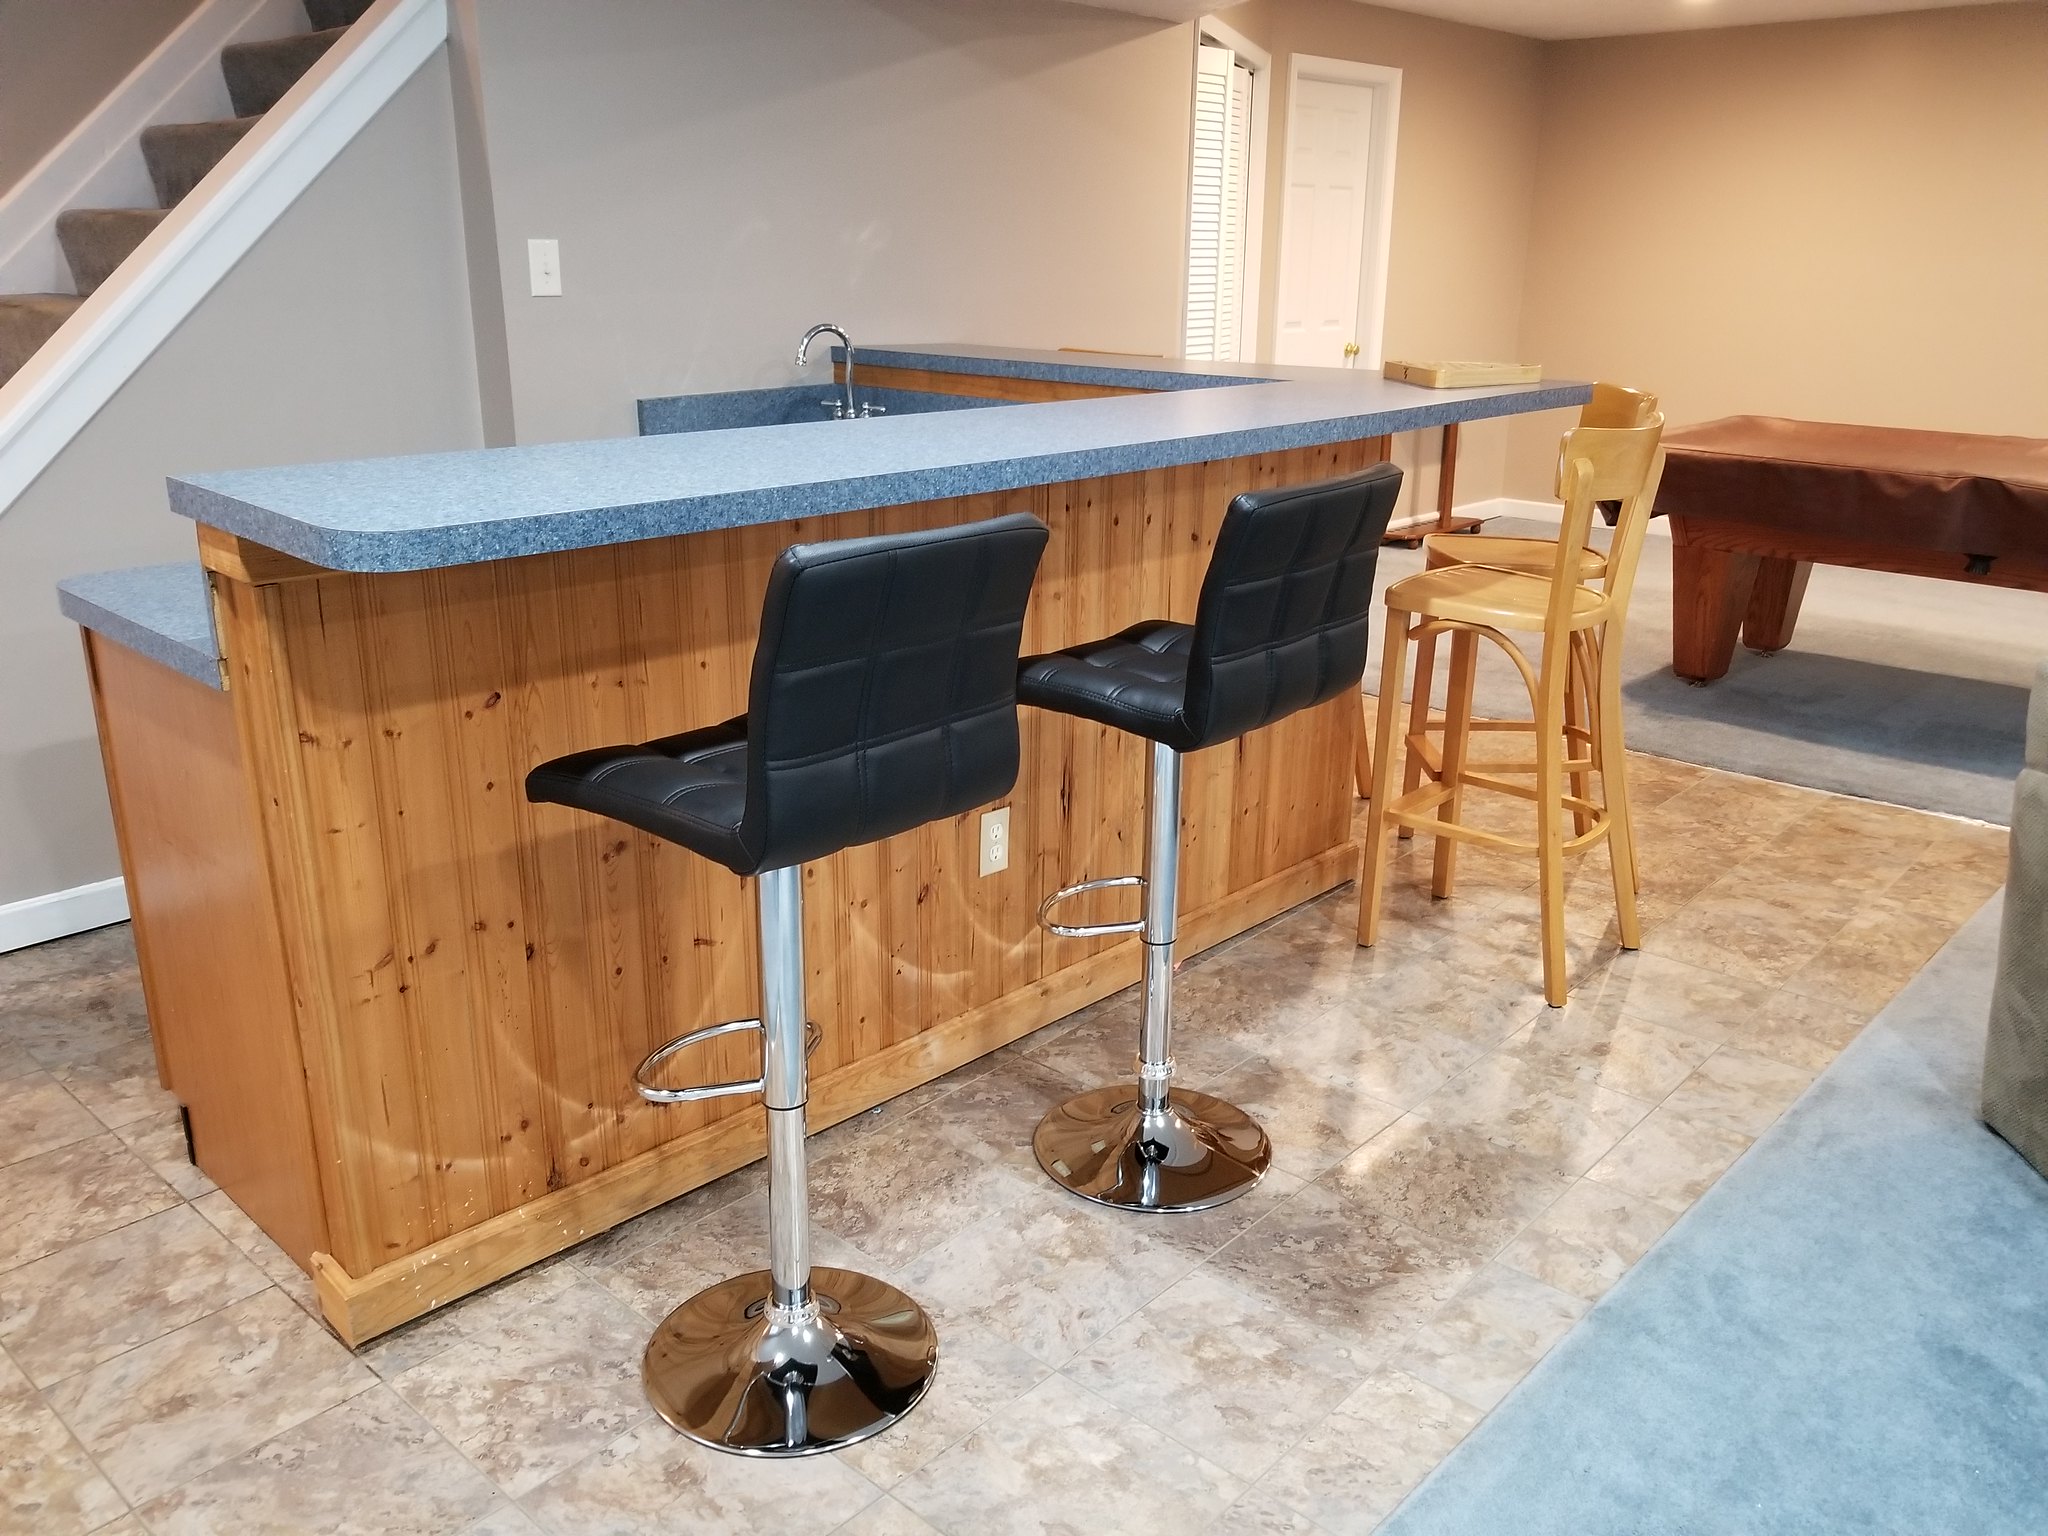
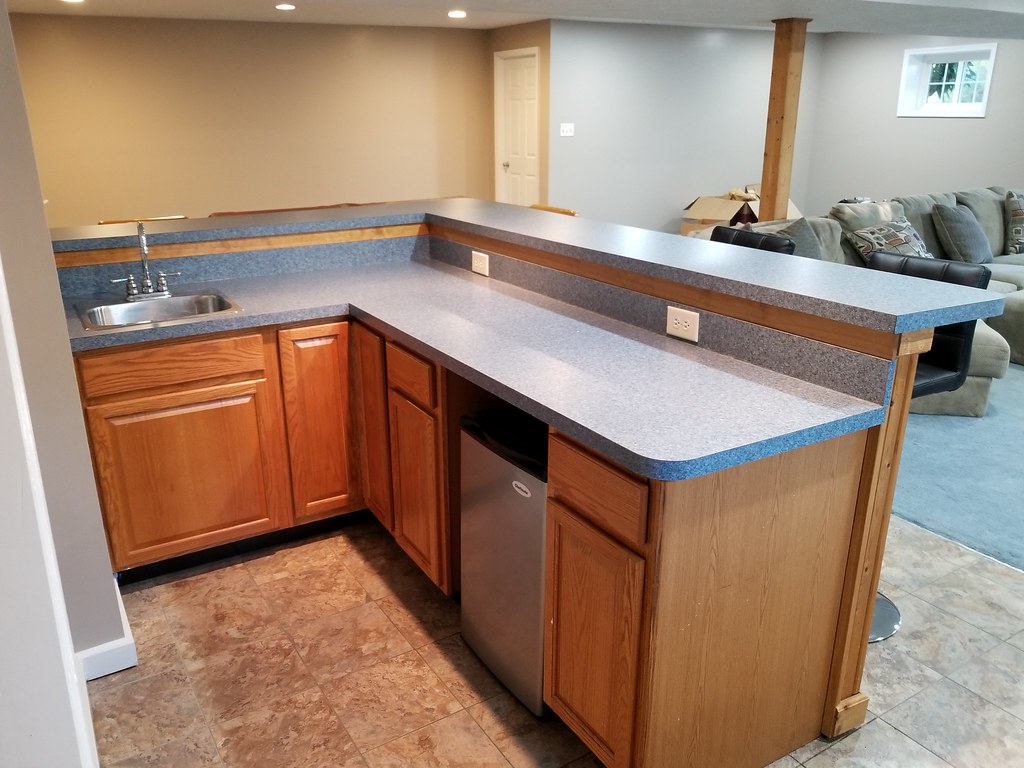
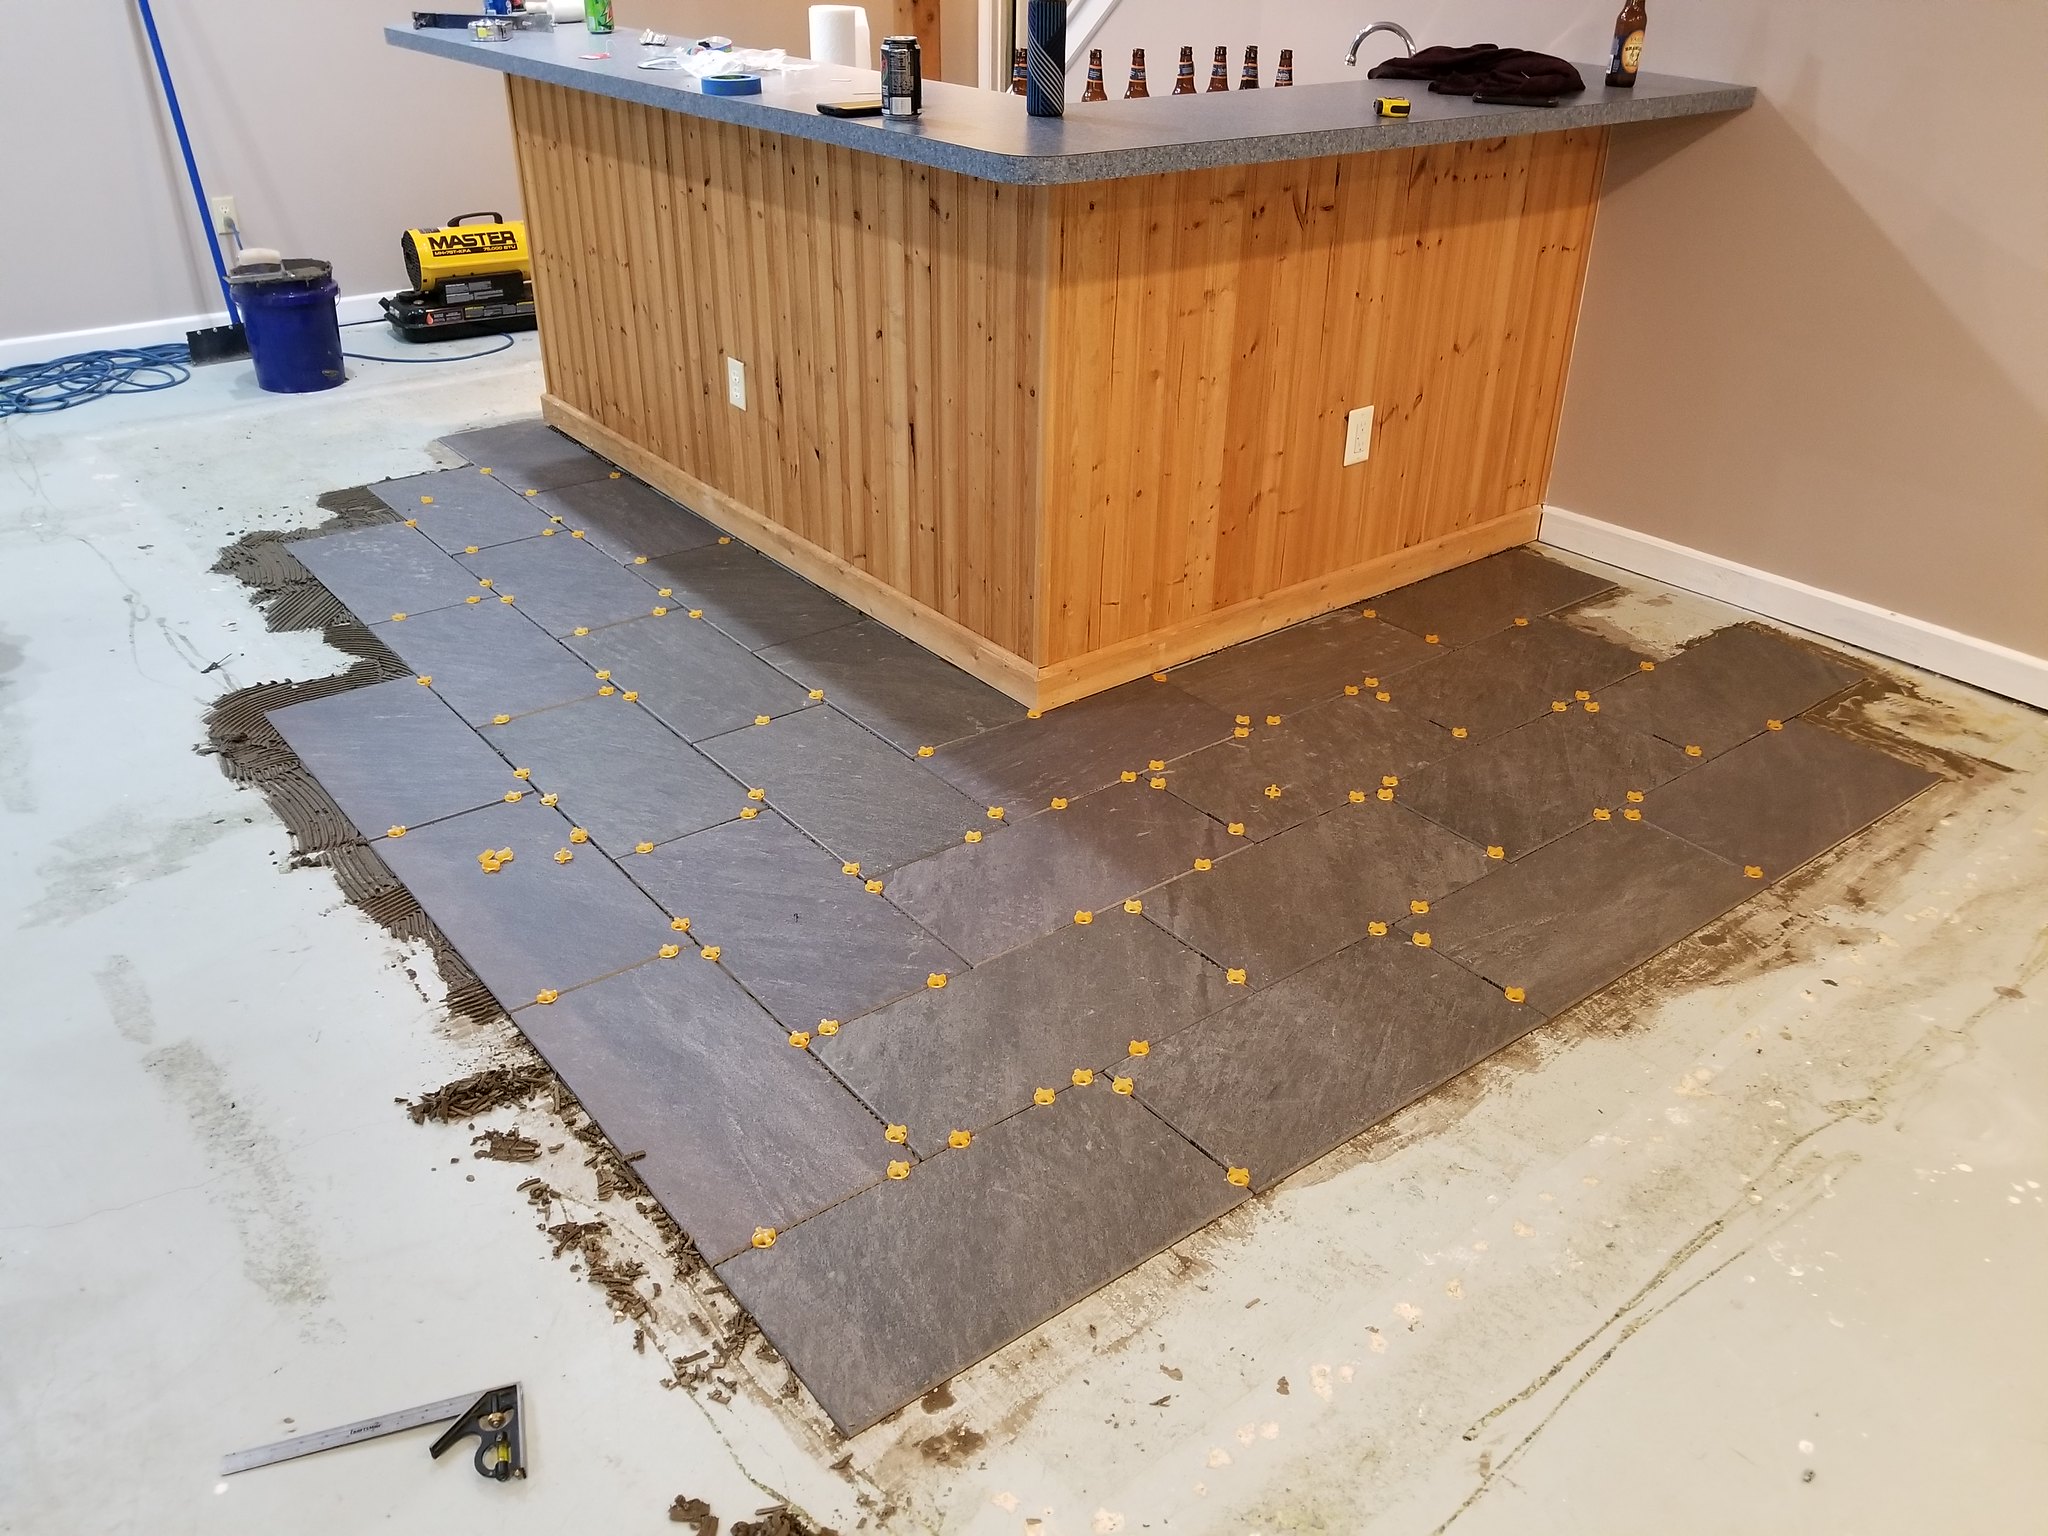
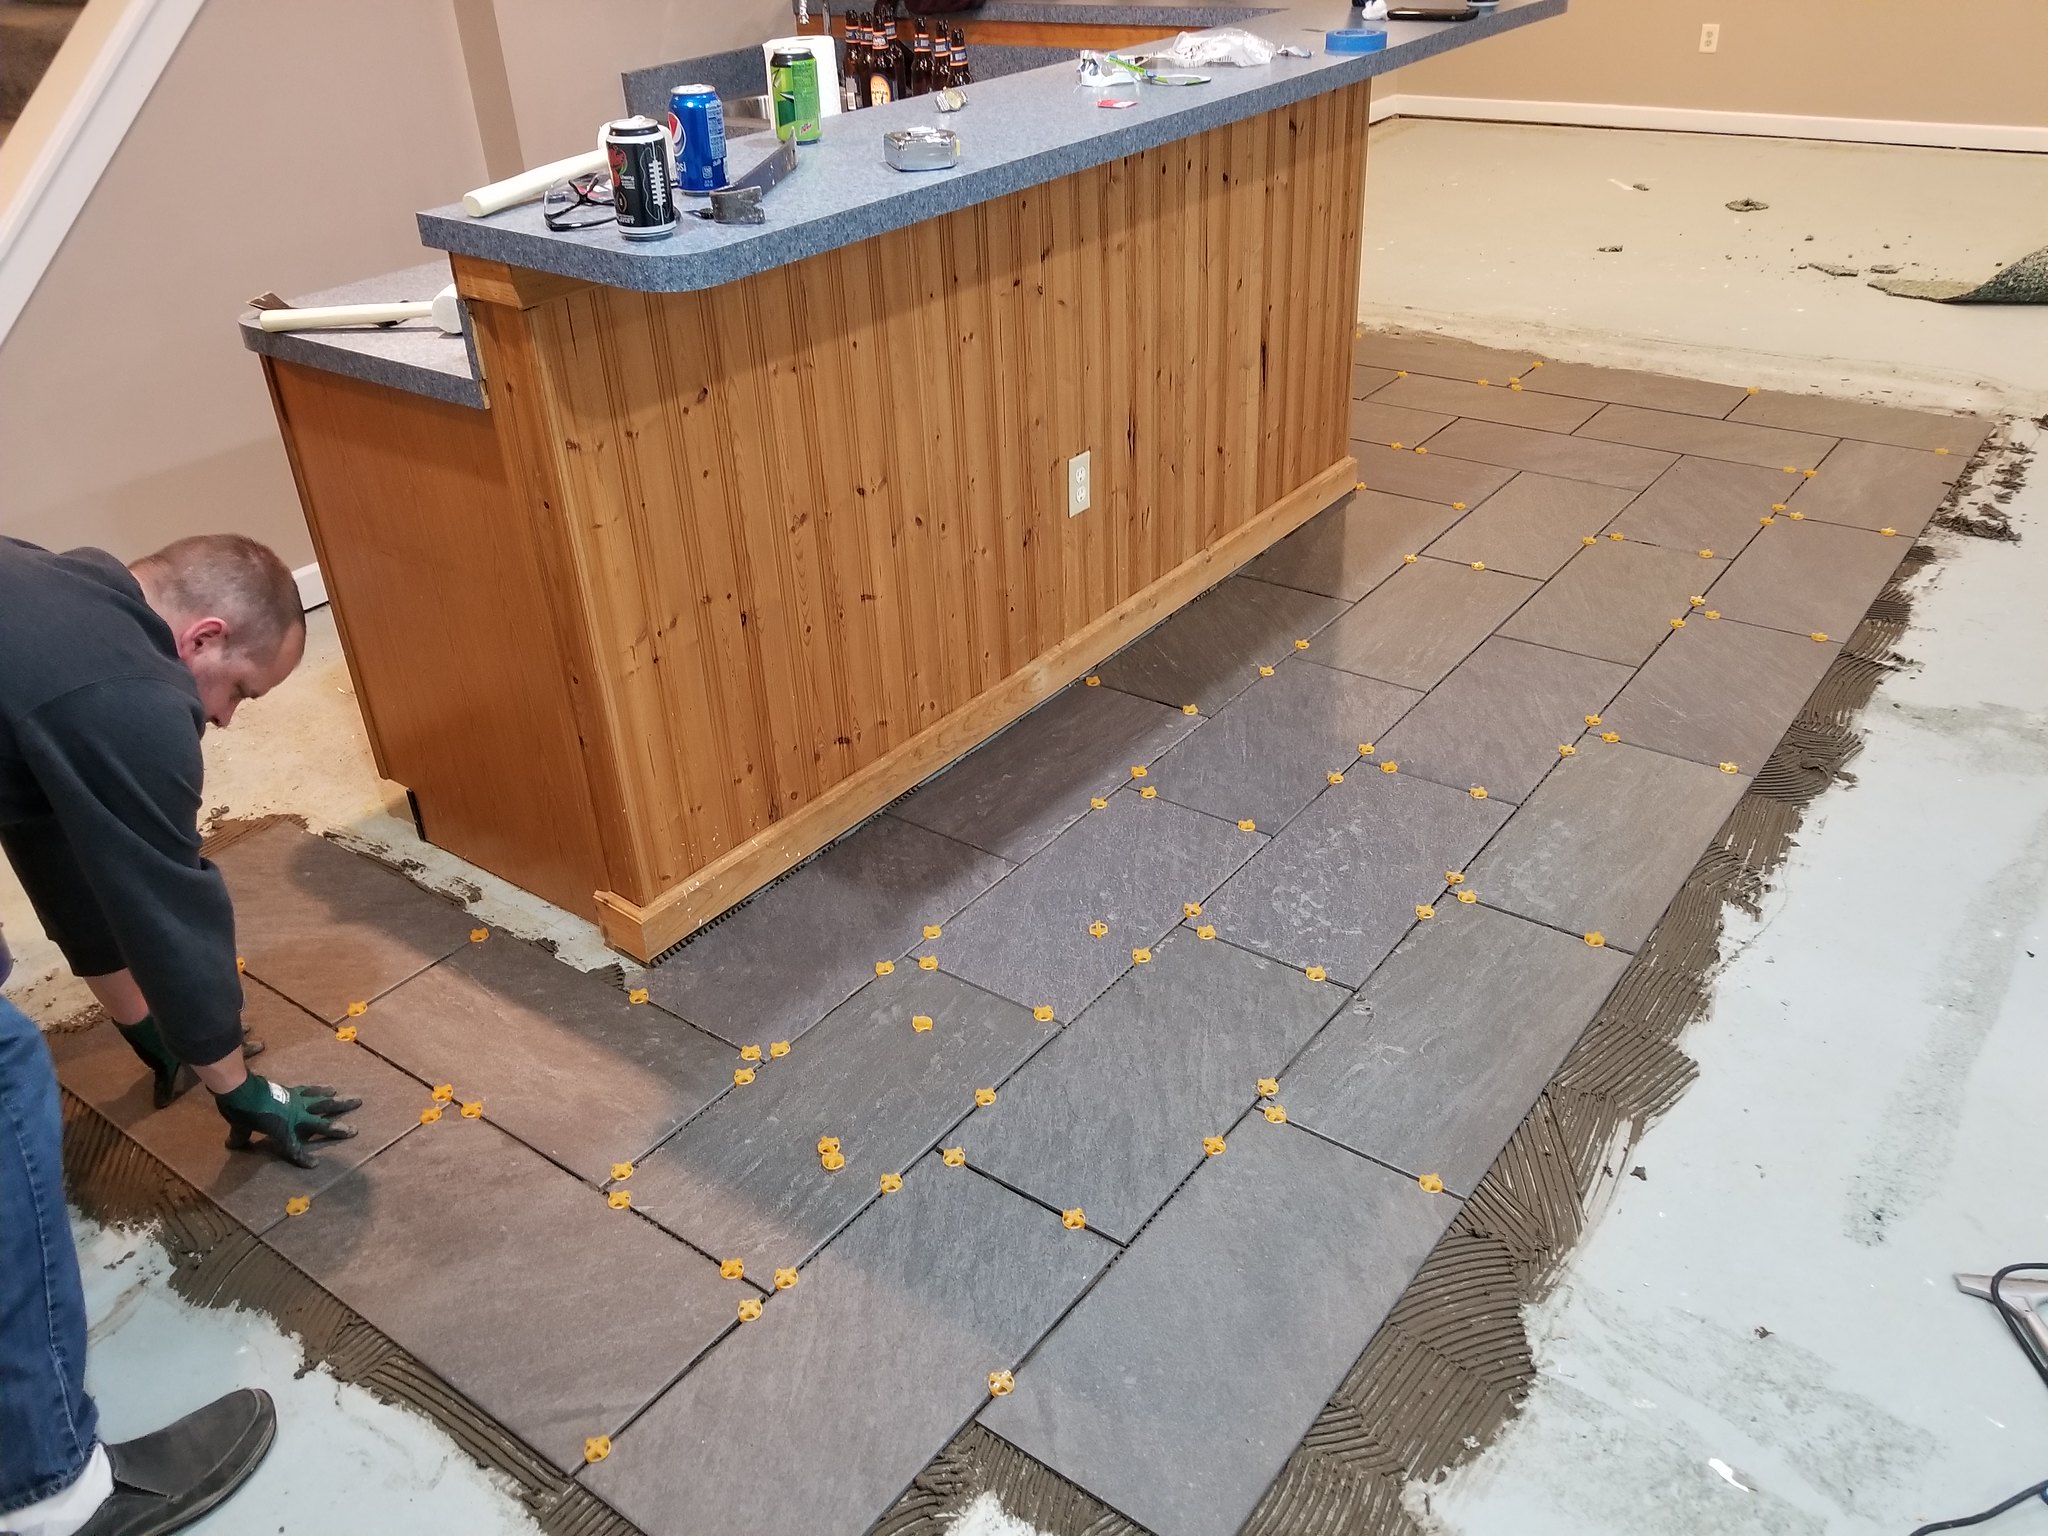
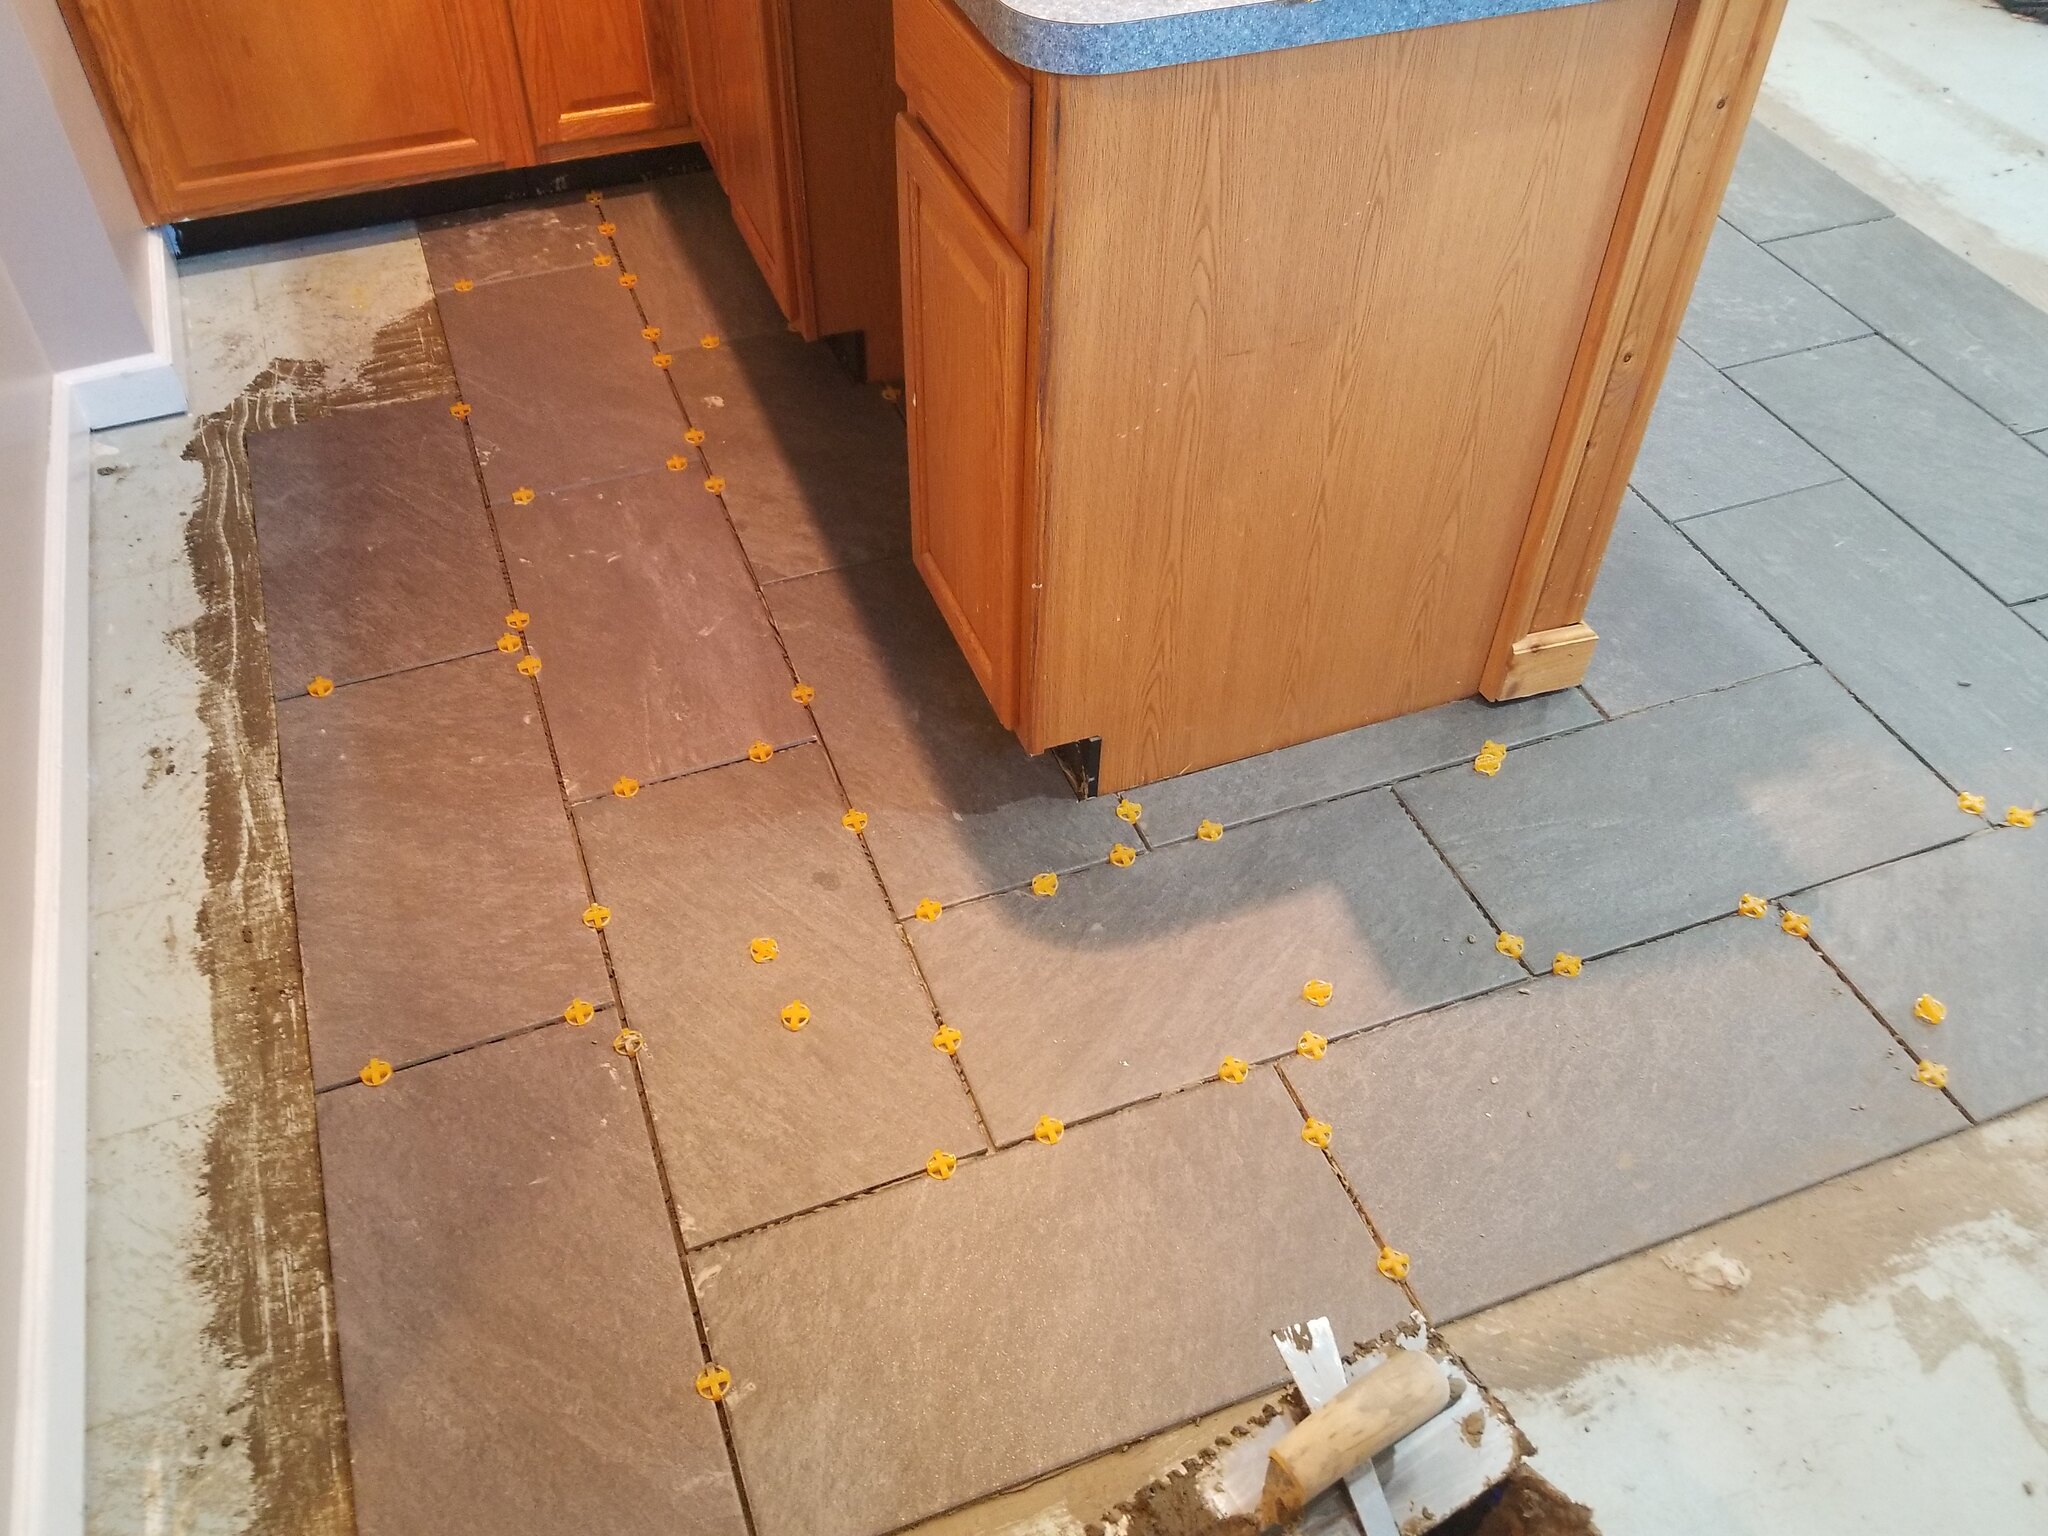
Then we started to lay down the tile. 12x24 tiles in a herringbone-esque laying pattern.
40243215081_c34602a0f1_k.jpg

25371957587_2adb32c0e2_k.jpg

40243213951_a2bbaca86b_k.jpg

25371956847_61dcb10879_k.jpg


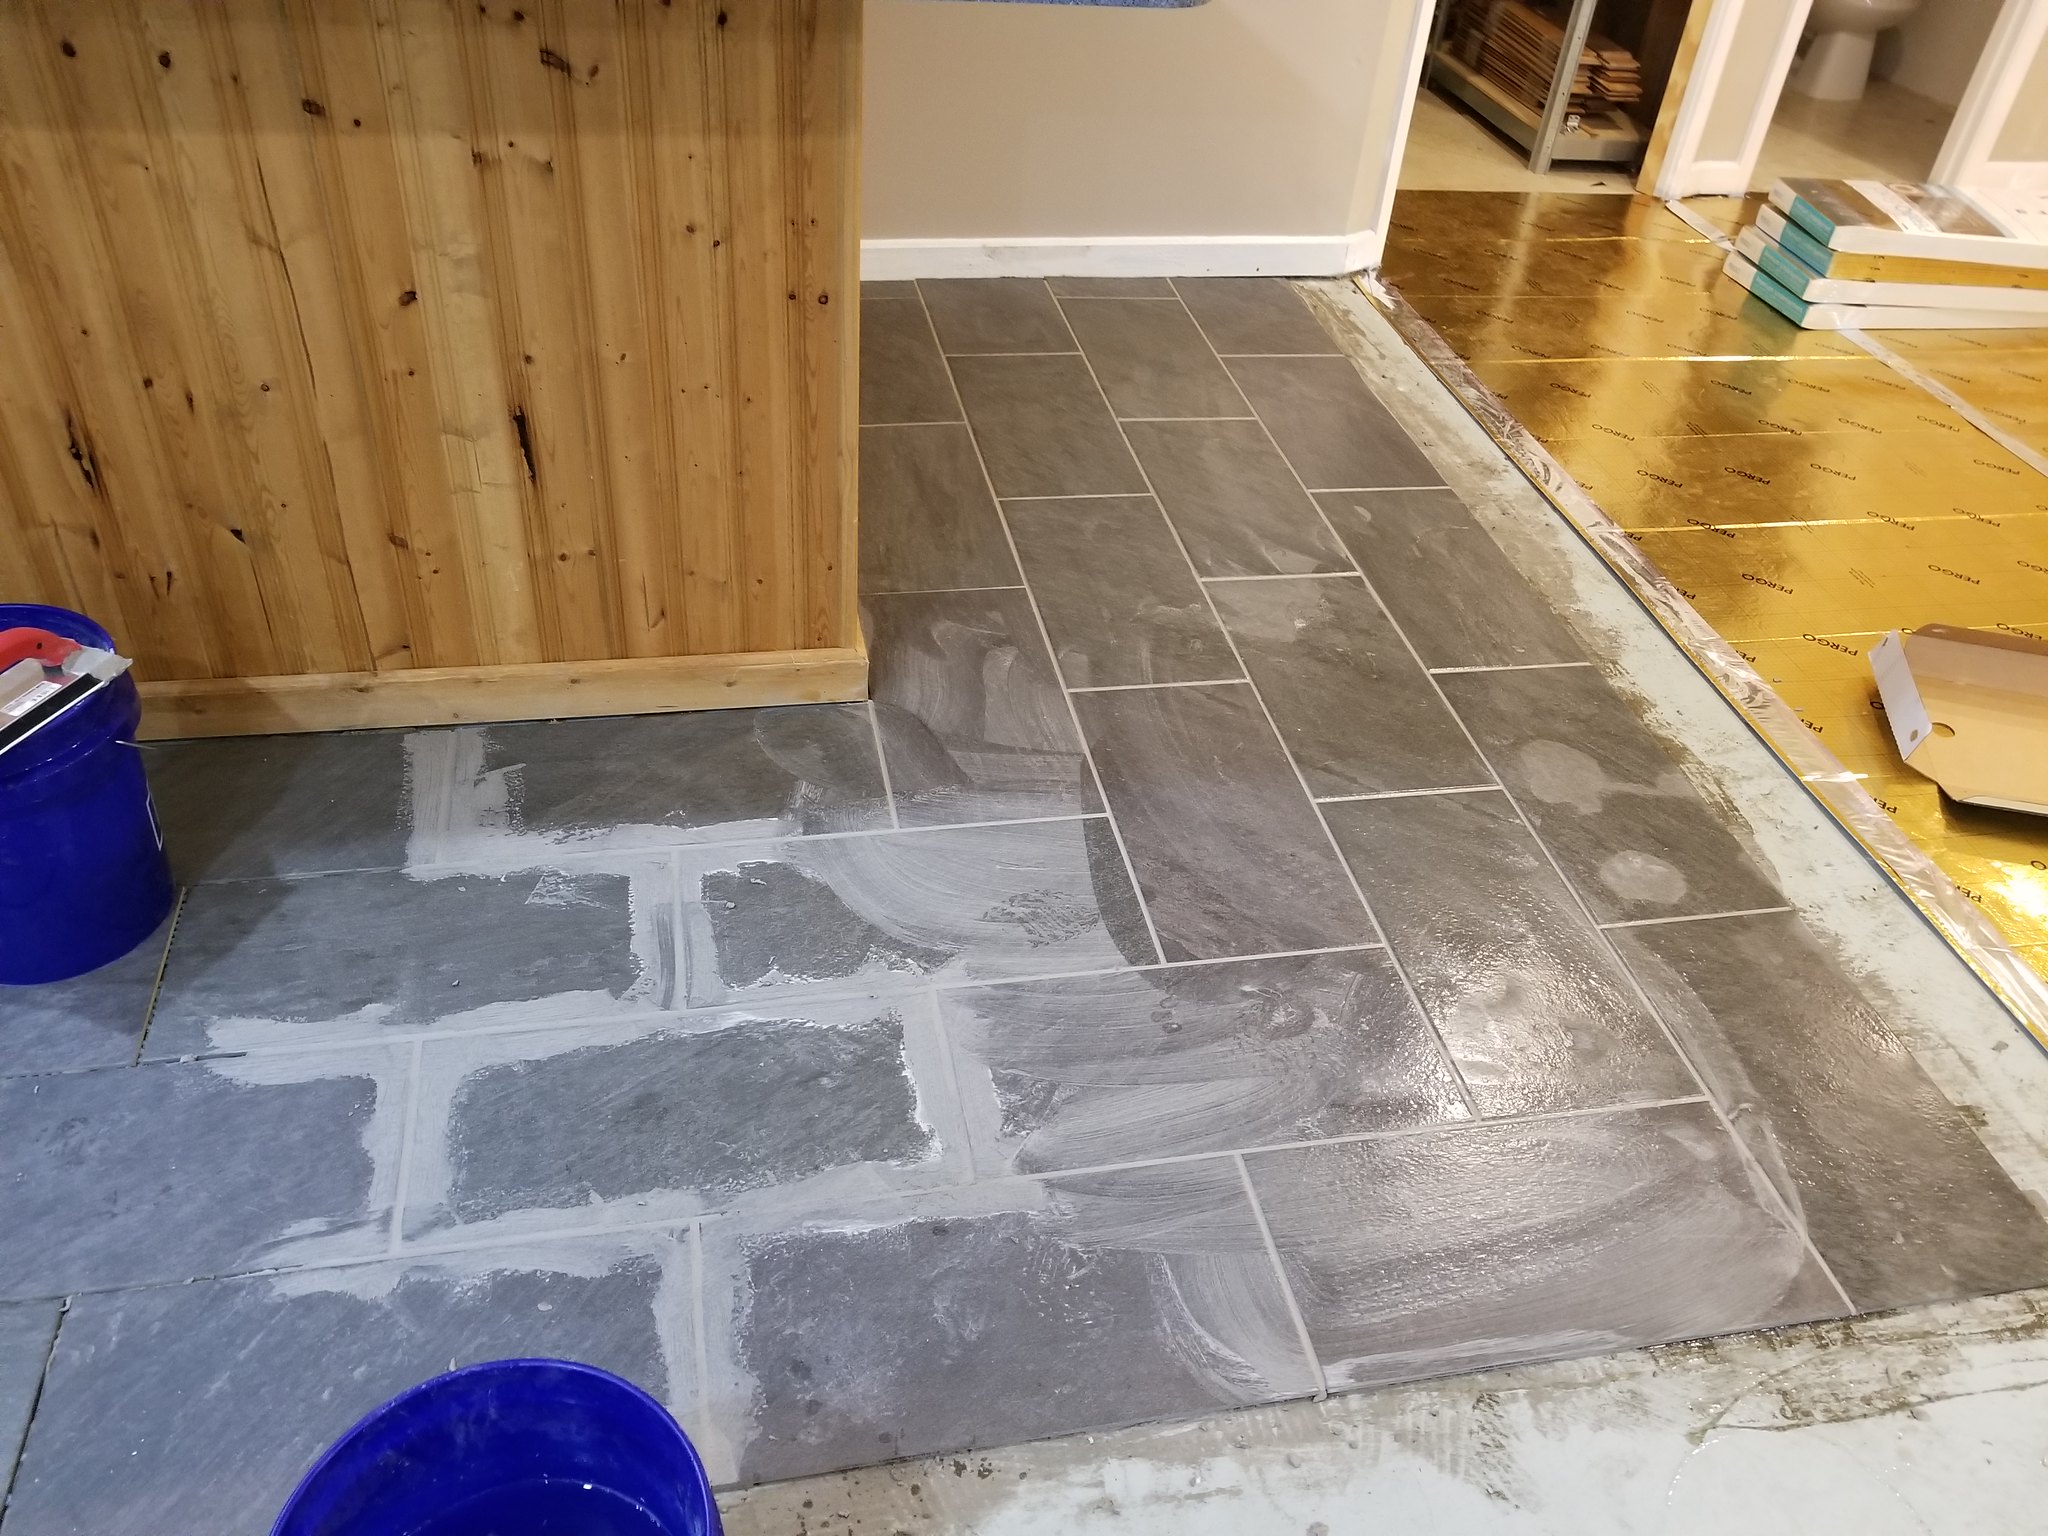
And then time for some light gray grout…..
40243212461_c3a7ab9e66_k.jpg

26370820128_752f82fc0a_k.jpg


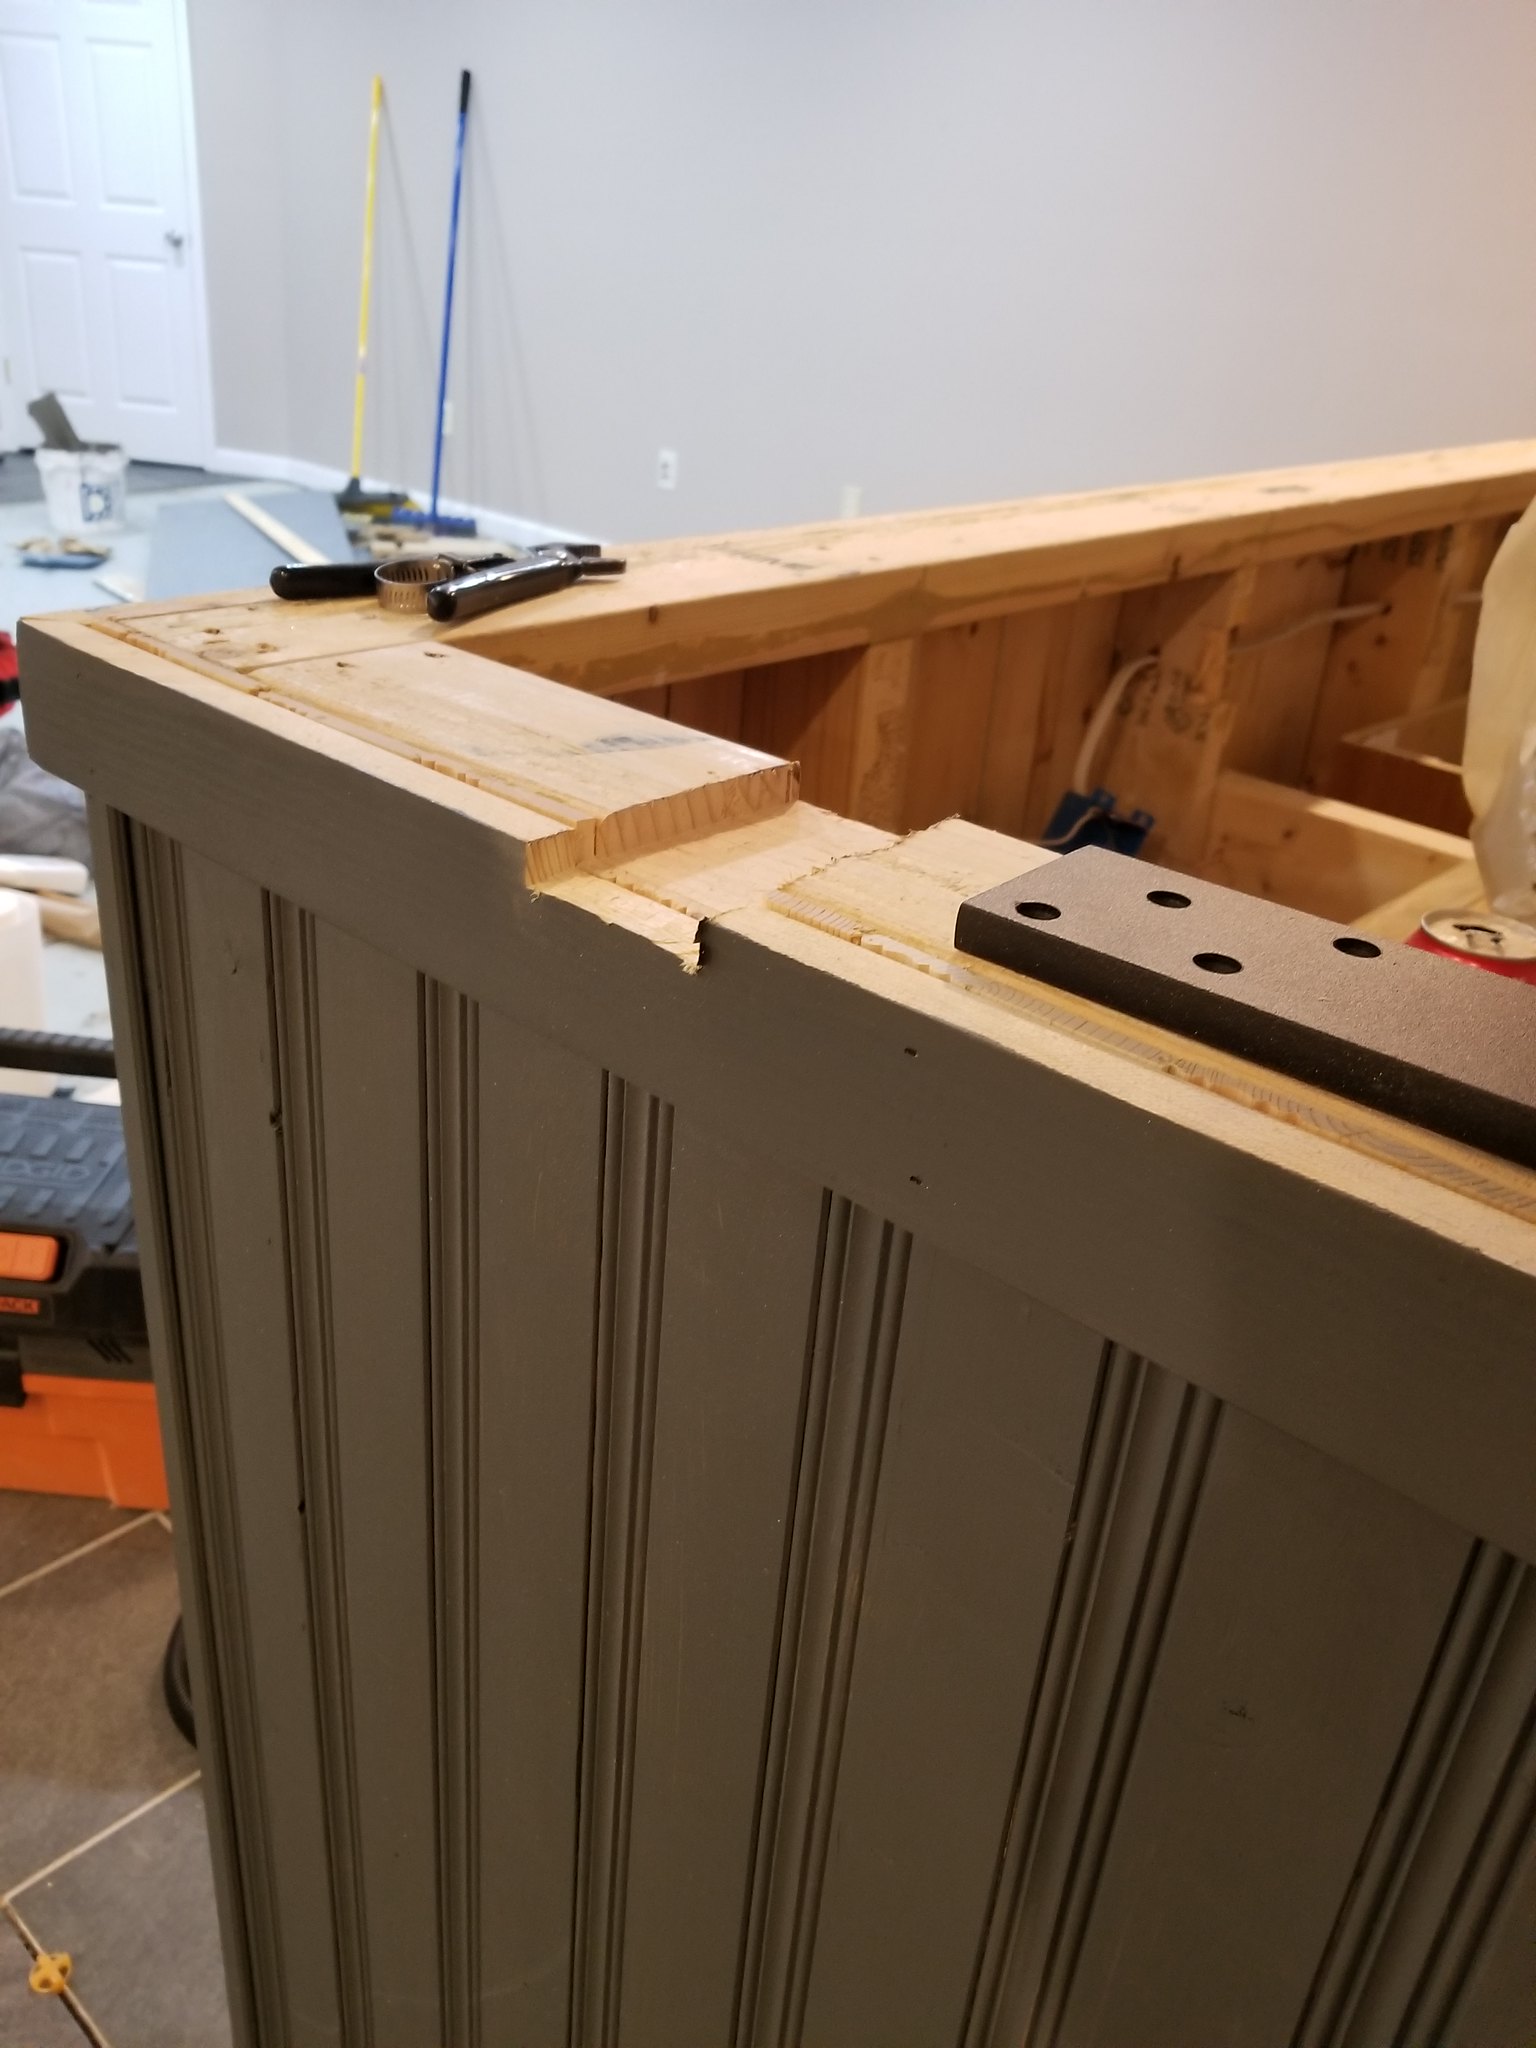
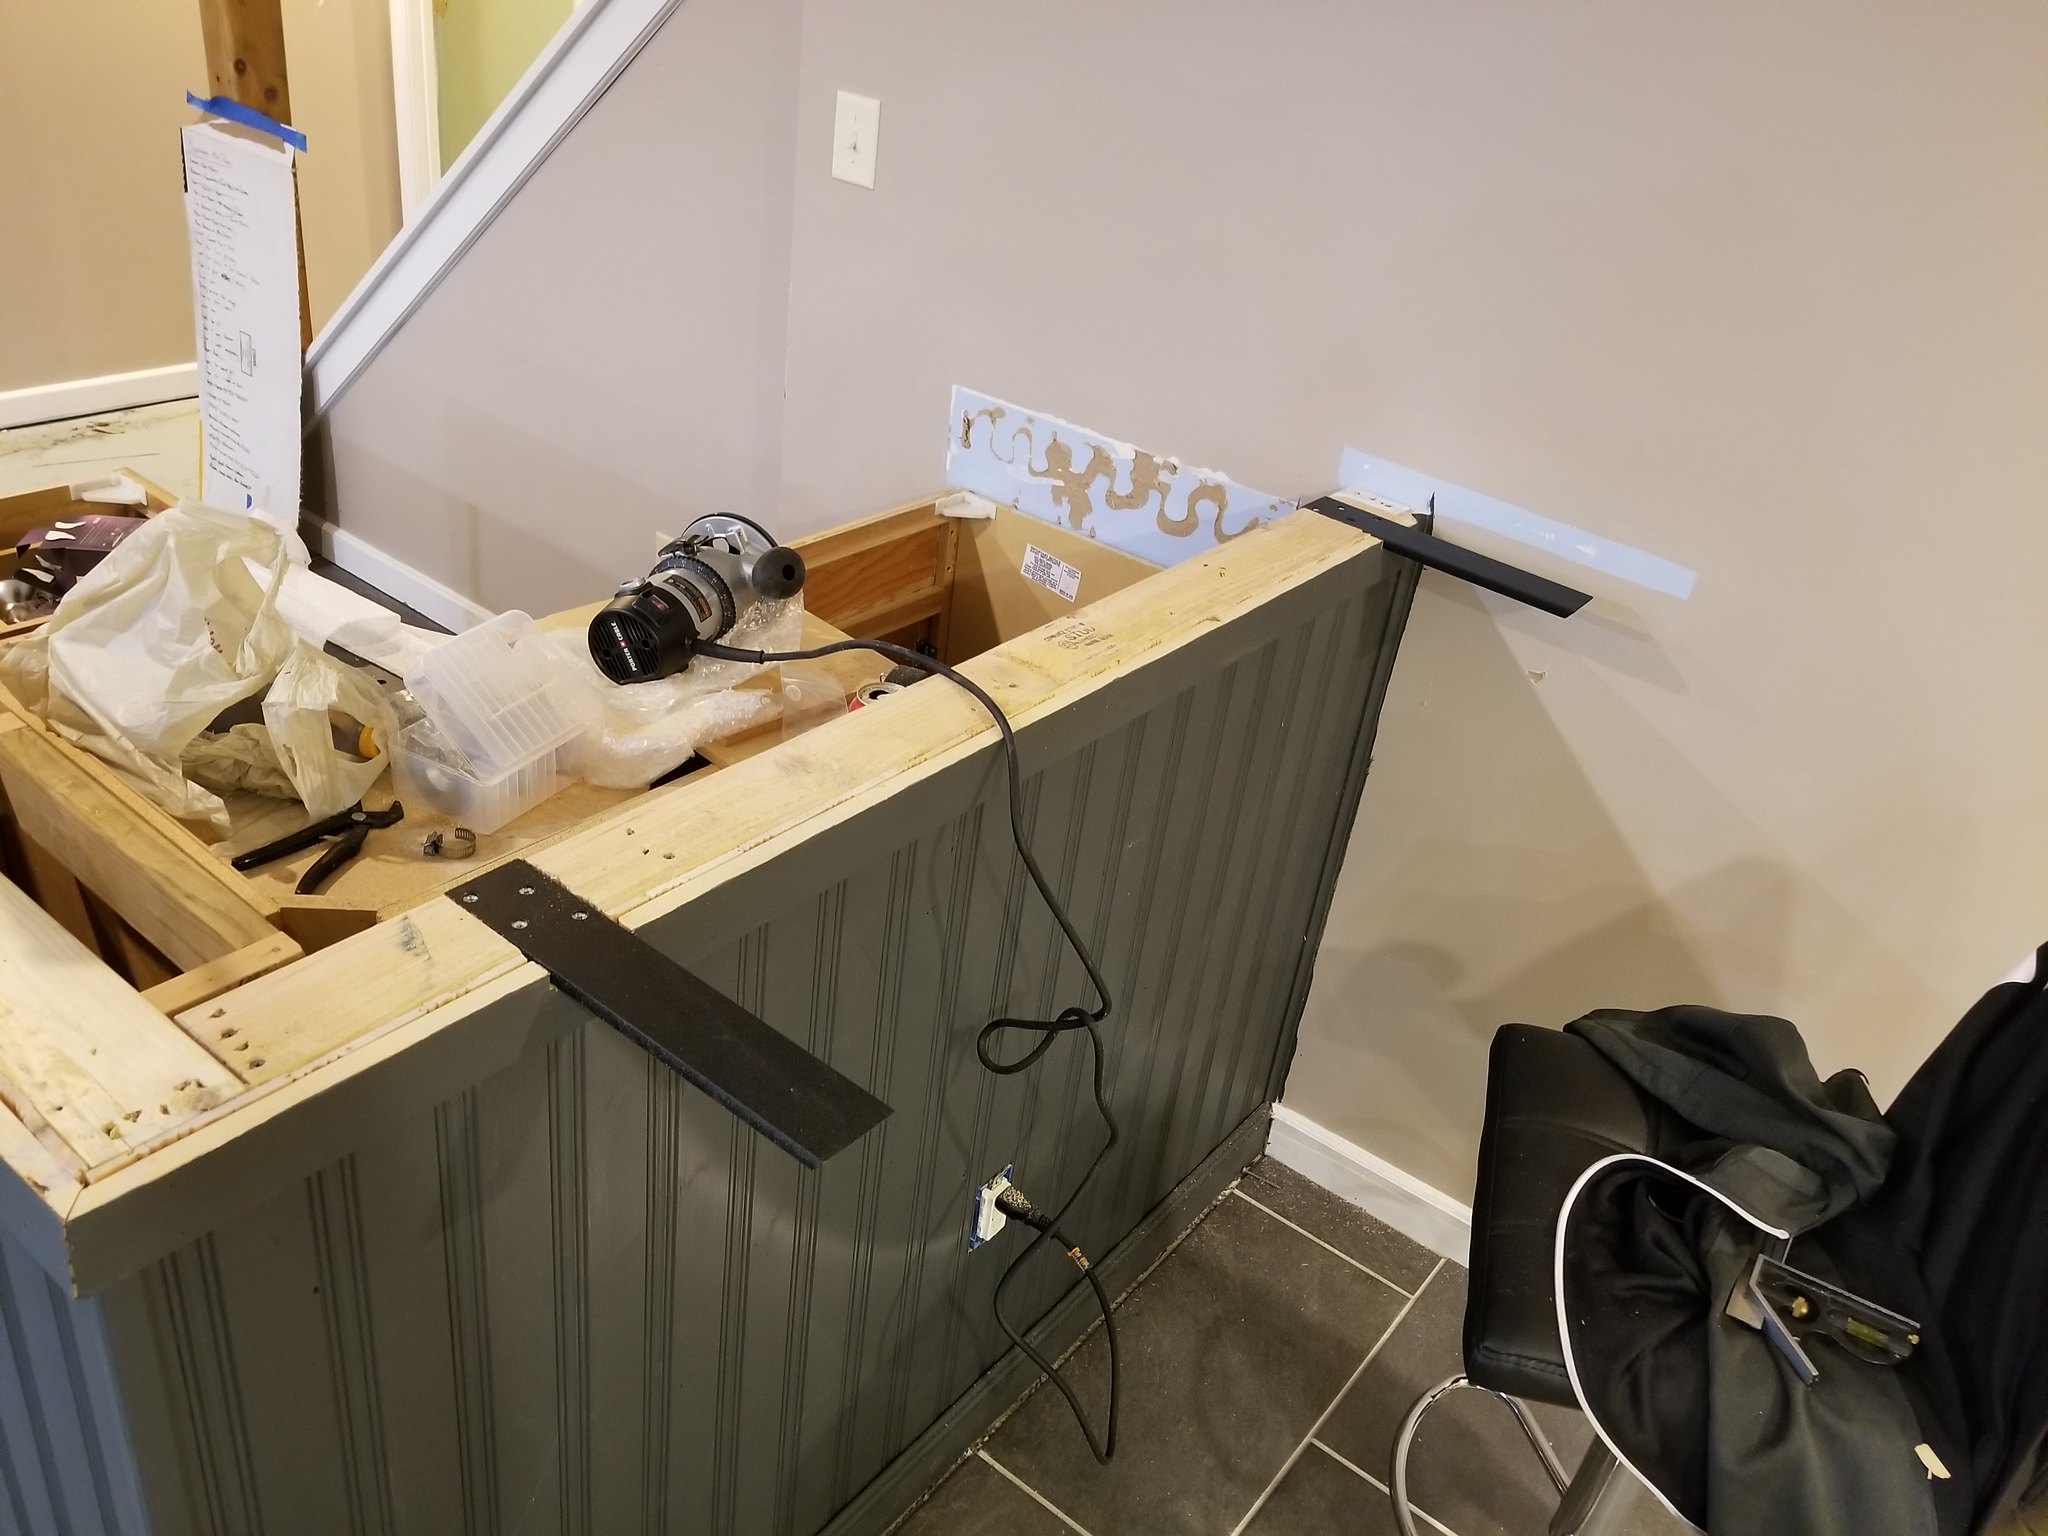
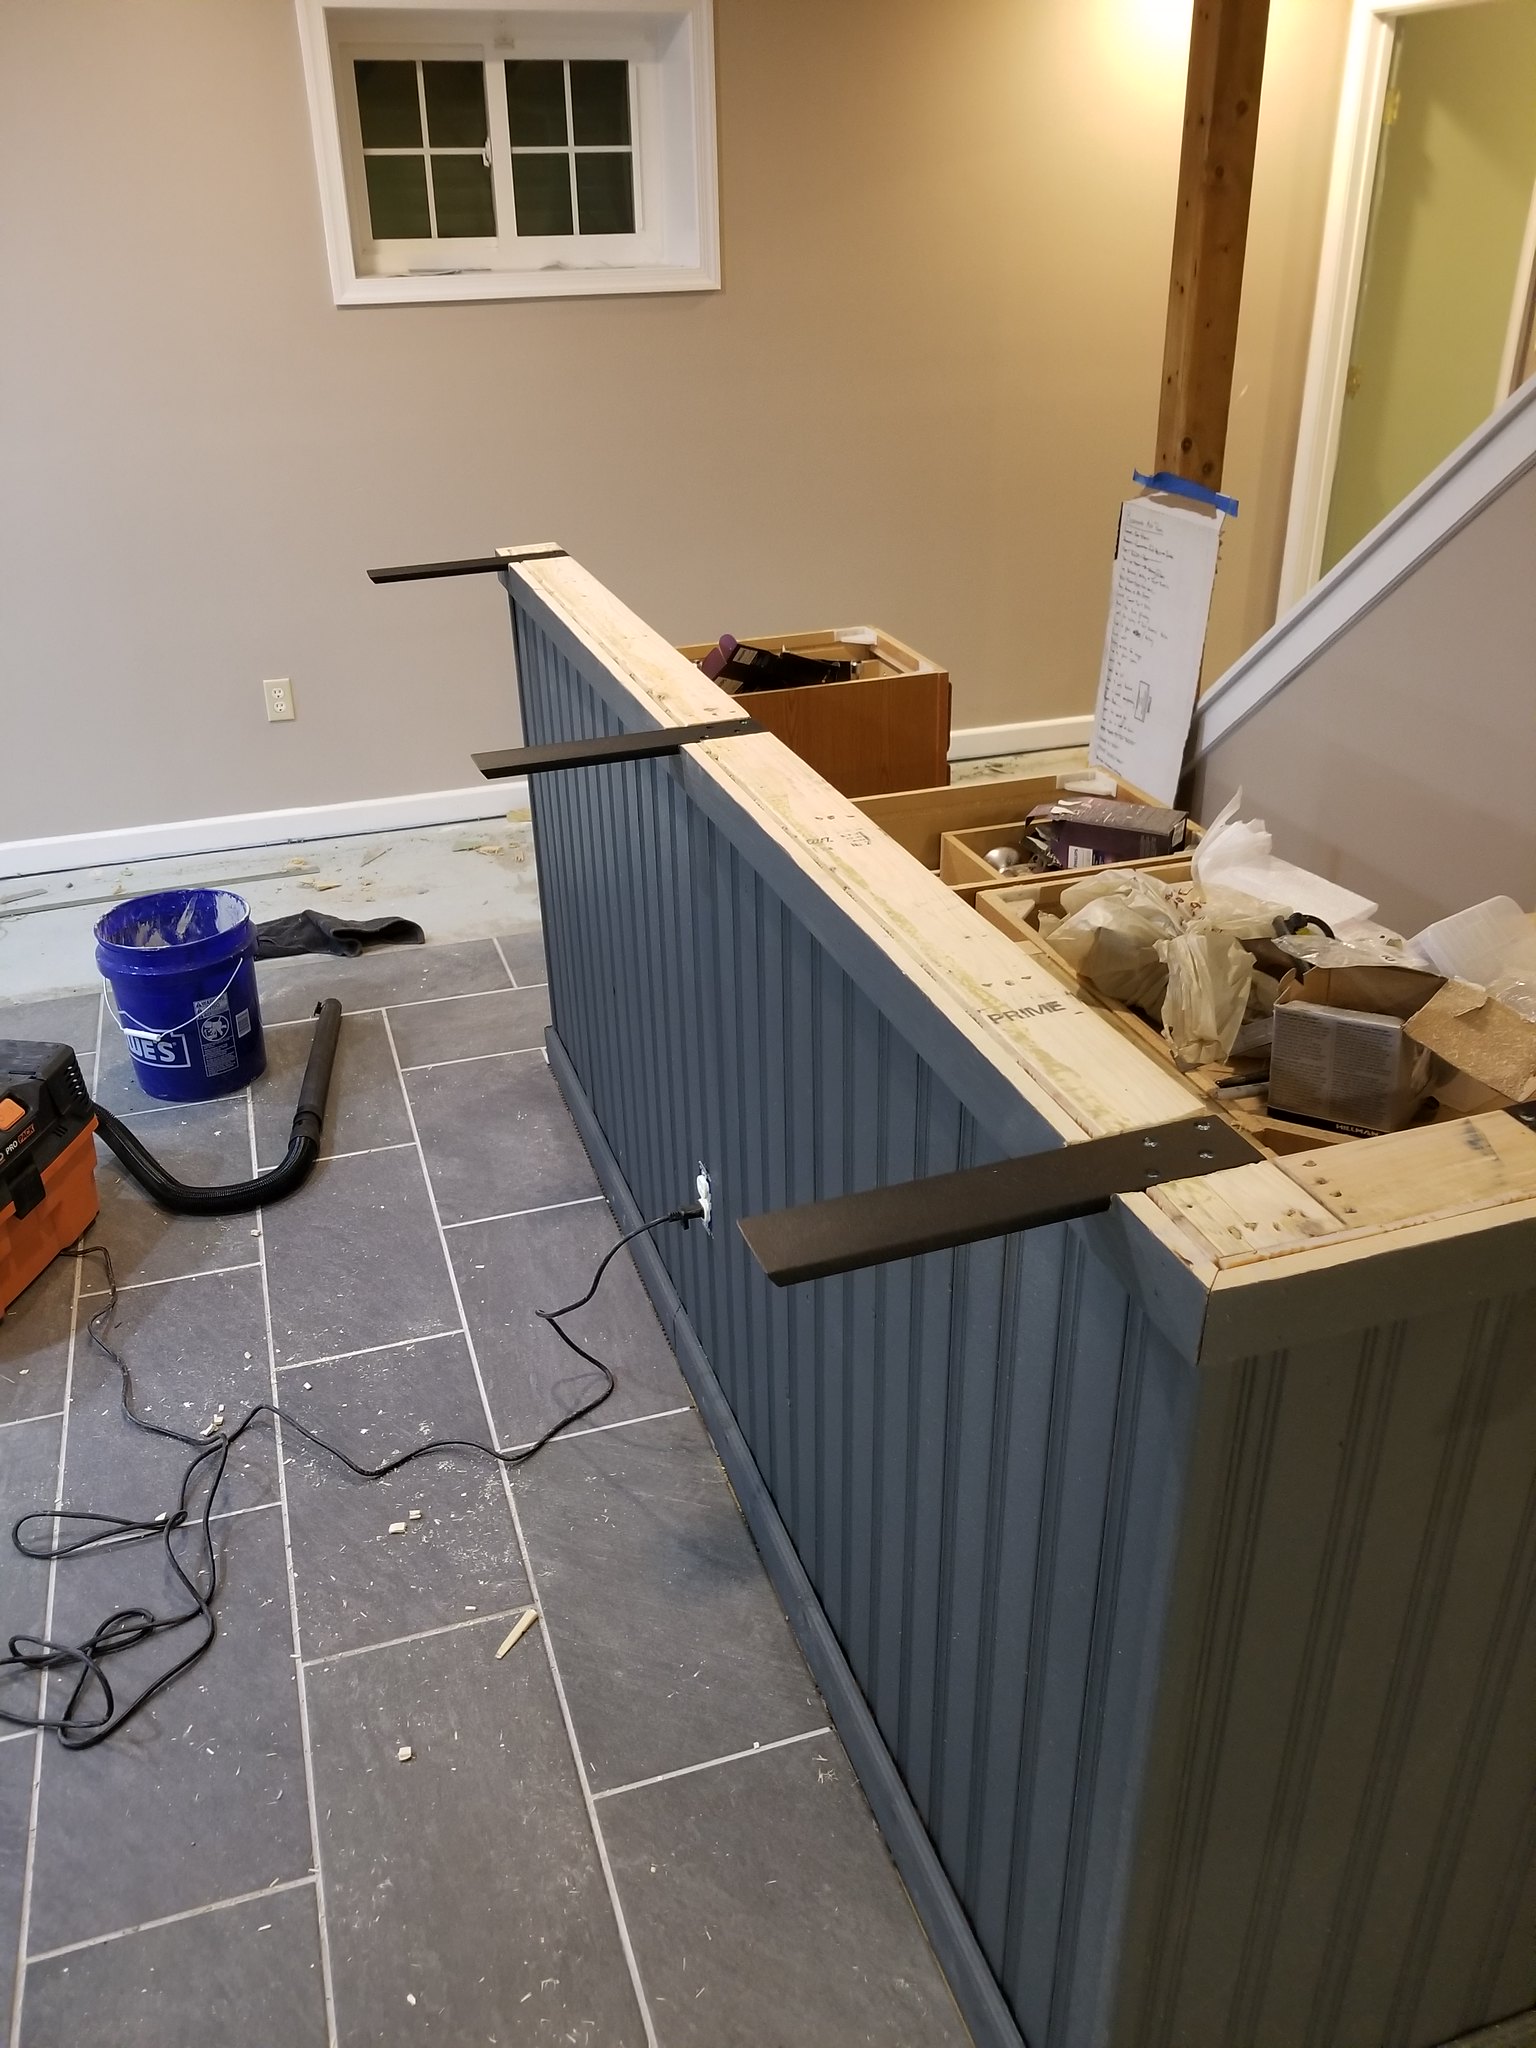
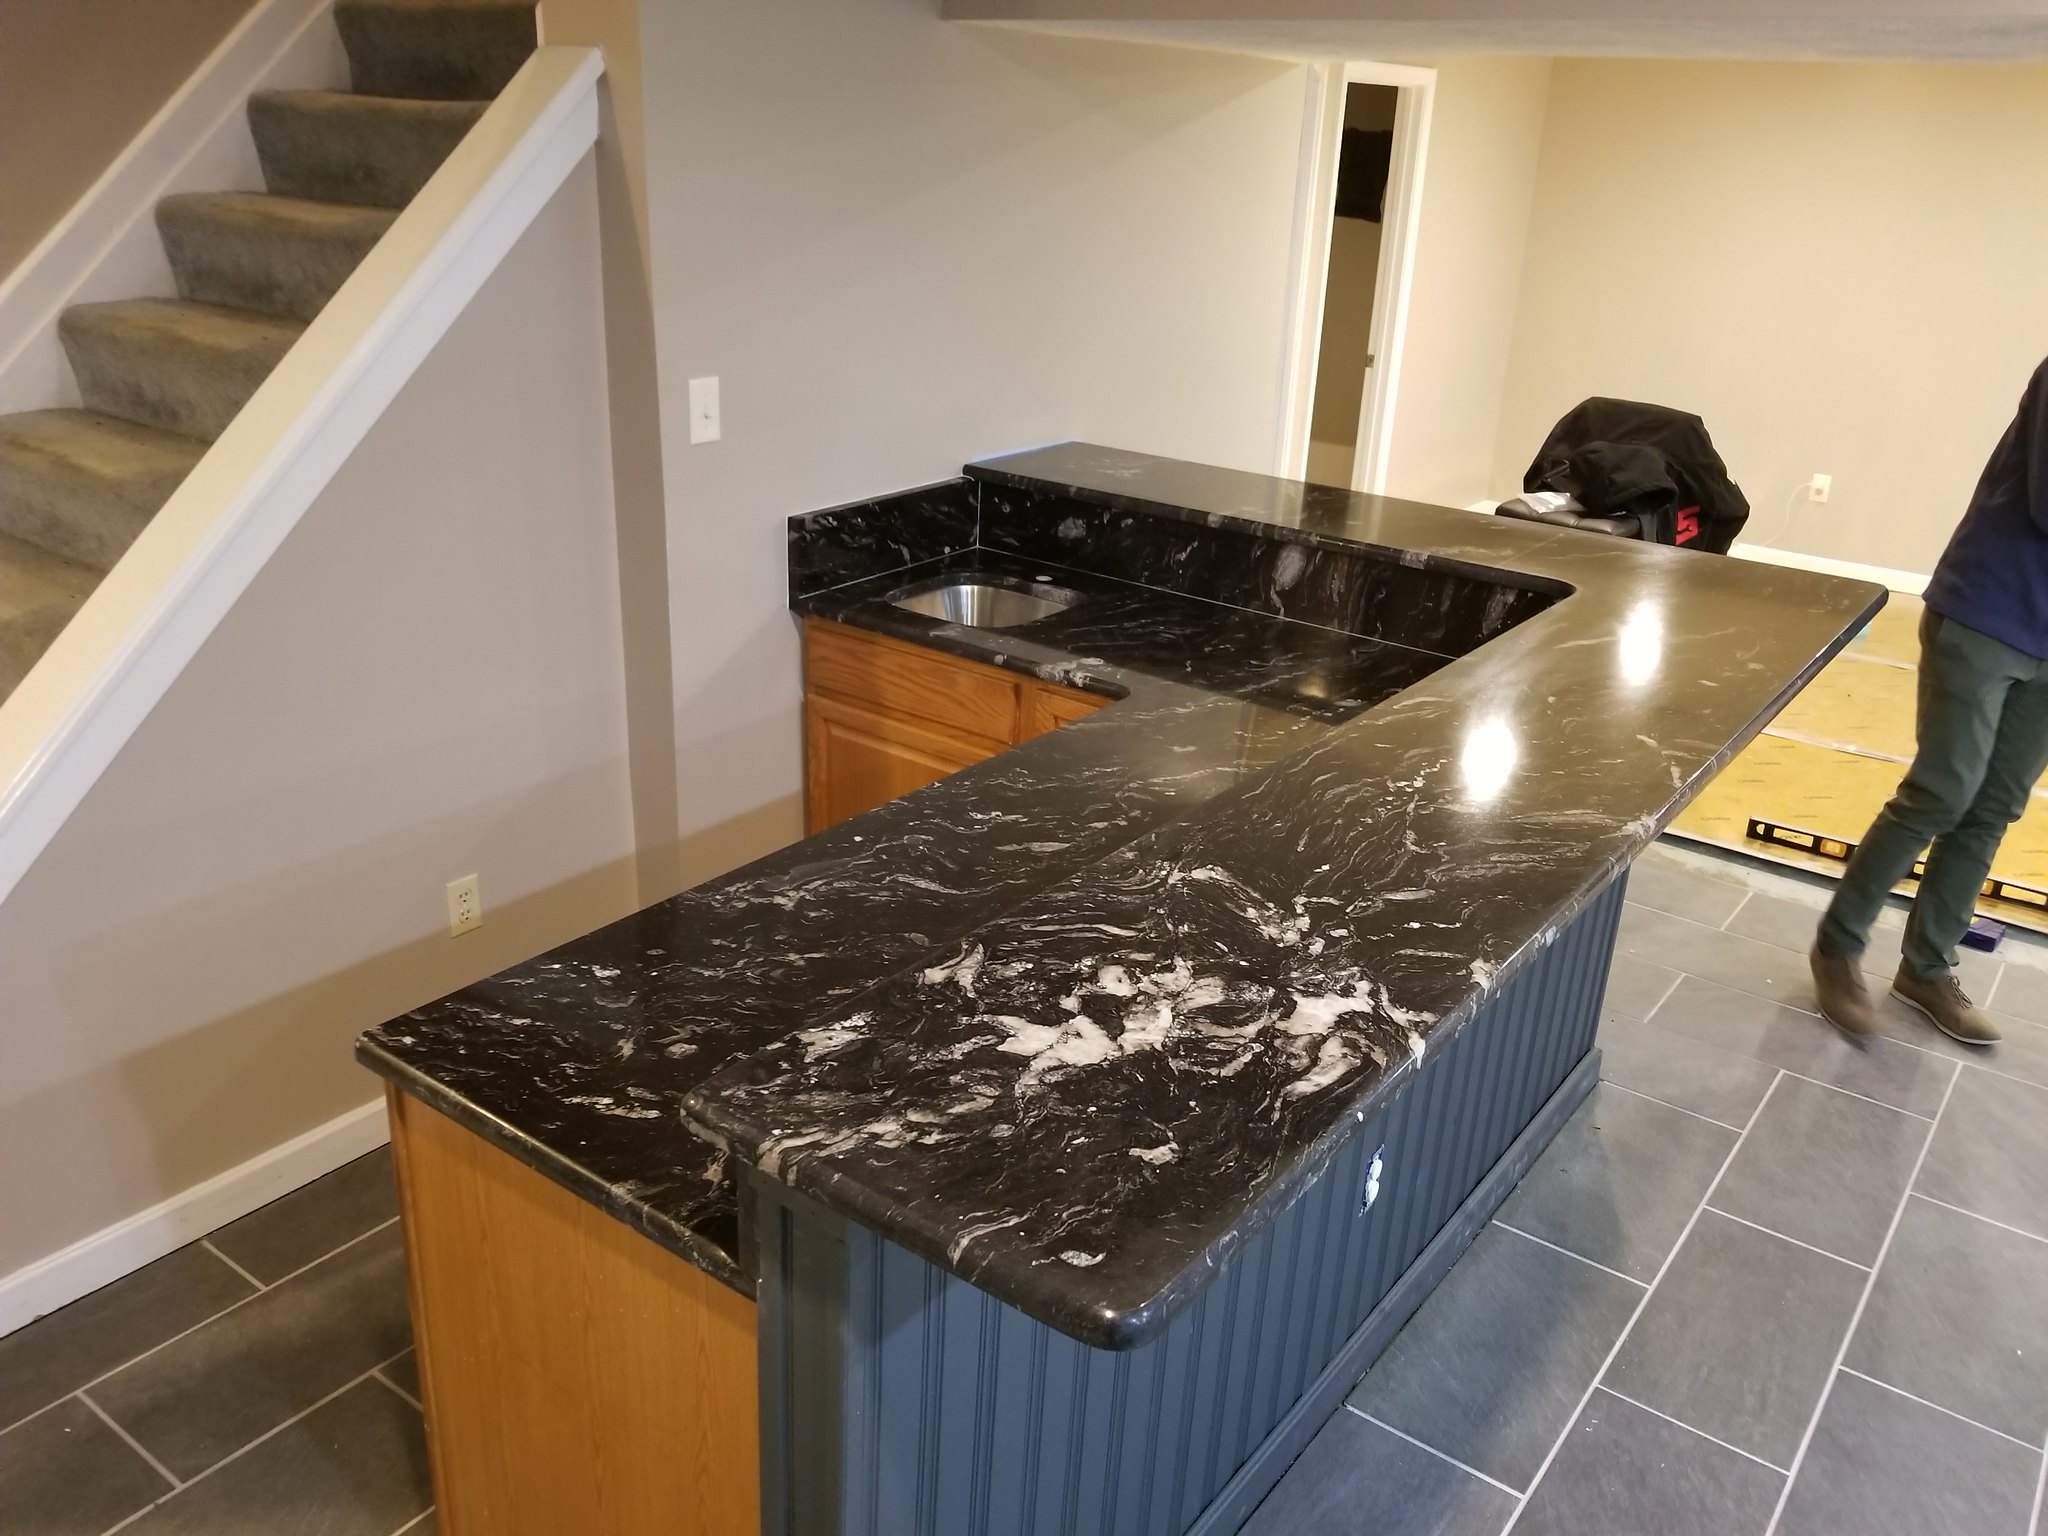
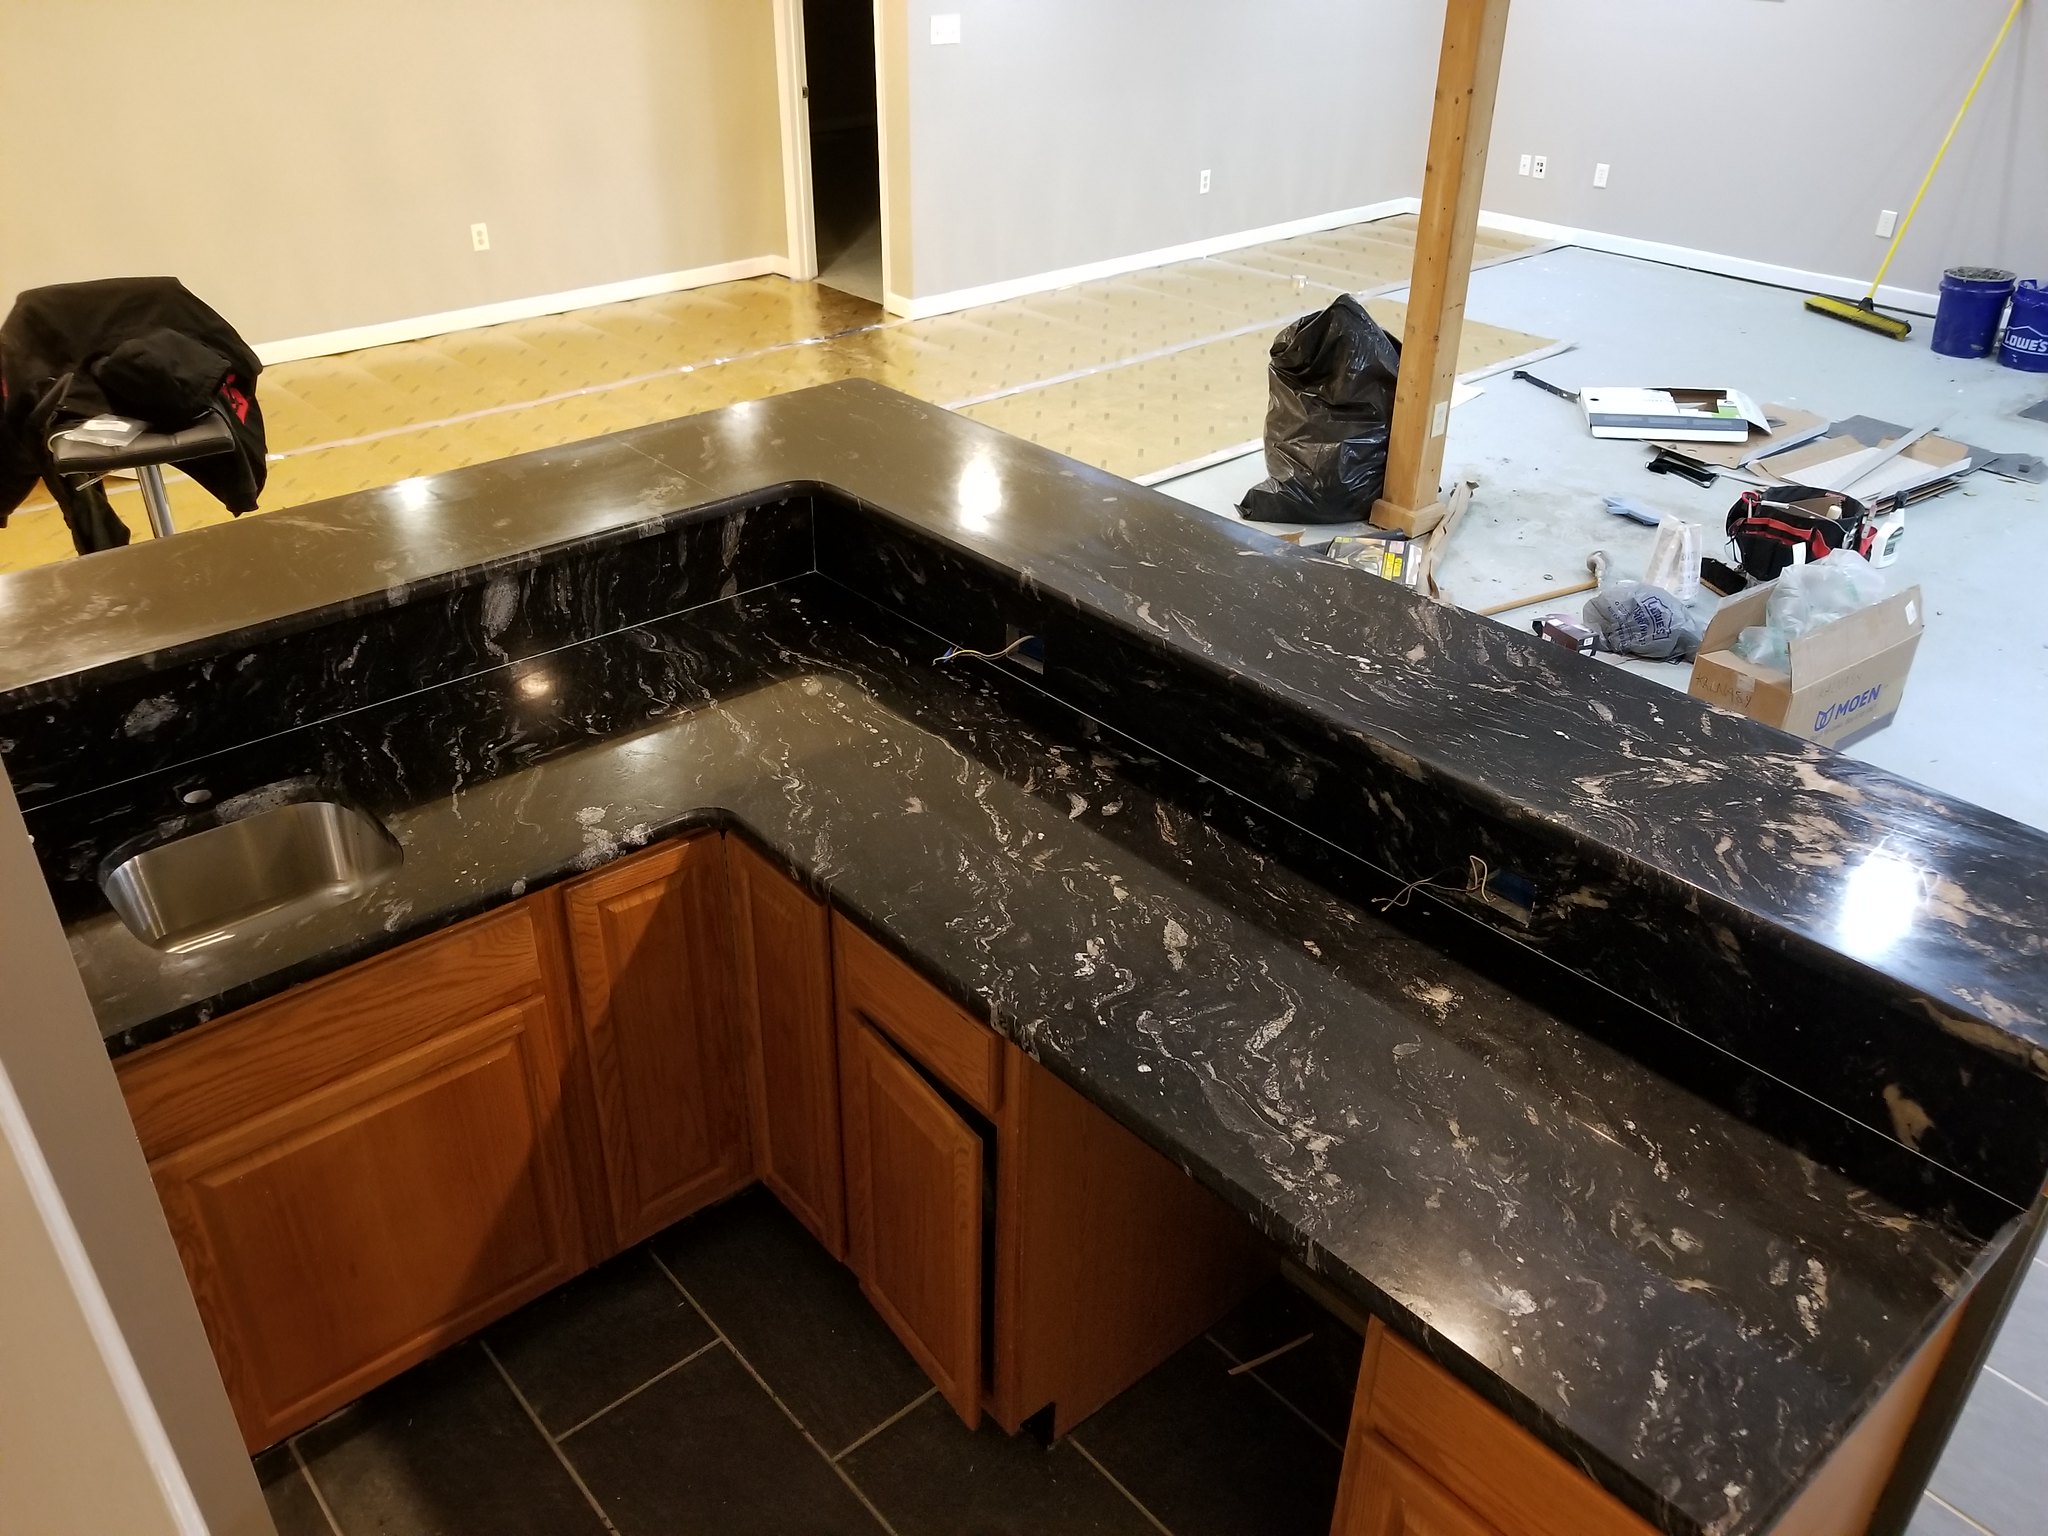
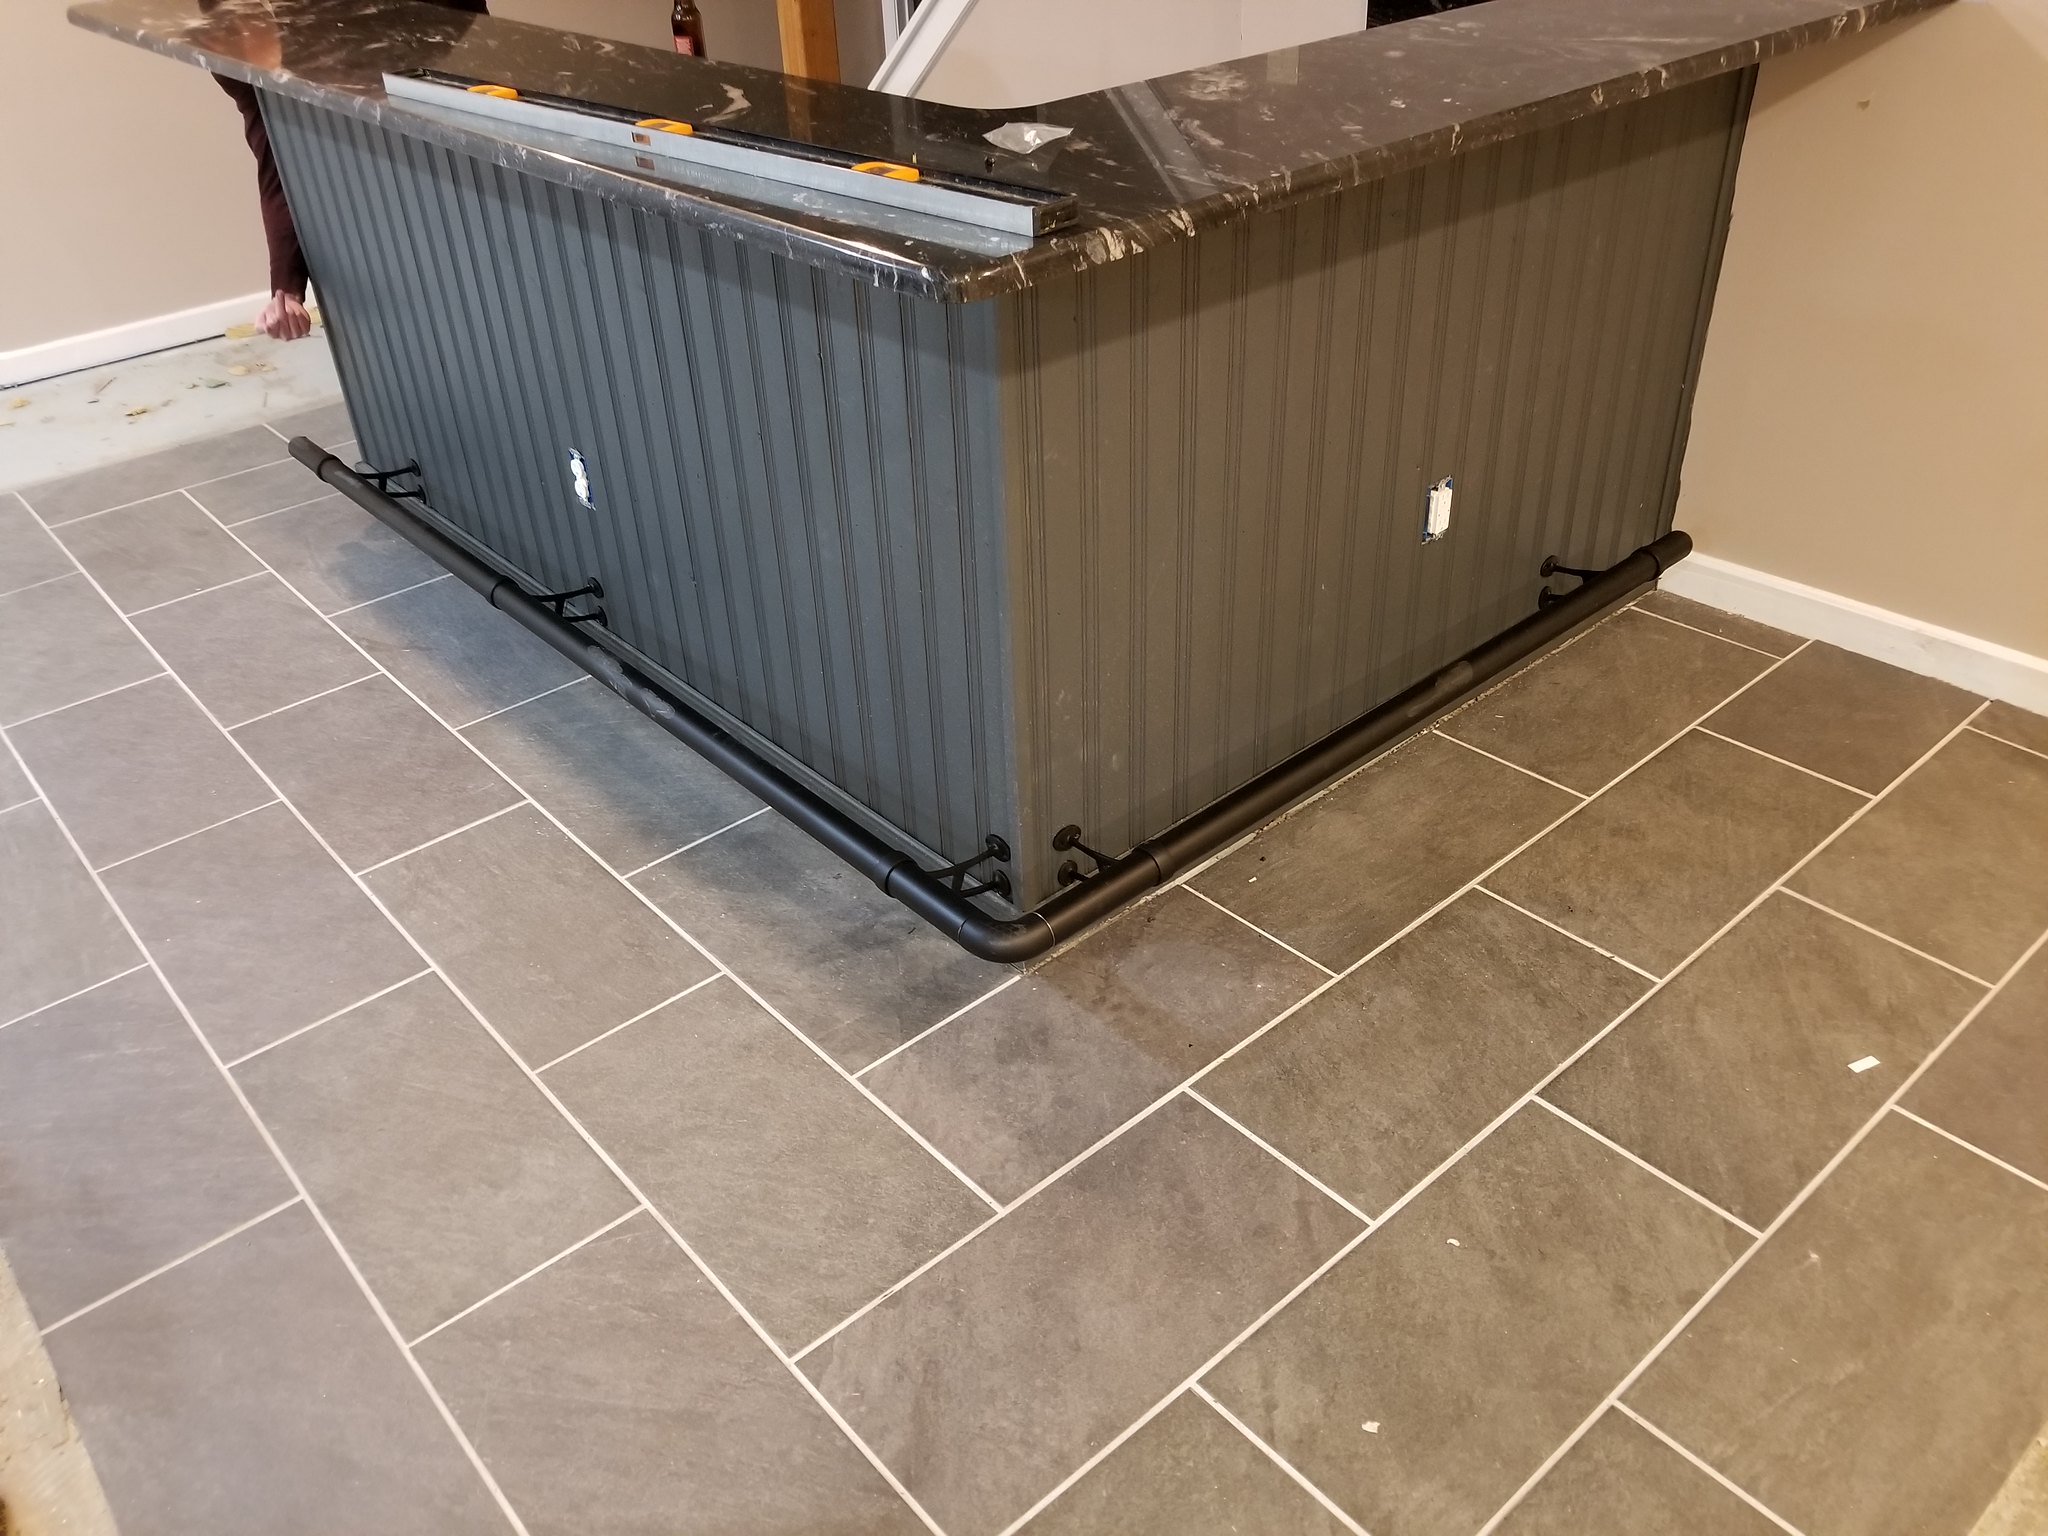
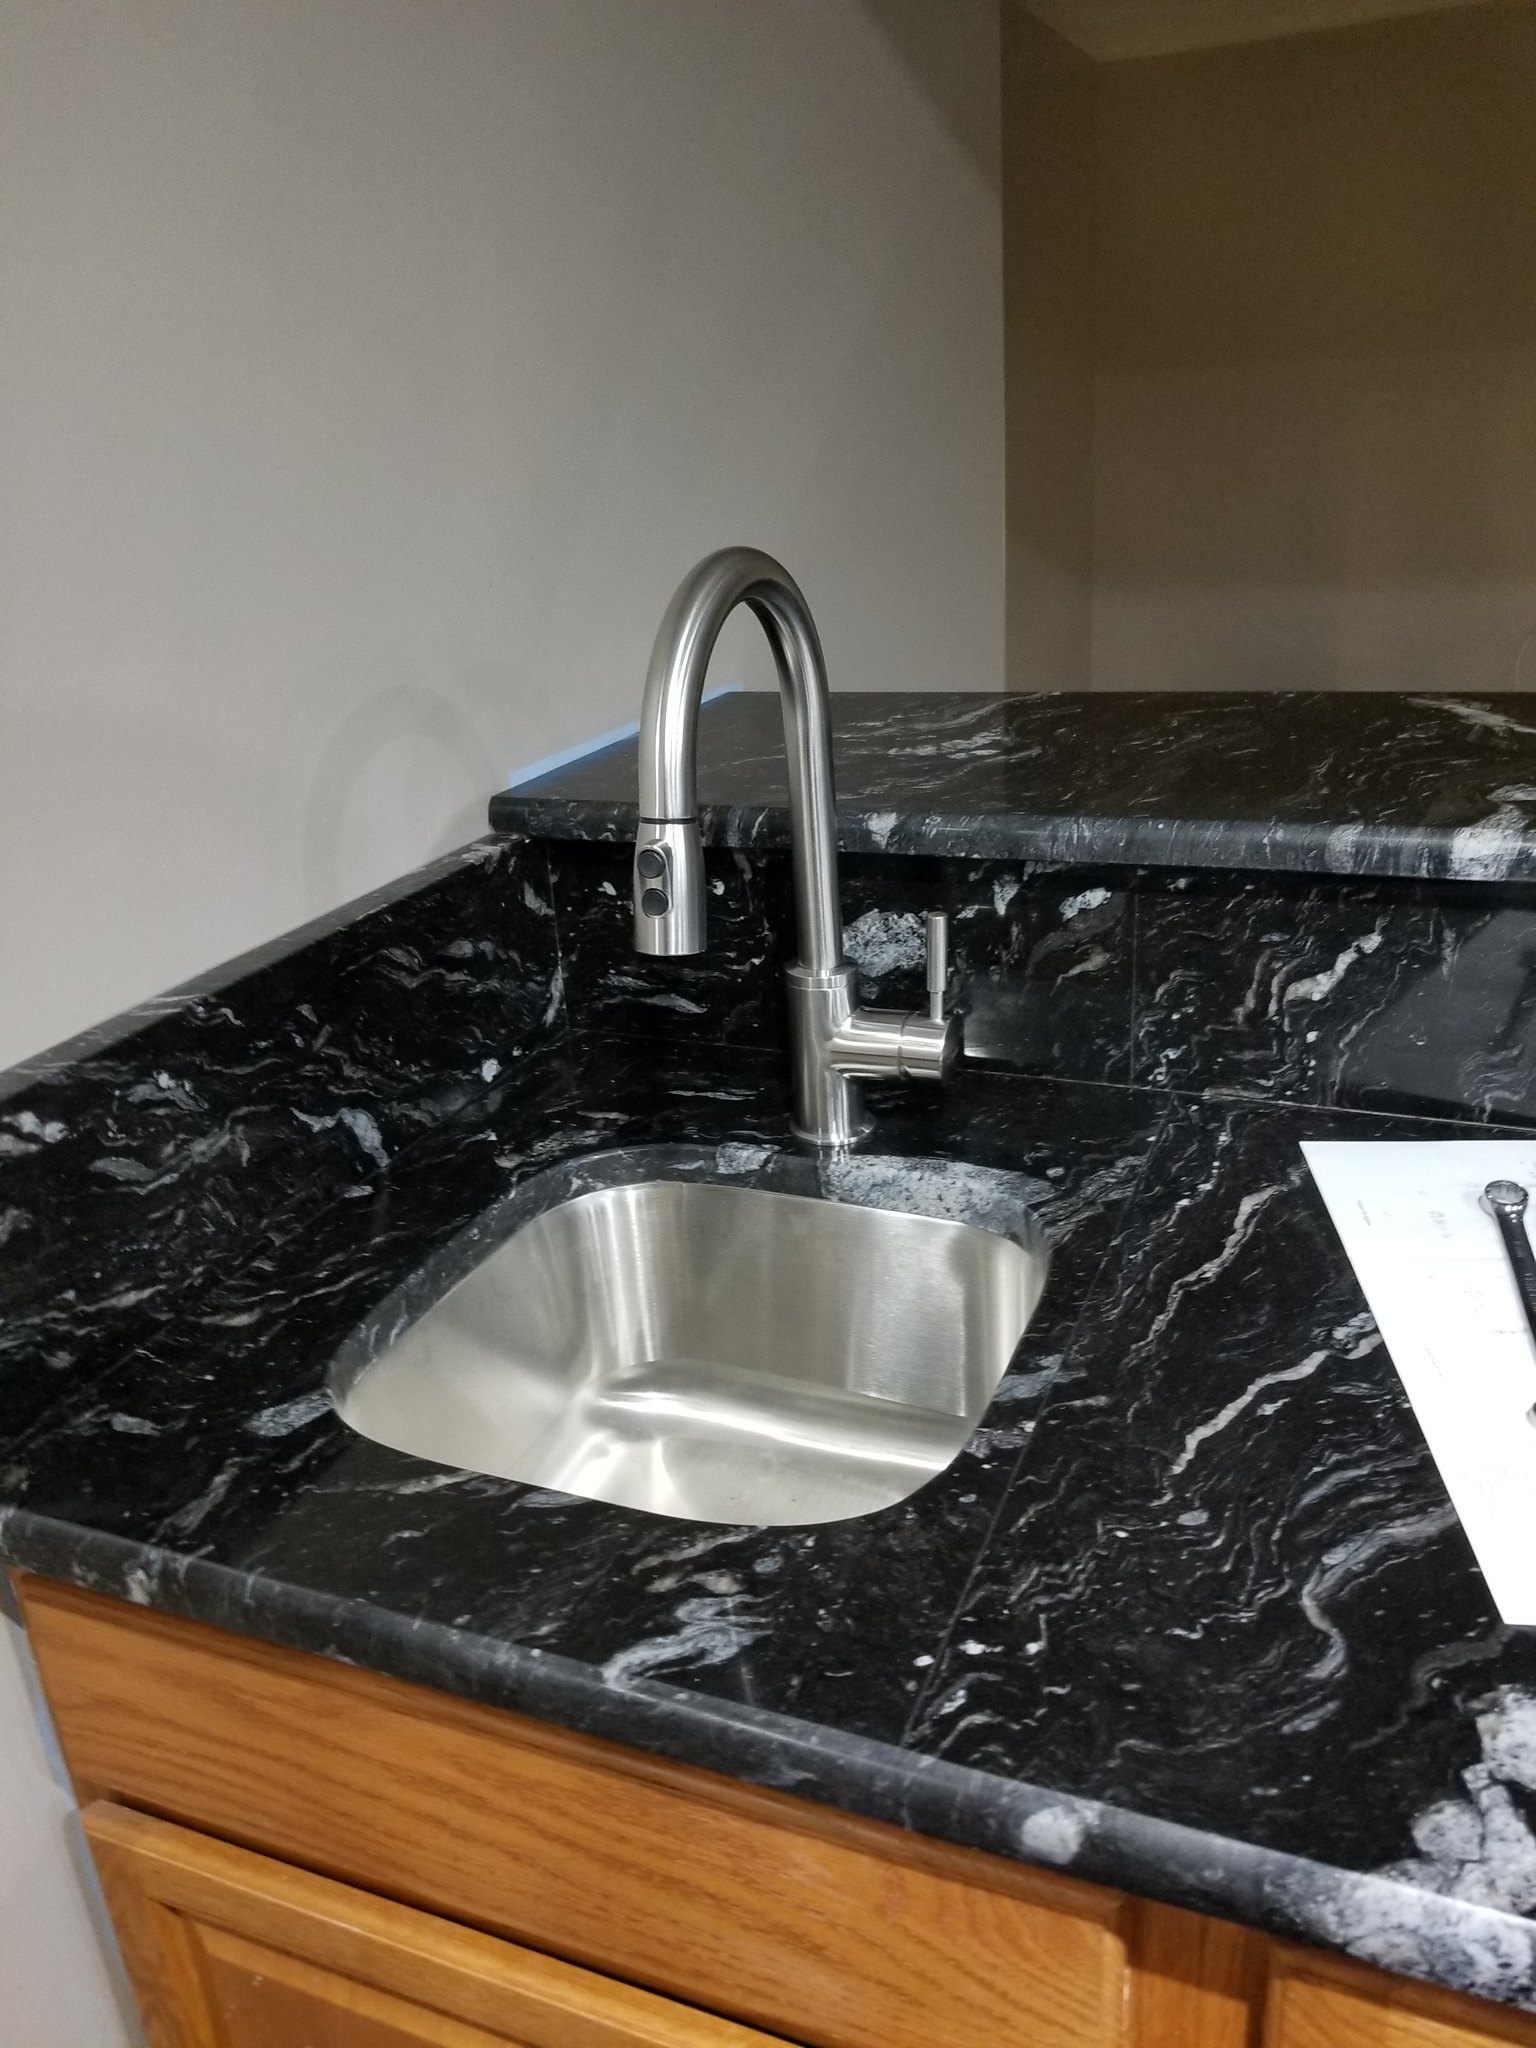
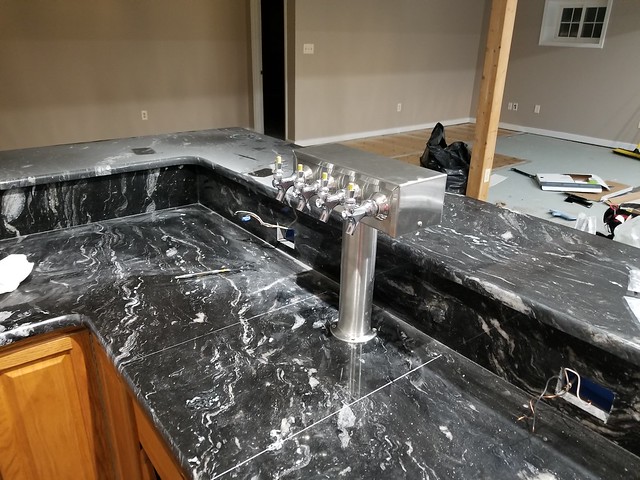
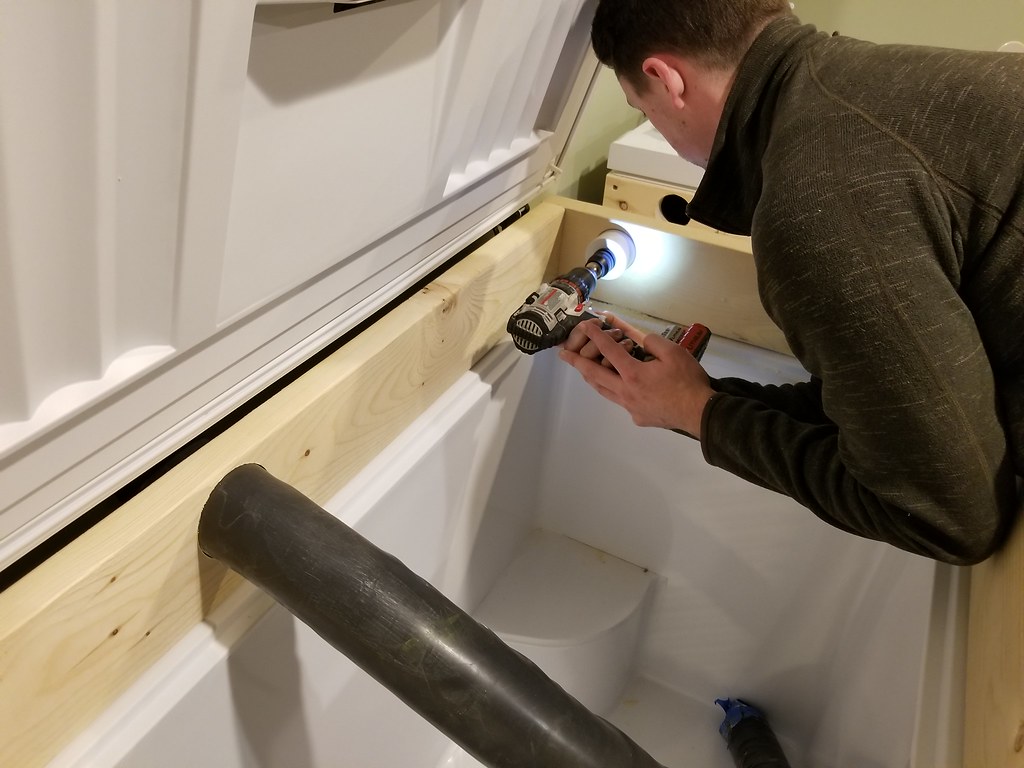
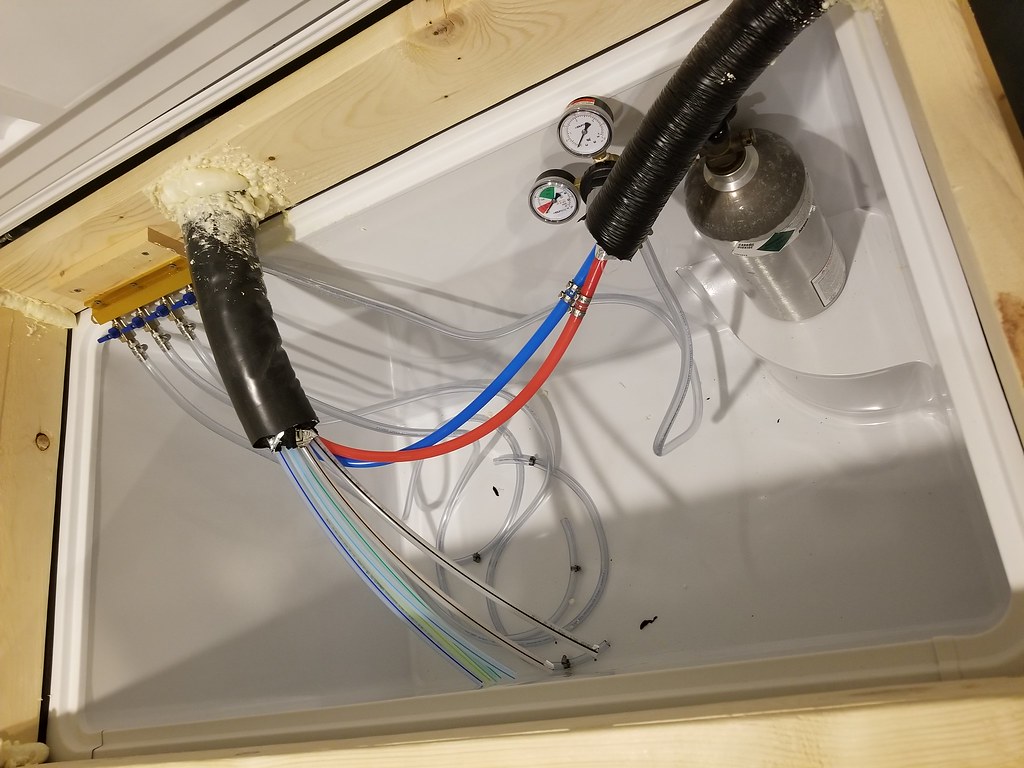
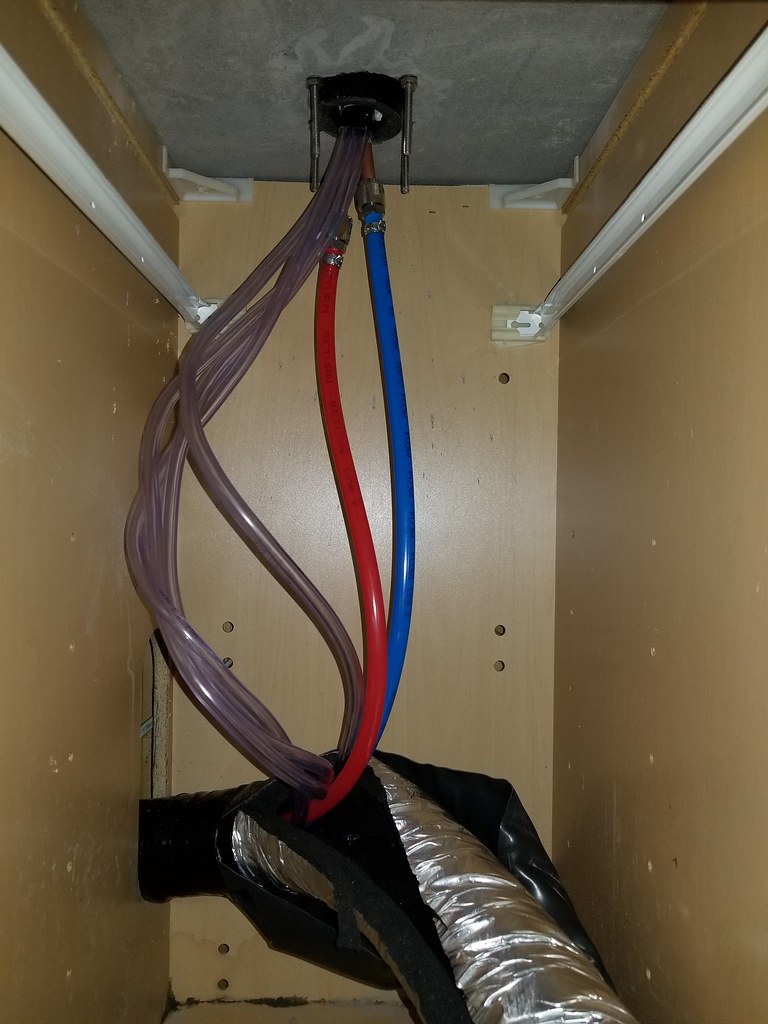
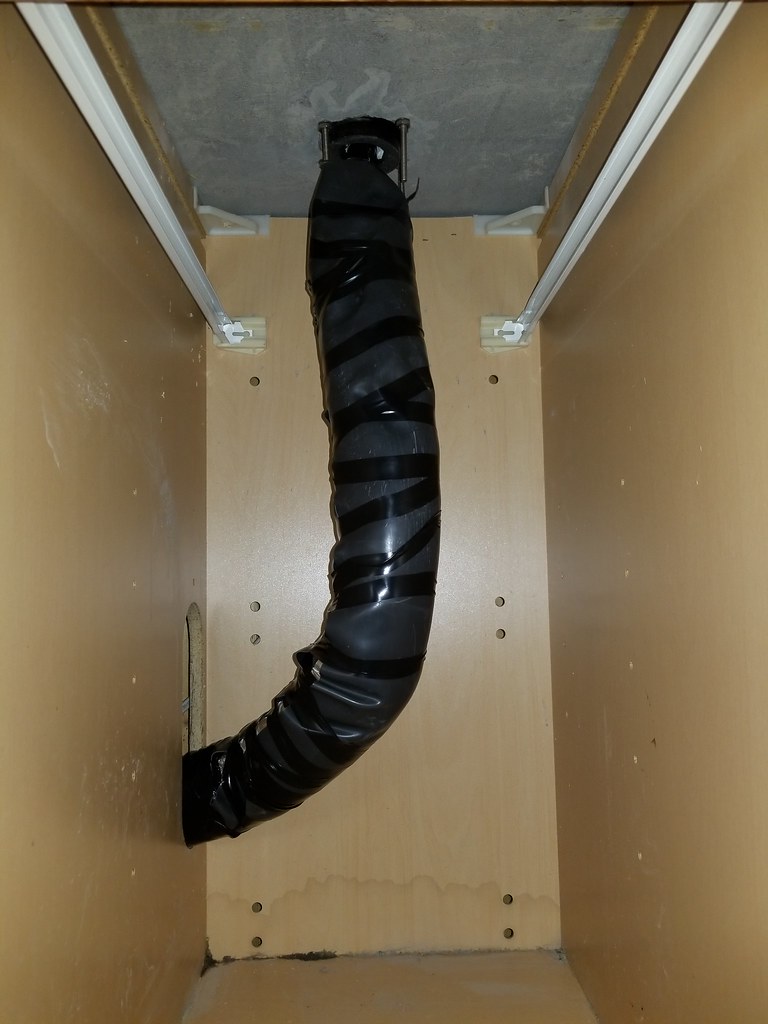
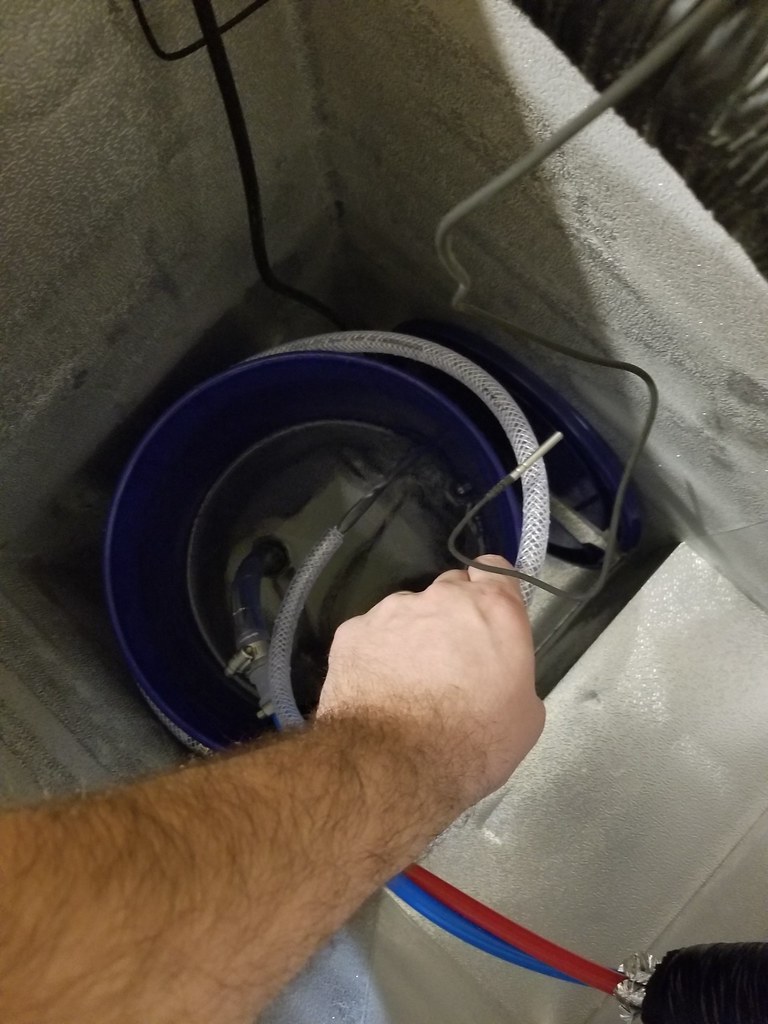
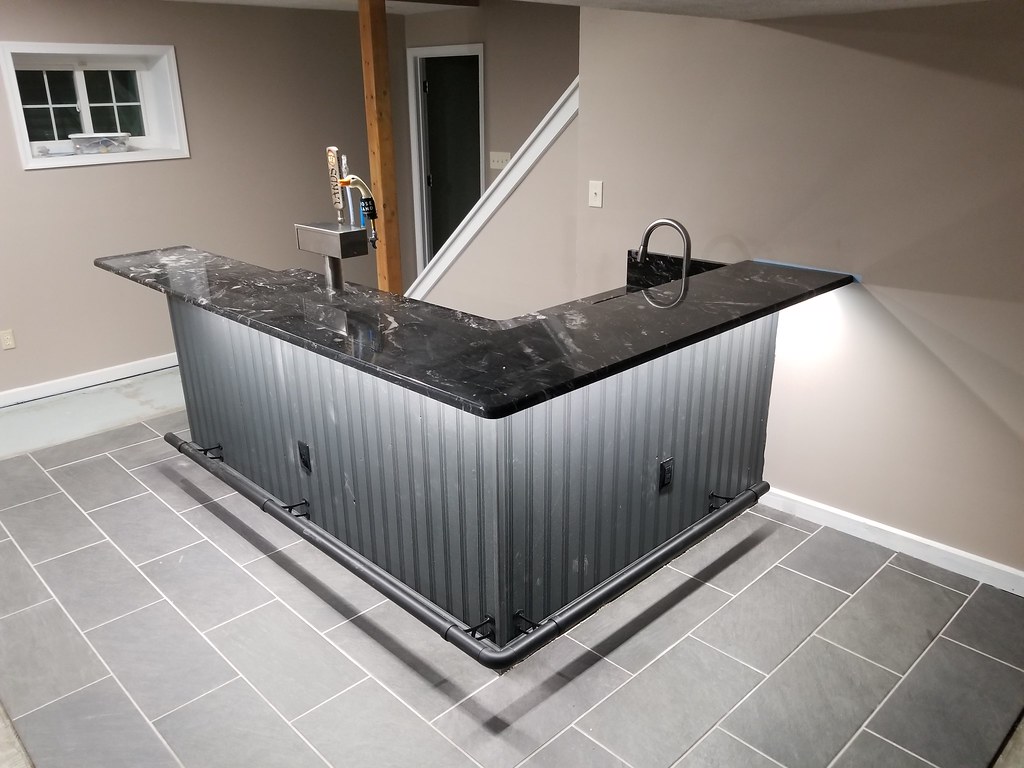
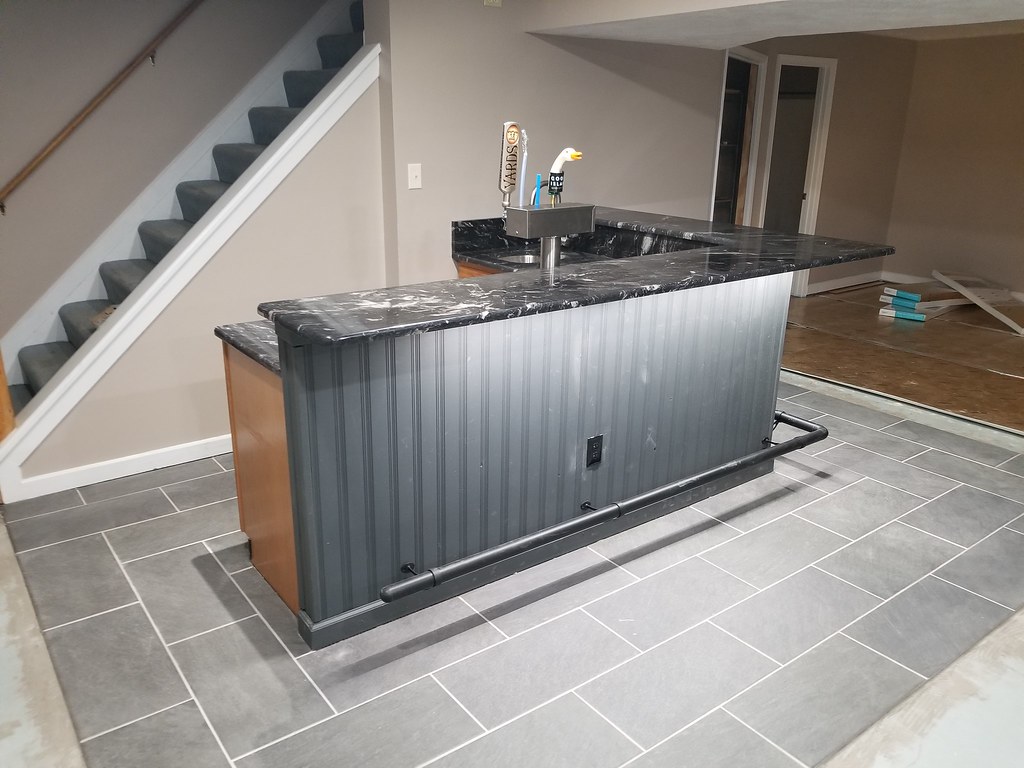
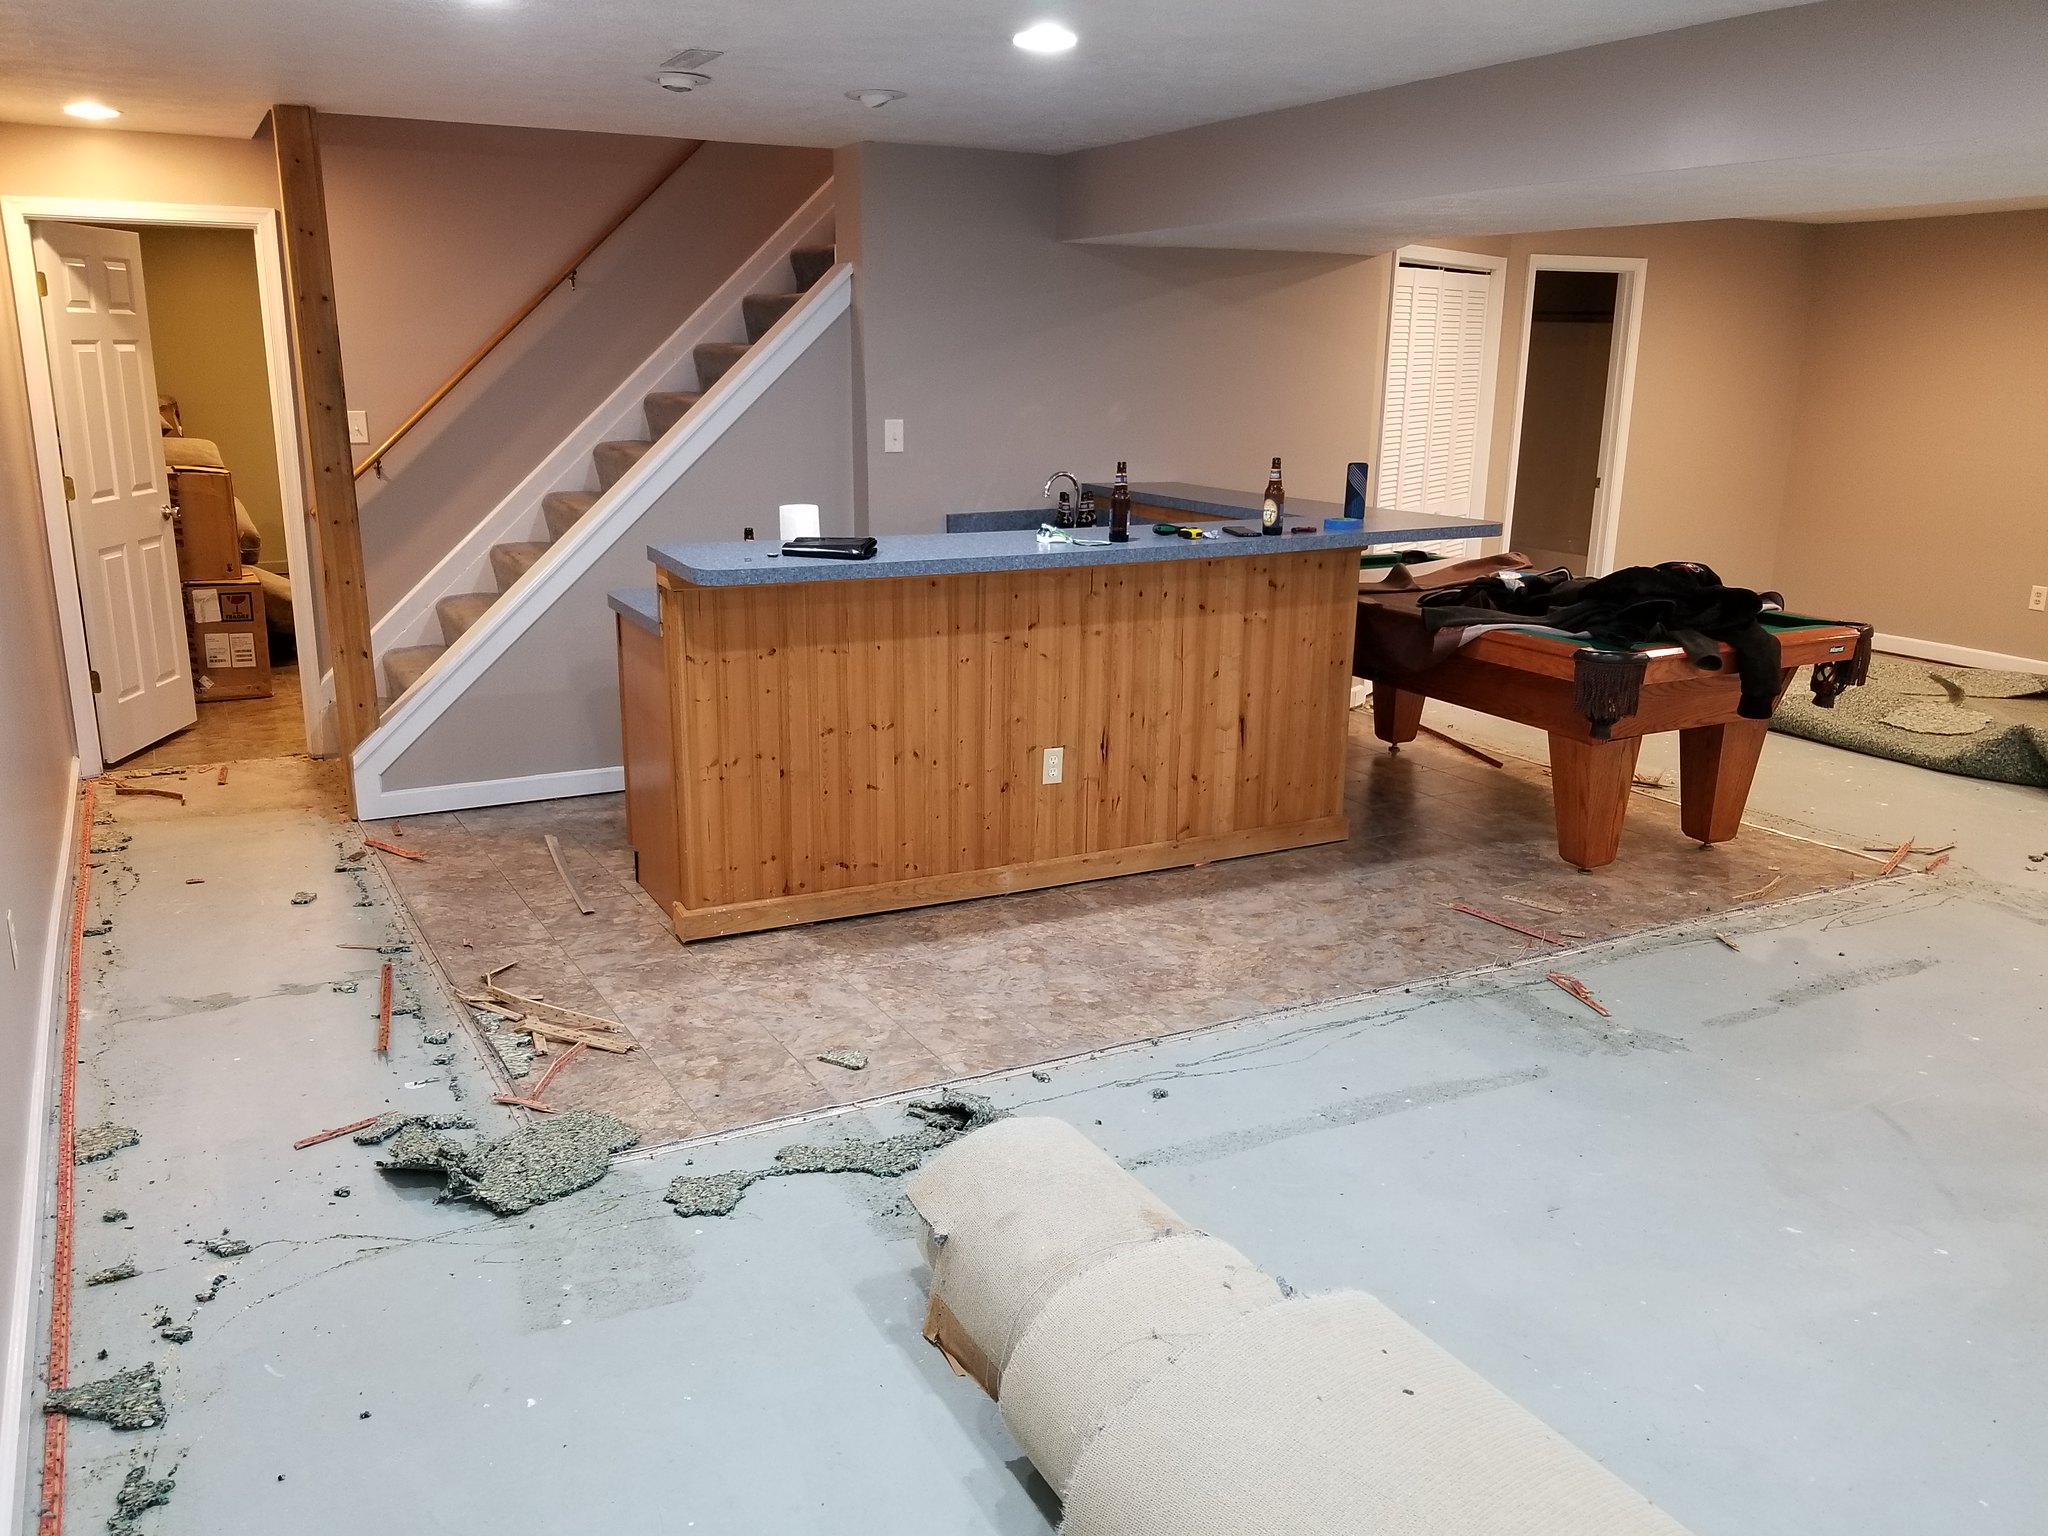
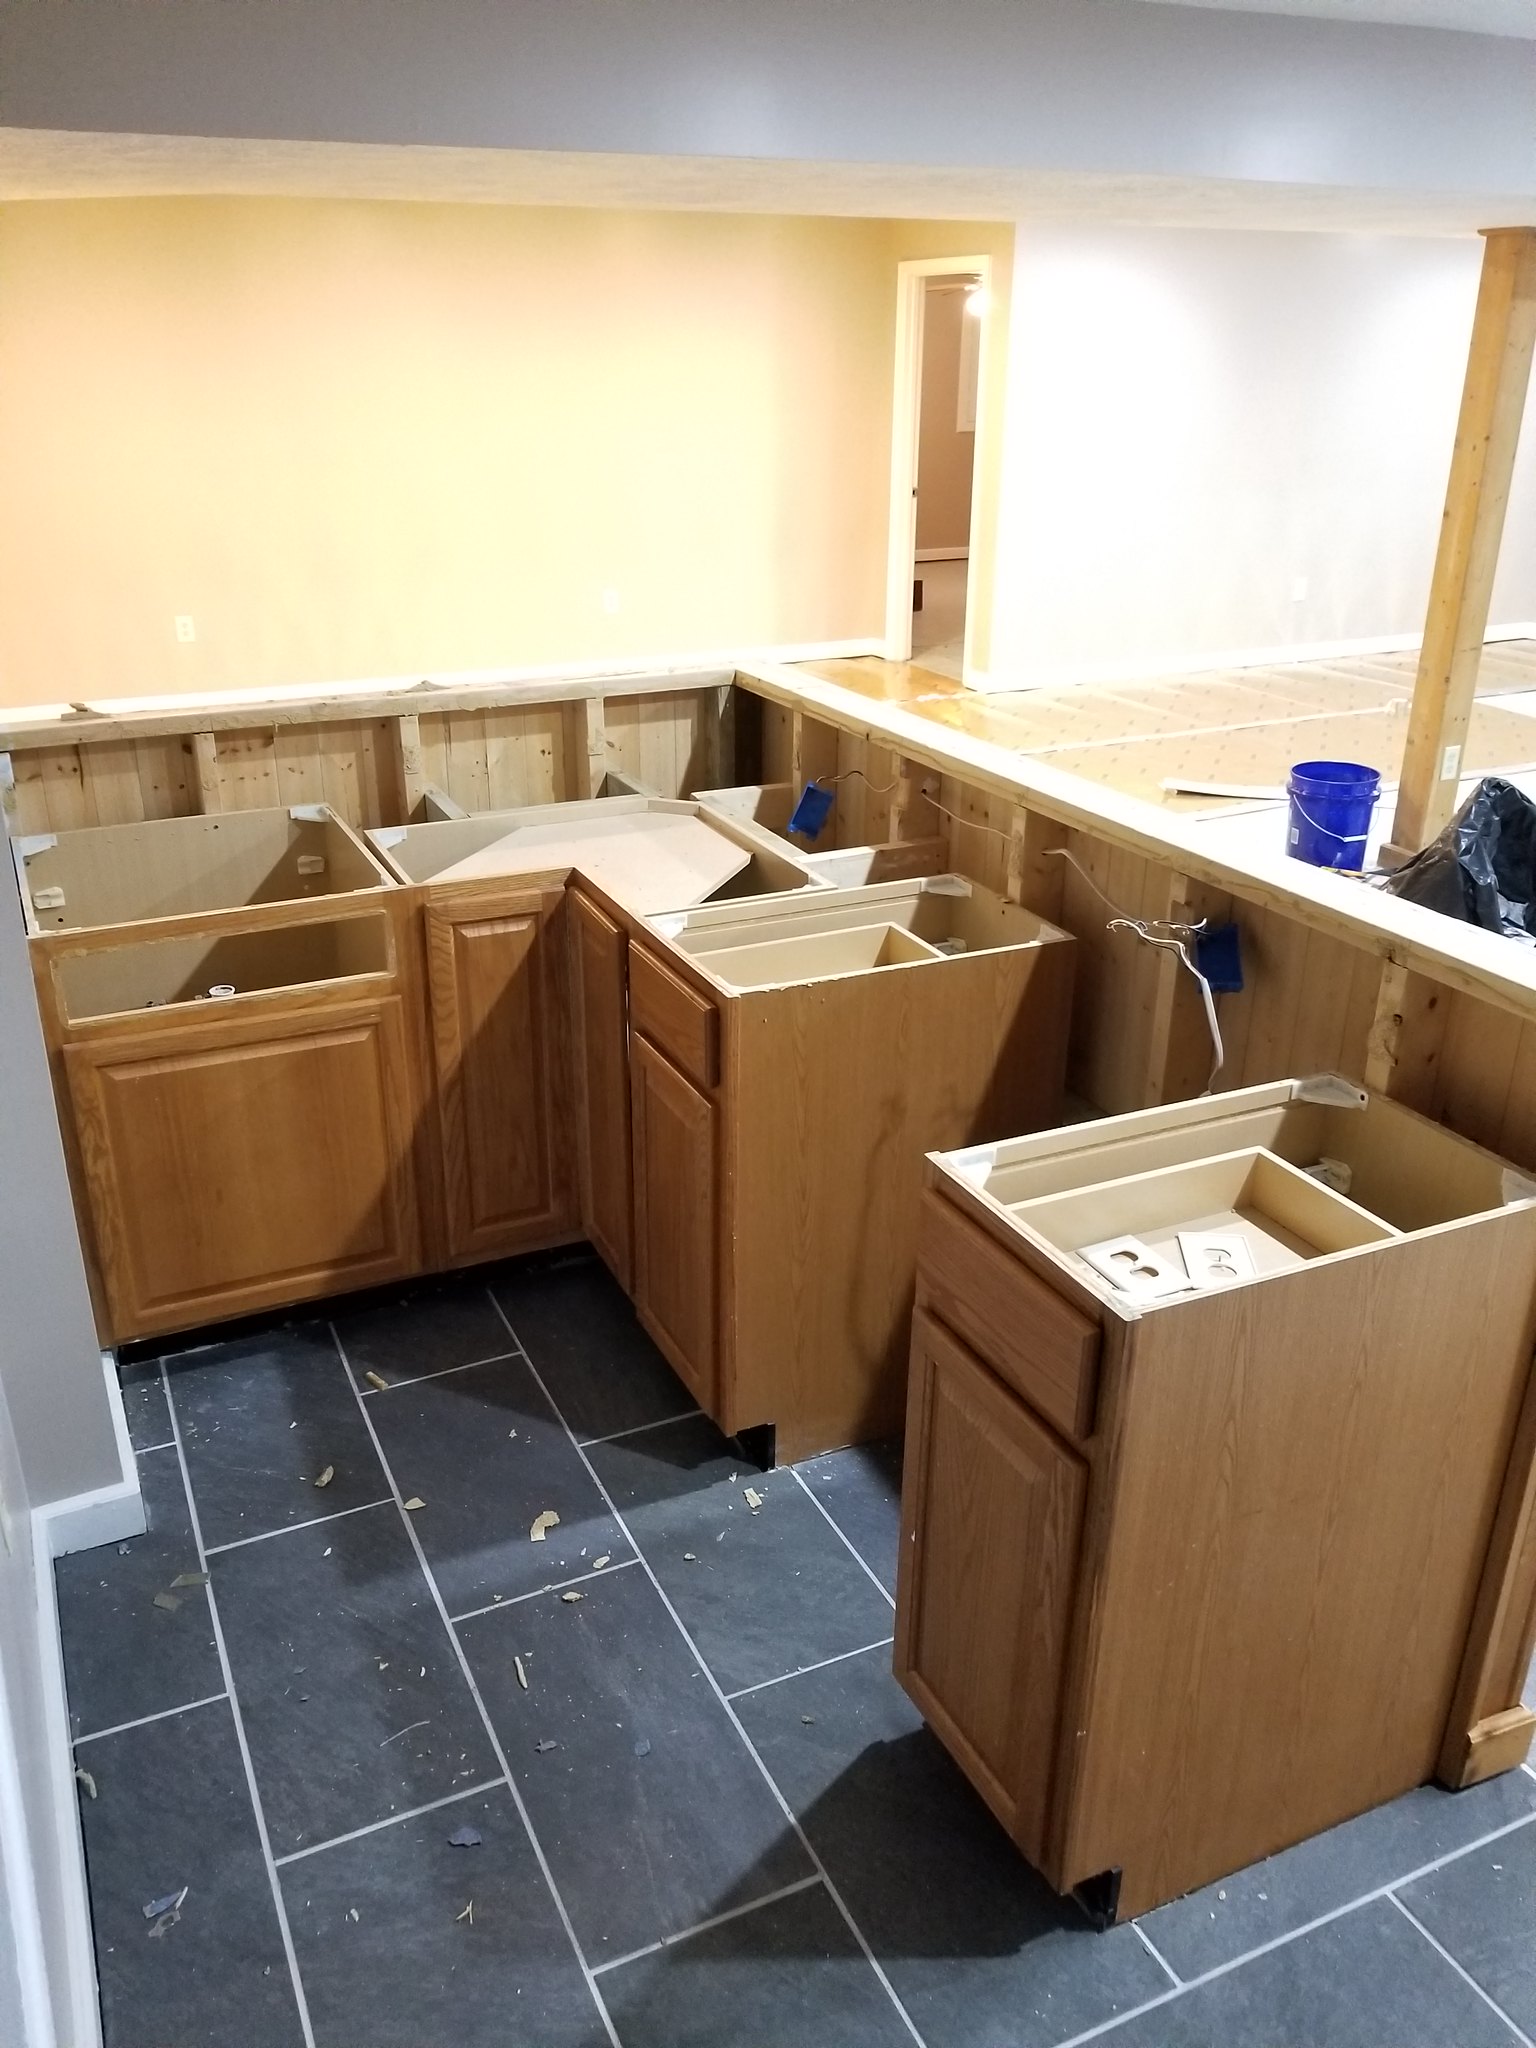
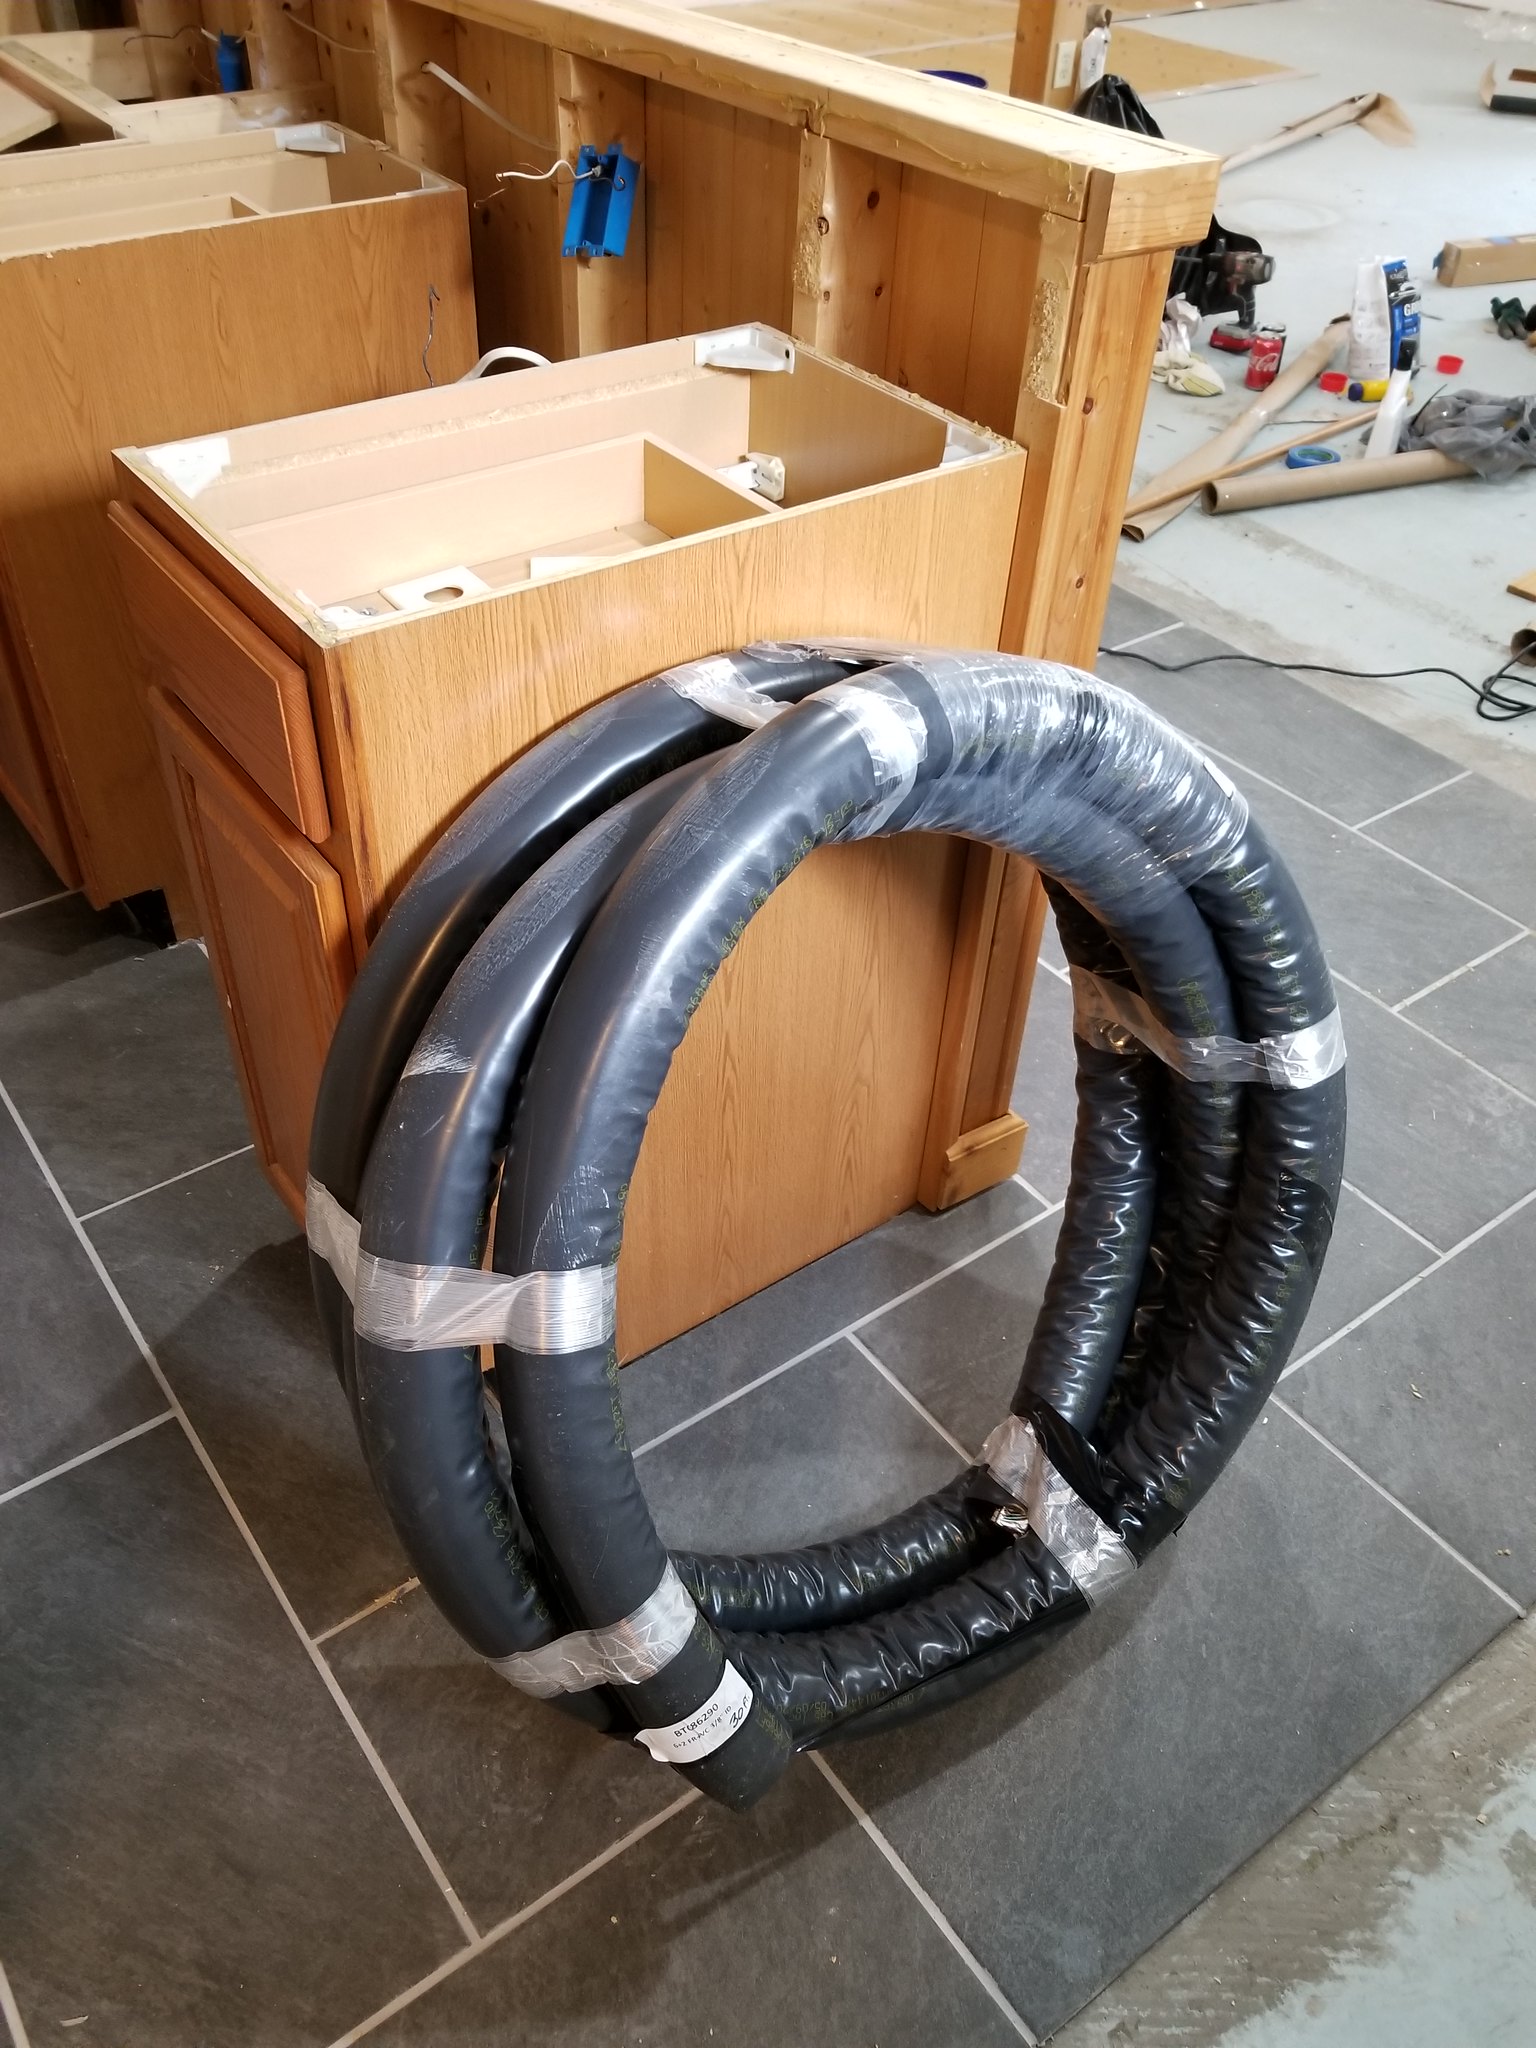
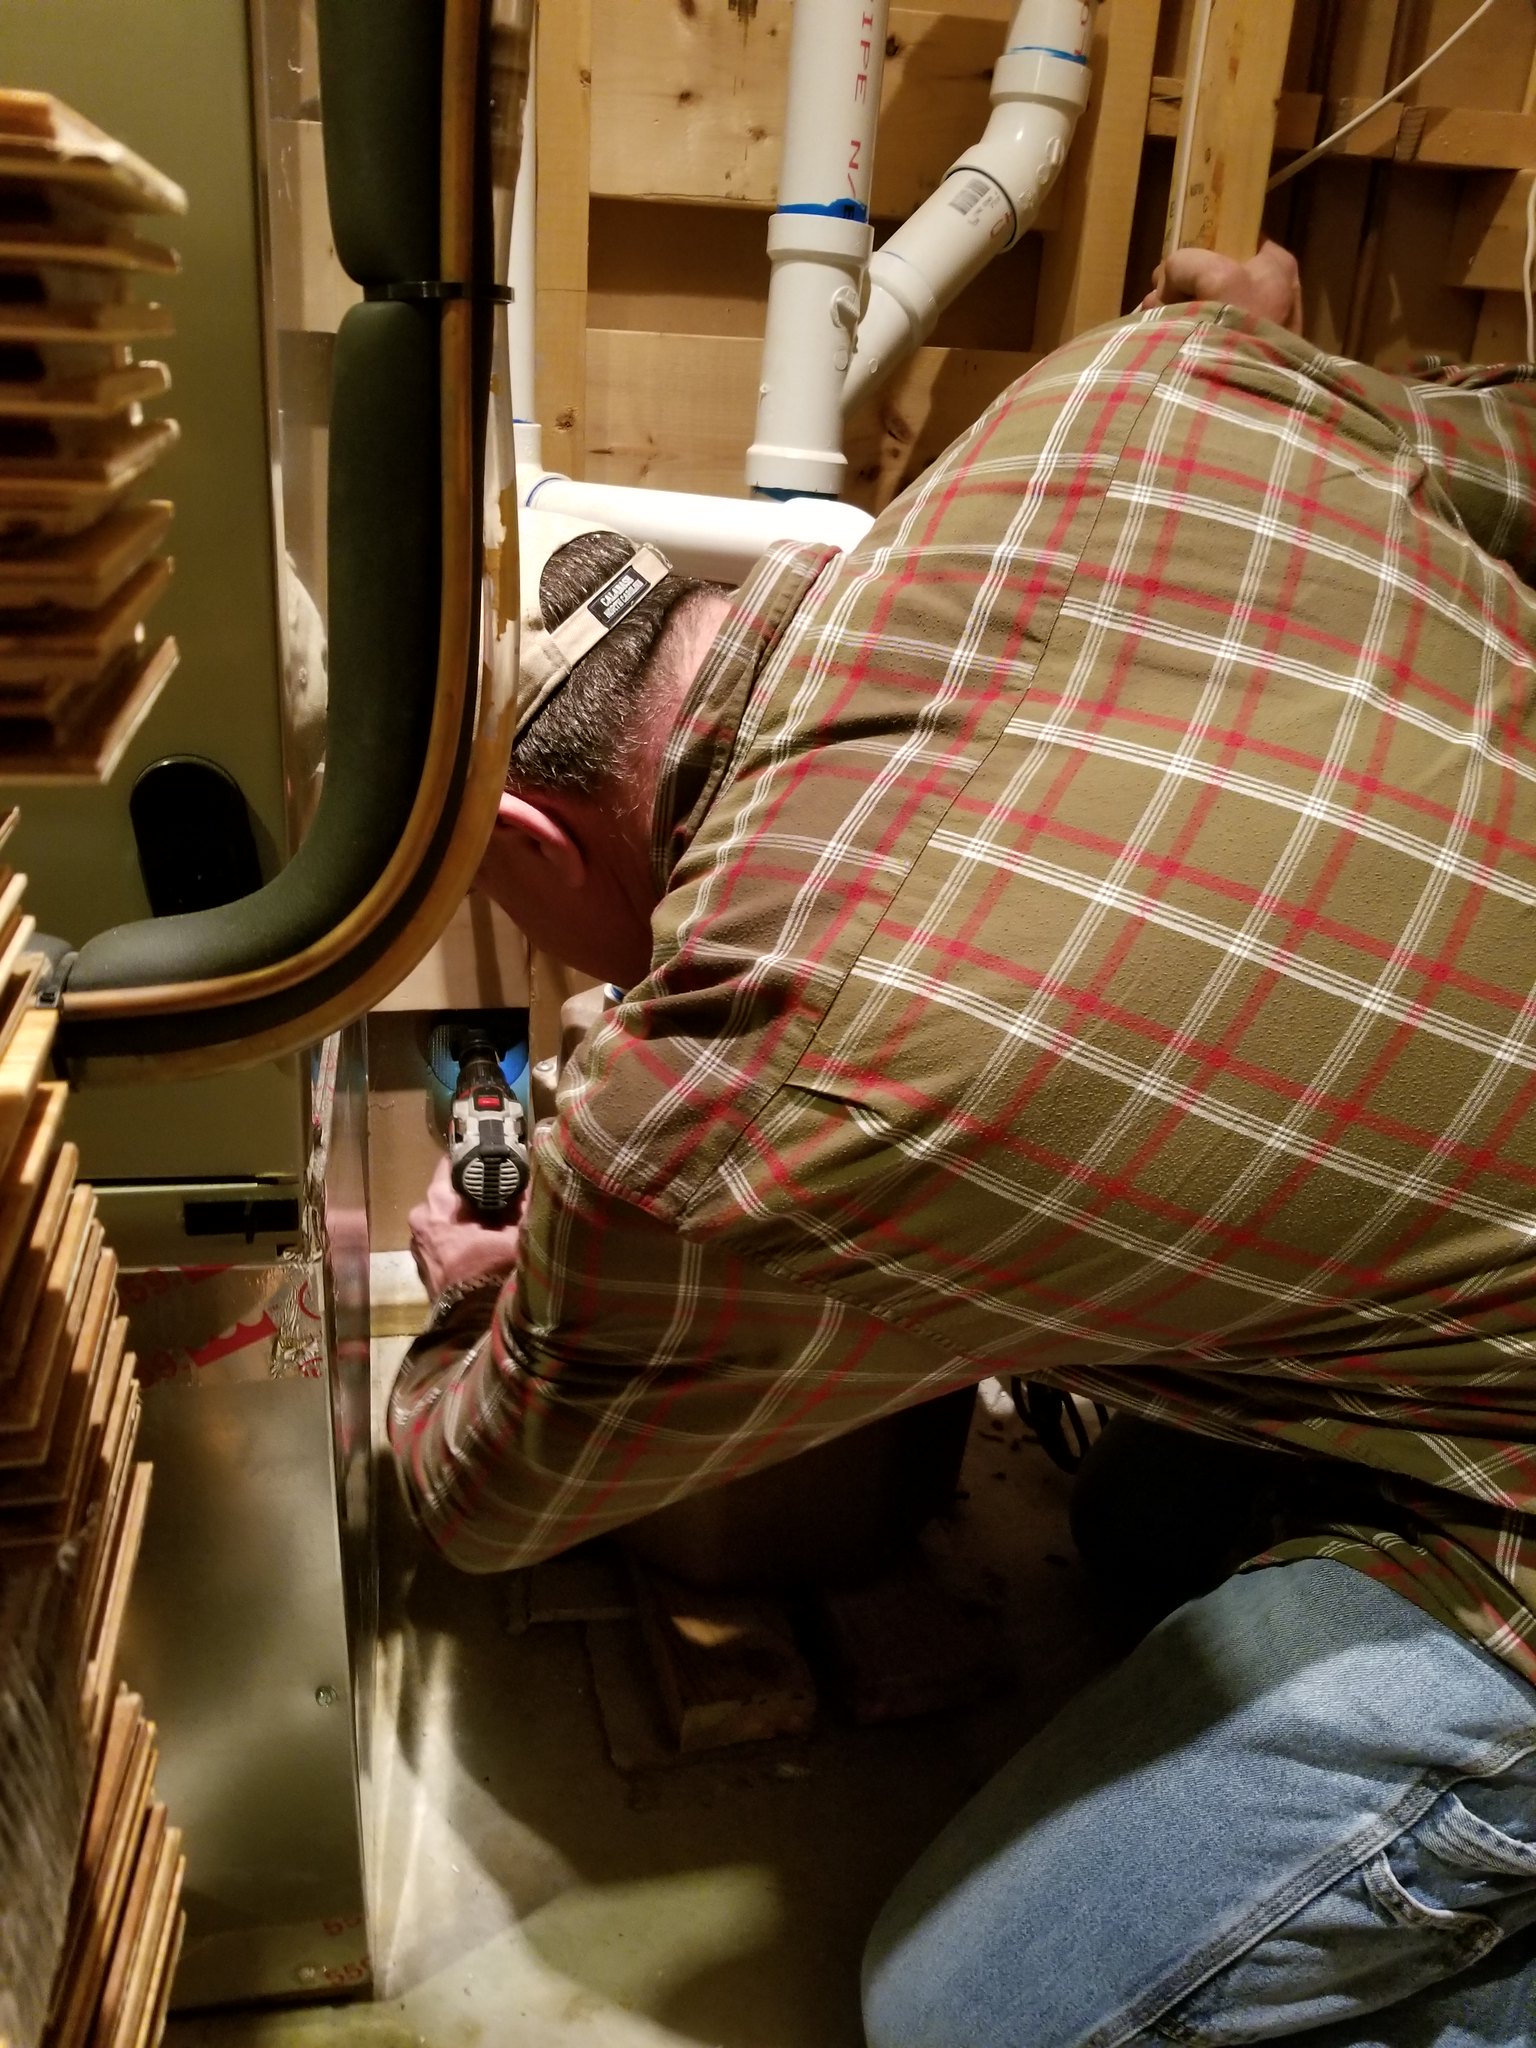
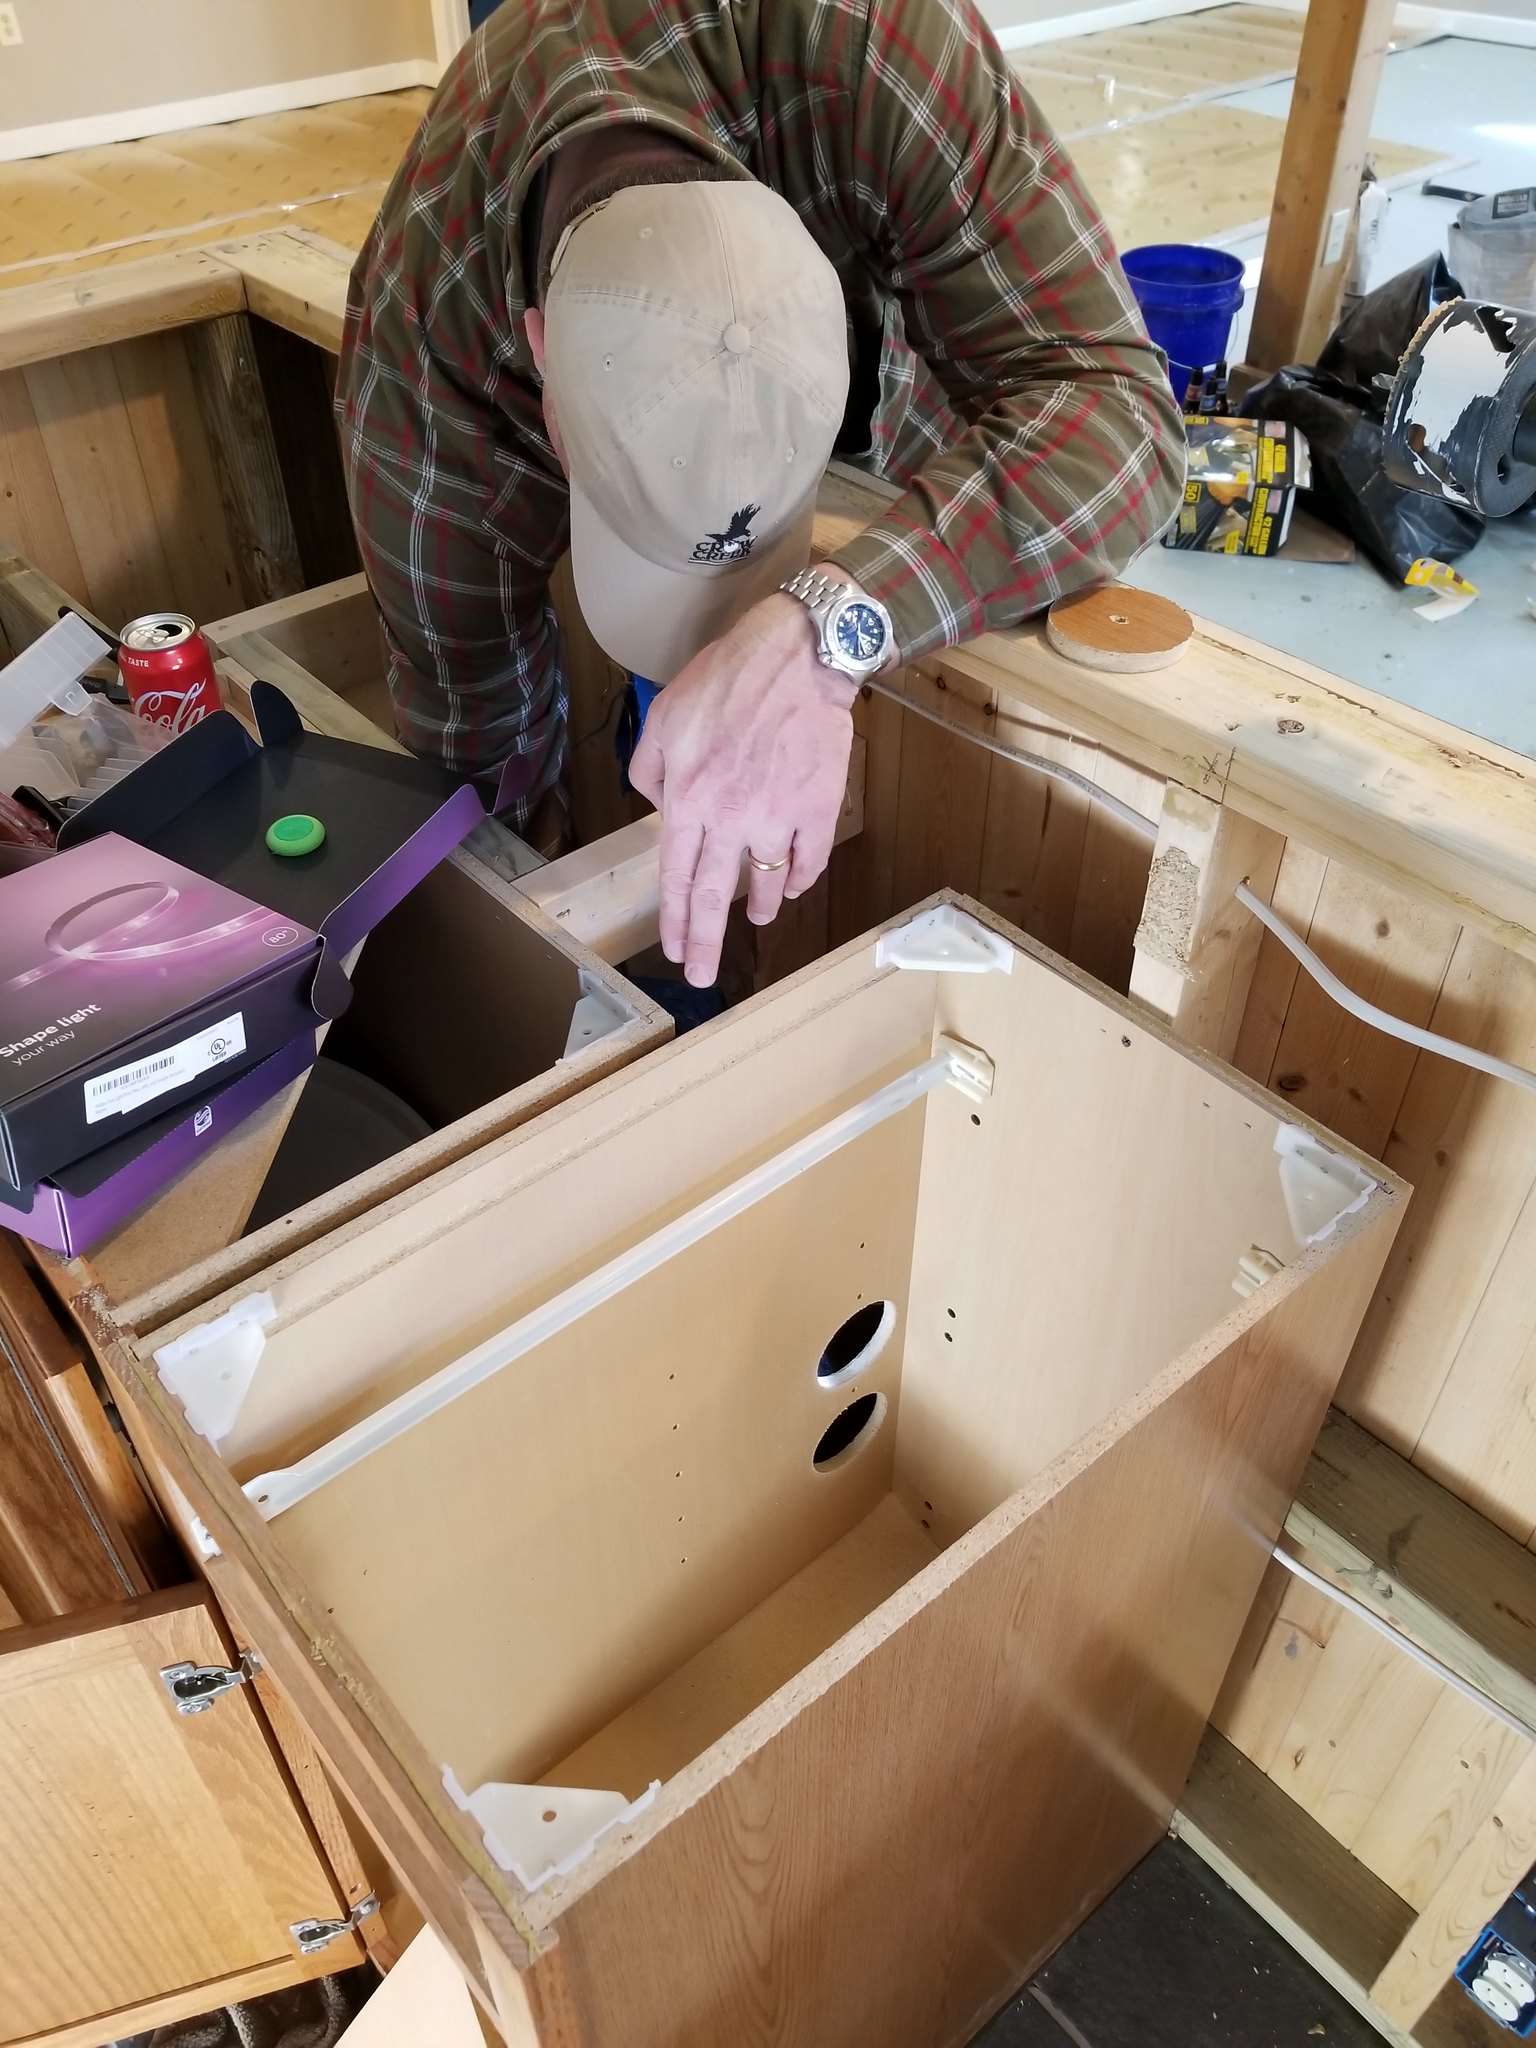
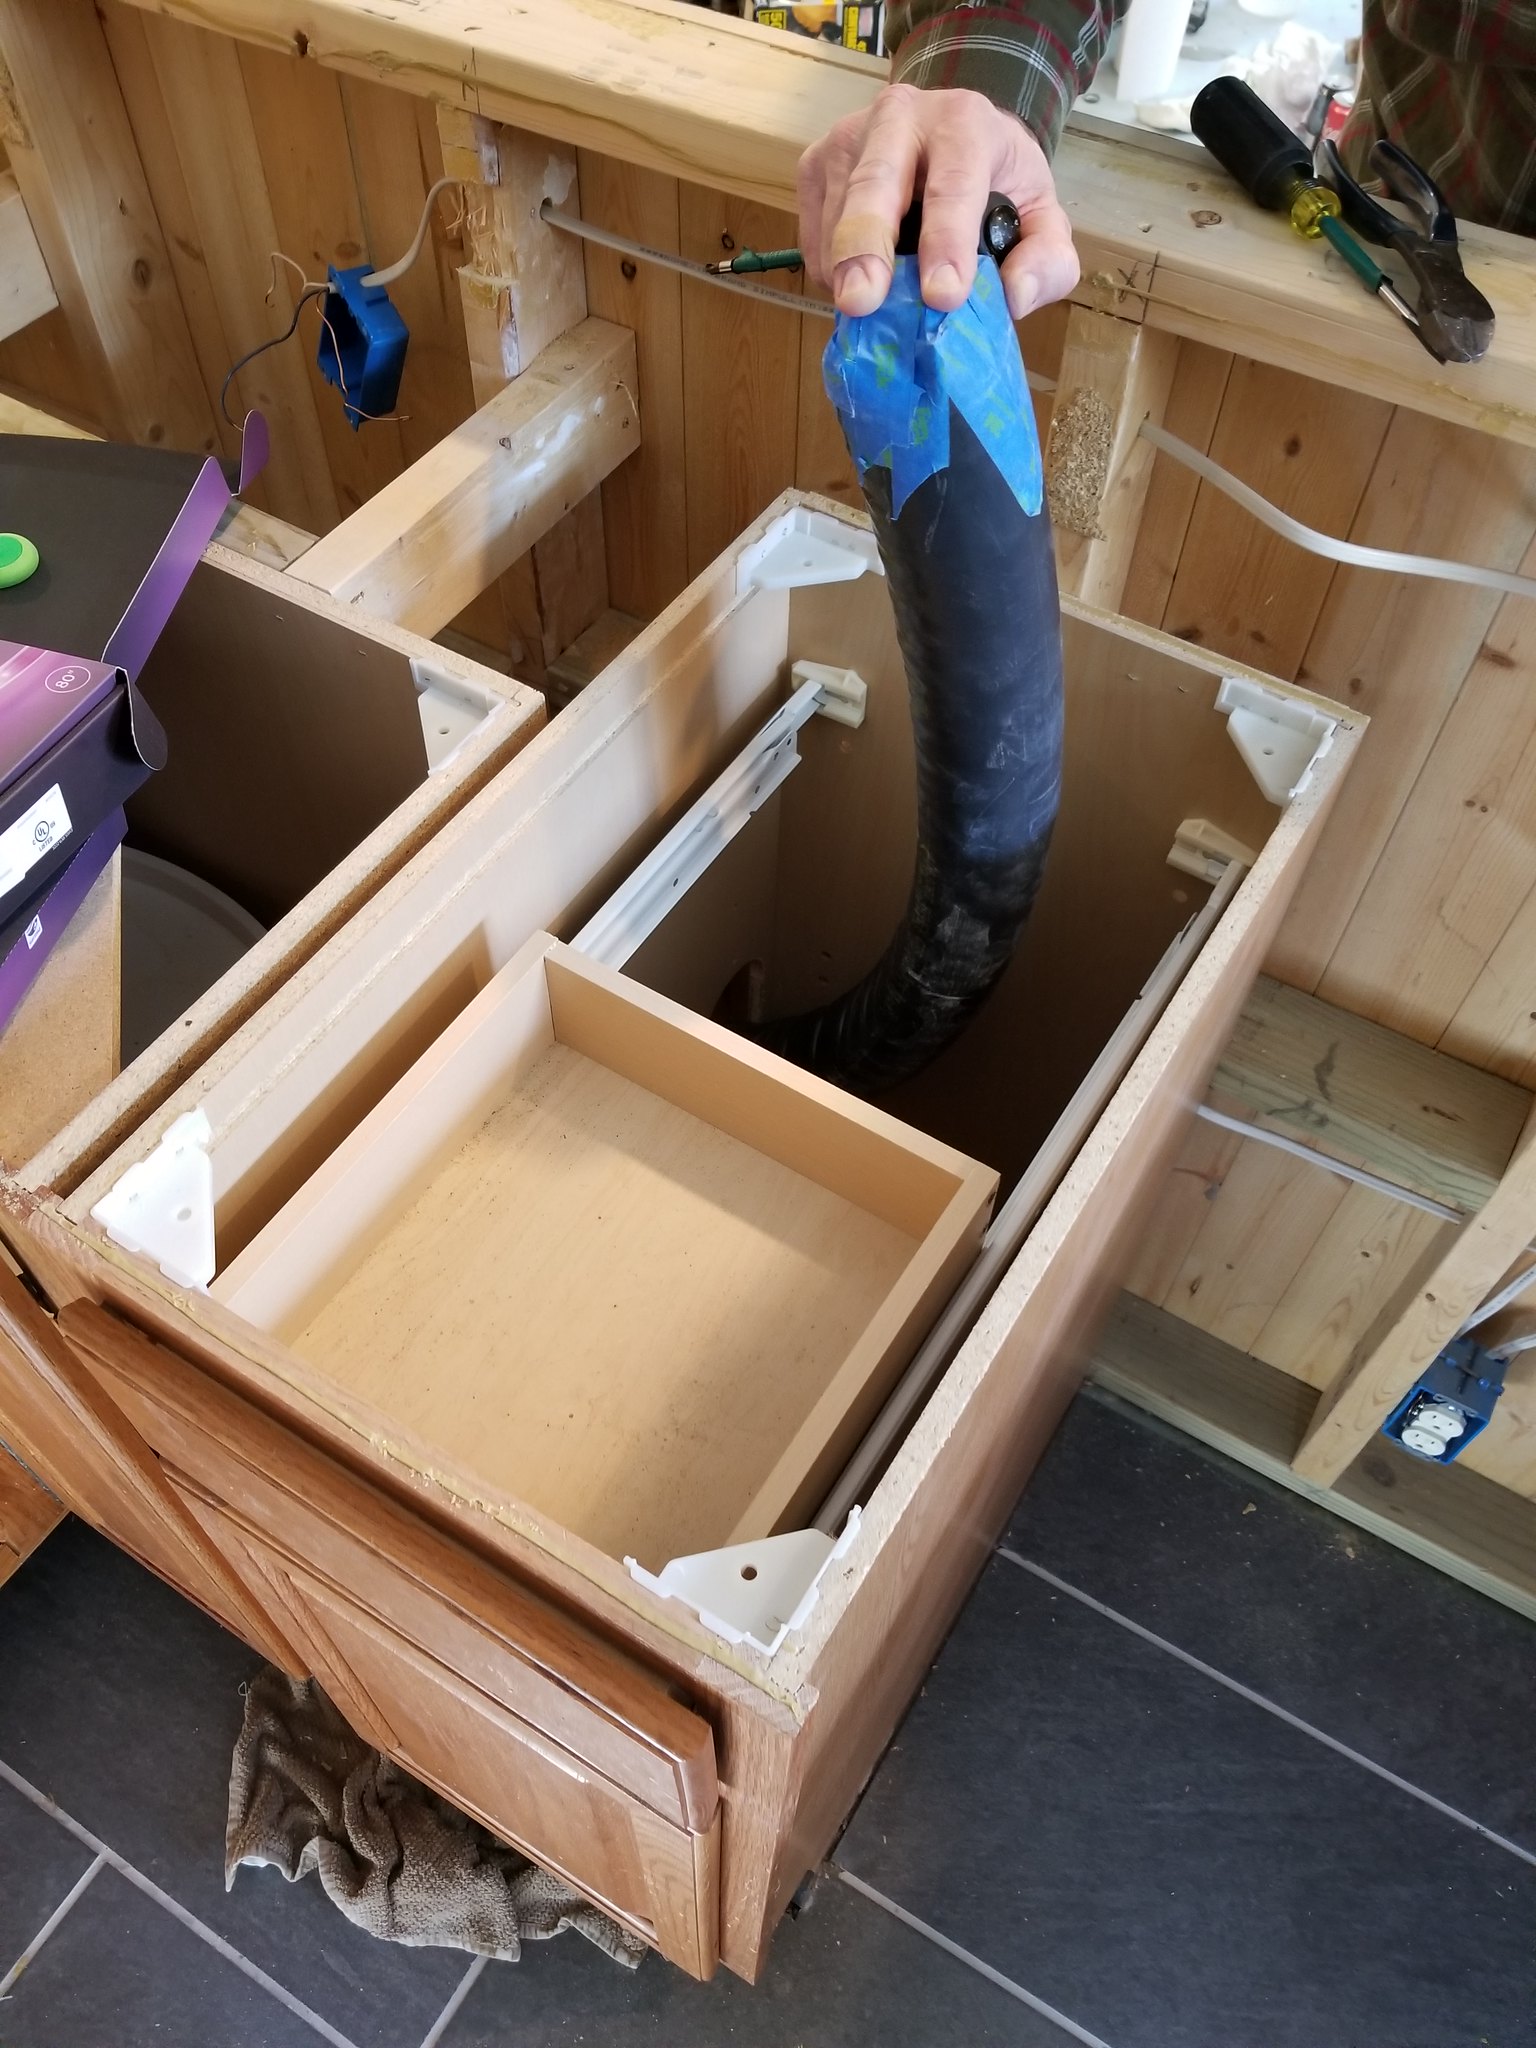
And then we removed the old countertops. This was the time we ran the trunk line for the keg system as it made the most sense with the counters off. We used a hole saw from the unfinished staircase room and drilled through the cabinet under the sink and then ran it around. Also took the cabinet drawer and shortened it by about 12” to leave plenty of room for the trunk line coming up and meeting with the tap tower.
26370819238_3e3df1a9b9_k.jpg

26370818568_140c7c4ade_k.jpg

26370817788_05df9f729c_k.jpg

38432550140_c3458a61f7_k.jpg

26370815898_1a83556d58_k.jpg
 
Next I added ‘stealth’ brackets for new counter tops coming in. New counters were cut from a custom stone that a local small company had in stock. Definitely not something your box store is going to have.
39532280274_cc54be30b5_k.jpg

26370807798_e63f4c44af_k.jpg

39532279264_4736d0b485_k.jpg

26370806488_cc11a6ae48_k.jpg

39532278044_3c6f3b0080_k.jpg


Then we added the bar rail, which is powder coated black.

26370805938_70ef5bf356_k.jpg

New sink/faucet
39532277414_2599428ea3_k.jpg


Tap tower
39532281654_f822092404_k.jpg

26370805478_b2bb43aecb_z.jpg


Now to the keezers…..
I just went to lowes and got a larger one and the smallest one they had. I will go into, but this was a mistake, but totally fixable. Anyhow, built standard keezer collars for both, seals added, and expanding foam on the inside corners.
25371945687_f02a006952_b.jpg

39532285304_3401204059_b.jpg

26370813808_5a7dda222e_b.jpg

Then we used a holesaw and cut holes in both collars for the glycol trunk line that will go between both of the freezers. And a hole that goes through the back of the keezer collar and through the wall that goes into that unfinished staircase room. Also added temp controllers to the front of both collars.
39532284254_b47c893988_b.jpg

26370812098_f4e9fa51f1_b.jpg

39532282984_51917a058c_b.jpg

26370810798_8042595635_b.jpg

Mounted the c02 distribution block
26370809038_8612b0814d_b.jpg
 
Connected the glycol trunk line to the glycol lines running through the main glycol line. Here is where I will note the least amount of ‘product’ lines that come in a trunk line with glycol is 6. The plan was only for a 4 tap tower, so I have 2 spare product lines, but I could always upgrade to a larger tower if for some reason I want 6 taps.
26370807128_7f3cb3a05d_b.jpg

39532278714_01fc8c45e0_b.jpg

Here is under the counter where all of the connections were made. Then we added proper insulation and taped it back up. I did go back and fully tape all of this, but ran out when I took the picture.
26370804328_803ef4f27e_b.jpg

39532275344_55e11022b8_b.jpg


Now for the glycol setup….
I did some research and read a few threads where people had success with a small chest freezer, placing a bucket inside, add a pond pump, and then a water/glycol mixture. Pump sends the glycol out and then the return line just brings it back into the bucket, extremely simple setup. But we will come back to this in a bit. Here it is when we first hooked it up to make sure the pump was strong enough and no leaks at the connections.
39532276424_d47757be60_b.jpg

And here is the keezer all populated with 4 sixtels. Plenty of room to always have 1 ¼ or ½ keg if we had a big party.
39532273254_fcf8d60981_b.jpg


The rec room also has phillips hue lights all around including lighting under the bar. Also you can see in the picture we painted the bar dark gray. Later on we painted the cabinets behind the bar to match as well.
26370802798_9c38281962_b.jpg

39532274474_0bfd512661_b.jpg


And then once we got all of the bamboo flooring down
26370801898_873fe9a983_b.jpg


And also got my Yards Brewing Co. neon sign hung up. Hue lights adding some cool accent lighting too!
39345337545_0c578e2f1a_b.jpg


Now here is where I address my mistake. Maybe a learning experience for someone, but oh well. I honestly jumped the gun when it came to the glycol setup and should have done more research. Our trunk line is about 25 feet and everyone I read about doing the same was much less. They were around maybe 10-15 feet where air cooled just didn’t work well enough. Well the issue was we could not get the glycol cold enough with the pump running to get the beer to optimal temperature. It was a mixture of the pump putting off heat and the returning glycol being warmer than what was in the bucket. You end up with mid 40 degree beer and about half a glass of foam. So the first fix was to try and stuff the freezer full of ice packs and frozen water jugs to help the freezer not have to work so hard with the hopes that it would be able to keep up. It didn’t work. Next I got a transmission cooler and wedged it against a wall in the freezer with the hopes that it would chill the returning glycol down more. It didn’t work. And finally, we made a stand for the bucket in the freezer and mounted the pump under the bucket and gravity fed the glycol to it. The hopes here was that the pump was warming the glycol too much and if it was outside the bucket we could fix the problem. It didn’t work.
So I finally sat down and did a lot more research and have landed at the a/c window unit glycol system where you take apart a window unit and use the guts to chill glycol in a cooler. The good thing is I can transfer everything from freezer and it can be used for the new system and then only thing left over is the small freezer and a few misc parts.
Anyhow, I will update this thread as things continue. We did all of the above in a about a month, evenings and weekends.
Thanks for reading.
 
Got the new glycol system operational last night. Window a/c unit. Temps were holding at 25 degrees last night easily. Extremely pleased.

25408640137_3680680329_b.jpg


40235051672_c97e593a1f_b.jpg


25408639617_81a9fc1748_b.jpg


40235051252_9c0ab26e3e_b.jpg
 
Curious Why didn't you try and Increase the Amount of Glycol in the Small Freezer first?

I actually attempted that as well. You could just tell the freezer could not keep up. The a/c unit method is already surpassing the needs for cooling. Not even putting a strain on it to keep the glycol that cold.
 
What about running a copper coil in the bottom of the small freezer to cool the glycol with the bucket and pump outside the freezer pushing the glycol into the freezer then to your faucets? Asking, because I was thinking of doing that but stumbled upon this post.
 
Nice work, I like your persistence. Your CO2 tank seems to be a bit small for having 4 beers on tap. I use a 20# CO2 tank mounted on the outside which lasts me 12 to 18 months depending on how many kegs I need to carbonate. The cost to fill a larger tank is not much more then the smaller tanks.
 
What about running a copper coil in the bottom of the small freezer to cool the glycol with the bucket and pump outside the freezer pushing the glycol into the freezer then to your faucets? Asking, because I was thinking of doing that but stumbled upon this post.
Not enough BTU unless you only need to maintain a few degrees below ambient.
 
Nice work, I like your persistence. Your CO2 tank seems to be a bit small for having 4 beers on tap. I use a 20# CO2 tank mounted on the outside which lasts me 12 to 18 months depending on how many kegs I need to carbonate. The cost to fill a larger tank is not much more then the smaller tanks.

That appears to be a 5lb tank and is enough to push around 16 kegs assuming there already carbonated. I personally use a 20lb to carbonate and a 20oz paintball canister in my kegerator. That’s usually just enough to push all four kegs.
 
Back
Top