Check out my immersion chiller (Pic)

Homebrew Talk - Beer, Wine, Mead, & Cider Brewing Discussion Forum

Help Support Homebrew Talk - Beer, Wine, Mead, & Cider Brewing Discussion Forum:

This site may earn a commission from merchant affiliate links, including eBay, Amazon, and others.

Walnut_Hills

Member
Joined
Jul 27, 2009
Messages
17
Reaction score
0
Location
Athens, Ohio
Greetings all:

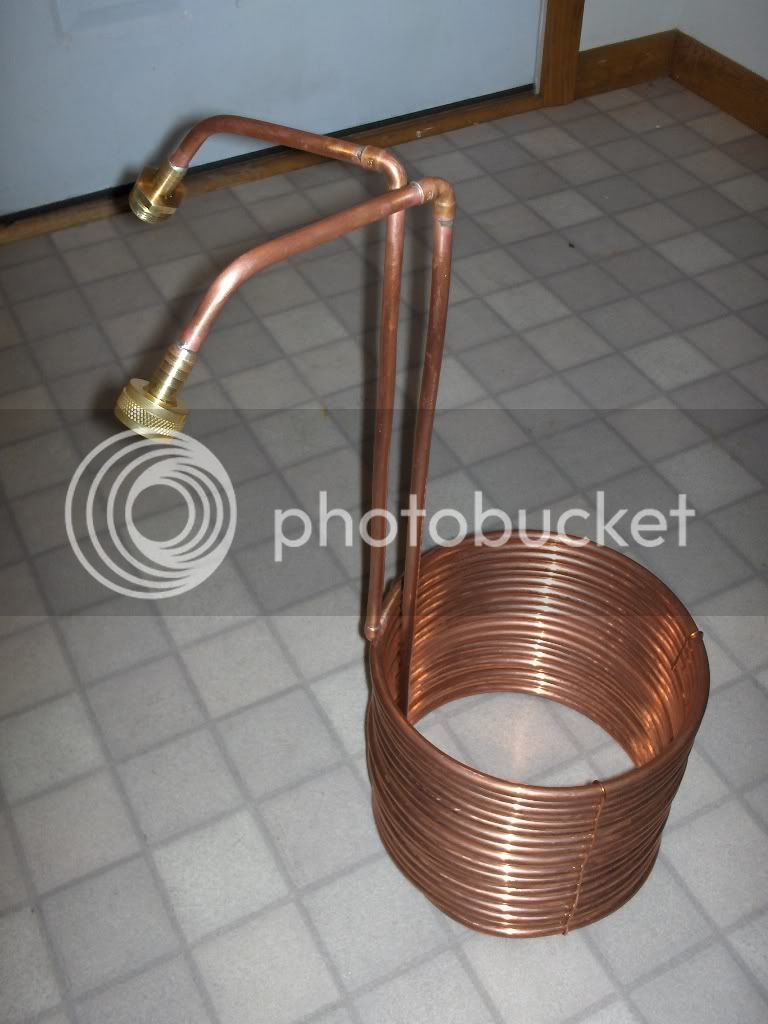
I decided an immersion chiller would be a good addition to my brewing operation, so I watched Bobby_M's youtube video, and viola!

It cost me about 50 bucks total; $10 of it was for the garden hose fittings, which are a nice touch. I used 50 feet of 3/8" OD refrigerator tubing, and this project took my father and I about 1.5 hours to complete.

chiller.jpg
 
That is very cool. I love how nicely finished it is and I'm slightly jealous. Ok, I'm really jealous because it looks just like one that I would like to build.
 
Looks good and very professional. Mine looks similar but I had to use zip ties to hold the coils firm. It was a temporary solution that works fine and I kind of forgot about because I don't care much what it looks like. You might want to consider putting quick connect fittings on yours. I put them on mine and it makes it much easier...... twisting the hose around is a PITA to connect it. Nice job.
 
Nice job wraping! You'll get some good cold break from that puppy...and be able to pitch your yeast sooner rather than later. :)
 
Thanks everyone for the encouragement!

One feature of my chiller I'd like to point out is the 14 gauge copper wire I used to bind the coils together. If you look at the picture, you can see two of my copper "clips." We bent three clips in place once the whole thing was put together so that it doesn't act like a slinky. Afterward, we ran water through it to test for leaks. The source for the 14 gauge copper wire came from a few scraps of household electrical wire scrounged from the garage.

So I lied a little about the cost of the project. Looking at my notes, I paid $40 for the coil of copper wire at Lowe's, $10 for the two brass fittings, also at Lowe's, and $4 for two 1/4" (tube size) copper elbows at my plumbing supply shop. The other 2 fittings, along with torch, flux, plumbing solder, brushes, cutter, bender, and what-nots were on hand in Dad's garage.

Mnm, with regard to your post, luckily the female hose fitting is two-piece, so I don't have to twist the hose around to attach it. In any case, I do plan to attach about a 4' leader of hose to the inlet and outlet, so that the chiller won't be supporting the weight of my garden hose.

The craftsmanship is my father's work. He assisted me in coiling the tubing around a corny keg, but the sweating was done by him. We both watched this video:

[ame=http://www.youtube.com/watch?v=G8EolKTDZUQ]YouTube - Immersion Chiller (IC) Build[/ame]

then made it happen.

Cheers!

Matt@WHB
 
nice job!
I wish I watched Bobby_m's Video on this before i made my chiller. Mine looks like a bent copper mess, but gets the job done.
 
Most impressive I must say. I can only hope that mine's half as pleasing to look at when finished. :) Again Kudos and PROST !!
 
If you want them to keep their shape...

What I did was weave 14 ga copper wire up the side in three places. It helps keep the coils slightly separated too... allowing liquid to flow all around the tubing.

My next addition was a couple of hose jumpers for my Jockey Box. Now I can attach my jockey box to the garden hose...add ice to the jockey box...and the output from the jockey box goes to my immersion coil. Micromatic, BeverageConnection..both sell the fitting that can adapt a faucet shank to a hose fitting. They're commonly used on beverage line cleaners.
 
mr clean:

Here is my reasoning for doing it myself: Austin Homebrew sells a 33' immersion chiller for $65 plus $8 shipping, which is where I would have ordered it from. Therefore, I was able to build a chiller that is 17' longer, 19 bucks cheaper, and has brass connection fittings instead of crappy vinyl tubing and hose clamps. Besides, in my opinion, it's true homebrew when you build you own brewing equipment.

Cheers!

Matt@WHB

Preach it! :mug:
 
Back
Top