funky_brewster
Active Member
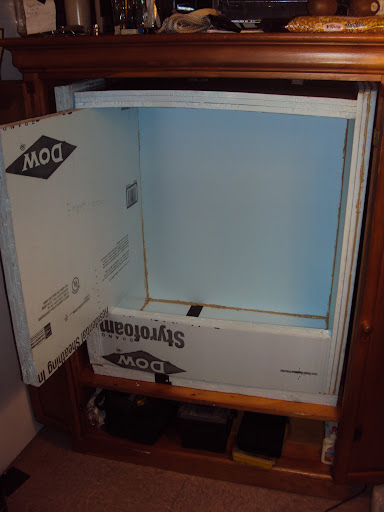
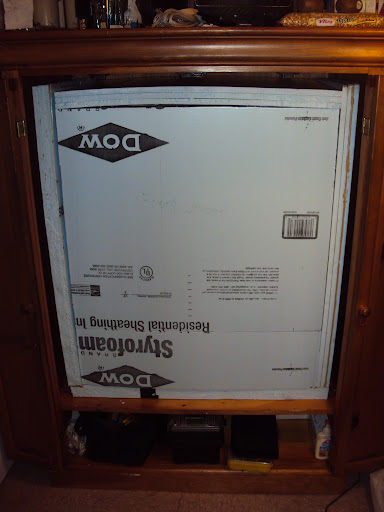
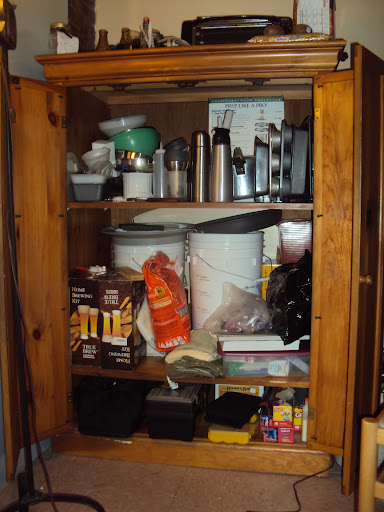
After much deliberation and thought as the the best way to improve temperature consistency while not cramping my apartment space significantly, I arrived at the idea of building a Son of Fermenter into this free-standing closet unit that was left here by a previous tenant.
Im still debating the exact chamber design. In the space, I can either go with a traditional "Son of Fermentation" chiller which would effectively be self-contained and just lives in the cabinet. (build plans for the SoF chiller: http://knoxhomebrewer.com/images/stories/chiller%20plans.pdf)
Alternatively, I could upgrade in chamber dimensions and possibly ease of maintenance by going for a "Mother of Fermentation" chiller (plans: http://www.wortomatic.com/articles/38DD-Mother-of-a-Fermentation-Chiller)
The basic difference is whether I want a movable unit with ice up top inside the chamber level (SoF), or if I want to utilize the under-shelf space to do something more like the Mother of Fermenter. The shelf dimensions are just over 34 x 20 and have enough room for two buckets side-by-side.
Part of the fun for this project was getting 4x8 extruded polystyrene (EPS) foam board back to my apartment in Prospect Heights Brooklyn from the Lowes in Gowanus (about 2 miles away). I foolishly drove there yesterday, not thinking through how I would transport the foam boards back (I have and will strap just about anything to my roof, but something told me that styrofoam might not hold up). So I returned there today, the day before before Hurricane Irene is set to hit NYC and just about 2 hours before the first-ever complete shutdown of mass transit in the city. Other than some odd looks (from people likely wondering if I was planning to board up windows with thin styrofoam), it wasnt too terrible an experience.
Im sure there are supply stores in the city that carry 2 EPS but I hadnt found one and just wanted to get something out of this weekend, so I picked up three 0.55 sheets and planned to glue them together. Its not ideal for a few reasons, but this is what Ive got to work with.
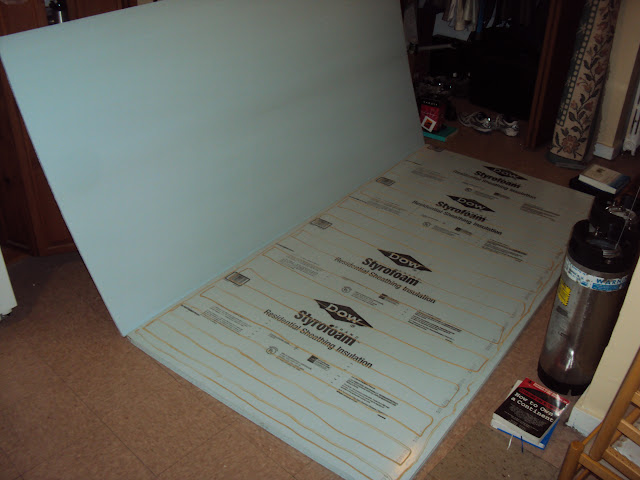
Using adhesive made for foam board (in the same aisle as Liquid Nails, which is recommended in SoF build plans), I put a bead down on one sheet then sandwiched another sheet on top, truing up the corners as best as possible. I let it dry a half hour or so then repeated to bond the 3rd sheet. The plan is to let the whole piece dry a long while since I need to make many cuts after deciding on a design.
For now, the slab sits. And I contemplate more chamber space or more chamber portability. Tomorrow we shall see!
Im still debating the exact chamber design. In the space, I can either go with a traditional "Son of Fermentation" chiller which would effectively be self-contained and just lives in the cabinet. (build plans for the SoF chiller: http://knoxhomebrewer.com/images/stories/chiller%20plans.pdf)
Alternatively, I could upgrade in chamber dimensions and possibly ease of maintenance by going for a "Mother of Fermentation" chiller (plans: http://www.wortomatic.com/articles/38DD-Mother-of-a-Fermentation-Chiller)
The basic difference is whether I want a movable unit with ice up top inside the chamber level (SoF), or if I want to utilize the under-shelf space to do something more like the Mother of Fermenter. The shelf dimensions are just over 34 x 20 and have enough room for two buckets side-by-side.
Part of the fun for this project was getting 4x8 extruded polystyrene (EPS) foam board back to my apartment in Prospect Heights Brooklyn from the Lowes in Gowanus (about 2 miles away). I foolishly drove there yesterday, not thinking through how I would transport the foam boards back (I have and will strap just about anything to my roof, but something told me that styrofoam might not hold up). So I returned there today, the day before before Hurricane Irene is set to hit NYC and just about 2 hours before the first-ever complete shutdown of mass transit in the city. Other than some odd looks (from people likely wondering if I was planning to board up windows with thin styrofoam), it wasnt too terrible an experience.
Im sure there are supply stores in the city that carry 2 EPS but I hadnt found one and just wanted to get something out of this weekend, so I picked up three 0.55 sheets and planned to glue them together. Its not ideal for a few reasons, but this is what Ive got to work with.
Using adhesive made for foam board (in the same aisle as Liquid Nails, which is recommended in SoF build plans), I put a bead down on one sheet then sandwiched another sheet on top, truing up the corners as best as possible. I let it dry a half hour or so then repeated to bond the 3rd sheet. The plan is to let the whole piece dry a long while since I need to make many cuts after deciding on a design.
For now, the slab sits. And I contemplate more chamber space or more chamber portability. Tomorrow we shall see!