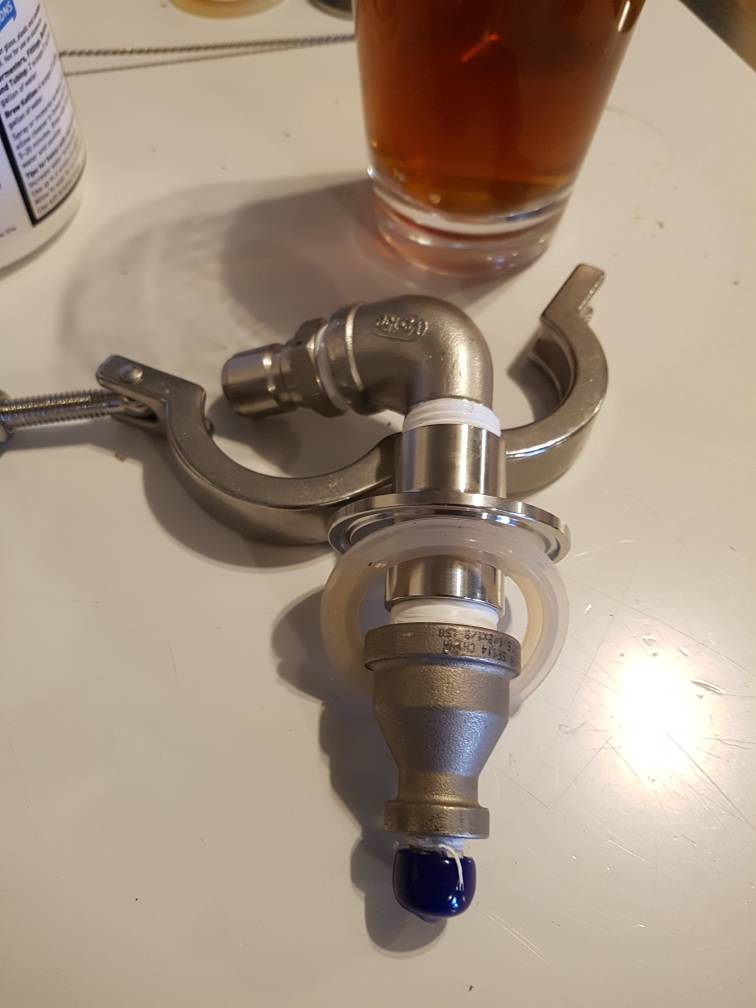
Boil kettle condenser - no overhead ventilation needed

Homebrew Talk - Beer, Wine, Mead, & Cider Brewing Discussion Forum

Help Support Homebrew Talk - Beer, Wine, Mead, & Cider Brewing Discussion Forum:

This site may earn a commission from merchant affiliate links, including eBay, Amazon, and others.
Having the hop basket on the bottom during the boil is not a good idea. I did it for just a few seconds once, and got some light scorching (luckily not enough to taste in the beer.) So, having it on the bottom for long periods of time is likely to result in significant scorching.

Brew on :mug:
For gas heat yes but I do this for my smaller 6 gallon electric brew sessions in my 15 gallon bayou kettle and it works well.
I would guess most people using gas/propane setups would have proper ventilation for it and wouldnt be looking for this approach but I could be wrong here.
 
Last edited:
Happy with the results! The device works great. I might try the smaller nozzle down the road because the discharge water never got over 115 degrees. I did throttle it back a bit as well. It worked so well I bet the 1.5" would have been fine.
The only thing I might add is another 2" fitting on the cover. It would save lifting the lid for hop additions.
 
For gas heat yes but I do this for my smaller 6 gallon electric brew sessions in my 15 gallon bayou kettle and it works well.
I would guess most people using gas/propane setups would have proper ventilation for it and wouldnt be looking for this approach but I could be wrong here.
Good point. It's only an issue if the hop basket is sitting on metal that is directly heated. So, as long as it doesn't touch the element in an electric system, touching the bottom should be ok.

Brew on :mug:
 
Good point. It's only an issue if the hop basket is sitting on metal that is directly heated. So, as long as it doesn't touch the element in an electric system, touching the bottom should be ok.

Brew on :mug:

I suppose in that circumstance, some type of standoff would solve that problem. Maybe even silicone feet would be enough, but some SS bolts/rods/washers etc. might do the trick. I think the magnet is cool though!
 
Can’t wait to try it out! Thanks for the ideas! Now on to the rest of the electrical
IMG_1865.jpg
 
Anyone notice performance gains with the TC fitting on the lid as opposed to the side of the kettle? Steam obviously rises is my thought, but id rather not have to mess with a lid with this contraption on it to stir, add hopps, take a nosey look at whats going on etc... Also, the side output seems like a free boil over insurance package. Just built up a new 18 gal pot with 2" TC fittings for the element, plus some for recirc / whirlpool. Doing 10 gal batches so i have some room for a 1-1/2" Solder on fitting on the side....
20180204_135104.jpg
 
I was wondering about the condenser for mashing based on the need to use it when boiling. I need to get rid of the condensation - condensation starts quickly in the low room temps I'll be brewing at in the garage in the winter. If I used the condenser for boiling, I was wondering if it would also work during mash when doing BIAB.

I found a lid that will fit for $25. I guess now my great deal on the Craigslist kettle is not as good as I thought it was.
https://www.webstaurantstore.com/21-aluminum-pot-pan-cover/407APTC100.html

There are others at restaurant supply places online that are cheaper, but they don't state the diameters. I've sent their customer service departments some emails.

None the right size on Amazon or eBay that I found. 20" ID x 21" OD would be a decent fit - close enough.

I'll find one and drill a hole in it for the bulkhead fitting.

Where I'm brewing in the garage is cold - just above freezing right now. Condensation starts at relatively low temperatures. I hope the BIAB bag won't wick up moisture up and around and drip down the outside of the kettle.
I found that buying a pizza tray was a cheap substitute for a real lid. I ordered a handle and drilled holes to mount it.
 
Anyone notice performance gains with the TC fitting on the lid as opposed to the side of the kettle? Steam obviously rises is my thought, but id rather not have to mess with a lid with this contraption on it to stir, add hopps, take a nosey look at whats going on etc... Also, the side output seems like a free boil over insurance package. Just built up a new 18 gal pot with 2" TC fittings for the element, plus some for recirc / whirlpool. Doing 10 gal batches so i have some room for a 1-1/2" Solder on fitting on the side....View attachment 556786

I don’t think anyone has compared them. That said, there is not a thin layer of steam just up by the lid - the whole cavity is filled with steam. And the vacuum created in the condensing process should create plenty to draw from that cavity. Maybe in theory you could get a tad less condensation on the lid, but I doubt it and doubt IMO a few inches lower is going to amount to any performance difference.
 
Has anyone used a camlock fitting to attach this to the side of their kettle? That way, you could recirculate during the mash, then disconnect and attach this for the boil.
Thanks!
 
Has anyone used a camlock fitting to attach this to the side of their kettle? That way, you could recirculate during the mash, then disconnect and attach this for the boil.
Thanks!
What difference would it make whether its camlock or TC? Someone mentioned using a fitting with a tc on both the inside and outside to do this which is totally doable (I linked optional hardware above which would be less than $20 and bolt on and seal with included silicone oring.)
but when you get into the 1' and greater camlocks the tri clamp options are actually cleaner and more cost effective unless im not understanding what your suggesting?
 
I guess I am operating under the assumption that it would be cheaper to just use a cam lock to attach it to the kettle than using a TC assembly.
 
Has anyone used a camlock fitting to attach this to the side of their kettle? That way, you could recirculate during the mash, then disconnect and attach this for the boil.
Thanks!
The Brewboss solution uses a camlock, so it's likely to work even though it significantly reduces the opening. However, I don't think anyone that has done this has reported on how well it works. You could always buy a triclover fitting for your recirculation connection and swap it out as well. I bought a TC blank to install during mash if I have a full pot, so that's no different.
 
We are starting to repeat ourselves on this thread. It would help if people read above before asking duplicate questions...

I think the camlock is ok. Probably not ideal but ok. The real issue is the sprayer section, which has to have enough volume in it to expose the steam to the spray. That is why I initially went with 2” TC, but others are reporting success with 1.5” TC too, which makes sense. However, if that section gets much smaller, lots of the spray will just hit the tubing wall and not be exposed to the steam.

I agree with @augiedoggy that the TC solution is cleaner but if you want to try the small camlock, give it a go.
 
I don’t think anyone has compared them. That said, there is not a thin layer of steam just up by the lid - the whole cavity is filled with steam. And the vacuum created in the condensing process should create plenty to draw from that cavity. Maybe in theory you could get a tad less condensation on the lid, but I doubt it and doubt IMO a few inches lower is going to amount to any performance difference.
While not familiar with trying both, I'm quite familiar with hydralics/fluid dynamics. We have a pressurized vessel with a direct opening to a lower pressure environment, won't matter where that opening is (or at least any observed difference would be marginal and likely impossible to tell without equipment). Add to that the thermodynamic that creates the vaccum thay brundog mentioned and it matters even less.


We are starting to repeat ourselves on this thread. It would help if people read above before asking duplicate questions...

I think the camlock is ok. Probably not ideal but ok. The real issue is the sprayer section, which has to have enough volume in it to expose the steam to the spray. That is why I initially went with 2” TC, but others are reporting success with 1.5” TC too, which makes sense. However, if that section gets much smaller, lots of the spray will just hit the tubing wall and not be exposed to the steam.

I agree with @augiedoggy that the TC solution is cleaner but if you want to try the small camlock, give it a go.

Either should work, but there are other advantages to tri-clover in my opinion. First, you'll have a higher pressure in the tube (the 1/2" section to accommodate the cam lock connections). This will move the steam past the sprayer at a faster rate, likely raising output temp. I'd posted a few pages back my plan for doing both mash and steam condensation with the same base parts such that I just flip the assembly and swap caps to go from one to the other. It wouldn't be an issue to simply add a couple tri-clamp 1/2" npt or brewhardwares tri-clamp to cam lock caps to have an easy to change and clean set up, maybe $40, tops?. Personally, I'd rather just slowly migrate my other stuff to all tri-clamp, YMMV. Maybe everyone else doesn't blow their gaskets out of their camlocks as often as I do...
 
The Brewboss solution uses a camlock, so it's likely to work even though it significantly reduces the opening. However, I don't think anyone that has done this has reported on how well it works. You could always buy a triclover fitting for your recirculation connection and swap it out as well. I bought a TC blank to install during mash if I have a full pot, so that's no different.
That was my point I was assuming we were comparing camlocks that would be big enough to work as effectively as the TC fittings. I have camlocks on my setup and used larger diameter 1" camlocks on my main rims tube for easy disassemble and cleanup, the 1' camlock fittings cost more than 1.5" tri clamp fittings.

That said I prefer camlocks everywhere else on the hot side over TC fittings. mainly hoses or pumps if someone moves them during brewing. They are just much easier to use and quicker to remove and connect
 
Last edited:
I was thinking of capturing my waste RO water and adding some ice packs to it and using a submersible pump to circulate water through the mister. Anyone have any ideas on a pump that would work for this scenario? I saw this one on amazon, but don't know if it is strong enough to get the PSI needed (http://amzn.to/2GXYrgG)
 
That was my point I was assuming we were comparing camlocks that would be big enough to work as effectively as the TC fittings. I have camlocks on my setup and used larger diameter 1" camlocks on my main rims tube for easy disassemble and cleanup, the 1' camlock fittings cost more than 1.5" tri clamp fittings.

That said I prefer camlocks everywhere else on the hot side over TC fittings. mainly hoses or pumps if someone moves them during brewing. They are just much easier to use and quicker to remove and connect
Have to admit, it never occurred to me that you can get camlocks bigger than 1/2" commonly available for homebrew, but knowing where they started life, of course they do. Outside of our hobby, 1/2 is probably the least common.

So, revising my previous statement. I don't think there would be much issue, though if using 1", I'd probably go with the 9gph mister given the data supplied by the guys who have tried both using 1.5 and 2" TC. I say that based on the increased velocity the steam will be entering given the 1/2" to 1" difference in the steam path.
 
Had a great first brew day using the new condenser assembly. Boil-off rate was only 1/2 gallon, way less than my usual 1.5 gallon rate. I was brewing in front of an open window, but without any type of fan or hood. Some steam escaped during hop additions, but not enough to create any condensation on the ceiling or elsewhere. This also was my first brew day in my newly renovated basement space. Having the water source and utility sink right next to me was so convenient. It also was nice to have cold tap water (50 degrees), so my chill took only about 10 minutes. I didn't quite hit my numbers, probably because my starting water volume was too high. But who cares - it'll still be great beer!

 
Last edited:
If you're trying to be budget minded and want a pump driven setup you can try to find a headlight washer pump from a junk yard. Some of them are capable of pressure around 50-55psi. Look for pathfinders with headlight washers.

Once I get around to buying a larger kettle I think i'm going to move to this setup, looks awesome.
 
Just curious, has anyone connected a CIP ball to the TC side port to clean their kettle? Wondering how this would work side mounted. Could really make clean up a lot easier.
 
I replace my sparge arm and whirlpool arm in my MLT and BK respectively, with CIP cleaners. They work a treat. The water is recirculated via the brewing pumps.

But your idea is a good one @marjen. You could use the TC / pickup type fittings to add a CIP assembly.
 
I use one of these in my keg washer. It's 1/2" FPT, but you can get them with a TC fitting for a bit more. I can vouch that the ones from QM Stainless are high quality, available via eBay or Amazon. Maybe a little more than a plastic one from McMaster, but no additional shipping.
 
They look good. Chugger pump enough? The TC one look like you need the TC on the inside of the vessel. The other could work.
Thanks
 
I use one of these in my keg washer. It's 1/2" FPT, but you can get them with a TC fitting for a bit more. I can vouch that the ones from QM Stainless are high quality, available via eBay or Amazon. Maybe a little more than a plastic one from McMaster, but no additional shipping.

Actually not more - these look good! I can’t look up the McMaster one right now but search “drum washer”
 
So, what kind of chiller is everyone using now that they’ve implemented the condenser? Just planning out a new purchase, and thought that an IC may be an issue here when it’s added to the boil for the last 15 or so, since we need the lid on. Anyone have a work around?
 
So, what kind of chiller is everyone using now that they’ve implemented the condenser? Just planning out a new purchase, and thought that an IC may be an issue here when it’s added to the boil for the last 15 or so, since we need the lid on. Anyone have a work around?
I'm just going to add mine at flame out and turn the water on after it's been in there for 10 minutes, I'll also have the kettle whirlpooling during this time.
 
Last edited:
I'm just going to add mine at flame out and turn the water on after it's been in there for 10 minutes, I'll also have the kettle whirlpooling during this time.

This makes good sense. Once you add the IC, the temp of the wort will drop slightly, and steam production will drop dramatically.
 
This solution would work best I think with an external chiller... I may be totally off base here but I am curious is there a lot of folks using these using an immersion chiller? I would have guessed no.

Also I know this came up in the beginning but has anyone noticed any ill effects of the dreaded "DMS" or is this really more of another brewing myth as suspected?
 
Last edited:
This solution would work best I think with an external chiller... I may be totally off base here but I am curious is there a lot of folks using these using an immersion chiller? I would have guessed no.

Also I know this came up in the beginning but has anyone noticed any ill effects of the dreaded "DMS" or is this really more of another brewing myth as suspected?
I've been wondering about this as well
 
I was thinking of running an IC through the lid and just having it in the boil the entire time. I'm not doing BIAB so it would just be in the boil kettle. I plan on using a Boil Coil so it won't interfere with the element.
 
Just got done running the water supply line and connector for the condenser assembly.
Got the mister nozzle, TC connector and waterline QD ready. Just need the TC tee which didnt arrive in time for tomorrows brewday. Next time...
20180217_120507.jpg
20180217_121553.jpg
 

Latest posts

Back
Top