BIABasket - My Grain Basket Doubles as a Hop Spider

Homebrew Talk - Beer, Wine, Mead, & Cider Brewing Discussion Forum

Help Support Homebrew Talk - Beer, Wine, Mead, & Cider Brewing Discussion Forum:

This site may earn a commission from merchant affiliate links, including eBay, Amazon, and others.

Mike123

Well-Known Member
Joined
Feb 2, 2011
Messages
196
Reaction score
169
Location
Las Vegas
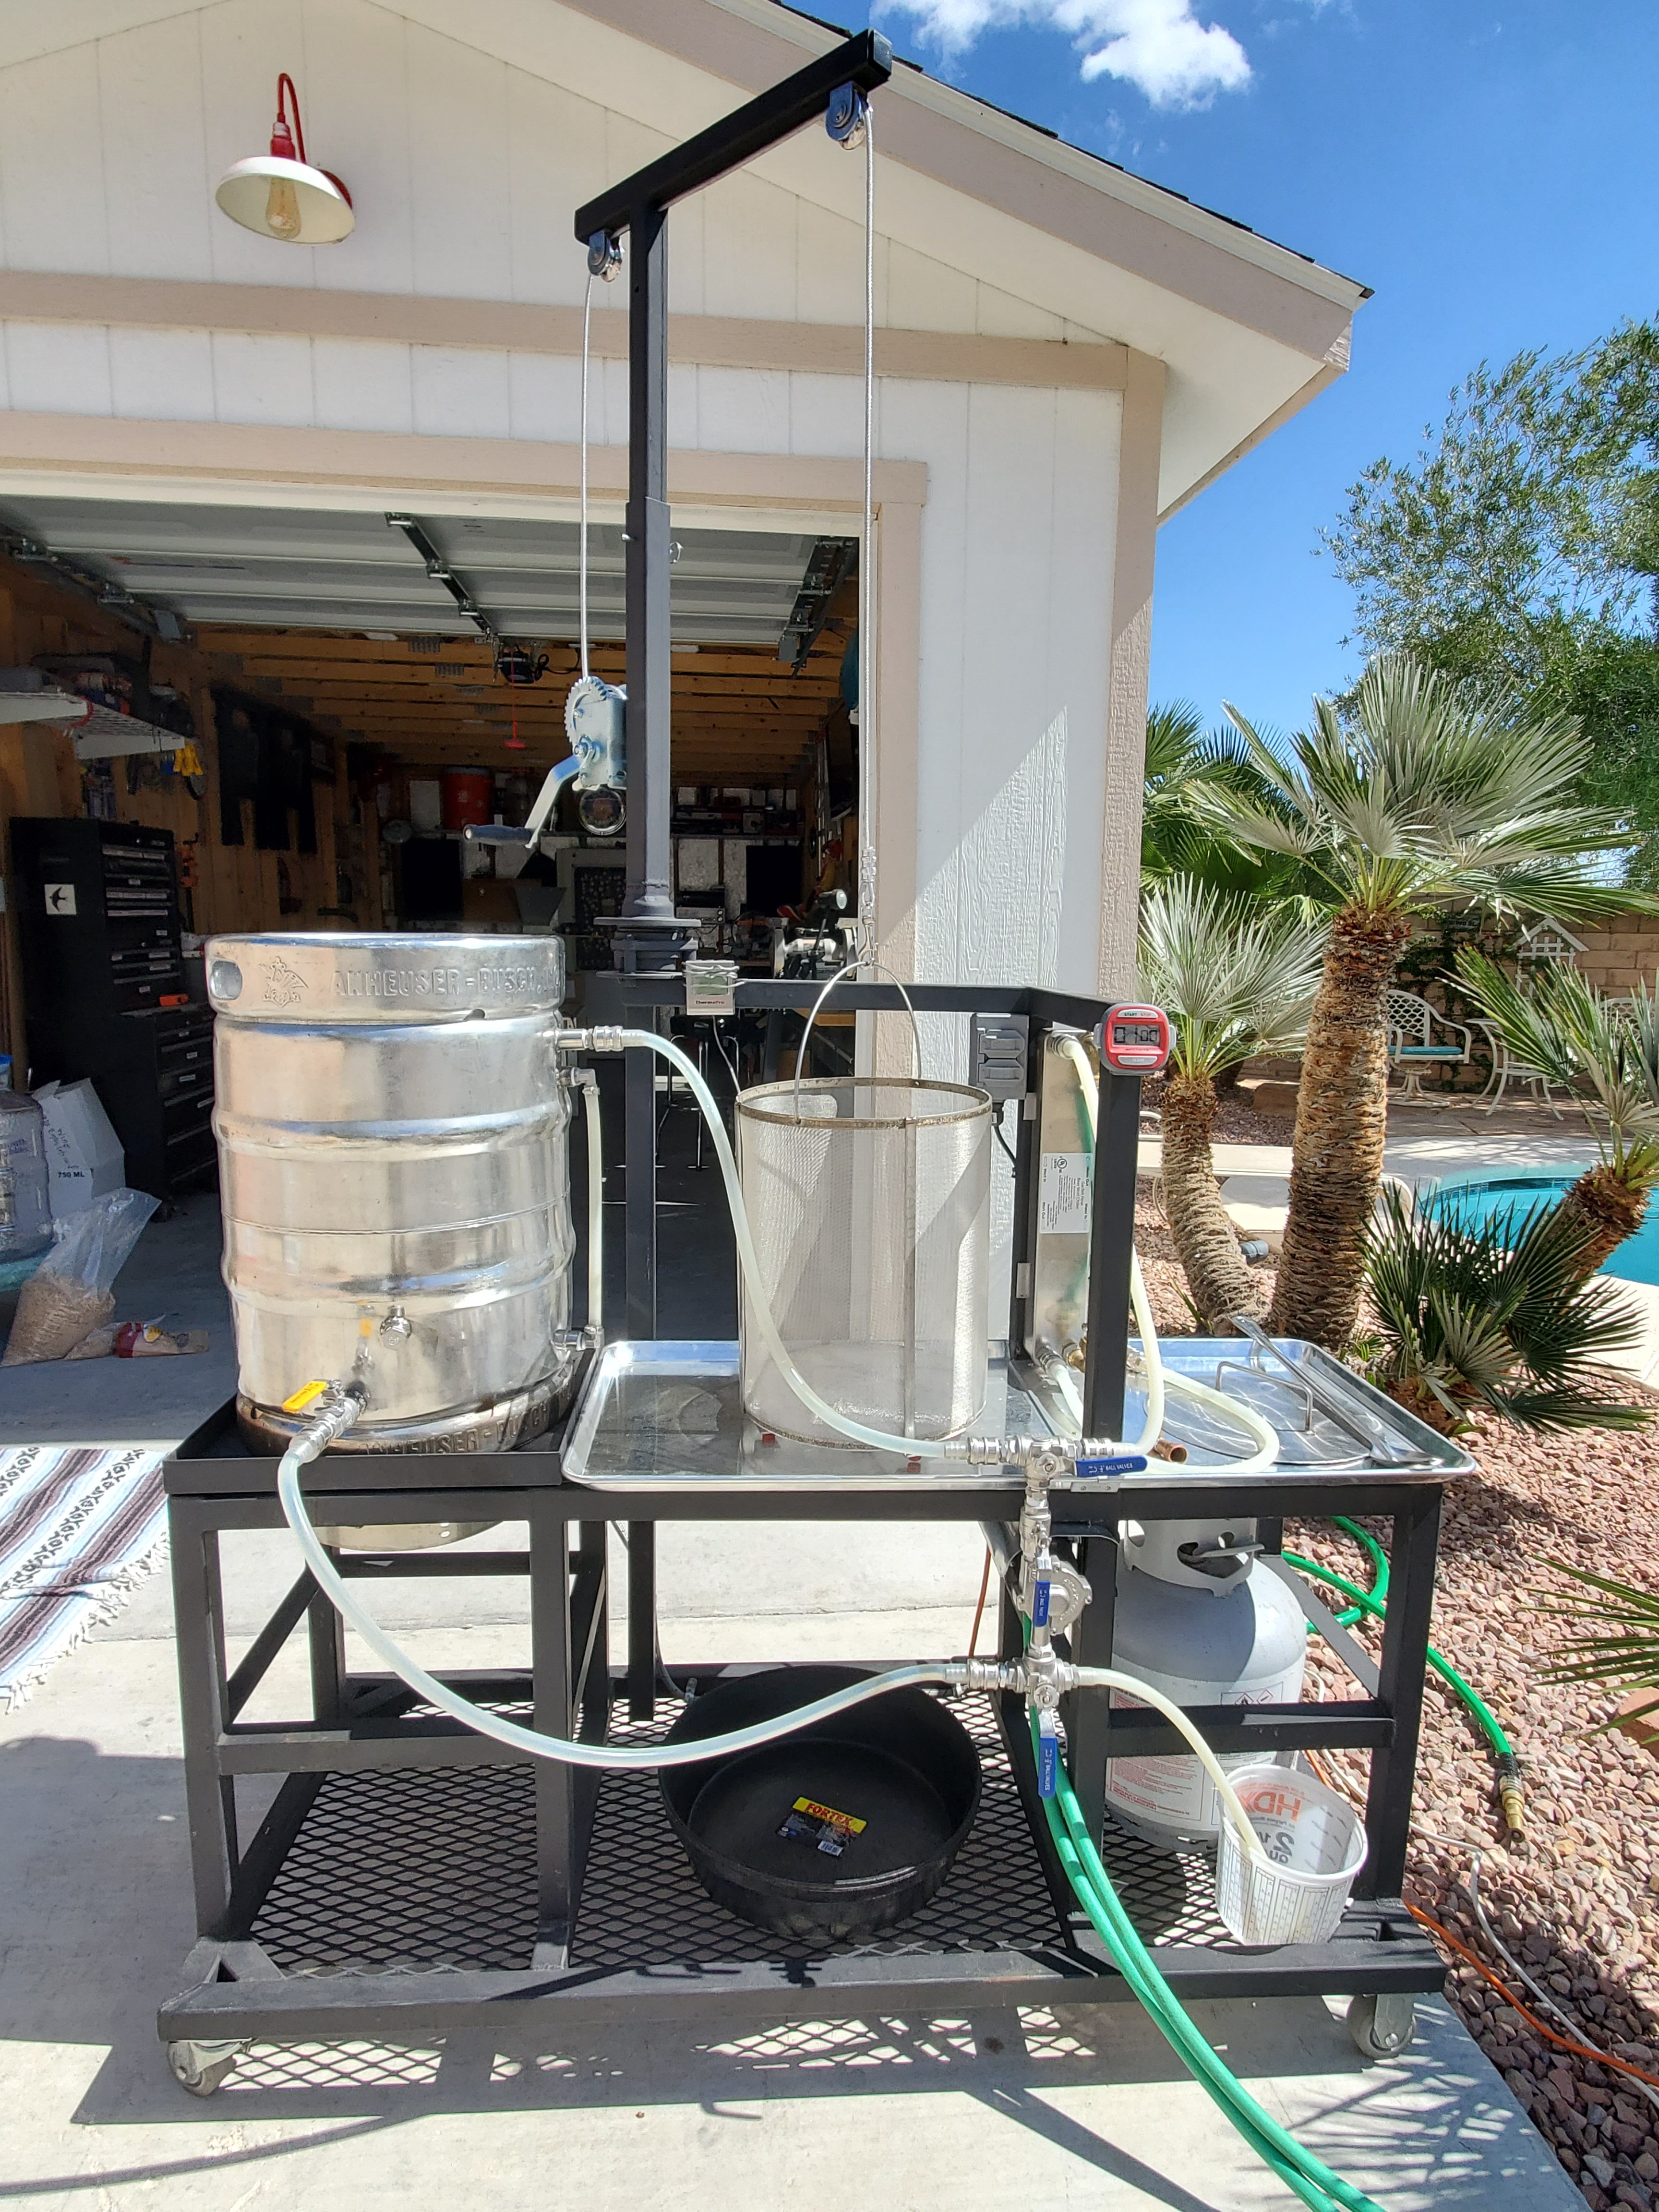
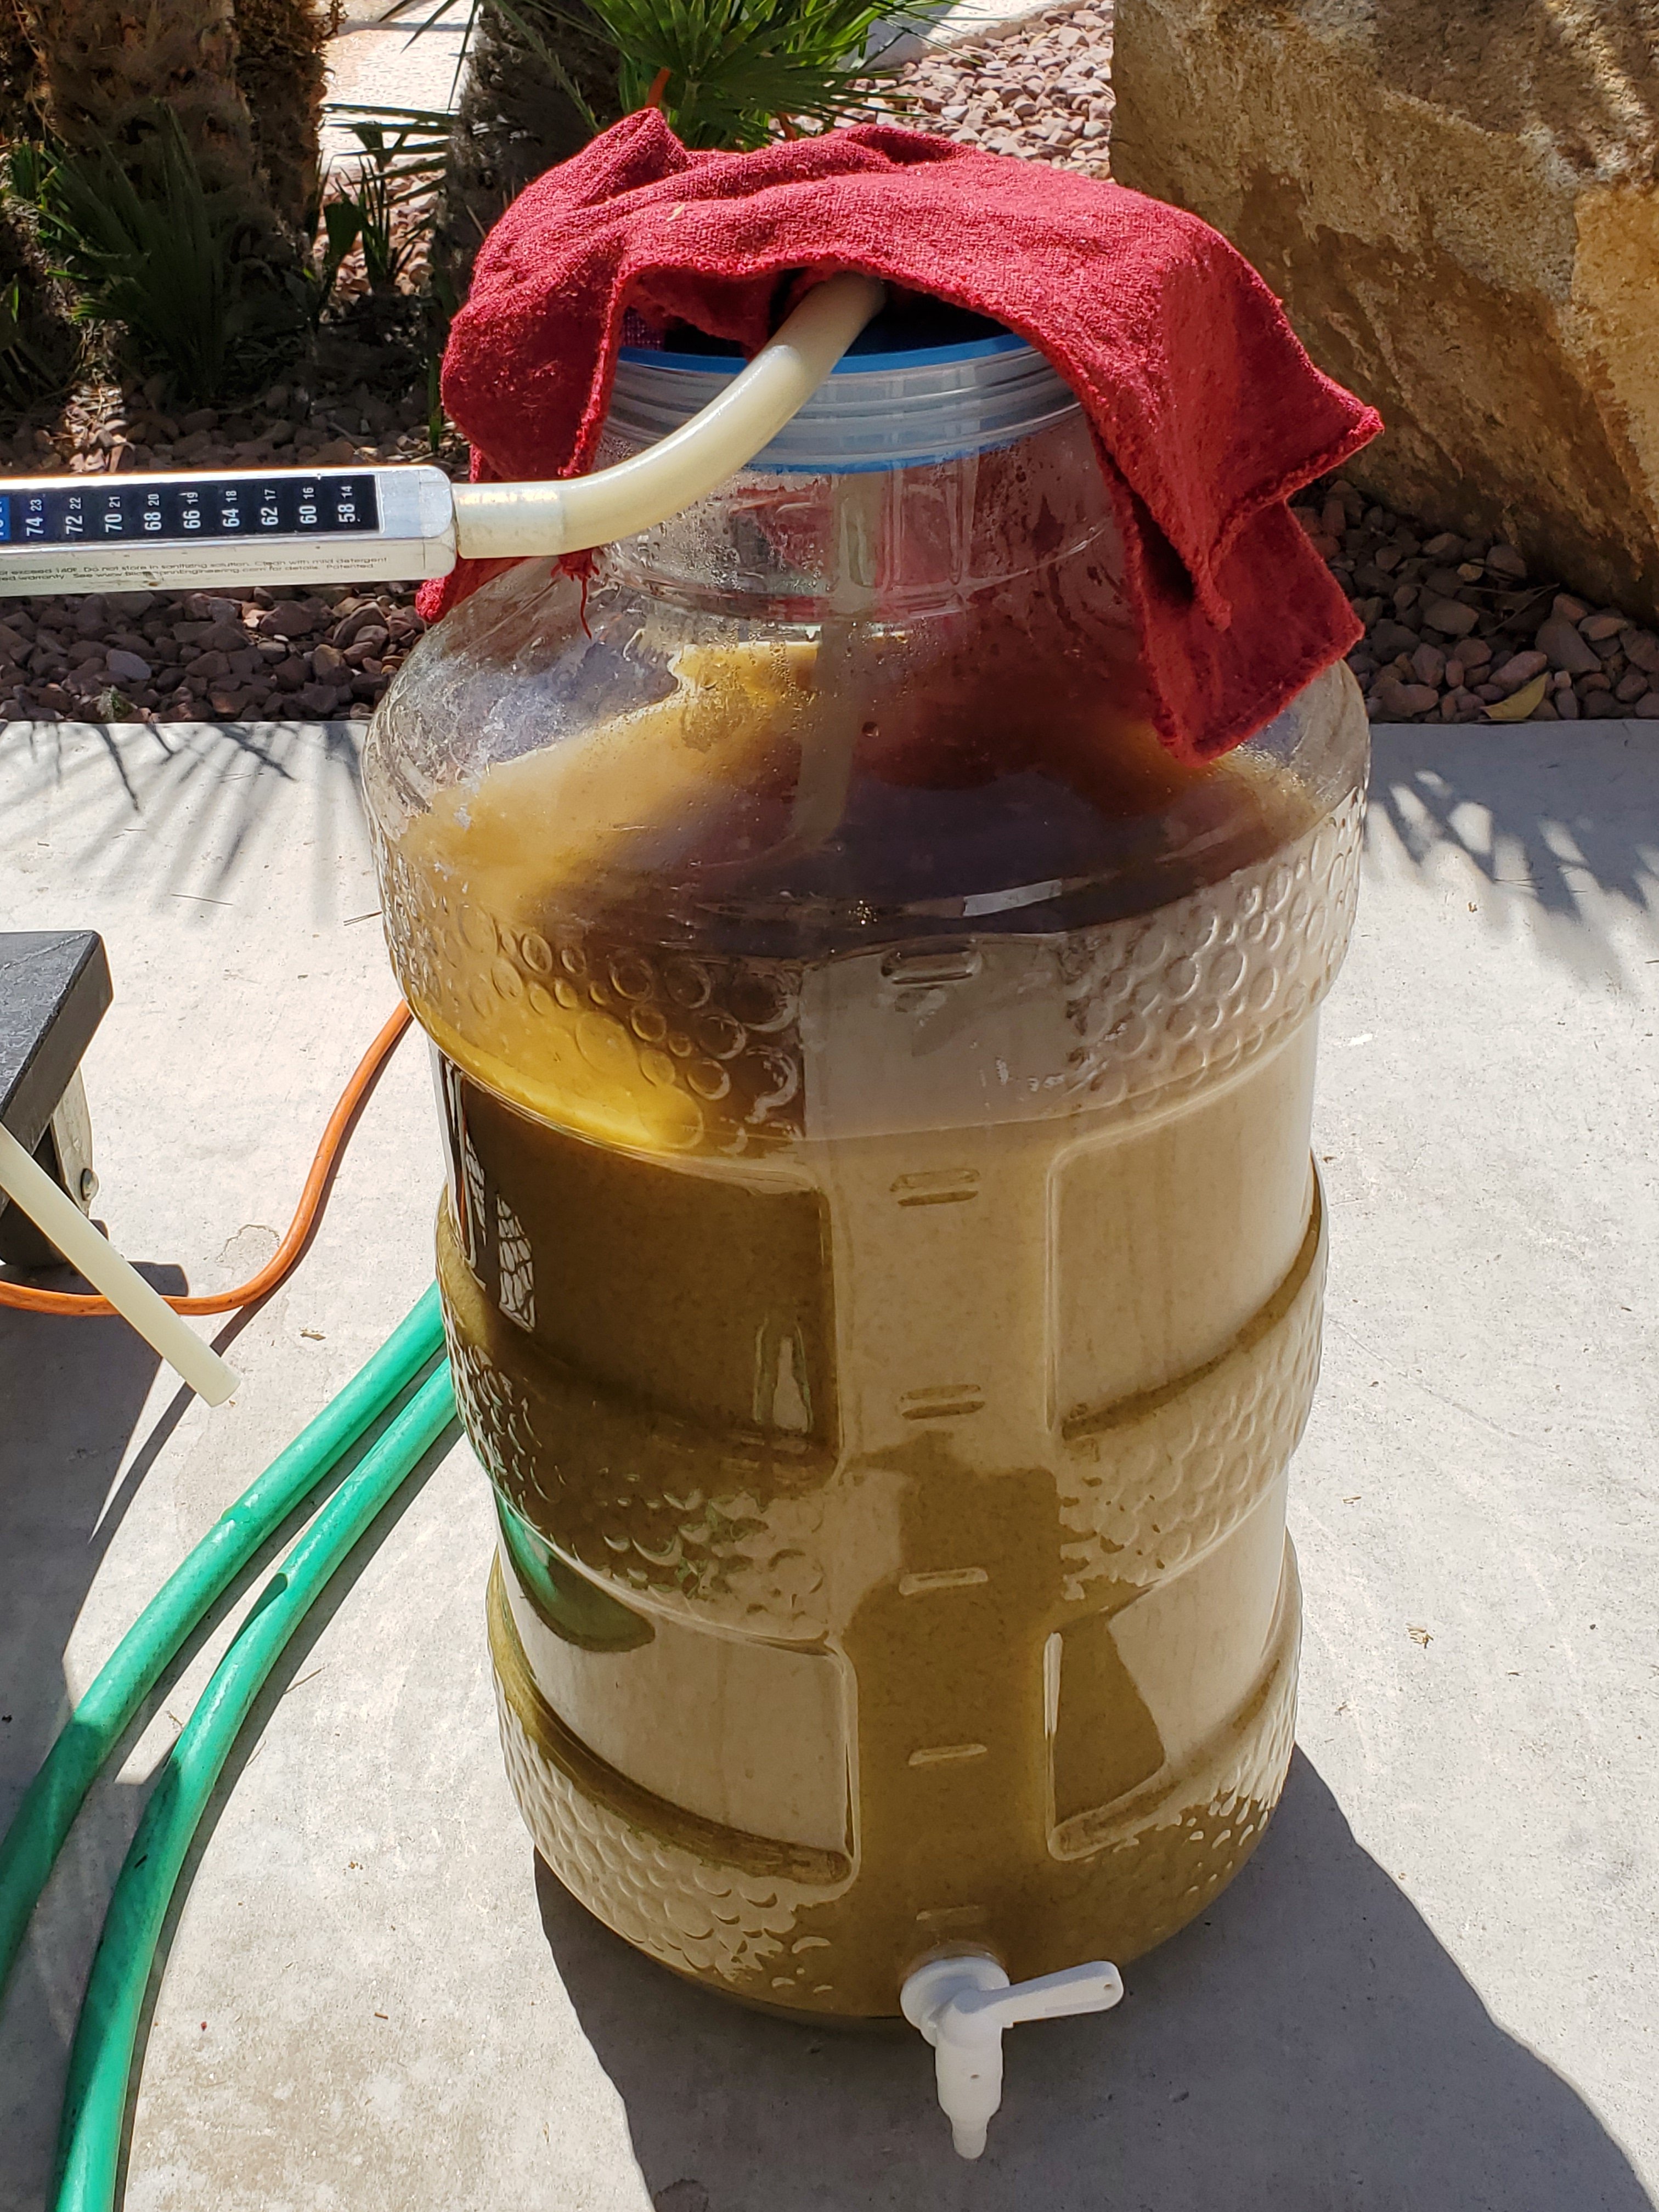
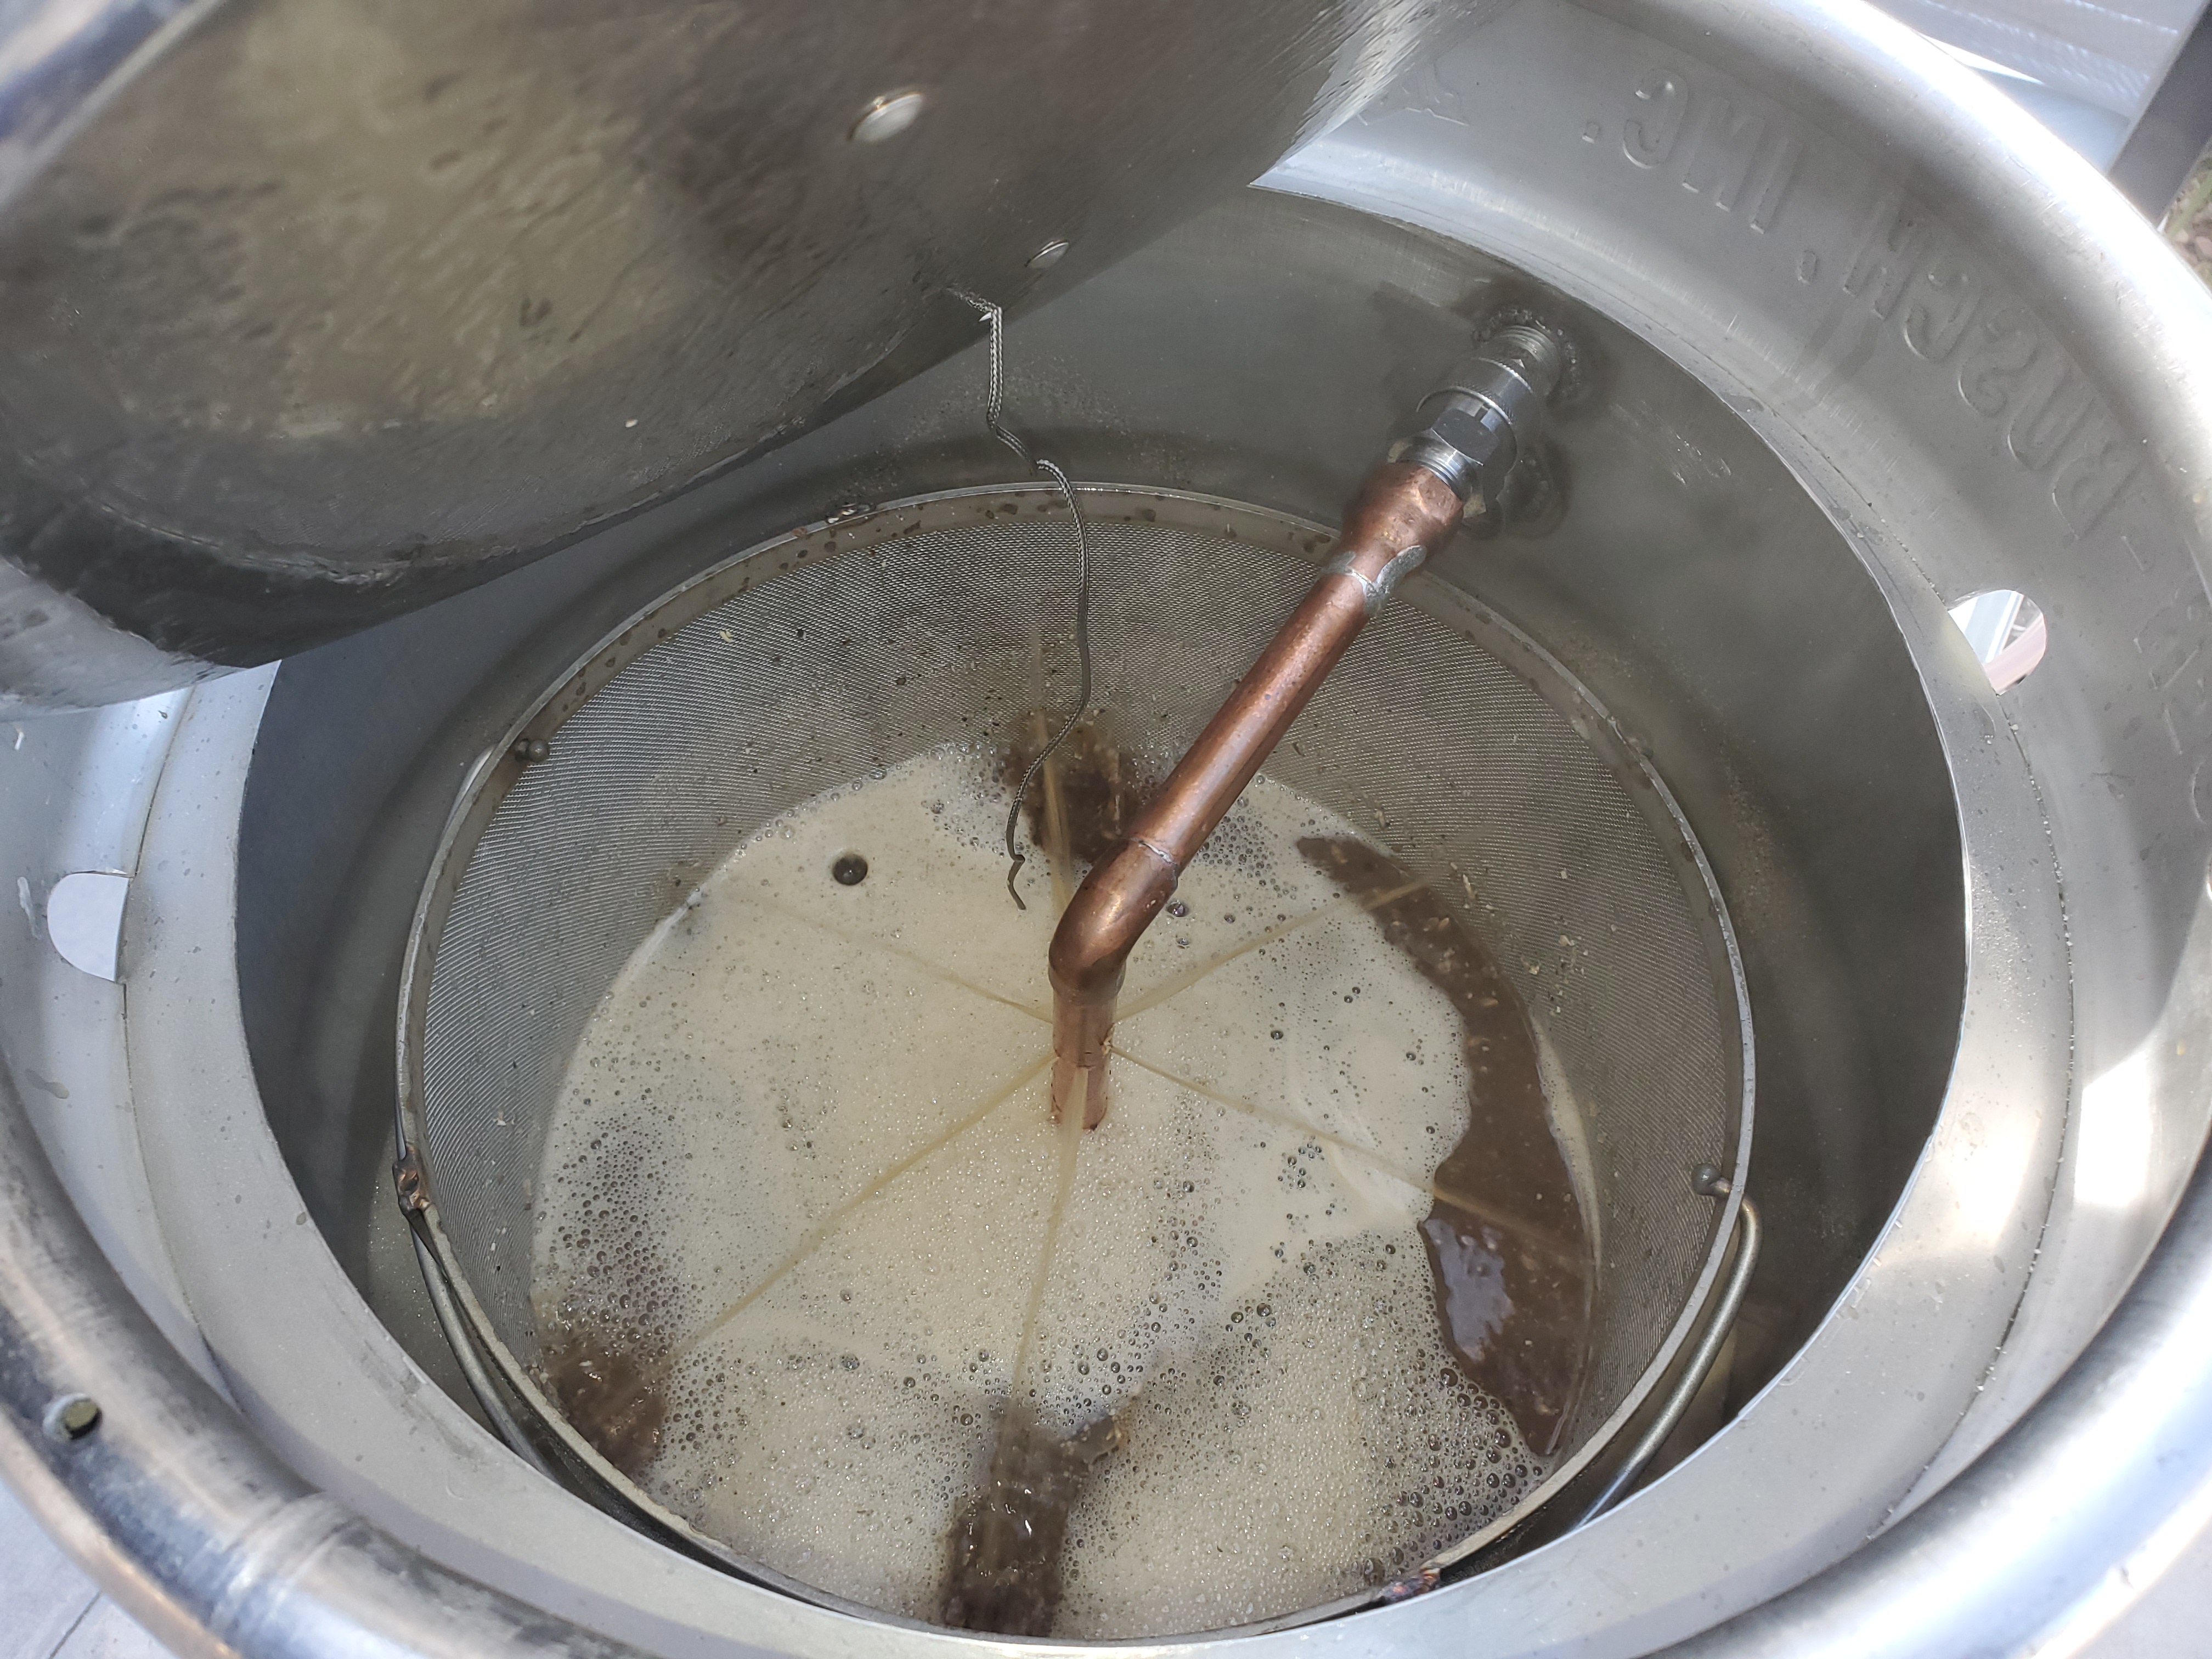
Well yesterday was the first day I attempted to use my grain basket for the dual purpose of hop spider, and it worked. My grain basket is stainless steel with a 12.5" diameter, is 15" tall, and has 800 micron mesh. It just fits into my 15.5 gallon Keggle, and has 1.5" feet to keep the basket off the Keggle bottom. This grain bill was 13.5 lb., and I have room for quite a bit more. As you can see my system recirculates during the mash with an infusion pipe centered in the mash. The recirculation pipe works very well, and so far (twice) I have had complete conversions in 30 minutes. (The first brew was a Pete's Wicked Ale clone, which turned out great - 75% efficiency). After the mash conversion was complete I drained and emptied the grain basket and lowered it back into the Keggle and proceeded to boil. I used 2 ounces of hops during the boil, and as you can (sort of) see in my pictures (sorry about the order) the wort inside basket was boiling, and the temperature inside and outside the basket was 212F. After the boil I lowered the wort temperature to 175F for a hop stand, and added 8 ounces of hops (this is a New England IPA recipe) for 15 minutes. Then I lifted the basket to drain, and chilled to 70F through my plate chiller with no clogging. I got a lot of hop trub in the fermenter but that has never been a problem; it settles out. I am very please with this setup and results.
20200307_132810.jpg

20200321_115343.jpg
20200427_081049.jpg
20200427_094620.jpg
20200427_104050.jpg
20200427_105017.jpg
20200427_105712.jpg
20200427_105006.jpg
20200322_082326.jpg
 
Last edited:
I just watched a youtube brewer (can't recall but I think it was Short Circuit Brewing) that has a few different electric systems and when playing with the Clawhammer basket as a hop spider, he said he'd never do it again and strongly recommended against it.
Heck, if it works for you, do it I say.
 
I just watched a youtube brewer (can't recall but I think it was Short Circuit Brewing) that has a few different electric systems and when playing with the Clawhammer basket as a hop spider, he said he'd never do it again and strongly recommended against it.
Heck, if it works for you, do it I say.


I remember that one. It was a live brew day a couple of weeks ago. I wondered about using a big basket like that too. I saw on Brian's (from Short Circuited Brewers) kettle, the hot break creeping up between the kettle and basket. Changed my mind when I saw that.
 
I just watched a youtube brewer (can't recall but I think it was Short Circuit Brewing) that has a few different electric systems and when playing with the Clawhammer basket as a hop spider, he said he'd never do it again and strongly recommended against it.
Heck, if it works for you, do it I say.
I tired this and had the same thing happen to me. The whole basket clogged up. I almost boiled off all the wort below the basket before I noticed. Dont recommend lol.
 
Here is a little more on my process, prompted by your comments. I did not put the hop basket into the Keggle until after the hot break - not by design just how it happened (I was dumping the basket and cleaning out the grain residue). This brew had late boil additions. (NEIPA). I'm in the school that does not worry about hot break removal anyway. During the boil the hops collected on the bottom few inches of the basket below the wort level, but wort was freely flowing through the basket wall above that.....so there was always wort in the bottom of the Keggle and no chance of all of it boiling off. I raised and lowered the basket a couple of times to dislodge the hop trub, but I am not sure that was necessary. I think some of this has to do with size of the basket relative to the size of the Keggle. It appears my setup has the correct dimensions, it is working for me so far. This single vessel setup has made my brew day MUCH easier, and faster. If I experience any of the issues you guys mentioned I'll come back here and report that. Cheers!
 
It looks like you are keeping hop debris behind, but the wort still looks as if it has a lot of stuff in it. One thing I would say it maybe locate the end of your diptube at the side of the keggle, instead of in the center. I do not know your chilling methods, but optimal would be to chill, let sit for 20-30 min. then draw from the side to leave the break behind and transfer clear wort.
 
It looks like you are keeping hop debris behind, but the wort still looks as if it has a lot of stuff in it. One thing I would say it maybe locate the end of your diptube at the side of the keggle, instead of in the center. I do not know your chilling methods, but optimal would be to chill, let sit for 20-30 min. then draw from the side to leave the break behind and transfer clear wort.
I chill through a plate chiller directly from the Keggle, so I can't do what you are suggesting unless I recirculate chilled wort back into the Keggle (not a good idea I think we would agree). I could locate the diptube at the side as you suggest, and leave behind more trub. As it stands I am leaving behind probably a few cups of wort - if I move the pickup to the side of the Keggle I would leave behind more like a gallon, but it would be mostly trub. The Keggle bottom is concave so it holds a lot of fluid. One more thing - something I did not do during this brew was to catch hop trub in a 6" diameter 400 micron basket, at the return/recirculation port, just before beginning the chilling process. (See picture) I did that for my last brew, and the idea is to catch trub that might clog the plate chiller, and it worked. I did not do that this brew because my wort pump failed right at the end of the mash (I still need to understand why). (Good news is my chiller did not clog this time either.) So I am saying for my normal process, when the pump is working, I would have a lot less hop trub in the chilled wort.
20200322_095901.jpg
 
Last edited:
Chilling along with separating the stuff is difficult. I am working on it myself. The only problem I see is the use of baskets only addresses the hop material. If you are inclined, the longer but better way would be to use the large basket during the boil, recirc through the small filter and run out all of the wort through your plate chiller. Then you would have three choices:

1) Put the wort into a settling bucket, let the break fall out and then transfer very clear wort into your fermenter
2) Put the wort back into the kettle, let the break fall out and transfer very clear wort into your fermenter.
3) Run the cloudy wort directly into your fermenter.

Remember, option # 1 & 2 are not about 'clear beer' in the end but an overall better brewing process.
Thanks Bassman, I appreciate the discussion! Actually this is my normal procedure, through the plate chiller directly into my fermenter (#3). I have not considered #1 or #2 because the wort is most vulnerable to infection as soon as it is at fermentation temperature. Maybe I am overly careful due a few batches of infected beer when I was learning to brew. Although my process results in cloudy beer into the fermenter, it settles out at the end of fermentation, and settles further in the bottle or in the keg.....I get clear beer in my mug/glass. The only thing I have not mastered, which is your point I believe, is removal of the break before going to the fermenter. (How long would the break take to fall out if I were to use step #1 or #2?) I've read that there are two schools of thought about break removal - some say remove it to get better beer, and some say you can't tell the difference if you do or not (There is a Brulosophy ExBEERiment about that). I don't know honestly, but my end product does not have any off flavors lately. I am very interested in what you work out on chilling along with separating out break material; I hope you post whatever you come up with. Anything else you have to add to this, I am all ears. Cheers!
 
I do the settling bucket as I clean up my system while the wort is dropping out everything. It has a stainless steel cap floating on the wort as well as a lid on the bucket. Yes, the wort is a bit vulnerable, but covering it and having it at cool temps is fine for 20-30 minutes.

Since your are using a plate chiller instead of an immersion chiller, the options are let it sit hot in the kettle before chilling or let it sit cold after chilling. Hot promotes DMS, so cold seems like a better bet. I brewed a long time with a plate chiller, it makes fine beer but now I am into keeping the trub behind. It is a hobby so it is best to make your process choices based upon interests and fun. Zero trub is the German way for better yeast performance, head retention and brighter flavor. How much of this translates to homebrew is up to personal tastes and experiments.
You got my attention with this. I was not aware of that. If the Germans have historically done this there must be something to it.
 
I should not say "zero trub" as I do not know the extremes, but very limited trub or carry over from every process is what I go after. Clean wort into the boil kettle and clean wort into the fermenter. Homebrewers have some equipment hurdles compared to large automated systems, so the accepted process has often involved a lot of sediment and carry over. While this does not stop one from making enjoyable beer, it comes down to what you want to pursue with the hobby. The brewing texts favor clean wort.
 
I should not say "zero trub" as I do not know the extremes, but very limited trub or carry over from every process is what I go after. Clean wort into the boil kettle and clean wort into the fermenter. Homebrewers have some equipment hurdles compared to large automated systems, so the accepted process has often involved a lot of sediment and carry over. While this does not stop one from making enjoyable beer, it comes down to what you want to pursue with the hobby. The brewing texts favor clean wort.
OK thanks for the clarification. My process includes 1) filtering the wort before beginning the boil using the smaller 400 micron basket in my picture above, to remove grain residue, and 2) filtering the wort with the same 400 micron basket at the end of the boil to remove hop trub (I am not sure how much break is being caught). So I'm doing everything I can with the equipment I have to clarify the wort. In this last brew my wort pump failed at the end of the mash so I could not filter at all (other than what the 800 micron basket was catching), thus the high level of trub in my fermenter, but normally I have double filtered as described.

I'll give some thought to improving on that, maybe with a finer "catch" basket? That 400 micron basket is actually a dry hop basket (Depth Charge) that fits into my Big Mouth Bubbler fermenter. My plan was to experiment with this 400 micron basket to decide if I need it, or if I need a finer mesh basket for this filtering step. I'll give that some thought; one would think a 200 micron basket would catch pretty much everything, but it will probably slow down my brew day because I'll have to empty that catch basket repeatedly. I'll think about your settling techniques too. Thanks and Cheers!
 
I think filtering will only work for hops debris and some large grain particles. I have tried lower than 300 micron and it does not help as it only clogs. With BIAB, it is tough to stop mash sediment. I do this by running the wort into a separate pot, clean out the kettle (Anvil Foundry) and pump it back in for the boil. This gives it time to settle and leave everything that fell out of the bag in the kettle.

The reoccuring theme is settling and drawing off. It takes more time but it is the only way to deal with the fine stuff. Many will think this is overkill. Maybe it is, but that has be decided by the brewer.
So to get good settling of trub, earlier you said 20-30 minutes settling time at fermentation temperature, and then you transfer to the fermenter and pitch yeast, right? I suppose I could try that without too much trouble. I could let the chilled wort sit while I do cleanup, and then transfer and pitch as a final step, which may be beneficial for aerating the wort as well. Both of my fermentation vessels are Big Mouth Bubblers with spigots so it would be relatively easy. If this settling step works for both hop and break material I think I will try it. The catch steps I described above with the 400 micron basket take about 10 minutes or more each, so it would be a wash in terms of brew day duration. Plus those steps are a PITA because the wort is hot and currently I am holding the basket. Thanks and Cheers!
 
Yes, the chilled wort would be transferred to the settling bucket (the bucket needs a spigot or use with siphon). This wort is relatively clear (because the hop debris was already left behind) but if you try this, it is amazing how much more gets left behind (trub, fine particles) when you let it settle. Make sure it is covered as to keep as much air particles out etc...

What I decided to do is start using a 300 micron hop spider in the boil kettle. Hopefully this will keep the hop matter that floats after chilling contained. This floating stuff is the most difficult to deal with imho as it will not settle out very quickly. So deal with the hops first, then settle out the break. With your system, the plate chiller is forcing you to use the bucket. If you had an immersion chiller, this could all be accomplished in the kettle. No right or wrong way, just adaptation to your system.
 

Latest posts

Back
Top