Hey Guys,
I'm Elco, founder of BrewPi. Up until now BrewPi has only focused on controlling fermentation, but that's about to change. The very first step in this, is to build a HERMS myself.
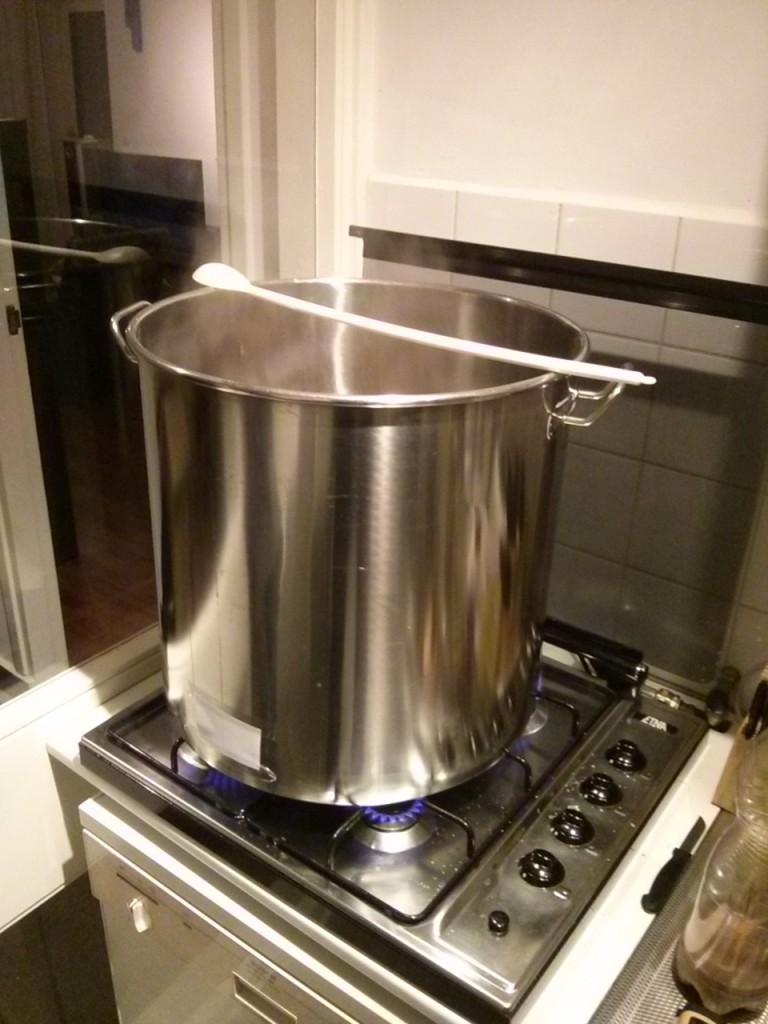
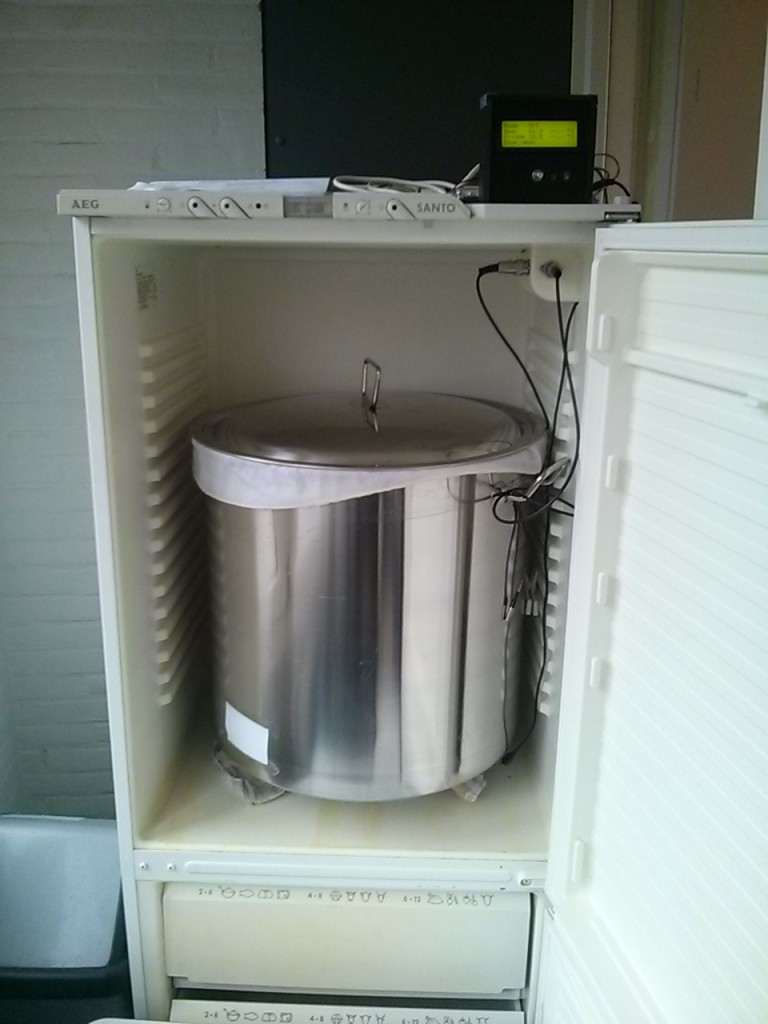
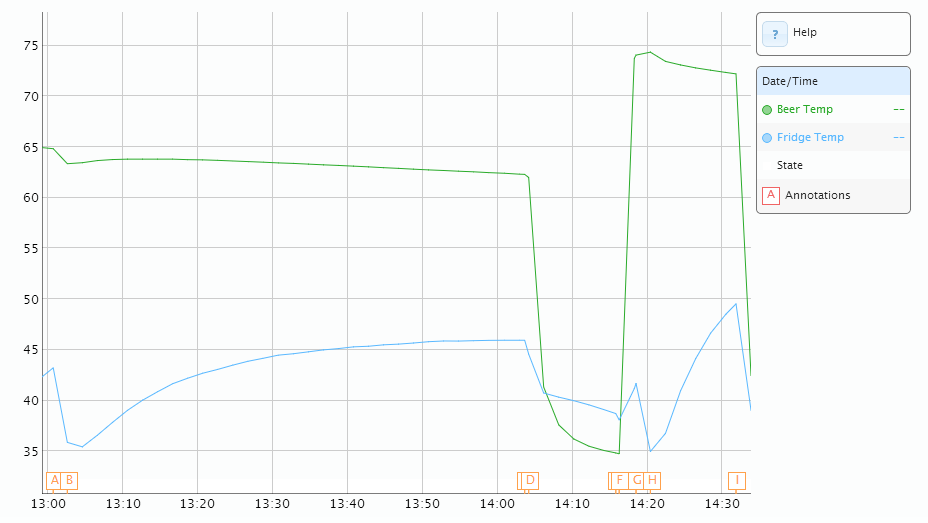
Until now I have been doing stove-top BIAB. I have had pretty good results with my very simple method:
- Heat water on stove (4 burners at once, big kettle)
- Put kettle in fridge for 5 minutes to preheat the fridge
- Put kettle back on stove, keep fridge door closed
- Heat again
- Put back in fridge, add grains, close door. Fridge is well isolated, temp hardly drops.
- For a next mash step, take kettle out, put on stove again (stir!) and put back.
With that very simple method I could produce pretty decent beers, but I think it's time for an upgrade.
For the software, we are going to rewrite BrewPi from scratch. It will be very modular and very flexible. It will adapt to all kinds of setups: HERMS, RIMS, BIAB, Fridges, Glycol, etc. But that's not the point of this post. I would like to talk about hardware here.
We are going to build 2 systems:
- 1 33L cheap and simple HERMS with manual hose swapping (Koen's system) and probably just one pump.
- 1 70L fully automated HERMS with motorized ball valves and two pumps. (My system).
Both systems will use electric Camco heating elements in the HLT and BK.
I have sourced most stainless steel parts and we even machined a lot of custom parts. I will post an update when these are ready (2-3 weeks).
I am building this HERMS for myself, but in such a way that I can provide all these parts later as a complete, simple to assemble HERMS kit.
On our website we will provide build guides, similar to the Electric Brewery.
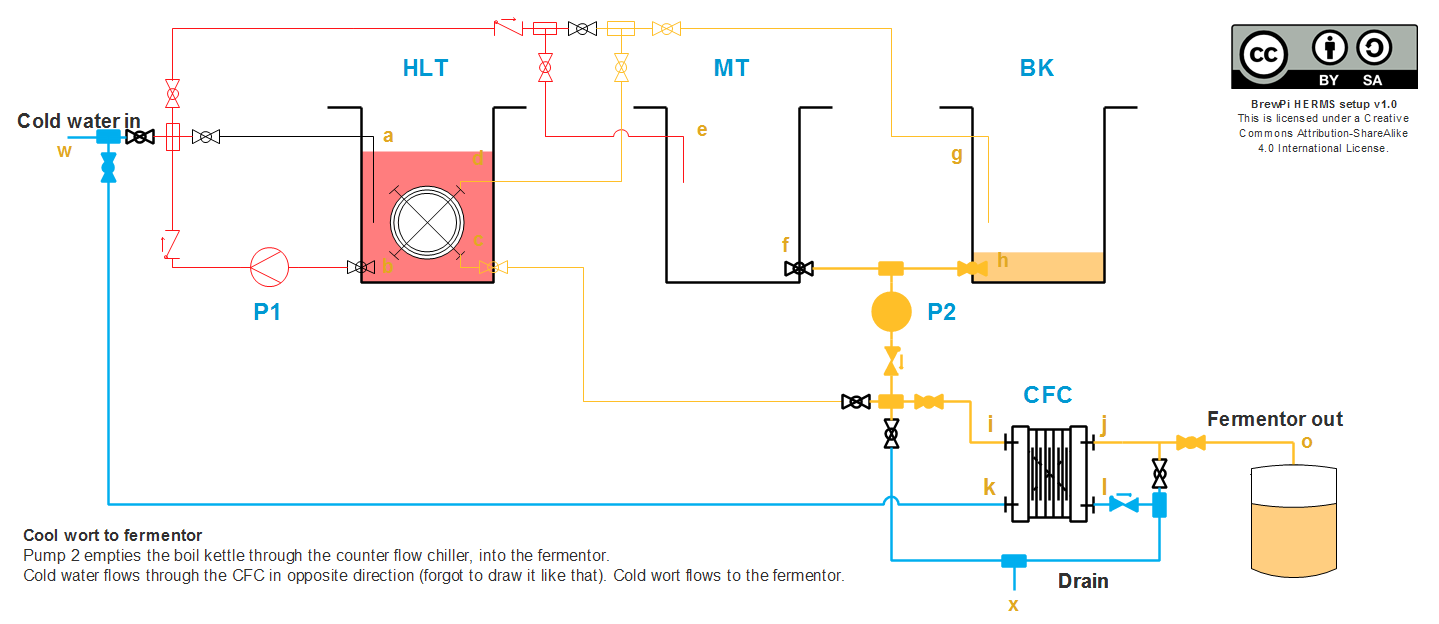
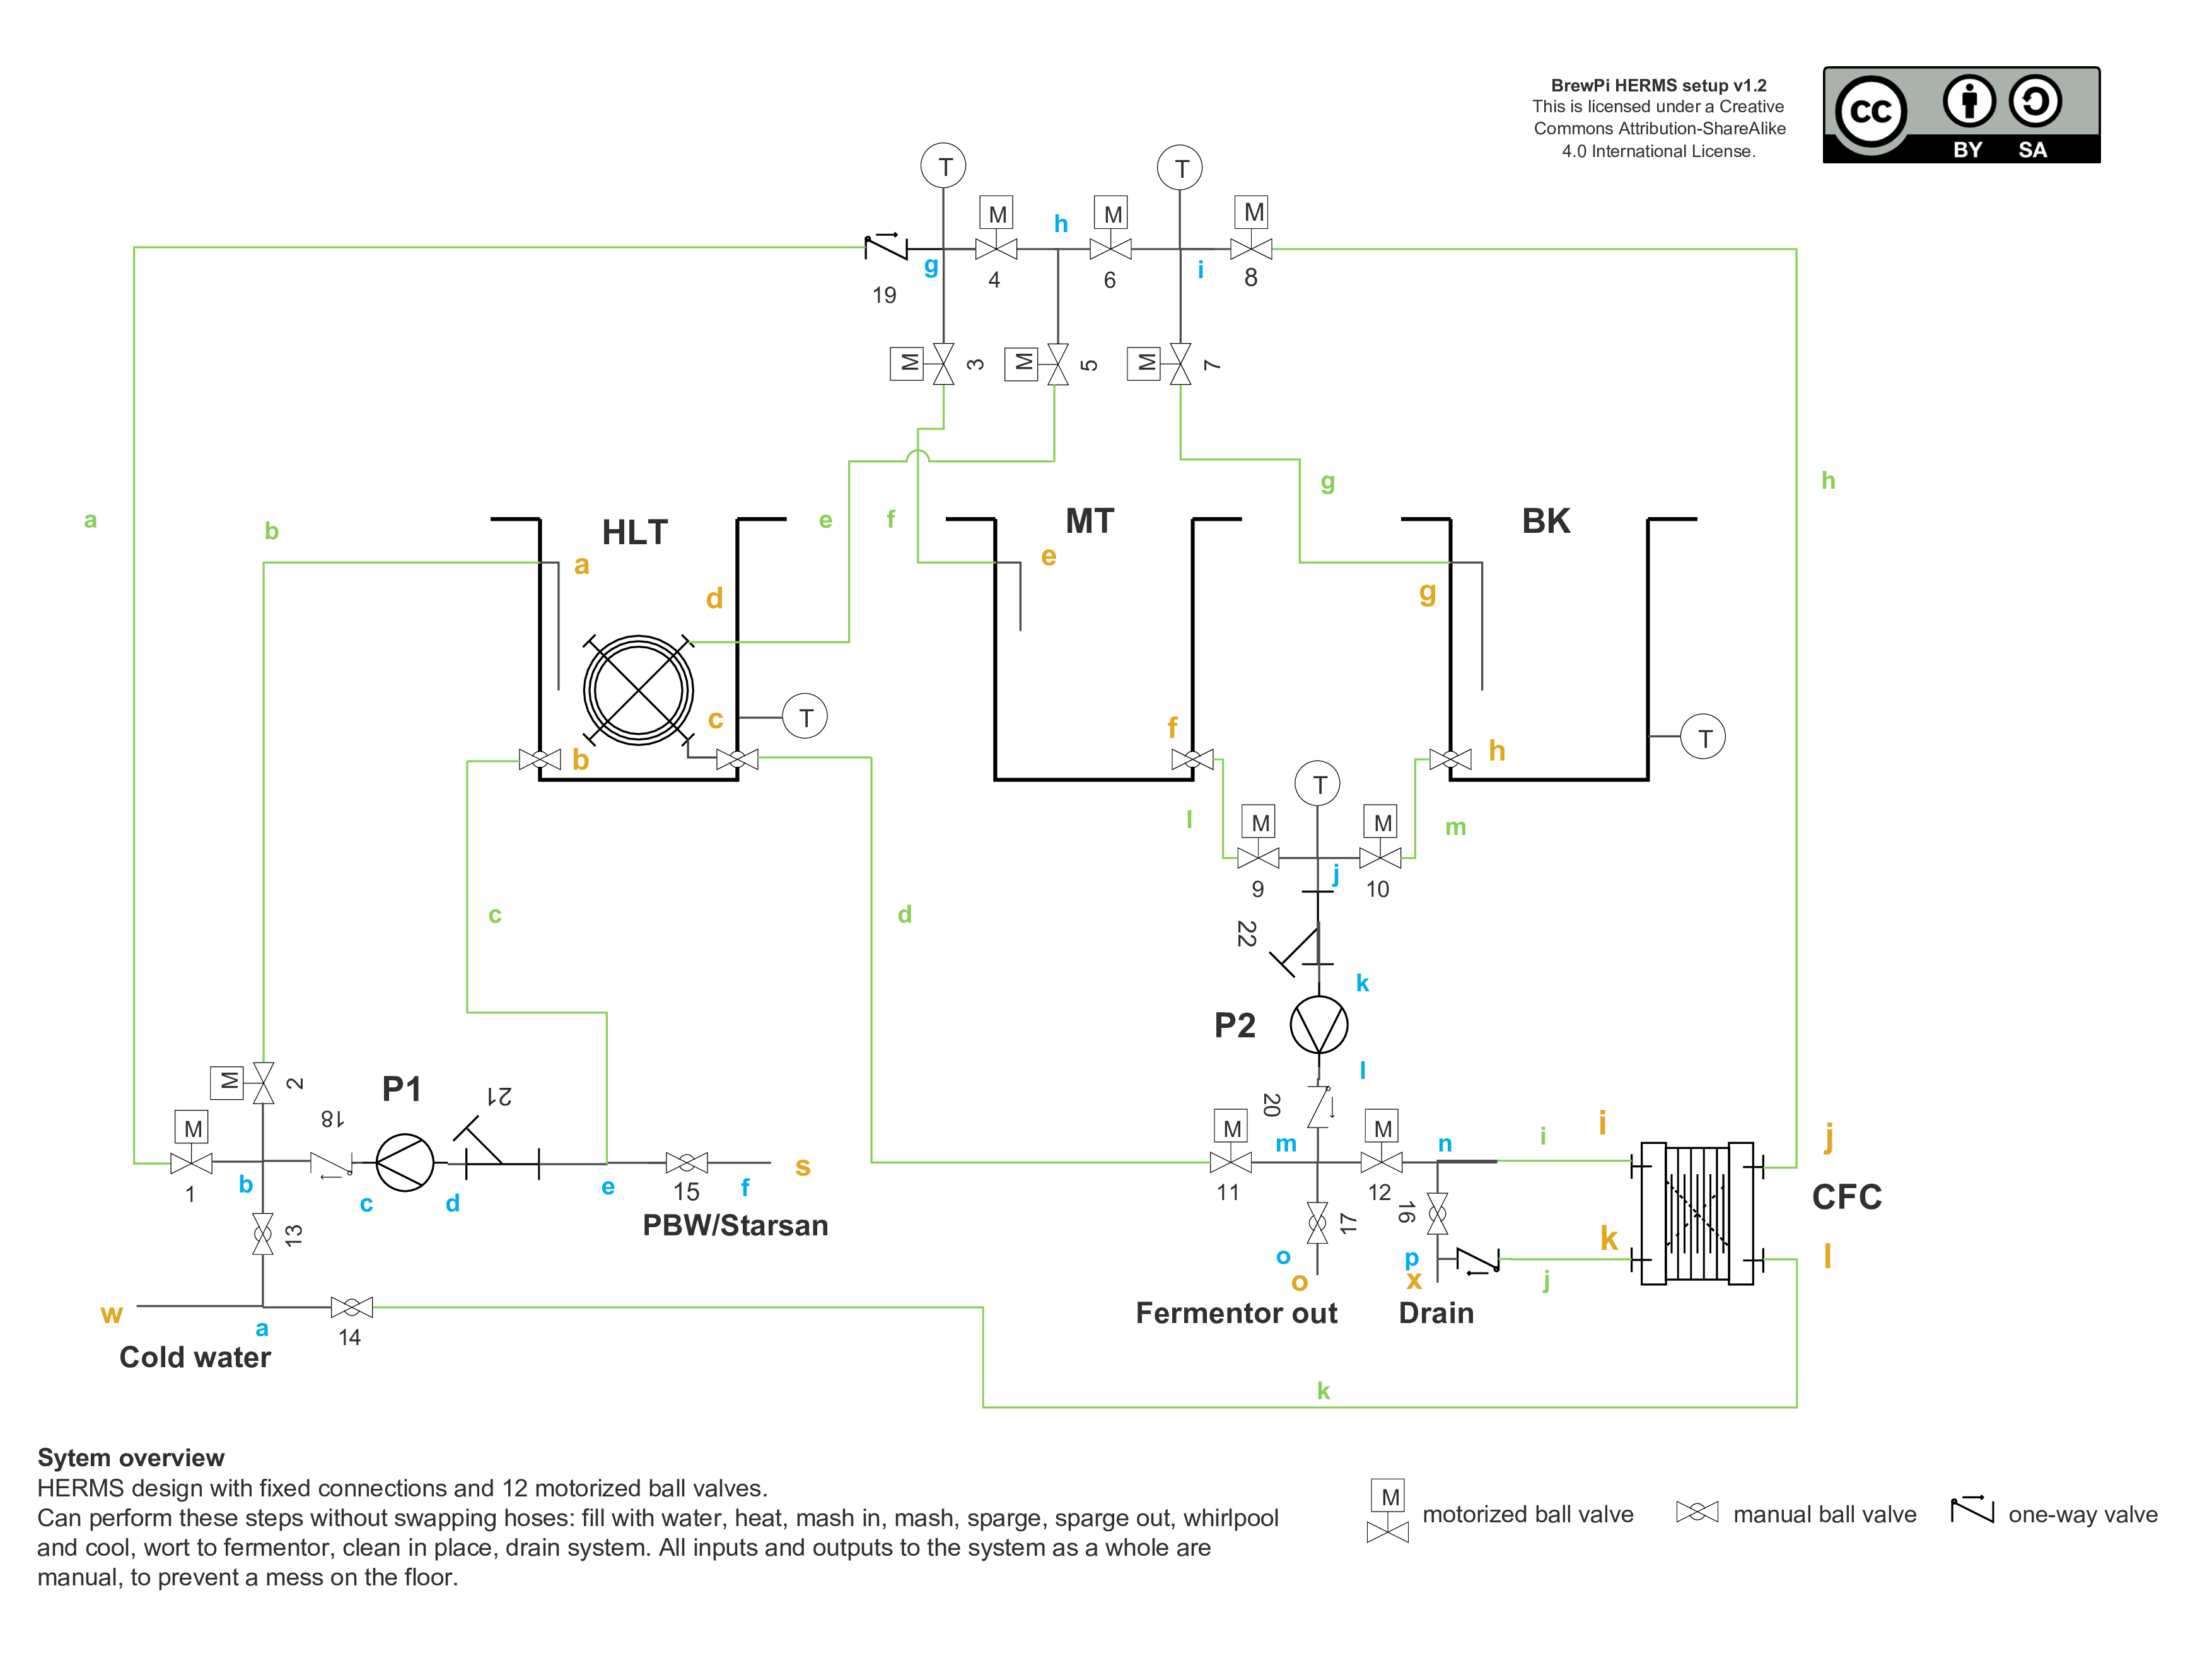
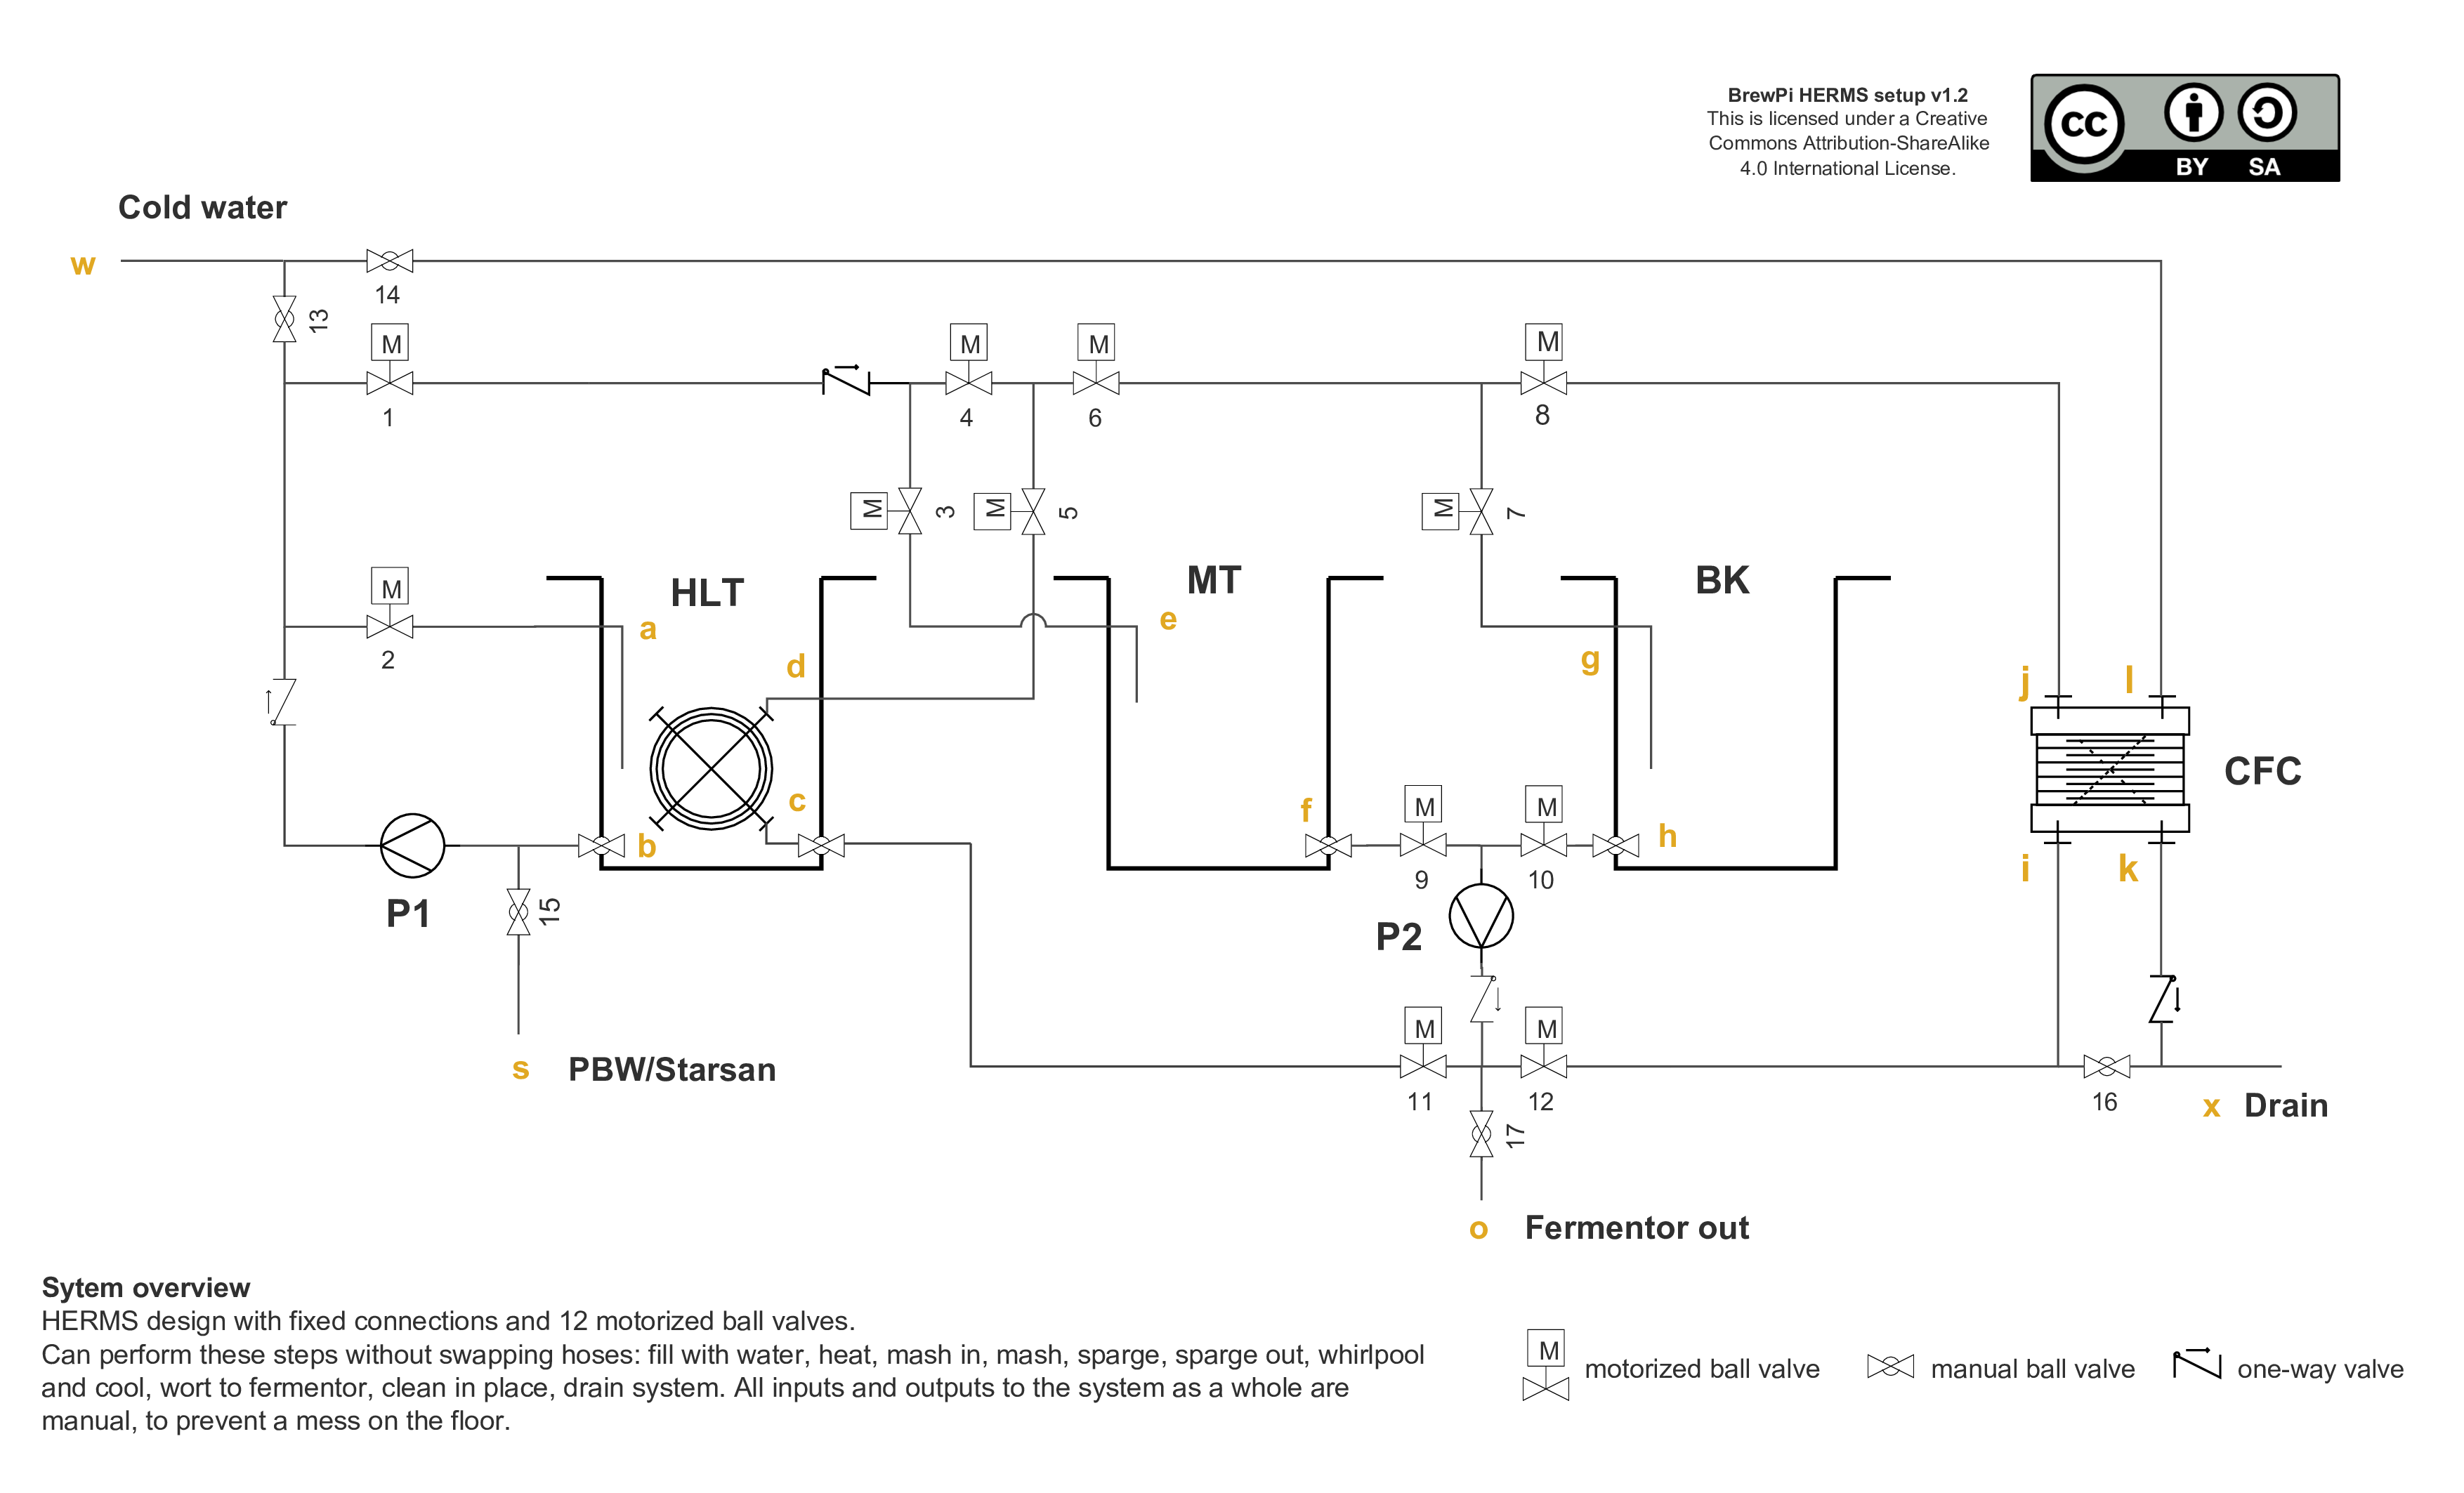
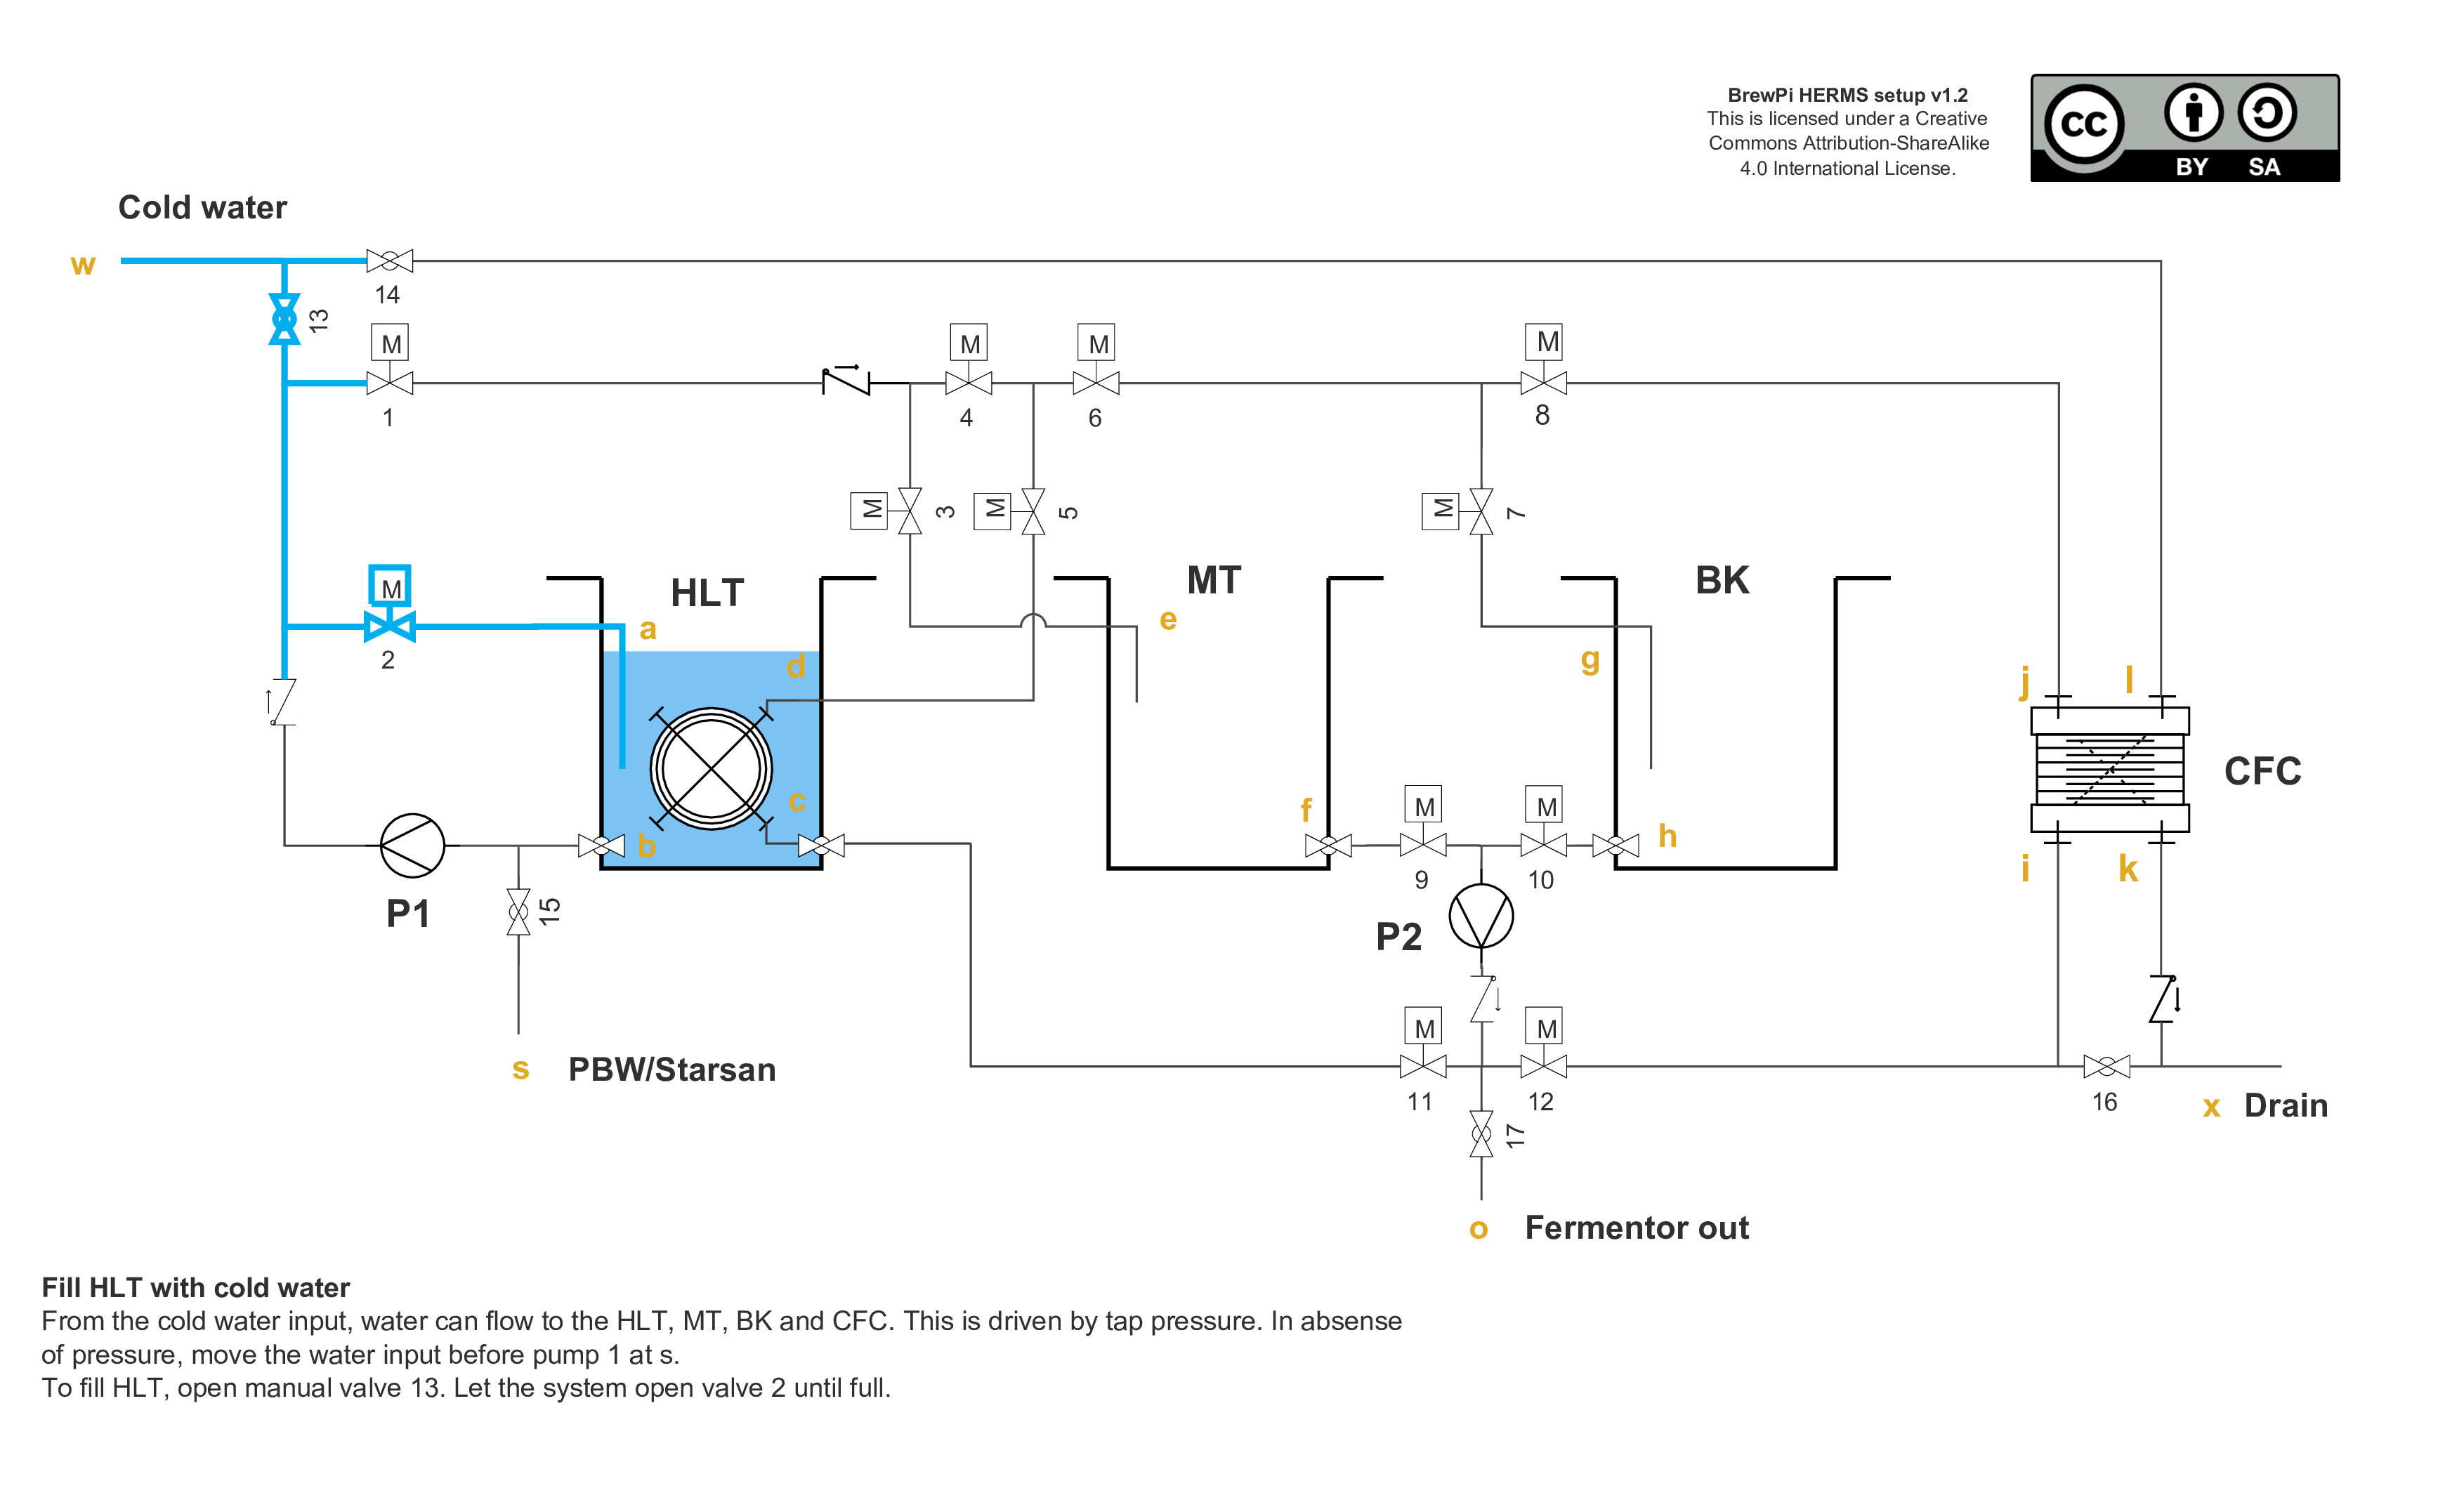
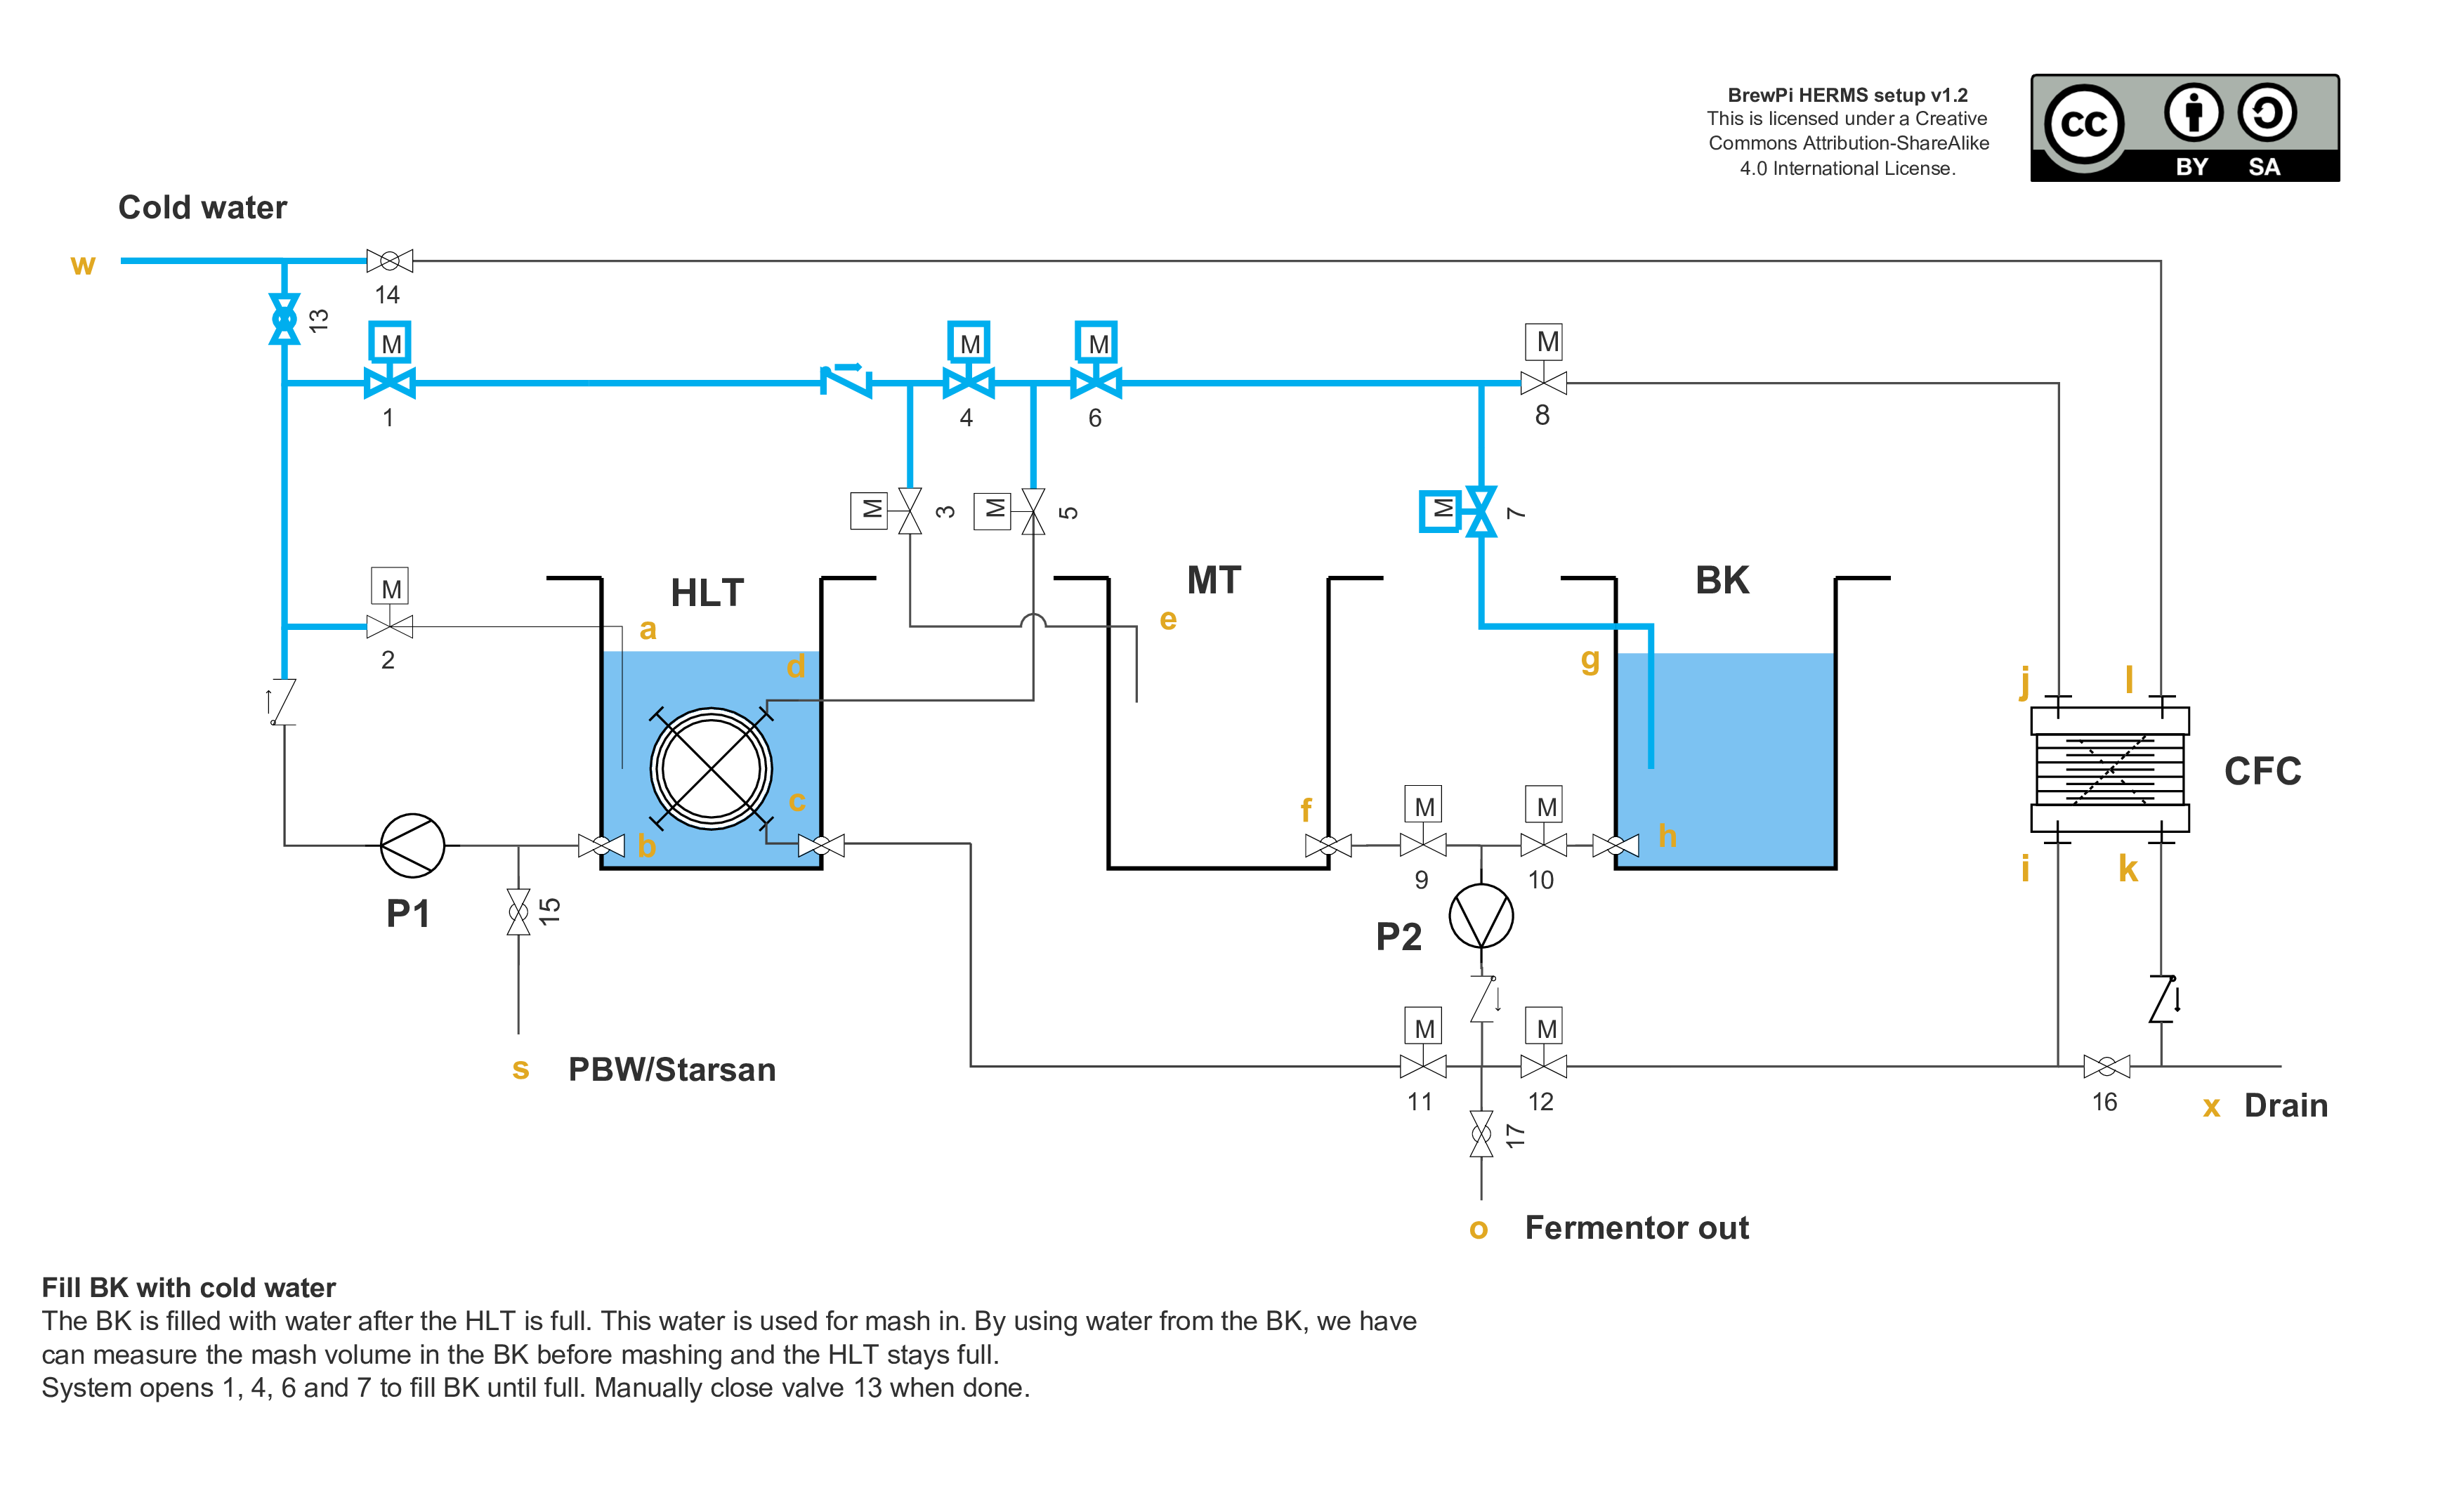
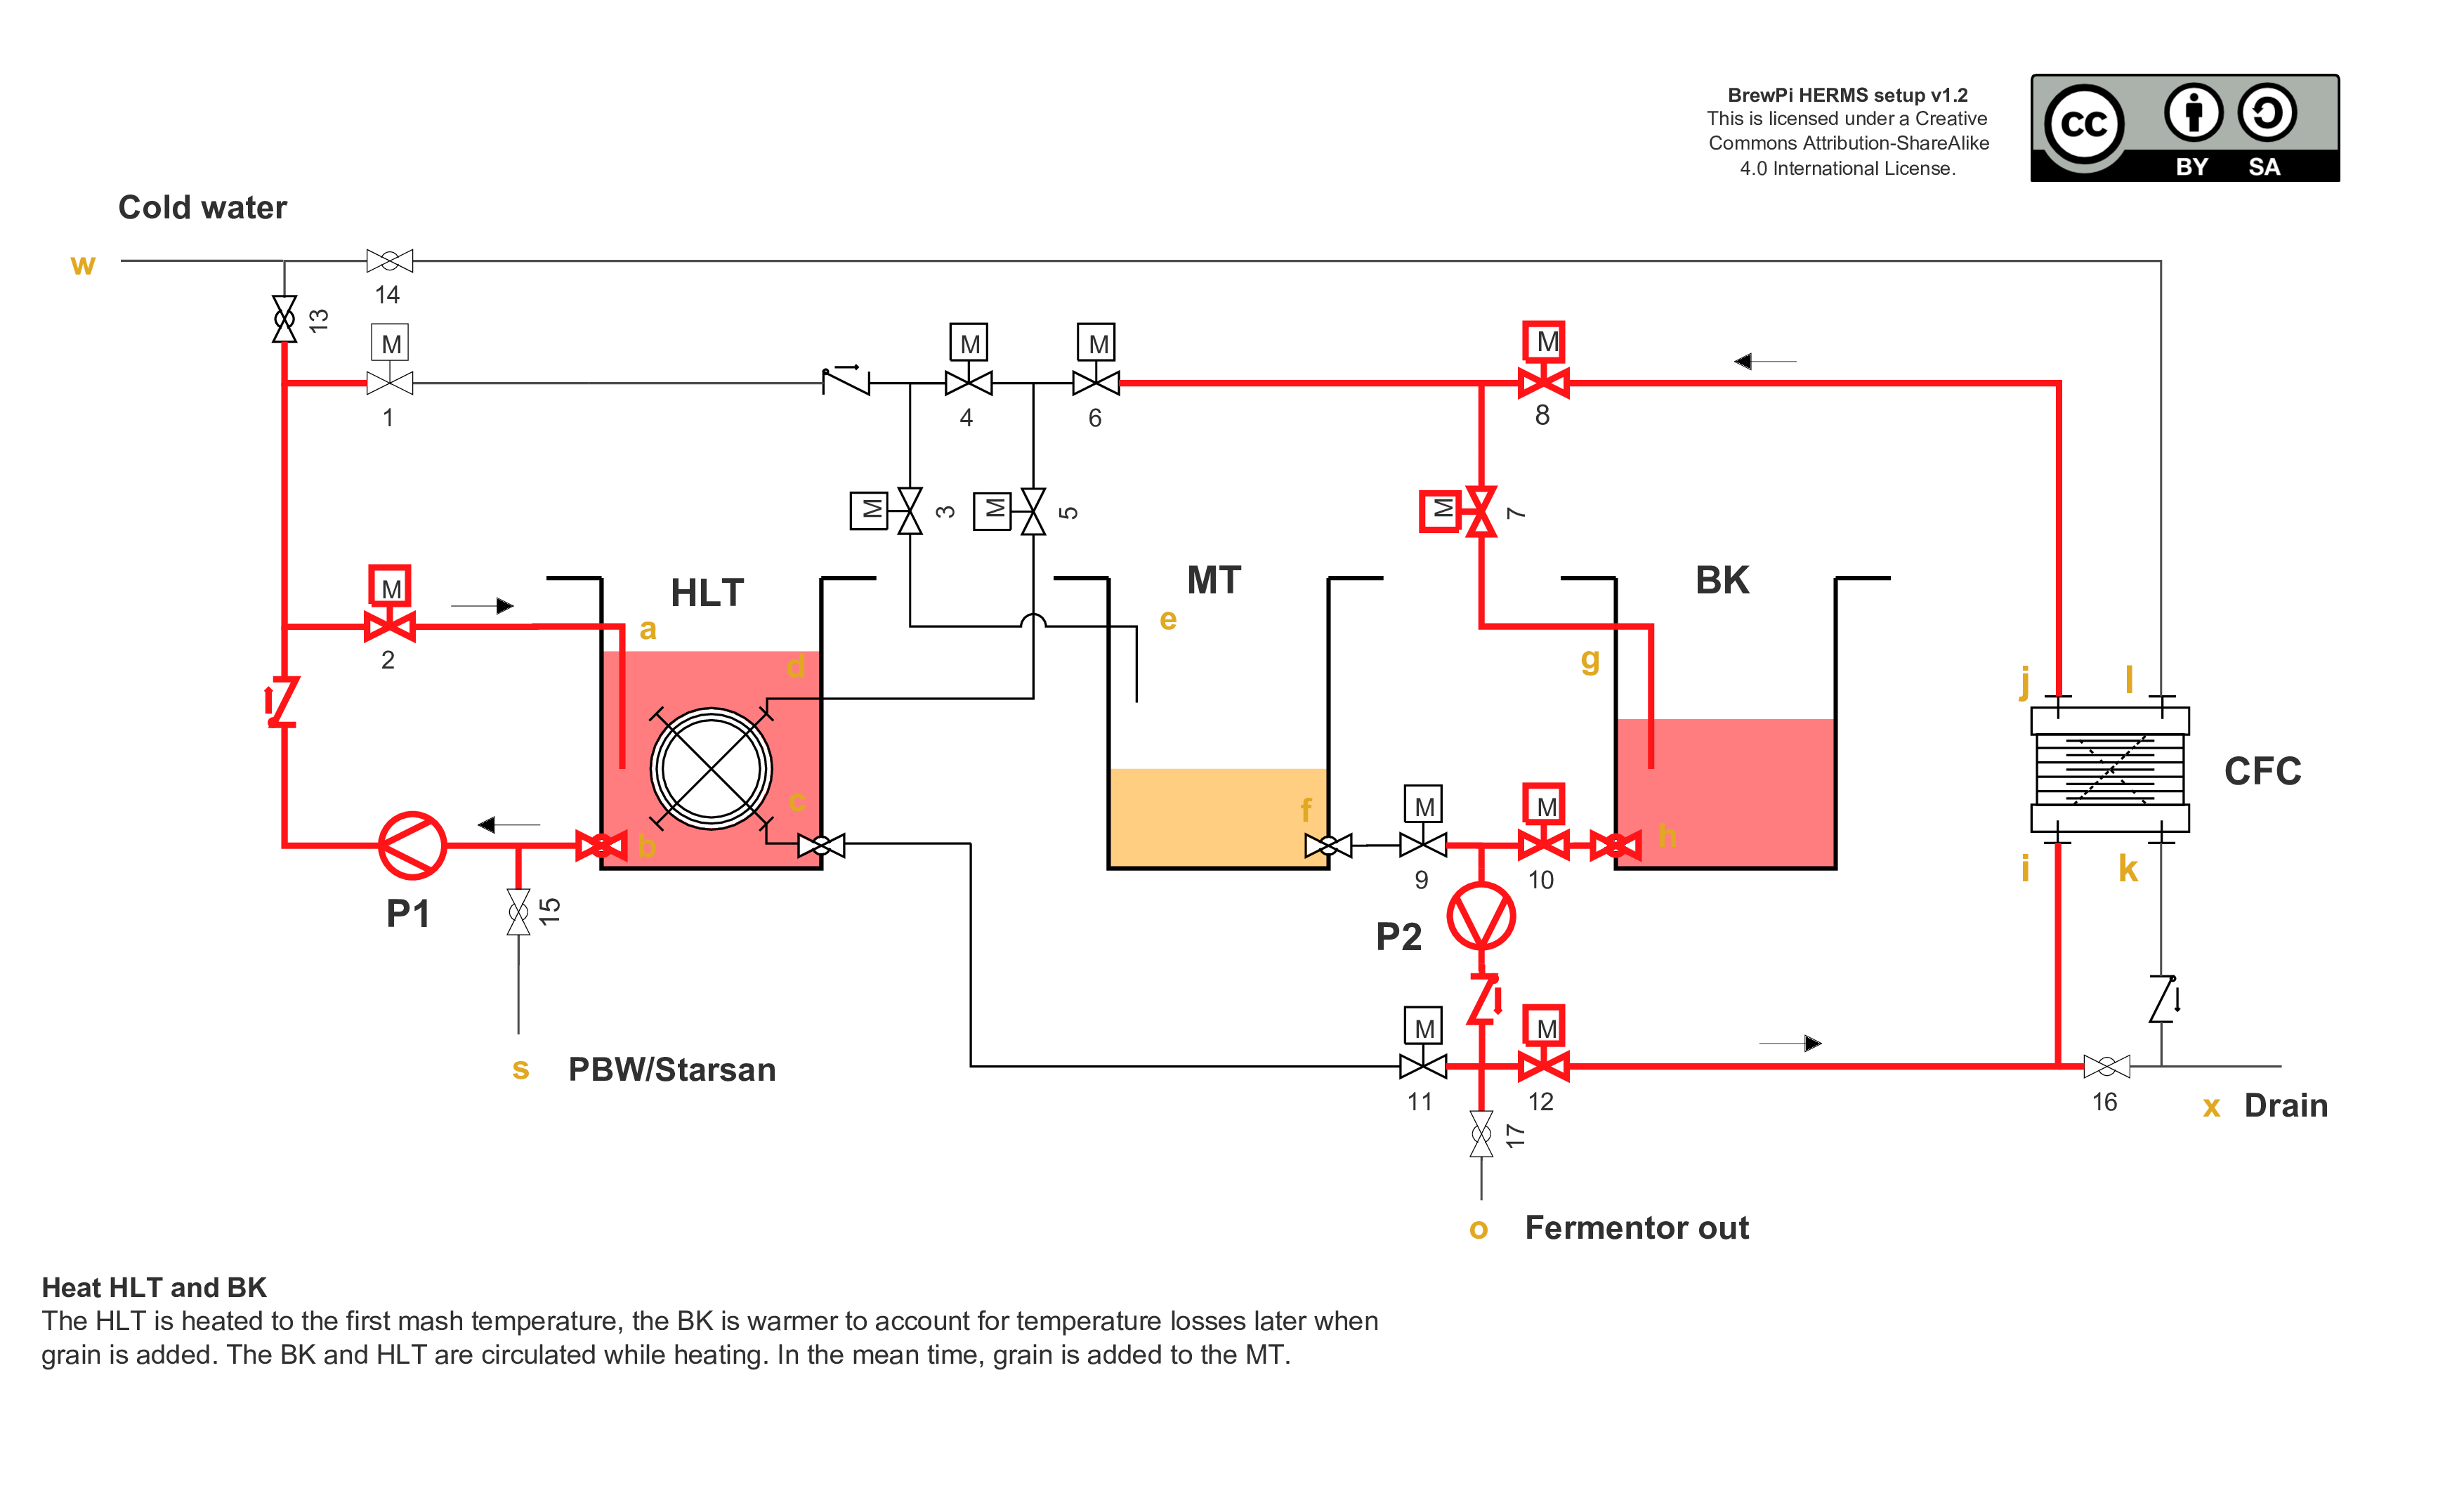
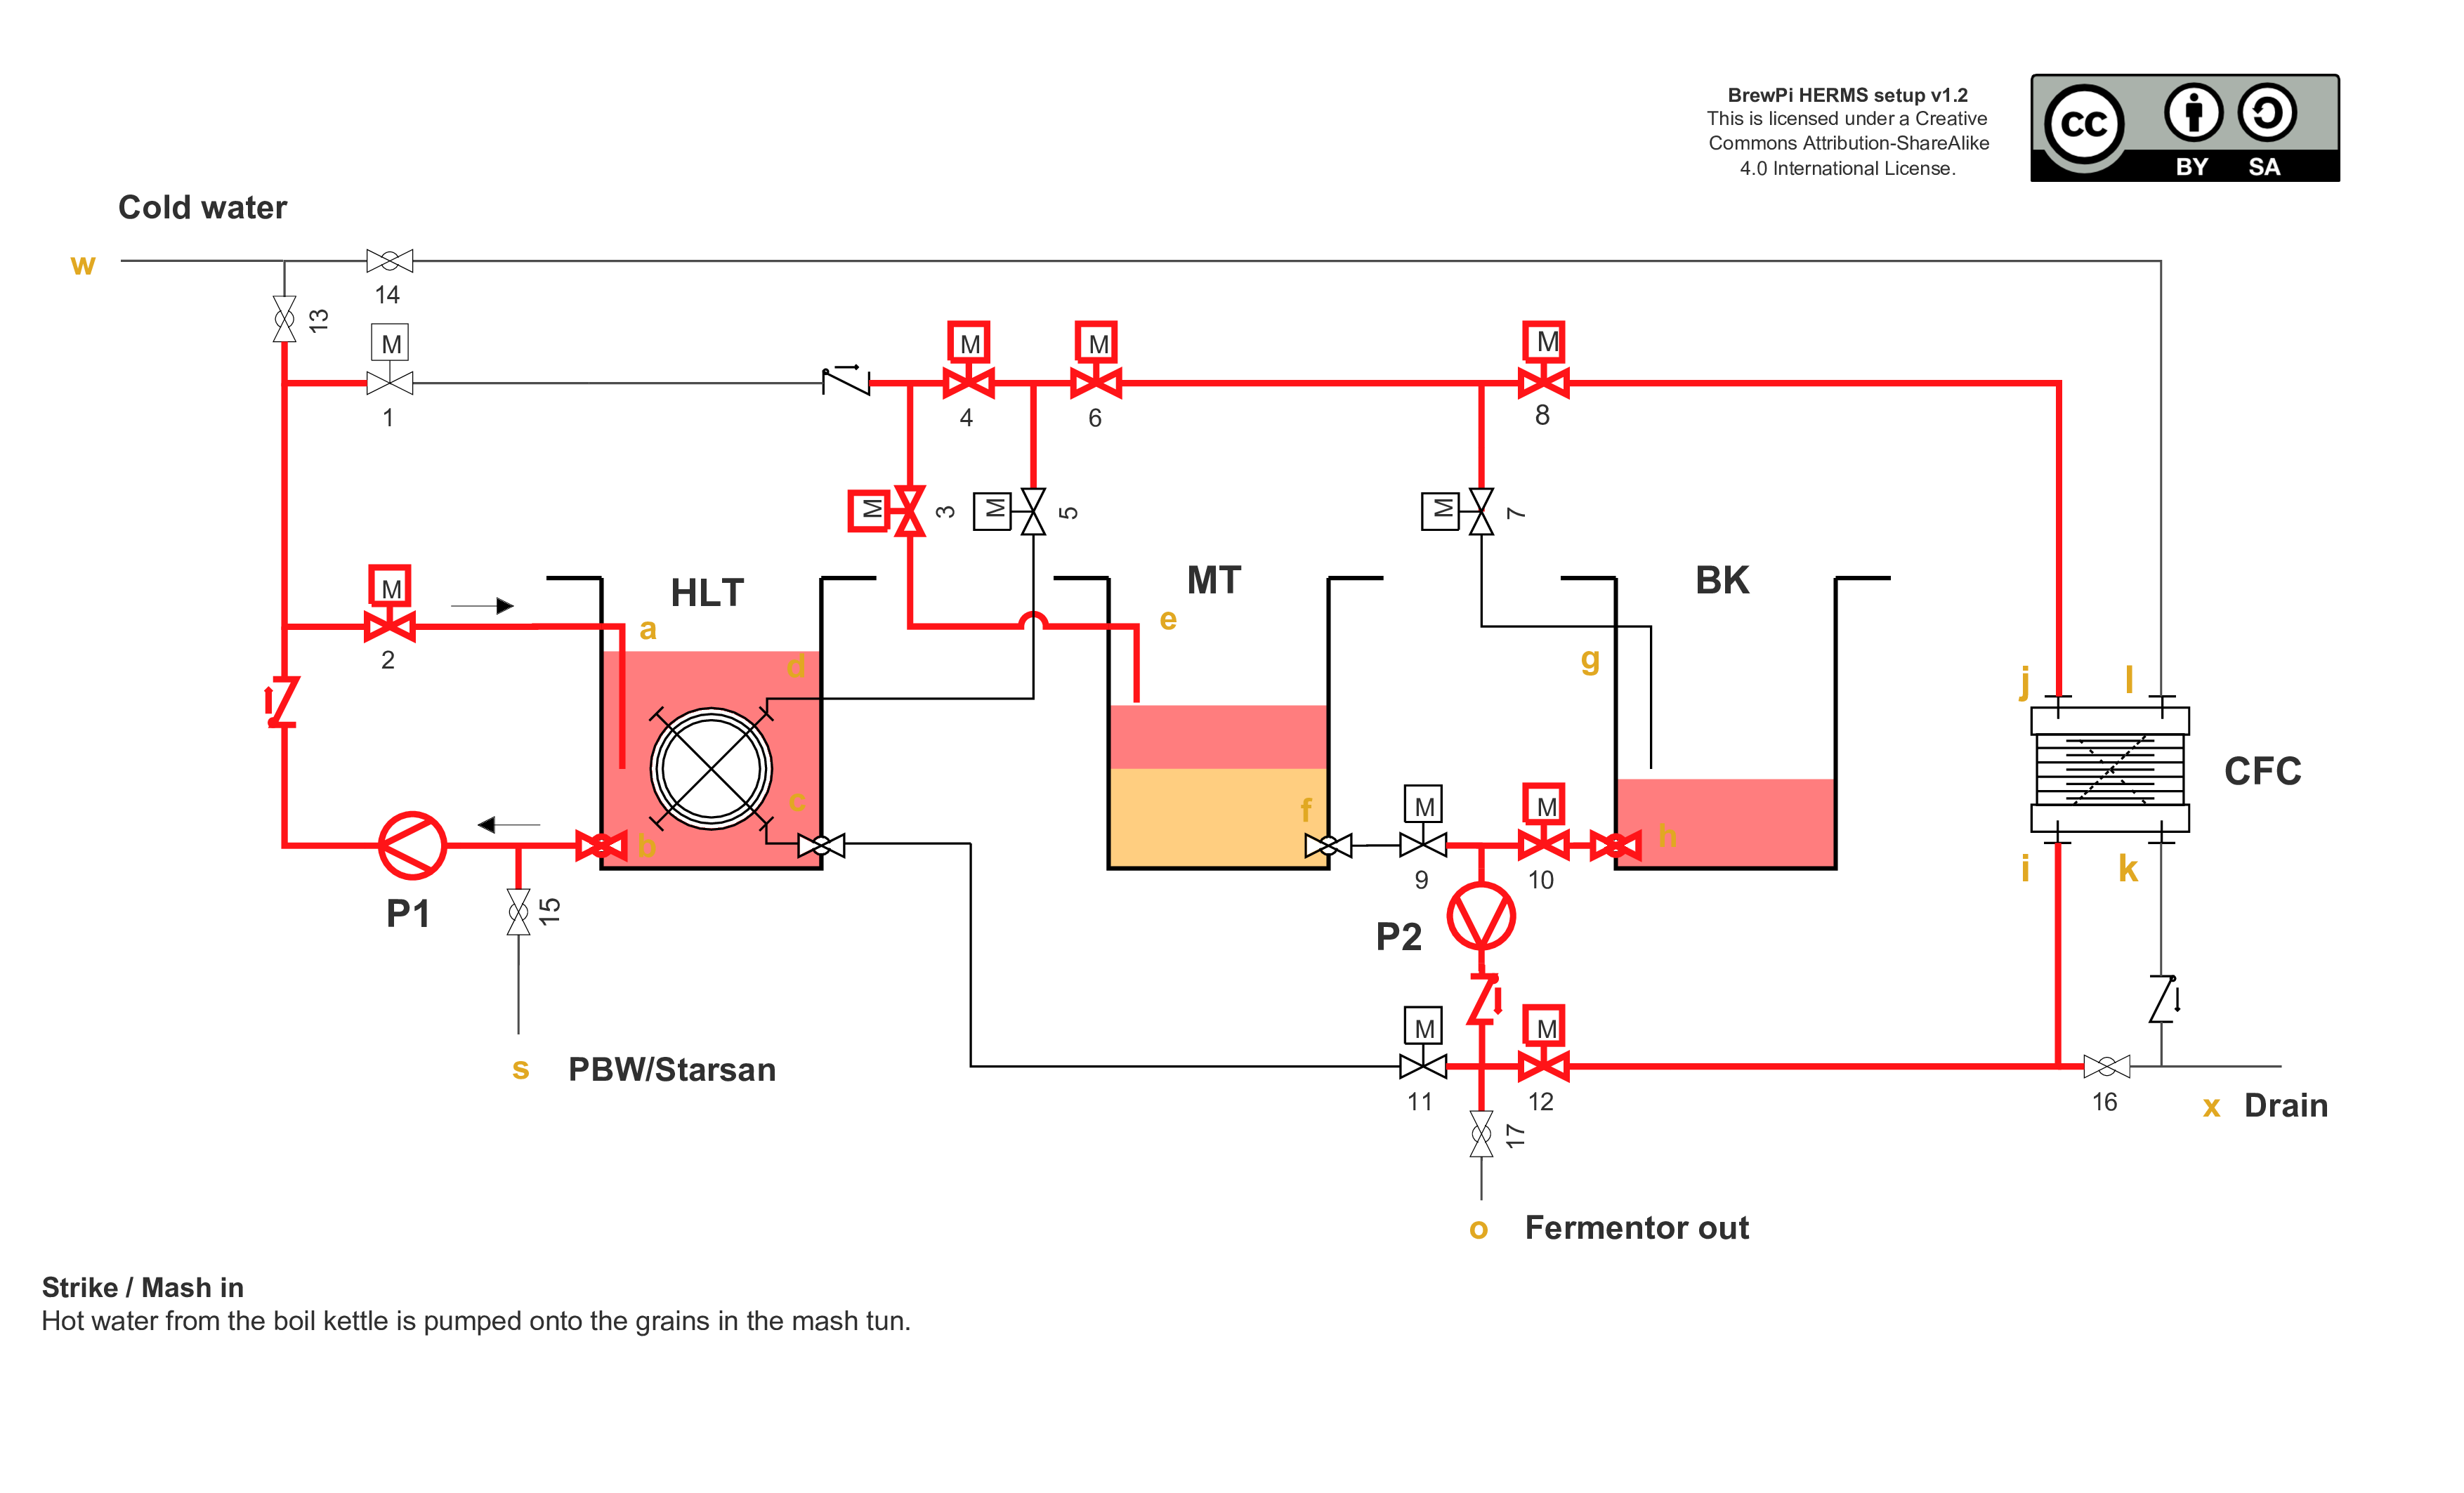
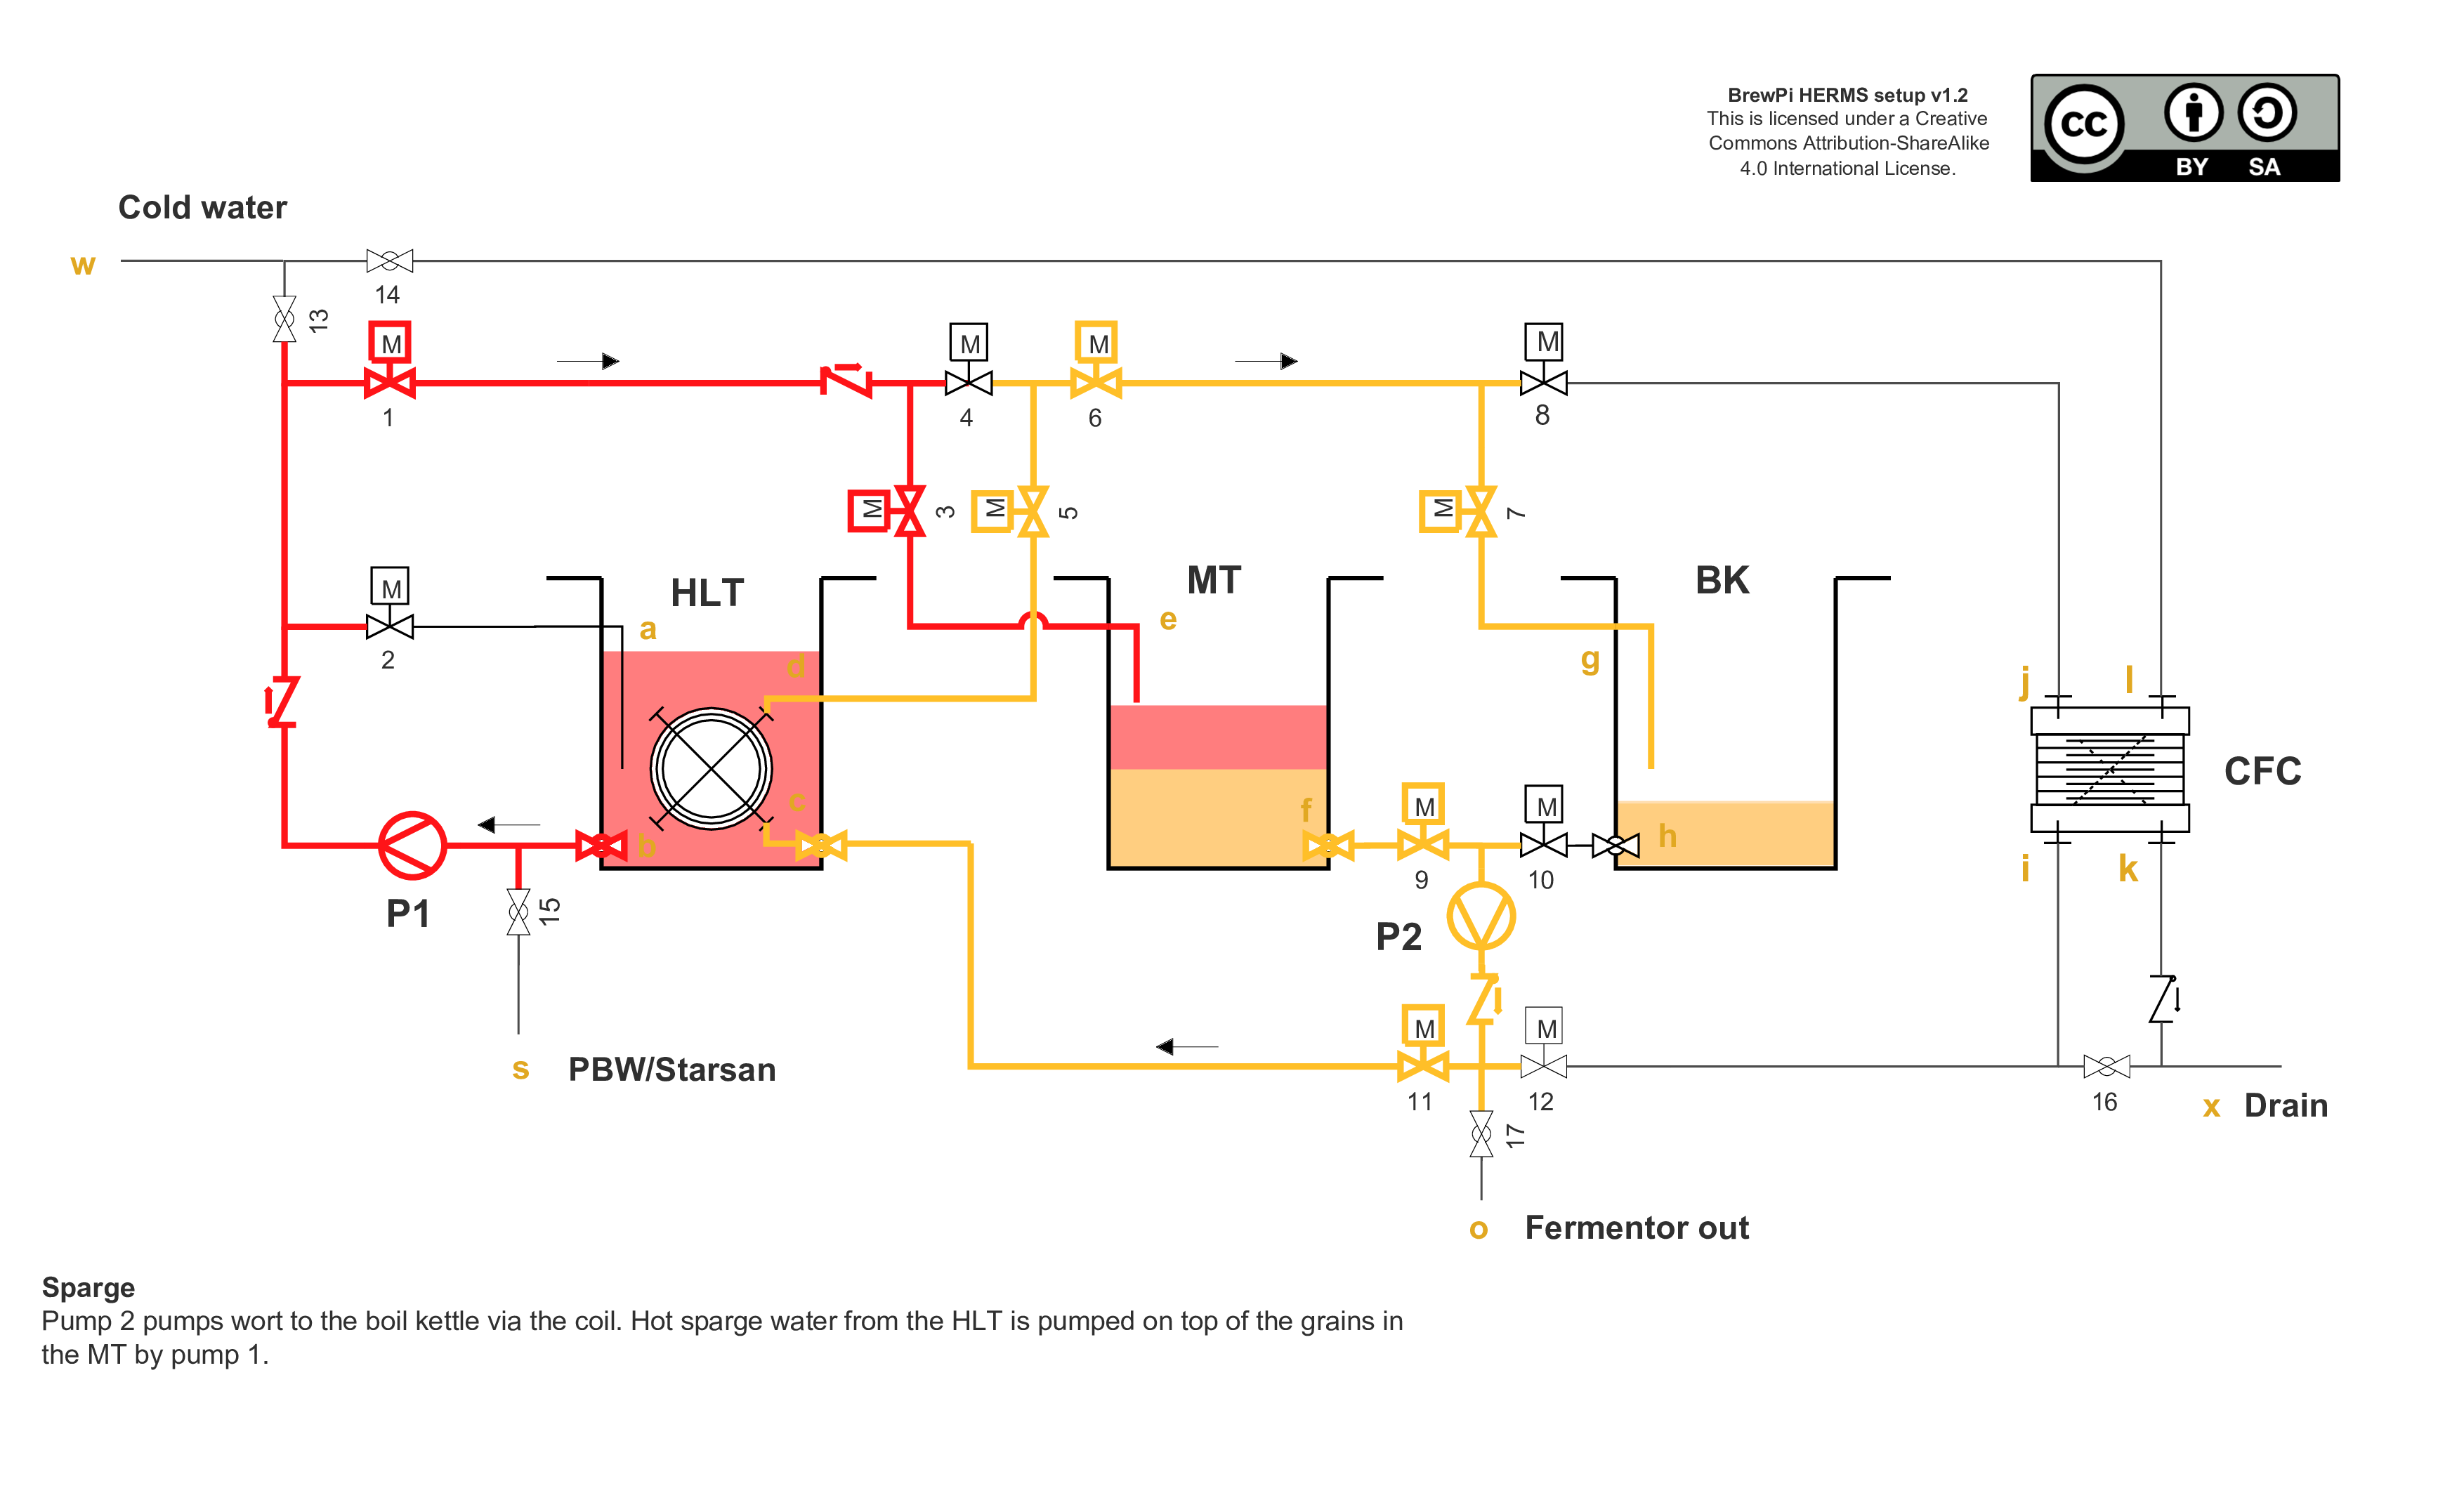
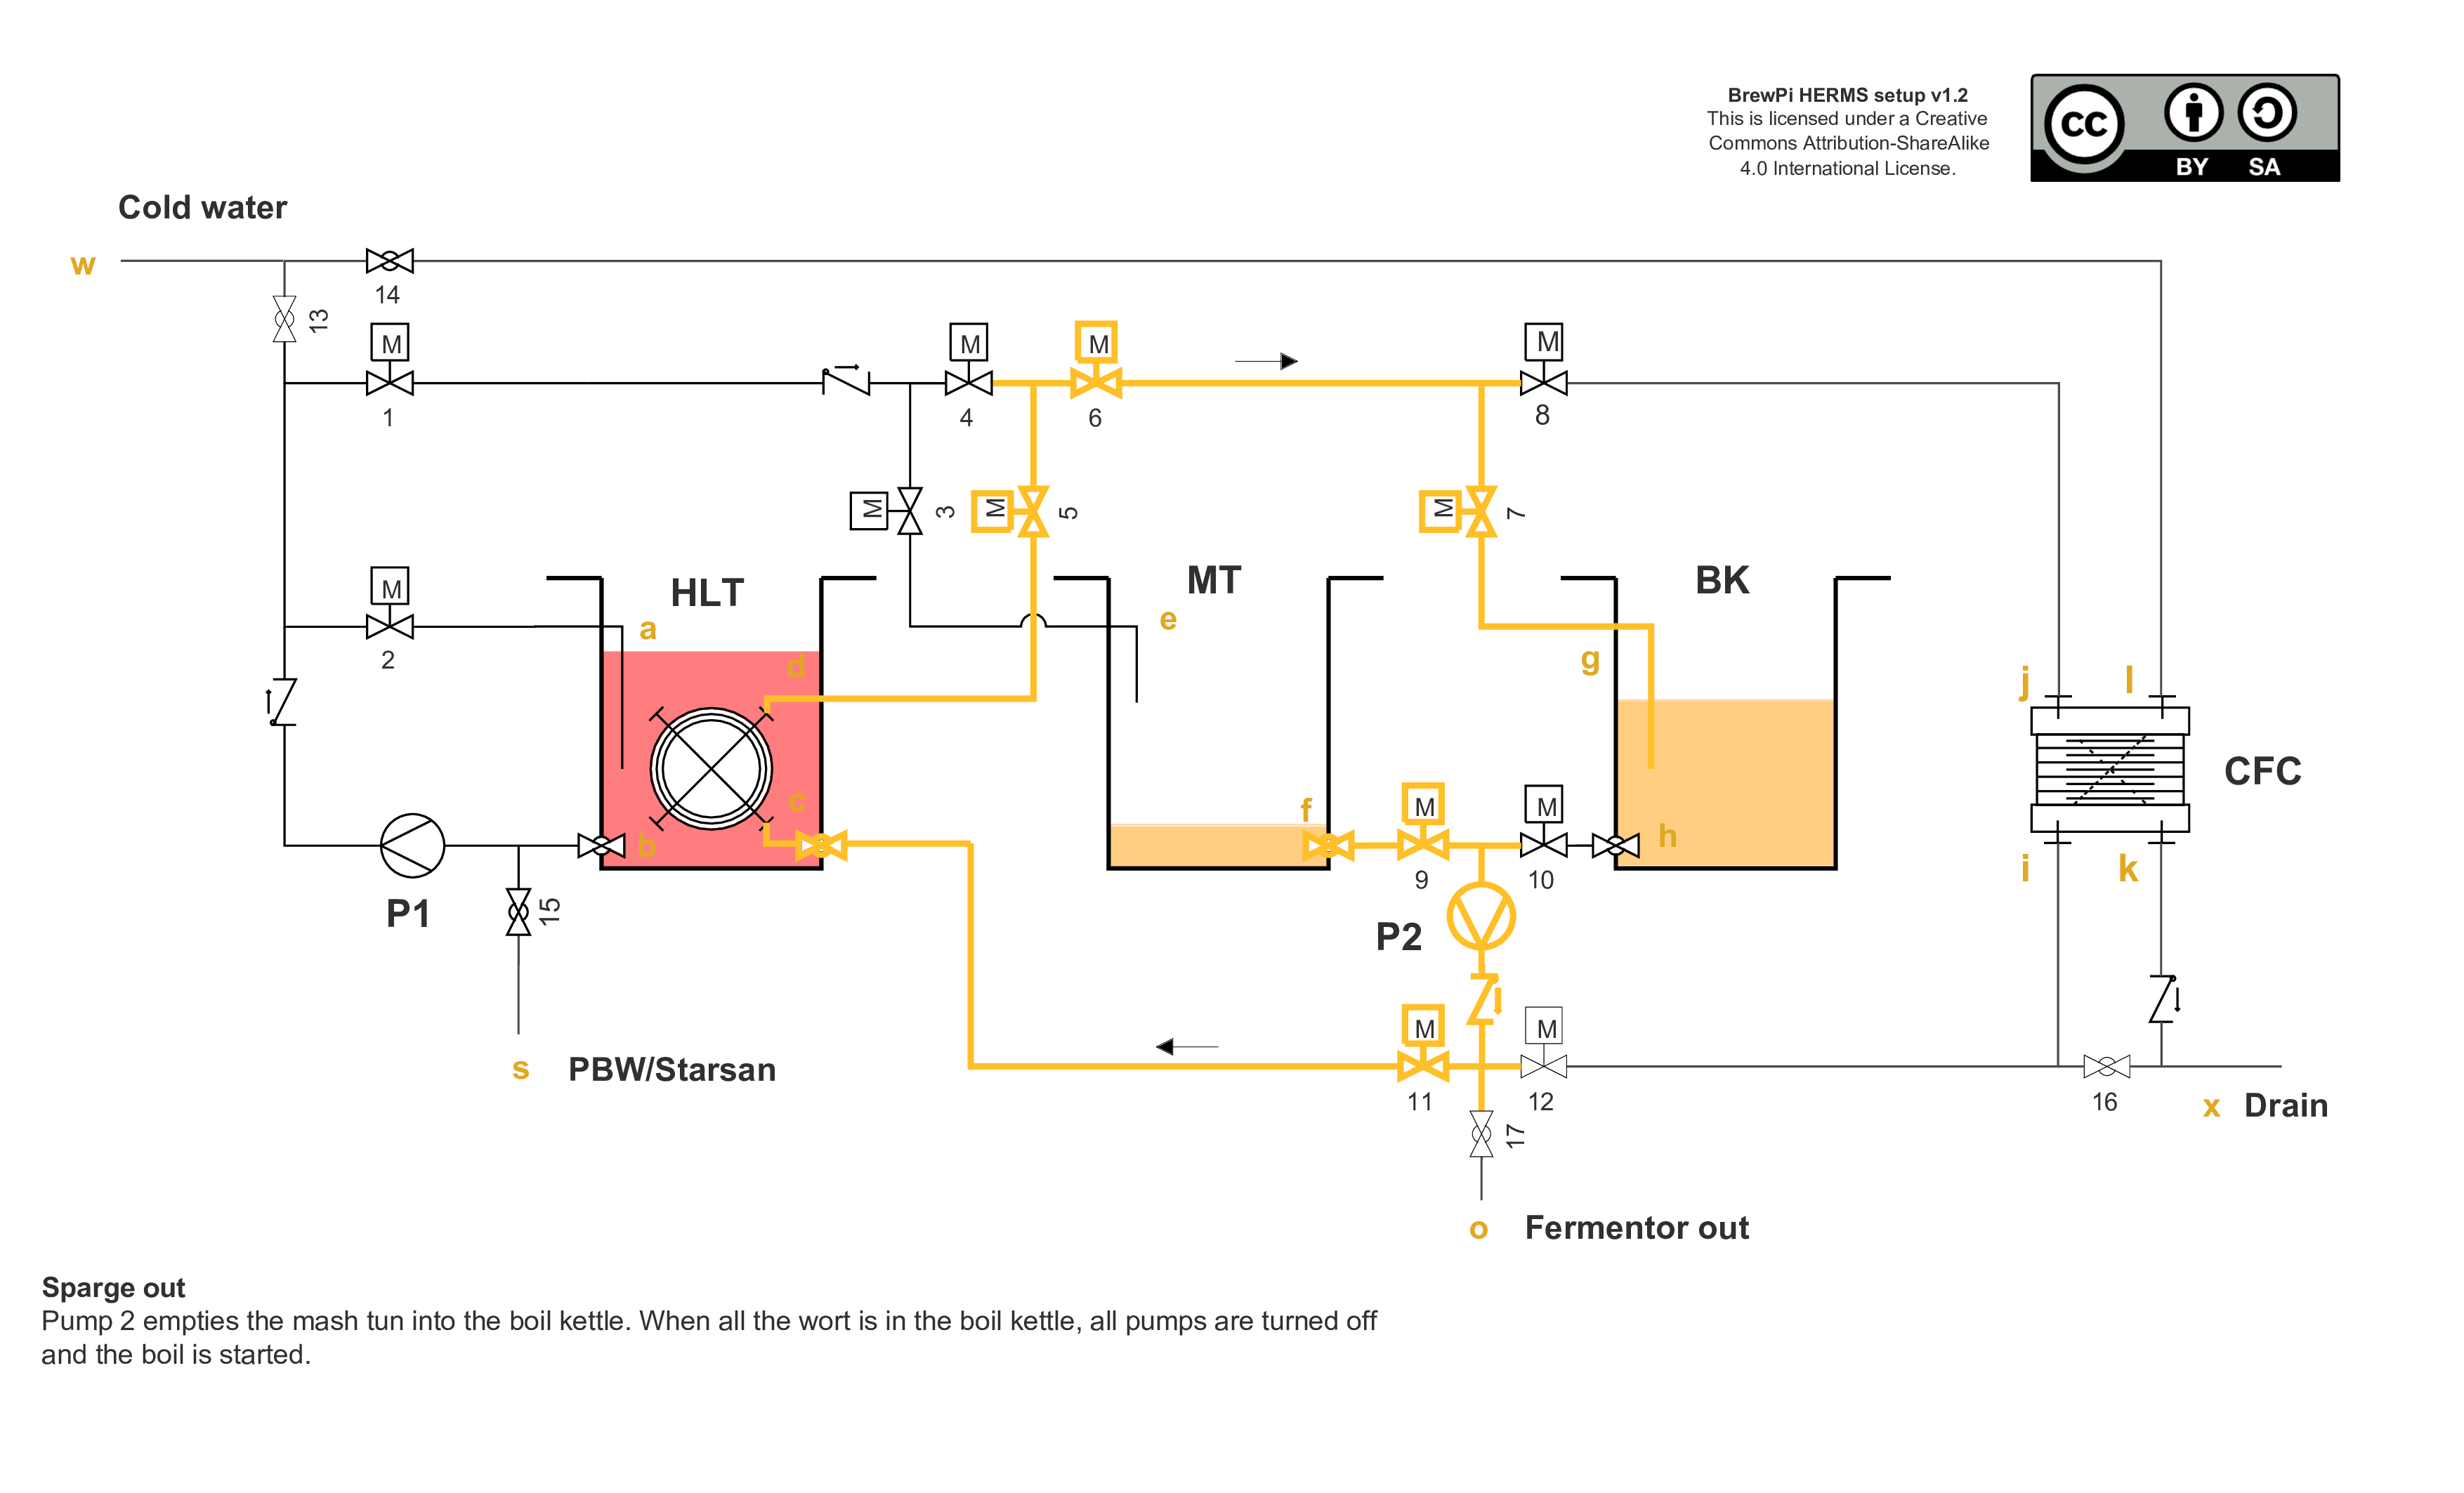
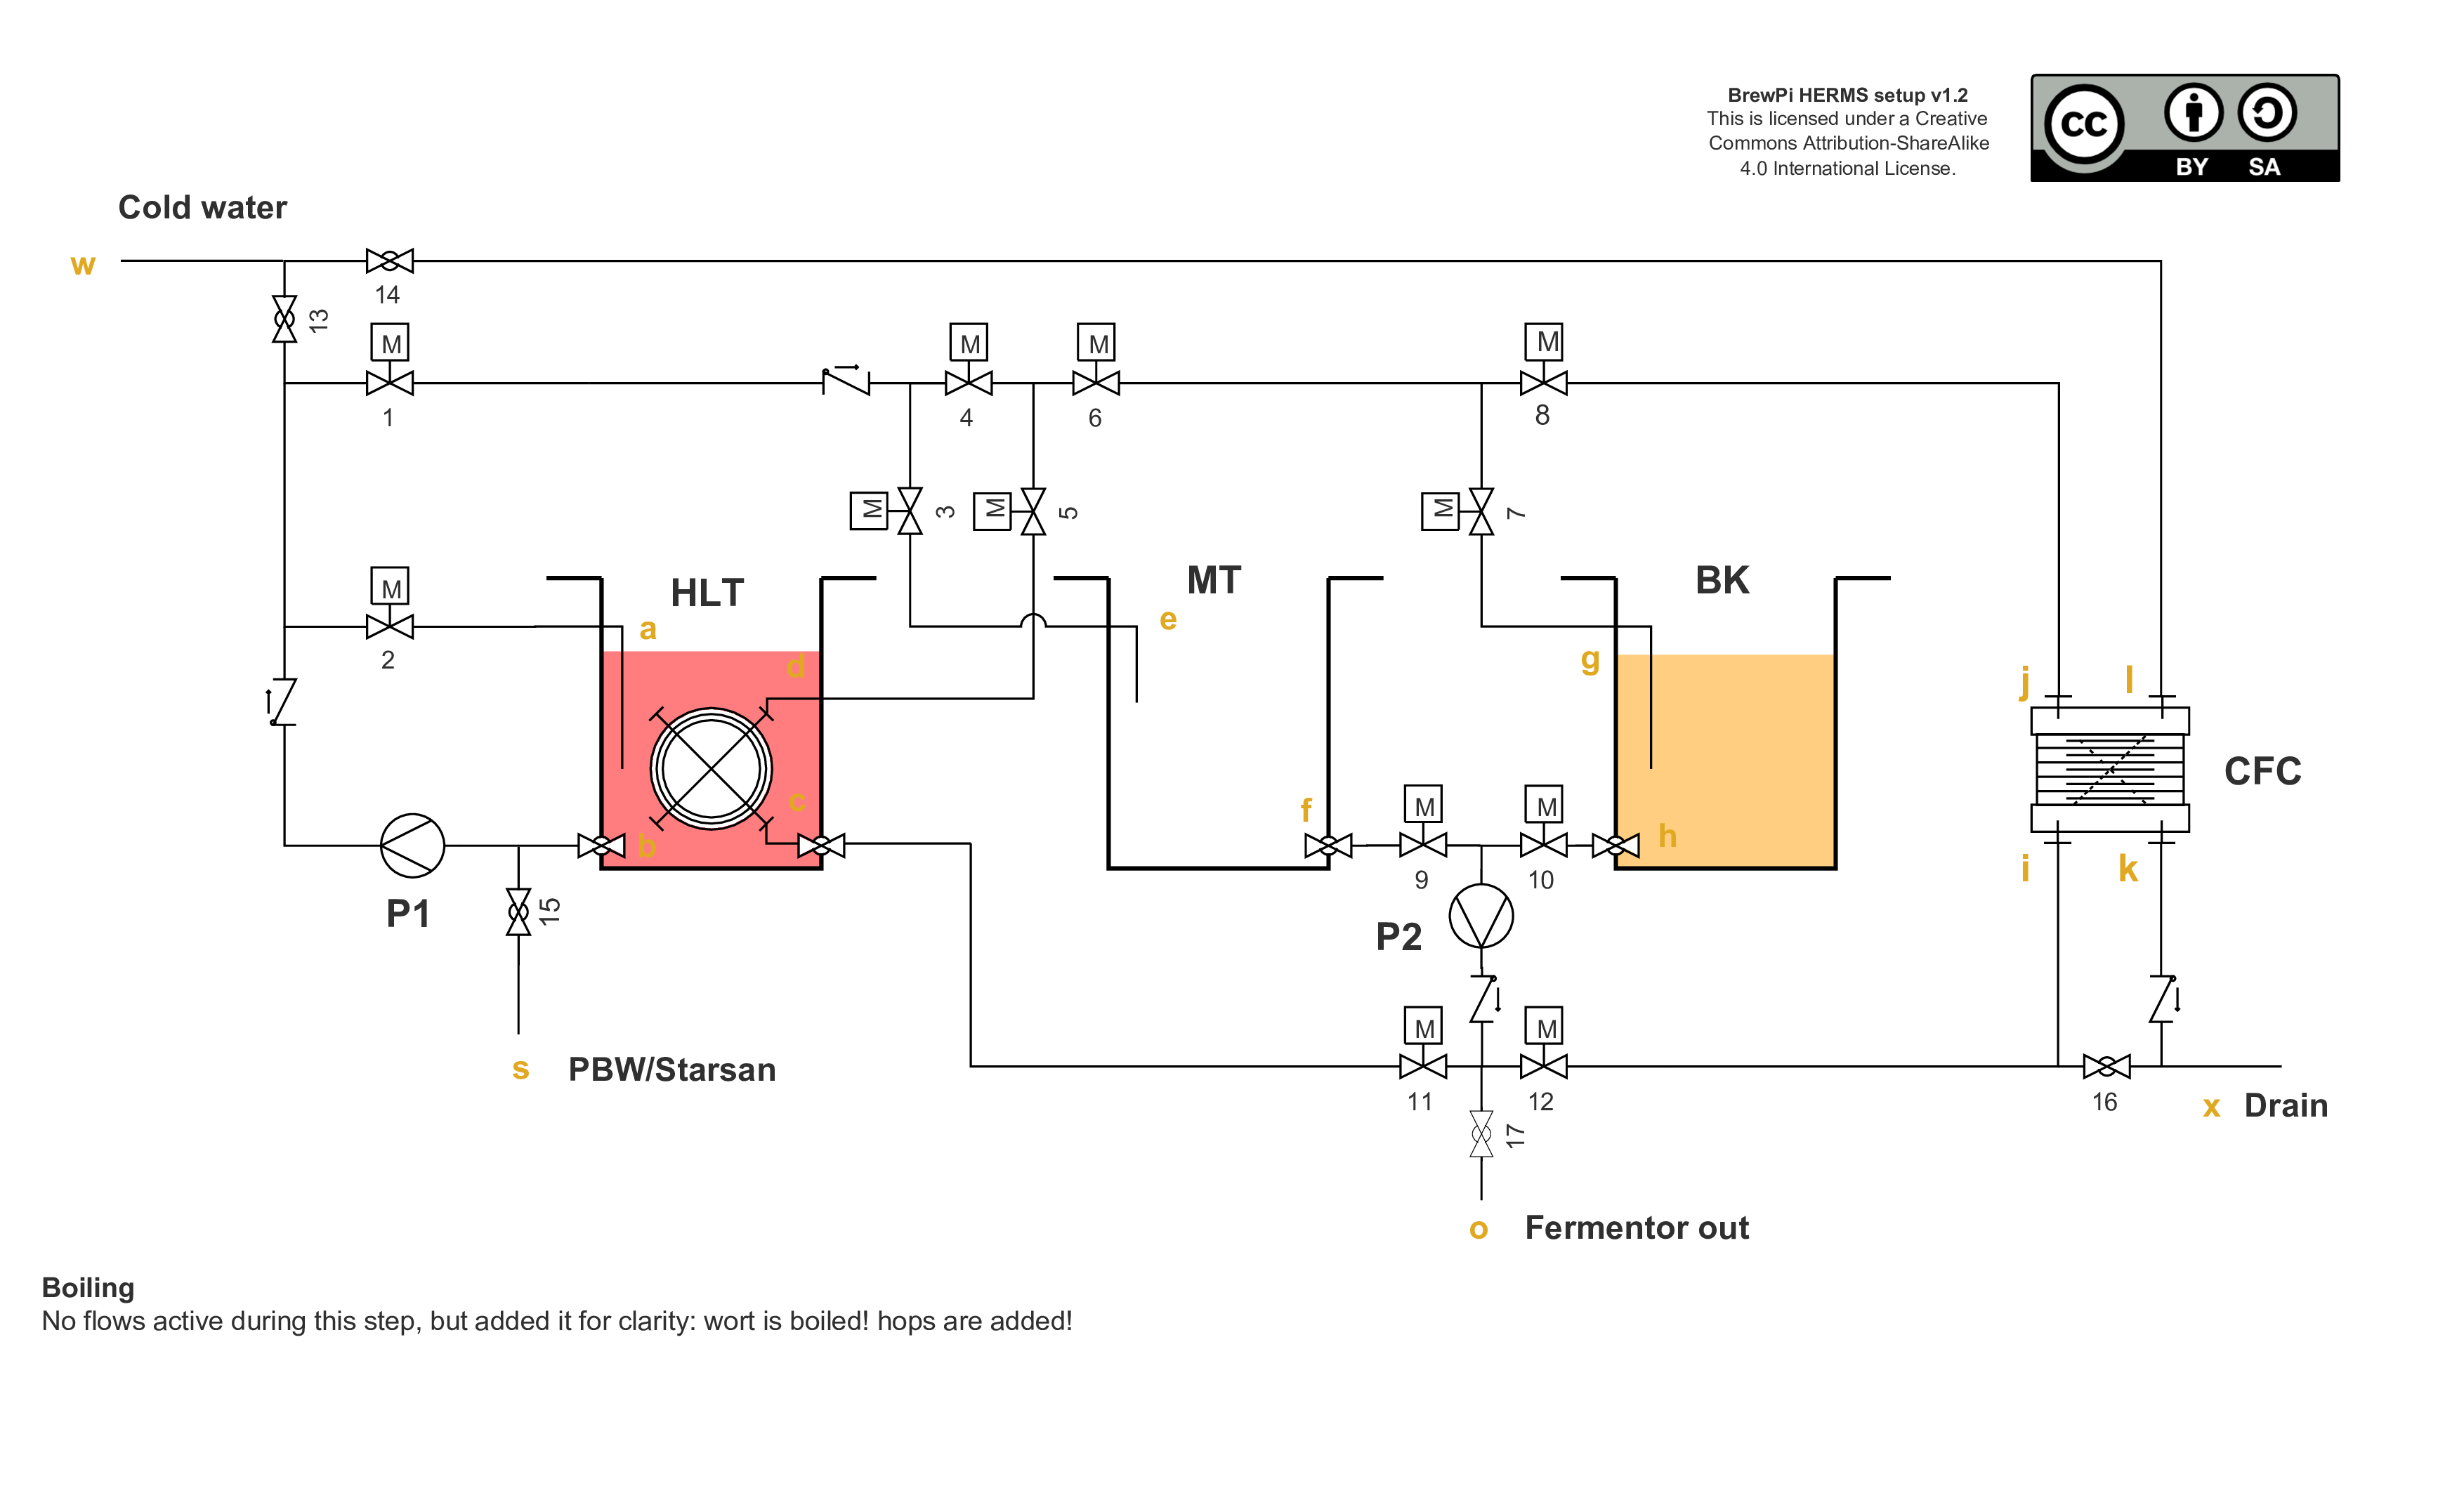
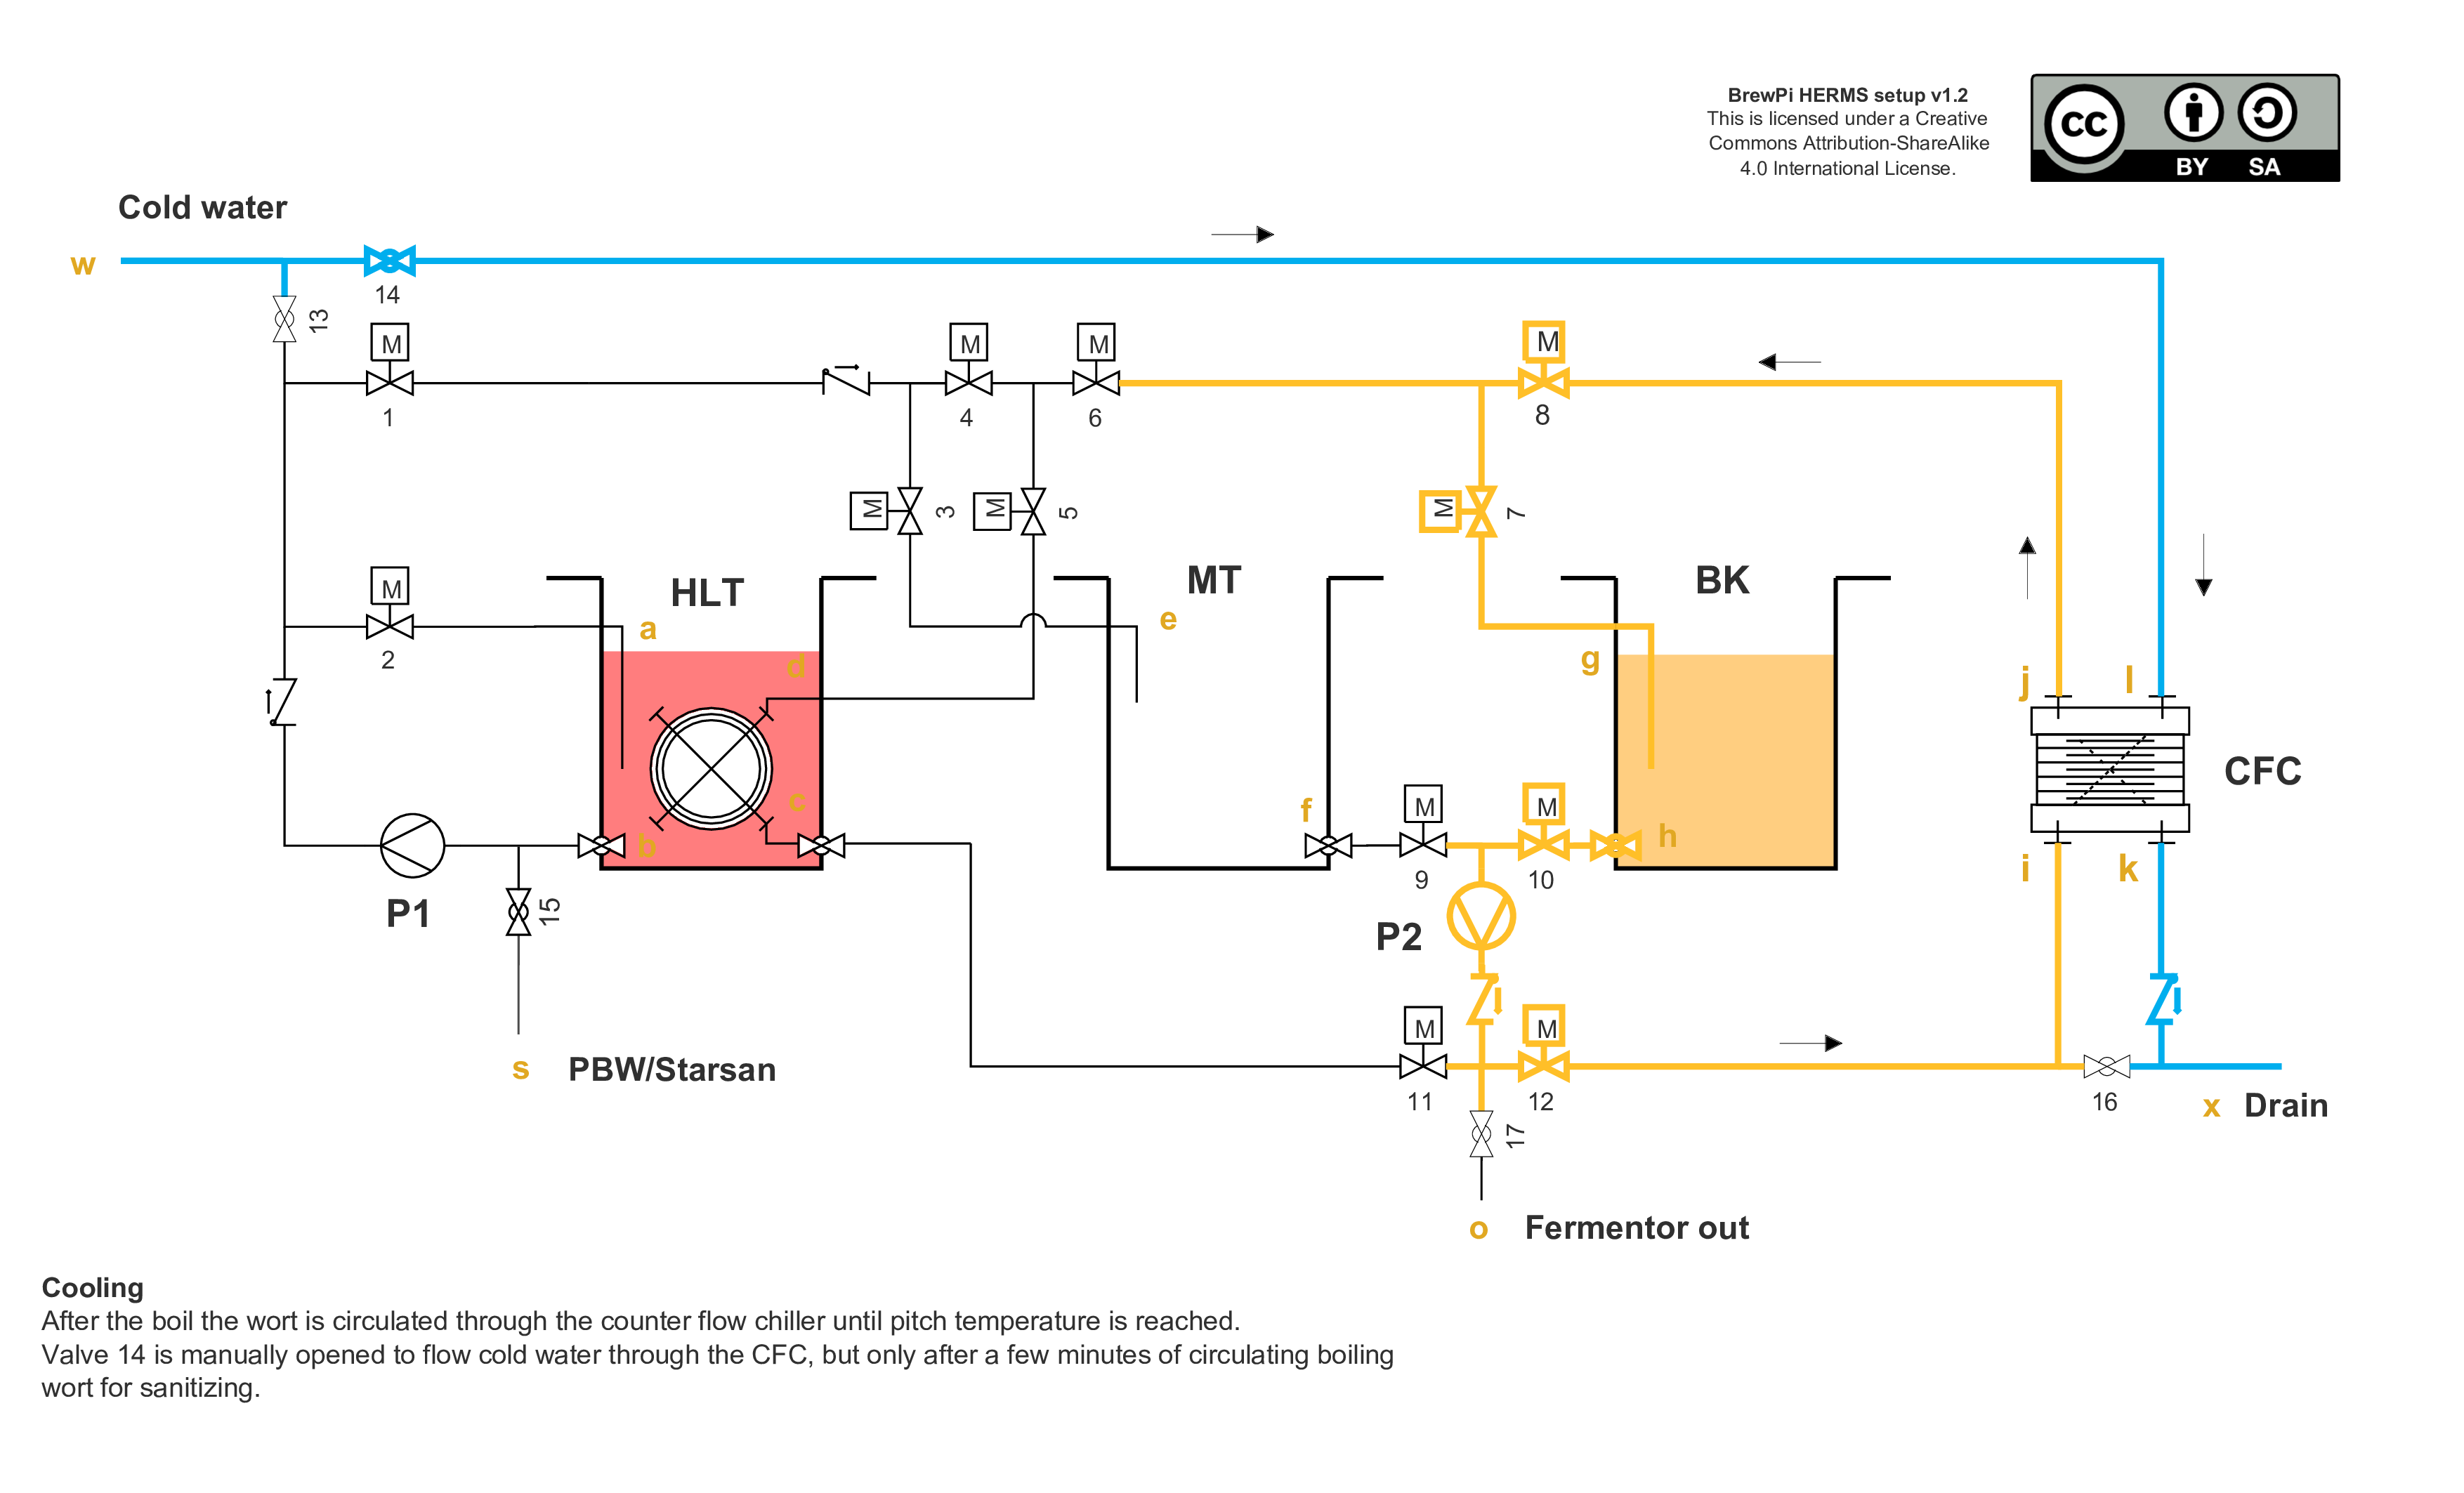
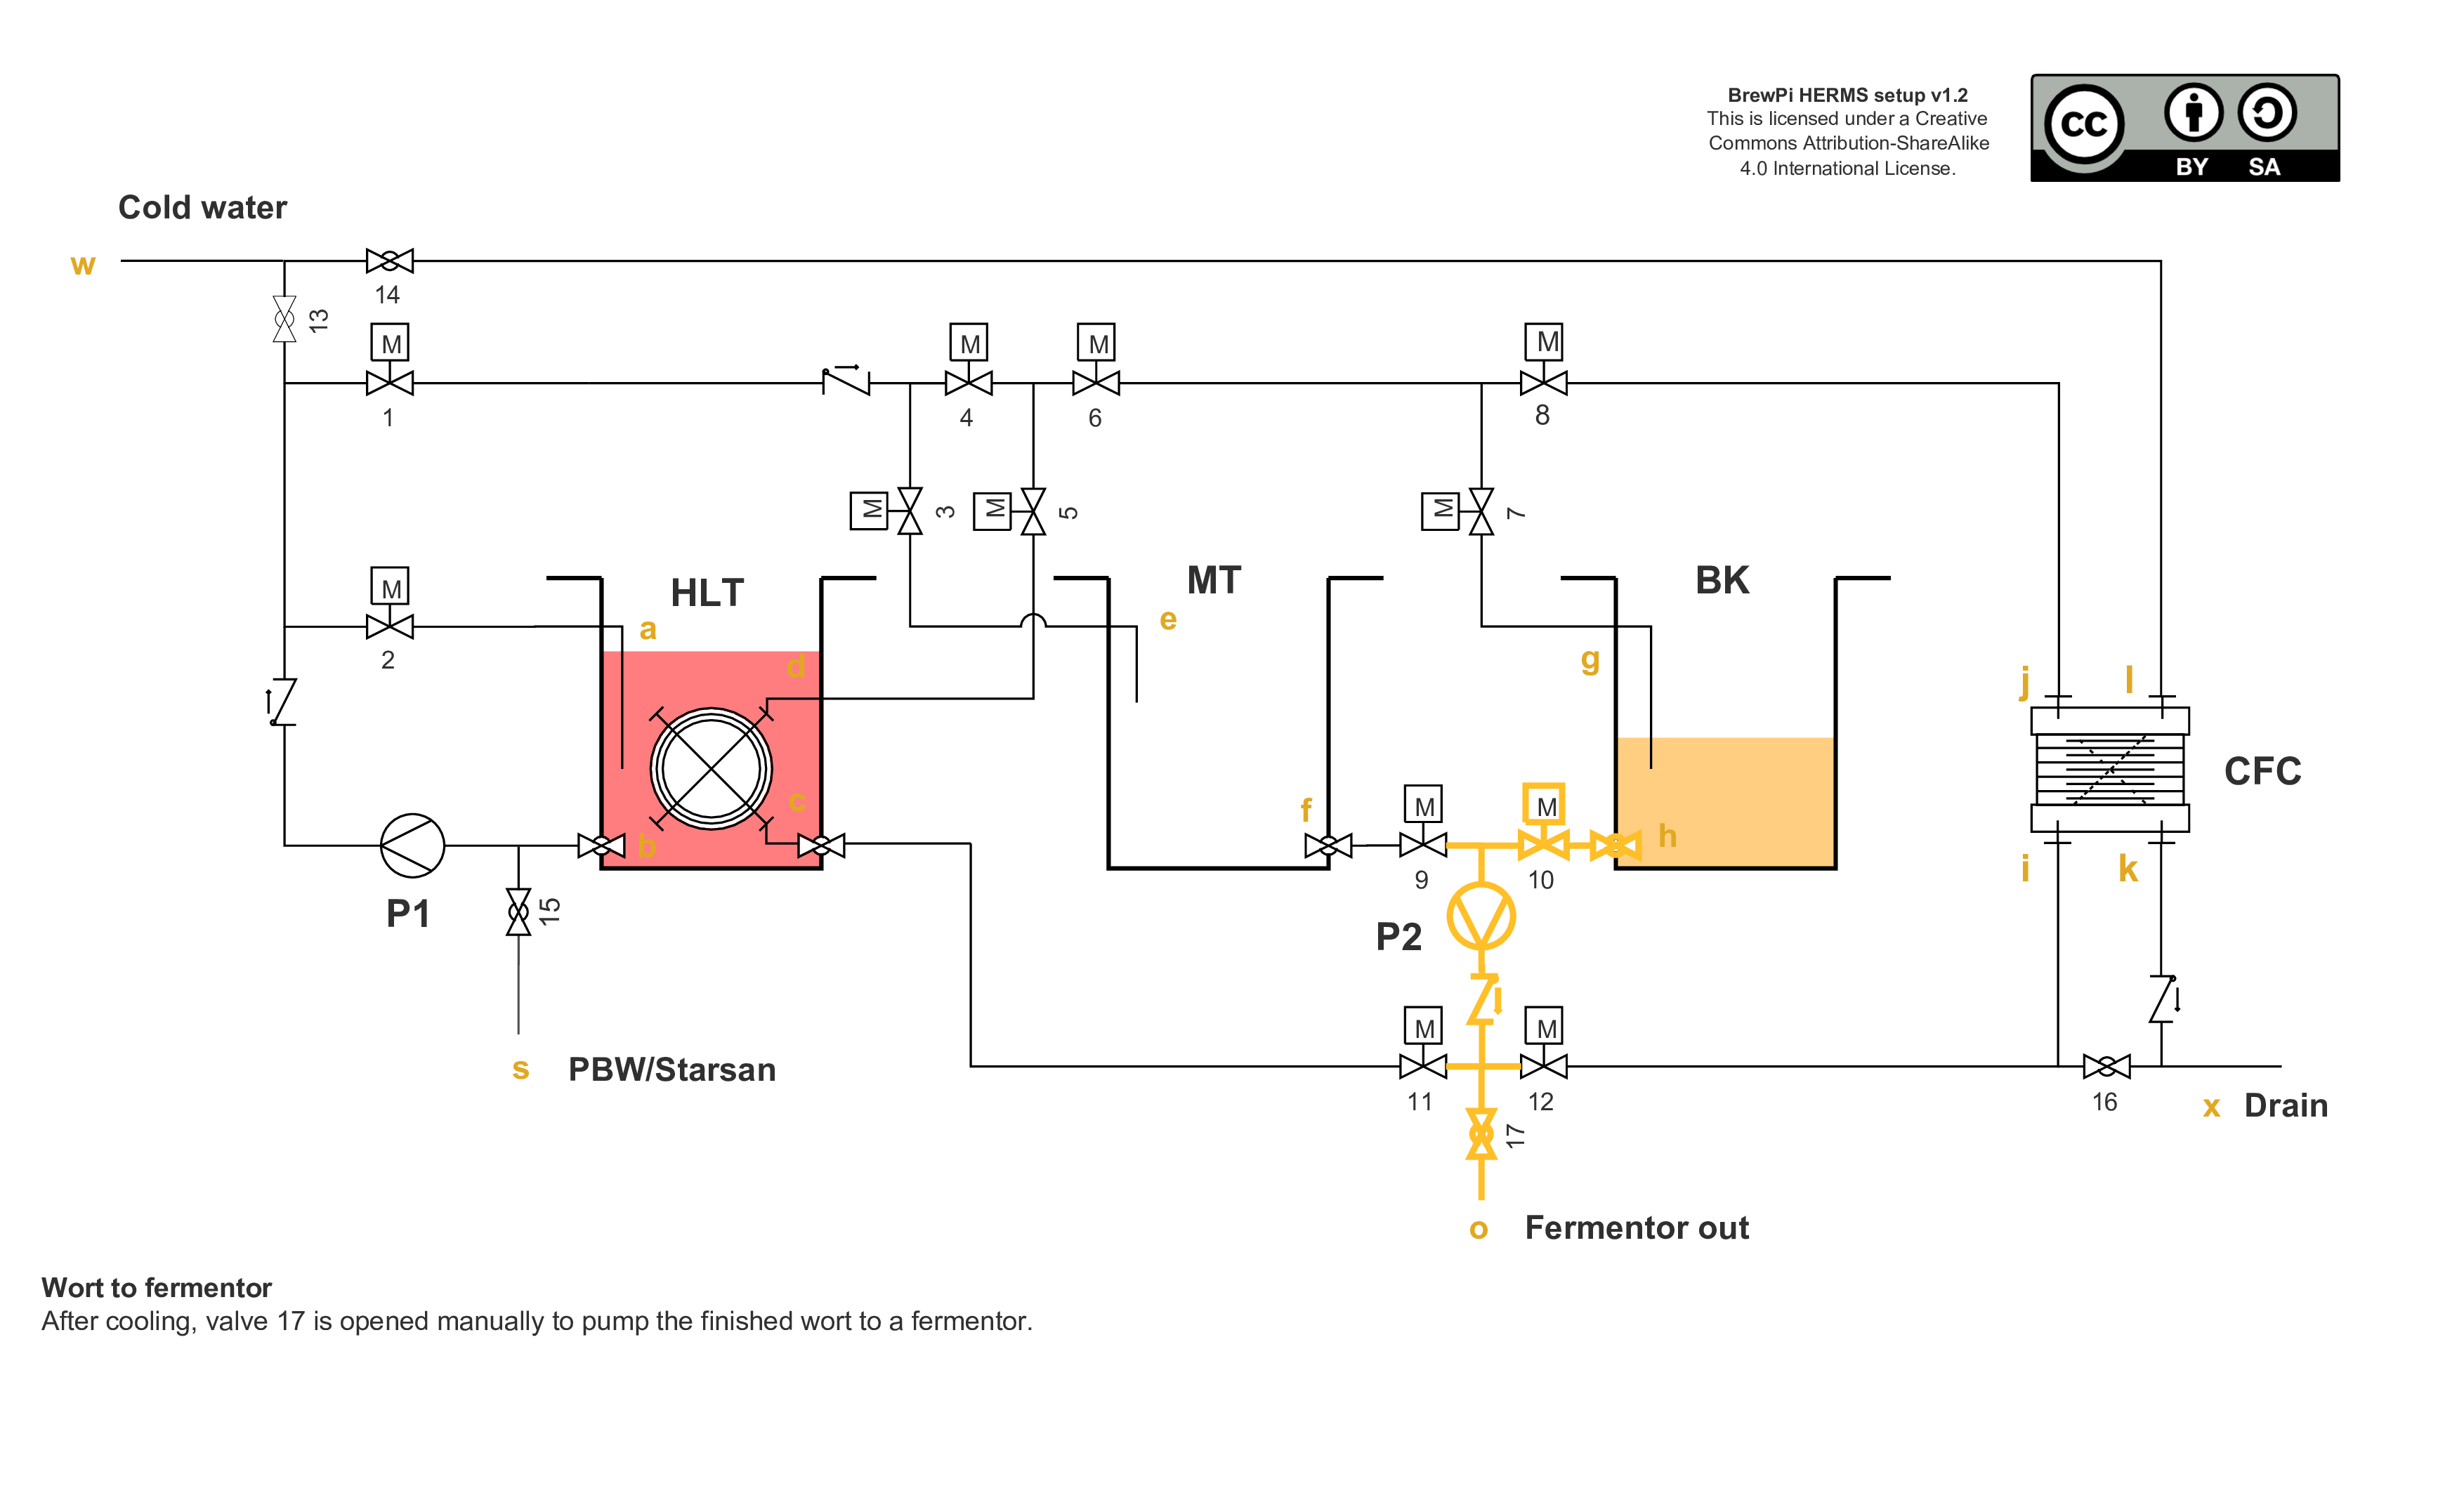
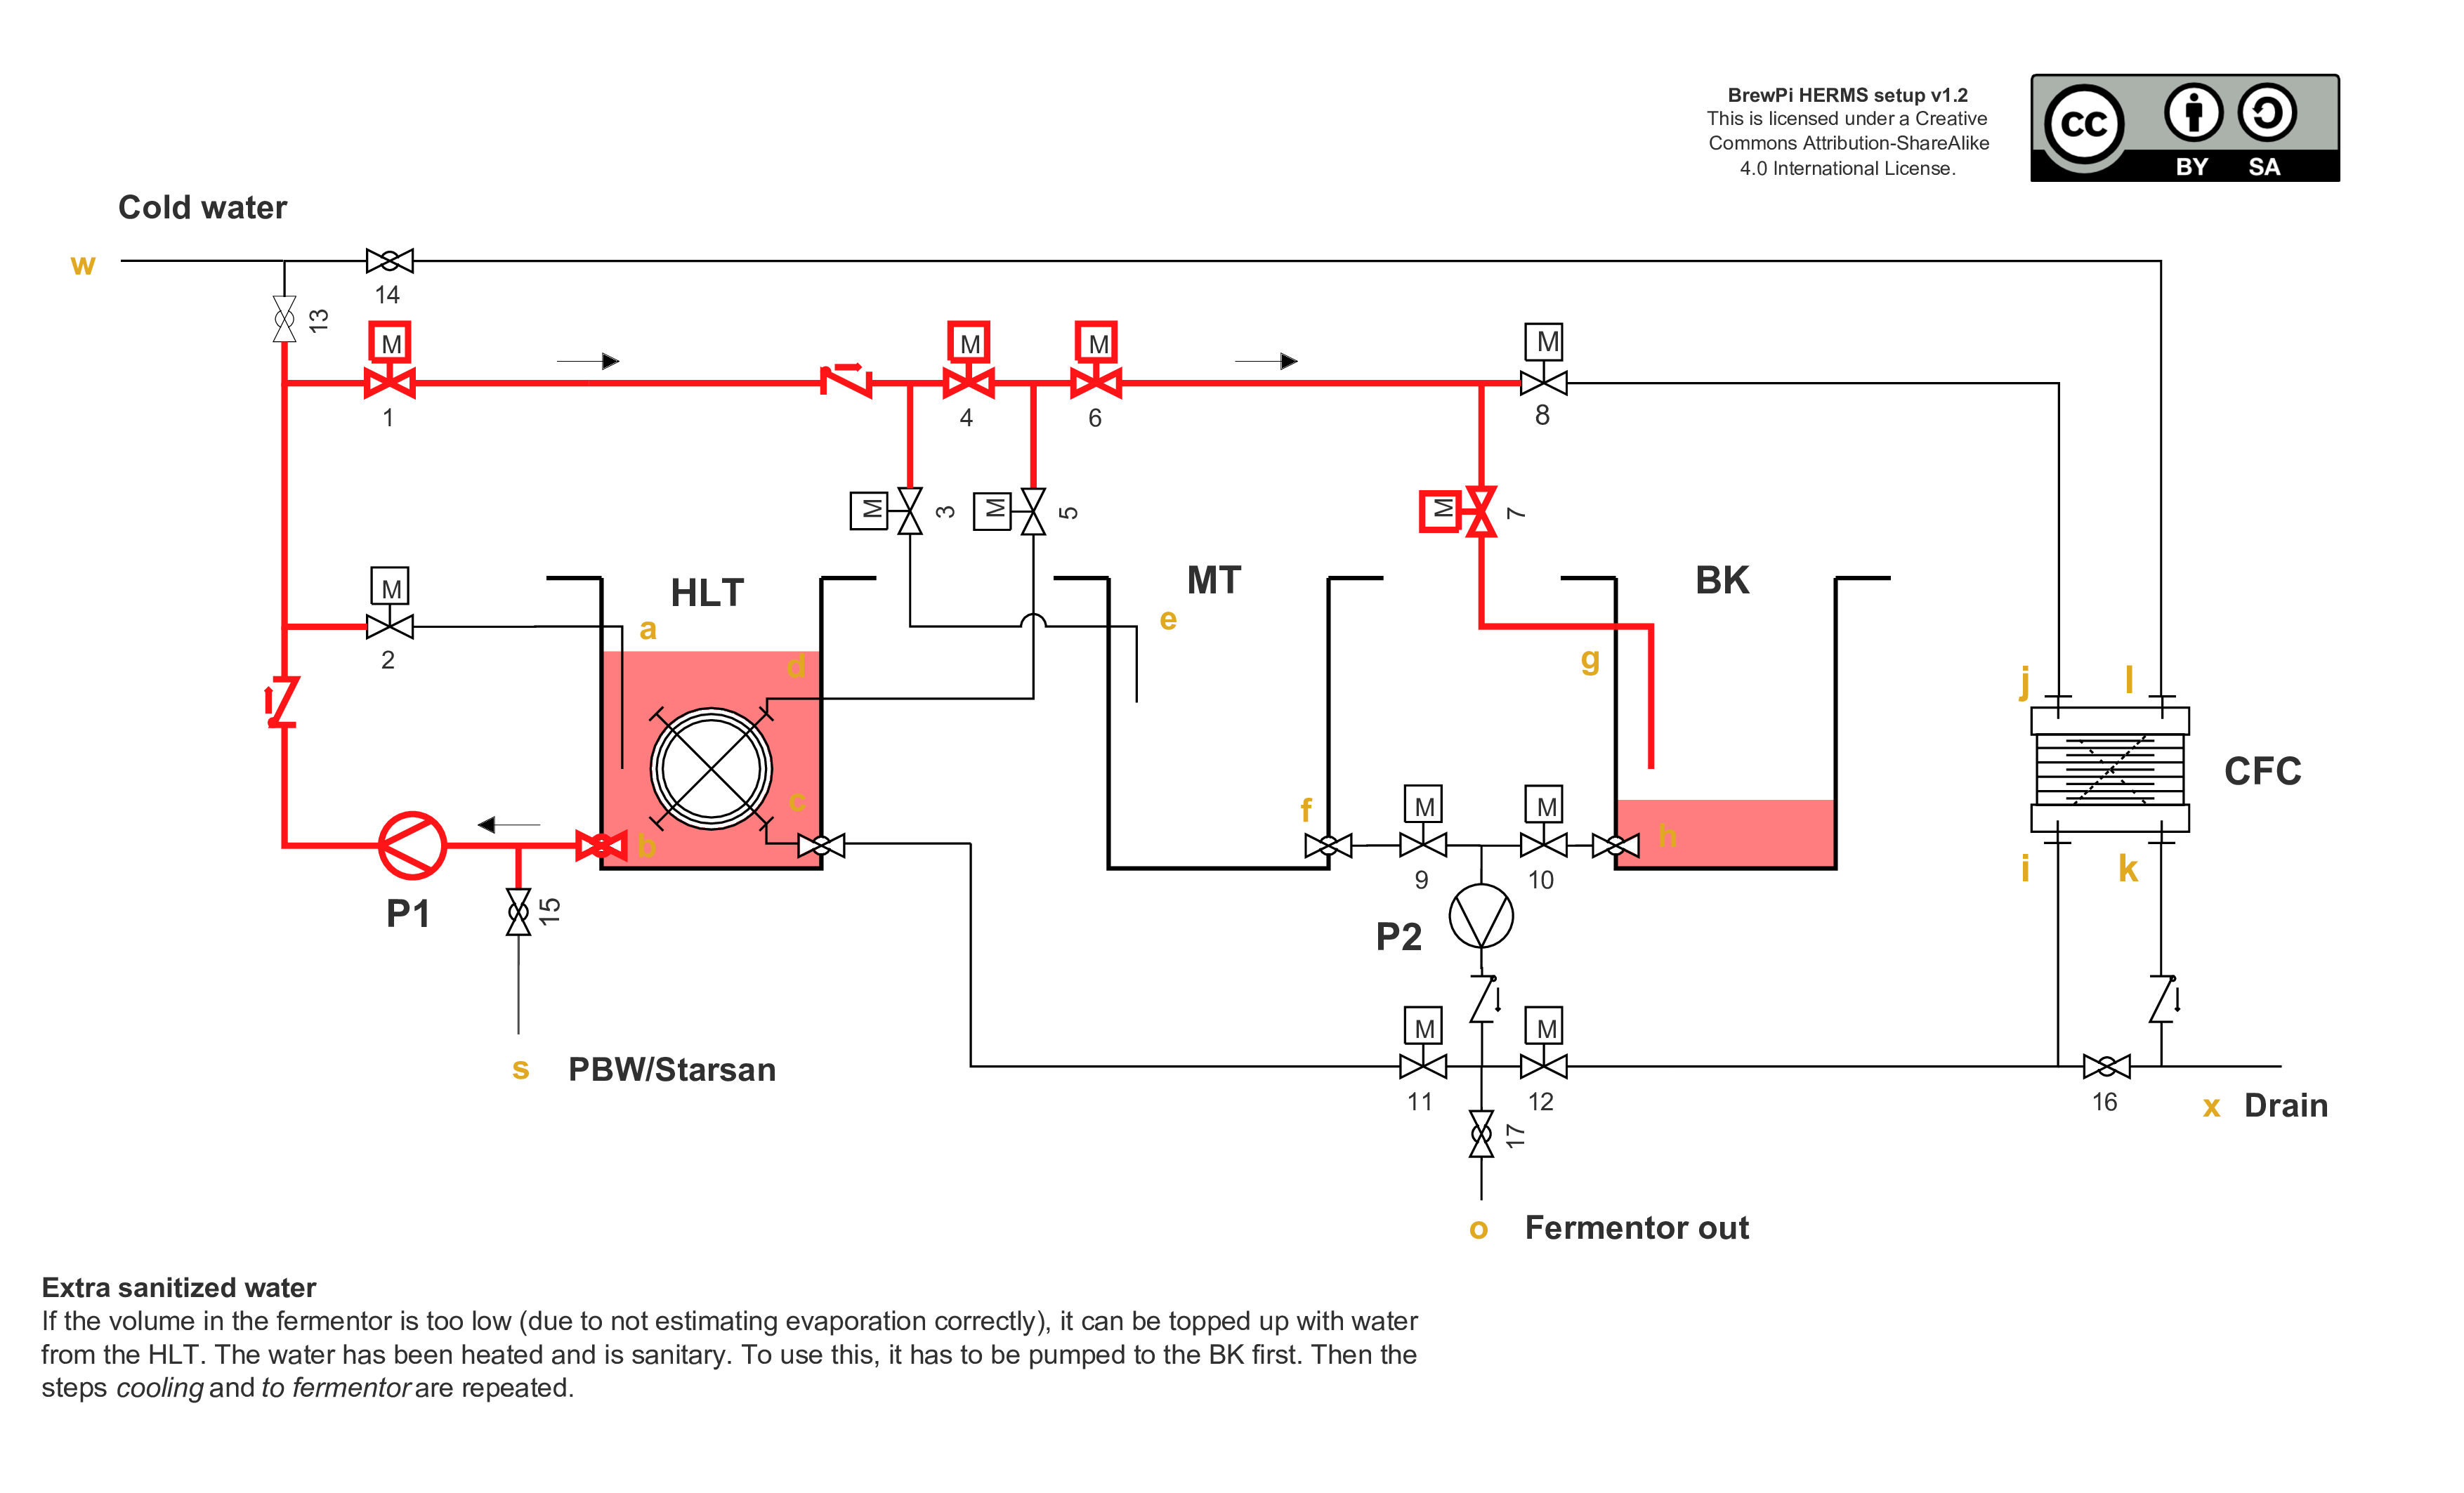
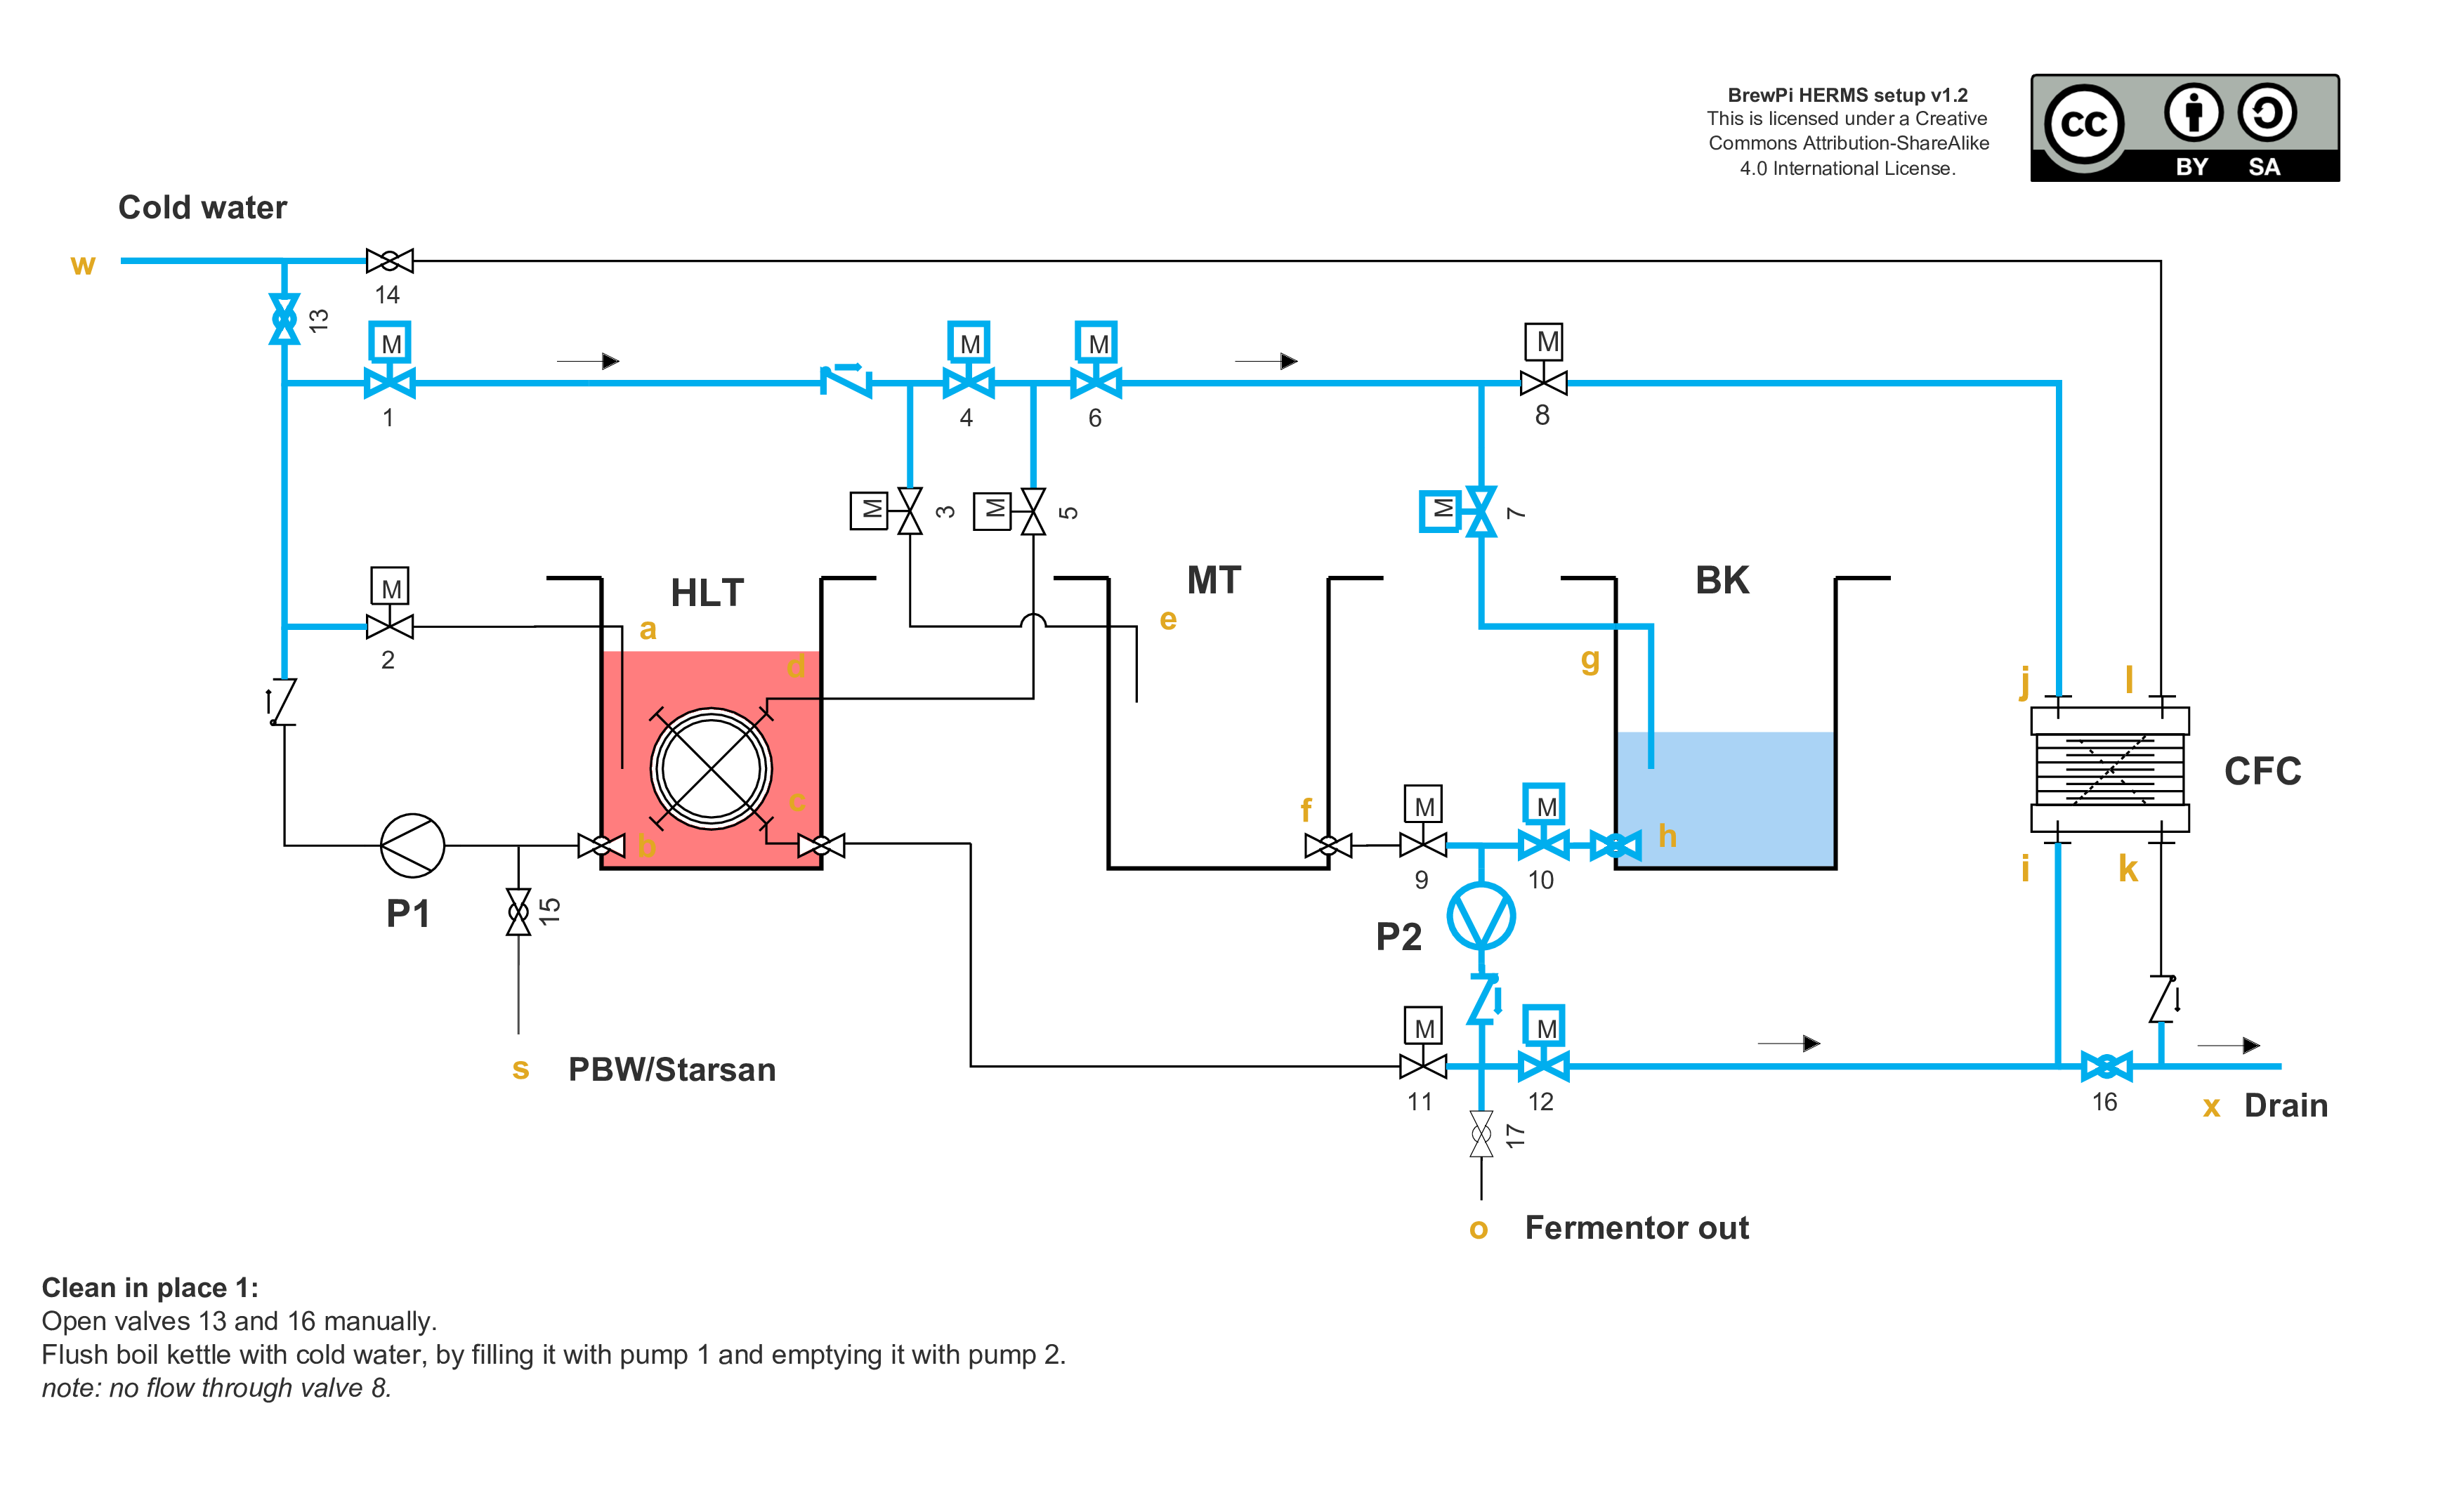
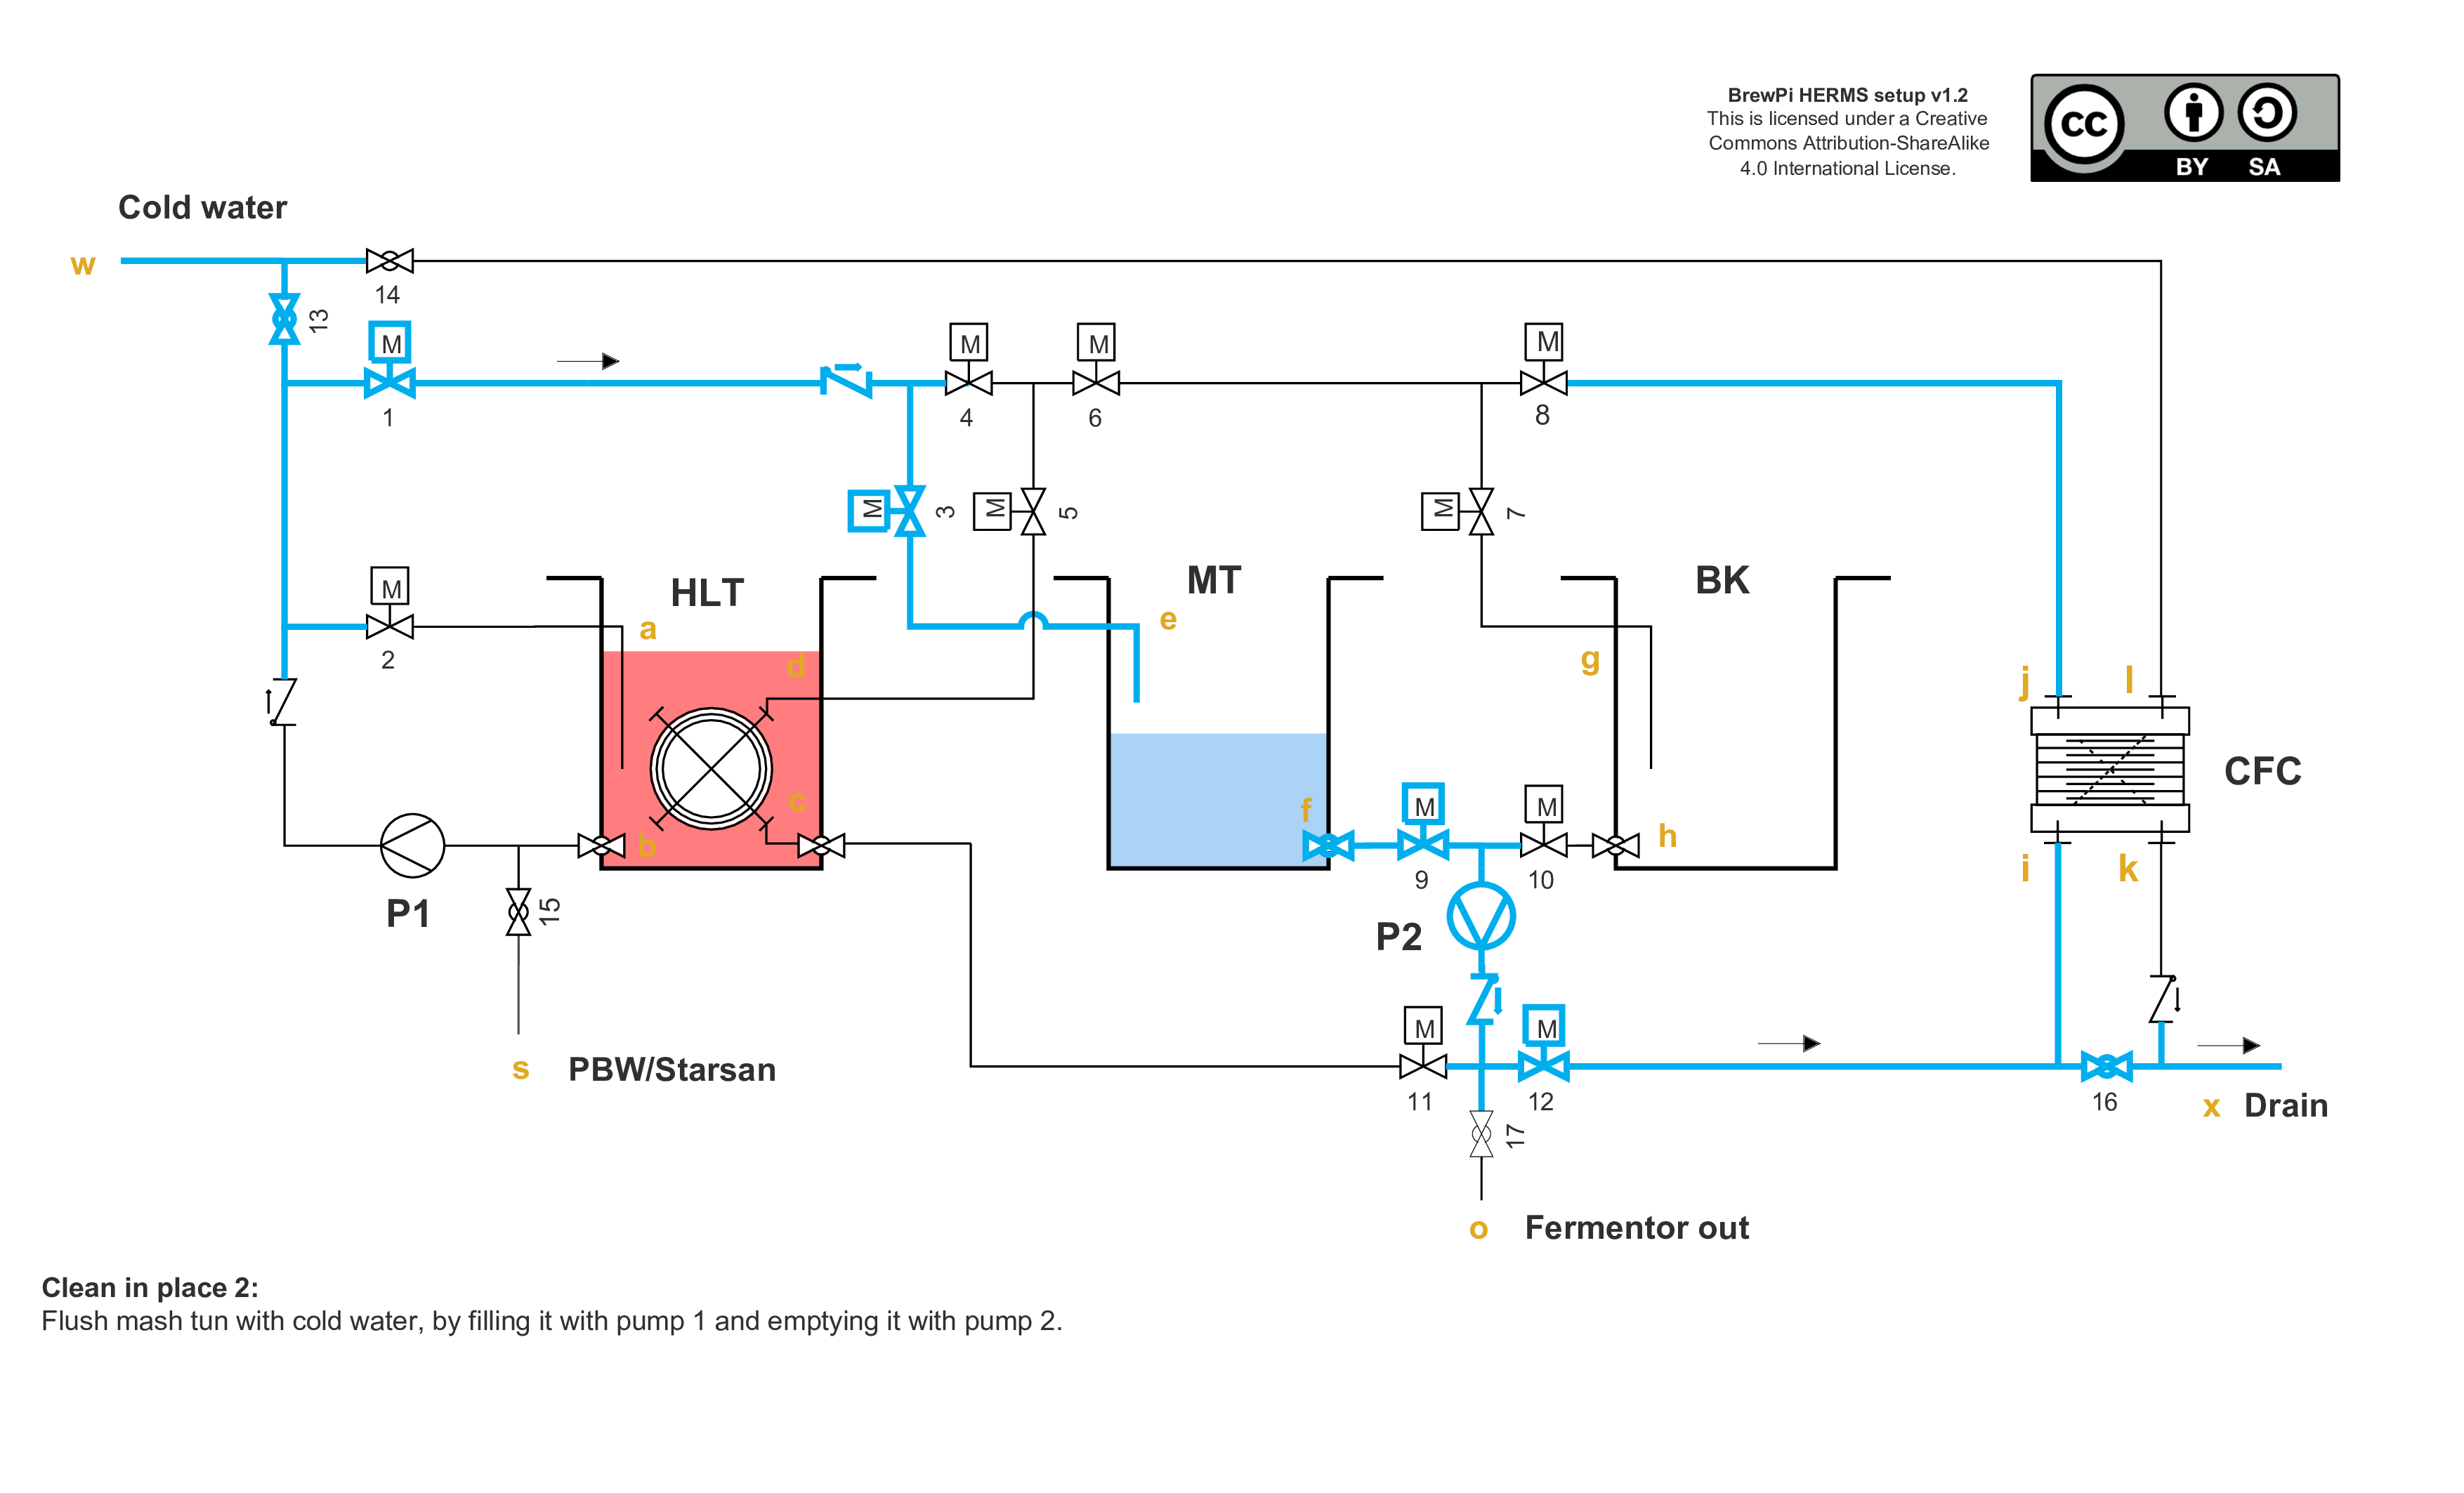
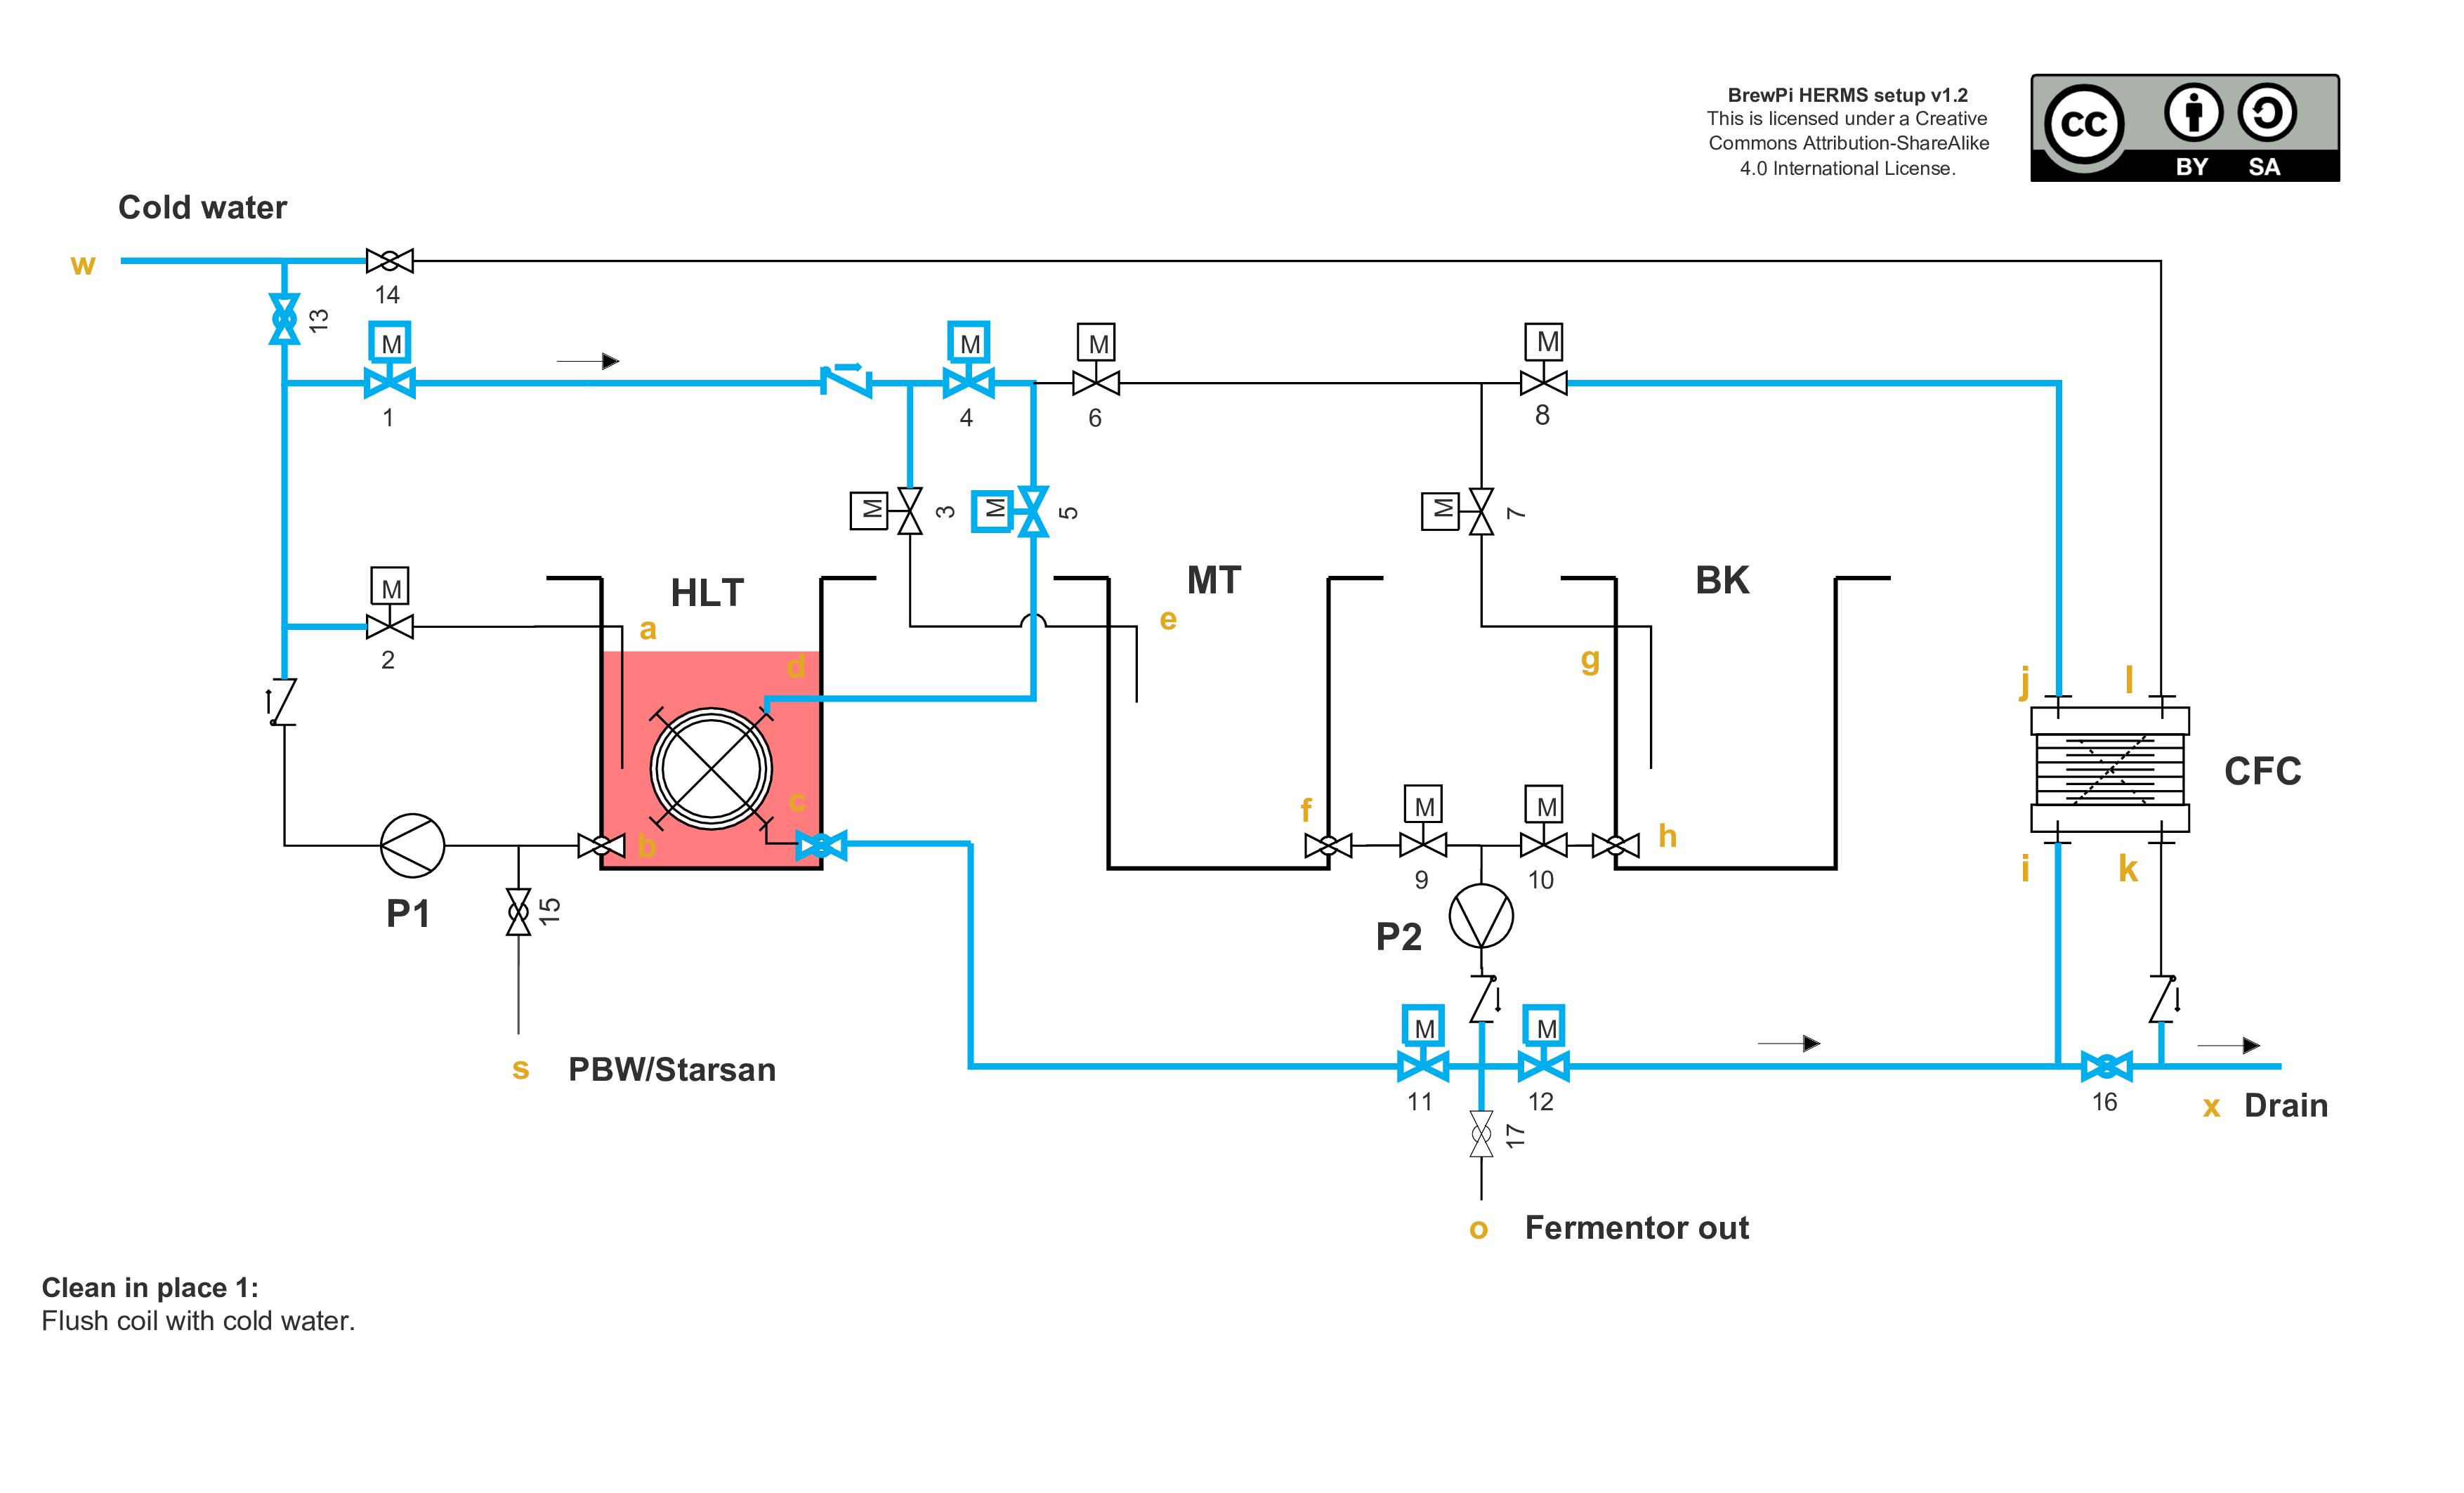
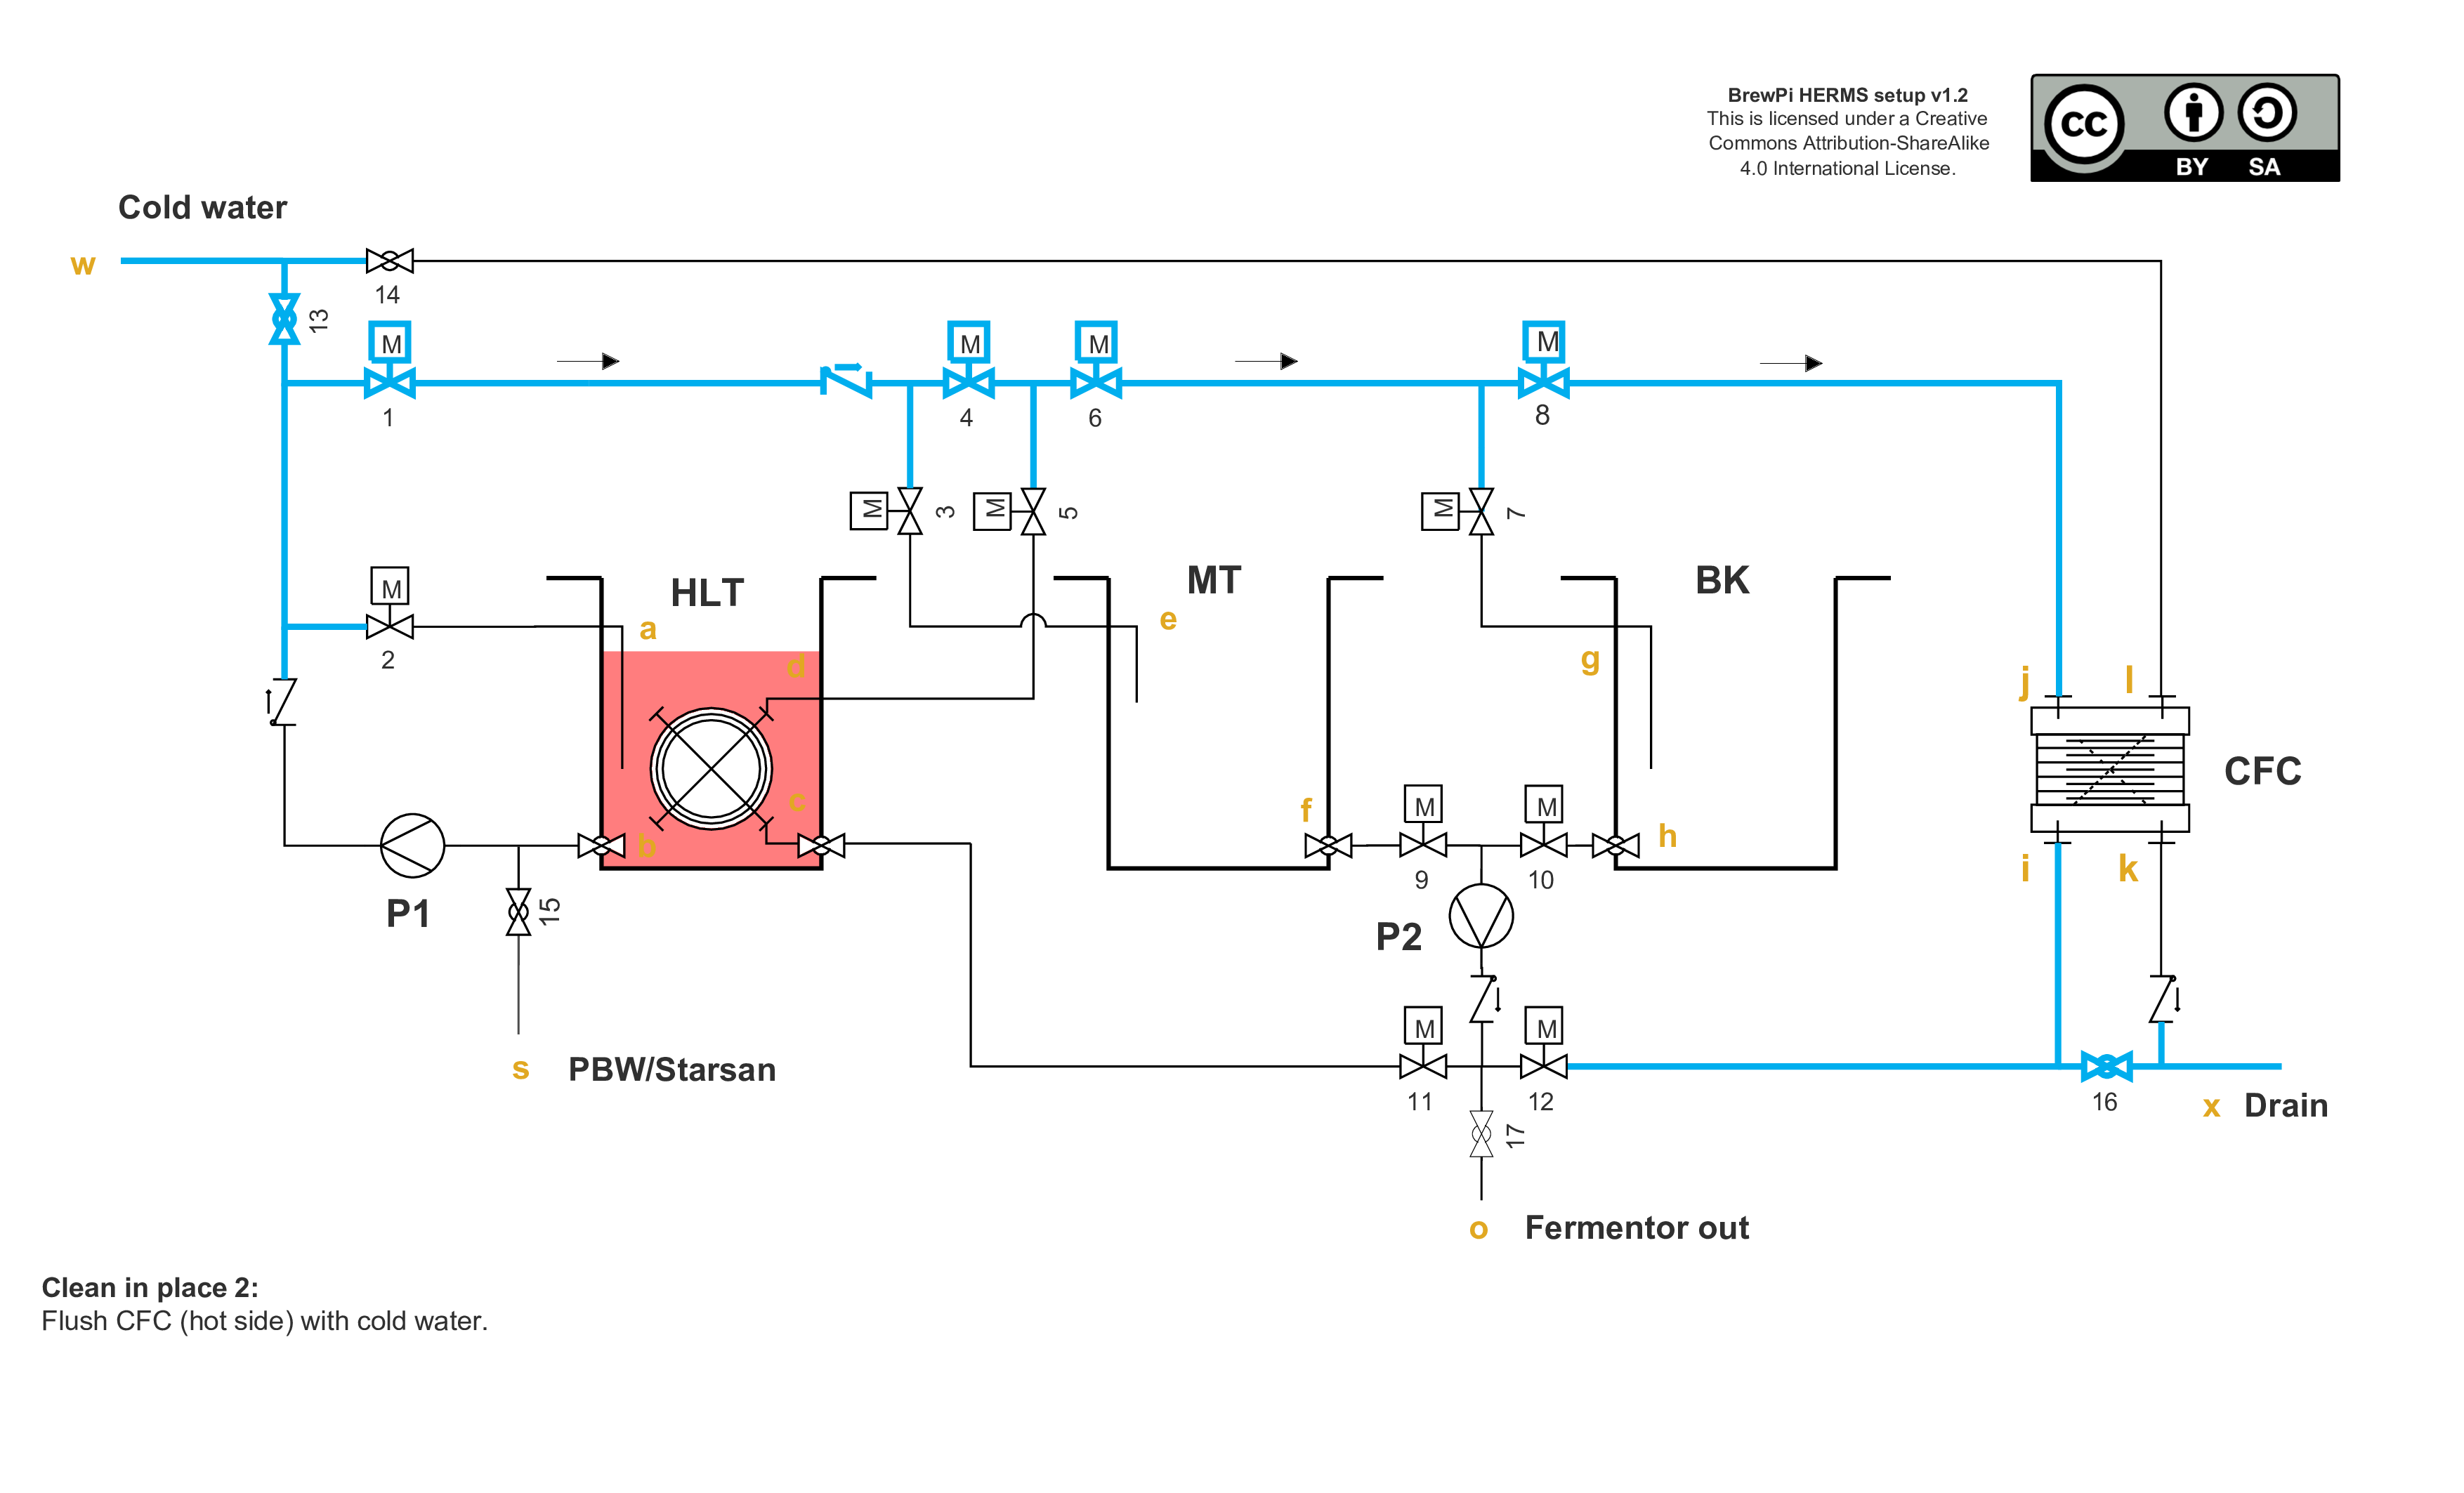
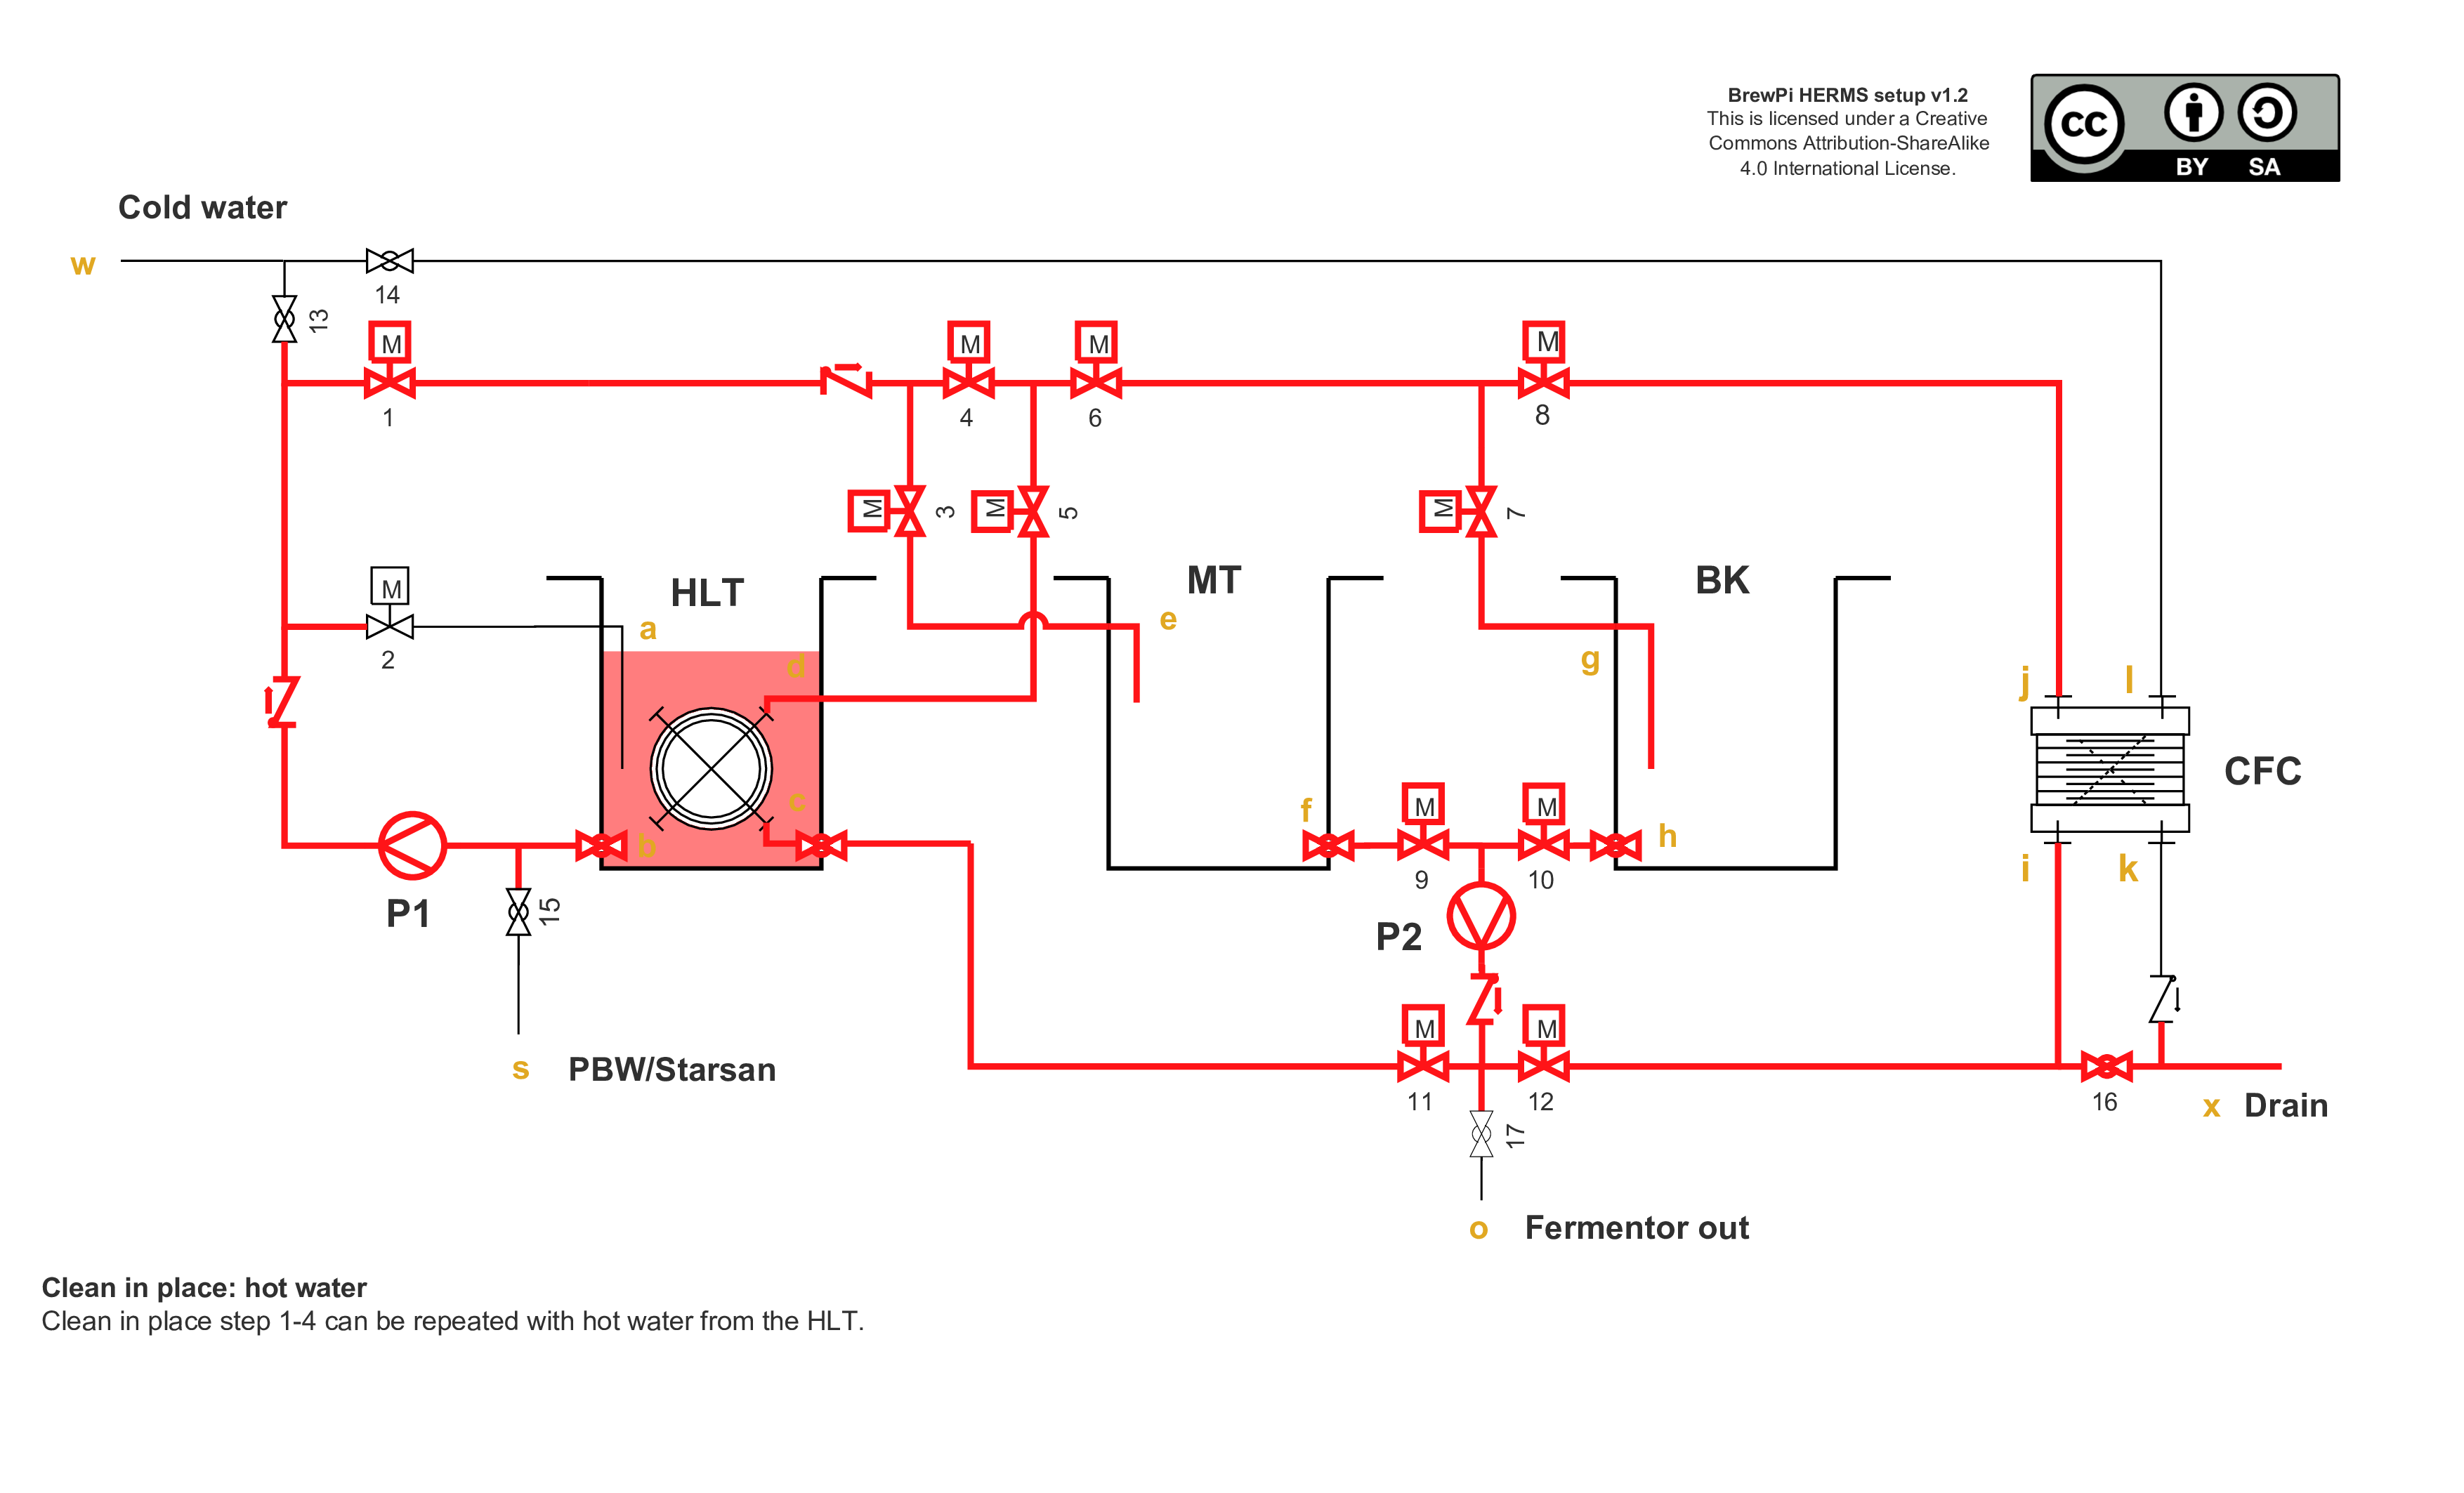
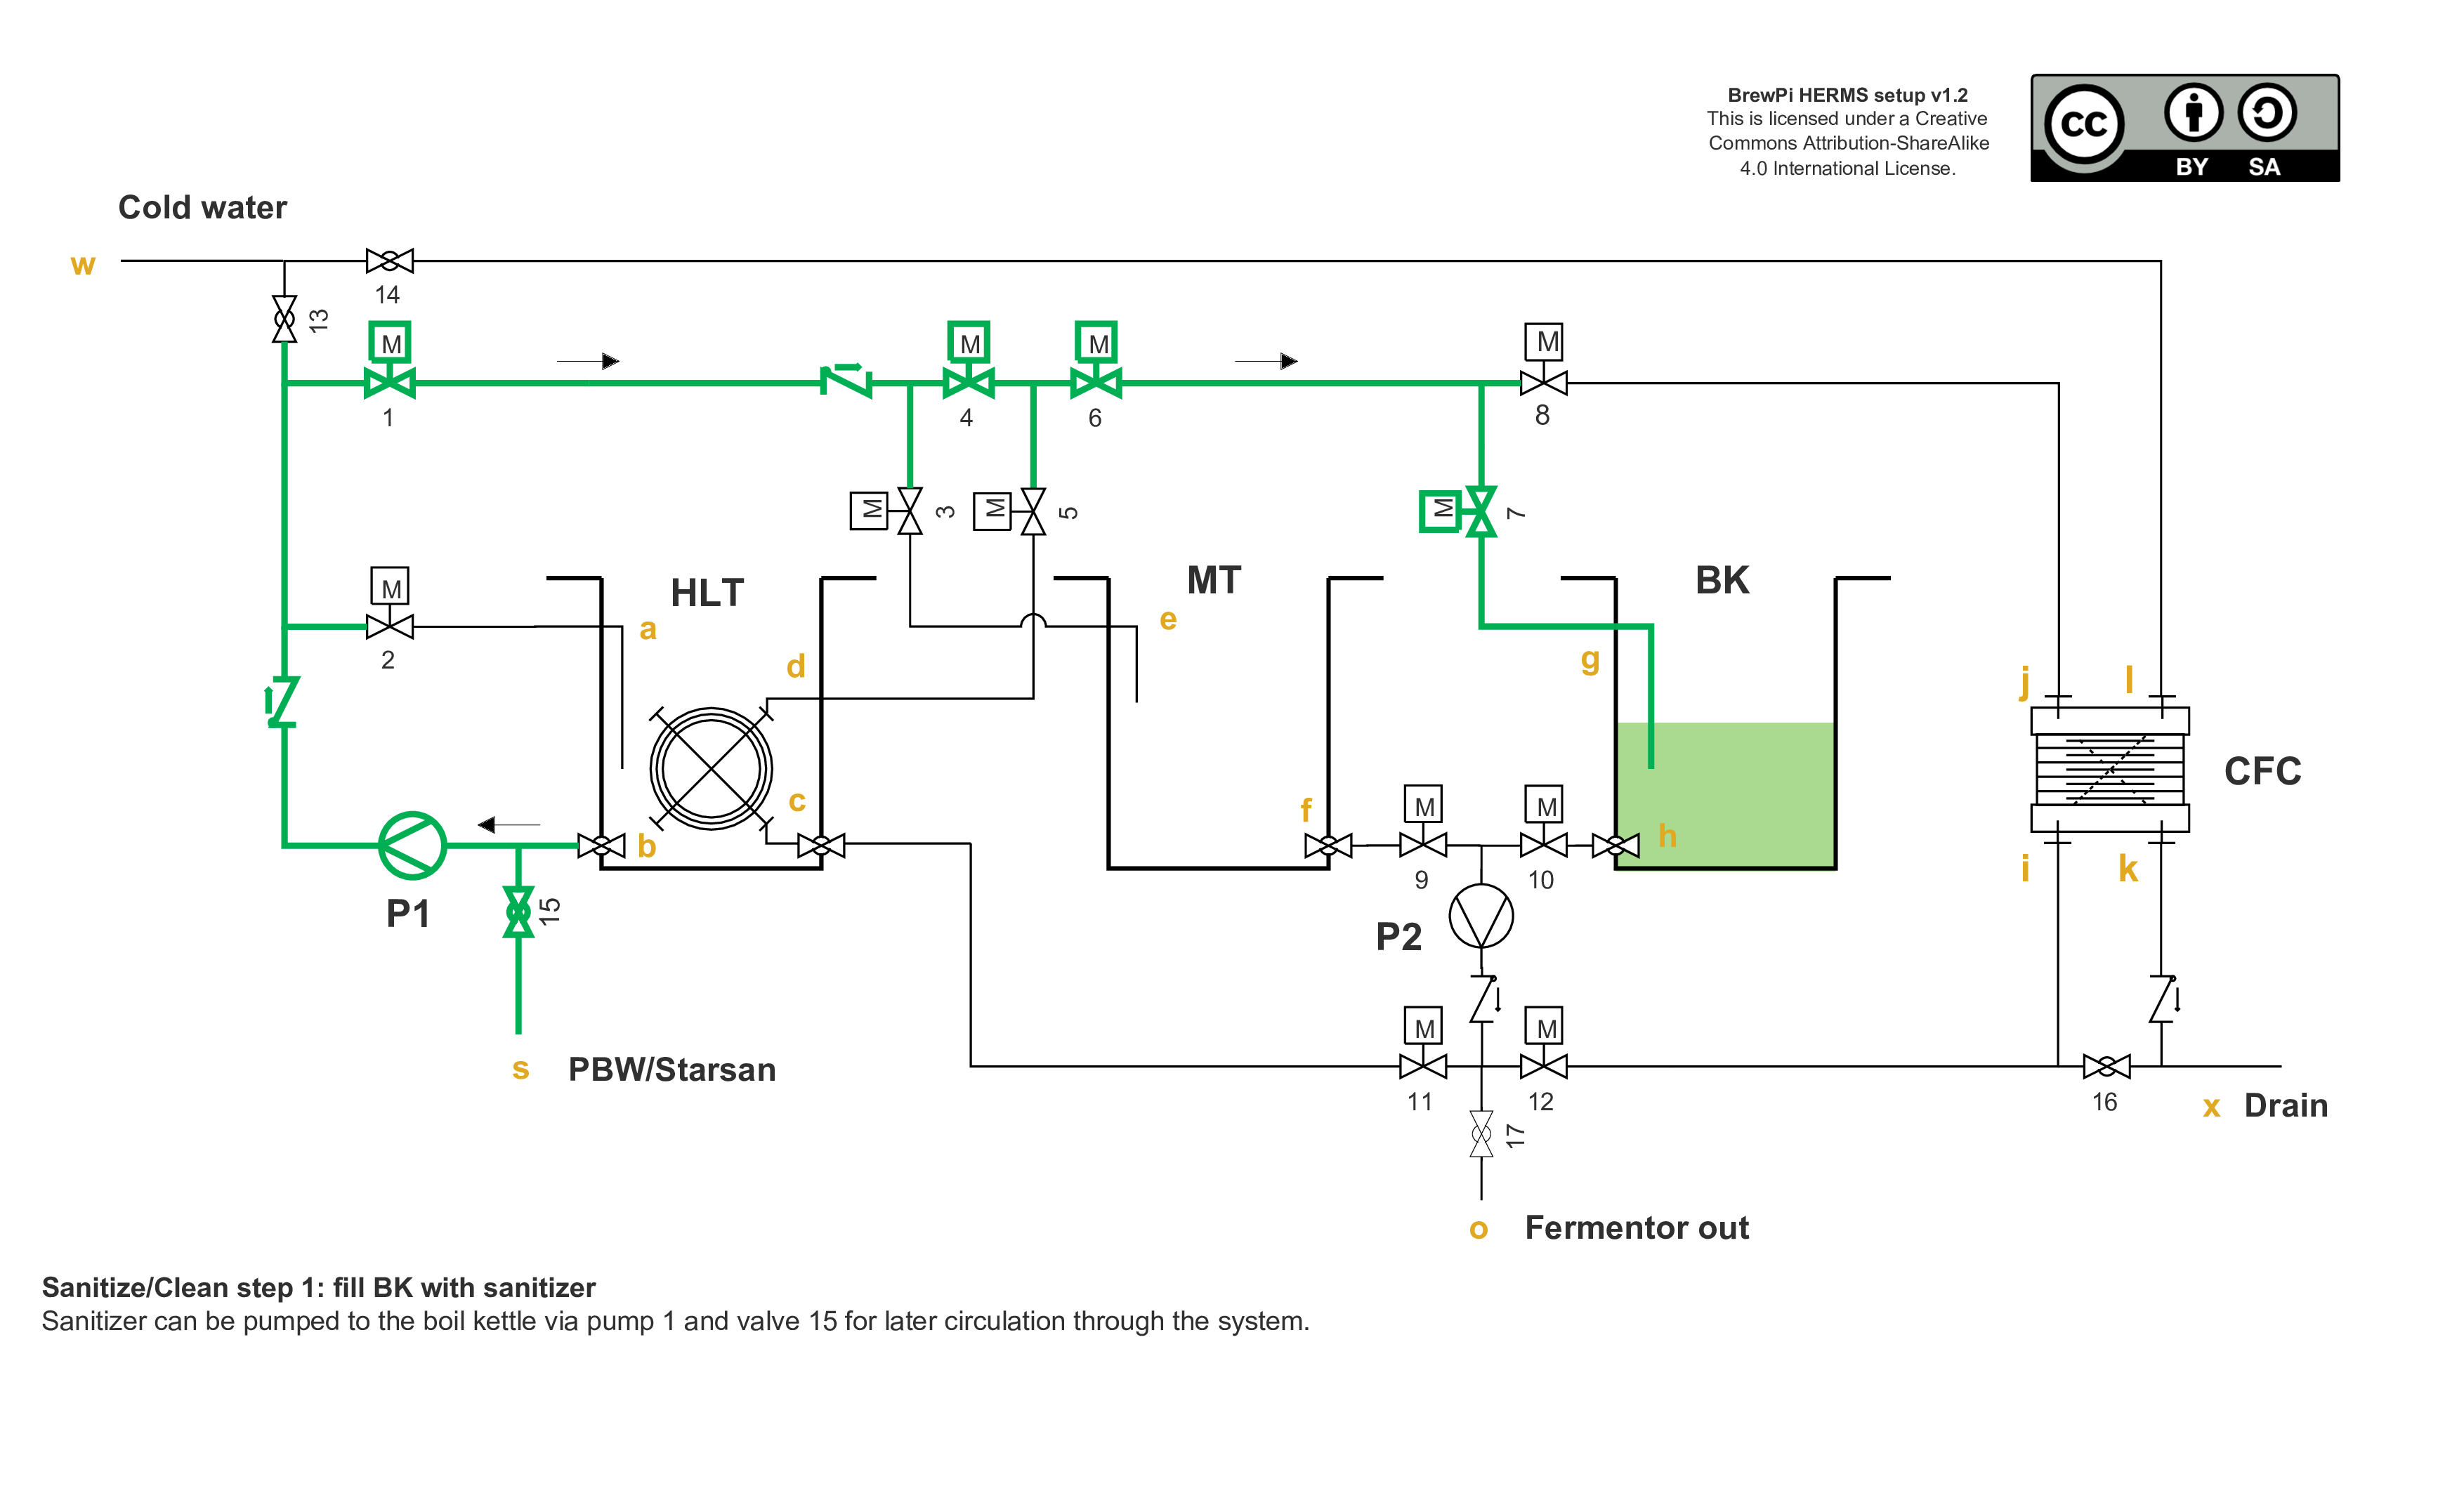
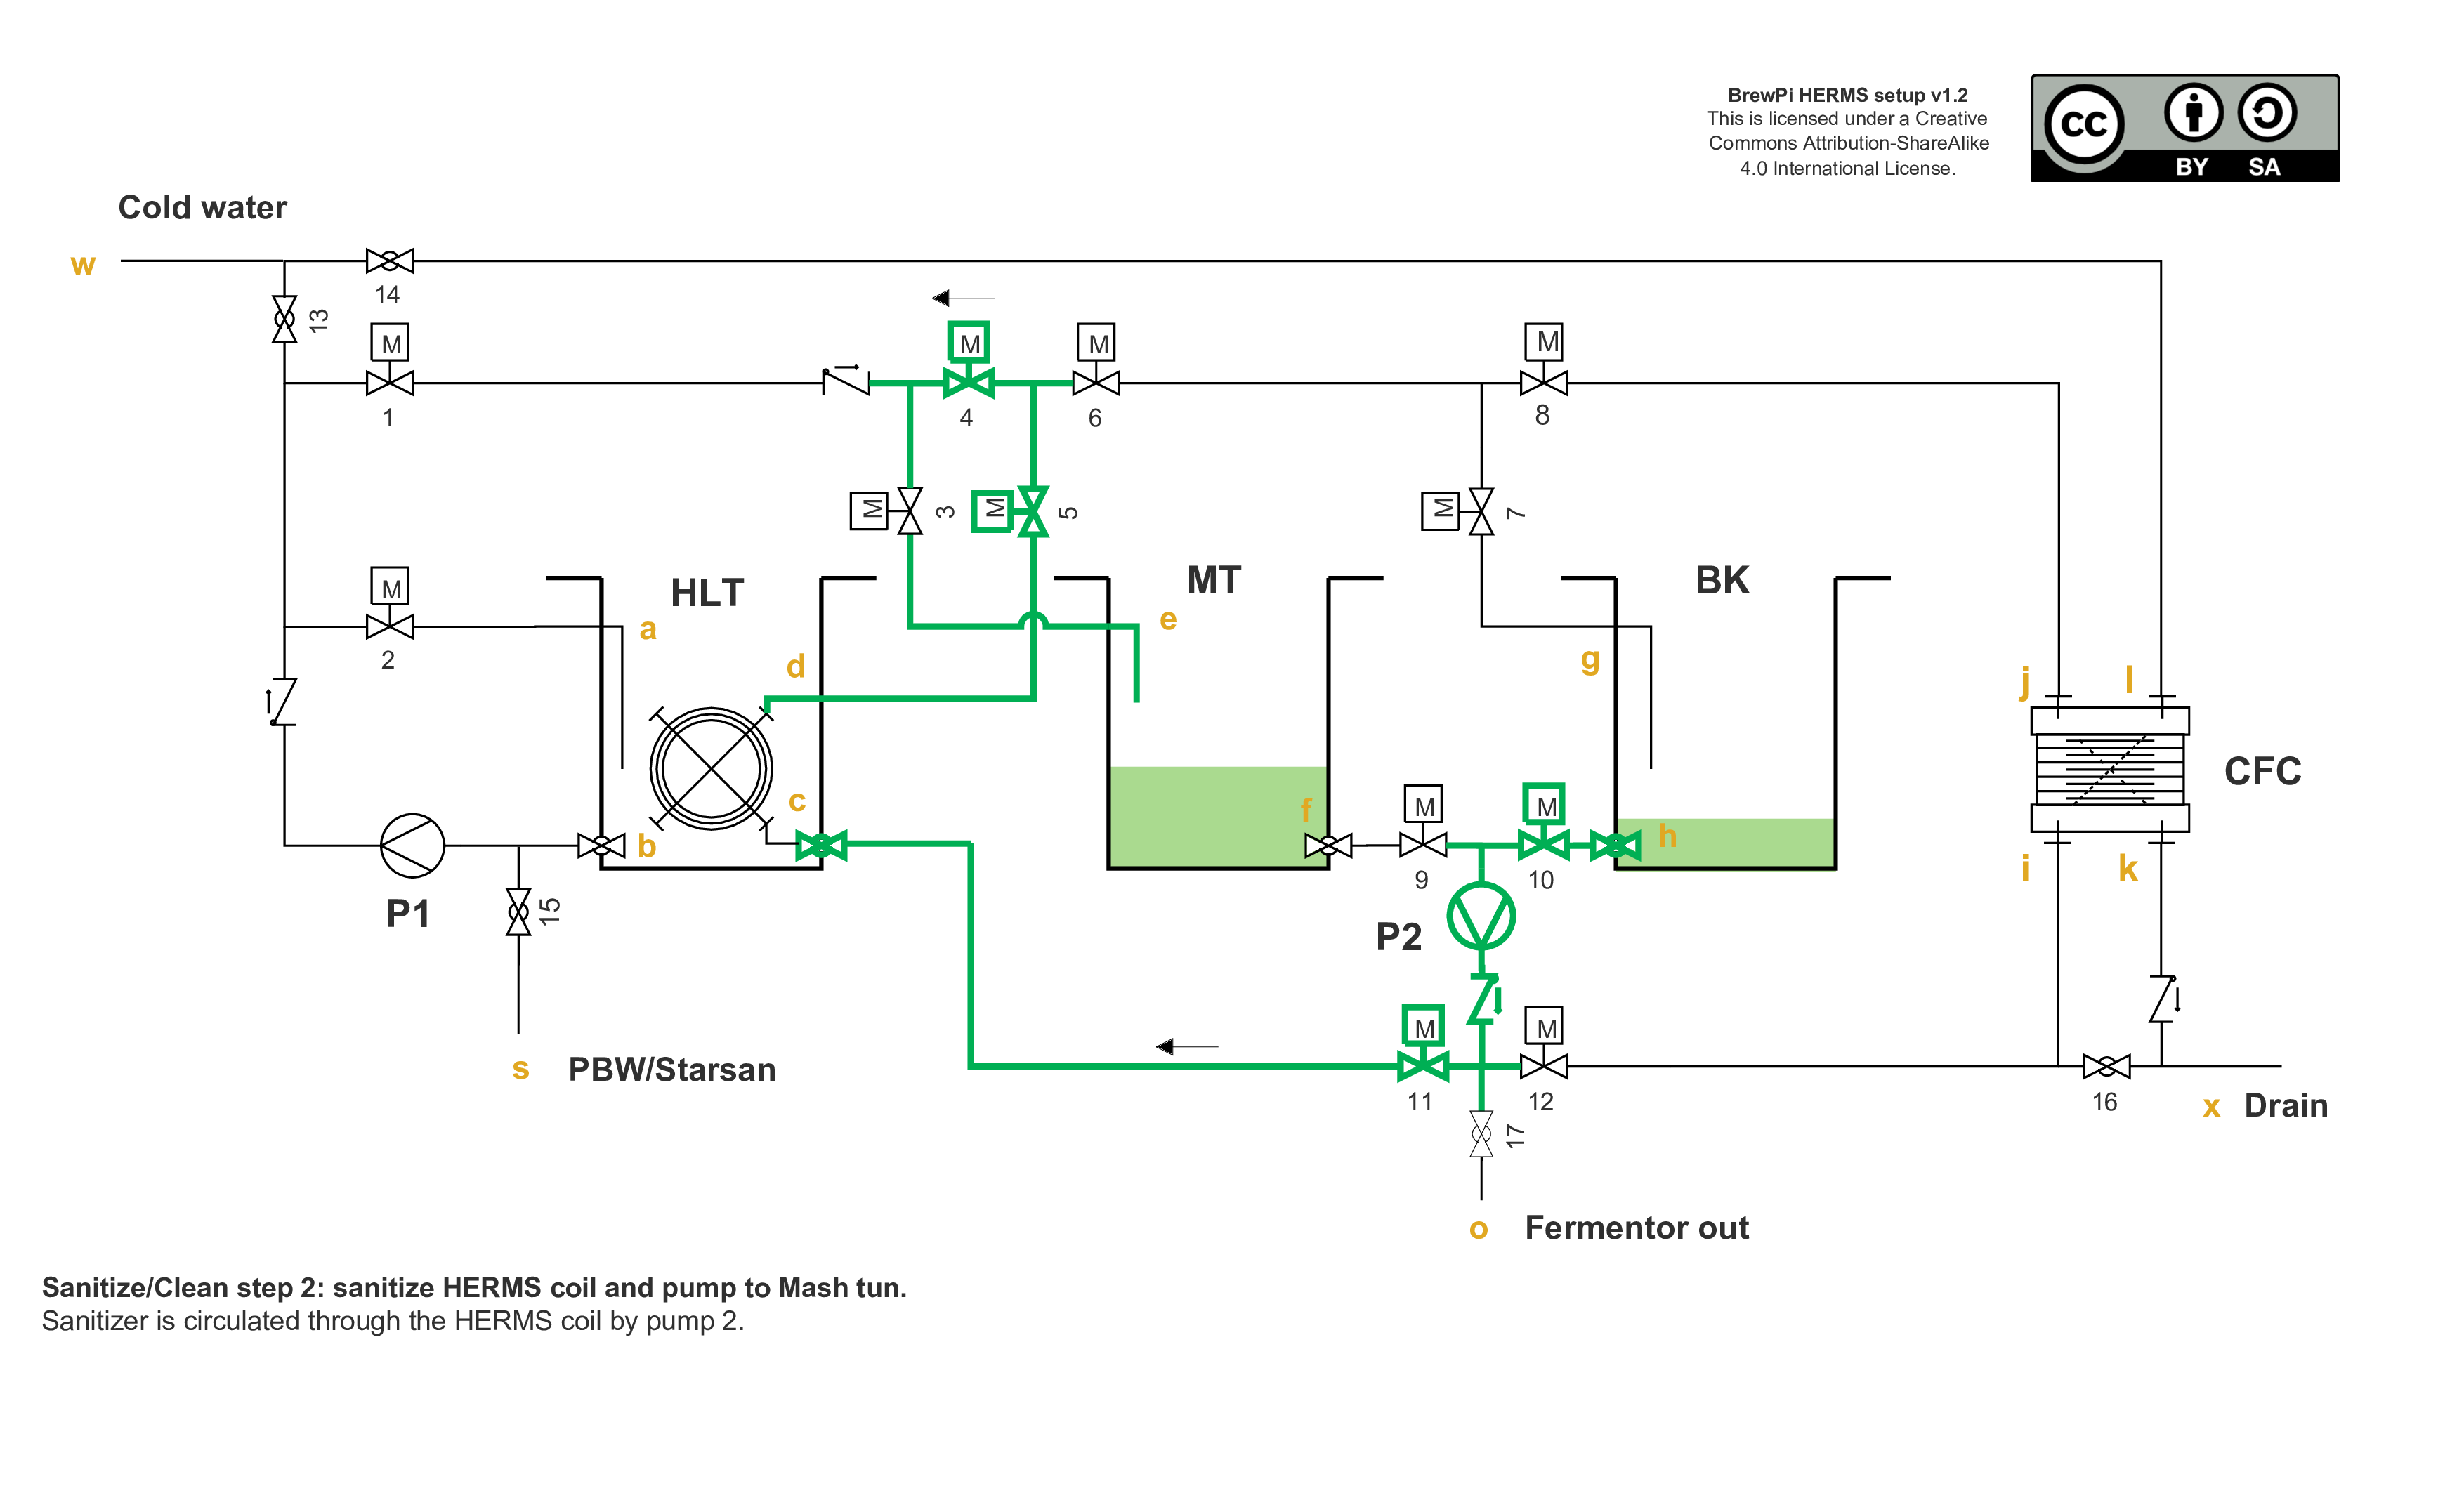
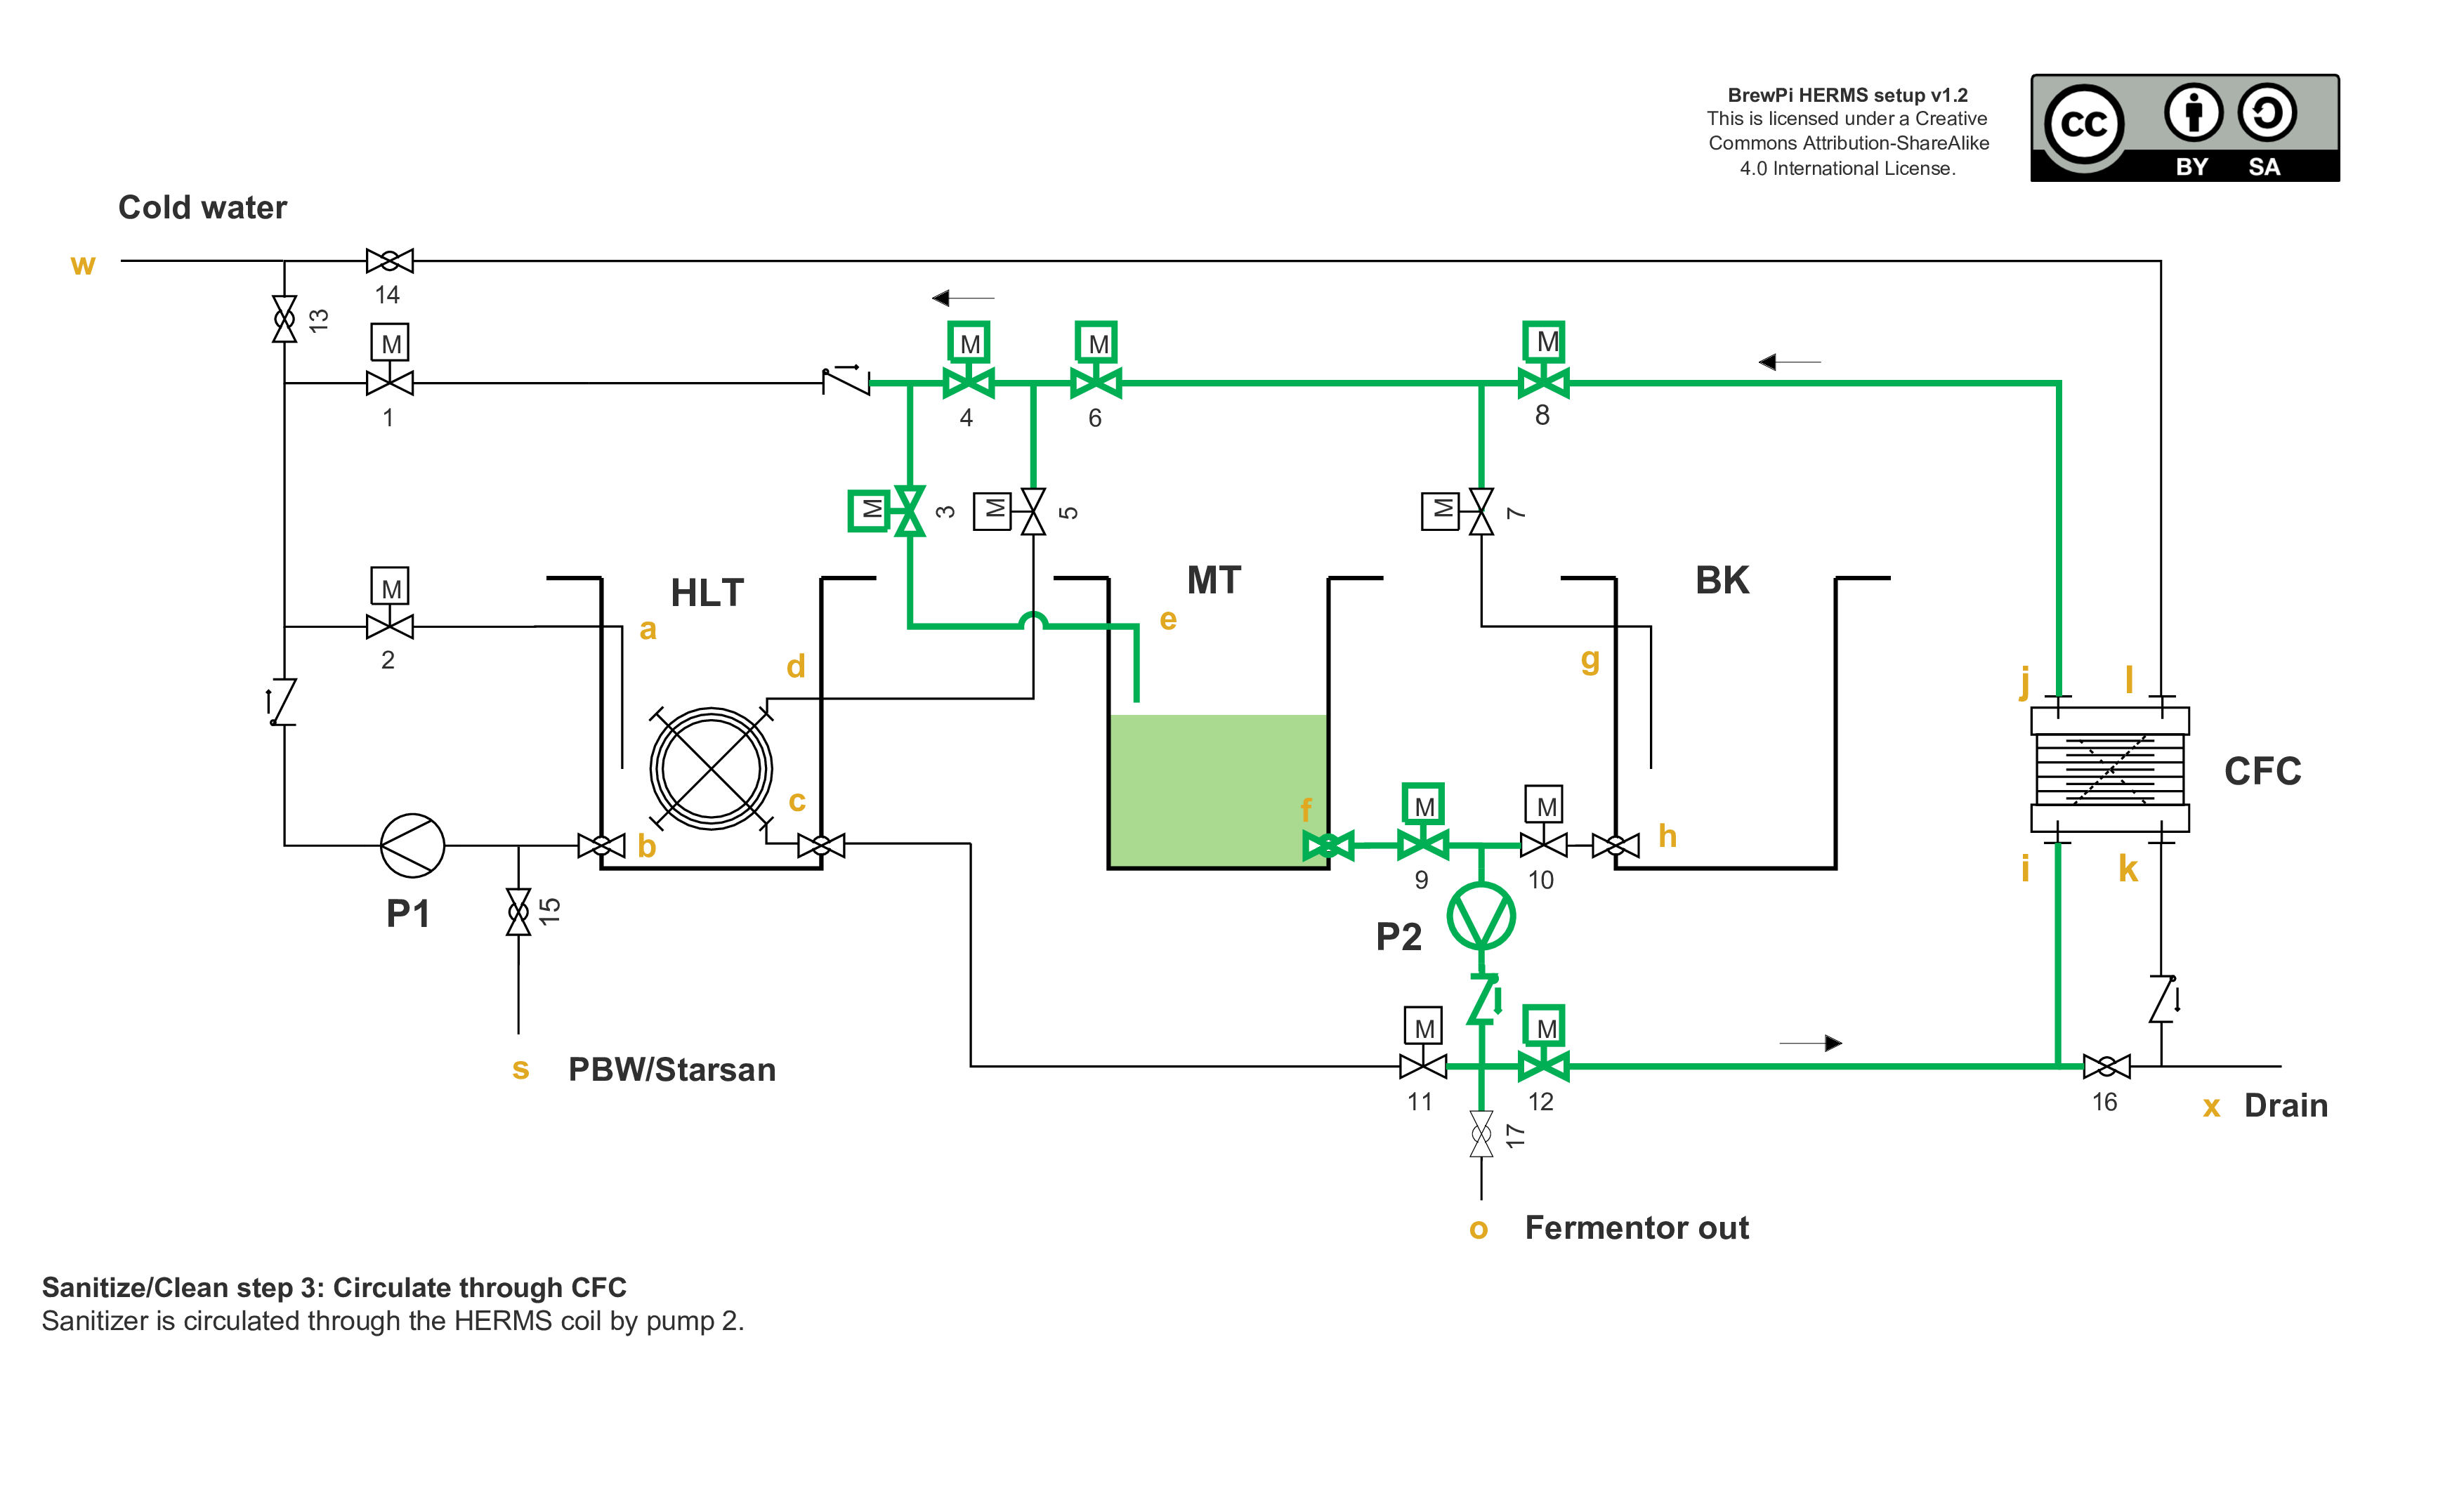
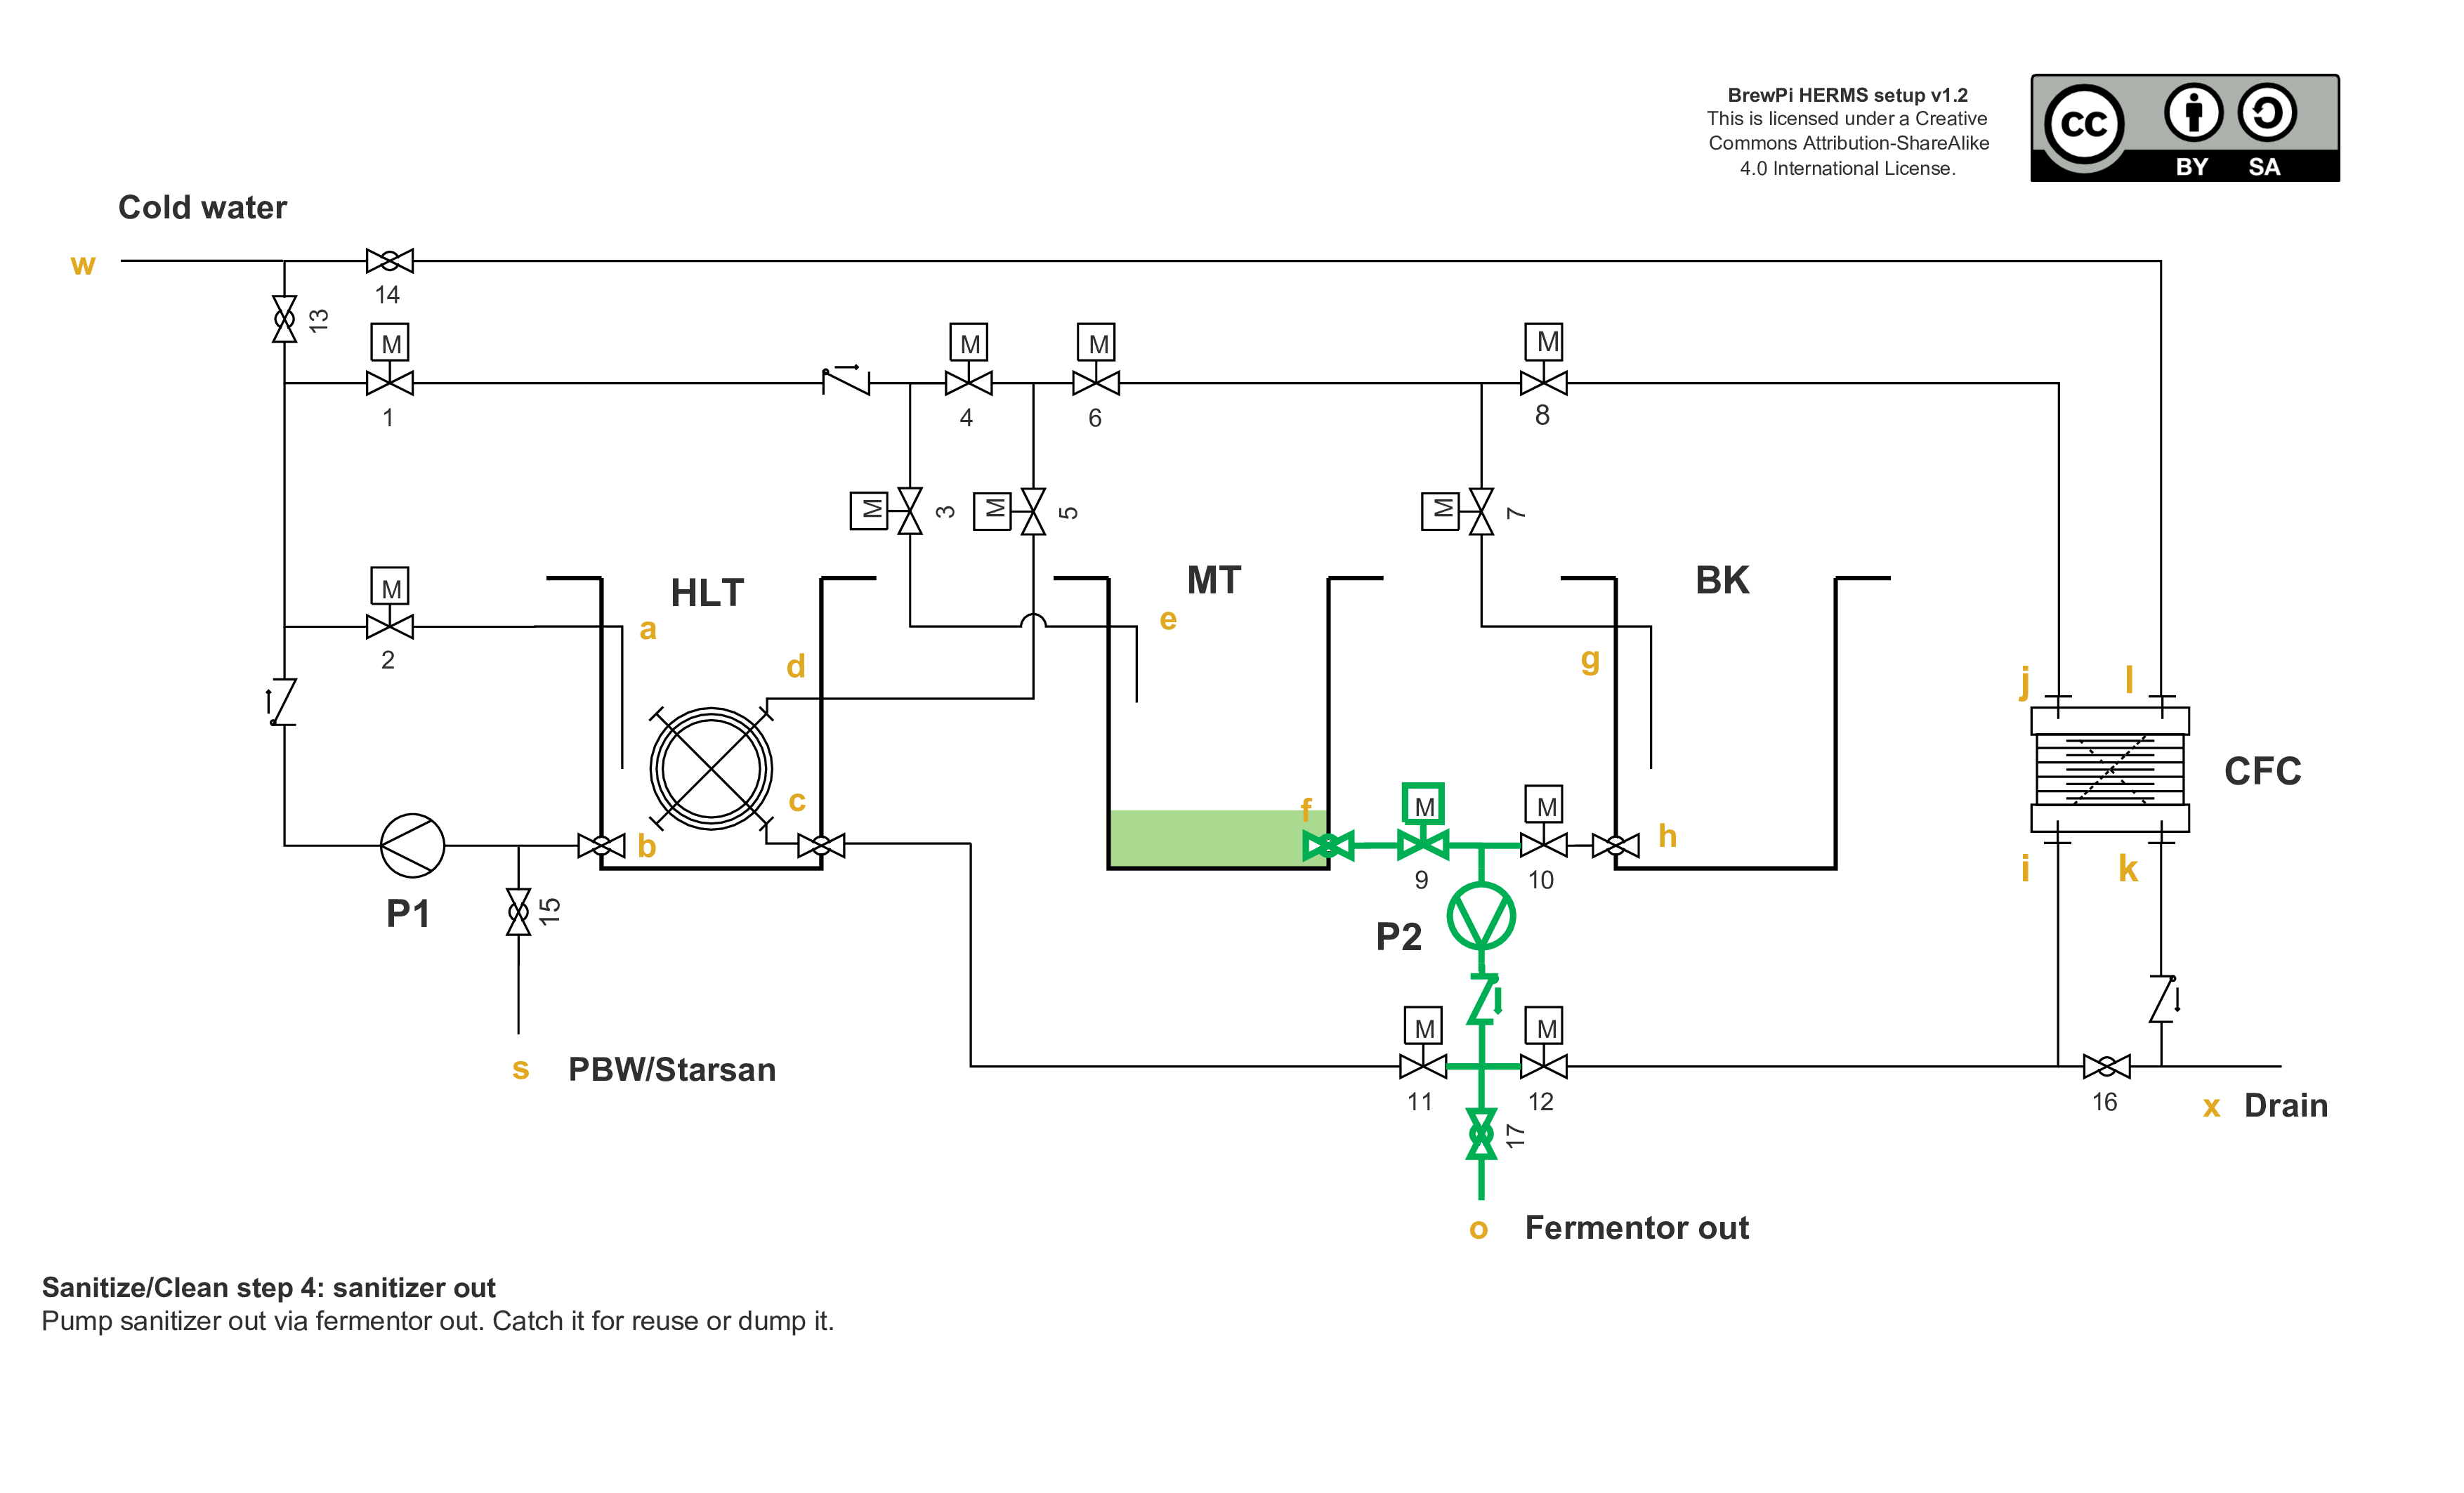
So let's get to the point: I made a Piping and Instrumentation diagram.
I used the trial version of Edraw. If you want to adapt my diagram for yourself, get the files from GitHub:
https://github.com/BrewPi/herms-layout
If you want to download/print the diagrams, get the PDF:https://github.com/BrewPi/herms-layout/blob/master/pdf/BrewPi-HERMS-drawing.pdf?raw=true
Otherwise, look at the images below.
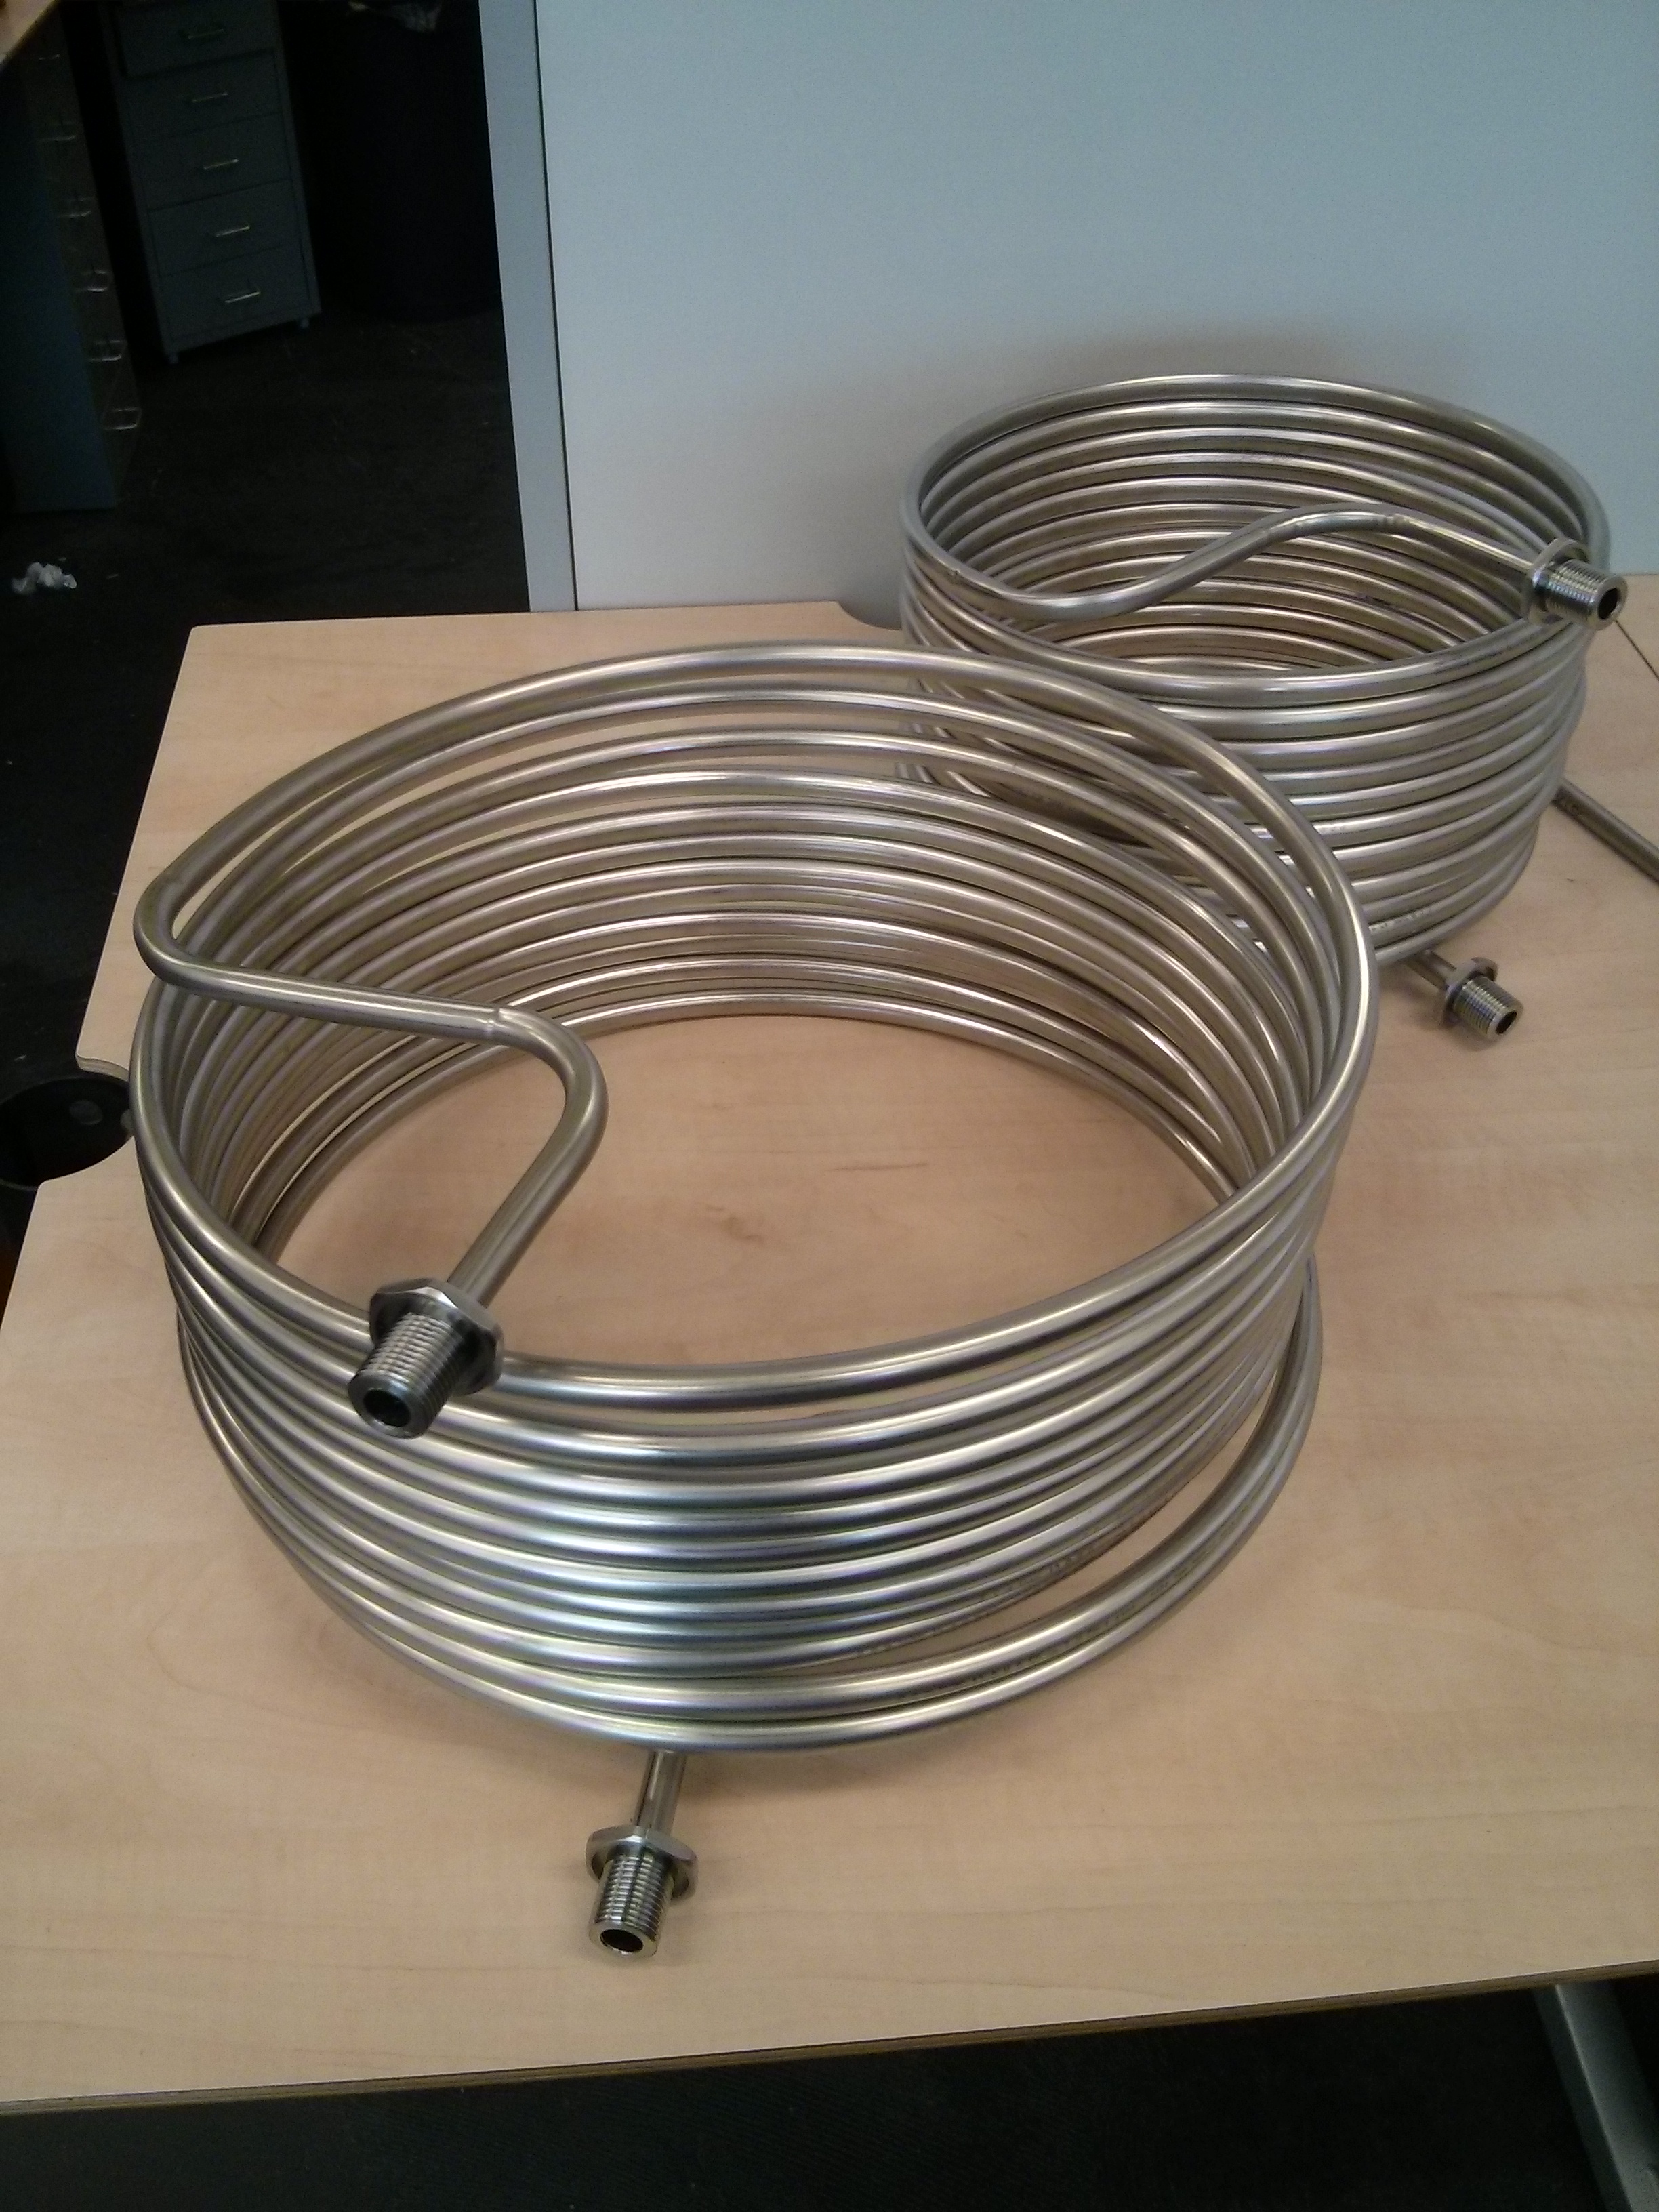
I got some inspiration from blackheart brewery [tag]blackheart[/tag], but due to lack of running water they used ice in the HLT to chill. I have running water, so a counter flow chiller was added for much more effective cooling.
When I brew, I tend to make a huge mess (wort on the floor, burnt hands, sugar solution splashed everywhere, etc), so that's why I think a closed system would be much better for me.
A lot of attention has been given to clean in place possibilities of the system. It should be easy to flush with tap water, hot water and PBW. Therefore a dedicated cold water input and drain output have been added.
I plan to use silicone hose for all connections. I like to see the wort flow and this makes the system very re-configurable and easy to take apart.
After the clean in place procedure (cold, PBW, cold, hot), the system should be pretty clean, but I would still like to fully drain it. This can be done by opening all valves. For this to work well, the tubing that's drawn above the kettles, should be above the kettles. I have to figure out a nice way to do this. Suggestions welcome.
I have a 150x60cm stainless steel table with 2 levels to hold this beast. Pumps will be below the kettles on the lower level.
I do not plan to use a tipping system. I do not have room for tipping and read blackheart comment that they never use their fancy tipping system. All the cables are in the way to make tipping work well.
I will rely an on a powerful wet vac for cleaning and emptying the kettles.
So without further ado, here are the pics:

Your feedback is very welcome!
If you want to play around with the design, all files are available from GitHub under the Creative Commons Attribution-ShareAlike license .
.
Cheers!
I'm Elco, founder of BrewPi. Up until now BrewPi has only focused on controlling fermentation, but that's about to change. The very first step in this, is to build a HERMS myself.
Until now I have been doing stove-top BIAB. I have had pretty good results with my very simple method:
- Heat water on stove (4 burners at once, big kettle)
- Put kettle in fridge for 5 minutes to preheat the fridge
- Put kettle back on stove, keep fridge door closed
- Heat again
- Put back in fridge, add grains, close door. Fridge is well isolated, temp hardly drops.
- For a next mash step, take kettle out, put on stove again (stir!) and put back.
With that very simple method I could produce pretty decent beers, but I think it's time for an upgrade.
For the software, we are going to rewrite BrewPi from scratch. It will be very modular and very flexible. It will adapt to all kinds of setups: HERMS, RIMS, BIAB, Fridges, Glycol, etc. But that's not the point of this post. I would like to talk about hardware here.
We are going to build 2 systems:
- 1 33L cheap and simple HERMS with manual hose swapping (Koen's system) and probably just one pump.
- 1 70L fully automated HERMS with motorized ball valves and two pumps. (My system).
Both systems will use electric Camco heating elements in the HLT and BK.
I have sourced most stainless steel parts and we even machined a lot of custom parts. I will post an update when these are ready (2-3 weeks).
I am building this HERMS for myself, but in such a way that I can provide all these parts later as a complete, simple to assemble HERMS kit.
On our website we will provide build guides, similar to the Electric Brewery.
So let's get to the point: I made a Piping and Instrumentation diagram.
I used the trial version of Edraw. If you want to adapt my diagram for yourself, get the files from GitHub:
https://github.com/BrewPi/herms-layout
If you want to download/print the diagrams, get the PDF:https://github.com/BrewPi/herms-layout/blob/master/pdf/BrewPi-HERMS-drawing.pdf?raw=true
Otherwise, look at the images below.
I got some inspiration from blackheart brewery [tag]blackheart[/tag], but due to lack of running water they used ice in the HLT to chill. I have running water, so a counter flow chiller was added for much more effective cooling.
When I brew, I tend to make a huge mess (wort on the floor, burnt hands, sugar solution splashed everywhere, etc), so that's why I think a closed system would be much better for me.
A lot of attention has been given to clean in place possibilities of the system. It should be easy to flush with tap water, hot water and PBW. Therefore a dedicated cold water input and drain output have been added.
I plan to use silicone hose for all connections. I like to see the wort flow and this makes the system very re-configurable and easy to take apart.
After the clean in place procedure (cold, PBW, cold, hot), the system should be pretty clean, but I would still like to fully drain it. This can be done by opening all valves. For this to work well, the tubing that's drawn above the kettles, should be above the kettles. I have to figure out a nice way to do this. Suggestions welcome.
I have a 150x60cm stainless steel table with 2 levels to hold this beast. Pumps will be below the kettles on the lower level.
I do not plan to use a tipping system. I do not have room for tipping and read blackheart comment that they never use their fancy tipping system. All the cables are in the way to make tipping work well.
I will rely an on a powerful wet vac for cleaning and emptying the kettles.
So without further ado, here are the pics:
Your feedback is very welcome!
If you want to play around with the design, all files are available from GitHub under the Creative Commons Attribution-ShareAlike license
.Cheers!
")