Agreed all around. If I had known I could have a 10.5 gallon brew kettle, insulated stainless mash tun, electric heat and a stainless immersion chiller for less than $400 I hope I could have talked my past self into purchasing it.
With that said, I am happy that I also have all my *stuff* and both brewing options have their place. And my Foundry has now proven its place with a successful brew day while I was solo parenting my two year old and nine month old.
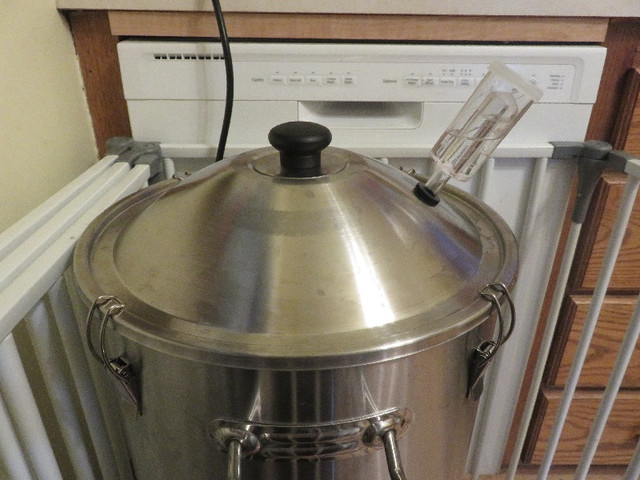
My nine month old wanted to start the day even earlier than I had the delay timer set to be ready, but I'm going to go ahead and call that not the Foundry's fault

From mash in to pitching the yeast my trial brew day was almost exactly 4 hours. I mashed for an hour, it took almost exactly an hour to bring approximately 6.5 gallons (volume measured at 178F) from 153F to boiling, I boiled for an hour, and then it took about an hour to cool to ~70F. I did not recirculate at any point but will look into this for future batches- I was noticed some significant (2-3 degree) temperature stratification during the mash (despite stirring), I had one moment of significant temperature overshoot during the mash (the display read 4 degrees above the set point, which resolved with a hasty stirring), and I suspect chilling will be much faster once I keep the wort moving. My efficiency was a lousy 62% but this was a no sparge with 23% red wheat malt, and I'm starting to suspect the red wheat malt is too small to be milled well at my LHBS. I plan to use only barley for my next batch to explore this variable. My one complaint about the system is it stubbornly displayed 203-205 degrees F during the boil, despite my thermapen confirming a boiling temperature closer to 211. It makes me wonder how much of the 2-3 degree temperature variation I observed during the mash was due to stratification and how much was due to measurement differences.
I also found a flaw in my plan of using a grommet and airlock in the lid
(Yes, I brewed with it enclosed in a safety gate in my kitchen) I briefly tried leaving the airlock like that but the star san kept leaking out. I attached a blow off tube to the center "stem" of the airlock and that worked perfectly for fermentation.
End result? I was done with my brew day before 11:30 am. That has never happened in the 6 years I've been home brewing. And I was able to watch my kids the whole time. That opens up a whole new world of brew day potential for me, and that's worth every penny.