Another stupid brewstand

Homebrew Talk - Beer, Wine, Mead, & Cider Brewing Discussion Forum

Help Support Homebrew Talk - Beer, Wine, Mead, & Cider Brewing Discussion Forum:

This site may earn a commission from merchant affiliate links, including eBay, Amazon, and others.

invictusbrew

Well-Known Member
Joined
Jun 12, 2013
Messages
349
Reaction score
95
Yep, that's right. Another one. I've been planning this build for about a year now... but don't let that fool you into thinking it will be any good (God, I sure hope it turns out good). My skills on this stuff are decent at best, and will probably show through, but at the end of the day even if the welds aren't so great, the paint looks like I let my 3 year old do it, and the electronics are just this side of a fire hazard, I'll feel damn proud that I built the thing myself. As ugly as she may be because of it. :rockin:

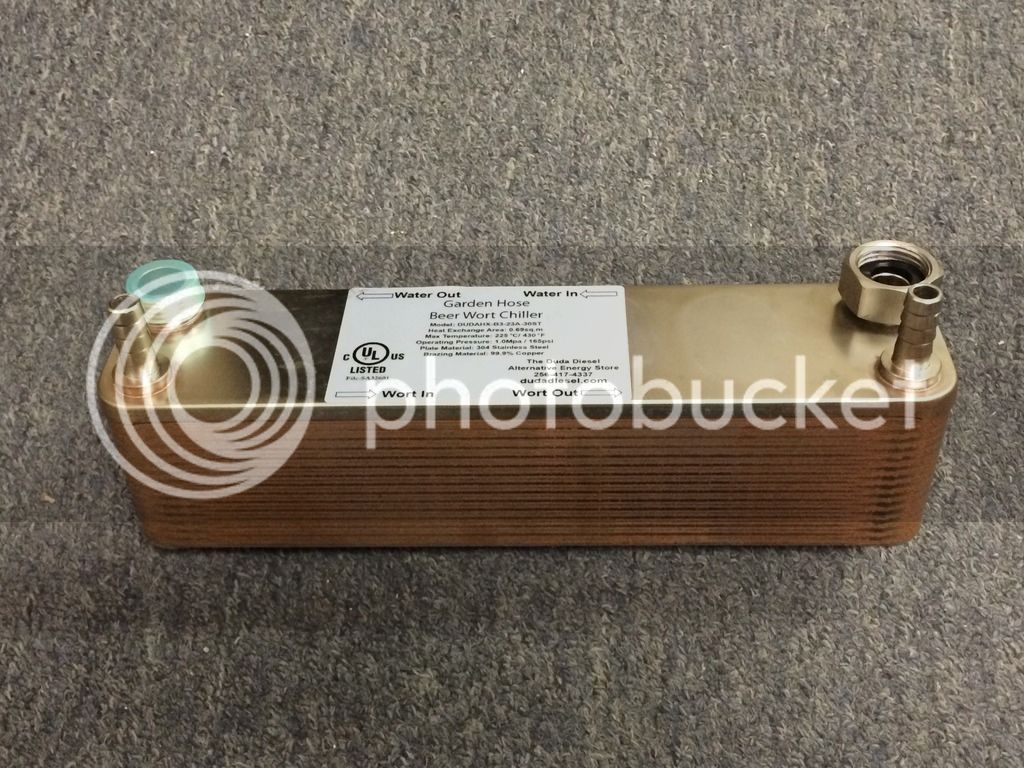
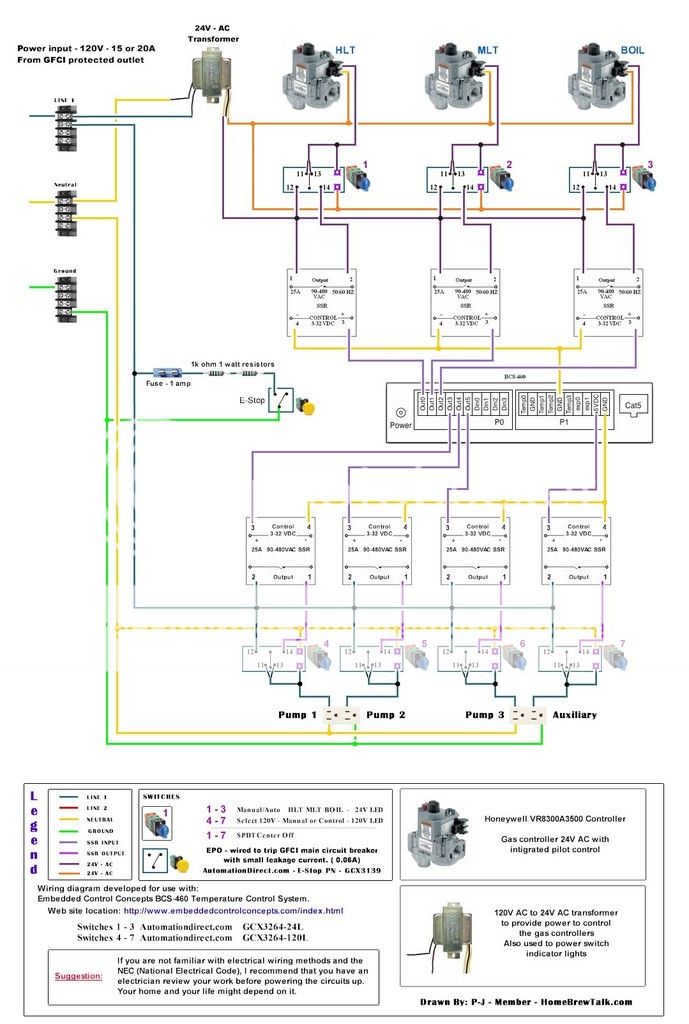
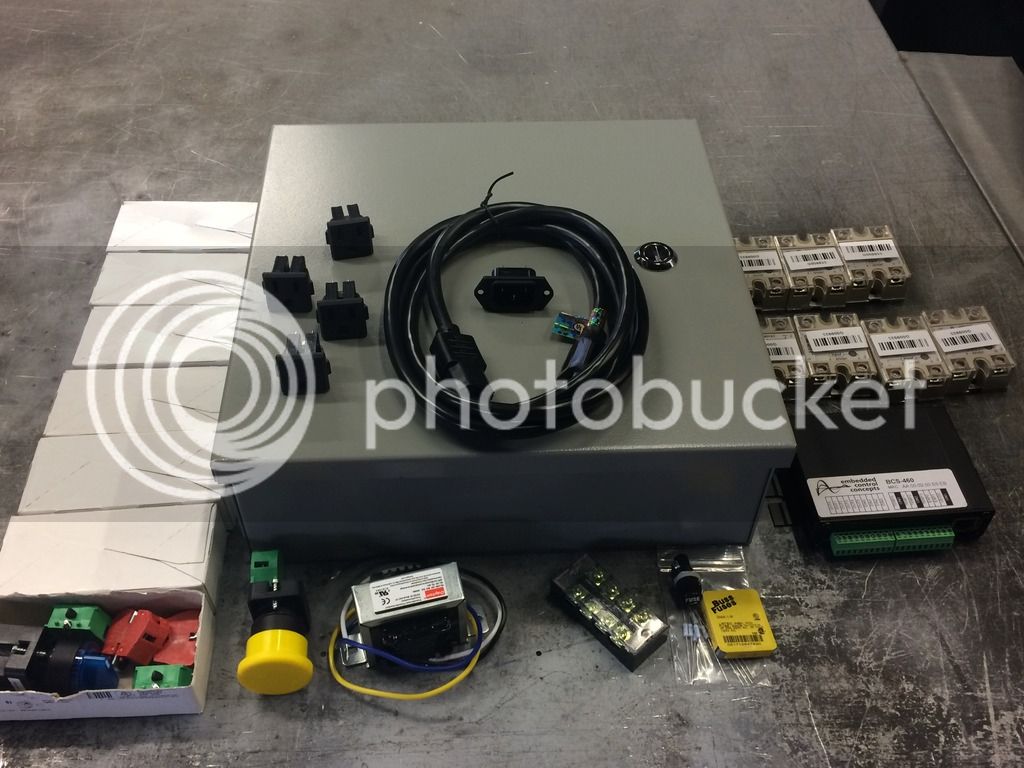
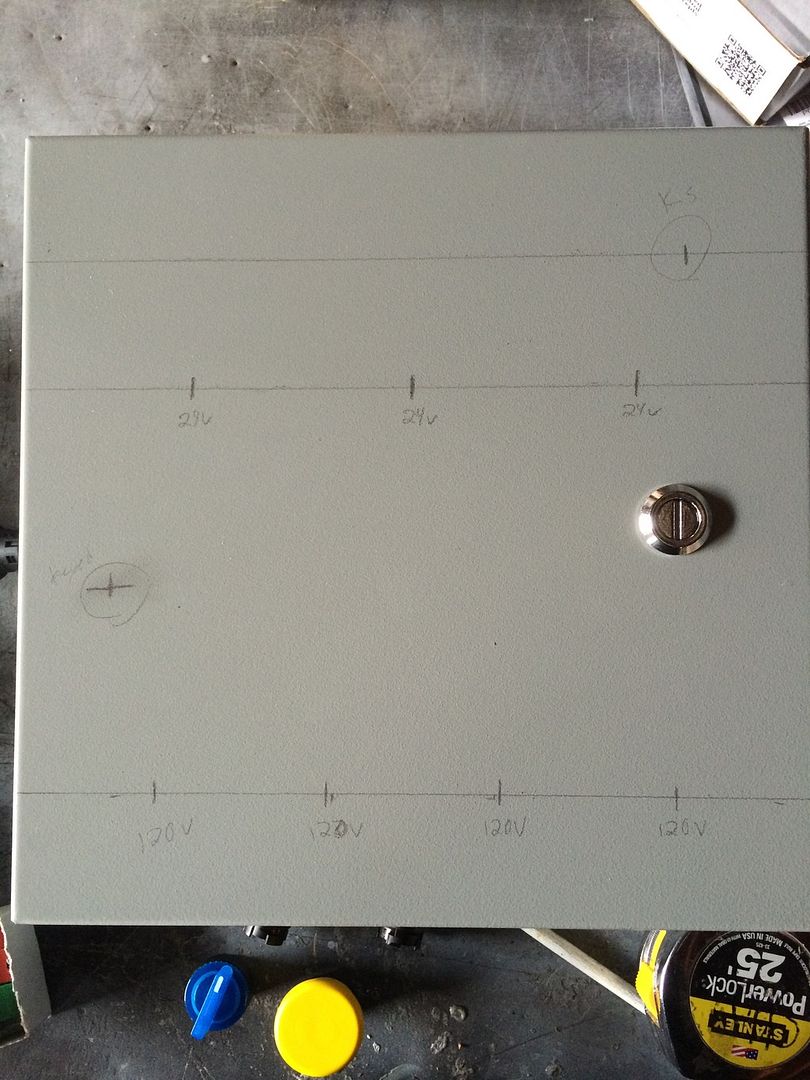
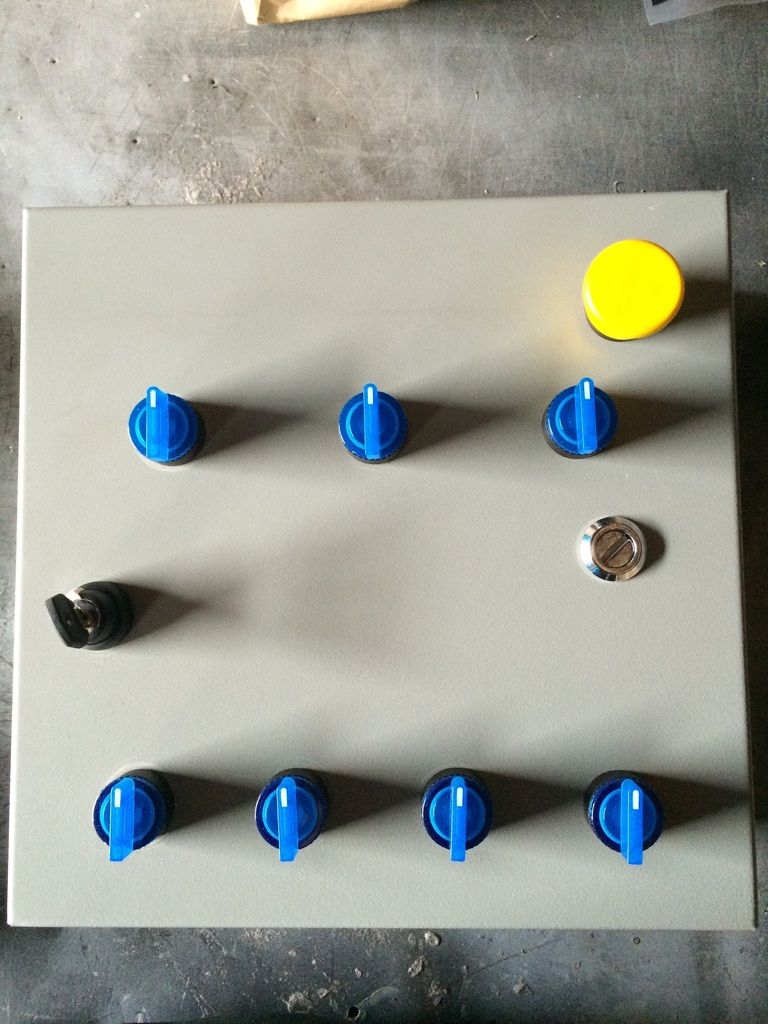
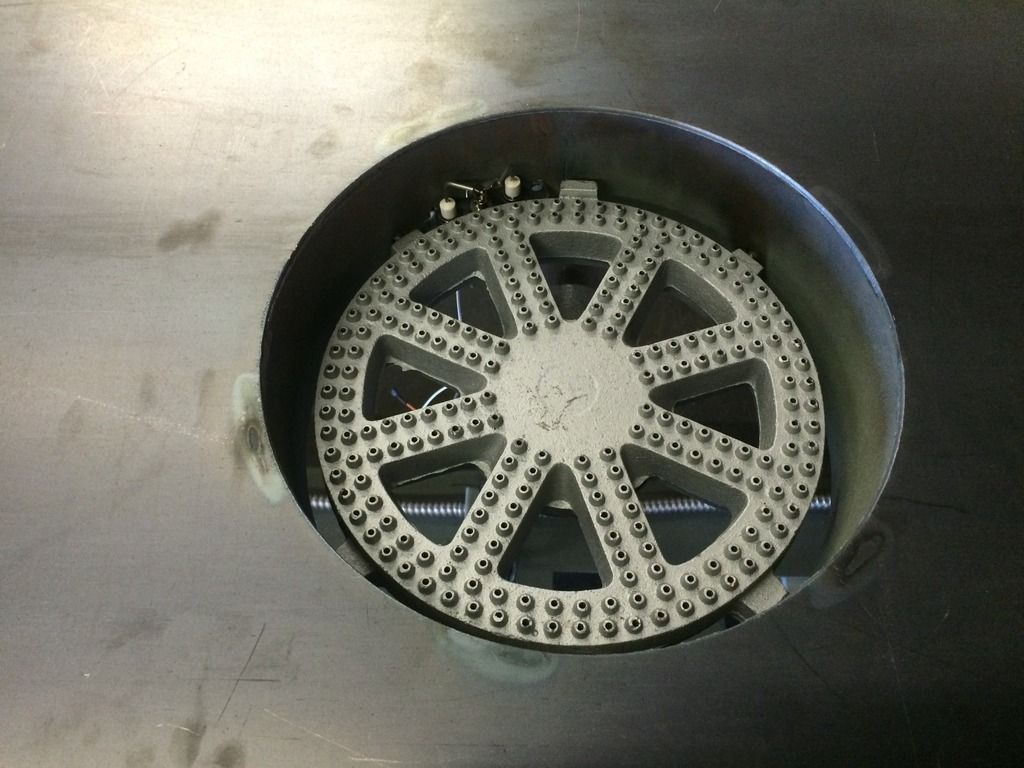
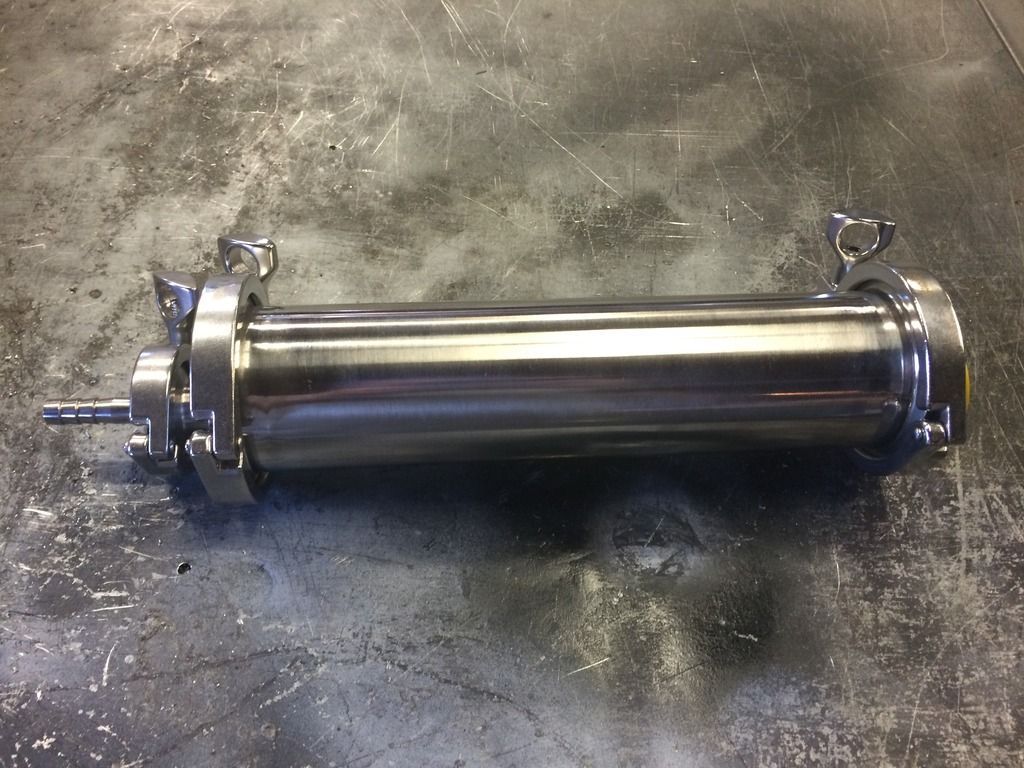
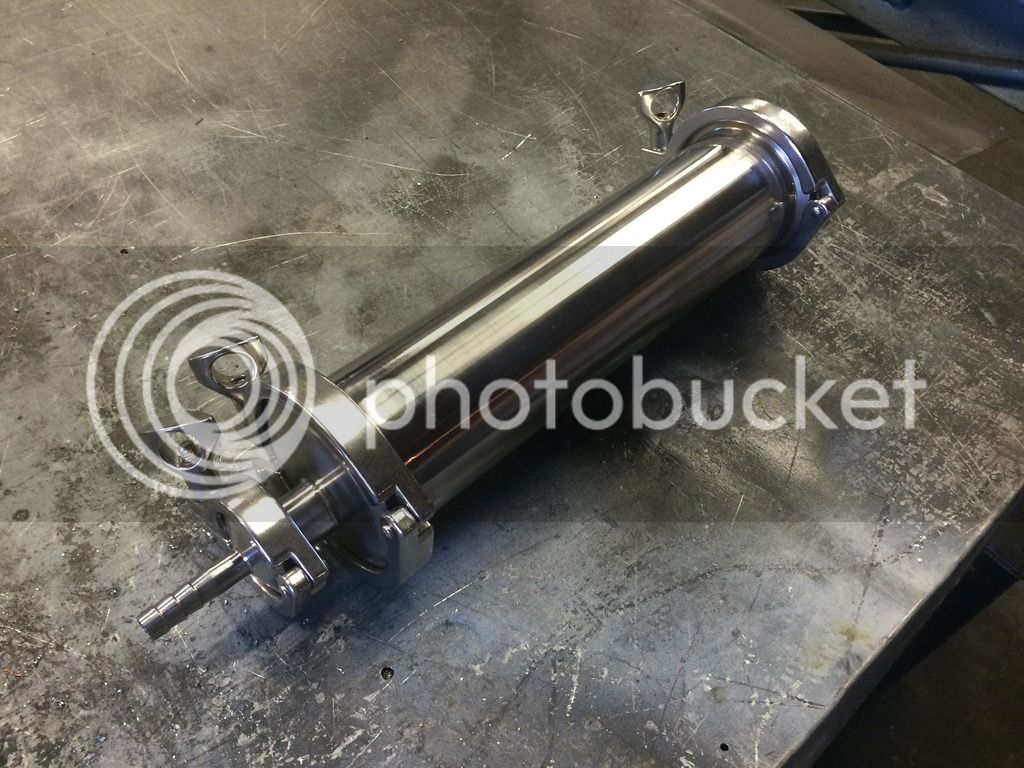
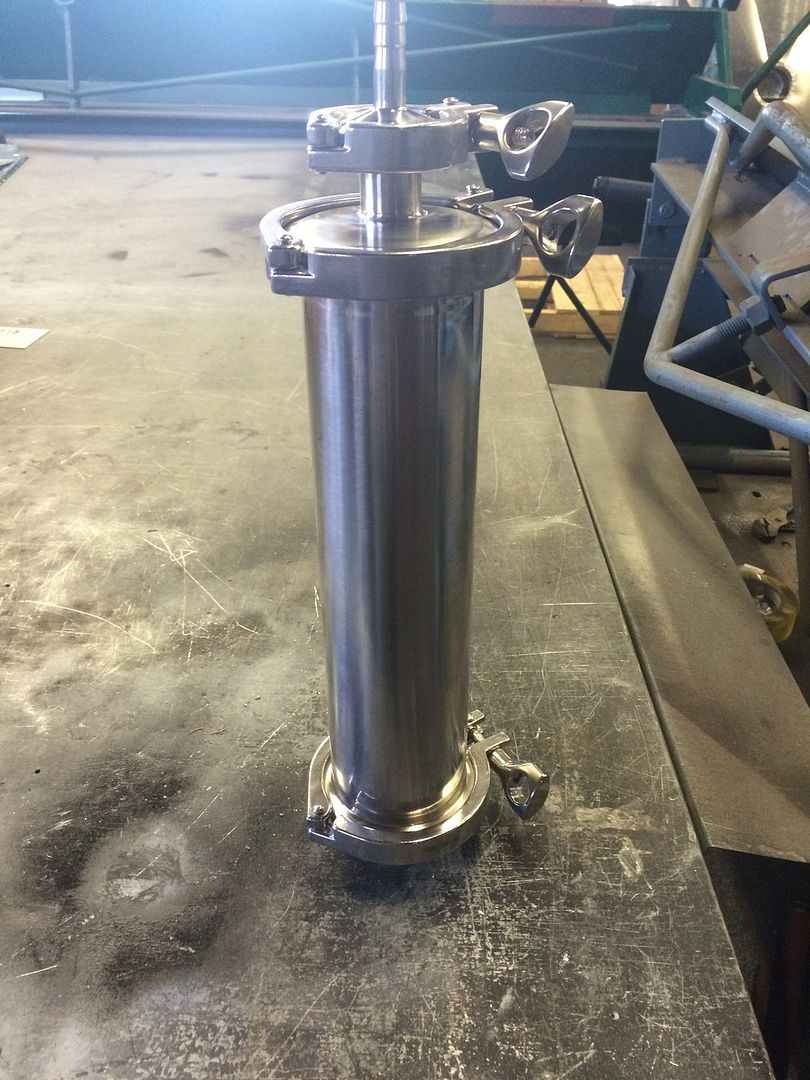
So, let's begin: The plan all along has been a single tier, propane-fueled direct-fired system (as much as I know about how the electric heating systems work and how safe they are, I just can't bring myself to pretty much stick electricity into water... I just can't do it.), 30 gallon kettles purchased from the guy's at Brewer's Hardware, 3 pumps, plate chiller, hop infuser, all run off a BCS-460 controlled panel to be at least partially automated.

Now, that's the plan... But anyone who knows me, knows that for better or worse, sometimes things don't go to plan. So, I hope I can either provide a little bit of inspiration for those looking at making their own brewstand, or at the very least give you all a chance to laugh at my pain! :tank:

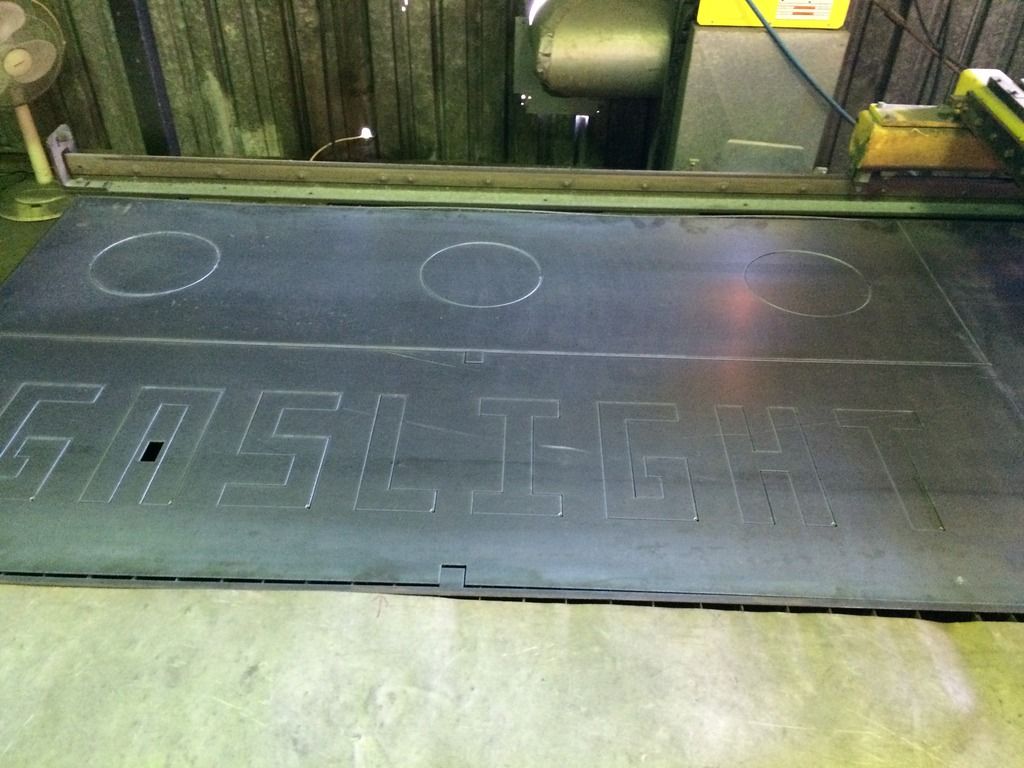
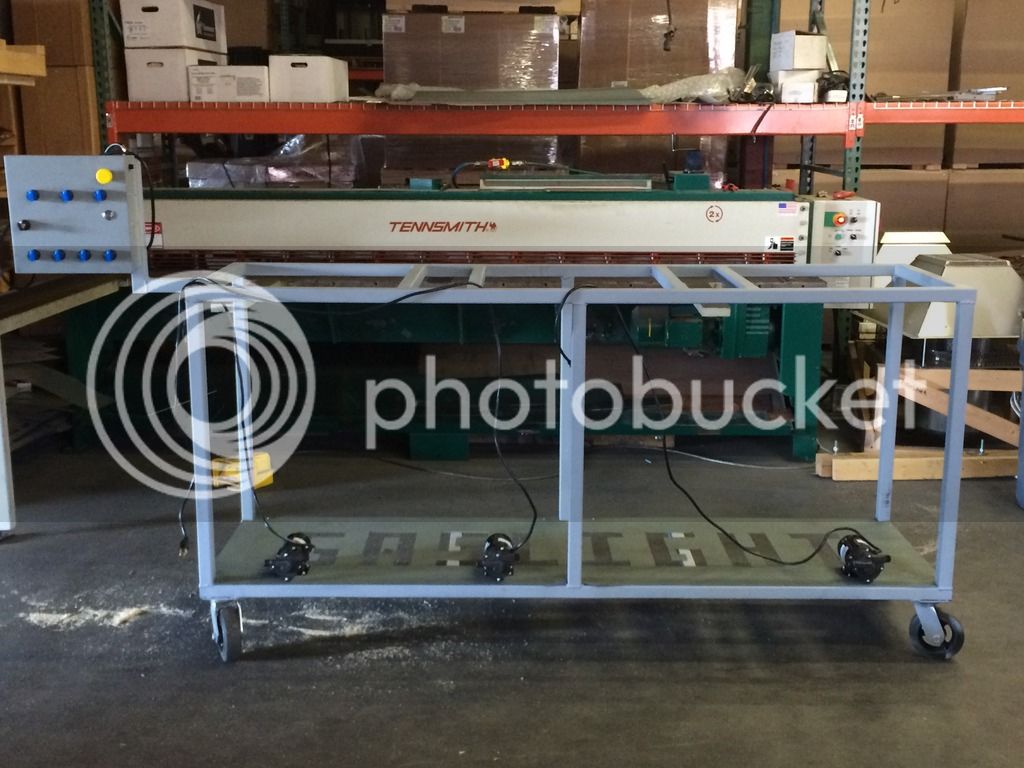
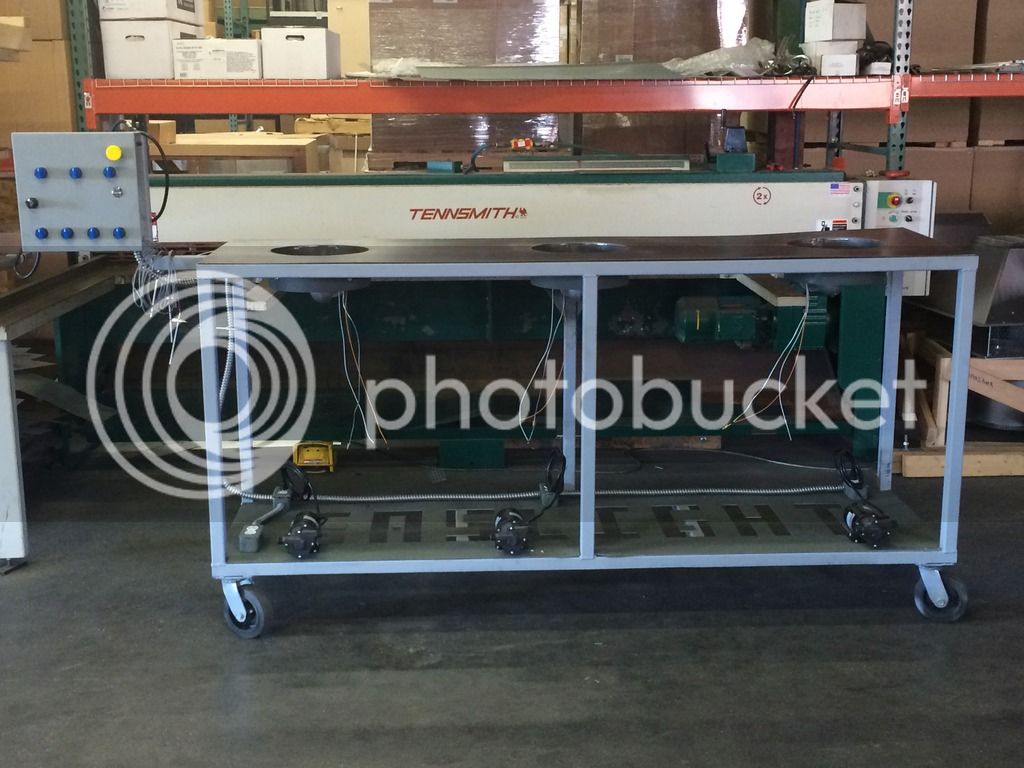
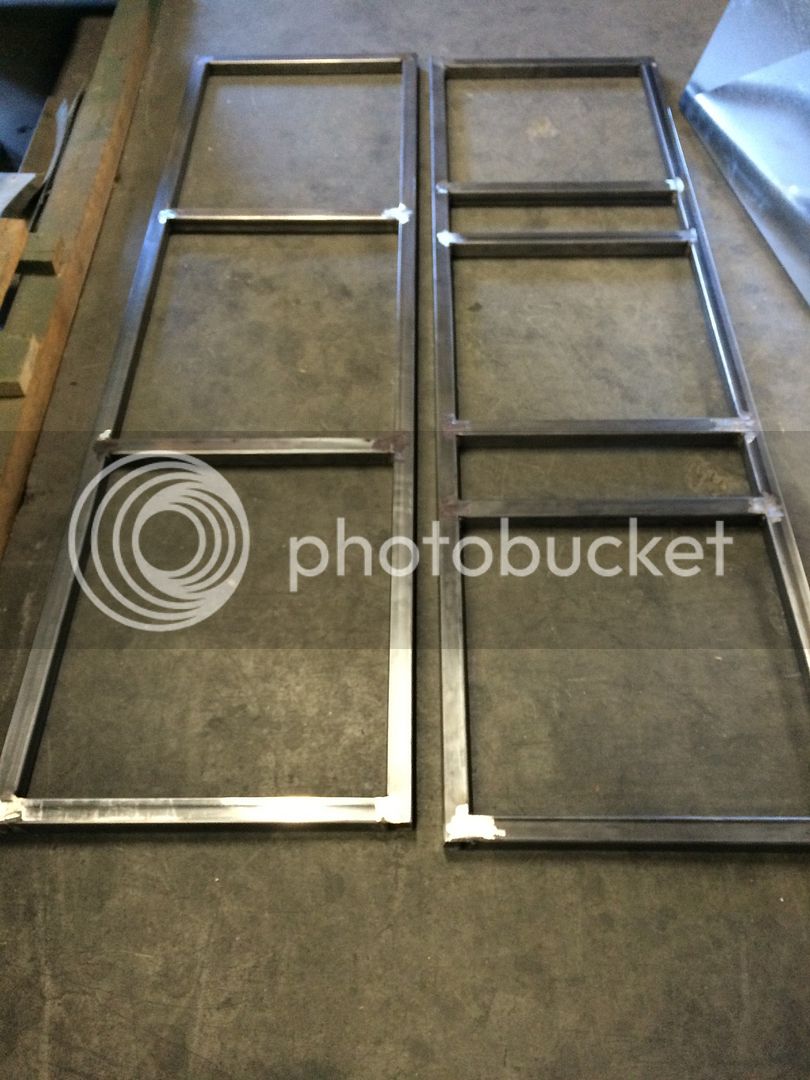
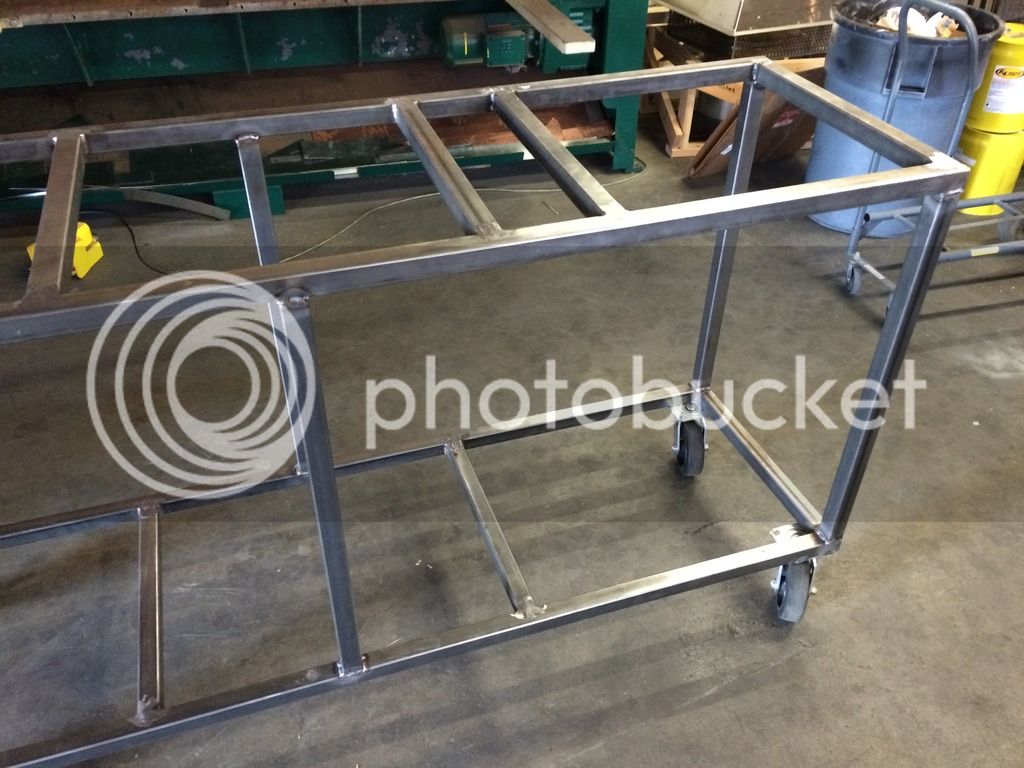
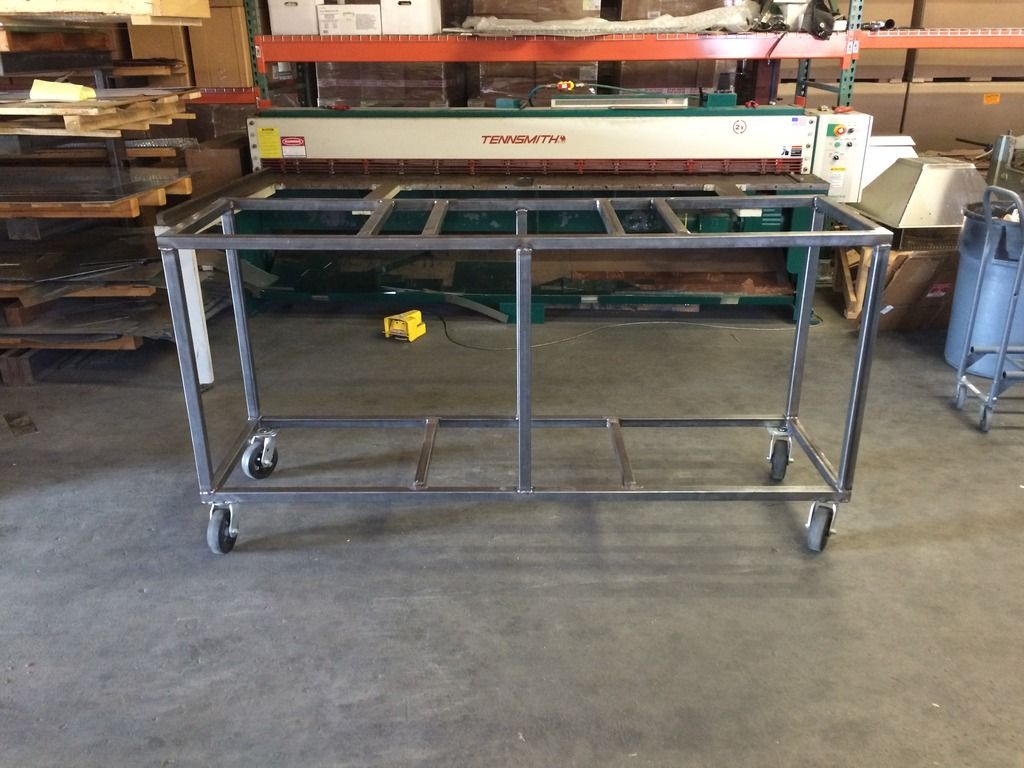
I started out with the rolling frame for this bad boy, 1-1/2" square tube, roughly 1/8" thick, mild steel. My welding skills are nothing to write home about, but they should be good enough to hold this thing together even under a full load.

IMG_1713_zpsttytx9jt.jpg


IMG_1722_zpsgkpwjldm.jpg


IMG_1720_zpscnnnmtij.jpg
 
Frame, primered so that it won't rust while I work on everything else. I've got my burners sitting there on top of it, along with most of the components for the control panel in the other box (will get more into that when I get the chance to start putting that together).

IMG_1736_zpsua4tckae.jpg


Here's the Plate Chiller from Duda Diesel that came yesterday.

IMG_1732_zpsi1sed2sy.jpg
 
I'm with you - my welds aren't pretty but they've held up thus far (although I'm pretty sure yours are looking prettier than mine!) Do you have a schematic for your electrical yet? I'm completely lost figuring out how to wire BCS to control pumps and propane valves!
 
Good looking stand man!

I've been thinking about putting one together exactly like that. How high is it, and how'd you decide to put it at that level?
 
I'm with you - my welds aren't pretty but they've held up thus far (although I'm pretty sure yours are looking prettier than mine!) Do you have a schematic for your electrical yet? I'm completely lost figuring out how to wire BCS to control pumps and propane valves!

Yeah, I'm using a P-J schematic for three direct fire burners (apparently not many people go this route? It was a PITA to find!). I also did a bit of work on my panel - I'll put together the pictures I have tonight and show off a bit of what I have currently.
 
Good looking stand man!

I've been thinking about putting one together exactly like that. How high is it, and how'd you decide to put it at that level?

On rollers it stands about right at 36" tall. I put it at that height because it makes it so my kettles are still low enough to look down into (though I will admit, someone shorter than me would have one hell of a time), but tall enough to still look good. If I remember, I will try and take some pictures with the kettles on top and me standing next to them to illustrate my point.
 
Here's the Control Panel. Still have a bit of work to do, but I only had a couple hours yesterday.

P-J Schematics
IMG_1726_zpswd4pvxmi.jpg


Most of the parts/pieces
IMG_1842_zpsydoihslc.jpg


IMG_1859_zpsghviw6ka.jpg


IMG_1861_zpsts1o9of7.jpg


IMG_1871_zpsw6fy6dd1.jpg
 
Got a chance to cut out some parts on my plasma machine today:

image1_zpstqhie7yh.jpg


The one with holes is more or less (mostly more) the heat wash shield for the burners, I'll be welding collars onto it to attach the burners to before priming and attaching it to the stand. The other is just a shelf to attach pumps, chiller, etc to.

Welded on the control panel arm and attached the bottom shelf and the pumps:
image4_zps1uzkci7c.jpg


Hopefully I'll get some more time this weekend to put some more of this together. If only this damn thing called work wouldn't constantly take up my time during the days!

EDIT: I also fixed a couple errors I made on the control panel and pretty much finished the wiring except for the connections to pumps, gas valves and temp probes - I will also have to figure out if I'm going to dedicate a laptop or tablet to this and have it mounted on as well or just work out some way to make the BCS wireless (suggestions are always welcome!).
 
Last edited:
Yeah, I'm using a P-J schematic for three direct fire burners (apparently not many people go this route? It was a PITA to find!). I also did a bit of work on my panel - I'll put together the pictures I have tonight and show off a bit of what I have currently.

Looking awesome so far! Loving the plasma cutting work and really appreciate the electrical diagram. I'm only going 2 burner automation, but otherwise pretty much the exact same with the electrical. Did you pick up most or your parts locally or source them online? Mind providing a control panel part list (and any links if online)? I'm with you on work getting in the way so looking to take some days off work to knock my propane manifold and control box out... only issue is I need to make sure I have all the parts I need on hand or that plans dies and I end up either brewing or drinking homebrew (not the worst way to spend a day off but not the goal).
 
Looking awesome so far! Loving the plasma cutting work and really appreciate the electrical diagram. I'm only going 2 burner automation, but otherwise pretty much the exact same with the electrical. Did you pick up most or your parts locally or source them online? Mind providing a control panel part list (and any links if online)? I'm with you on work getting in the way so looking to take some days off work to knock my propane manifold and control box out... only issue is I need to make sure I have all the parts I need on hand or that plans dies and I end up either brewing or drinking homebrew (not the worst way to spend a day off but not the goal).

Thank you! I'm a bit spoiled when it comes to machinery, that's for sure! :rockin:
As for a panel parts list, I'm sure I can put that together for you. I've got a bag full of the receipts and packing slips for all my components so I don't forget in case I need replacements (though I sure hope I never do!). It is however at work, so I'll post it tomorrow if I get the chance.
 
Looks awesome!

Not sure what gauge your square tubing is but I can't help wonder if a vessel full of liquid sitting in the middle section of your stand, how much flex or bounce the stand will have in it??

Not trying to be a downer. Just wondering if a few diagonal braces are needed??
 
Nah, it's 1/8th in. Plus the rectangular plate with the holes in it will also help to evenly distribute the weight of everything. I already put the kettles on all fully loaded after I welded it together and she's solid. No worries about being a downer, I'd rather hear I'm doing something wrong from someone here than to learn the hard way! :)
 
Update: Welded the collars onto the top plate. Installed burners, igniters and temp probes. Next step: burner stand-offs and gas manifold.

IMG_1946_zps7qt6wa9t.jpg


image1_zps5bou4ota.jpg
 
Two spark igniters per burner? Those things wreak havoc on control systems like the BCS, Brewtroller, etc. Transient spikes will reboot the processor. Hot surface igniters are a better solution.
 
One Spark ignitor, one sensor. And I didn't think about the fact that it may disrupt the BCS... Interesting, I'll have to test it and go to an HSI if I have to. Thanks for the warning!
 
You also mentioned that you are working on burner stand-offs. Are you talking about grates that will support the kettles? You're going to need to elevate the kettles and get some good air flow going through there. With the way it is currently setup, I'd also say you may need to end up drilling some 1" holes in the wind screens to get some additional air flow. Before deciding on a final design for kettle supports, I'd say to do some tests to ensure the burners are flowing well. Those burners need a lot of good air flow to burn clean.
 
You also mentioned that you are working on burner stand-offs. Are you talking about grates that will support the kettles? You're going to need to elevate the kettles and get some good air flow going through there. With the way it is currently setup, I'd also say you may need to end up drilling some 1" holes in the wind screens to get some additional air flow. Before deciding on a final design for kettle supports, I'd say to do some tests to ensure the burners are flowing well. Those burners need a lot of good air flow to burn clean.

Yep, that's exactly what I mean. Also, I will probably be doing holes as well. I had a document a while back that outlined good rule of thumb for air clearance around a burner like this, but I can't seem to find it anymore. I figure some 3/4" standoffs and some holes will be good, but it would be nice to find that paper and figure that out with more certainty. If anyone knows how to calculate something like that, please let me know!
 
Very nicely done.

Thank you!

I should have some more pictures up this weekend, going to run a test batch on it (more to test the burners and stand off than anything else) - I will probably just temporarily hook the burners up to on-off switches and test the other electronics once I have the basics figured out.

I have also been working on a hop infuser made completely out of TC parts. It's not finished, but it is nice and shiny:

IMG_2139_zpsqdixp3q6.jpg


IMG_2140_zpsp0q6mjhf.jpg


4" Tri-Clover parts. I have a perforated stainless screen that will get proper seals and contain the whole leaf hops inside so that they don't clog the system. I will also be mounting this (idea currently is to use large hose clamps to hold this in place, but with a sheet metal shop at my disposal, that idea is subject to change) vertically with the pump inline below, pushing the wort upwards through the infuser so as to assist in keeping the line blockage free.

IMG_2141_zpst0vqbpyz.jpg
 
Everything looks really great! I'm about to start a very similar project so it's encouraging to see someone else on the same journey!

Keep up the great work! Cheers!
 
Thanks!

I was able to do a "mechanical systems check" (basically everything but automation - figured I'd keep it simple and step my way) a couple weeks ago with an American Brown Ale. Everything went great, stand offs were perfect and I was able to hit my temps pretty quickly with these burners. I kept it to a 15 gallon batch even though the plan is 20+ gallon batches in the future. I did have to improvise a bit with sparging as my sparge arm didn't make it in in time for the brewday - oh well, got it now.

Also have a grain mill coming in as well as the last couple parts I needed for my hop infuser. Just about finished with the fermenters too, just need to insulate and finish the A/C glycol chiller (last batch went into buckets).

Sadly, I completely forgot to get some pictures of the brew day when I had everything hooked up properly, but here is a picture from the other day while I was running a systems check on the electronics (excuse the fire hazard at front-center ;)):

IMG_2160_zpssp2ihthi.jpg
 
What kettles did you use for your build? Those look nice!

Edit: Never mind! I found it. Reading is good for info sometimes!
 
What kettles did you use for your build? Those look nice!

Edit: Never mind! I found it. Reading is good for info sometimes!

:) Glad you found it! Brewer's Hardware to anyone who also might have missed it!

So, I actually finished this thing, it's now fully operational. Had a few bugs I had to work out and all, but had to take a hiatus from all things brew for a while as we got a new house and things really picked up at work about a year ago. Once things calmed down a bit with the move and I had some time gaps to brew again, I chose instead to get back into shape. So, 35 lbs lighter, and the most in-shape I've been since high school, I'm ready to get back into brewing and quickly ruin all my hard work! :p

I started back with 5 gallon batches on the stovetop to get back into the swing of things, but my last brew on this system went pretty well... My chief complaint is the time it takes to heat that much liquid using direct flame. I might cough up the money and have some elements welded into at least the HLT just to speed things up a bit on brew days - if anyone has any other ideas, I'm all ears!

Oh, and HBT? I've missed you! :mug:
 
Invictusbrew, glad to see your back at it! I got in better shape too. I lost 30 lbs myself and feel great. Looks like your dialing in your new system. It will take a few batches. I ended up spending the money as you are suggesting and went electric. Absolutely love it and glad I went that route. Lots of luck with your future brews!

John
 
Back
Top