You are using an out of date browser. It may not display this or other websites correctly.
You should upgrade or use an alternative browser.
You should upgrade or use an alternative browser.
3-in-1 "Boil Kettle, Jacketed Chiller, Conical Fermenter" by Brewha
- Thread starter MeetsCriteria
- Start date

Help Support Homebrew Talk - Beer, Wine, Mead, & Cider Brewing Discussion Forum:
This site may earn a commission from merchant affiliate
links, including eBay, Amazon, and others.
So this Sunday is the inaugural brew day on the BIAC. Couple questions for those that have brewed on the BIAC before -
Do you set your strike water temperature to the same temp you mash at? Or do you raise it per Beersmith/brew program calculation? I believe Nathan on the video demonstration sets the strike water at the same temp as the mash, but I would think that would cause it to fall 10-15 degrees and take 10 or so minutes of reciruclating to heat the mash back up to proper temp, meanwhile thinning out your intended mash. Thoughts?
And also, what gap settings do you have your grain mills at? Mine is currently set at 0.030" which I'm afraid might be too fine and clog up the colander via cavitation.
So this Sunday is the inaugural brew day on the BIAC. Couple questions for those that have brewed on the BIAC before -
Do you set your strike water temperature to the same temp you mash at? Or do you raise it per Beersmith/brew program calculation? I believe Nathan on the video demonstration sets the strike water at the same temp as the mash, but I would think that would cause it to fall 10-15 degrees and take 10 or so minutes of reciruclating to heat the mash back up to proper temp, meanwhile thinning out your intended mash. Thoughts?
And also, what gap settings do you have your grain mills at? Mine is currently set at 0.030" which I'm afraid might be too fine and clog up the colander via cavitation.
I'm also interested in this answer. In my diy verssion which is the same concept w/o the built-in conical, I typically only heat my strike water to about 3-degrees over the desired point. That is because there is the full volume of water involved and the temp does not get "diluted" as much.
I'm also interested in this answer. In my diy verssion which is the same concept w/o the built-in conical, I typically only heat my strike water to about 3-degrees over the desired point. That is because there is the full volume of water involved and the temp does not get "diluted" as much.
I haven't used one but I normally start by taking the temperature of my grain and changing that setting beersmith mash section. I follow the temp that it spits out end up hitting my mash temps perfectly.
So this Sunday is the inaugural brew day on the BIAC. Couple questions for those that have brewed on the BIAC before -
Do you set your strike water temperature to the same temp you mash at? Or do you raise it per Beersmith/brew program calculation? I believe Nathan on the video demonstration sets the strike water at the same temp as the mash, but I would think that would cause it to fall 10-15 degrees and take 10 or so minutes of reciruclating to heat the mash back up to proper temp, meanwhile thinning out your intended mash. Thoughts?
And also, what gap settings do you have your grain mills at? Mine is currently set at 0.030" which I'm afraid might be too fine and clog up the colander via cavitation.
My inaugural was last weekend. I just used an online mash calculator, plugging in the water temp and amount of grains. Given it was a very loose mash, I think I doughed in with the water 5 degrees above my target temp, and hit it perfectly. My grain mill was set to 0.038", and my efficiency was in the mid-70s with an hour mash that was constantly being recirculated. Remember you're probably not using the "normal" amount of strike water you're used to using (unless you were a BIAB person before).
Only issues I had the entire brew day was (1) getting a sweet spot on the rate of recirculation. By the end the valve was barely open, as anything more was causing too much to be drained from below and I worried about dry firing the element. And (2) forgetting to ramp down the power control on the element once I hit strike temps... halfway through the mash I realized this. Taking it from 100% down to 25-30% meant that when it kicked on after mash temp fell one degree it didn't overshoot and end up being 2-3f over the target mash temp. First time brewing electric, trial and error!
bigdongsr94
Well-Known Member
Smmmio
My inaugural was last weekend. I just used an online mash calculator, plugging in the water temp and amount of grains. Given it was a very loose mash, I think I doughed in with the water 5 degrees above my target temp, and hit it perfectly. My grain mill was set to 0.038", and my efficiency was in the mid-70s with an hour mash that was constantly being recirculated. Remember you're probably not using the "normal" amount of strike water you're used to using (unless you were a BIAB person before).
Only issues I had the entire brew day was (1) getting a sweet spot on the rate of recirculation. By the end the valve was barely open, as anything more was causing too much to be drained from below and I worried about dry firing the element. And (2) forgetting to ramp down the power control on the element once I hit strike temps... halfway through the mash I realized this. Taking it from 100% down to 25-30% meant that when it kicked on after mash temp fell one degree it didn't overshoot and end up being 2-3f over the target mash temp. First time brewing electric, trial and error!
Great information! I'll check back-in tomorrow with pics and details on how the brew day went

Great brew day, so much more relaxed than what I've been used to. Mash was 156, beersmith said 165 for infusion, went 160 just in case and was 5 degrees low. Within 10 min was back up right where I needed it. Just your standard first run issues and things to adjust for next batch. Also worth noting when chilling to check the middle of wort temp vs the thermowell, it was around 30 degrees off (checked with Thermapen) until the system started to reach equilibrium, just important to know for pitching yeast. This thing is absolutely awesome and worth every penny. It is currently fermenting at 65° with my Teco Tk-500 with a 1 degree set differential. Lifting the colander is definitely a 2 person job, will be putting in a hoist or pulley system at some point.
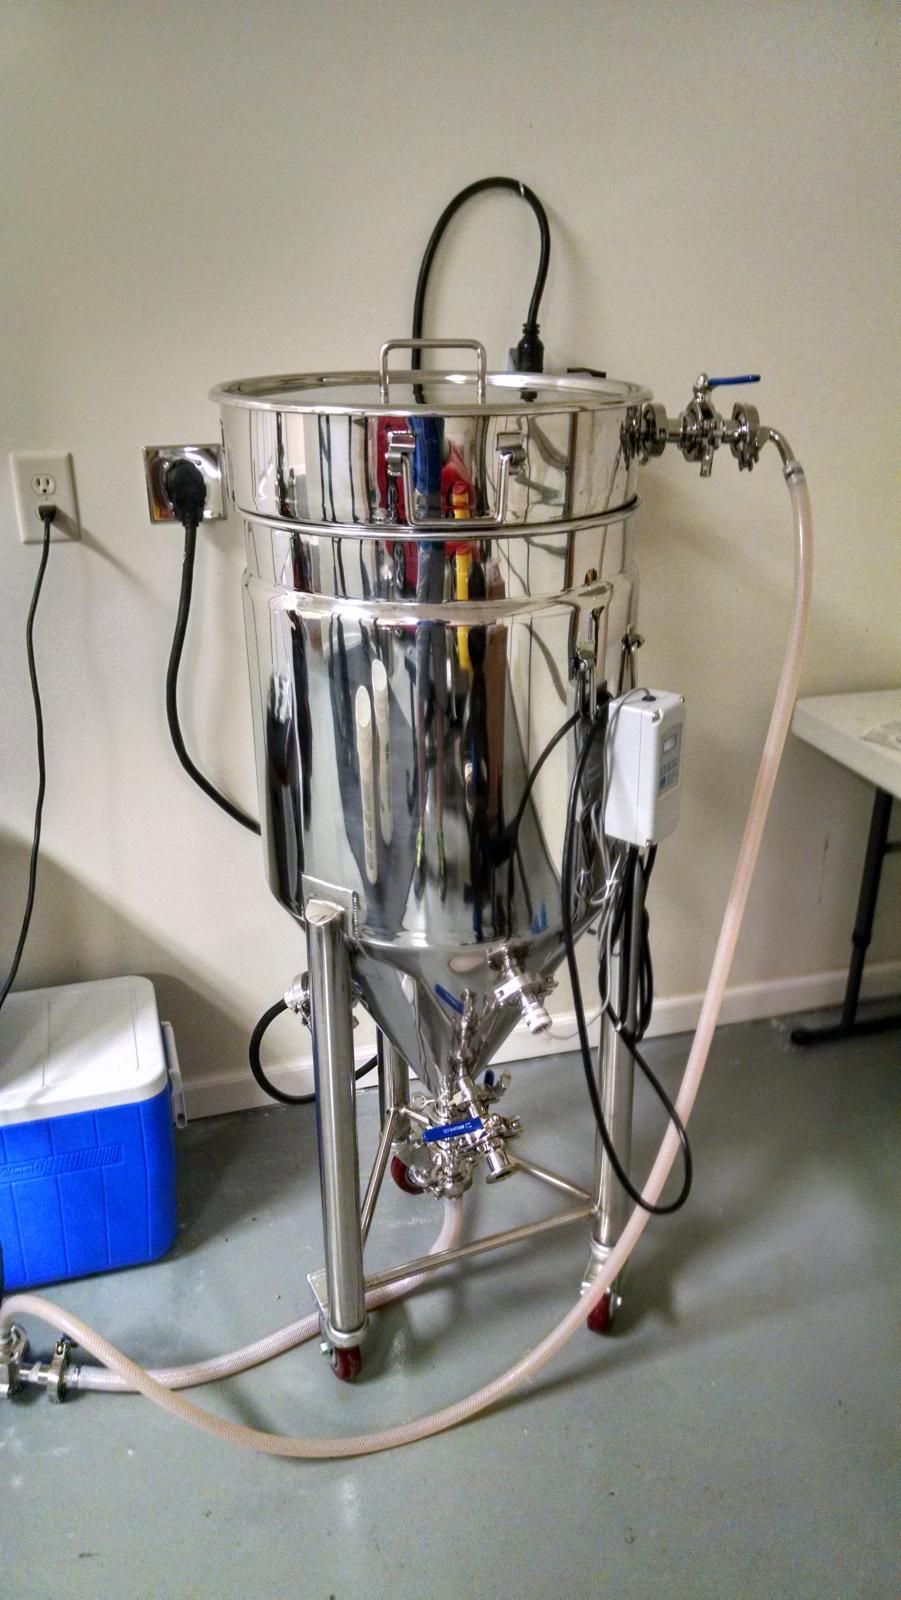
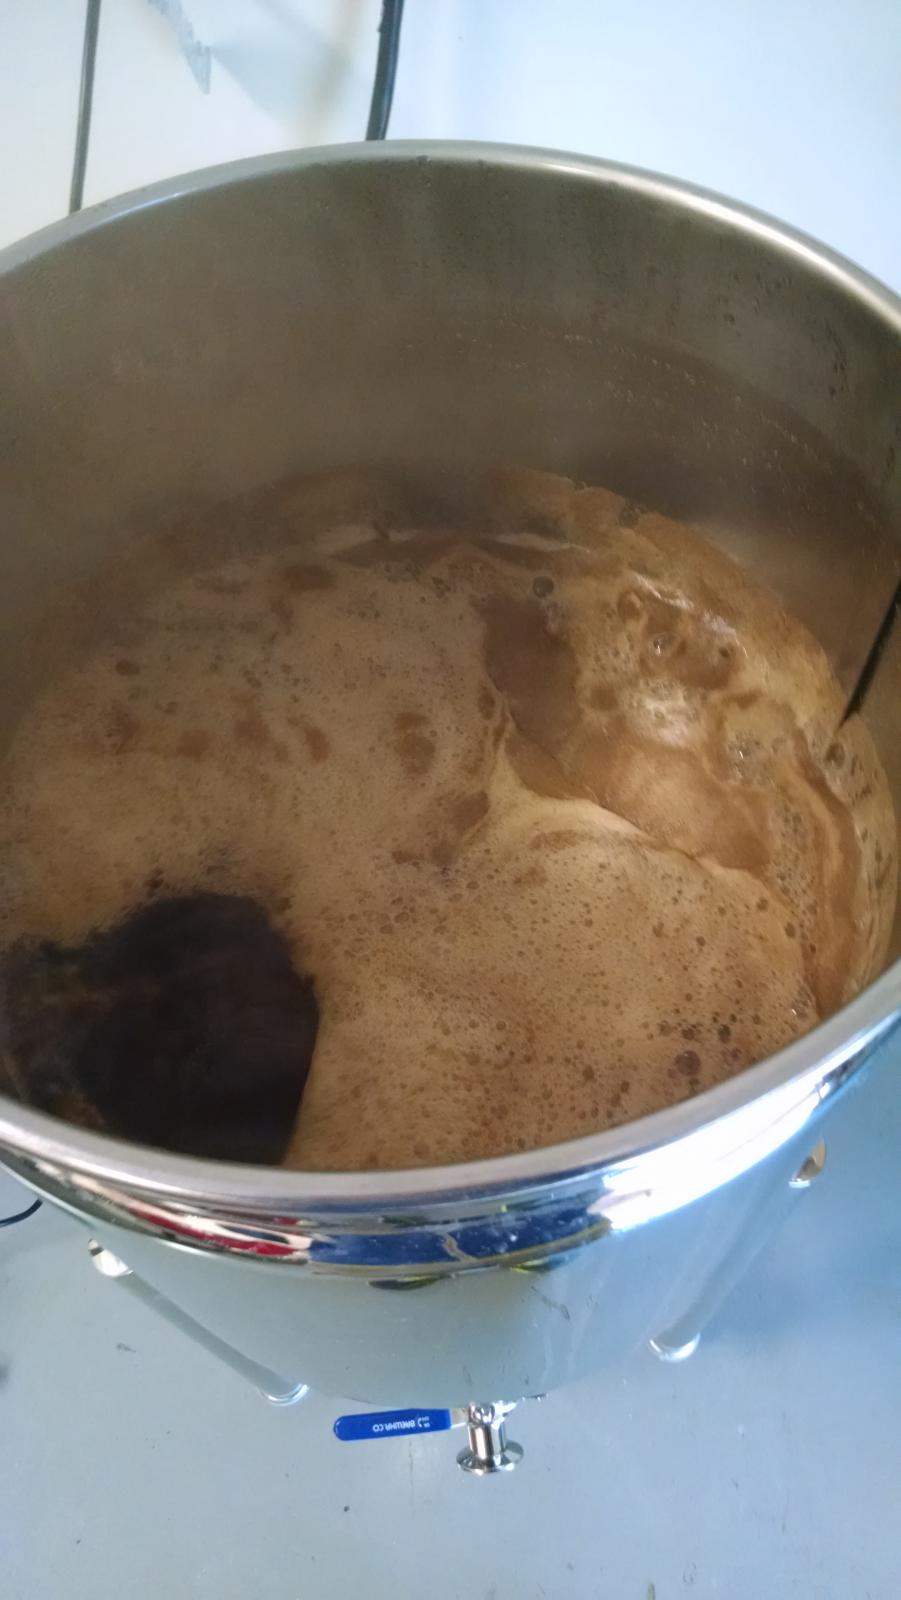
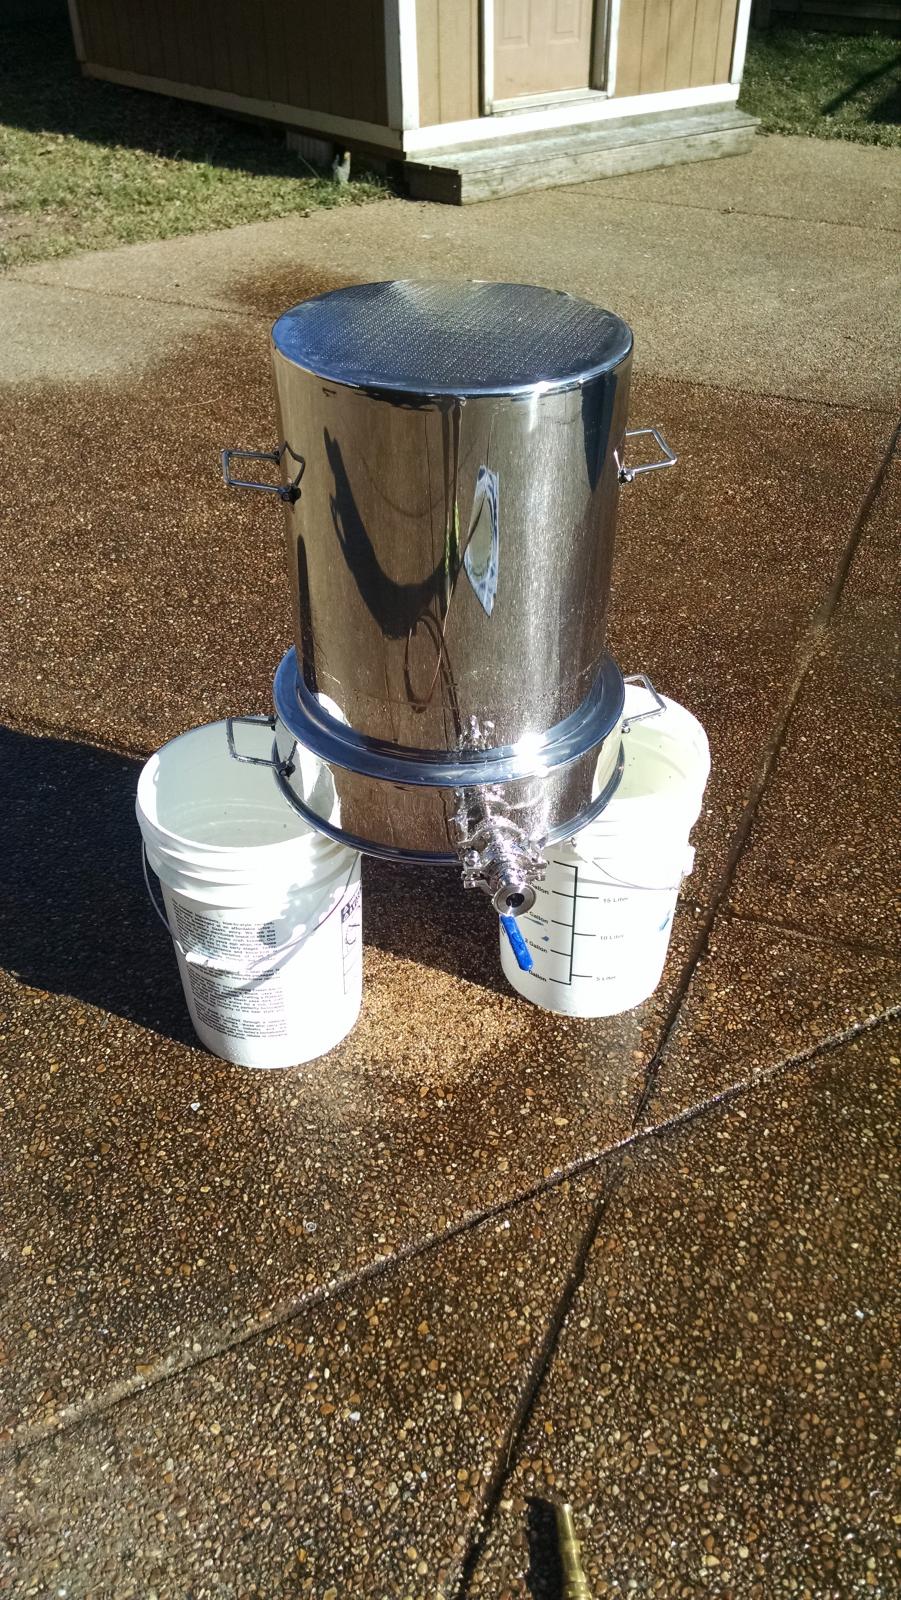
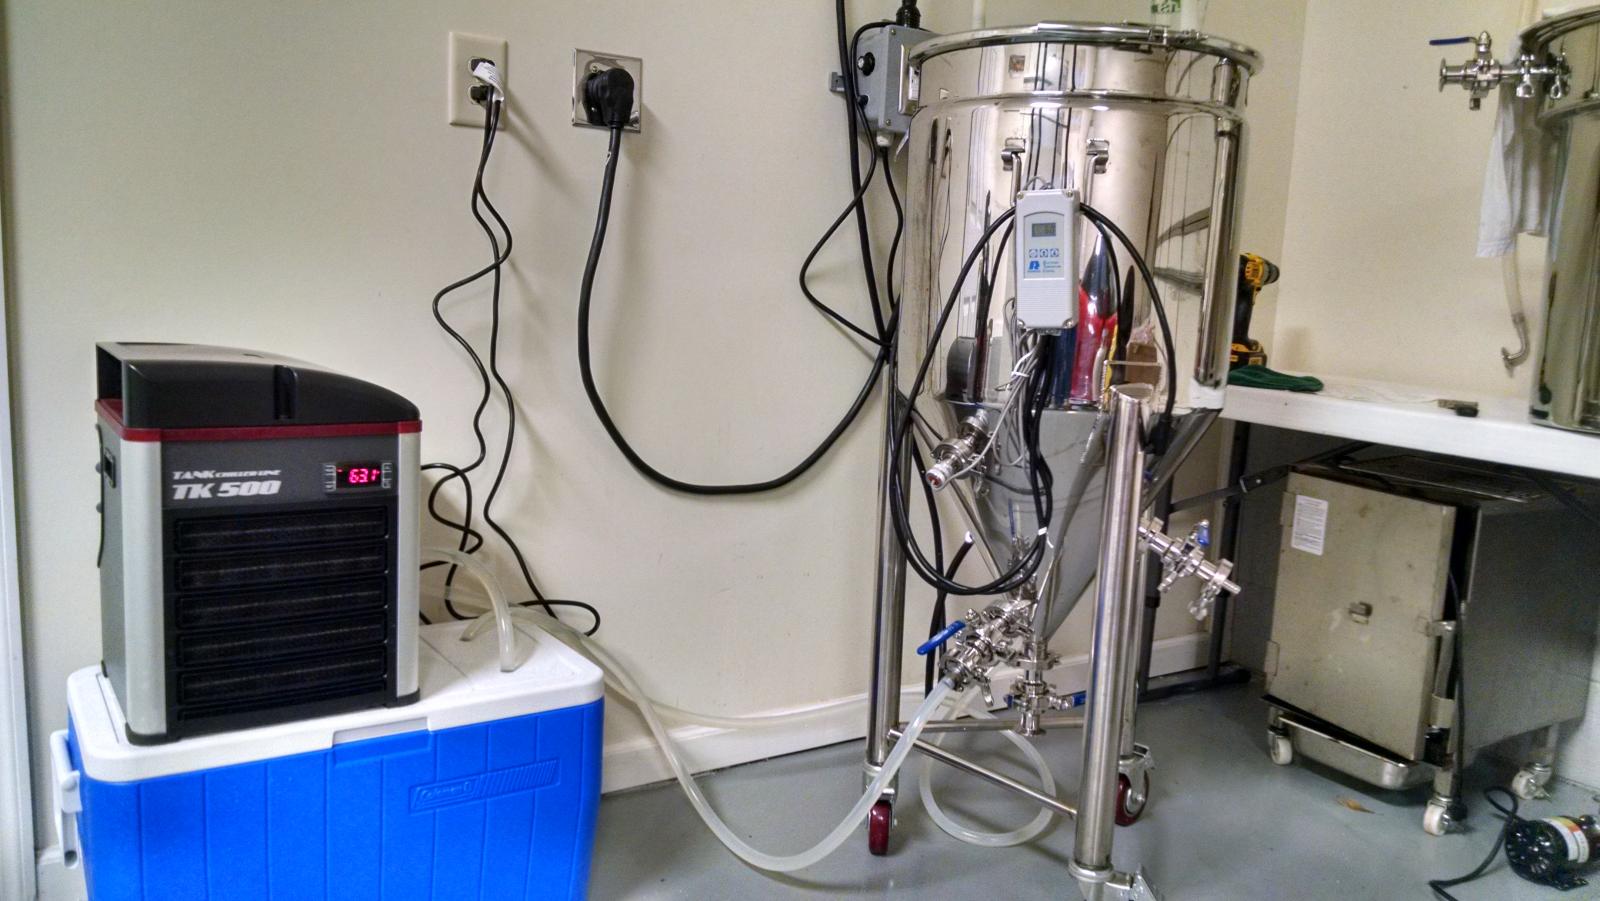


You don't need a reservoir larger than the jacket because you fill the jacket, plus the reservoir.
Following my boil, I do the following:
1)Connect the solenoid to the input of the jacket, and connect tap water to chill hot wort. I let the tap water chill to about 80*F and the solenoid shuts off flow at that point.
2)Disconnect solenoid and tap water (jacket is full at this point) and connect glycol chiller to input & output of the jacket. This means that the glycol chiller is always full, and the jacket is full after doing the large portion of chilling with tap water.
3)Turn the glycol chiller on and continue chilling to fermentation temp from there.
I'm getting a medium BIAC for my garage. So, if I buy a 1/3hp 2300BTU/hr glycol chiller with a 3gal reservoir, that should work fine and the total coolant would be 8gal including the 5gal in the jacket, correct? Also, for $150 more, I can get a 1/3HP, 2600BTU/hr chiller with 7gal reservoir. I need to make this decision.
Another question for you guys with the medium size, the price is now $3340. Did the price go up over the last month?
Final quesiton: which racking arm did you guys get from Stout?
According to Nathan the jacket on the medium BIAC holds roughly 2 gal, not 5. I debated between the same two Glycol chillers before settling on my TK-500, I don't think you can go wrong with either one. I primarily went with the TK-500 for the price, built-in heater for full closed loop control, and the fact I'm only using water instead of a glycol mix.
The medium BIAC was $3340 when I ordered mine about 5-6 weeks ago.
No racking arm for me, IIRC it only pulled out an extra 8oz or so vs without it.
Thanks for the help!
The deed is done. I have now dropped over $5k on new brewing equipment and glycol. I will soon have a lot of brewing equipment available including a 4ft x 4ft fermentation cabinet with a new 5000btu ac unit. I'll probably sell my three SS Brewtech BrewBuckets my big propane setup, kettles, brand new RIMS tube and PID. Somebody will get a killer deal and I'll free up a lot of space in my garage 

The deed is done. I have now dropped over $5k on new brewing equipment and glycol. I will soon have a lot of brewing equipment available including a 4ft x 4ft fermentation cabinet with a new 5000btu ac unit. I'll probably sell my three SS Brewtech BrewBuckets my big propane setup, kettles, brand new RIMS tube and PID. Somebody will get a killer deal and I'll free up a lot of space in my garage
It's a good feeling

Make sure to post up after your first brew!
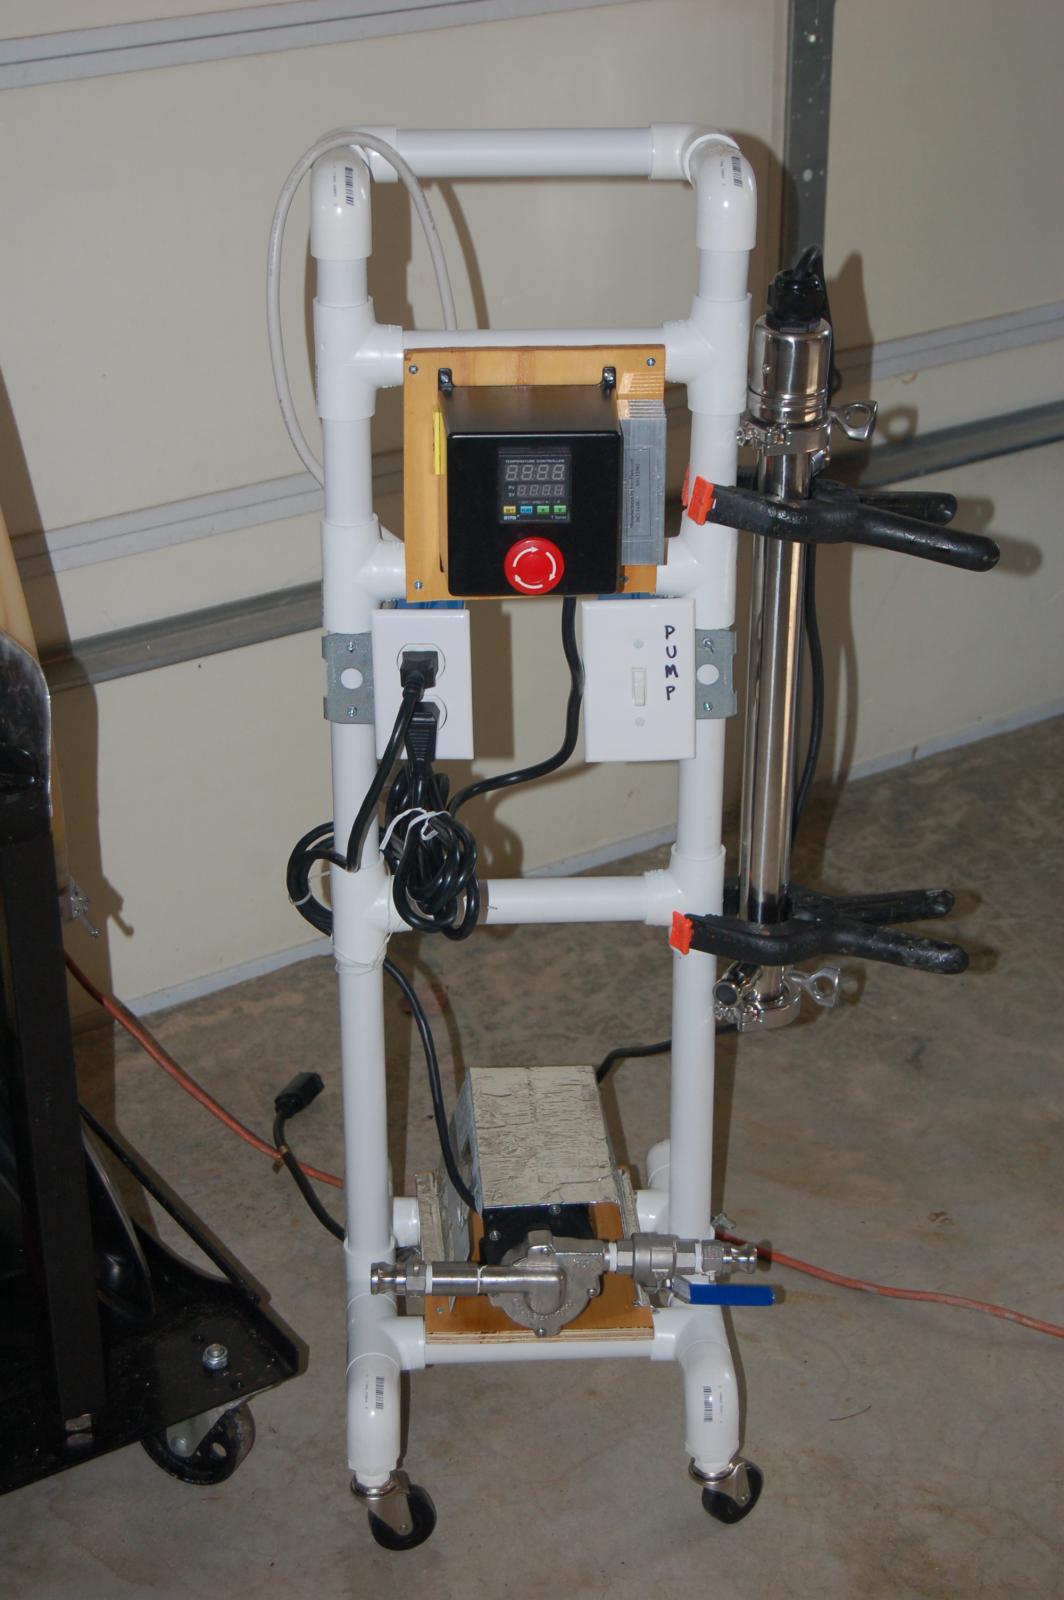
I just realized I can use my RIMs for heating in winter to keep this thing warm. My basement is all finished and not setup for lots of potential water spillage. So brewing will continue in the garage. I should be able to keep the jacket filled with water and have the jacket connected to the RIMS tube and that in turn is pumped back into the inlet on the 3-in-1 jacket. I ordered the Ranco controller with two plugs for an additional $70. I'll simply plug in the RIMS assembly to that and it will turn on when needed. That should work, right? Here is my RIMS setup:

I also found another less expensive glycol chiller that is 1/6hp with a 2-gal reservoir. I think this will work and the price is actually quite nice. I know the UBC brand is used by commercial breweries including the one where I took the Brewery Immersion Course.
cuda6pak, based on your experience with your new chiller, what do you think about this glycol chiller?
http://rapidswholesale.com/ubc-2-gal-glycol-chiller-1-6-hp-115-v.html
cuda6pak, based on your experience with your new chiller, what do you think about this glycol chiller?
http://rapidswholesale.com/ubc-2-gal-glycol-chiller-1-6-hp-115-v.html
I just realized I can use my RIMs for heating in winter to keep this thing warm. My basement is all finished and not setup for lots of potential water spillage. So brewing will continue in the garage. I should be able to keep the jacket filled with water and have the jacket connected to the RIMS tube and that in turn is pumped back into the inlet on the 3-in-1 jacket. I ordered the Ranco controller with two plugs for an additional $70. I'll simply plug in the RIMS assembly to that and it will turn on when needed. That should work, right? Here is my RIMS setup:
👍👍👍👍. Let us know how this works out. I can't have water left running where I will be storing my unit when I get it so I was planning on transferring to fermenters. This could change that at a nice price point.
jeffreybandel
Well-Known Member
I pulled the trigger and will be getting my medium BIAC in a couple of weeks.
I also found another less expensive glycol chiller that is 1/6hp with a 2-gal reservoir. I think this will work and the price is actually quite nice. I know the UBC brand is used by commercial breweries including the one where I took the Brewery Immersion Course.
cuda6pak, based on your experience with your new chiller, what do you think about this glycol chiller?
http://rapidswholesale.com/ubc-2-gal-glycol-chiller-1-6-hp-115-v.html
Honestly I would pay extra for the higher HP glycol chiller, especially with you being in ATL and the 3-in-1 being in the garage. I haven't fully tested out my TK-500 with cold crashing, but I can tell it wasn't chilling as fast as I thought it could. I also have to dial in my system a bit more with throttling the pump and playing with the amount in the reservoir, but doing it over again I'd go with the higher HP chiller.
HeyGuys,
I'm slightly annoyed. I am being told that customs needs my SSN since the order is over $2500. Did you have to supply that info? If that is the case, I may not be getting this equipment. I don't give my SSN to anyone other than the scumbags at the IRS. I've been a victim of stolen SSN before and I'm very careful.
I'm slightly annoyed. I am being told that customs needs my SSN since the order is over $2500. Did you have to supply that info? If that is the case, I may not be getting this equipment. I don't give my SSN to anyone other than the scumbags at the IRS. I've been a victim of stolen SSN before and I'm very careful.
jeffcosgrove
Well-Known Member
Ordered mine on Friday and was asked to supply SSN as well.
The deed is done. I have now dropped over $5k on new brewing equipment and glycol. I will soon have a lot of brewing equipment available including a 4ft x 4ft fermentation cabinet with a new 5000btu ac unit. I'll probably sell my three SS Brewtech BrewBuckets my big propane setup, kettles, brand new RIMS tube and PID. Somebody will get a killer deal and I'll free up a lot of space in my garage
Let me know when you sell. I might be interested in your brew buckets.
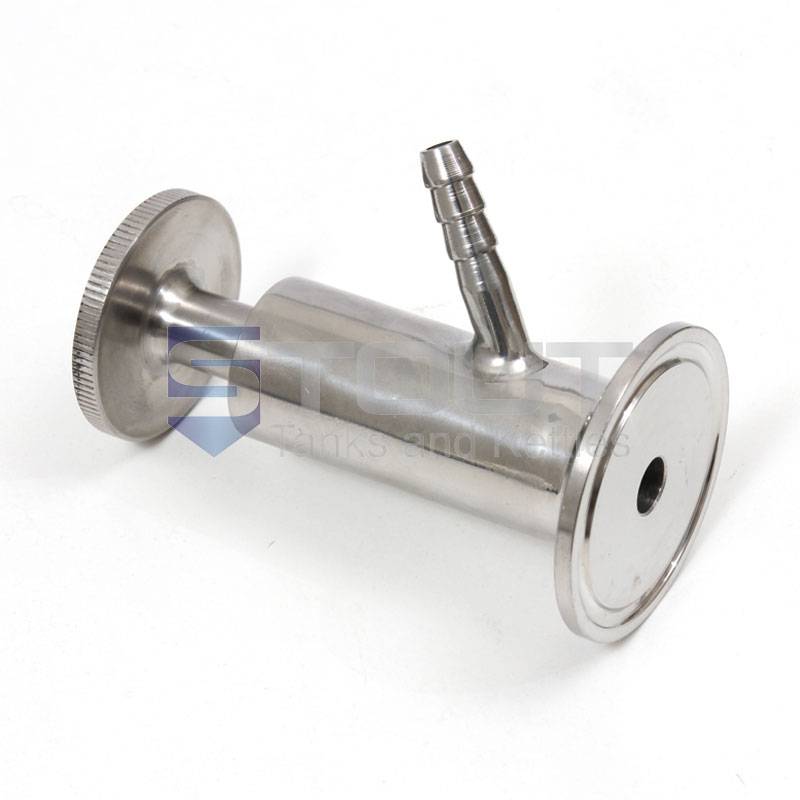
Have any of you guys currently using the BIAC seen the need for a sample valve? Since I am considering buying several of the large versions I thought I may go ahead and buy a sample valve to use on my medium when it arrives. Stout has one at a very nice price ($30). I'm also still going to buy the O2 assembly from Stout that I posted a few weeks ago:

MeetsCriteria
Well-Known Member
I have that very valve. I haven't found it necessary. (I just leave it in the conical 3-4 weeks and assume it's finished). Perhaps in the commercial setting it would be useful, as you'd want to know exactly when your beer was finished to improve turn around time.
It seems that the sanitary valves that come with the BIAC have a fitting on the bottom that would allow you to vent / sample however, so it could be redundant, if not as elegant a solution as the sample valve you reference.
Certainly, the quality of that valve is good and it definitely works.
It seems that the sanitary valves that come with the BIAC have a fitting on the bottom that would allow you to vent / sample however, so it could be redundant, if not as elegant a solution as the sample valve you reference.
Certainly, the quality of that valve is good and it definitely works.
I purchased my BIAC 6 months ago and couldn't be happier. Quality is excellent and customer service is top notch.
I've been using the element to maintain precise ferment temperatures. I built a wall mount controller which has a PID and a DSPR1 from Auberins. I set the temperature to 69 and the DSPR1 to 1% and had no trouble maintaining set point. Delta was around 20 degrees. My guess is the duty cycle was 10%.
I've been using the element to maintain precise ferment temperatures. I built a wall mount controller which has a PID and a DSPR1 from Auberins. I set the temperature to 69 and the DSPR1 to 1% and had no trouble maintaining set point. Delta was around 20 degrees. My guess is the duty cycle was 10%.
Yeah, that valve is probably best used with a BBT for collecting carbonation samples. I still may get one now, just because it is so inexpensive.
I have that very valve. I haven't found it necessary. (I just leave it in the conical 3-4 weeks and assume it's finished). Perhaps in the commercial setting it would be useful, as you'd want to know exactly when your beer was finished to improve turn around time.
It seems that the sanitary valves that come with the BIAC have a fitting on the bottom that would allow you to vent / sample however, so it could be redundant, if not as elegant a solution as the sample valve you reference.
Certainly, the quality of that valve is good and it definitely works.
That is interesting. I have been planning to keep my RIMS tube and the pid that controls it to circulate warm water through the jacket. It is a 110v system and works quite well for RIMS. So I think it would do the trick circulating through the jacket.
I purchased my BIAC 6 months ago and couldn't be happier. Quality is excellent and customer service is top notch.
I've been using the element to maintain precise ferment temperatures. I built a wall mount controller which has a PID and a DSPR1 from Auberins. I set the temperature to 69 and the DSPR1 to 1% and had no trouble maintaining set point. Delta was around degrees. My guess is the duty cycle was 1%.
If you have it you might as well use it. May be plumb it into your chiller for those days where you have to do both (heat/cool).
I think Nathan is going to offer a DSPR1 in the future,looks like the Ranco plugs into it.
Have you cold crashed with your chiller yet?
I think Nathan is going to offer a DSPR1 in the future,looks like the Ranco plugs into it.
Have you cold crashed with your chiller yet?
If you have it you might as well use it. May be plumb it into your chiller for those days where you have to do both (heat/cool).
I think Nathan is going to offer a DSPR1 in the future,looks like the Ranco plugs into it.
Have you cold crashed with your chiller yet?
If that last question is for me, the answer is no. I'm still waiting for my stuff to arrive. I believe the BIAC ships next week.
Just stumbled across this oxygenating "wand". Could run it through a rubber stopper and stick the stopper in one of the triclovers ports on the lid.
http://www.ontariobeerkegs.com/Stainless_Steel_Oxygenation_Wand_p/oxygenation-wand-w-stone.htm
http://www.ontariobeerkegs.com/Stainless_Steel_Oxygenation_Wand_p/oxygenation-wand-w-stone.htm
Well Lads, my medium BIAC system has given up its Canadian citizenship and crossed the border to become an Amurcan. I expect it probably next week. Also, I just don't think anyone can provide the level of service I have received from Nathan. As he grows, I hope he can continue to provide that level of service through his employees.
Nobody else has ever offered an all in one system at this level. I think we as a group should probably do some kind of mass review and/or video. Blichmann sure has their share of them.
Nobody else has ever offered an all in one system at this level. I think we as a group should probably do some kind of mass review and/or video. Blichmann sure has their share of them.
jeffcosgrove
Well-Known Member
Nathan's customer service has been outstanding to say the least. I have bombarded him with emails both before and after my purchase and he always responds very quickly and answers all of my questions thoroughly. Mine is scheduled to ship on Tuesday and once I get the system going I would be more than happy to join in on a group review.
Hello Lads, the CSA tracking info says the ETA for my delivery is tomorrow. The CSA site also says my crate weighs 260lbs. Is there anything special I'll need to have in place or will their guy(s) take care of unloading it. I have not received a call from them yet and I assume they call to schedule the delivery. I just hope they transfer it to a smaller truck.
The other thing I did not verify was the type of plug. I think it has a standard clothes dryer plug, correct? I have a spa panel on my deck and no spa. The nice thing about that is the main breaker panels are all in the basement. All I have to do is remove the wire from the spa panel on the deck and pull it back through the conduit and into the basement. From there, I just run it through a wall and it is in the garage! I just need to know if I need to take that spa panel as well. It has a breaker and the main breaker in my basement that runs it is a 60amp. I found an electrician who can come next week to move it and I'm more than willing to just pay him. But in the meantime, I could go to Home Depot and buy the needed outlet and box.
The other thing I did not verify was the type of plug. I think it has a standard clothes dryer plug, correct? I have a spa panel on my deck and no spa. The nice thing about that is the main breaker panels are all in the basement. All I have to do is remove the wire from the spa panel on the deck and pull it back through the conduit and into the basement. From there, I just run it through a wall and it is in the garage! I just need to know if I need to take that spa panel as well. It has a breaker and the main breaker in my basement that runs it is a 60amp. I found an electrician who can come next week to move it and I'm more than willing to just pay him. But in the meantime, I could go to Home Depot and buy the needed outlet and box.
For the medium BIAC, it came in two separate crates. I carried each with the truck driver from the truck to my garage, no big deal. They gave the driver my phone number and he updated me when he thought he could be there, and then when he was on his way a few minutes out.
I didn't give any special instructions for my BIAC and it came with the standard NEMA 14-30 plug for your standard NA dryer plug.
I didn't give any special instructions for my BIAC and it came with the standard NEMA 14-30 plug for your standard NA dryer plug.
Mine arrived this morning. My guy told me he was only authorized to drop it in my driveway! But it only took $10 to get him to put it in my garage using his pallet jack. I think that was maybe 90 seconds of extra moving for him, so all is good. I have been on conference calls all day and have not had a chance to open it yet. But, it is one impressive package and 0 visible damage.
BTW, the tall crate is exactly 48" tall and the small one was 26.5" and that does not include the pallet.
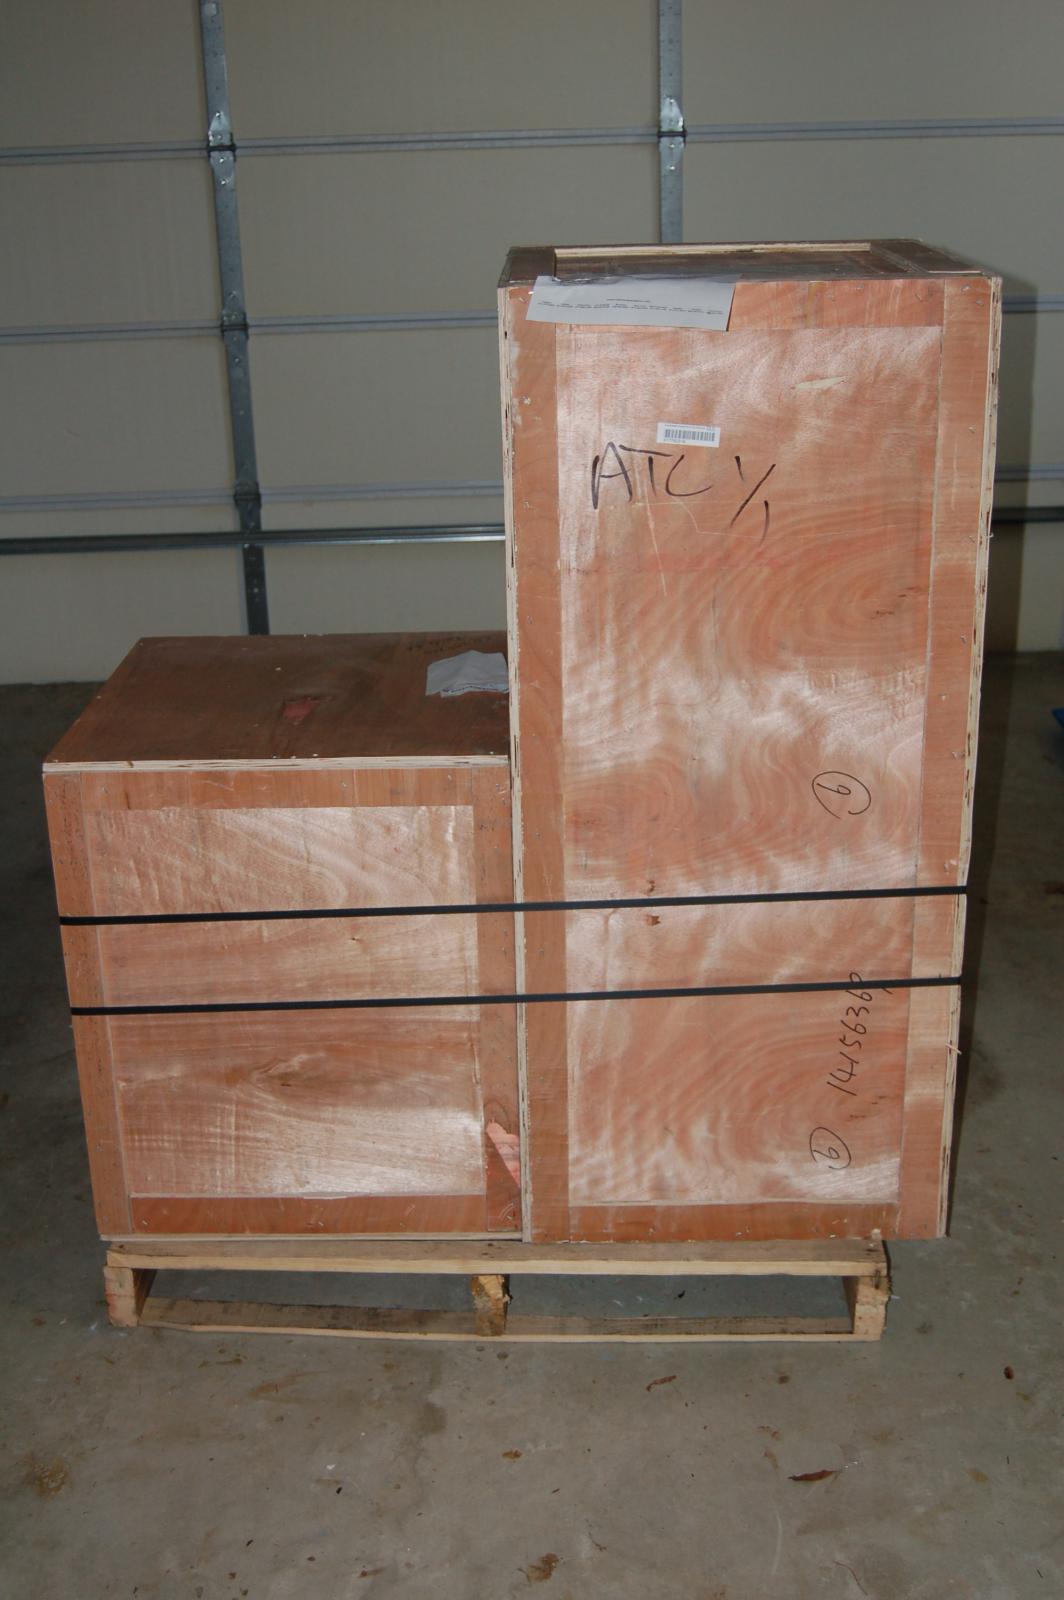
BTW, the tall crate is exactly 48" tall and the small one was 26.5" and that does not include the pallet.

riverme
Well-Known Member
Been following this thread closely.I hope the results will pan out as im near the verge or purchasing as well.
I can't be more pleased with the crate and the equipment inside. I still need to go through it all to be sure all my parts and the options are there. But, I have a few more photos to share. You'll need a screwdriver or drill with screwdriver bits to get in. The smaller crate requires a lift out or you can use a rubber mallet as I did to easily tap a side off. The large crate opens from the side. There are probably hundreds of small commercial breweries across the US that don't have stuff this nice. If there is anyone sensitive or underage, this stuff is XXX Rated Hard Core Porn, so beware.
First is the view inside the smaller crate, this is the mash colander portion and second is a photo of the packing inside along with the hop basket and volume gauge. I ordered the keg filler, lifting cables and the dual ETC options. That is probably all inside the colander. I'll have to unpack the rest tomorrow.
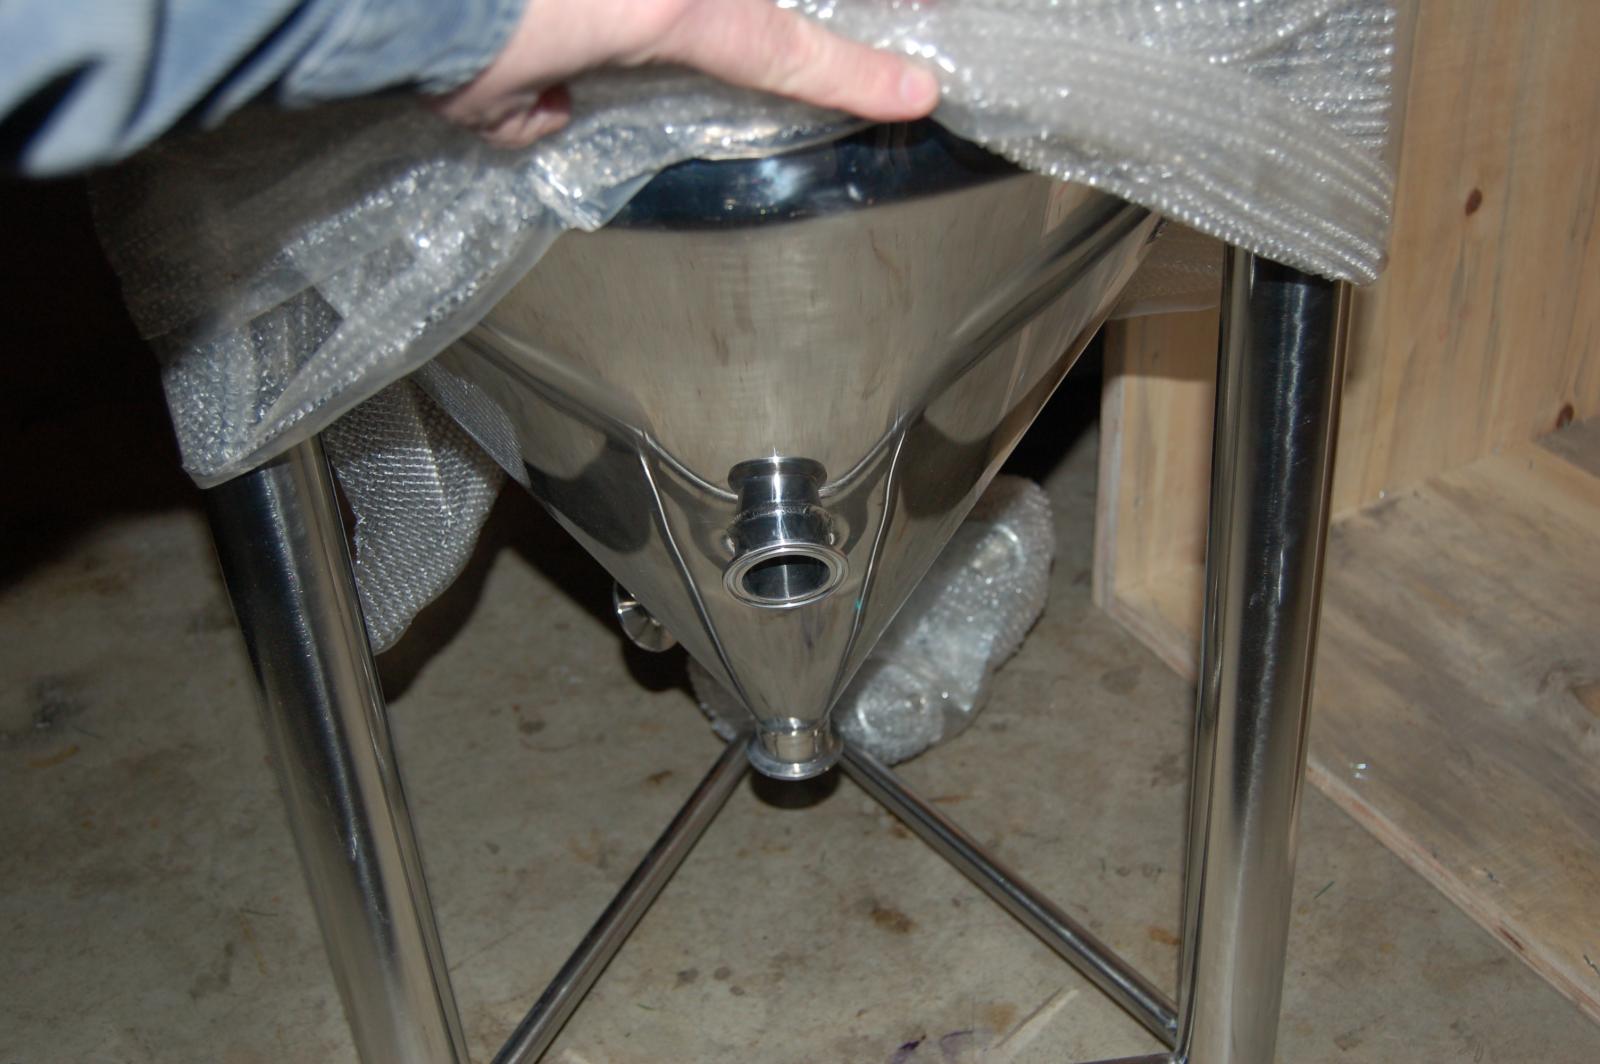
Third photo is the main 3-in-1 unit inside the crate and finally, a peek under her skirt
On a side note: it is very annoying to me to see all those brown stains on my garage floor. I built a Glen-L boat three years ago and there is a combination of marine epoxy and varnish dripped on my floor now.
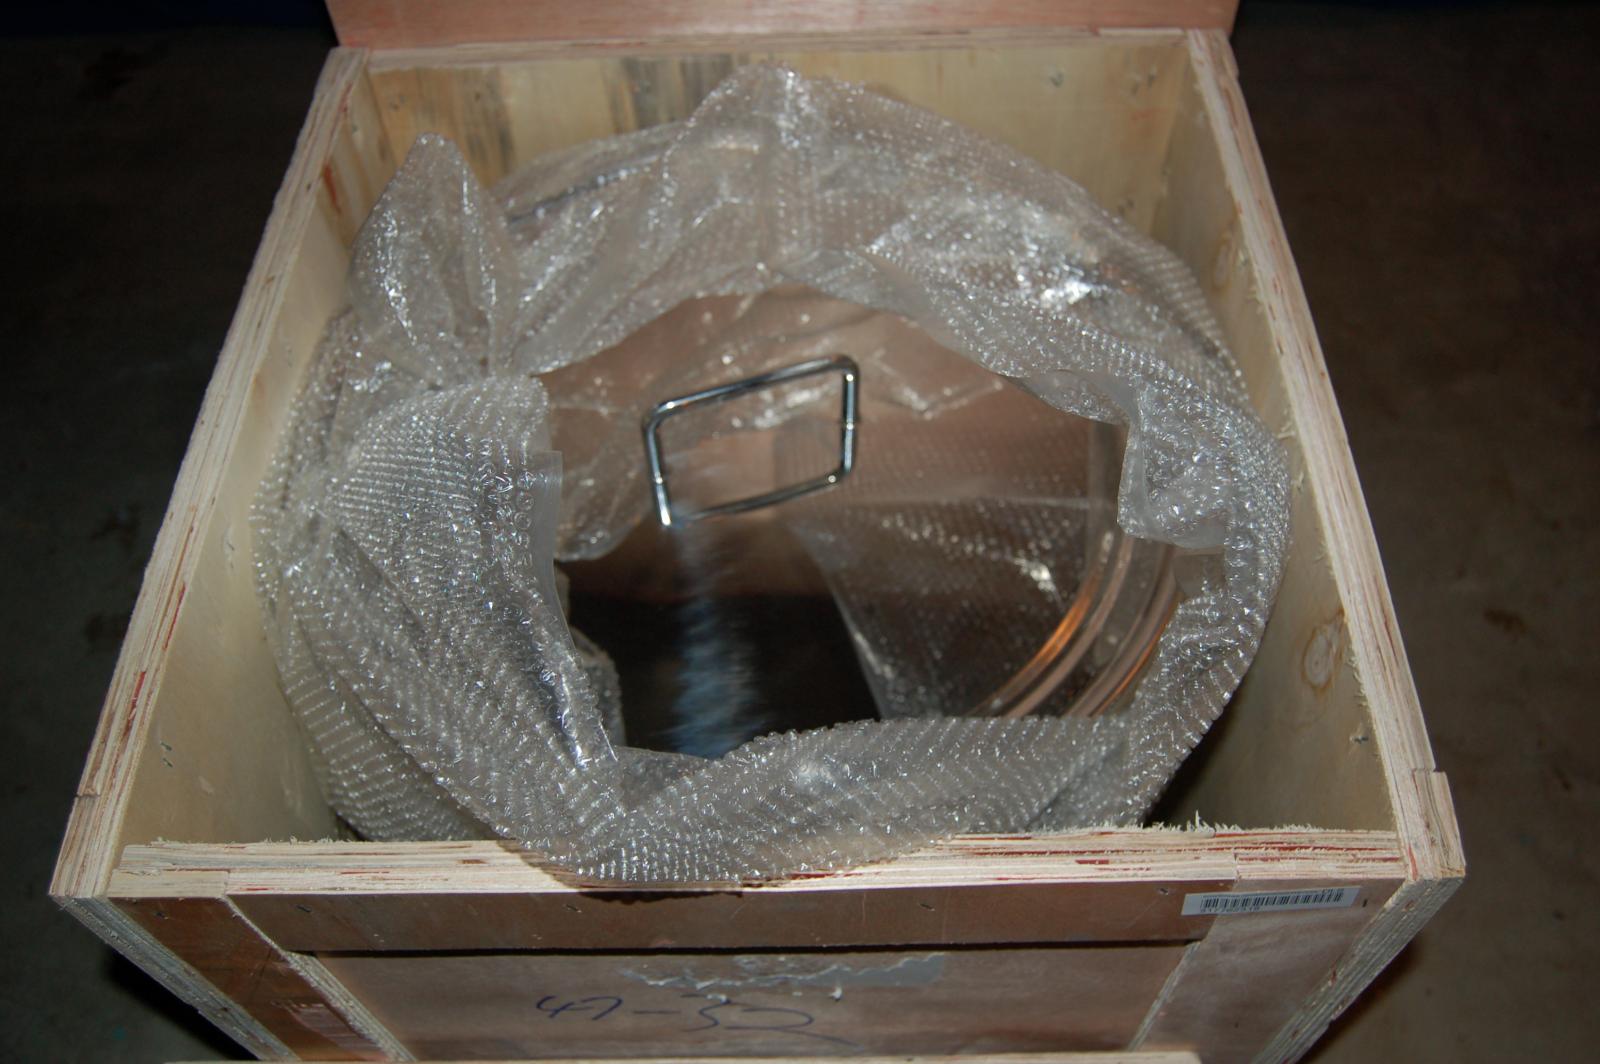
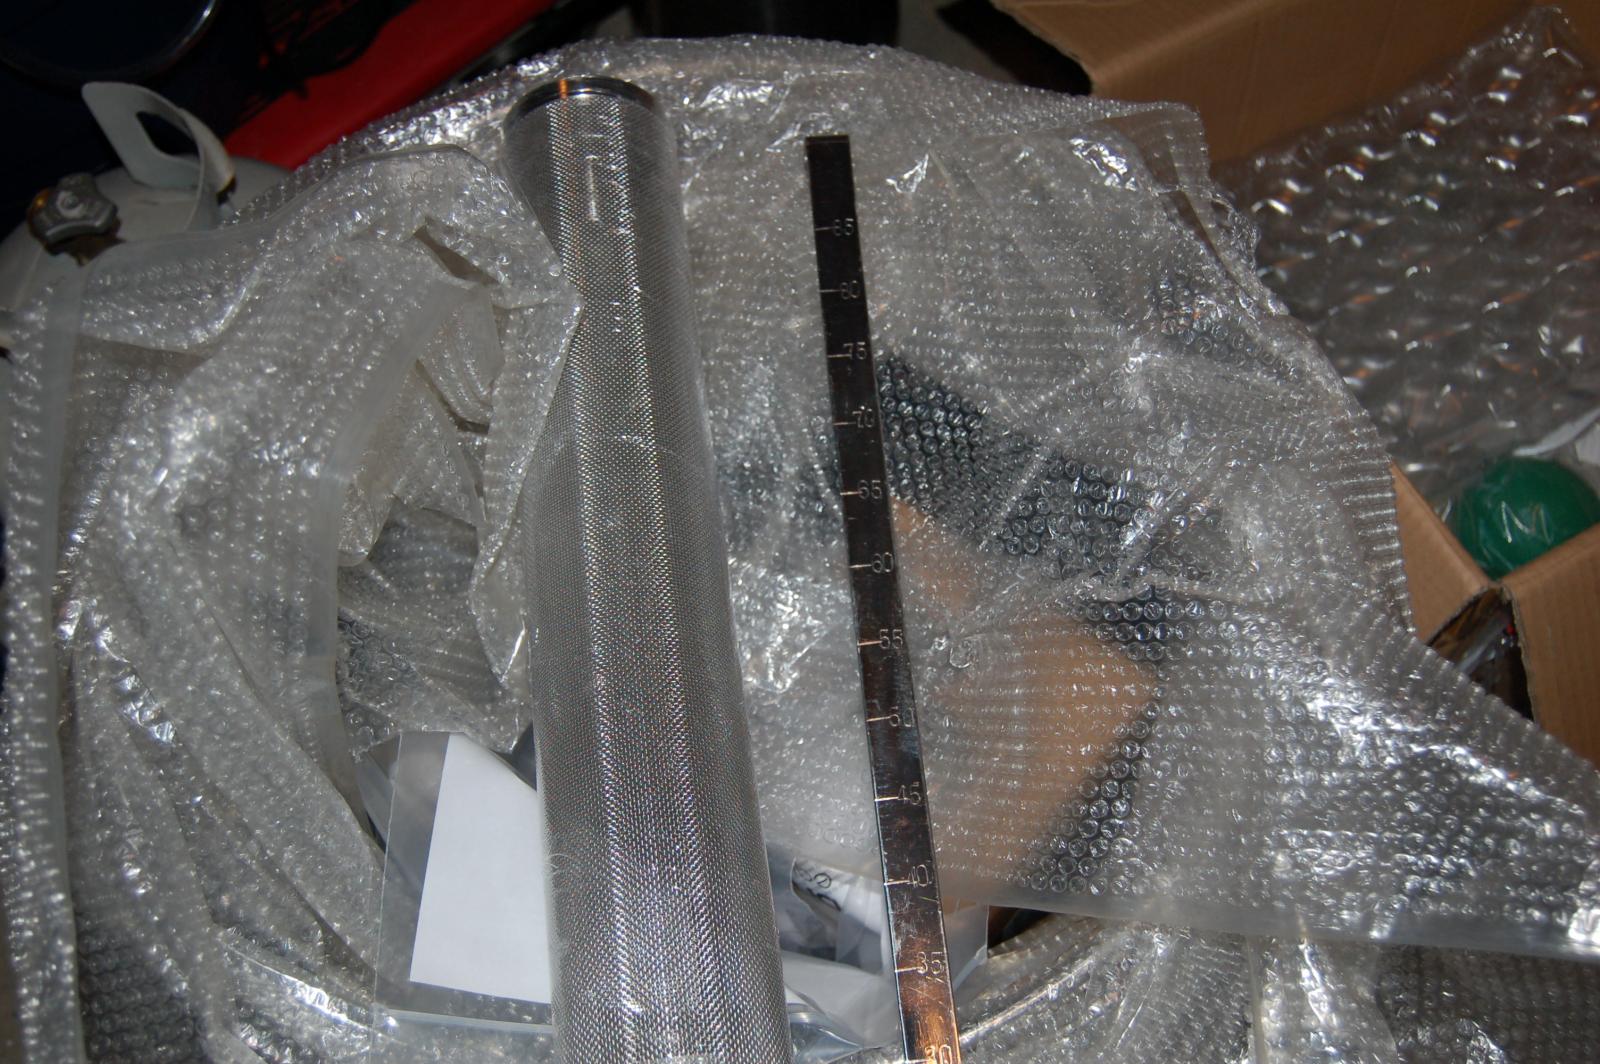
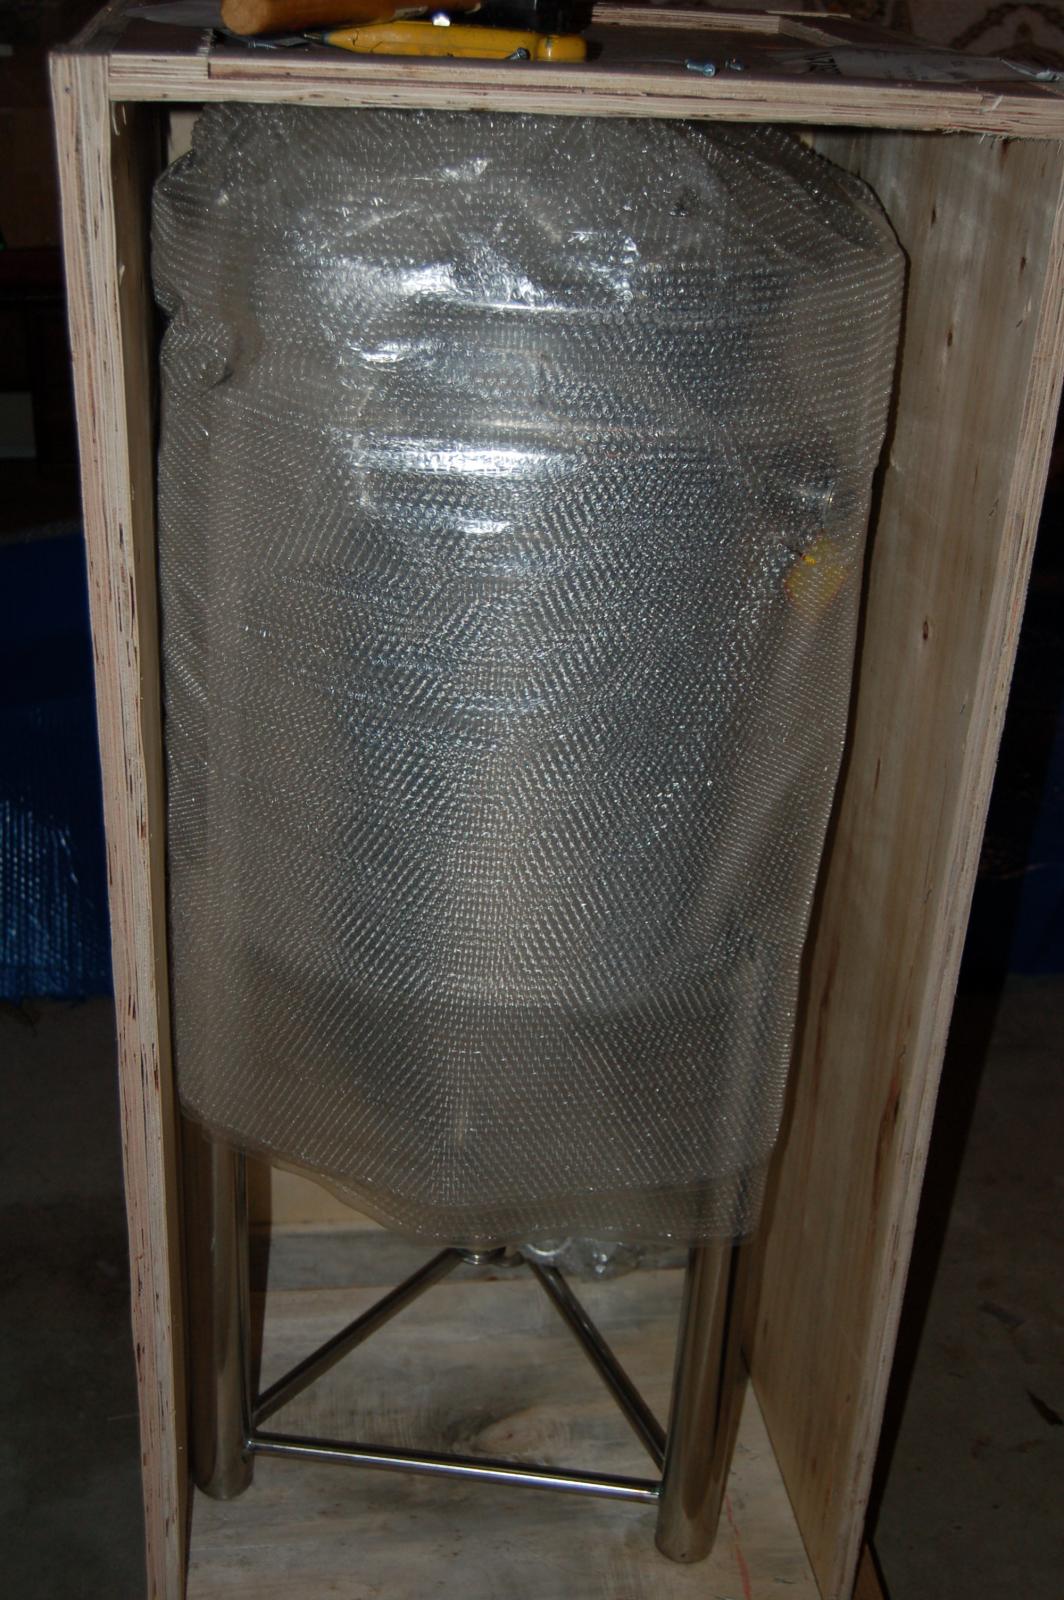
First is the view inside the smaller crate, this is the mash colander portion and second is a photo of the packing inside along with the hop basket and volume gauge. I ordered the keg filler, lifting cables and the dual ETC options. That is probably all inside the colander. I'll have to unpack the rest tomorrow.
Third photo is the main 3-in-1 unit inside the crate and finally, a peek under her skirt

On a side note: it is very annoying to me to see all those brown stains on my garage floor. I built a Glen-L boat three years ago and there is a combination of marine epoxy and varnish dripped on my floor now.


Similar threads
- Locked
- Replies
- 15
- Views
- 3K
- Replies
- 17
- Views
- 2K
- Replies
- 7
- Views
- 763
- Replies
- 1
- Views
- 711
