
Folks, I've asked several jockey box questions here/elsewhere and mostly just learned through failure. I'm happy to say my little trash can kegerator project has been finished and it finally works as well as I had hoped. Below are the details with pics. Enjoy.
The main concept was based around keeping every possible part of the beer circuit insulated and fully cooled, being able to break down the parts (within reason) for travel, and having a large enough storage area to hold a 1/2 barrel. The biggest hurdle was deciding to put a beer shank through the bottom of a chest cooler, due to the potential leakage of ice water if done incorrectly.
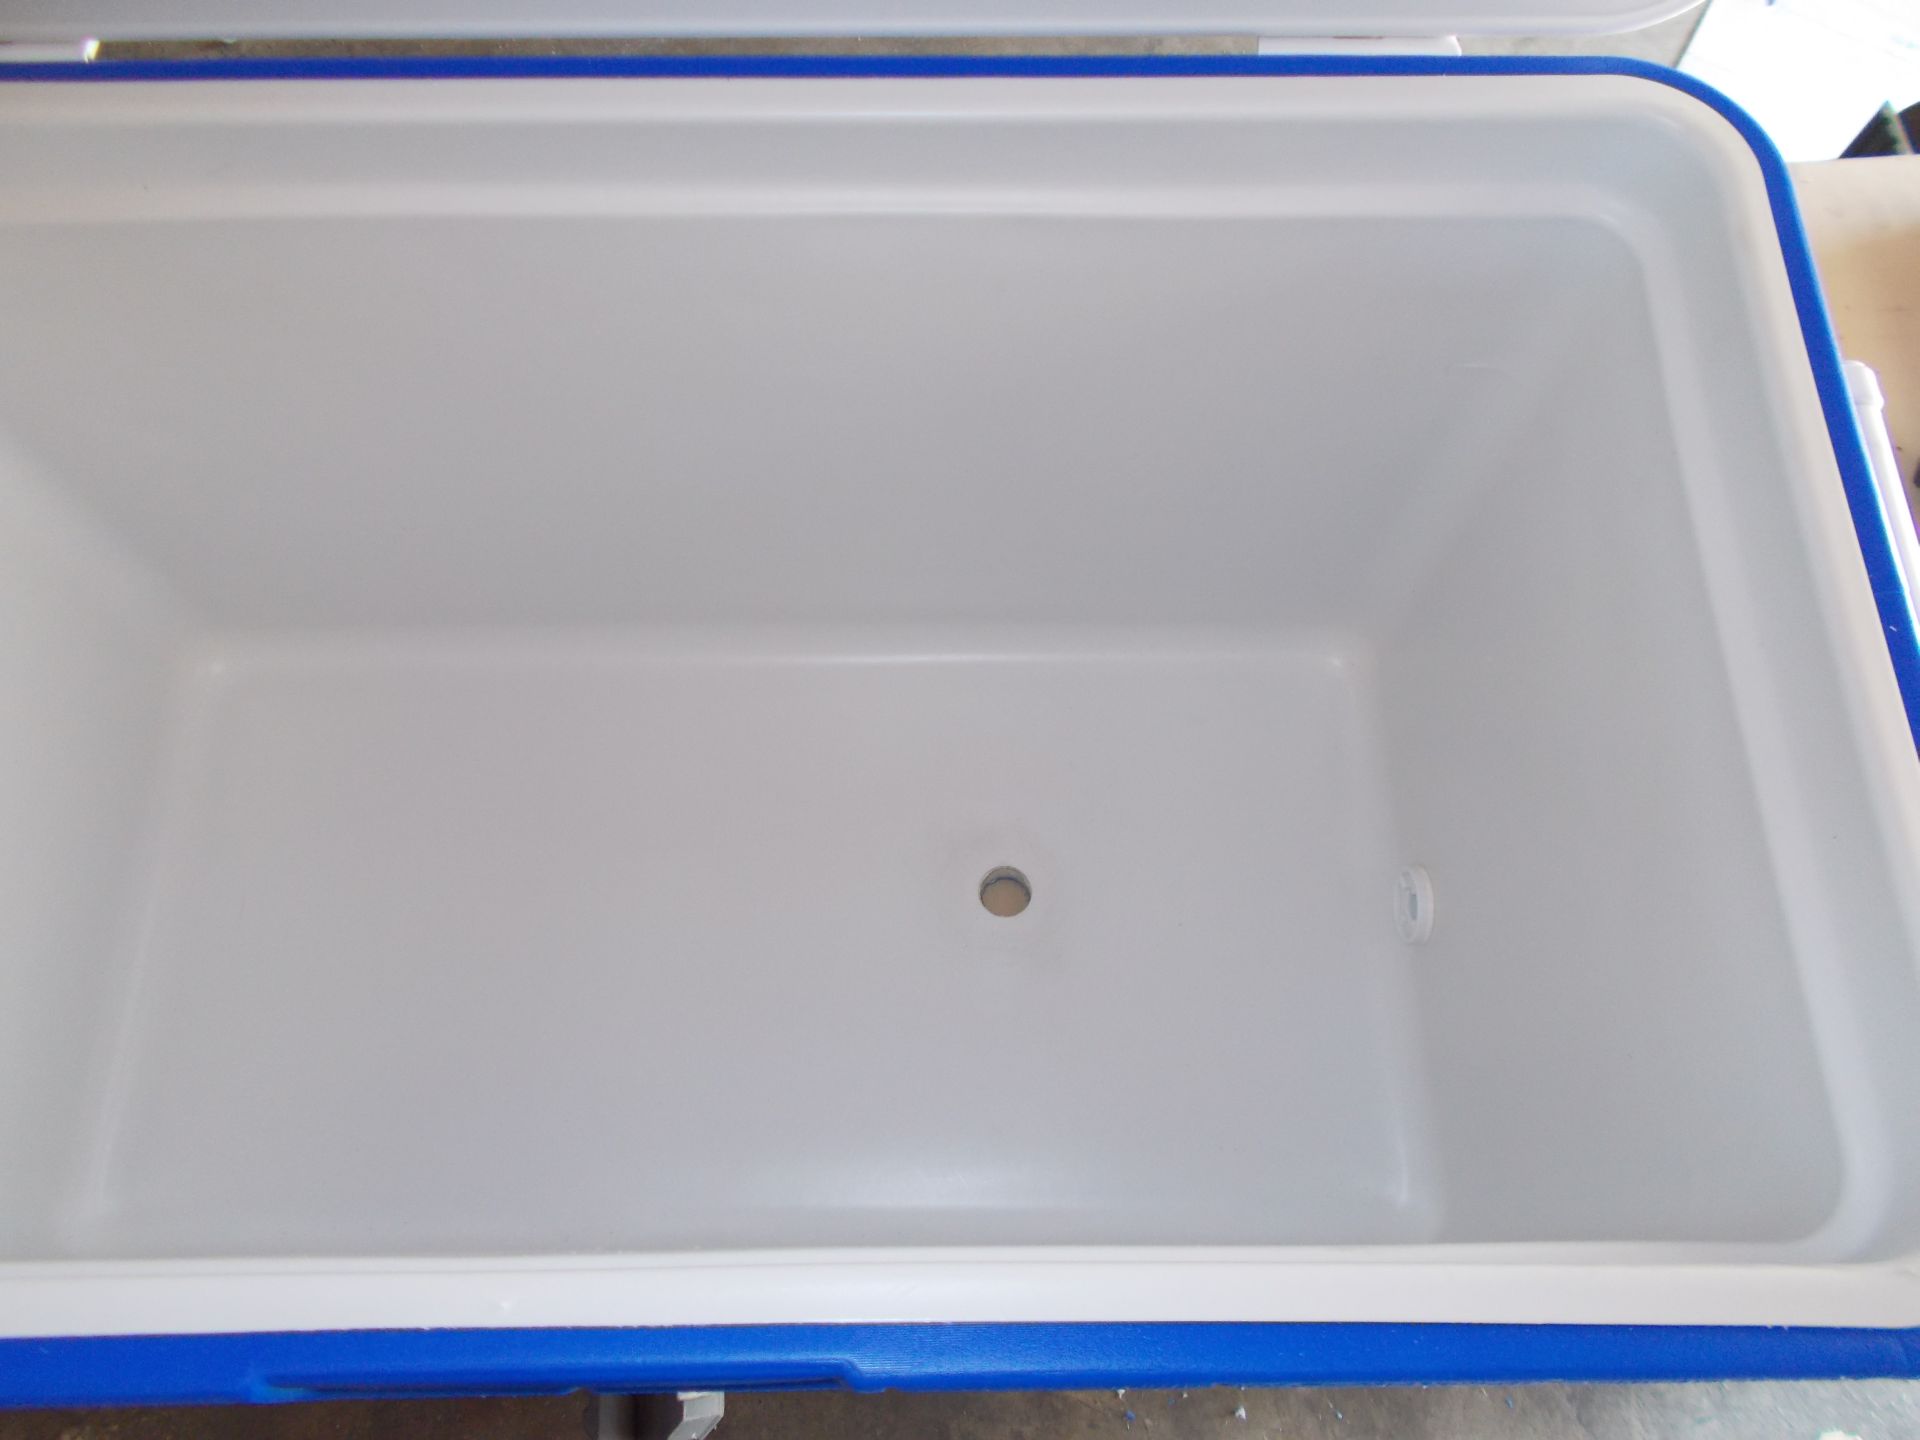
Here is the first 7/8" hole in the bottom of a fairly popular Coleman 48 quart cooler. While larger than I needed, this is one of the smaller coolers that comes with a drain, the inside and outside dimensions are as rectangular as plastic coolers come these days, and the walls are fairly rigid, so it made a good choice, especially for <$30.
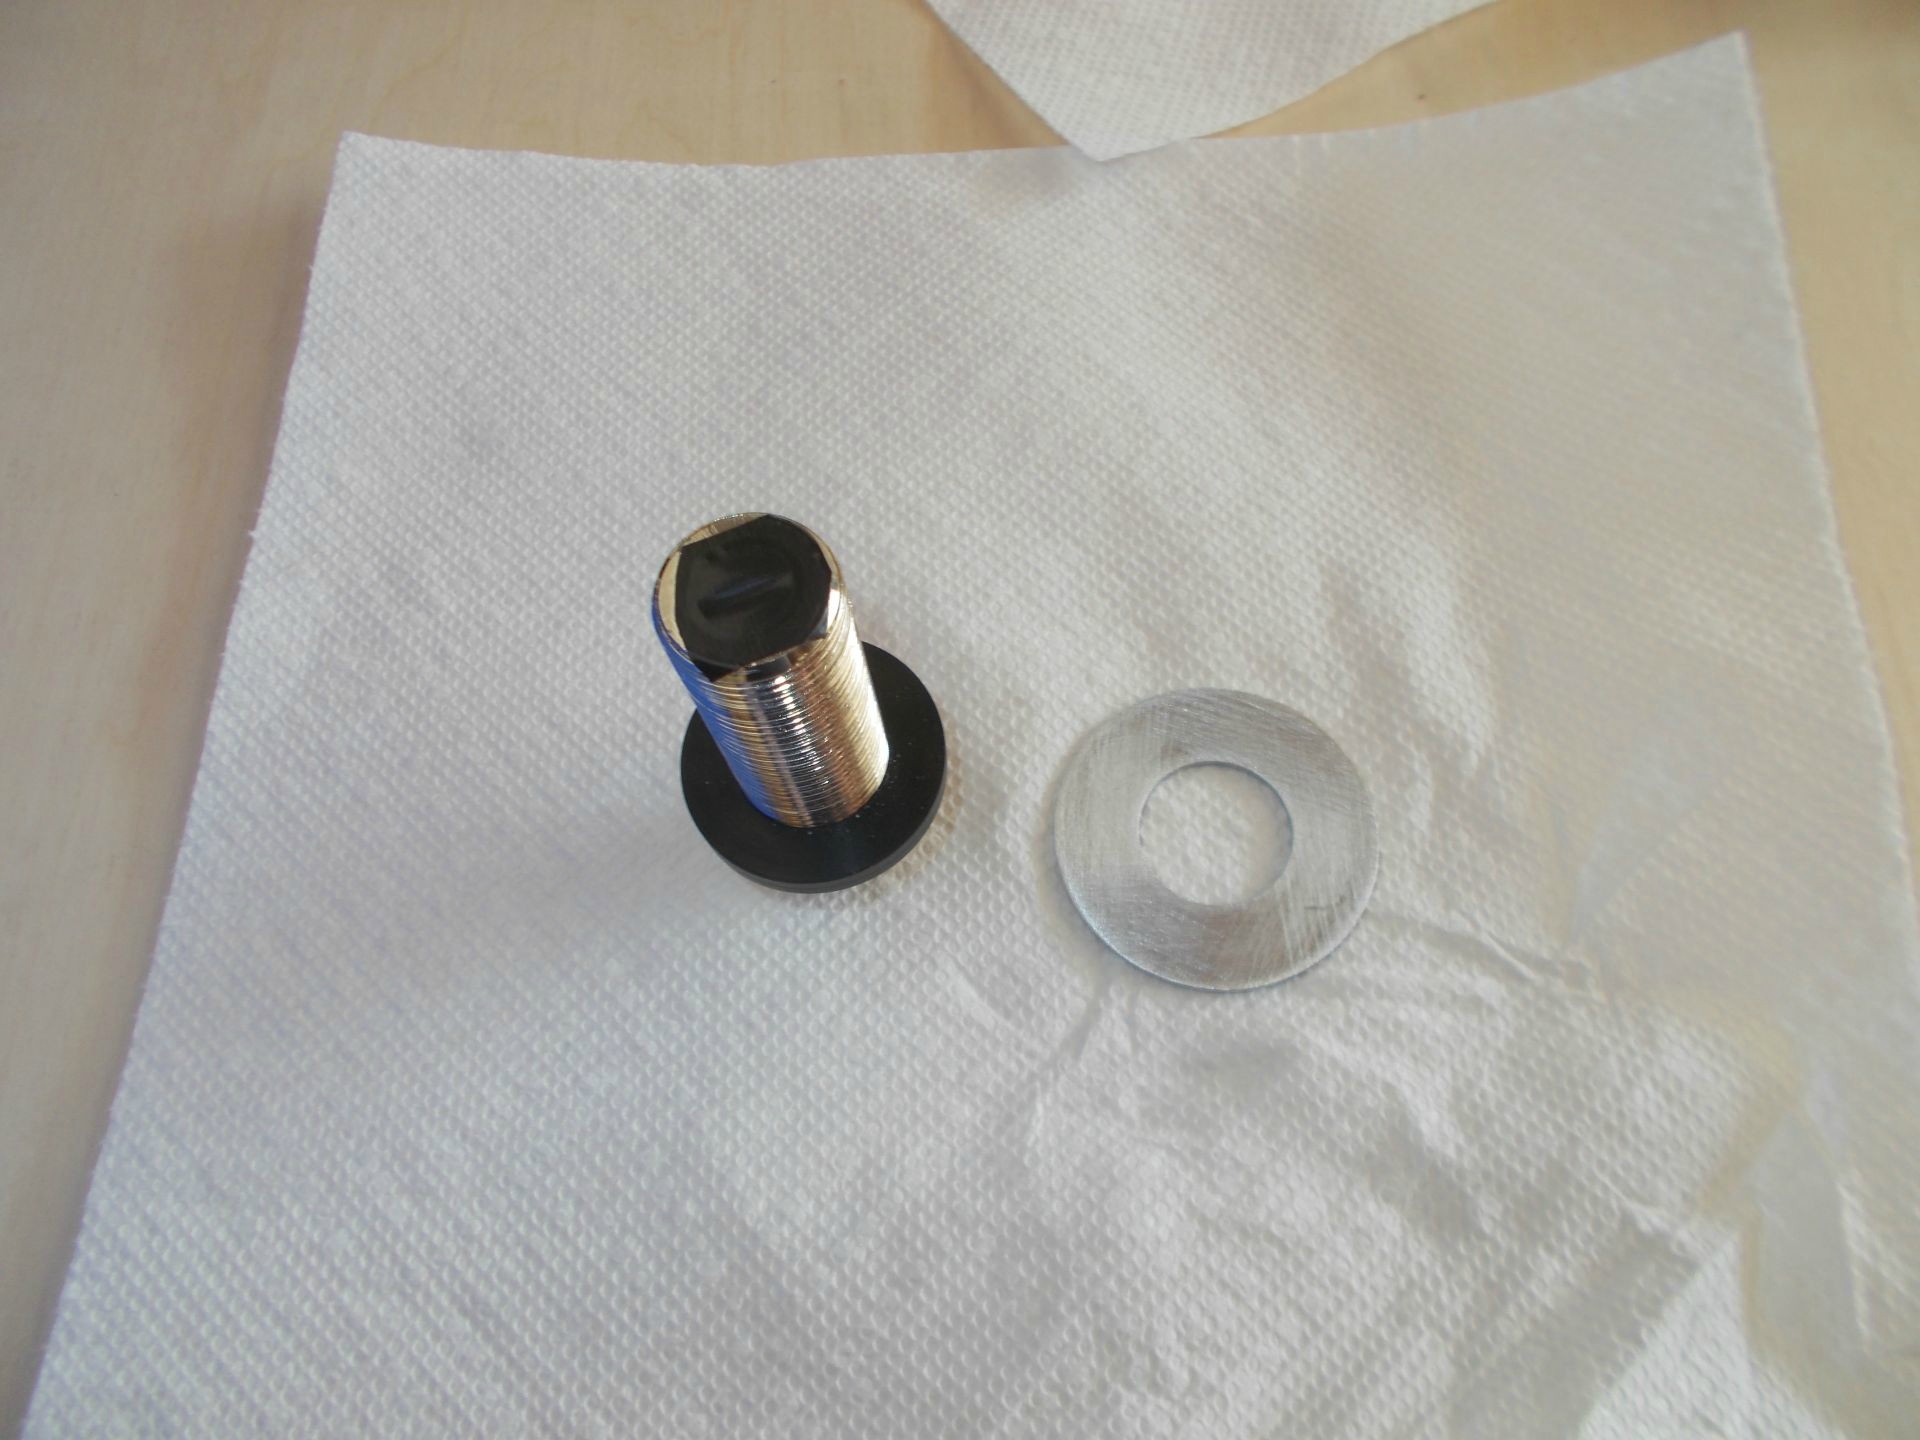
This is the beer shank and a 7/8" ID aluminum washer that has been scuffed up to accept sealer. I decided to include the washer on the critical inside surface to reinforce the plastic, since tightening the beer shank nuts was definitely going to crush and distort the cooler walls at even the slightest torque. I then scuffed the area around the hole in the cooler, applied 3M 5200 Marine Adhesive/Sealant to the washer face and pressed it down onto the cooler bottom, centering it over the hole. Then I assembled the shank through the cooler and aluminum washer with a neoprene gasket inside and out. The outside gasket is not necessary for sealing purpose, but I hope it may provide some extra springiness to keep the shank nuts from backing off while under very low torque. After tightening both nuts with two 30mm deep sockets held by hand until the cooler walls crushed a bit and just tight enough so the nuts wouldn't back off over time, I bedded the inside fitting to the cooler with more beads of 3M 5200. It was fairly easy to smooth out with a wet finger. Then I covered that with a damp paper towel to help it set up and keep the sealer clean until fully cured.
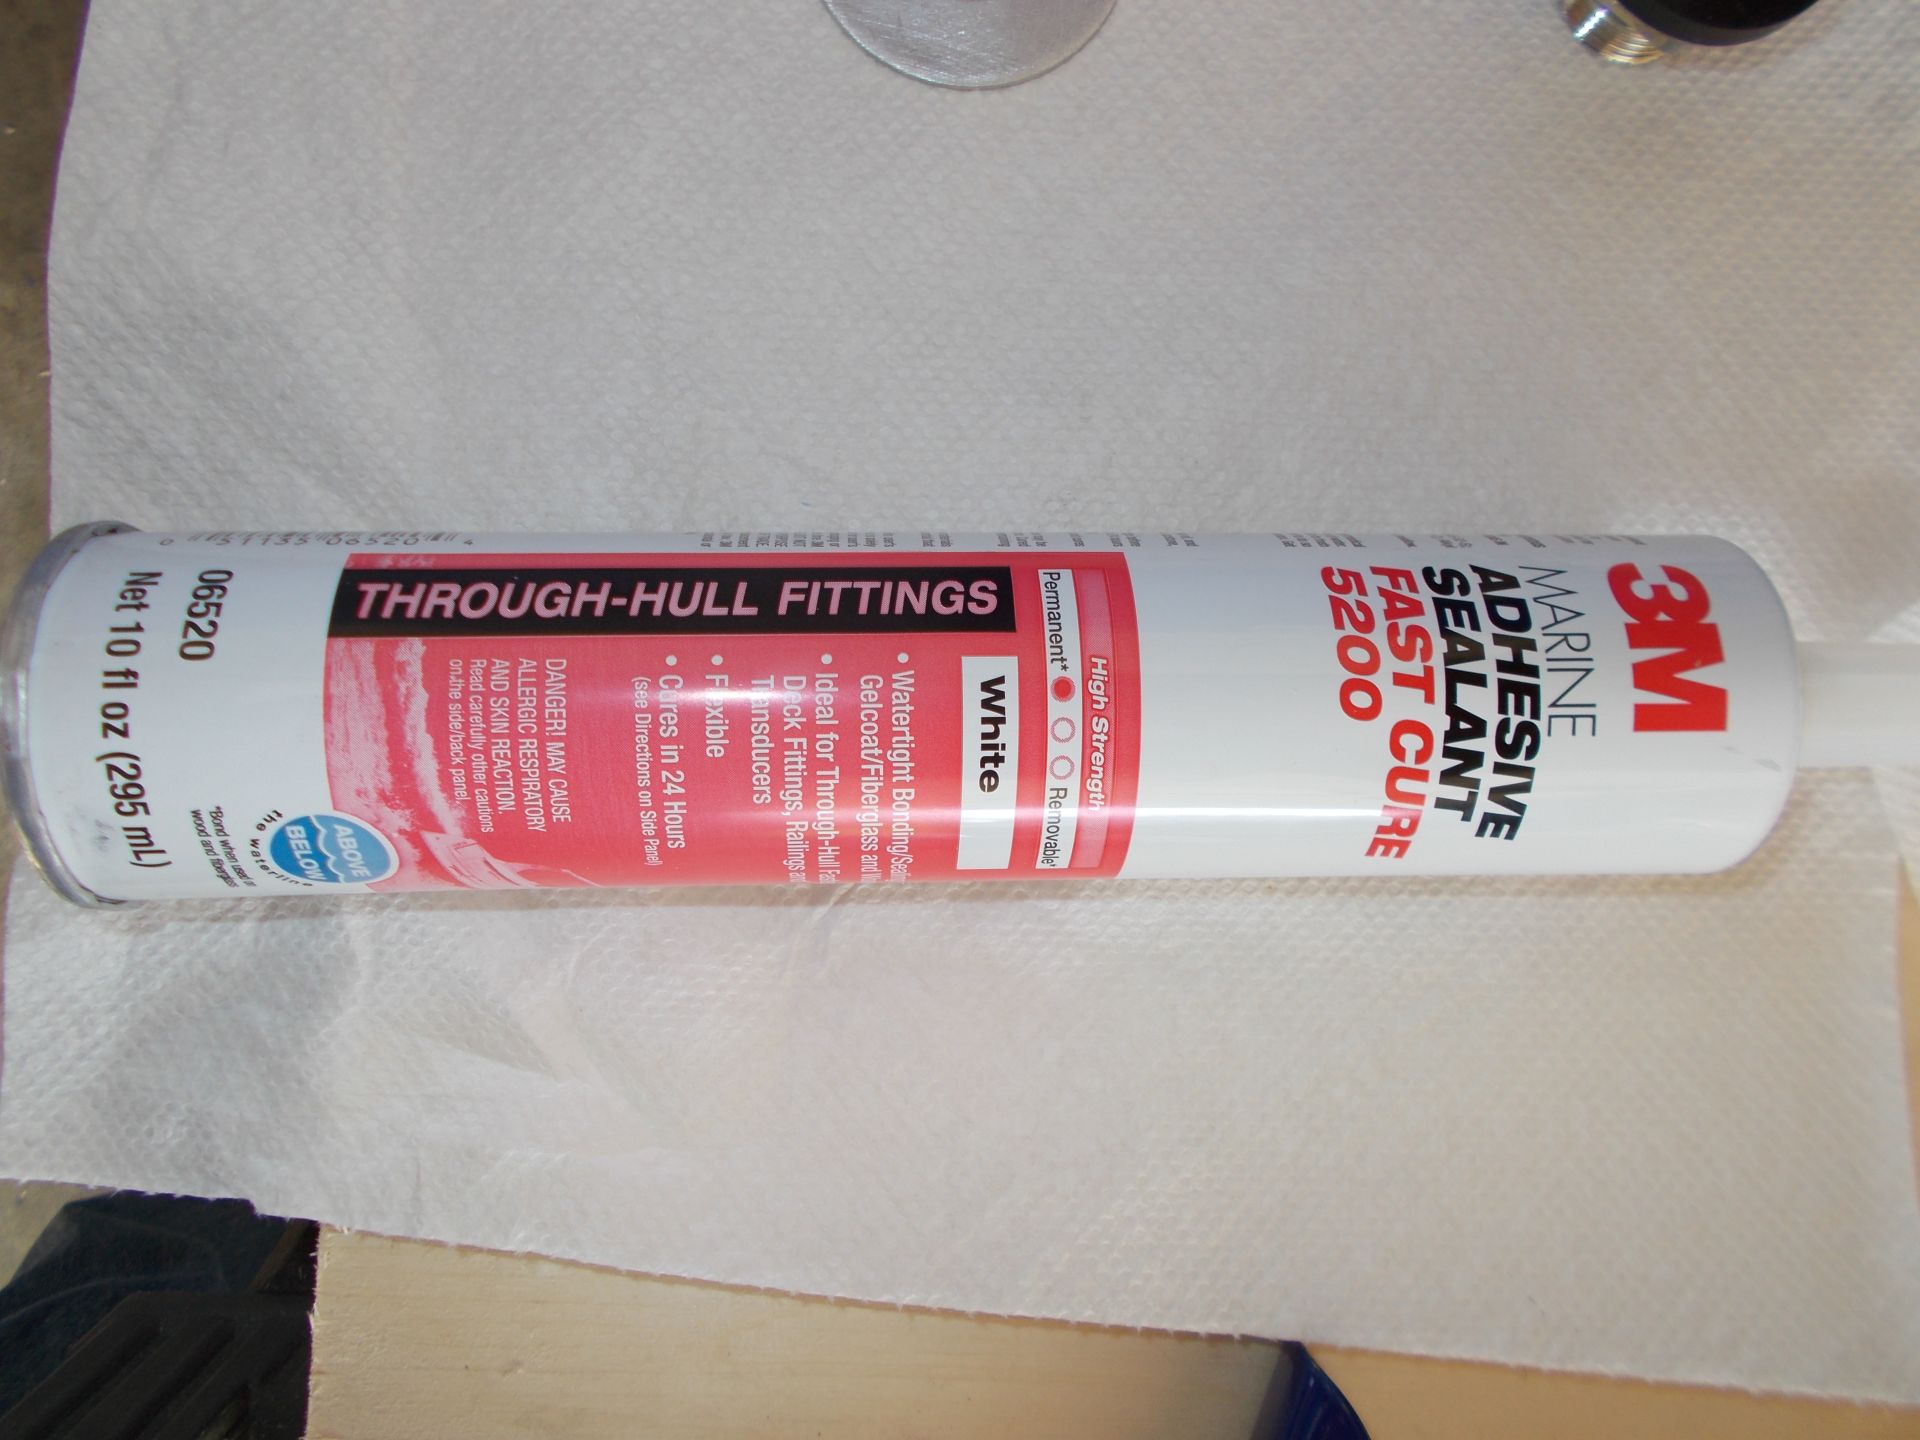
Expensive marine grade sealer. Used only one of the 10 ounces and had to throw the rest away since the tube contents start to cure immediately upon opening.
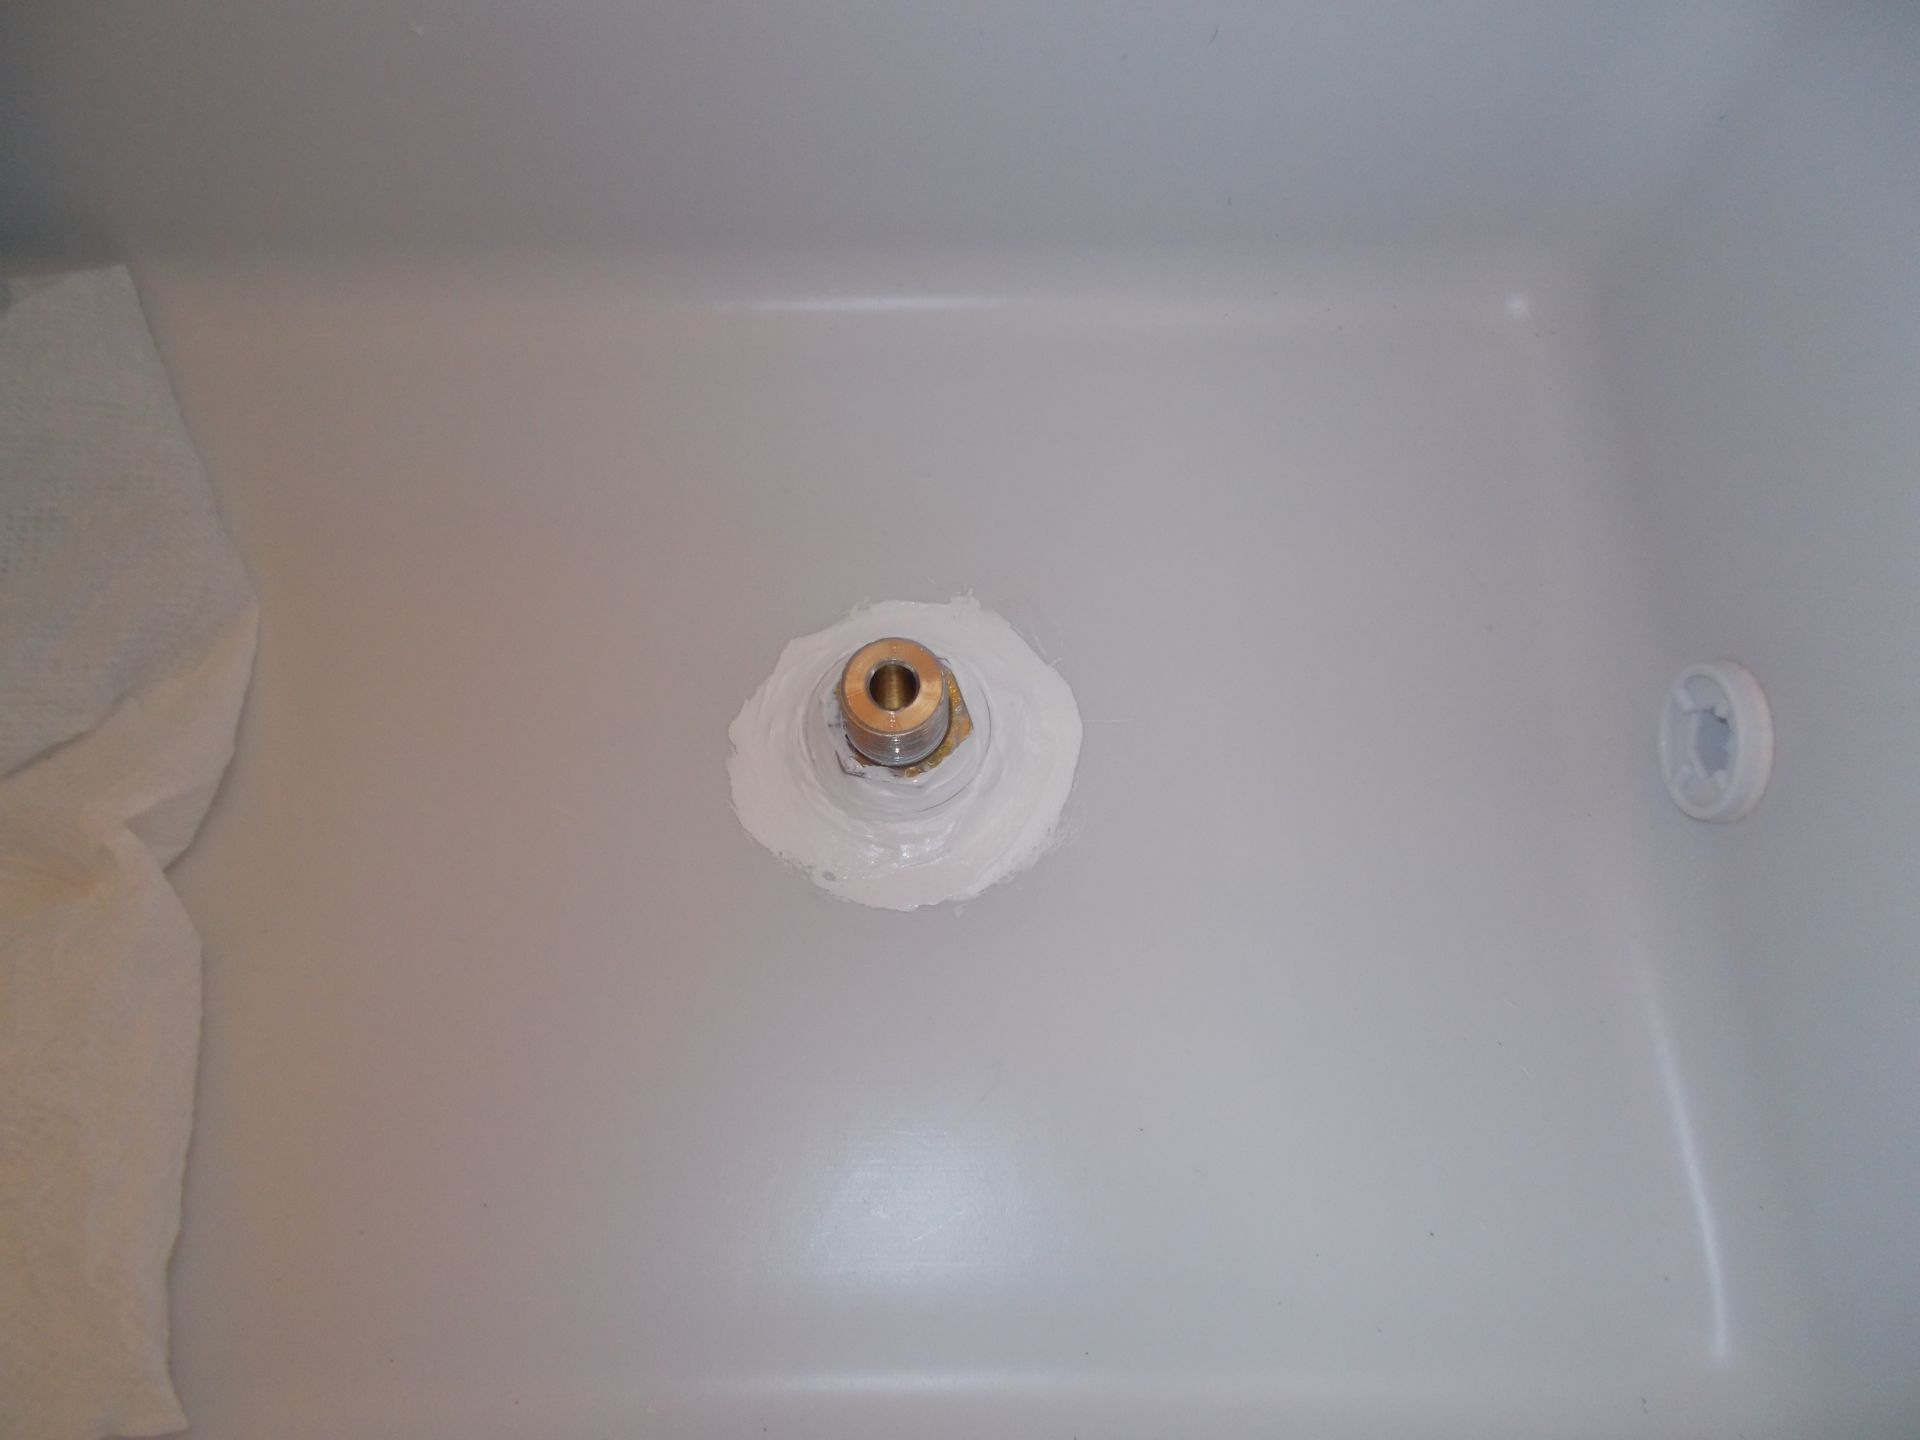
This is the finished shank installation with 3M 5200 sealer around the nut and washer.
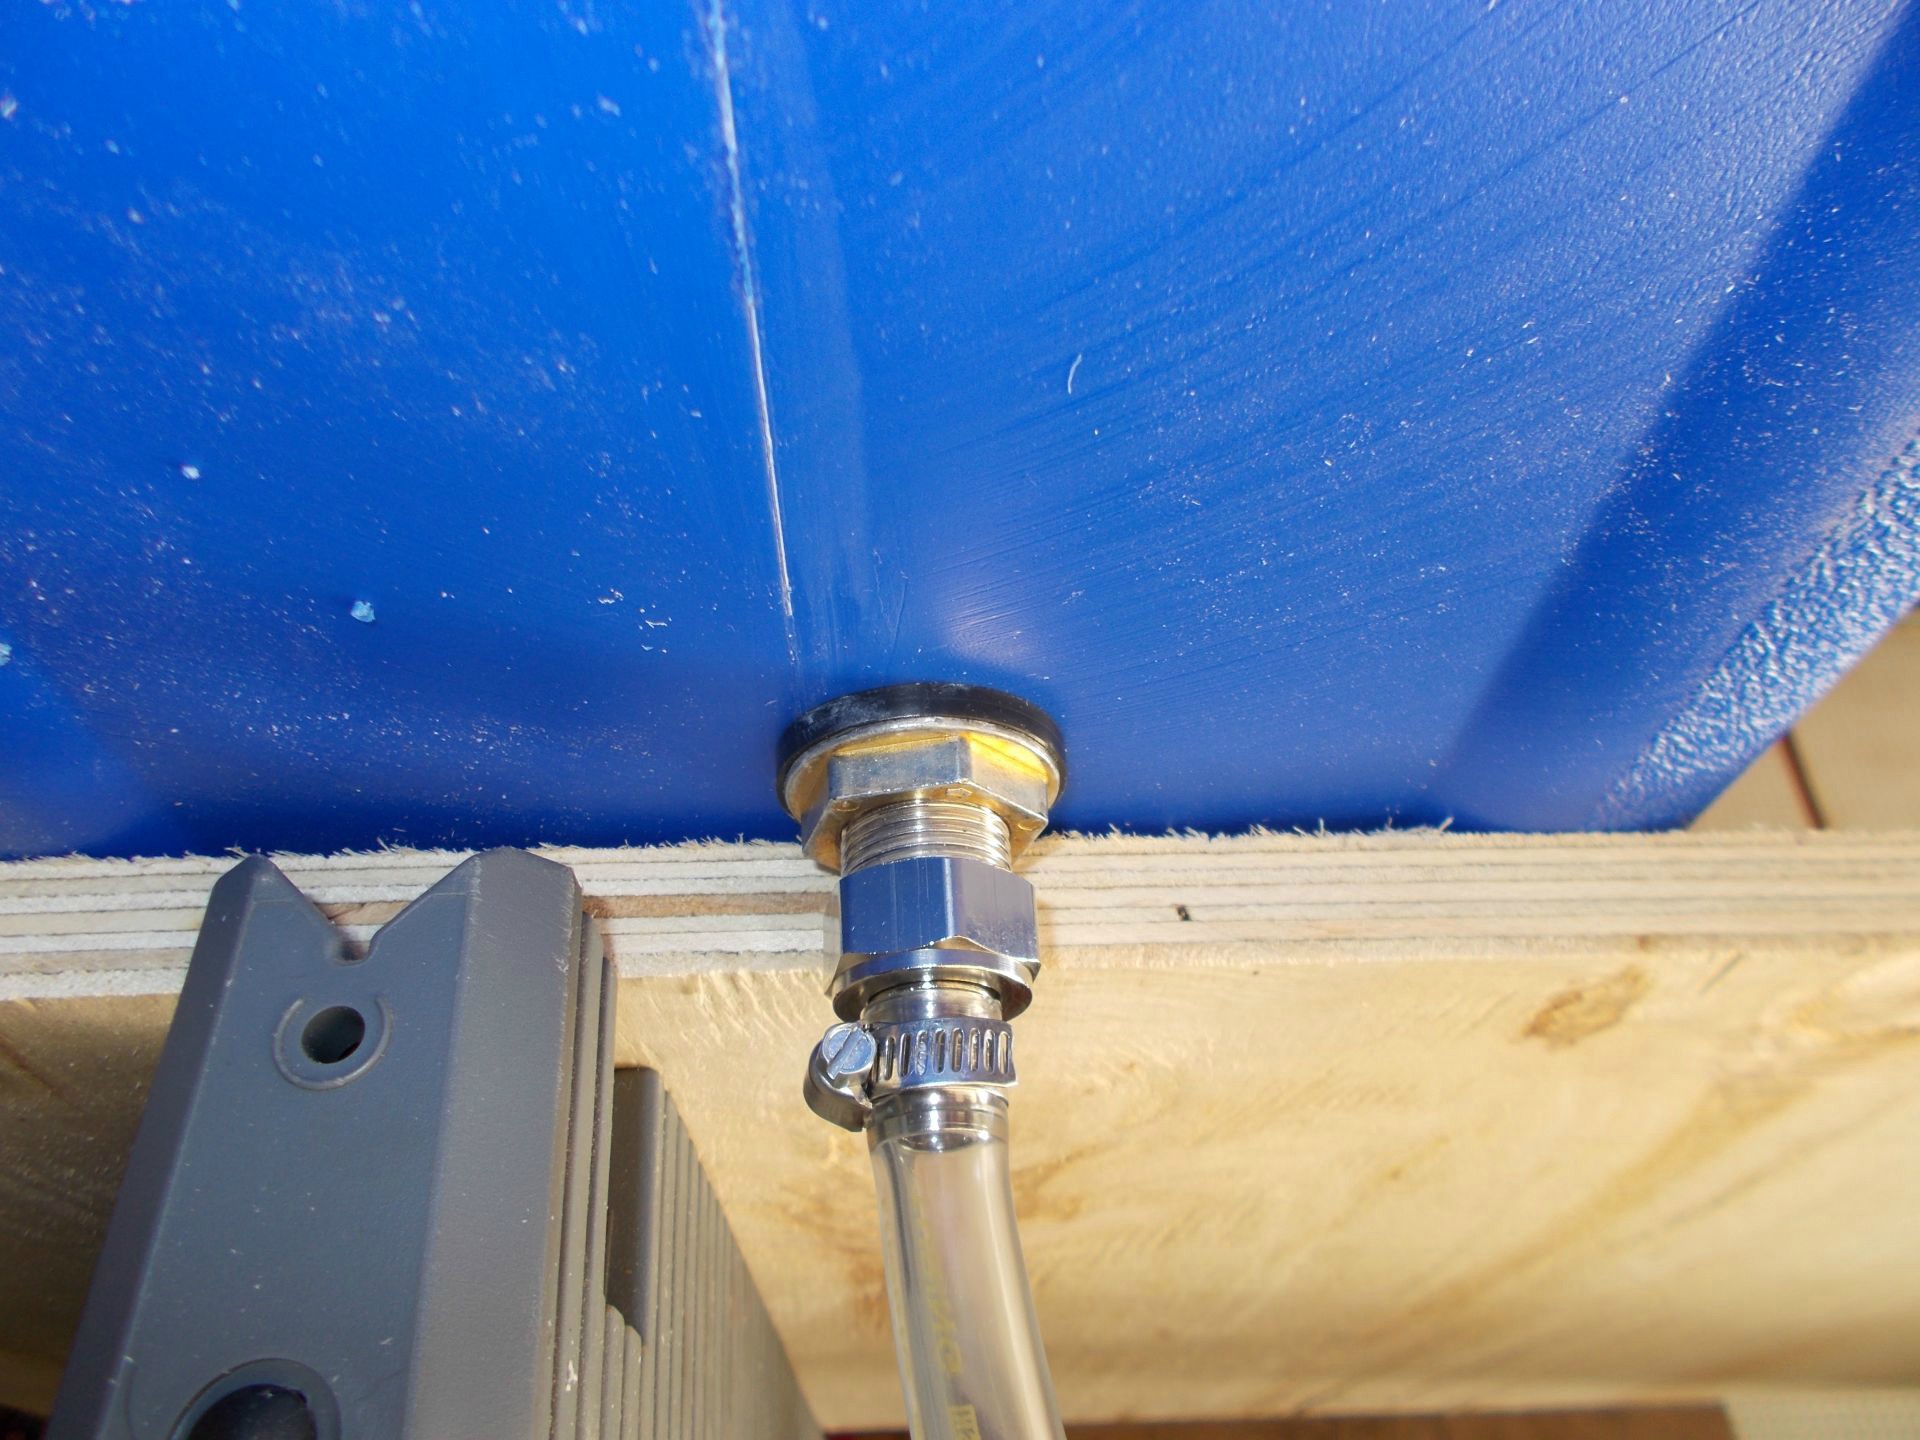
Here is a shot of the bottom of the sealed shank.
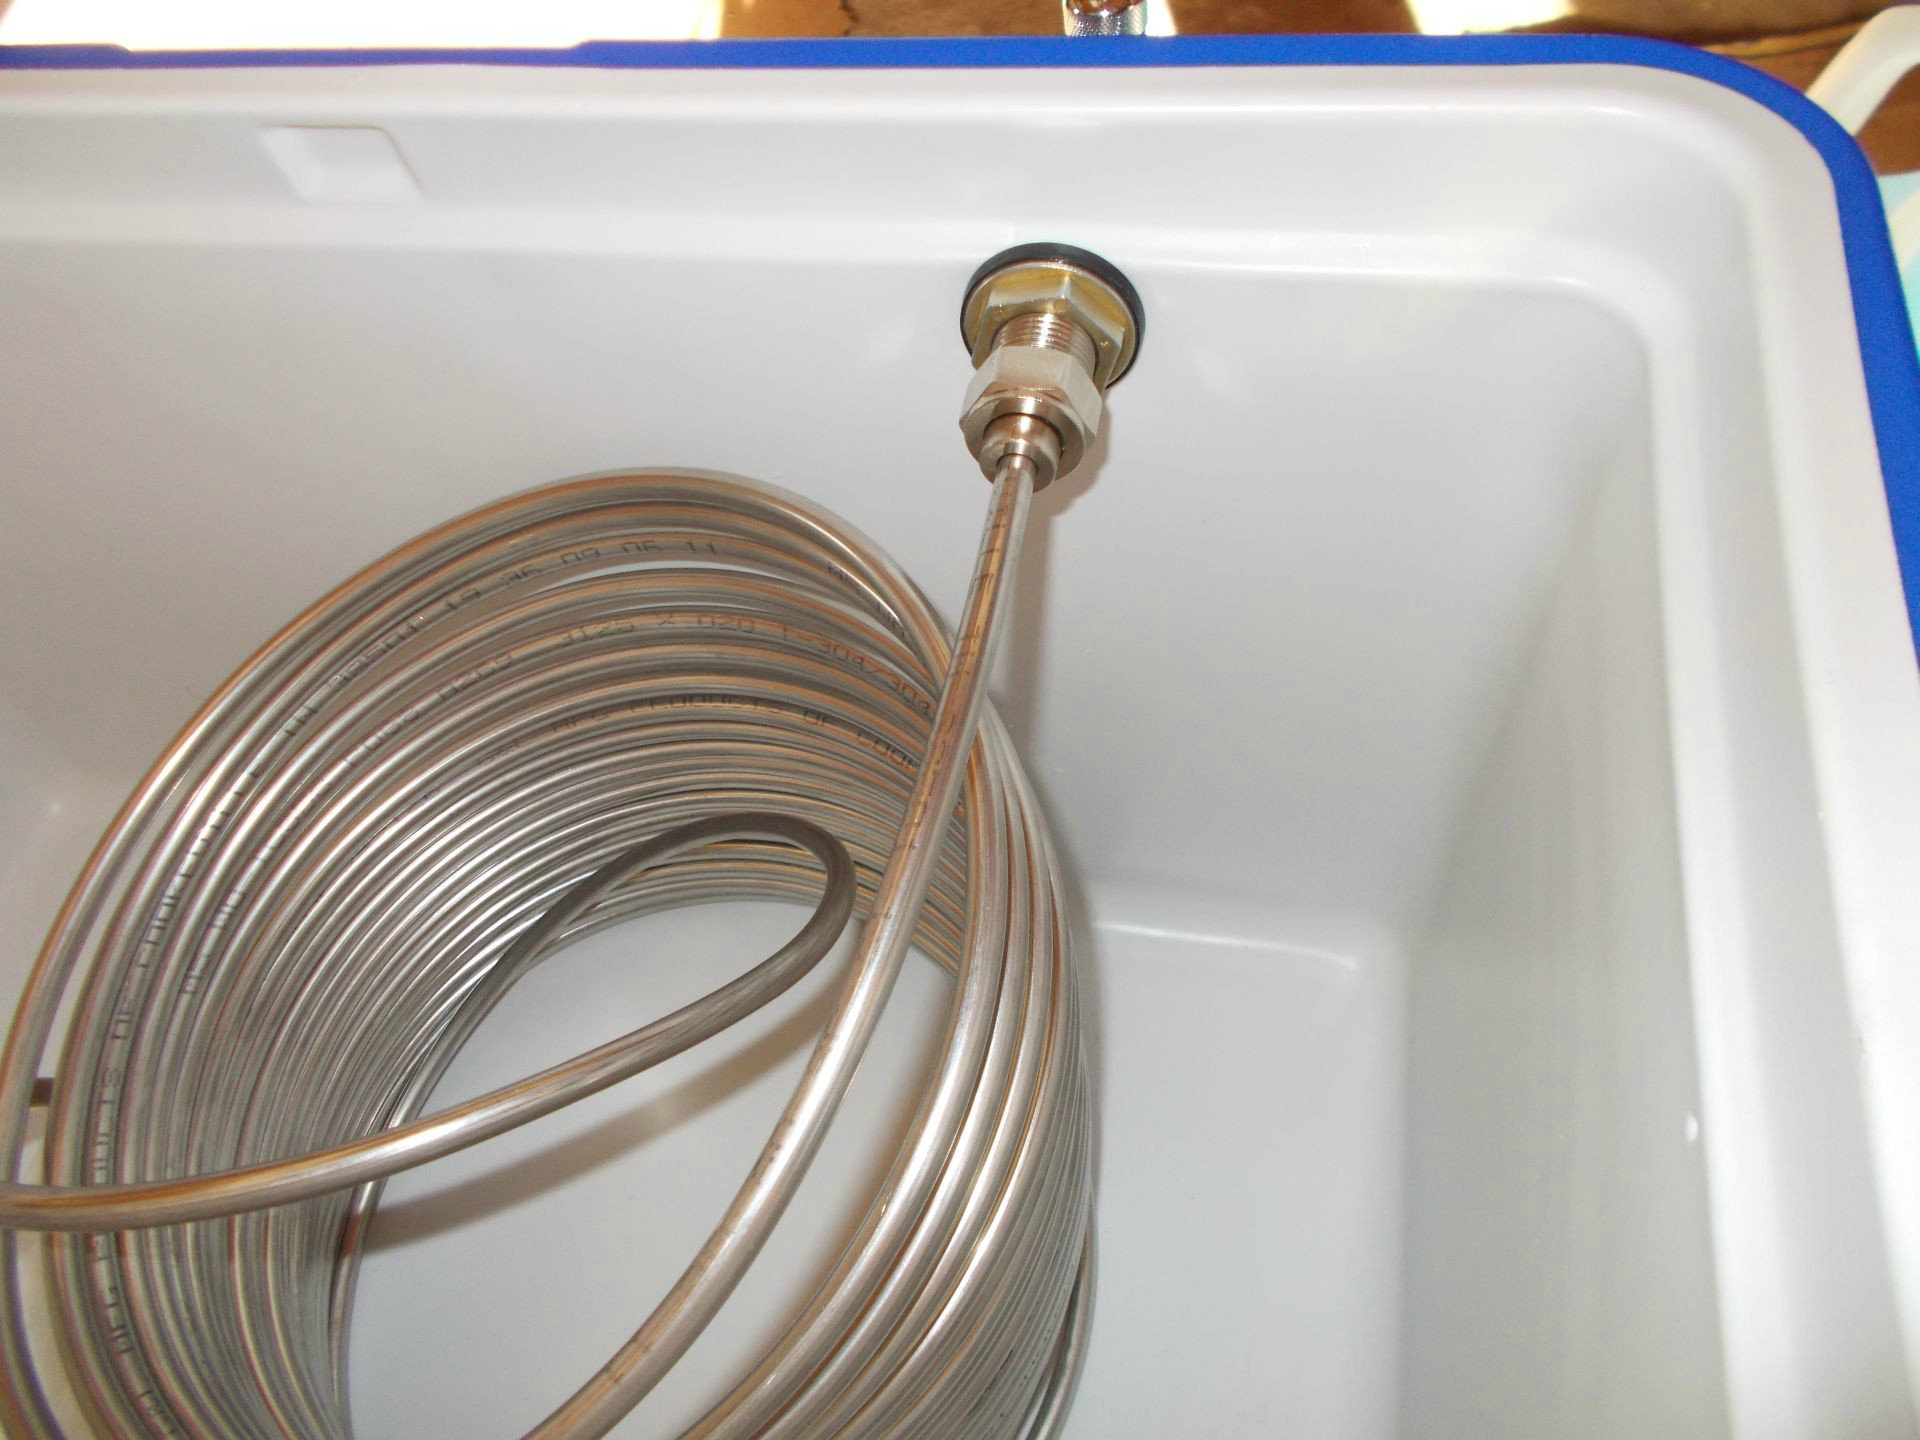
Like an idiot, I managed to start drilling the faucet hole before double-checking the inside wall. The idea was to have it as high as possible, but when the hole went through I realized it should have been at least 3/8" lower. Luckily it works and the lid closes since the part of the lid that fits down into that inner recess is shallower than the step in the wall. That lucky coincidence saved me a cooler and more sealer. The 5/16" ID coil went in without any problems. I just had to pull out on one end and bend it to the bottom to fit the unorthodox bottom shank. All jockey box parts were purchased through nybrewsupply.com, whose employees were very helpful on the phone.
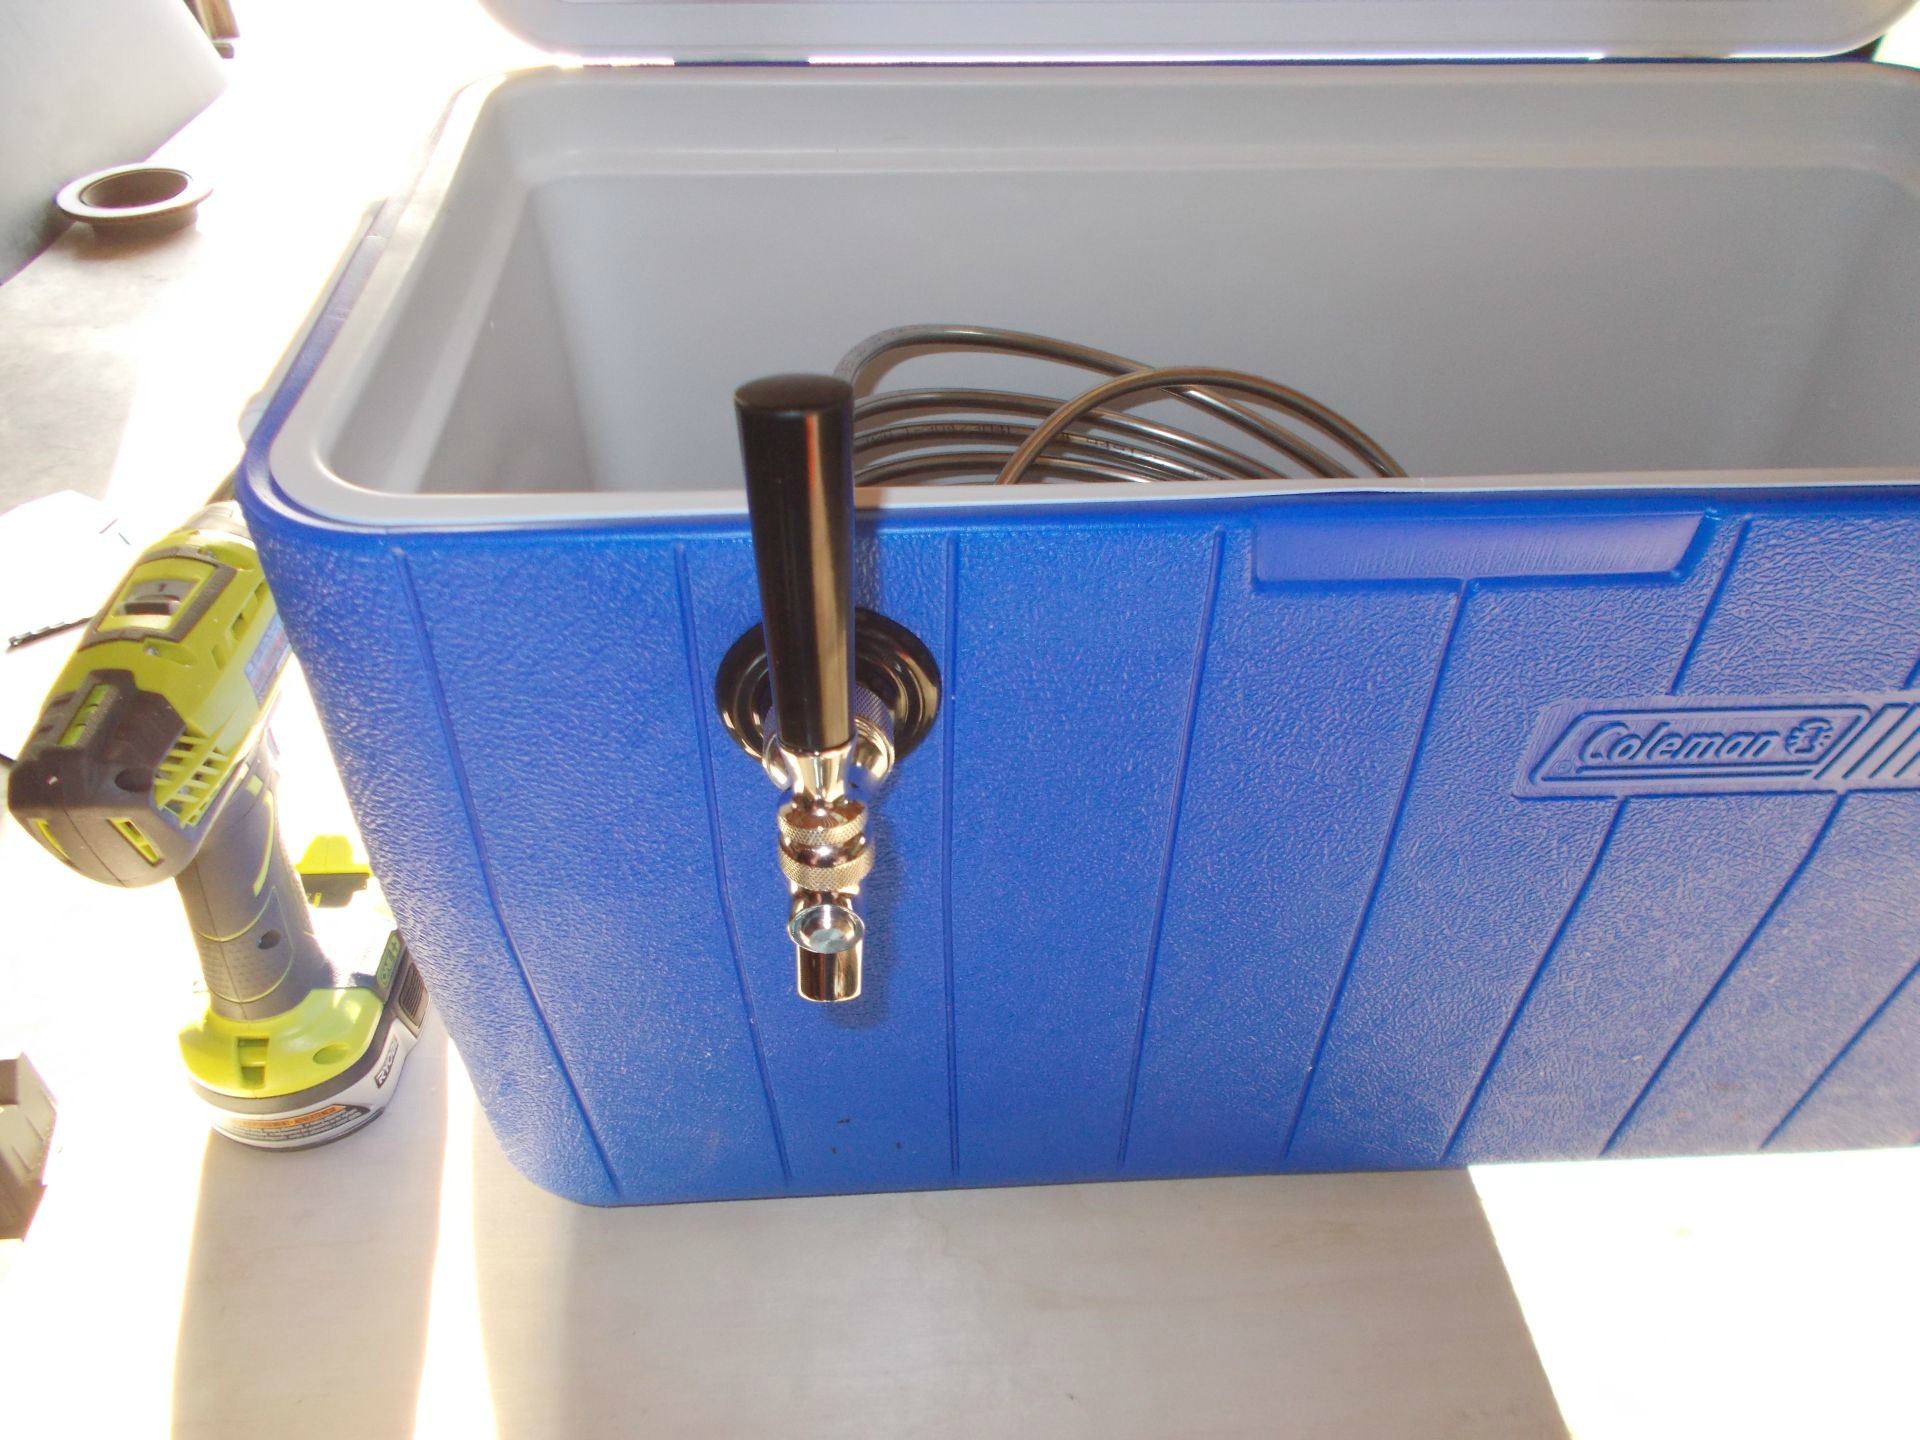
Faucet installed.

The cooler is going to sit on a platform so that everything stands within a fairly small footprint. This platform will then rest on a Brute 44 gallon trashcan. This is the standard version, not the "vented" version that has more interior contours. The standard Brute can has a fairly even cylindrical interior shape more conducive to the eventual application of insulation. I ran a high speed Scotchbrite disc along the top of the can to smooth out the raised lettering and casting irregularities, then applied a strip of 1/4" thick weatherstrip to eliminate air drafting. There will be several stages of insulation, this is the least of it. The bottom of the trash can is uneven due to the molded grips and the raised center extrusion. I needed to insulate the bottom and the insulation material is not going to withstand a 160lb keg applying such pressure to the base without a solid foundation, especially considering that a keg is supported only by the outer ring of its base.
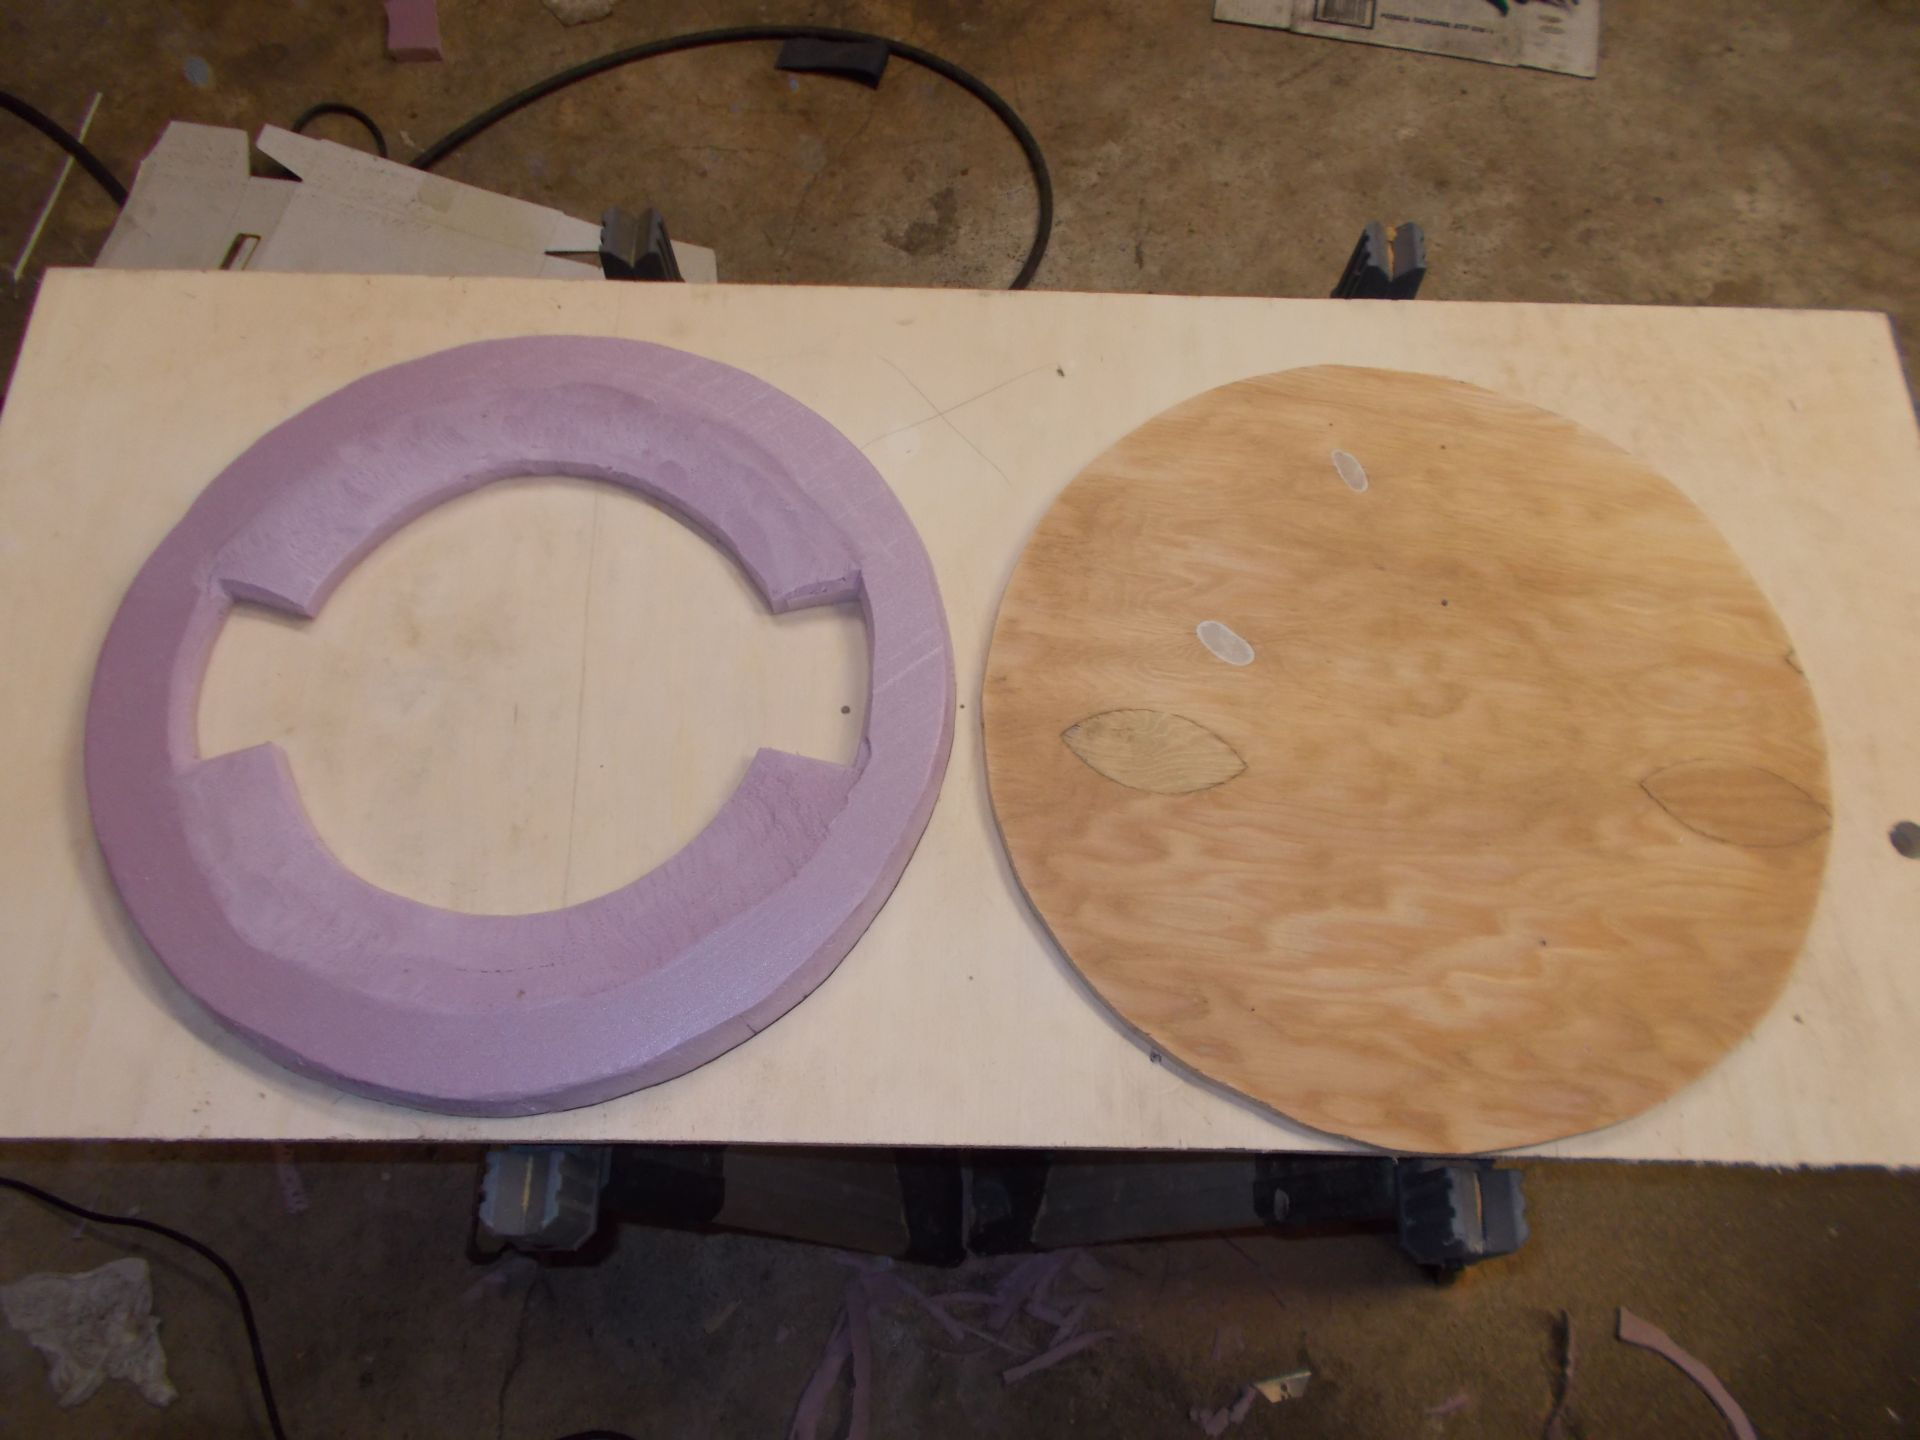
To fill the bottom and keep the overall weight down I decided on rigid foam (Dow Corning 1" thick board) to fill the odd contours, then 1/2" plywood to cap that and provide a flat even surface for the real insulation. The rigid foam required cutting and beveling with razor blade, then final shaping with the high speed Scotchbrite disc. The beveled side went down into the can and was adhered with 3M 77 spray, then the board was placed on top and adhered the same way. That was held in place to dry with a weight on top. Then a bead of sealer was ran around the 1/2 plywood board to the inside of the can for additional stability.
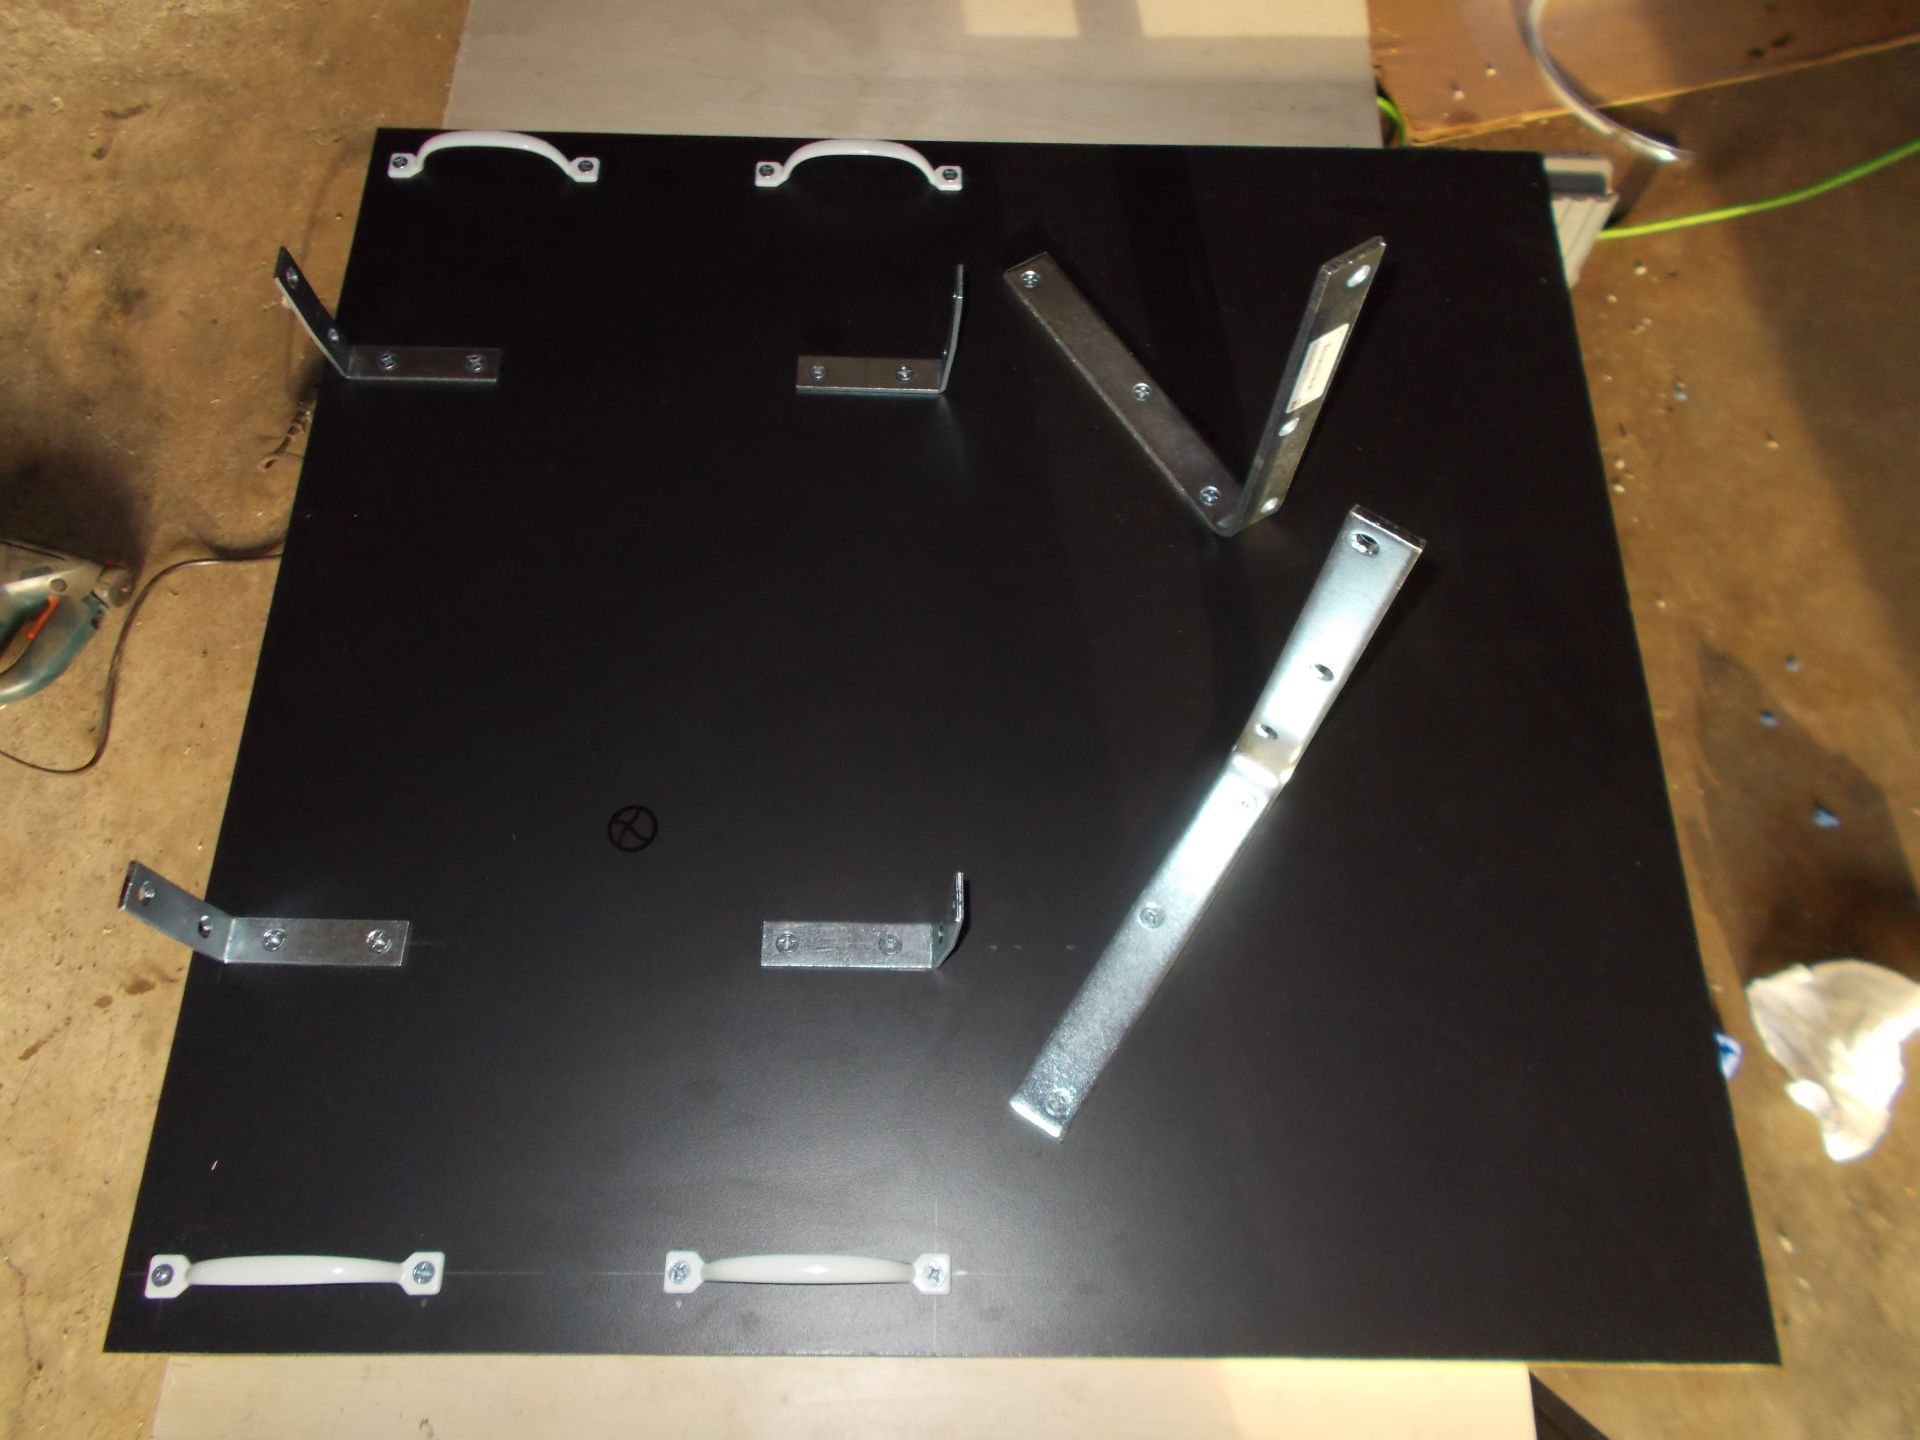
Here is the only full pic of the top "plate" or board that I took. It is not representative of how the final product turned out. The large upright brackets are there to hold the 5lb CO2 bottle. Due to a necessary modification I eventually had to settle on strapping the CO2 bottle to the side of the trash can. The four smaller brackets were bent and placed specifically to align the cooler in place exactly over the through-hole and keep it from sliding around. I used two cheap external gate style pull handles on each side of the cooler mounting area to keep it from sliding sideways and provide a place to hook bungee cords if it became necessary (it didn't). The 3/4" plywood board was covered in some scrap Formica to weather the elements.
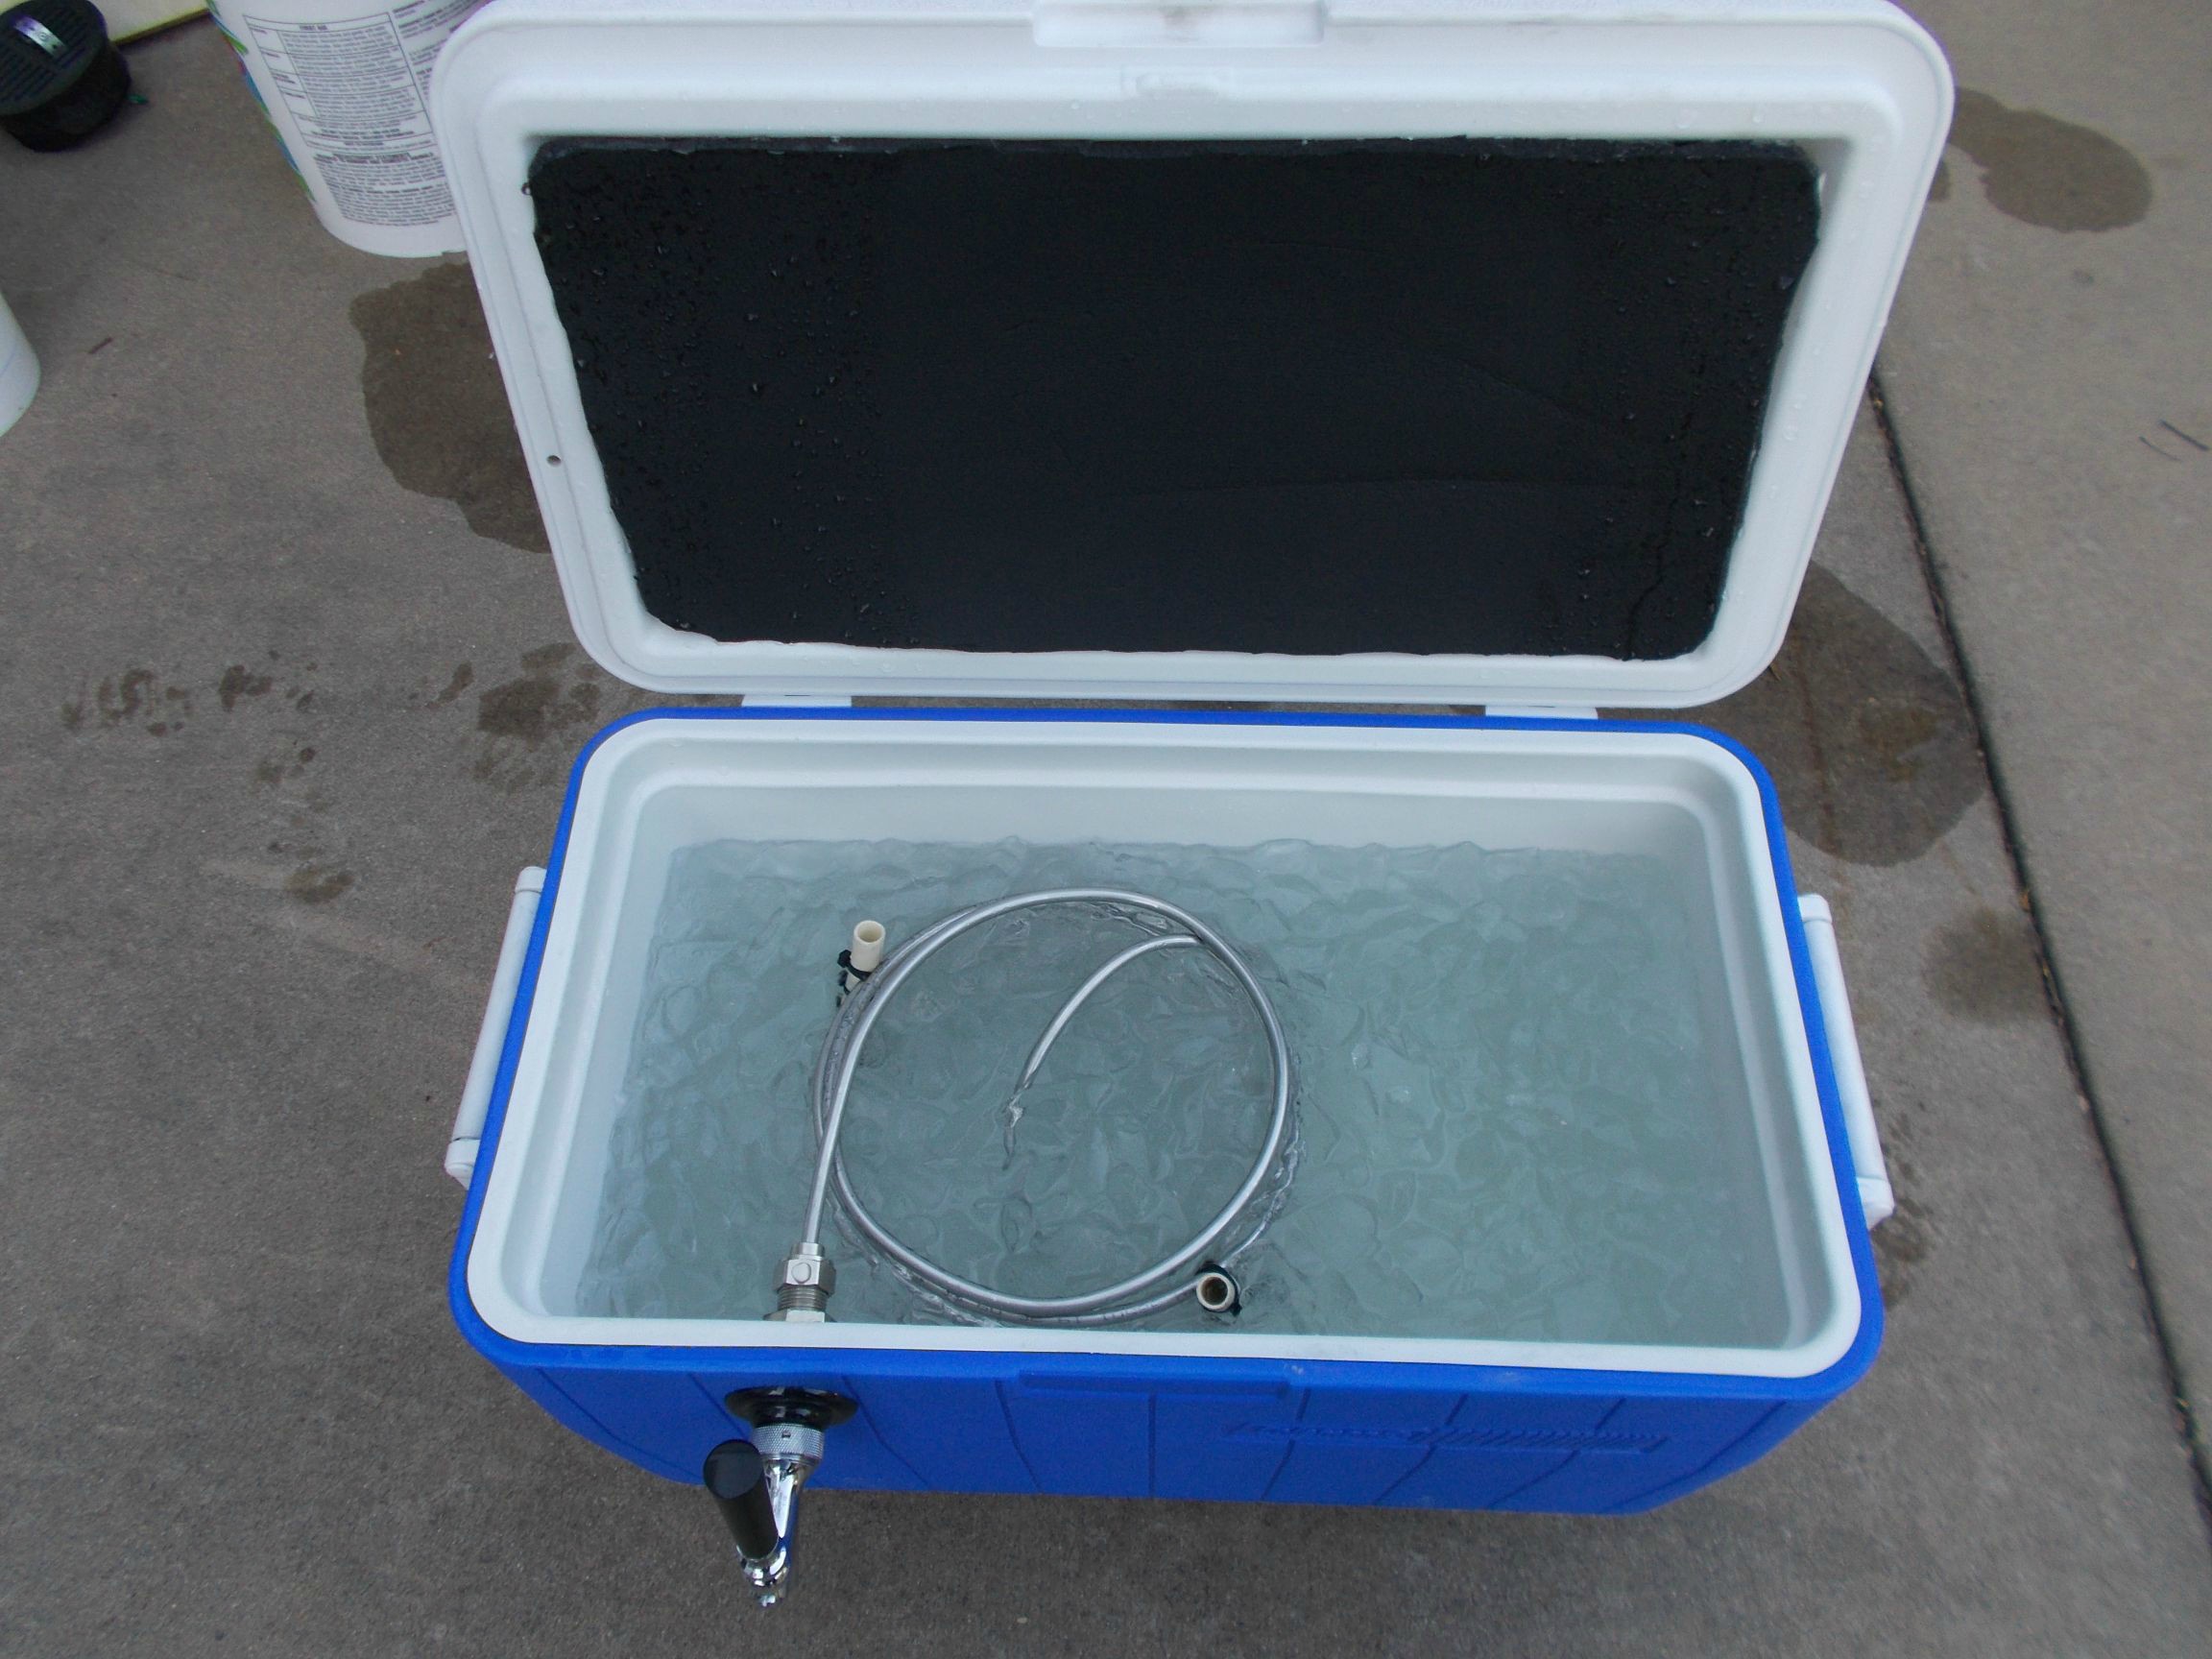
After the cooler passed a water leak test with flying colors, I hooked everything up with extra long 3/8" beer supply hose and 5/16" CO2 hose so that the top plate and cooler could be removed for access to the trash can innards without disconnecting the beer. This proved to be troublesome so I changed it up later. Another problem discovered in this testing phase was that no matter what pressure I set the CO2 regulator to, I could not dispense anything but foam. Even when the beer was coming out at a normal rate and ice cold, after about 2 ounces CO2 would violently rush out of the glass contents, causing a huge foamy mess of undrinkable beer. Any reduction in pressure from that point made the foam worse, but the foam was already in the beer as it was coming out of the spigot. Any increase in pressure made the beer shoot out violently and still with a ton of foam. After experimenting with some different hose length hookups, I determined that the only possible fix was to shorten the SS coil length. In the image above you can just make out the shortened coil (25 feet). I also made some PVC spacers for the coils by notching 10 reliefs in the side of two short pieces of small diameter PVC pipe, then wire-tying each coil in place. This combo ended up delivering beer cold and allowed the pressure to be reduced to 12-14 psi for "normally carbed" beers. On the inside of the cooler lid you'll see some scrap neoprene insulation glued in place courtesy of my buddy's stash. This area of the cooler is much thinner (no idea why they make lids like this, especially this model that doesn't have any cup holders molded in). Anyway, adding insulation here makes a major improvement in ice retention.
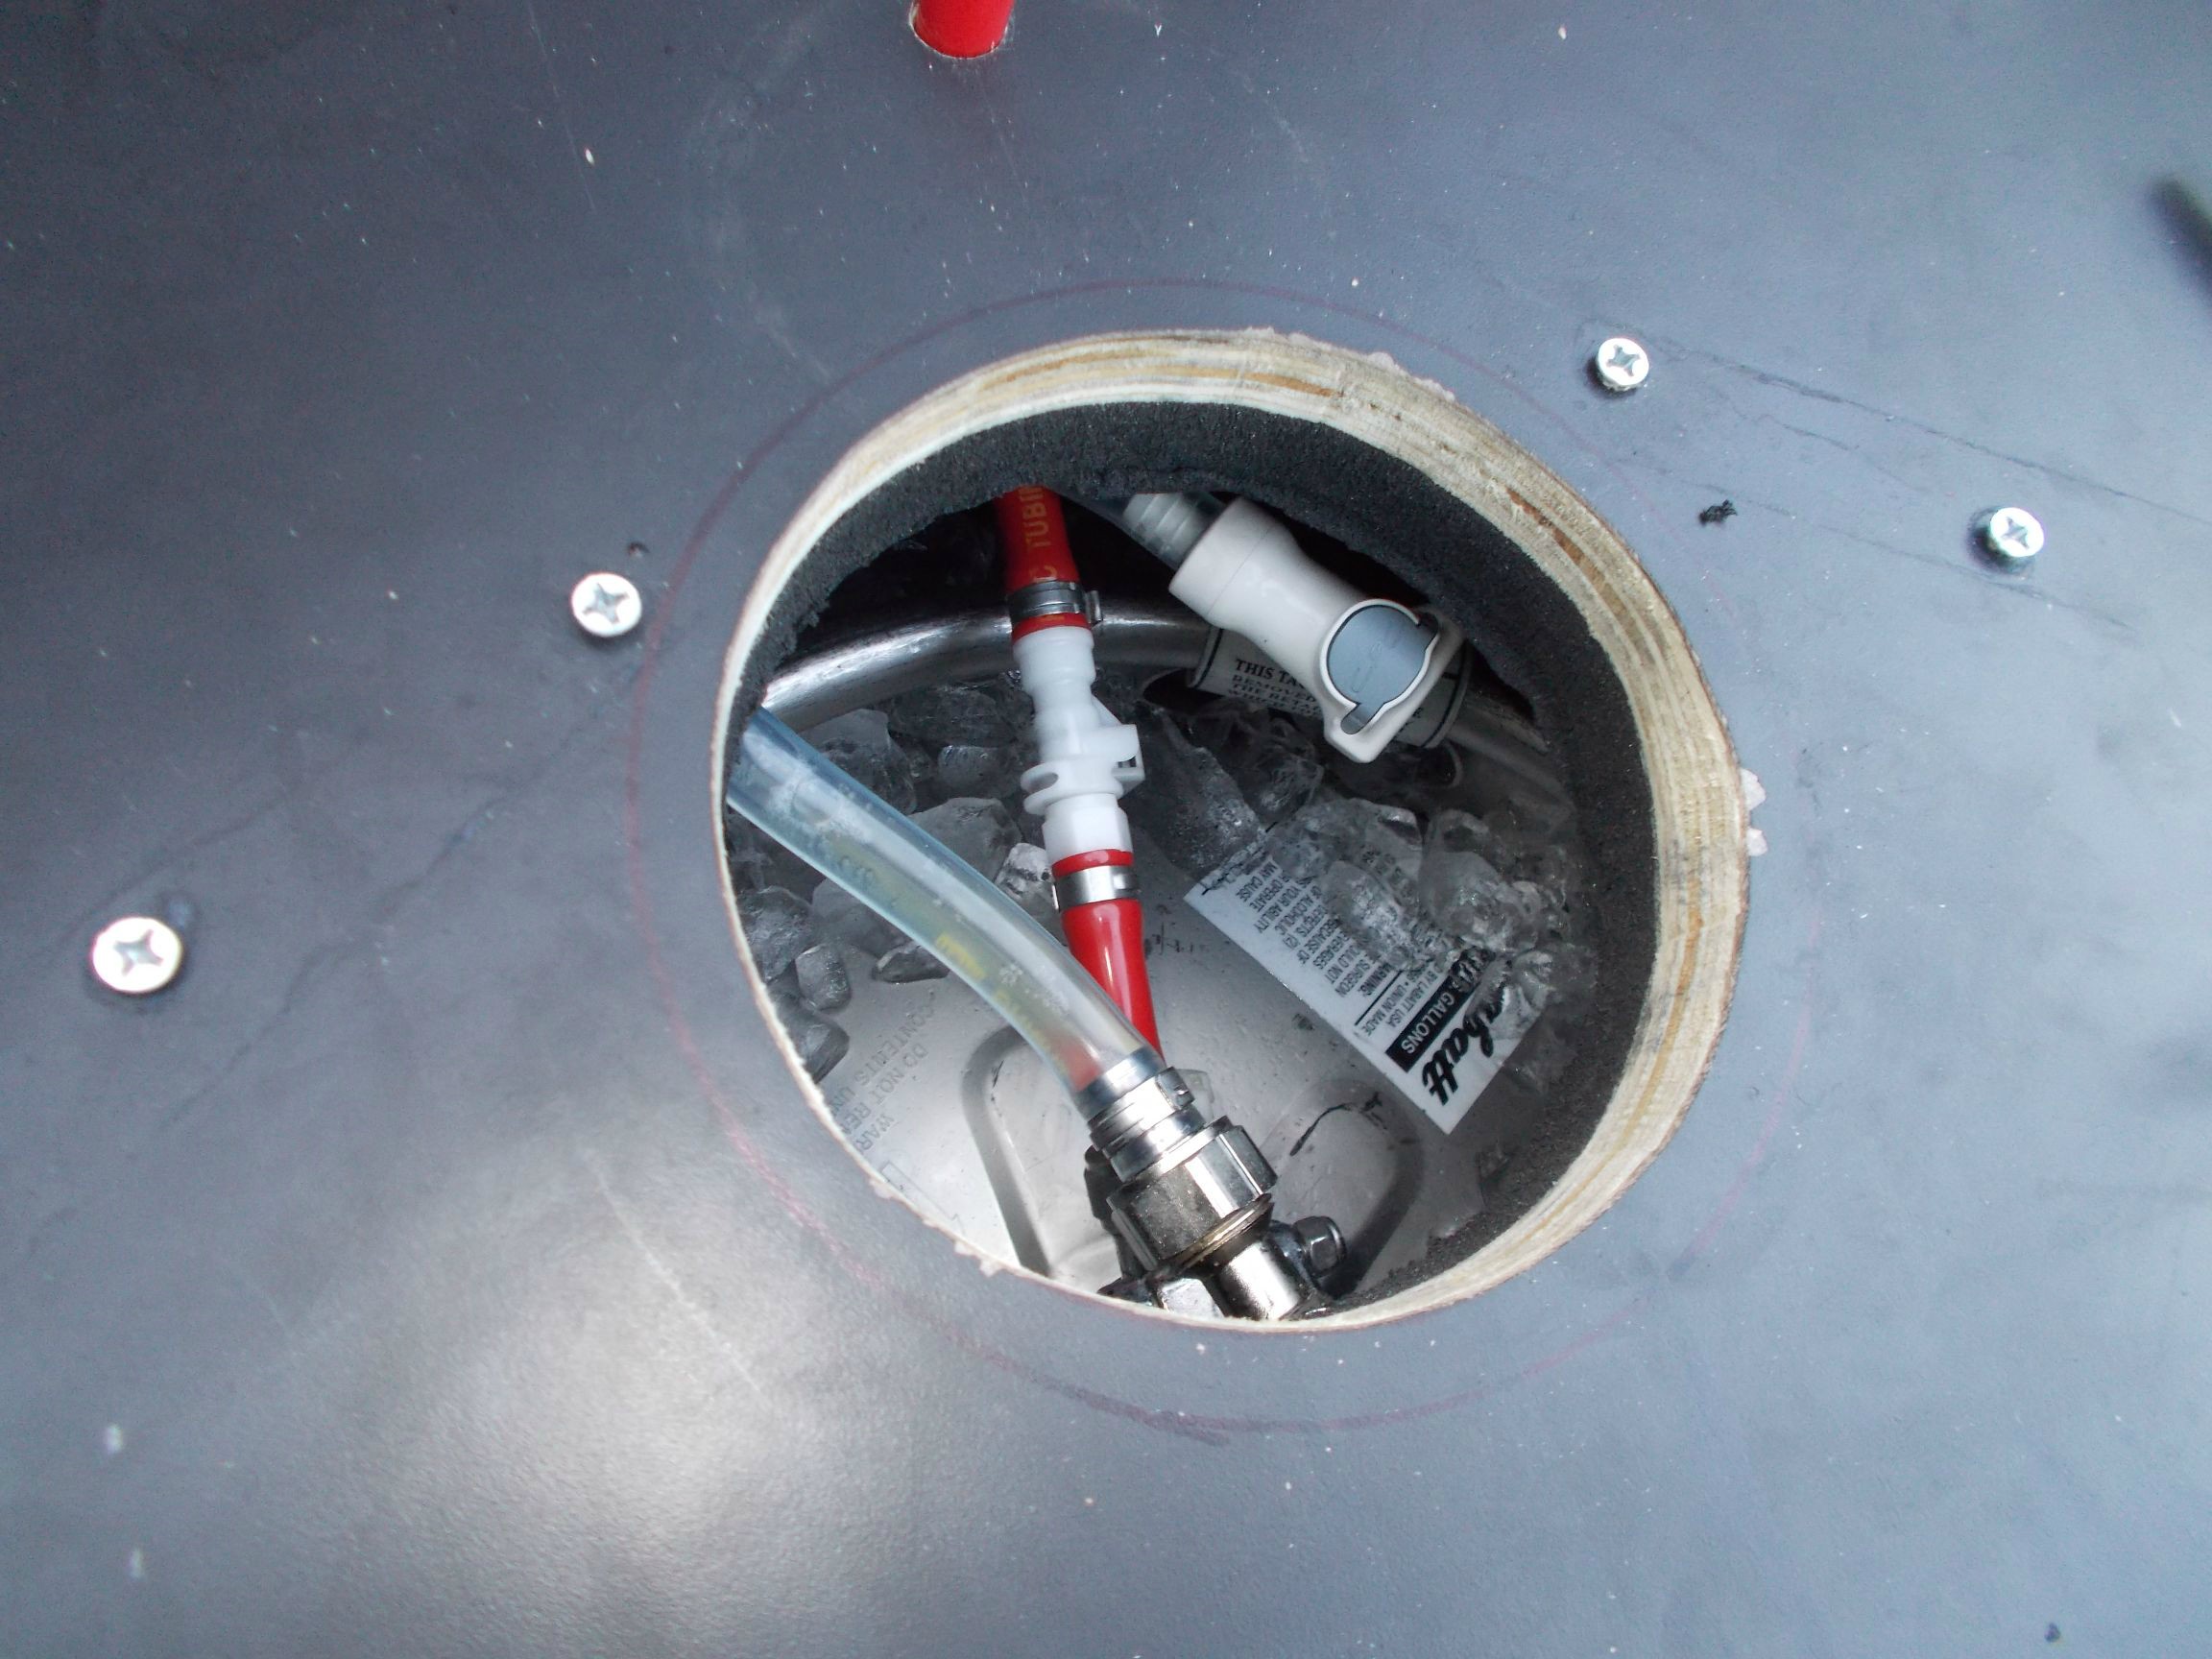
In addition to making a shorter coil, I felt that shortening the 3/8" beer tubing was also necessary, but that required that the top plate and cooler stay in place without the excess tubing to allow removal. I moved the CO2 bottle off of the top plate and made a 6" access hole. Here you can see the new quick disconnect beer and CO2 connectors, all accessible through the hole. Also necessary was a 90* beer outlet adaptor for the coupler since I had not considered all of the support and insulation that reduced quite a bit of head space in the trash can with the top plate installed.

Here's a 6" outside water drain grate modified with insulation and a crappy little strap handle to plug the access hole.
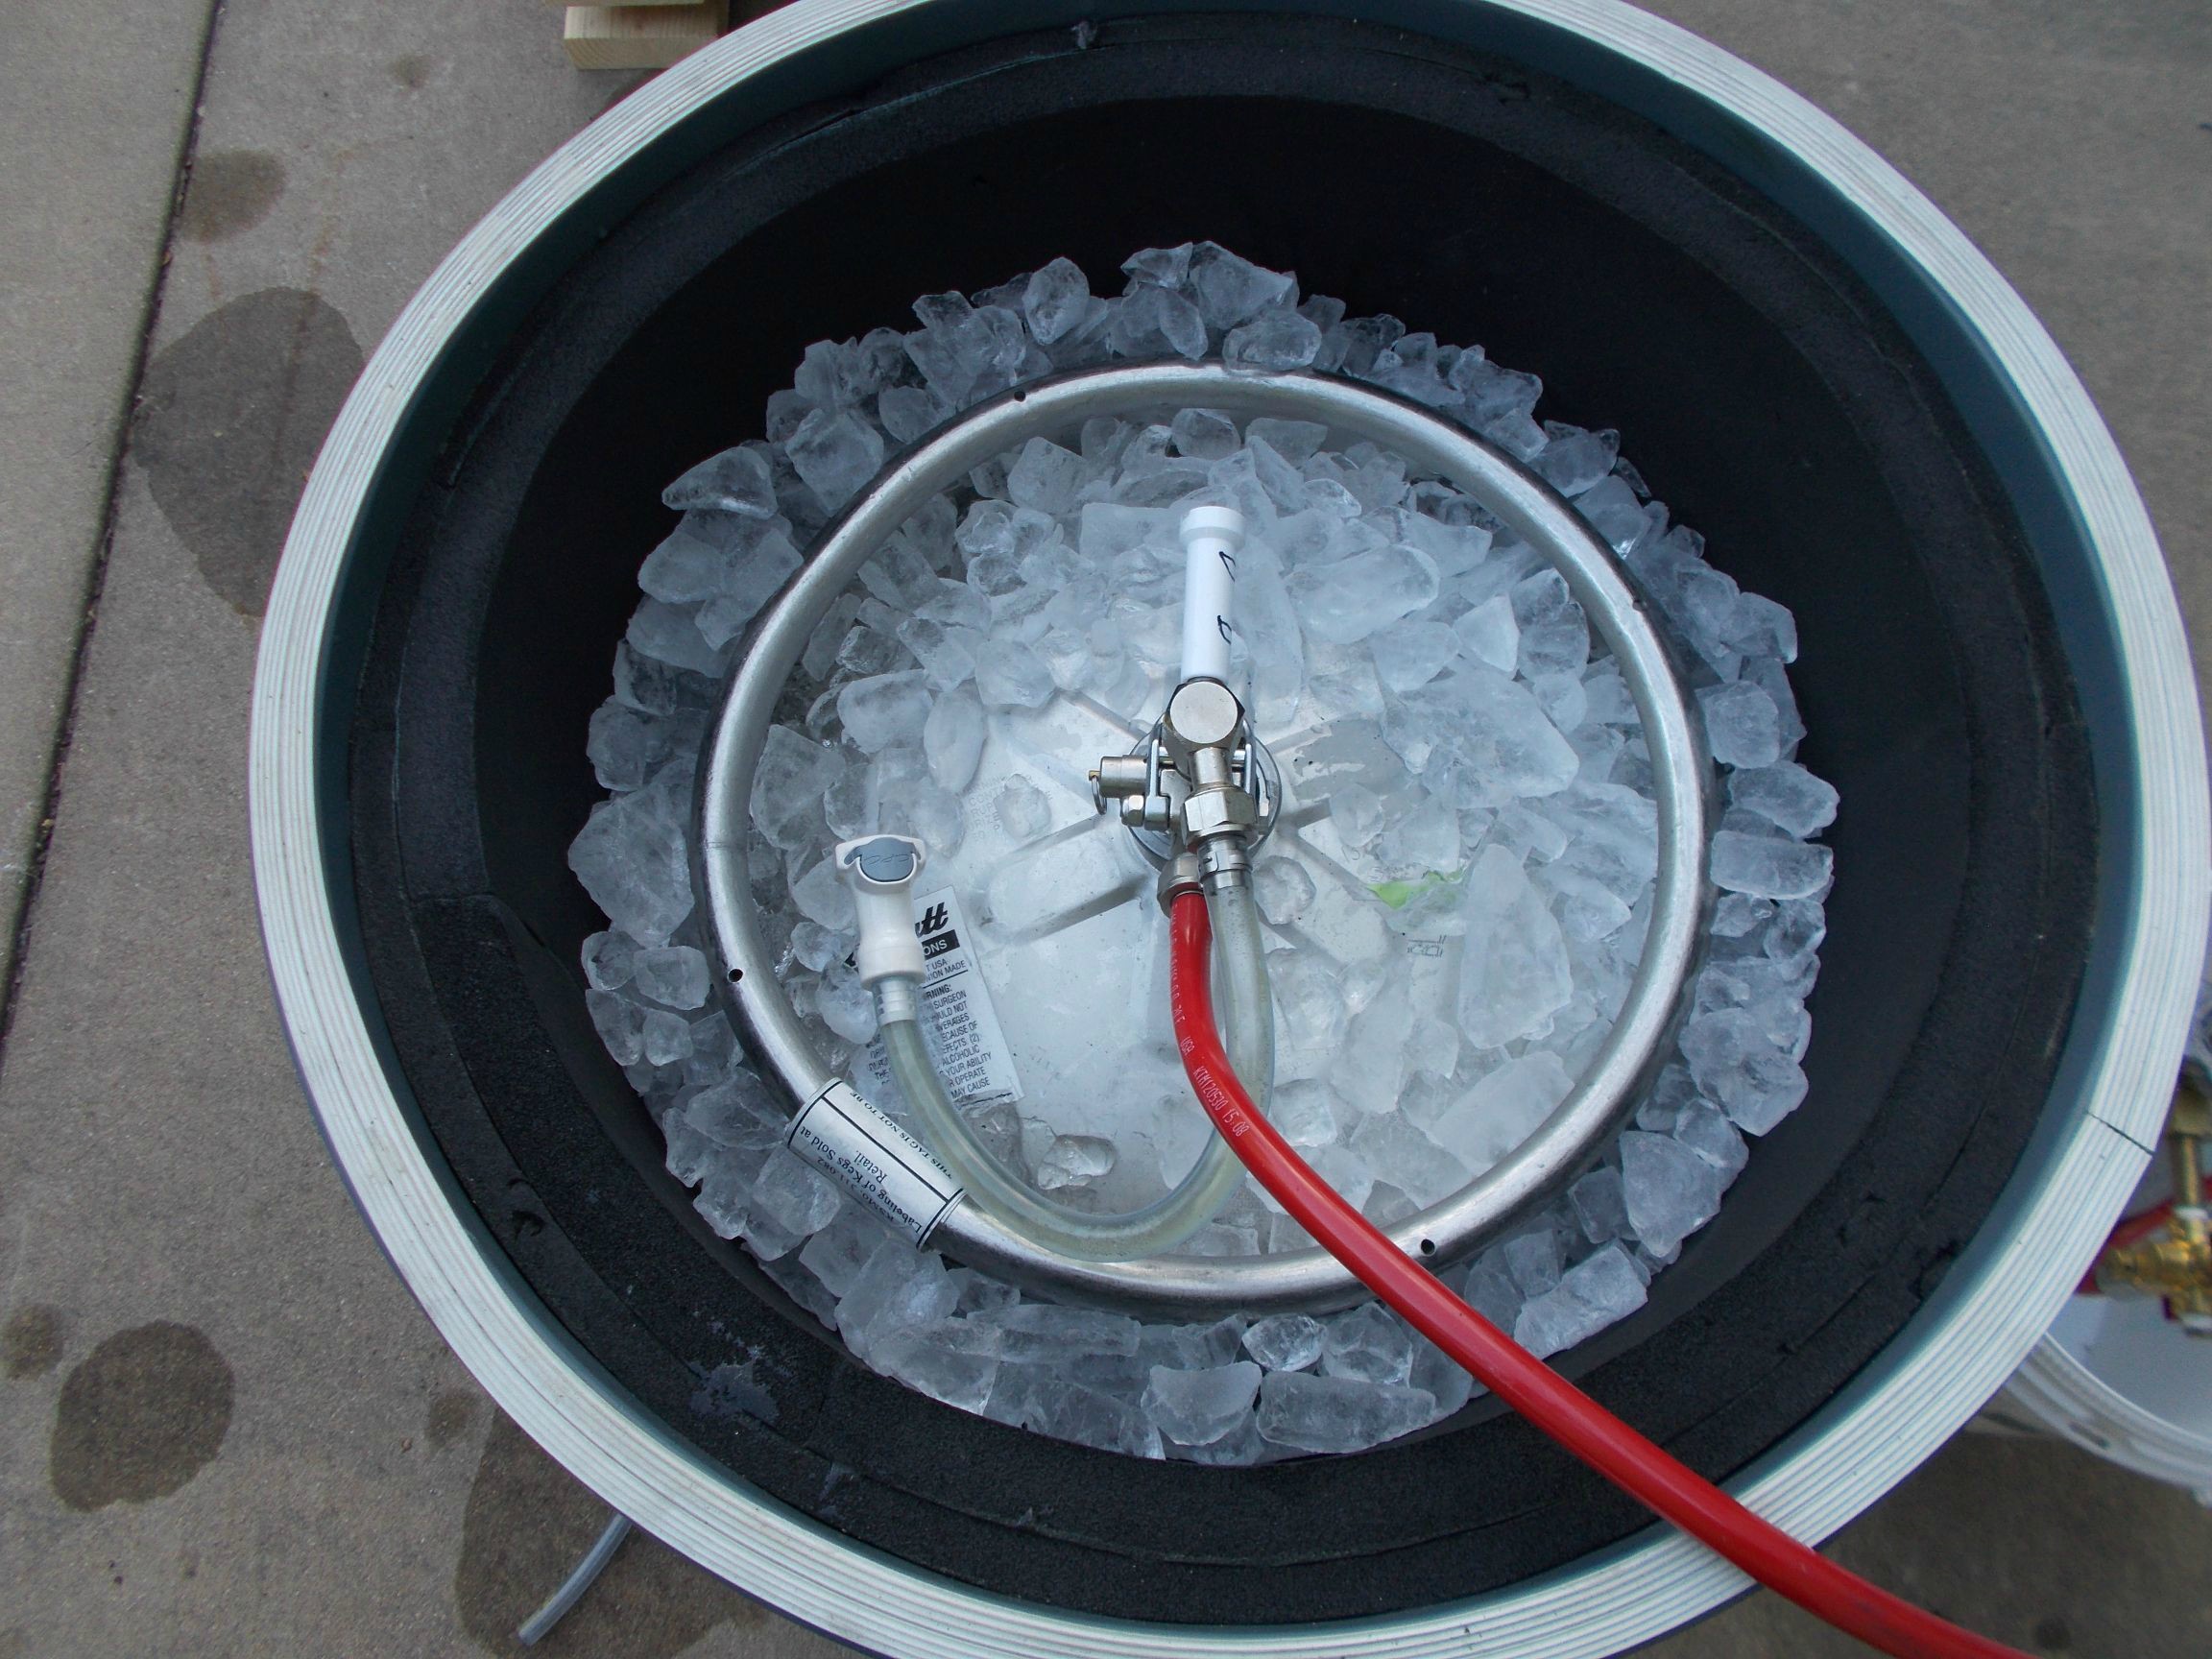
Speaking of insulation, I didn't think to take pics of that process, but my friend was totally responsible for all of the can insulation. He has job scraps of this 1" thick neoprene-like waterproof insulation sheet that pipe coverers use, and proceeded to make a seamless inside shell, bonded to the can. Since the can tapers larger at the top he stepped in a second layer up top. You can barely make out the two layers in the pic above. The bottom of the top plate was covered in a perfect circle of this insulation as well, so that when the lid is placed over the trash can the insulation compresses to the inside diameter of the can and also to the top surface of the can liner. The airtight seal is pretty impressive.
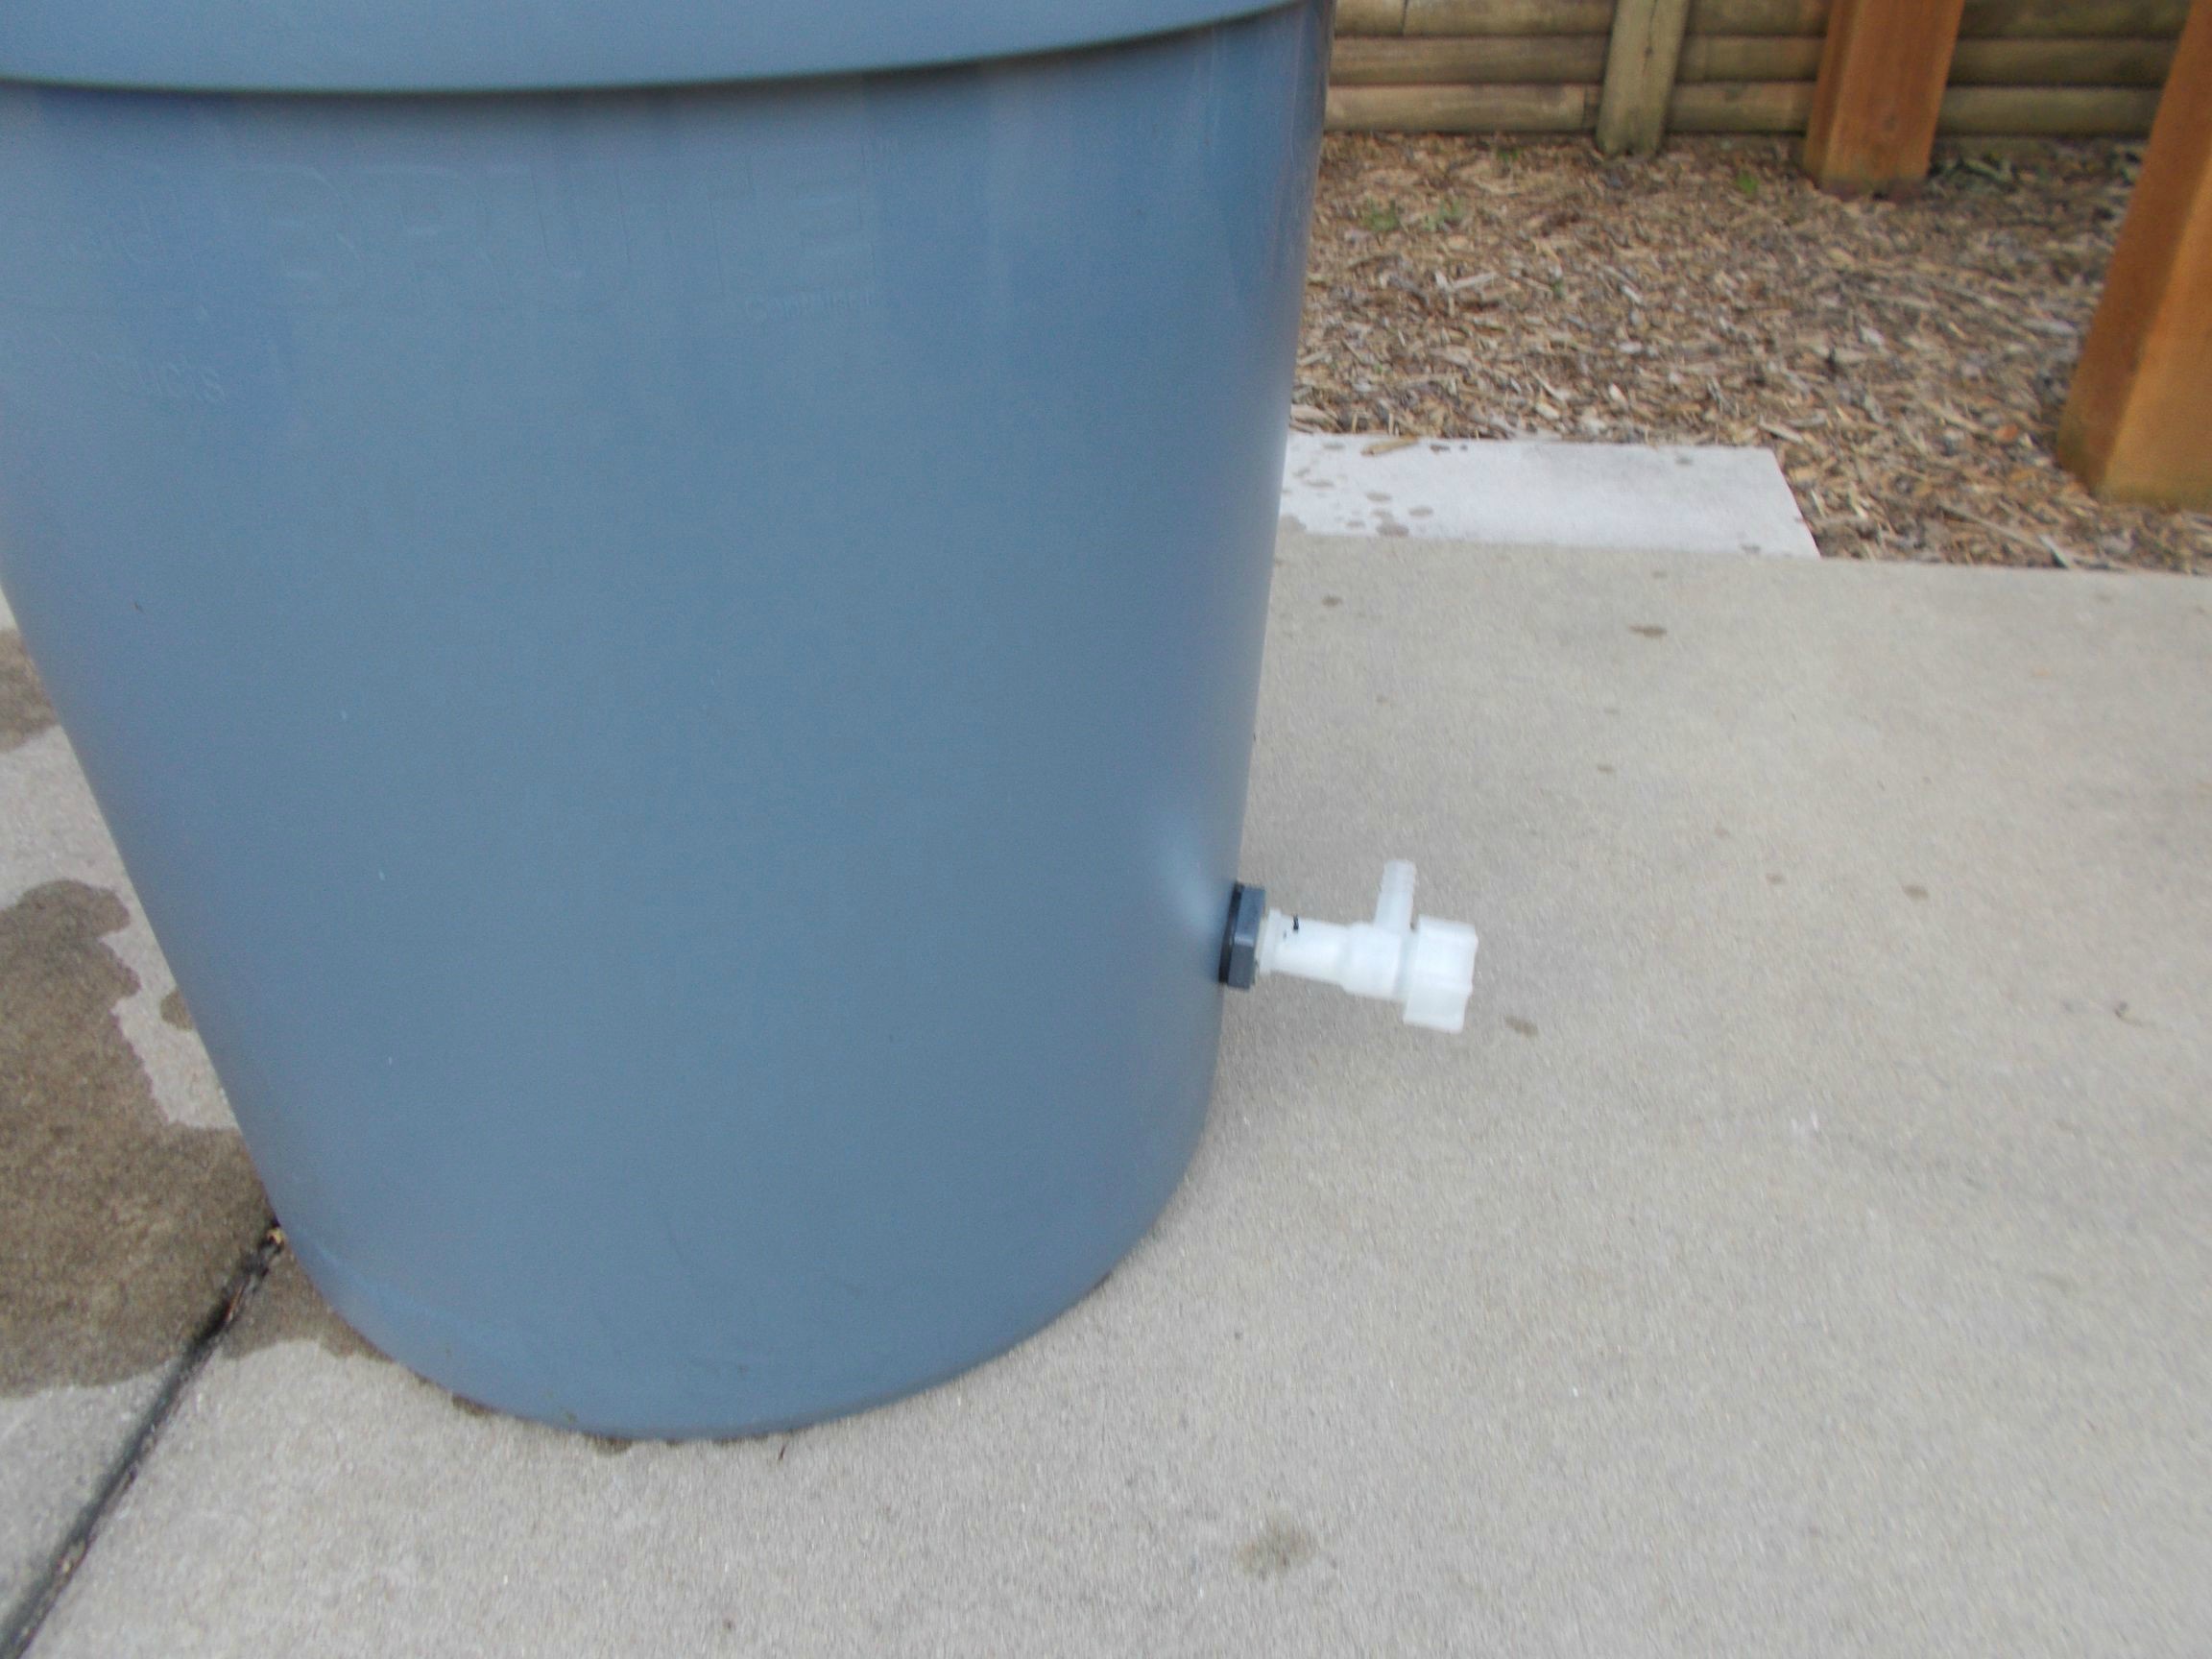
The 1/2" drain assembly, installed near the bottom of the Brute can, to facilitate draining excess water when servicing the ice level.
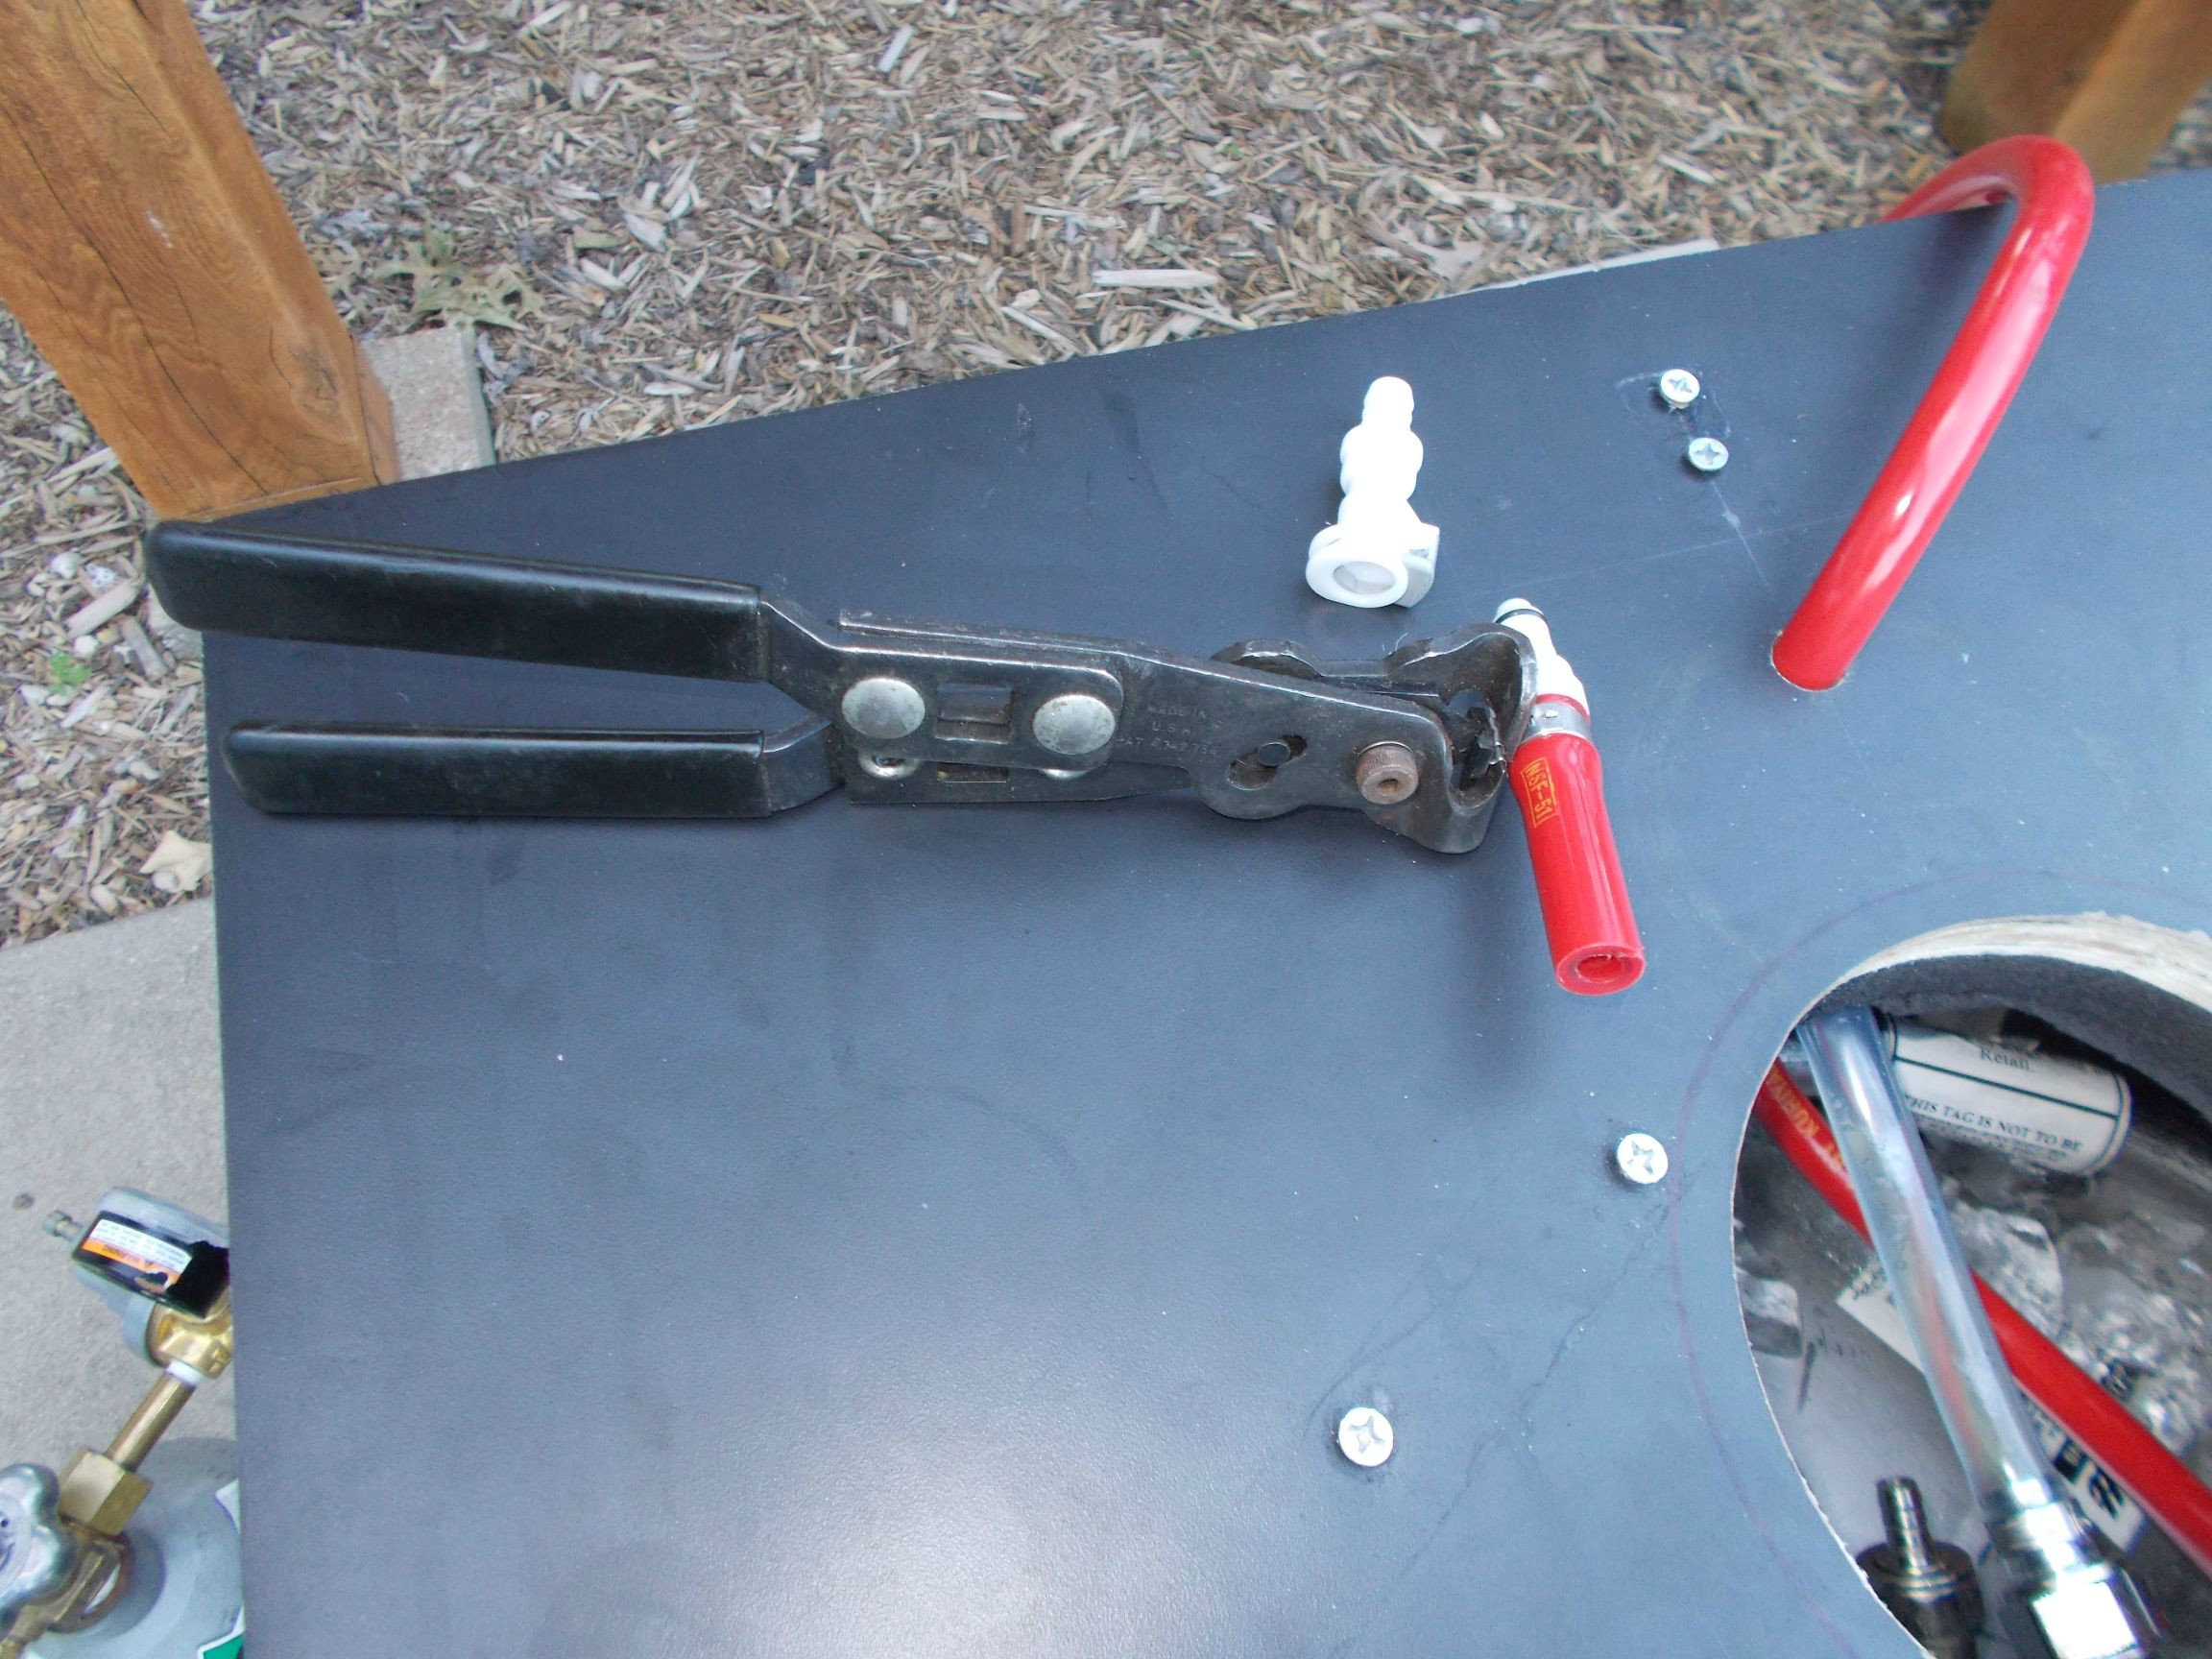
Tool used to crimp all of the fittings with Oetiker clamps.
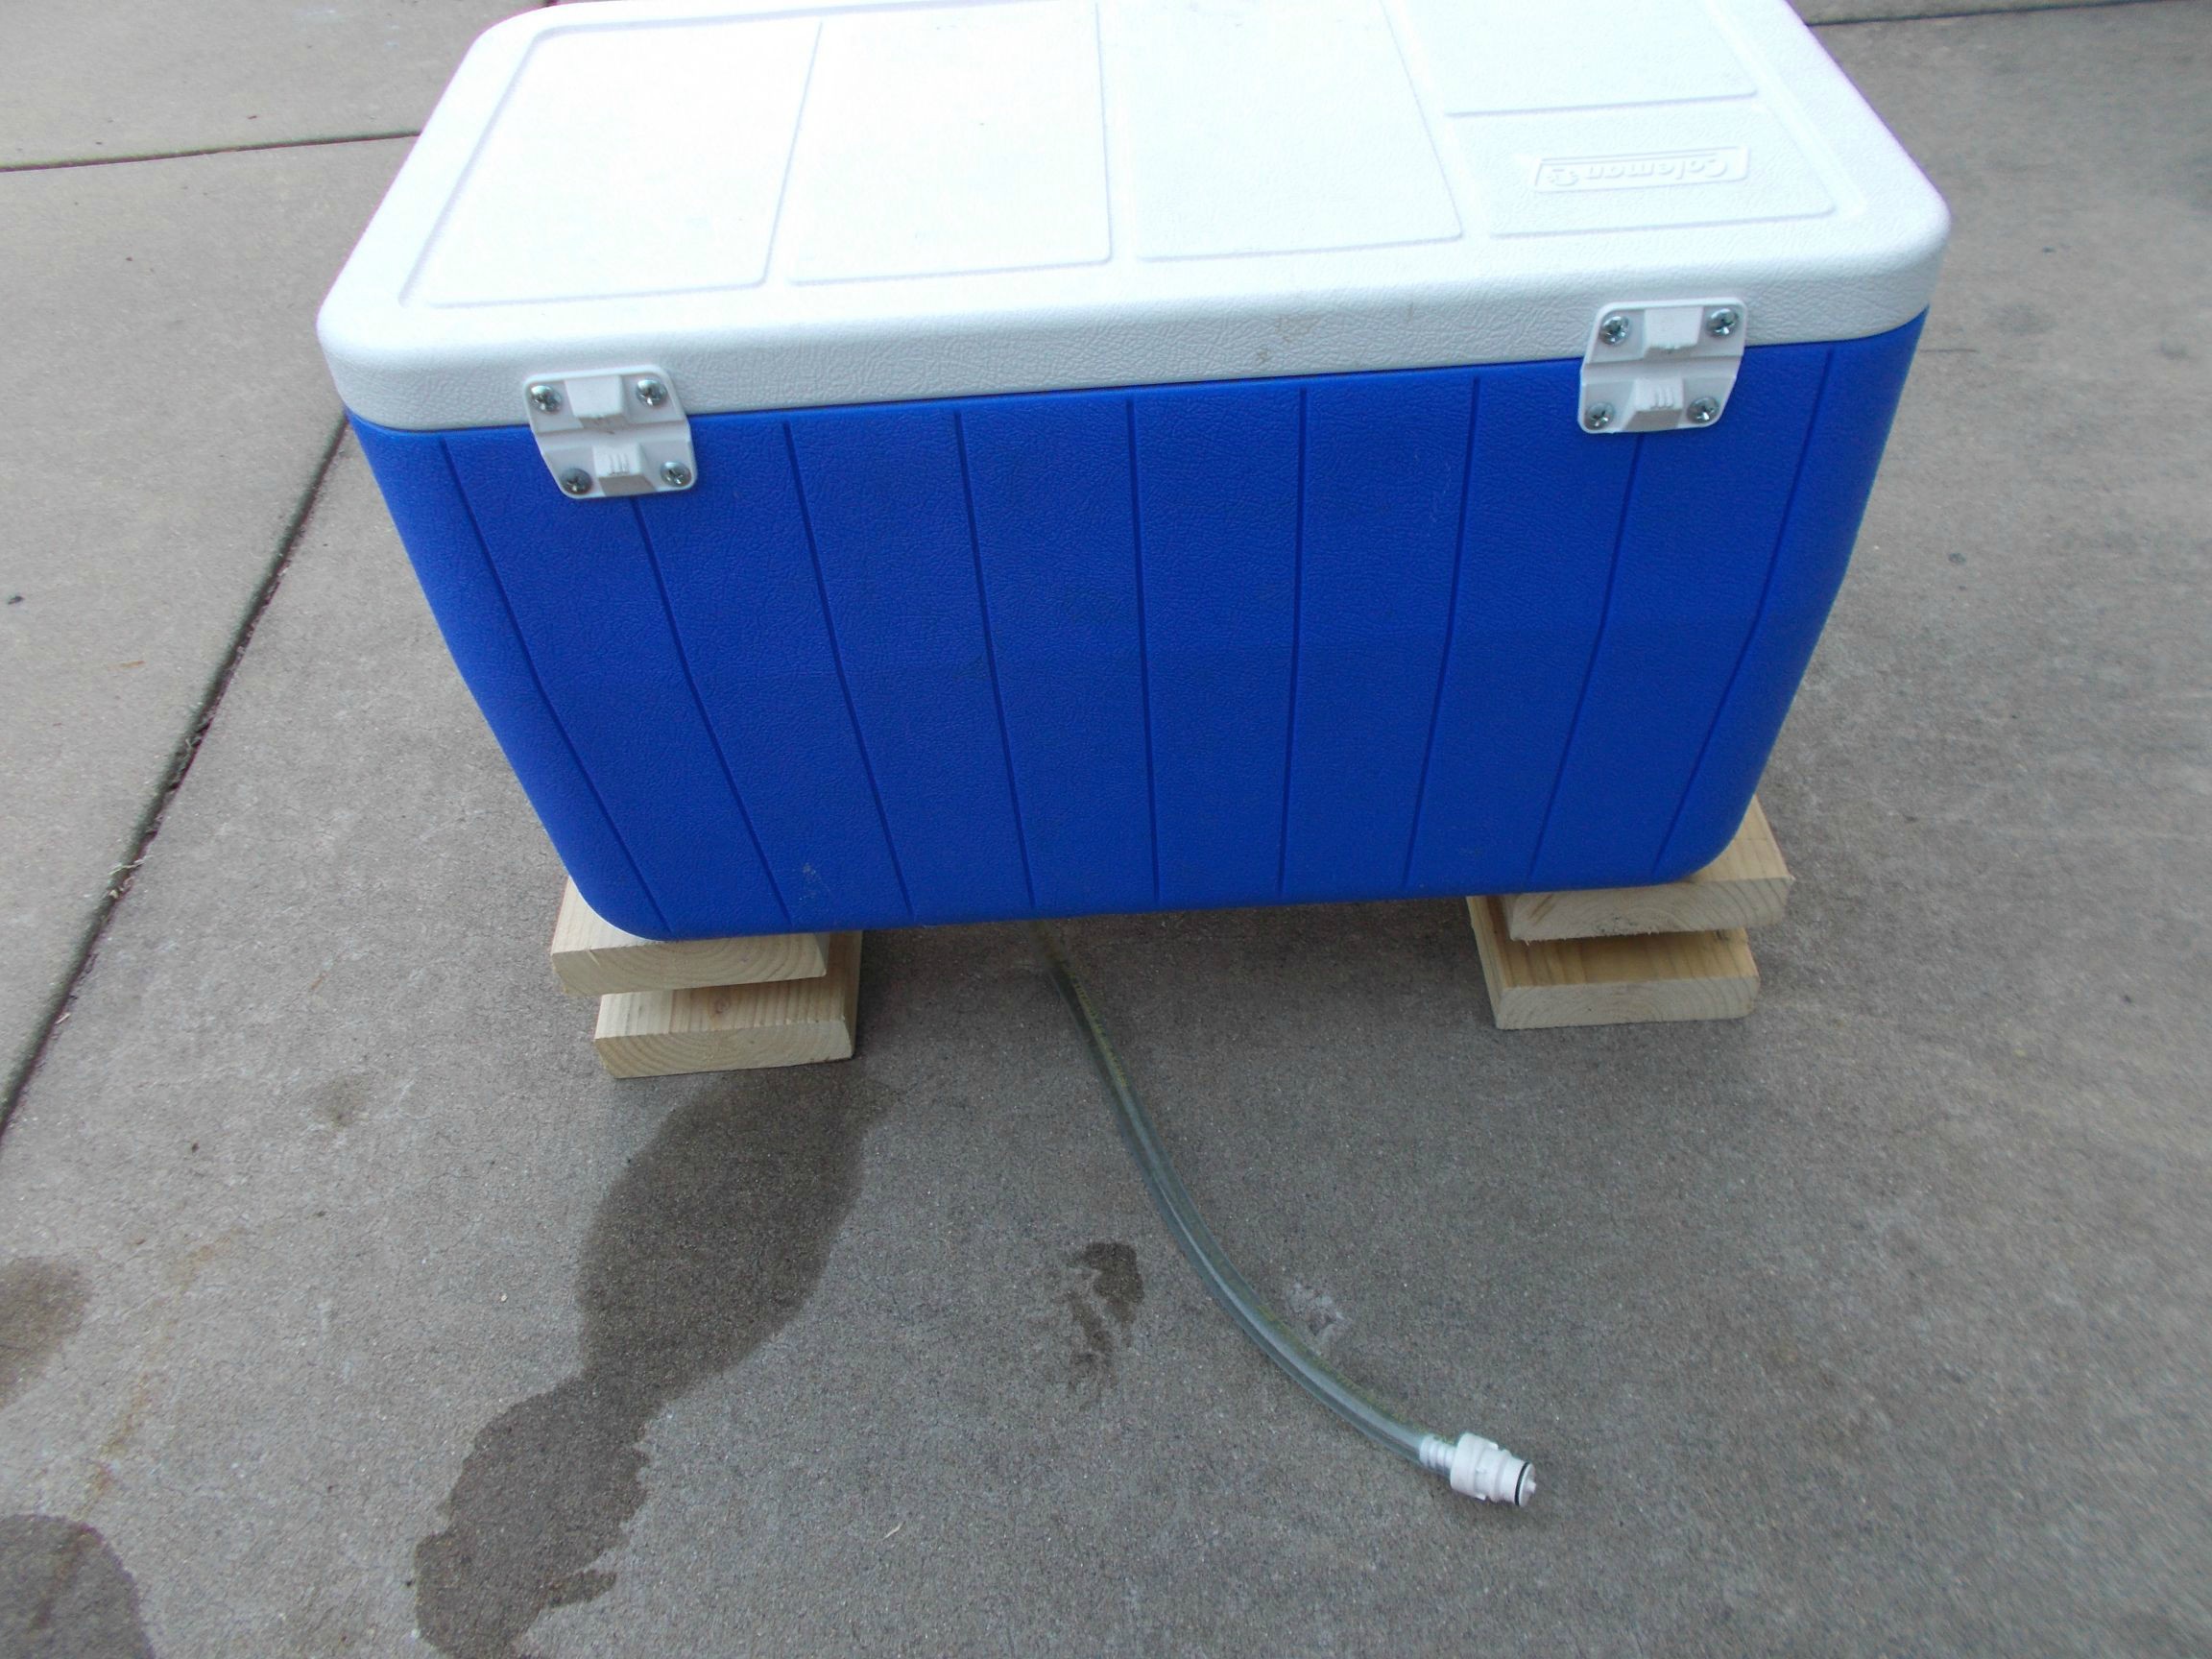
Cooler with shortened beer hose. It has to be propped up on something like these wood blocks I made from scraps. I was definitely not happy about this situation but the unfortunately obtrusive bottom through-shank was a requirement for the project. A better design would have integrated feet on the cooler and a custom mating point on the top plate, though I was not in the mood to be clever.
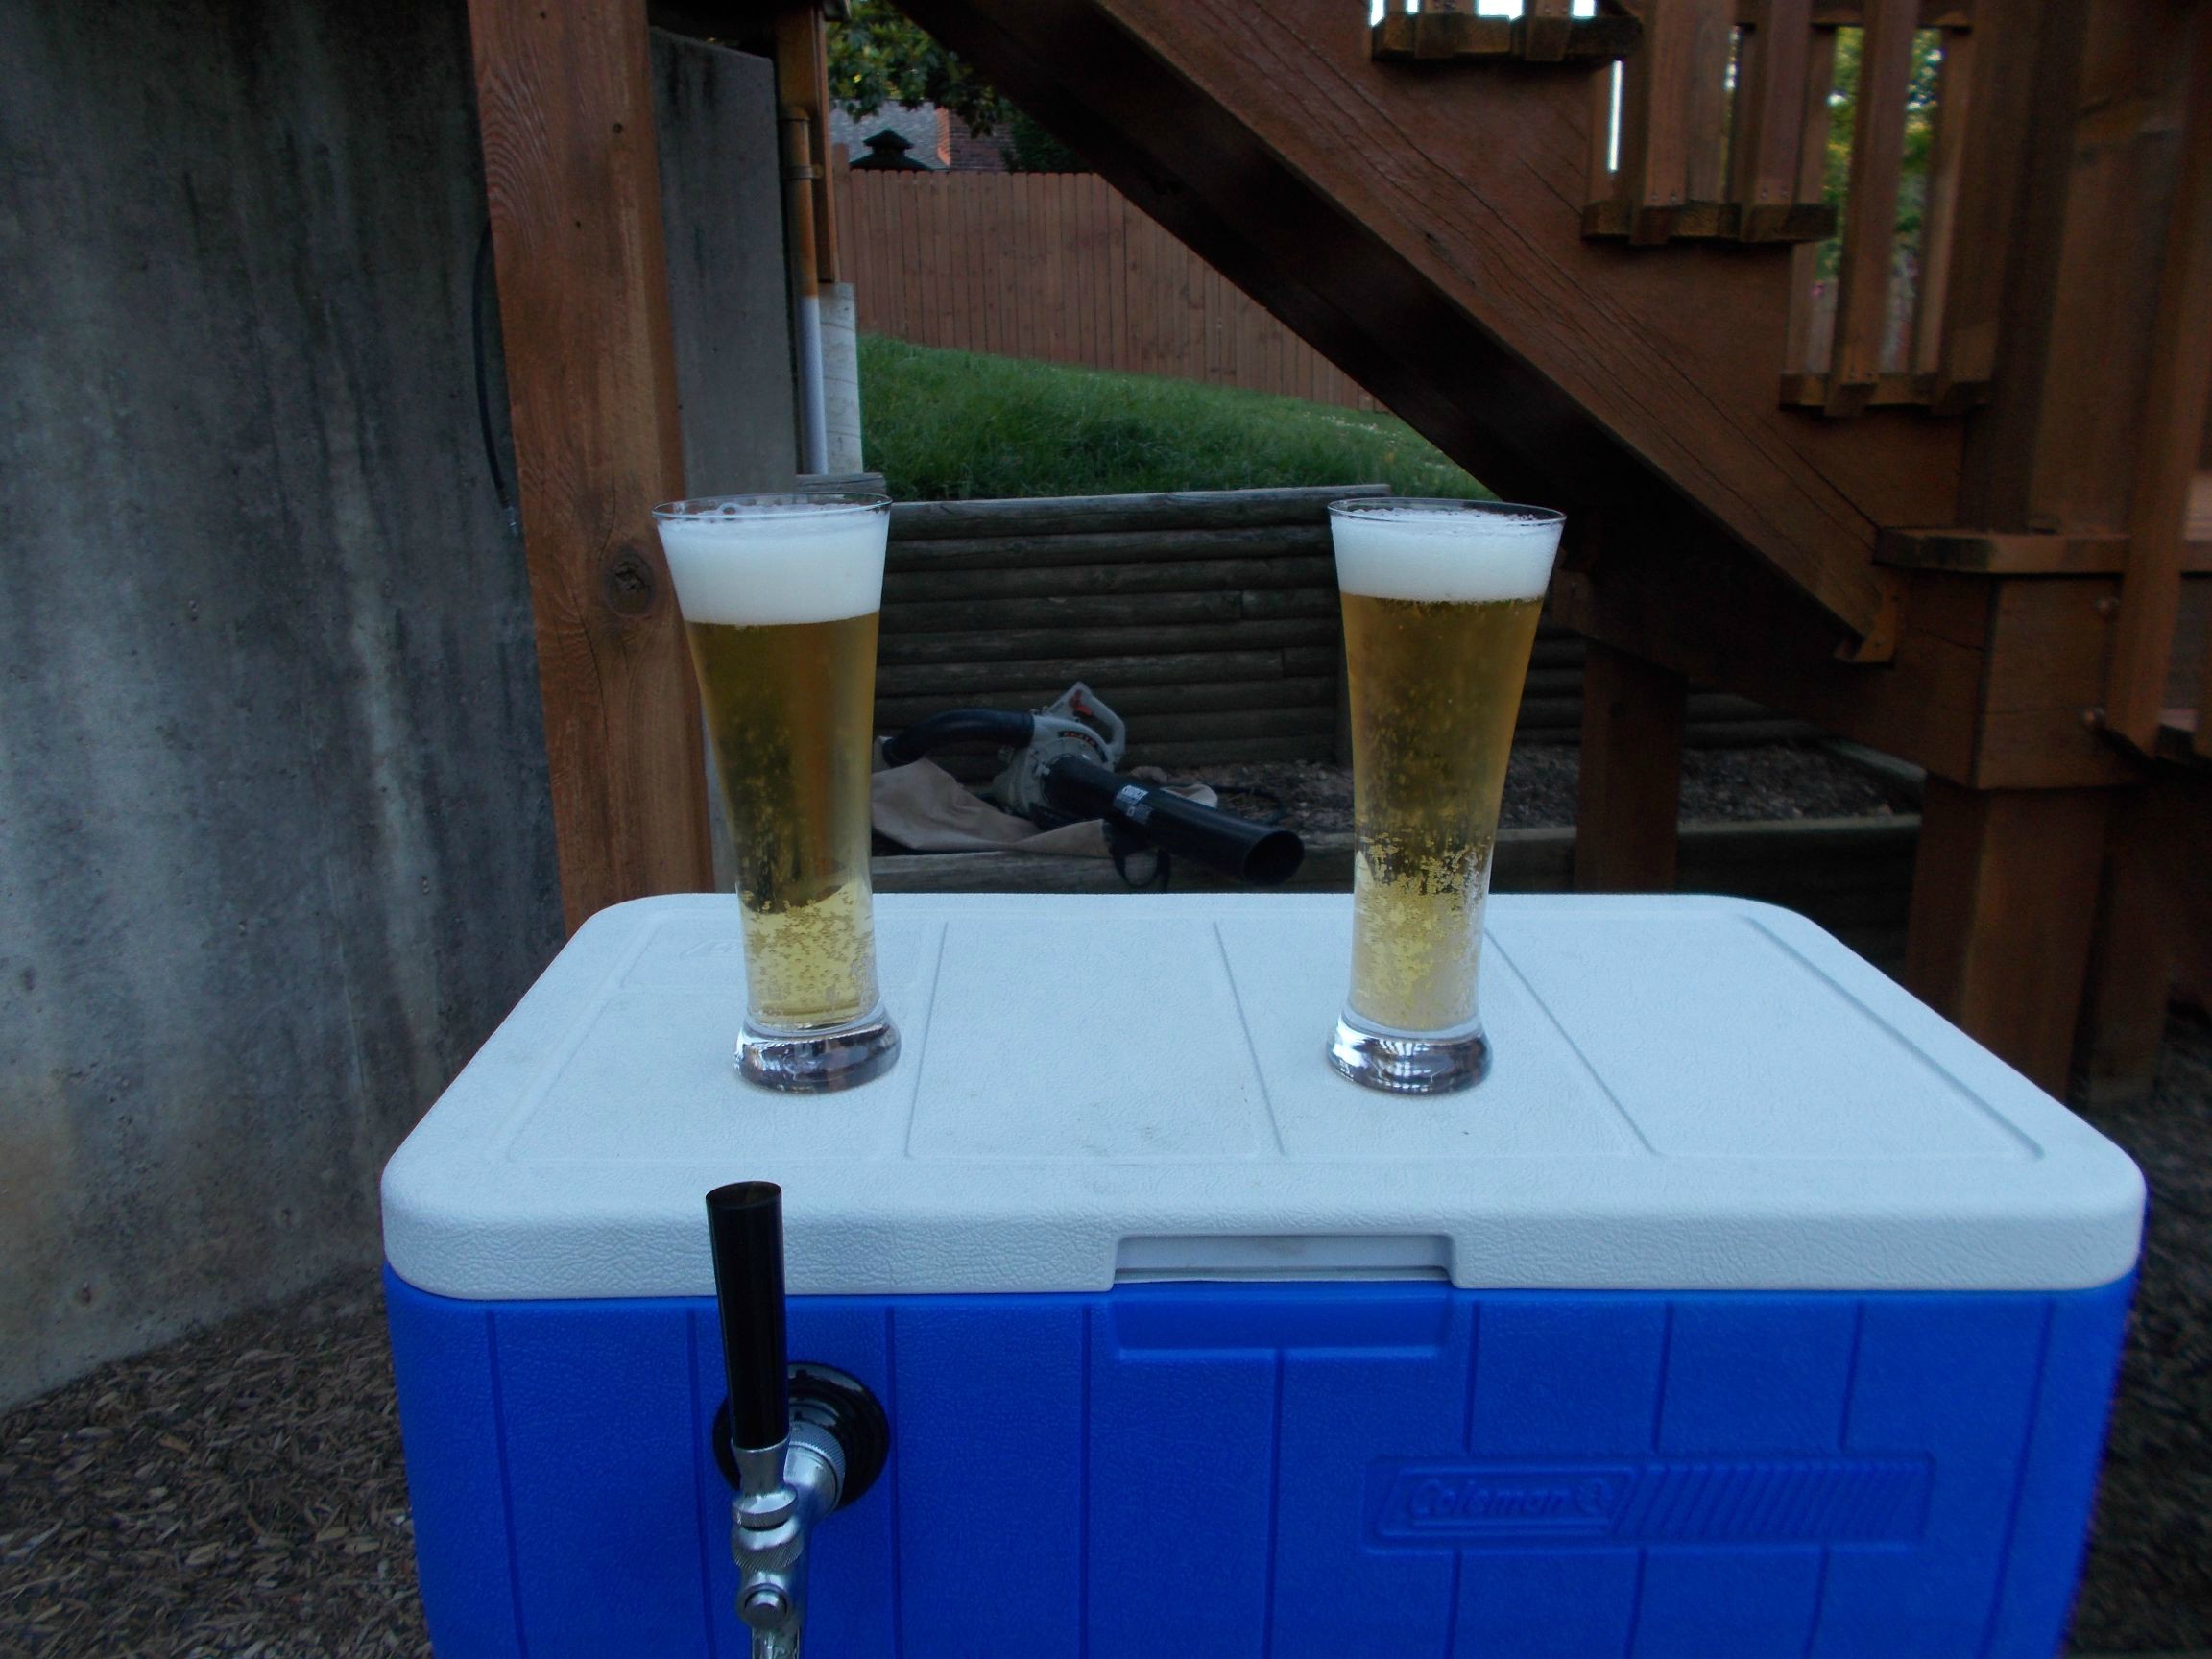
This is the only "action shot" I managed to take of the unit in action, and it was right after I lugged a full 1/2 barrel up into this beast. It was shaken up and I didn't give any time for the ice to cool the keg down evenly. The beer on the left is the first pour (without pouring off any foam first) and the beer on the right is a second glass shortly thereafter. This beer was Labatt Blue (woopty doo) but it was what I could get on short notice.
I wish I had taken pics of the assembled kegerator in action but I was too busy with other things. It worked great with almost no foam at all, consistent pours, and great pour rate. Next year I'll get it out again and definitely post shots of it pouring real beer.
The main concept was based around keeping every possible part of the beer circuit insulated and fully cooled, being able to break down the parts (within reason) for travel, and having a large enough storage area to hold a 1/2 barrel. The biggest hurdle was deciding to put a beer shank through the bottom of a chest cooler, due to the potential leakage of ice water if done incorrectly.
Here is the first 7/8" hole in the bottom of a fairly popular Coleman 48 quart cooler. While larger than I needed, this is one of the smaller coolers that comes with a drain, the inside and outside dimensions are as rectangular as plastic coolers come these days, and the walls are fairly rigid, so it made a good choice, especially for <$30.
This is the beer shank and a 7/8" ID aluminum washer that has been scuffed up to accept sealer. I decided to include the washer on the critical inside surface to reinforce the plastic, since tightening the beer shank nuts was definitely going to crush and distort the cooler walls at even the slightest torque. I then scuffed the area around the hole in the cooler, applied 3M 5200 Marine Adhesive/Sealant to the washer face and pressed it down onto the cooler bottom, centering it over the hole. Then I assembled the shank through the cooler and aluminum washer with a neoprene gasket inside and out. The outside gasket is not necessary for sealing purpose, but I hope it may provide some extra springiness to keep the shank nuts from backing off while under very low torque. After tightening both nuts with two 30mm deep sockets held by hand until the cooler walls crushed a bit and just tight enough so the nuts wouldn't back off over time, I bedded the inside fitting to the cooler with more beads of 3M 5200. It was fairly easy to smooth out with a wet finger. Then I covered that with a damp paper towel to help it set up and keep the sealer clean until fully cured.
Expensive marine grade sealer. Used only one of the 10 ounces and had to throw the rest away since the tube contents start to cure immediately upon opening.
This is the finished shank installation with 3M 5200 sealer around the nut and washer.
Here is a shot of the bottom of the sealed shank.
Like an idiot, I managed to start drilling the faucet hole before double-checking the inside wall. The idea was to have it as high as possible, but when the hole went through I realized it should have been at least 3/8" lower. Luckily it works and the lid closes since the part of the lid that fits down into that inner recess is shallower than the step in the wall. That lucky coincidence saved me a cooler and more sealer. The 5/16" ID coil went in without any problems. I just had to pull out on one end and bend it to the bottom to fit the unorthodox bottom shank. All jockey box parts were purchased through nybrewsupply.com, whose employees were very helpful on the phone.
Faucet installed.
The cooler is going to sit on a platform so that everything stands within a fairly small footprint. This platform will then rest on a Brute 44 gallon trashcan. This is the standard version, not the "vented" version that has more interior contours. The standard Brute can has a fairly even cylindrical interior shape more conducive to the eventual application of insulation. I ran a high speed Scotchbrite disc along the top of the can to smooth out the raised lettering and casting irregularities, then applied a strip of 1/4" thick weatherstrip to eliminate air drafting. There will be several stages of insulation, this is the least of it. The bottom of the trash can is uneven due to the molded grips and the raised center extrusion. I needed to insulate the bottom and the insulation material is not going to withstand a 160lb keg applying such pressure to the base without a solid foundation, especially considering that a keg is supported only by the outer ring of its base.
To fill the bottom and keep the overall weight down I decided on rigid foam (Dow Corning 1" thick board) to fill the odd contours, then 1/2" plywood to cap that and provide a flat even surface for the real insulation. The rigid foam required cutting and beveling with razor blade, then final shaping with the high speed Scotchbrite disc. The beveled side went down into the can and was adhered with 3M 77 spray, then the board was placed on top and adhered the same way. That was held in place to dry with a weight on top. Then a bead of sealer was ran around the 1/2 plywood board to the inside of the can for additional stability.
Here is the only full pic of the top "plate" or board that I took. It is not representative of how the final product turned out. The large upright brackets are there to hold the 5lb CO2 bottle. Due to a necessary modification I eventually had to settle on strapping the CO2 bottle to the side of the trash can. The four smaller brackets were bent and placed specifically to align the cooler in place exactly over the through-hole and keep it from sliding around. I used two cheap external gate style pull handles on each side of the cooler mounting area to keep it from sliding sideways and provide a place to hook bungee cords if it became necessary (it didn't). The 3/4" plywood board was covered in some scrap Formica to weather the elements.
After the cooler passed a water leak test with flying colors, I hooked everything up with extra long 3/8" beer supply hose and 5/16" CO2 hose so that the top plate and cooler could be removed for access to the trash can innards without disconnecting the beer. This proved to be troublesome so I changed it up later. Another problem discovered in this testing phase was that no matter what pressure I set the CO2 regulator to, I could not dispense anything but foam. Even when the beer was coming out at a normal rate and ice cold, after about 2 ounces CO2 would violently rush out of the glass contents, causing a huge foamy mess of undrinkable beer. Any reduction in pressure from that point made the foam worse, but the foam was already in the beer as it was coming out of the spigot. Any increase in pressure made the beer shoot out violently and still with a ton of foam. After experimenting with some different hose length hookups, I determined that the only possible fix was to shorten the SS coil length. In the image above you can just make out the shortened coil (25 feet). I also made some PVC spacers for the coils by notching 10 reliefs in the side of two short pieces of small diameter PVC pipe, then wire-tying each coil in place. This combo ended up delivering beer cold and allowed the pressure to be reduced to 12-14 psi for "normally carbed" beers. On the inside of the cooler lid you'll see some scrap neoprene insulation glued in place courtesy of my buddy's stash. This area of the cooler is much thinner (no idea why they make lids like this, especially this model that doesn't have any cup holders molded in). Anyway, adding insulation here makes a major improvement in ice retention.
In addition to making a shorter coil, I felt that shortening the 3/8" beer tubing was also necessary, but that required that the top plate and cooler stay in place without the excess tubing to allow removal. I moved the CO2 bottle off of the top plate and made a 6" access hole. Here you can see the new quick disconnect beer and CO2 connectors, all accessible through the hole. Also necessary was a 90* beer outlet adaptor for the coupler since I had not considered all of the support and insulation that reduced quite a bit of head space in the trash can with the top plate installed.
Here's a 6" outside water drain grate modified with insulation and a crappy little strap handle to plug the access hole.
Speaking of insulation, I didn't think to take pics of that process, but my friend was totally responsible for all of the can insulation. He has job scraps of this 1" thick neoprene-like waterproof insulation sheet that pipe coverers use, and proceeded to make a seamless inside shell, bonded to the can. Since the can tapers larger at the top he stepped in a second layer up top. You can barely make out the two layers in the pic above. The bottom of the top plate was covered in a perfect circle of this insulation as well, so that when the lid is placed over the trash can the insulation compresses to the inside diameter of the can and also to the top surface of the can liner. The airtight seal is pretty impressive.
The 1/2" drain assembly, installed near the bottom of the Brute can, to facilitate draining excess water when servicing the ice level.
Tool used to crimp all of the fittings with Oetiker clamps.
Cooler with shortened beer hose. It has to be propped up on something like these wood blocks I made from scraps. I was definitely not happy about this situation but the unfortunately obtrusive bottom through-shank was a requirement for the project. A better design would have integrated feet on the cooler and a custom mating point on the top plate, though I was not in the mood to be clever.
This is the only "action shot" I managed to take of the unit in action, and it was right after I lugged a full 1/2 barrel up into this beast. It was shaken up and I didn't give any time for the ice to cool the keg down evenly. The beer on the left is the first pour (without pouring off any foam first) and the beer on the right is a second glass shortly thereafter. This beer was Labatt Blue (woopty doo) but it was what I could get on short notice.
I wish I had taken pics of the assembled kegerator in action but I was too busy with other things. It worked great with almost no foam at all, consistent pours, and great pour rate. Next year I'll get it out again and definitely post shots of it pouring real beer.
")
