Masterbuilt Electric Turkey Fryer

Homebrew Talk - Beer, Wine, Mead, & Cider Brewing Discussion Forum

Help Support Homebrew Talk - Beer, Wine, Mead, & Cider Brewing Discussion Forum:

This site may earn a commission from merchant affiliate links, including eBay, Amazon, and others.
Joined
Nov 3, 2008
Messages
20
Reaction score
0
Location
Winnetka, IL
Hey all. I'm relatively new to the brewing world (about 8 batches over the past 12 months) and I'm quickly become addicted to the whole process. At this point I am still extract brewing, but I see moving on to more complex brews in the near future.

Due to my 2 young daughters aversion to the brewing smell (how can they NOT love the smell of hops), I'm contemplating building a brew station in my basement. Of course, propane is not a good idea inside, but I have come across some adds for the Masterbuilt Electric Turkey Fryer.

Here is the link to the manual: http://www.masterbuilt.com/pdf/manuals/20010406 & 20010306 Digital ETFV.pdf

What are everyone's thoughts about using something like this as a brew pot?
 
Check out the FAQ where it says it will use about 1.5 gallons of oil and that the fill line is the max amount of liquid that can be used safely.

Doesn't give you much to work with.
 
Well, that assumes that there would be a turkey in the pot as well.

I have a Charmglow electric fryer that I bought at Depot a few years ago. It's terrible. Worthless for brewing. Just doesn't have the oomph to generate a good boil. Remember, it's harder to heat water or wort to boiling temps than it is to heat oil for some reason that I do not remember or understand. This one might have some bigger cajones than mine, but best-case, you're looking at doing partial boils and struggling with that.

Really, all I've used it for has been heating sparge water, and even that's pretty slow going. If you were local so I wouldn't have to ship it, I'd sell you mine cheap.
 
I've read that in other posts that the fryers don't seem to be able to get a good boil, however, I was interested in this one because it can "Boil or steam 10lbs of crab legs and shrimp". Sounds like it was made to boil large amounts of water, although according to the manual, it "may take up to 55 minutes".
 
I have/had one that I filled over the line with water, than set my stock pot (canning pot) with 2 gallons of extract wort in it. Even with the lid kind of on (wouldn't go over the stock pot) it could not boil the wort. Water around the stock pot, inside the fryer pot, was boiling like mad. I had it set to the highest setting and still could not get it to boil, even after two hours. In other words; DON"T BOTHER!!!
The only reason I had it was a neighbor gave it to me new for $10 a couple of years ago. The spigot came in handy on my 60qt aluminum boil kettle, so it wasn't a complete bust.

Get a propane unit and move it outside!
 
I'm reading the responses, but who has used the exact model in question? To me, it seems there is a whole lot of unqualified comparison going on here.

BBB, I built a custom all-grain brewing rig using two Masterbuilt electric turkey fryers about 6 months ago. Out of the box, the 1650 watt heating element will boil ~6.5 gallons of water (starting at 80F) in ~30 minutes with the lid on. With the lid off, it takes much longer. This is due to the lack of insulation on the walls of the unit. I then added R3 pipe insulation to the walls of the unit and it now boils ~6.5 gallons of water in ~15 minutes.

Here are the facts:

  1. Can easily boil 6.5 gallons of water/wort.
  2. In factory form, requires the lid to be partially on to reach a rolling boil. With insulation, no lid is necessary.
  3. Costs less than $0.50 in energy (at SA, TX rates) to mash/sparge/boil a 5.5 gallon batch.
  4. Accepts 3/8" rigid tubing for easy pickup tube and/or filter connection.
  5. Allows you to conduct a step mash with the digital temperature controller (limited to 25F steps).
  6. Can be purchased for $110 - $130 (varies seasonally).

With two fryers, I can mash/sparge/boil a 5.5 gallon batch (~80% efficiency) or use the "grain in a bag" method to do an 11 gallon batch (~70% efficiency). I use a pump for mash recirculation and to provide positive pressure through the counterflow chiller, so it's just a matter of turning a few valves to change the configuration from a 5.5 to an 11 gallon setup.

So, I guess I'm trying to say - don't let the negative comments discourage you. The fryers do what they advertise and work well (with slight modification) for brewing. I'm quite happy with my brewing rig and the guys at my local homebrew club definitely aren't complaining about the quality of my brews. ;)
 
Thanks lamarguy. I was hoping someone had used these before for and I'm glad to hear that it works will for your rig (which is way more complex than I'm looking at). This unit is on sale at the local Bass Pro Shops for $99. I guess, the worst that could happen is I'm out $100 and I go back to stinking up the kitchen.
 
I have the Charmglow electric fryer, same as the masterbuilt I think. It works, I brew it occasionally. Kind of slow!!, mine needs the lid on to reach boil and will maintain boil w/ the lid cracked. I also supplement heat by using a heatstick. Depending how handy you are and what power sources you have in the basement, you could consider heat sticks or an electric kettle. I paid 50 bucks shipped.

Two 2000 watt heat sticks will outperform the 1650 watt fryer, can be used for strike sparge water in most brewing vessels.

The electric fryer is safer in case you have a blonde moment???


Hope this helps???

Mike
 
i have brewed in 7 gallon turkey fryers, you just ahve to pay attentino and be patient...
 
I'm reading the responses, but who has used the exact model in question? To me, it seems there is a whole lot of unqualified comparison going on here.

BBB, I built a custom all-grain brewing rig using two Masterbuilt electric turkey fryers about 6 months ago. Out of the box, the 1650 watt heating element will boil ~6.5 gallons of water (starting at 80F) in ~30 minutes with the lid on. With the lid off, it takes much longer. This is due to the lack of insulation on the walls of the unit. I then added R3 pipe insulation to the walls of the unit and it now boils ~6.5 gallons of water in ~15 minutes.

Here are the facts:

  1. Can easily boil 6.5 gallons of water/wort.
  2. In factory form, requires the lid to be partially on to reach a rolling boil. With insulation, no lid is necessary.
  3. Costs less than $0.50 in energy (at SA, TX rates) to mash/sparge/boil a 5.5 gallon batch.
  4. Accepts 3/8" rigid tubing for easy pickup tube and/or filter connection.
  5. Allows you to conduct a step mash with the digital temperature controller (limited to 25F steps).
  6. Can be purchased for $110 - $130 (varies seasonally).

With two fryers, I can mash/sparge/boil a 5.5 gallon batch (~80% efficiency) or use the "grain in a bag" method to do an 11 gallon batch (~70% efficiency). I use a pump for mash recirculation and to provide positive pressure through the counterflow chiller, so it's just a matter of turning a few valves to change the configuration from a 5.5 to an 11 gallon setup.

Got any pictures of your modifications?
 
I had actually bought a masterbuilt electric turkey fryer at one point (don't remember which model). I tested it (lid on), and couldn't get a boil in over an hour, so I returned it. I'm glad to hear someone has found a way to have success with it. I'm thinking hot liquor tank.
 
I just brewed my first mini-mash (hefeweizen) in an unmodified Masterbuilt Electric Turkey fryer. The built in digital thermometer was off by +20 degrees. I started with 3 gallons of strike water and mashed in 3lbs grain in a grain bag in the basket that came with the unit. I then sparged on the stove (thanks DeathBrewer!) in a 1 gallon stock pot, then dissovled 2.5 LME in it to avoid pouring it on to the heating element. That resulting wort was then added back to the Turkey Fryer for the boil. The basket stayed in to contain my hops in the grain bag. It was a rolling boil but with lid half on (which I know is a no no).

All in all everything went pretty decent. For the next batch I'm goin for my first AG batch with the DIY cooler mash/lauter tun and the Electric Turkey Fryer Hot Liquor Tank/Kettle.

This forum has been a HUGE help! Thanks!

@lamarguy I'd be interested in seeing pics of the insulation job you did if possible. Thanks for the idea!
 
All in all everything went pretty decent. For the next batch I'm goin for my first AG batch with the DIY cooler mash/lauter tun and the Electric Turkey Fryer Hot Liquor Tank/Kettle.

Glad to hear you were successful in doing a partial mash. A kettle will comfortably hold ~13 lbs of grain with the strainer in place (which I recommend to avoid tearing your bag) and ~6.5 gallons of water. That limits your OG to about 1.070 using grain alone, which is quite reasonable for 95% of the beers you'll ever make.

@lamarguy I'd be interested in seeing pics of the insulation job you did if possible. Thanks for the idea!

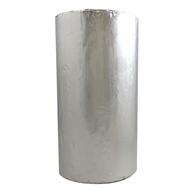
I used Thermwell insulation which can be purchased in the plumbing department at Lowes for less than $15. The roll is just enough to fully insulate two kettles (perfect for me). I just measured the circumference with a string, unrolled and cut the insulation to length on a table, and applied the sticky side to outer container (foil facing inward to deflect heat back towards the kettle). That stuff is sticky as hell, so don't press it down until you get it positioned correctly. I insulated the sides and bottom and taped the edges with HVAC foil tape (also sticky as hell :eek:).

077578023335md.jpg

+1 on this (Thanks for the post LG)

I did my turkey fryer with this insulation and it works like a dream. One thing to note is to keep at least 1 - 2" above the bottom of the kettle. This insulation works great, but it stinks to high heaven when it burns.
-Me
 
that's cheaper then the replacement controller and element. I sent them an email asking about them to see what kinda deal they had. could be interesting to use a stock pot with the controller and element. I got the below as a response. so for anyone needing a little electric helper i think this might be a good deal. buy two and you have a ton of heating options.

Part number 902060009 - 34.99 + S&H and part number 902060016 (break
> away cord) 12.99 + S&H. If you would like to place an order for the
> replacement parts please give our customer service team a call at
> 800-489-1581 M - F 8 am to 5 pm EST. They will be able to assist you
> with anything that you may need. Thank you for your time.
>
 
I did my turkey fryer with this insulation and it works like a dream.

Glad to hear.

And ya, $39 is a VERY good price. I purchased a spare heating element for $35 just in case one the units failed during a brew session. I consider it cheap insurance...
 
I have a Charmglow Model SETFAA from Home Depot. Bought it a few years ago to fry turkeys and just decided to use it for a brew kettle this weekend. It has a 1650W heating element, a temp dial, and a timer dial. And the pot is aluminum.

After cleaning it out (try to make sure all the cooking oil residue is gone), I boiled 3 gallons of water in it. And it boiled fast and without any problems.

For others who have tried to boil with the lid off - don't. I don't care if it's a propane heated pot or electric, keeping the lid off just wastes energy and will take longer to reach a boil. Of course once it reaches a boil, keep the lid off. Also, once it reaches a boil it doesn't take so much energy to keep it at that temp, so it's not a problem that the lid is off - gas or electric, your rig should be able to maintain a boil at that point.

For me, this works really well. It allows me to brew indoors (I don't have a garage and it's January in Minnesota) and it's really convenient. I use a shower stall in my basement as "the brewery", and I boil my wort there and also store my primary and secondary fermenters there. But I'm starting to digress.

If you get one of these turkey fryers, be aware that the heating element sits IN the pot (at least on the ones I've seen). So you'll have to clean it well afterwards. I found that Oxyclean works great on the pot and the heating element, though it will discolor the put since it's aluminum.

Hope this helps!
 
I have an older version of this Fryer. Mine is smaller and only holds about 4.75 gallons that leaves you about a 2 in margin of error for boil over.

It works really well on 3 gal boil. Last weekend I got brave enough to but 4.75 gallons in. It took a really long time to get to boil but did get there and maintained a good rolling boil.

for extract brewing 3 gal boil it works great, especially when you need to steep your grains at 155. you just set the temp and let it go.

I am now moving to AG so I switched to a propane burner. I will probably still use this for smaller batches and just for heating up extra water for clean up etc.
 
Just picked up the 28 qt one for use as a HLT. Seems like from my test run that it is going to work well and cut down on the propane use. Can't imagine using it as the brew kettle though. It does take longer to heat things up.
 
Just picked up the 28 qt one for use as a HLT. Seems like from my test run that it is going to work well and cut down on the propane use. Can't imagine using it as the brew kettle though. It does take longer to heat things up.

I use mine for my HLT. A few random thoughts:

As a previous poster noted, temp reads about 20 degrees F high. I set it to 200 for the strike water, dump it into my unheated 10 gallon Rubbermaid cooler mash tun and hit almost perfectly at 152-153 as a mash temp (sometimes need a quart of hot or cold to adjust temp). I then set it to 225 for the sparge (I do batch), which puts the water at about 200. I turn it off about 10 minutes before sparge to drop the temp a little. I have also stopped adding salts to the HLT, since they tended to build up on the heating element; I now add them directly to the mash.

Oh, and don't try to turn on your toaster oven to warm your Bavarian-style pretzels if the HLT is on the same circuit as your toaster oven. You will pop the breaker. I "test" mine weekly. :eek:
 
Very timely post. I picked up this electric Turkey Fryer last night at Academy for $99:

Cajun Injector Electric Gourmet Turkey Fryer - Bruce Foods Online Store

I did a test boil with a full five gallons of water starting around ~100 degrees. It looks as though max capacity is ~6 gallons, giving me plenty of room in my five gallon boil. I imagine my wort will be warmer when I finally use it. That being said, it took about 1 hour to boil the water without the lid. Not bad in my mind... should be much quicker with the preheated wort. This is going to be my first all grain brew so I'll report back later how it goes. I think I will end up preferring the electric model. While not as powerful, I can:

a) Use it indoors--very big plus being in Houston with 100+ degree weather.

b) Avoid having to buy a propane tank.

c) Eventually use it for parts when I eventually go the DIY route to make a better set-up.

d) Pre-heat water to a set temperature given that it has an electronic temperature control.

For those who have a nice patio / already have a propane tank, propane may be best.

Cheers

(PS One more thought--while most electric turkey fryers say only fill to 1.5 gallons... thats because they don't want some idiot dropping a 14 pound turkey into a vat full to the brim of 400 degree peanut oil. These things are a bane to redneck thanksgivings... every year I read about someone burning down there house this exact way. That being said, I've enjoyed fried turkey myself for several of my Thanksgivings... one taste and you'll agree its worth the risk.)
 
that's cheaper then the replacement controller and element. I sent them an email asking about them to see what kinda deal they had. could be interesting to use a stock pot with the controller and element. I got the below as a response. so for anyone needing a little electric helper i think this might be a good deal. buy two and you have a ton of heating options.

Part number 902060009 - 34.99 + S&H and part number 902060016 (break
> away cord) 12.99 + S&H. If you would like to place an order for the
> replacement parts please give our customer service team a call at
> 800-489-1581 M - F 8 am to 5 pm EST. They will be able to assist you
> with anything that you may need. Thank you for your time.
>

I have been wanting to switch over to electric and this feels like it makes a lot of sense.

If you look at the original owner's manual posted, you see three part numbers:
902060015 Control Panel and Element
902060016 Breakaway Cord
990060175 Element Bracket Kit

Does anybody know what the "Element Bracket Kit" is? Is it possible that I could order that as a functional bracket to help me mount the element to my existing stock pots?

Couldn't you rewire the thermostat on this to work with a Love controller to get better temp control?


Based on the MacGyver stuff you guys do on here, this seems like a pretty simple mod to make this a lot more functional.
 
Does anybody know what the "Element Bracket Kit" is? Is it possible that I could order that as a functional bracket to help me mount the element to my existing stock pots?

Couldn't you rewire the thermostat on this to work with a Love controller to get better temp control?

If it's what I think it is, it's the heating element assembly itself. The heating element is built into the controller, and there are two slots on the back of the black outer vessel that the controller slides into. This is a built-in safety [sic] device, to prevent using the coil in other setups. There is probably a simple way to bypass this.

As far as putting a Love controller on it, I was considering doing this, but haven't gotten around to opening up the controller yet. In it's unmodified state, when I set it to 200 degrees F, it heats the water to about 176, which is very close to the temp I need for strike (without preheating my cooler MLT). When I set it to 225, it reaches around 200, which is close to the temp I use for my batch sparge (I actually let it cool off a bit, or add a little more cold water, before sparging).

One thing you CAN'T do is use a plug-in controller; once the power is removed from the heater unit, it resets to an "off" state.
 
I pre-used my Turkey Fryer last night and added 4 gallons of 70+ water to it. Cranked up the controller and let it heat up. I have a lid for this which has 3 holes in it and I placed my Thermometer into one of them and it fits nicely. It took about 50 minutes to bring the water up to 169 degrees, but it maintained that temperature within 2 degrees for over 1 hour during my test.

I then raised the temperature to obtain a boiol and after about another 30 minutes, I had a good roiling boil. This fryer is designed to fry turkeys and the temperature control is marked for up to and beyond 375 degrees. I have made several turkeys in it and it works quite well.

I am not using the original pot as it was used for poultry, and I do not want to contaminate my beer. I also lined the inside of the outer plastic housing with a fire retardant material which aids in getting the temps up and maintaining it. I have the propane setup and all the other material and equipment to do AG and wanted to start one yesterday, but did not get to it.

I think the fryer (electric) could be used as a MLT and could be used to hold sparge water. It will boil water, but I think I will stick with the propane setup for that.

Salute! :mug:
 
Just picked up a second one (brand new) off of CL for $35. Will try to cut the slots to bypass the safety control and add the heating element to my 10 gallon stainless steel bk. Hopefully that works and I can supplement the heating with a $35 bucket heater and save $4 a batch over using propane.
 
Glad to hear you were successful in doing a partial mash. A kettle will comfortably hold ~13 lbs of grain with the strainer in place (which I recommend to avoid tearing your bag) and ~6.5 gallons of water. That limits your OG to about 1.070 using grain alone, which is quite reasonable for 95% of the beers you'll ever make.


I used Thermwell insulation which can be purchased in the plumbing department at Lowes for less than $15. The roll is just enough to fully insulate two kettles (perfect for me). I just measured the circumference with a string, unrolled and cut the insulation to length on a table, and applied the sticky side to outer container (foil facing inward to deflect heat back towards the kettle). That stuff is sticky as hell, so don't press it down until you get it positioned correctly. I insulated the sides and bottom and taped the edges with HVAC foil tape (also sticky as hell :eek:).

077578023335md.jpg

Stupid question : The pot has a removable aluminum liner, and you lined the inside of the outer pot - with this duct insulation?
 
I hate to necro but this insulation tip is the best $15 upgrade ever. I also ran insulated tape under the rim of the kettle so when it sits in the cradle, it seals.

With a 5.75g boil volume:

Starting from 135° tap water, only took ~10 minutes to reach mash temp (155°), ~10 minutes to reach mashout (170°), and 14 minutes to reach boil (212°)

Not too shabby for a free 1650w fryer. The insulation also fixed the issue where my temp dial was 15° off from actual!
 
Back
Top