New 3 Keggle Setup Question

Homebrew Talk - Beer, Wine, Mead, & Cider Brewing Discussion Forum

Help Support Homebrew Talk - Beer, Wine, Mead, & Cider Brewing Discussion Forum:

This site may earn a commission from merchant affiliate links, including eBay, Amazon, and others.

Skeller

Active Member
Joined
Jul 6, 2015
Messages
43
Reaction score
3
Location
Kansas City
Hey All

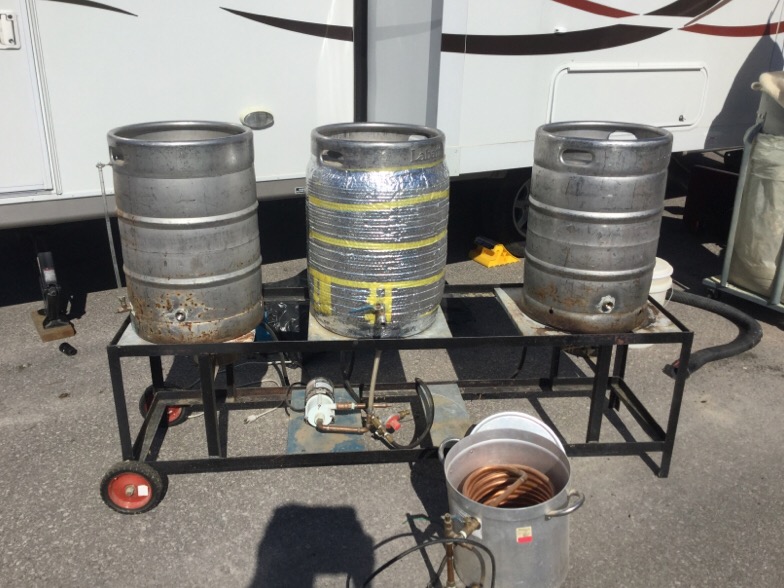
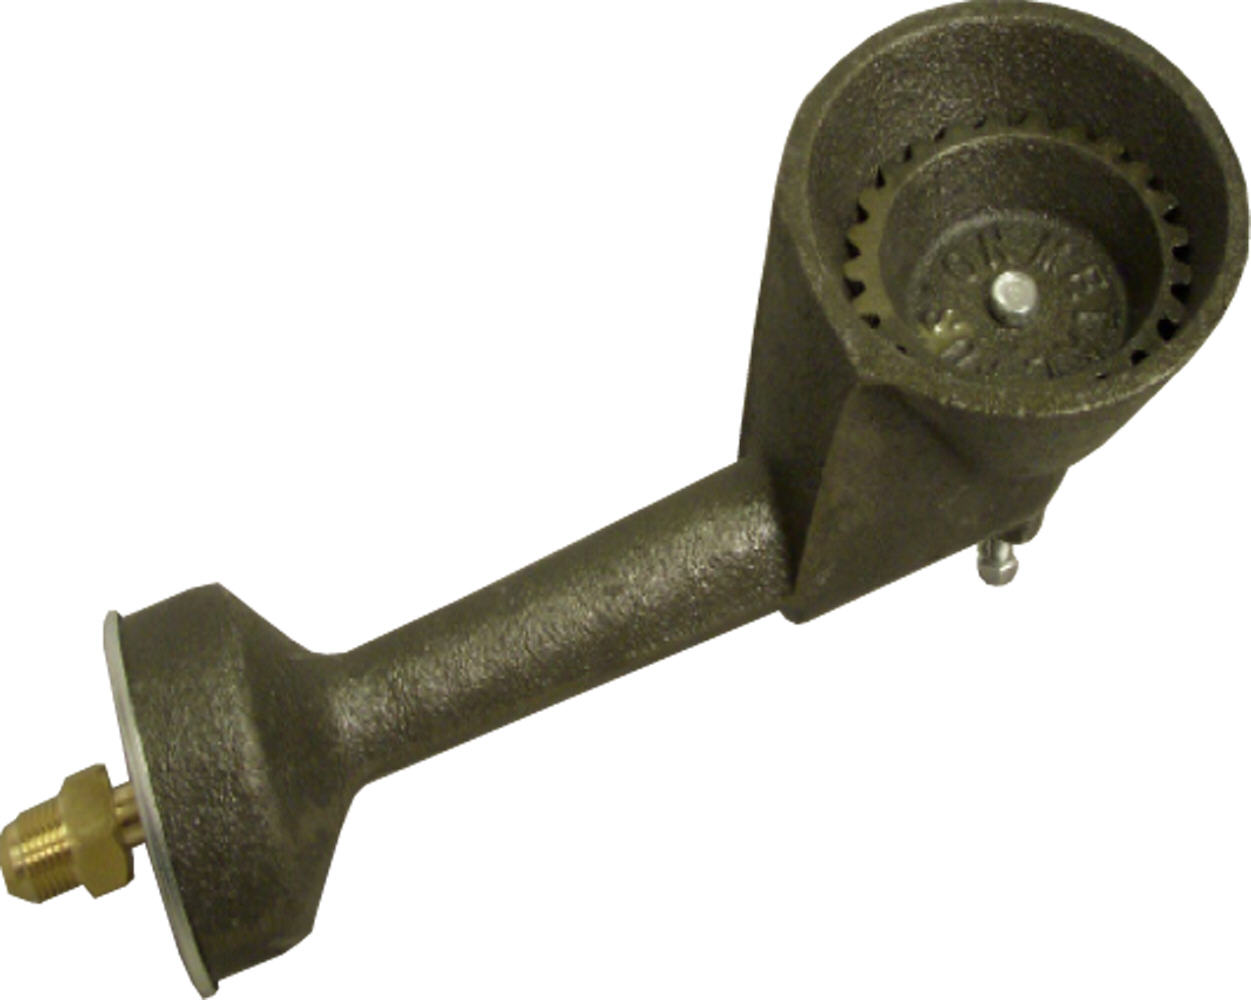
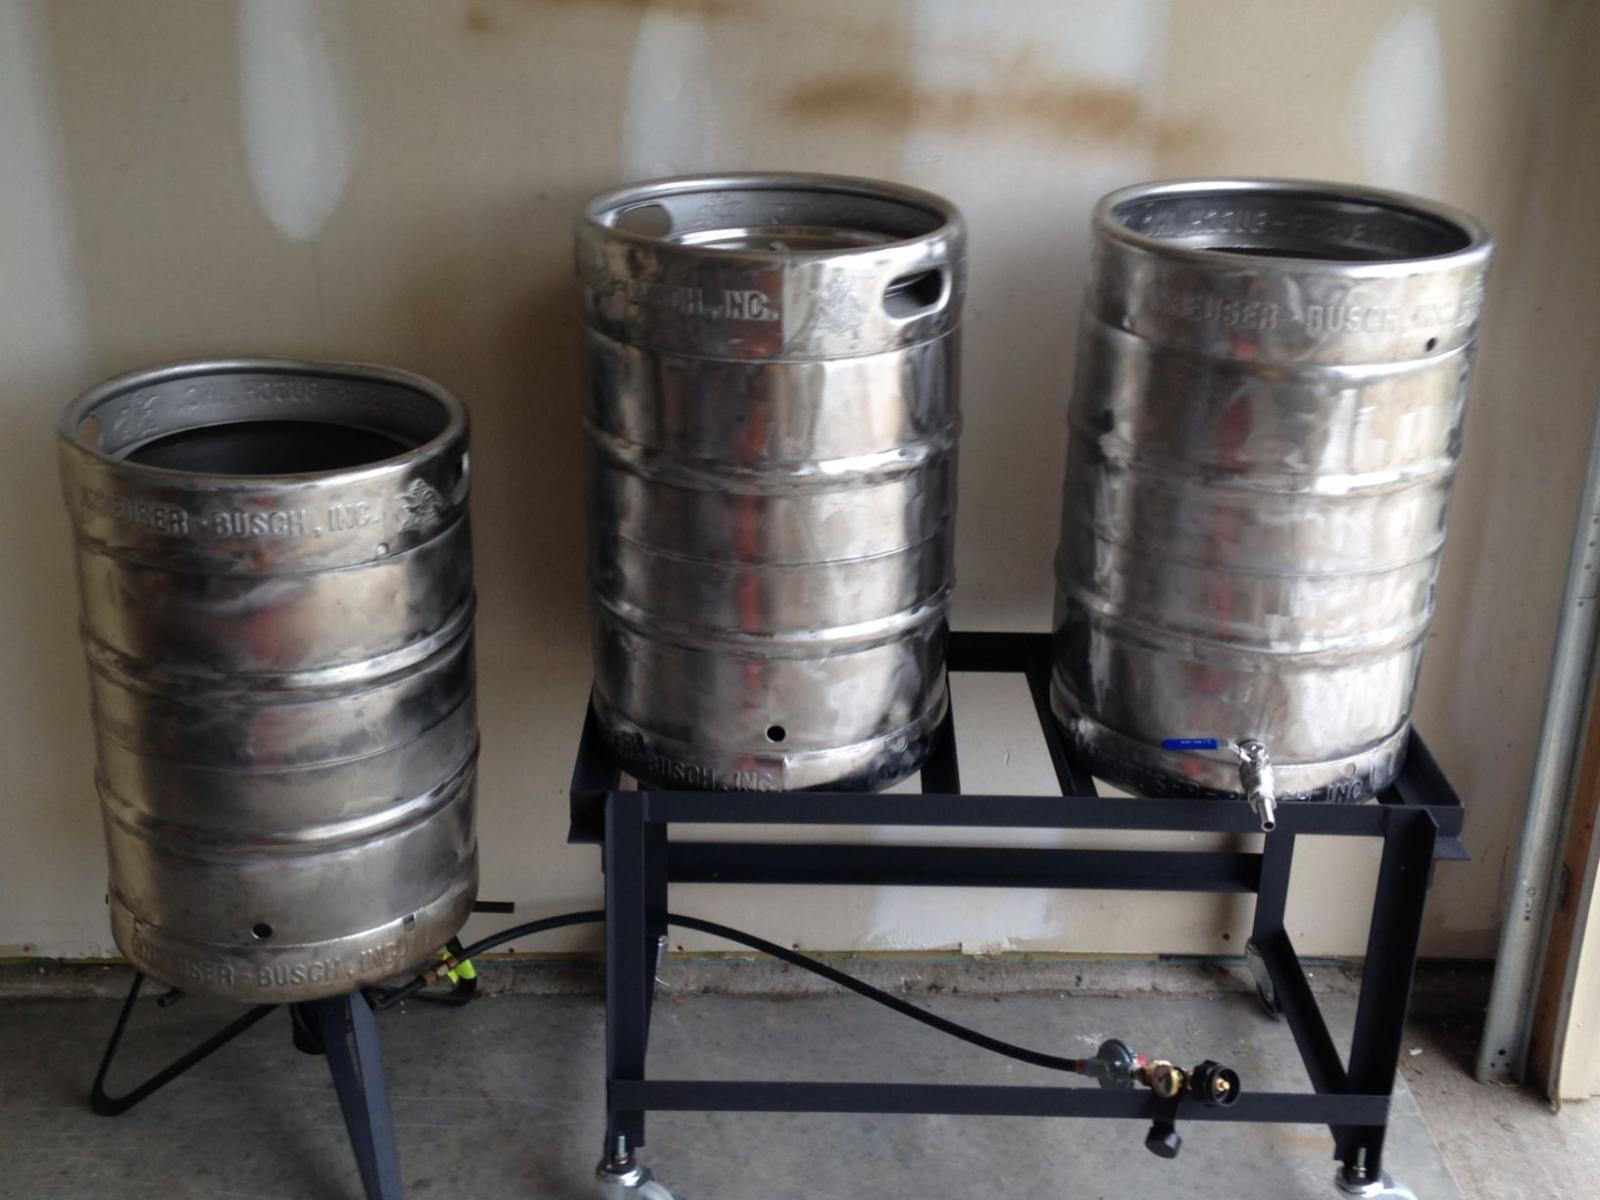
I am looking for some advice on a new 3 keggle set up i've been working on and am now very close to completing. Long term I plan to go with Brutus 10 type single level set up with a pump. Currently I have this angle iron table I got from a family member modified slightly, and it holds 2 kettles. I also have this single Jet Burner, which has to be highly inefficient given its like a jet engine firing (someone in another forum described it similar to making the sound of a harrier taking off lol). So I must eventually get a more efficient burner and will mount one or more on to the table. Probably the 10" Banjo's.
Also have to consider a spot for the 3rd Kettle - although the stand alone burner should work it would seem for now. Would like one of the nicer 3 kettle tables at some point.

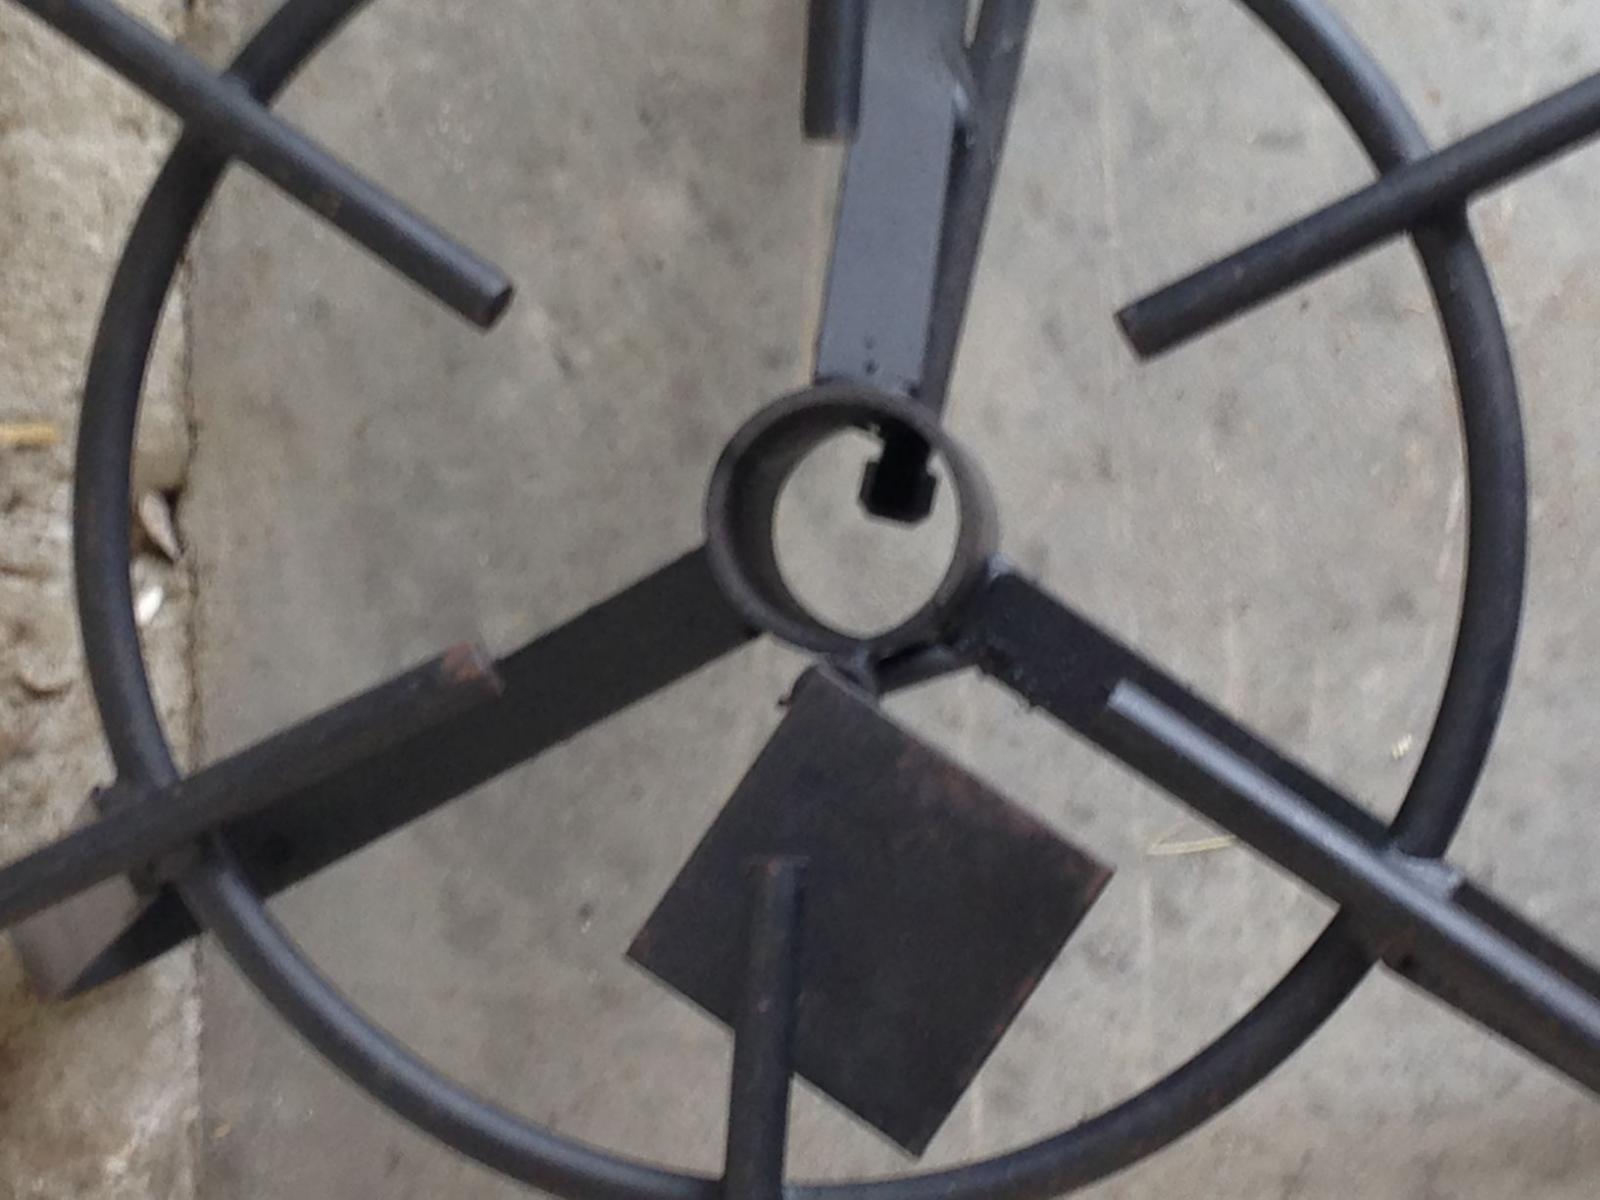
So i'm a little anxious to get started. Have 2 more valves coming and all of the connections I need. So, with only one burner, trying to fly sparge, and keep heat for a mash kettle + have strike water ready, seems it would be a little tricky moving the burner around (the burner does fit bottom of the table and sits on another cross piece of angle not currently shown, but it sits a bit low. So Im thinking batch sparge should be fine. I dont have gravity all figured out yet either. Likely just boil kettle on ground to transfer after mash is done, then we'd obviously have to make sure its high enough to transfer into the fermenter after chilling it (have mongo immersion chiller).

Then I thought just pulling the trigger on a banjo now, and mounting it under one kettle on the table. Should be easy enough - i'm not a welder but I can use bolts which is how I mounted the wheels.

For the mash, I could just insulate using the reflectix stuff - although I still feel like somehow that may not hold 150degrees on a simple mash for a full hour? I know applying flame can melt the stuff.

So what i'm asking for is just thoughts on how some of you would do it...if you're itchin to get a batch going by Saturday with what you see in the picture.

Appreciate any help and thoughts. This would be my first outdoor burner setup and i'm a bit nervous (yes yes...'relax, dont worry..'):rockin:

Tks
Scott
IMG_0856.jpg


IMG_0855.jpg
 
You have a great set up going!

I have three kegs, two sit on two burners on a cart with a chuuger pump. I have a stand alone turkey burner for the other. I have two mash tuns (a Mini-Brew) and a Cube Cooler with a screen) that I put on a rolling cart next to it. They are elevated so I can lift water to them and drain out into my two boil kettles. I do two 10 gallon batches, staggered by about 20 minutes.

I start by filling all three kegs and getting water hot.

My pump is critical to moving that much water.
 
A reflectix insulated keg will hold temp quite well, most of the conversion will be long done before it drops too much. Do two wraps and put some on the bottom too.
 
You have a great set up going!

I have three kegs, two sit on two burners on a cart with a chuuger pump. I have a stand alone turkey burner for the other. I have two mash tuns (a Mini-Brew) and a Cube Cooler with a screen) that I put on a rolling cart next to it. They are elevated so I can lift water to them and drain out into my two boil kettles. I do two 10 gallon batches, staggered by about 20 minutes.

I start by filling all three kegs and getting water hot.

My pump is critical to moving that much water.

Thanks and very helpful to hear how you do it. Wow, 2x10 gallon at a time sounds challenging considering i've never done one (10 gallon batch).
What is a 'mini-brew'? Considered a cube cooler but i have a mash screen/pick up set already in the middle keg.

Thanks again
 
A reflectix insulated keg will hold temp quite well, most of the conversion will be long done before it drops too much. Do two wraps and put some on the bottom too.

great thanks! so do i need put some on the top...that seems to stand to reason where heat might escape. Also read somewhere reflectix works best 'reflecting heat'. To do this, you need to wrap so its got a small gap between the kettle wall and the layer of insulation. This was being accomplished by putting vertical strips of reflectix as kind of furring strips to hold the main wrapped layer away from the kettle> Else they said it does not work as it is designed. Not sure you have tried this but...hey...if 2 wraps work that sounds a helluva lot easier
 
Without going 3 tier or buying a second pump you won't be able to fly sparge, I think.

I don't think a siphon would work from your mash tun to boil kettle how it currently looks. It might but without testing it you'll never know.
A second pump would be required to transfer wort to the mash and out of the HLT. A local brewer has a single tier I like and only has one pump. He batch sparges, step mashes, and before buying two more burners he used one and moved it from mash to HLT to heat as needed.


Useful information - thank you. Yea i was trying to figure based on 1 pump to start. But two i dont know. And i wondered on the gravity feed. I plan on testing all once i get my valves in the next day or two
 
I had about 6-8" between kegs. The MT was in the middle of the two others that were gas fired. I had no melting. I'll see if I have a pic.

image.jpeg
 
If I remember, I used the entire roll. I had a double disc on the bottom and just a lid on top.
I did many brews in Cdn winters with this setup
 
If I remember, I used the entire roll. I had a double disc on the bottom and just a lid on top.
I did many brews in Cdn winters with this setup

Ok Canadian winters and you were fine? That makes me feel much better i'm down in the Midwest Kansas City and while we do get some cold winters it will not be like that for several months, so I should be ok.

I can use the stand jet burner i guess im just sure i'll need a ton more propane with this thing. If I can hold temp on the mash, and I do a batch sparge, then really I dont need a burner for sparge water. Still have to heat up the strike water though and without pump would have to lift/dump a keg into the mash tun as wouldnt I lose a lot of temp doing a gravity..or even a pump transfer of the strike water? If I were heating water int he MLT it would not matter but again, if I wrap the MLT then no flame under it.

Anyway like how you have it set up - you're helping me get to start up!
Edit: Or I could just heat strike water in my 5 gal pot...easier lifting and dumping...


:mug:
 
I also used those jet burners, they sound like a 747 but they work well. I wouldn't say they are any less efficient. One key to those is making sure the inside is clean. They simply turn propane to heat, efficiency comes from how you make use of that heat.
 
I don't think you would lose much temp if you did gravity or even a pump. Because your mash will already be close to 168 if you're doing a mash out. I've read about people concerned with temp being too high when fly sparging for tanned extraction. Something about the sparge water cooling to 168 but most people said to hear it to 180. I personally believe the sparge doesn't matter if it's hot or cold and the main reason people truthfully use water at 168 is because it's less energy to bring it to a boil.
 
I also used those jet burners, they sound like a 747 but they work well. I wouldn't say they are any less efficient. One key to those is making sure the inside is clean. They simply turn propane to heat, efficiency comes from how you make use of that heat.


Good to know - but to be sure - you mean the single jet burner right - like i pictured with just the single flame tube. not the multiple nozzle jets.
 
I don't think you would lose much temp if you did gravity or even a pump. Because your mash will already be close to 168 if you're doing a mash out. I've read about people concerned with temp being too high when fly sparging for tanned extraction. Something about the sparge water cooling to 168 but most people said to hear it to 180. I personally believe the sparge doesn't matter if it's hot or cold and the main reason people truthfully use water at 168 is because it's less energy to bring it to a boil.


Ok but for the mash strike, you mean start at 180 or wherever i need to be in order to achieve my mash temp once the grain is added, then pump or gravity from the hot tank to the mlt?

Sorry for all the newb questions guys...definitely going to run a test before i start
 
Like this


thats what i was afraid of. thats not mine. Mine has a single hole and creates one conical flame. It literally looks like a fighter jet engine with afterburners on. In the pic you see the gas nut at the bottom - it has one small hole. Outside of efficiency it also gets blown out with even the slightest breeze.

I emailed King Kooker because a friend had acquired this and i was not familiar with these - so i asked to make sure it was a complete burner. They said it was.

IMG_0855.jpg
 
I also use a 3 keg set-up, but with 2 burners and a hoist for BIAB. My standard brewday is then 3 batches - a 10G immersion chilled batch and a pair of 5G no-chilled batches.

I heat about 11G of water in keg-1 (the 10G batch) and mash. During the mash I heat another 12G in keg-2 (the first 5G batch), timed to reach strike temperature as keg-1's mash completes. I then transfer the bag of grain from keg-1 to keg-3 (the middle keg) and draw off 4G of the water from keg-2 to dunk-sparge it. The remaining 8G in keg-2 is then used for the 2nd mash. When the boil is done in keg-1, I collect the first 8G of hot water from the immersion chiller in keg-3 and use it for the 3rd mash.

The separation of the burners also means that I can keep one batch boiling while the other is mashing without worrying about setting the insulating sleeping bags on fire.

Designing and building your own brew-stand from weldless strut is a lot of fun.

IMG_0522.jpg
 
I also use a 3 keg set-up, but with 2 burners and a hoist for BIAB. My standard brewday is then 3 batches - a 10G immersion chilled batch and a pair of 5G no-chilled batches.

I heat about 11G of water in keg-1 (the 10G batch) and mash. During the mash I heat another 12G in keg-2 (the first 5G batch), timed to reach strike temperature as keg-1's mash completes. I then transfer the bag of grain from keg-1 to keg-3 (the middle keg) and draw off 4G of the water from keg-2 to dunk-sparge it. The remaining 8G in keg-2 is then used for the 2nd mash. When the boil is done in keg-1, I collect the first 8G of hot water from the immersion chiller in keg-3 and use it for the 3rd mash.

The separation of the burners also means that I can keep one batch boiling while the other is mashing without worrying about setting the insulating sleeping bags on fire.

Designing and building your own brew-stand from weldless strut is a lot of fun.

OK, Im impressed.:mug:

Looks like you have developed quite a system......which I shall be recreating shortly. Seriously though, awesome brew day.

Have you ever though using a counter flow chiller? You seem like a DIY kind of person. You could take the imersion chiller you have and make this:
https://www.homebrewtalk.com/showthread.php?t=182236
Then you could chill all three batched as they finish the boil and end your brew day.
 
Last edited:
With the California drought I can't justify water-cooling all 3 batches, and I'm happy with no-chill except when I don't want the first-wort/whirlpool flavors that the slow cool-down of no-chill brings. This way I immediately re-use 1/3 of the immersion chiller water (and save on heating to strike); the next 1/3 I save for clean-up, and the final 1/3 goes into the rain barrel for the yard/chickens.

OK, Im impressed.:mug:

Looks like you have developed quite a system......which I shall be recreating shortly. Seriously though, awesome brew day.

Have you ever though using a counter flow chiller? You seem like a DIY kind of person. You could take the imersion chiller you have and make this:
https://www.homebrewtalk.com/showthread.php?t=182236
Then you could chill all three batched as they finish the boil and end your brew day.
 
I also use a 3 keg set-up, but with 2 burners and a hoist for BIAB. My standard brewday is then 3 batches - a 10G immersion chilled batch and a pair of 5G no-chilled batches.

I heat about 11G of water in keg-1 (the 10G batch) and mash. During the mash I heat another 12G in keg-2 (the first 5G batch), timed to reach strike temperature as keg-1's mash completes. I then transfer the bag of grain from keg-1 to keg-3 (the middle keg) and draw off 4G of the water from keg-2 to dunk-sparge it. The remaining 8G in keg-2 is then used for the 2nd mash. When the boil is done in keg-1, I collect the first 8G of hot water from the immersion chiller in keg-3 and use it for the 3rd mash.

The separation of the burners also means that I can keep one batch boiling while the other is mashing without worrying about setting the insulating sleeping bags on fire.

Designing and building your own brew-stand from weldless strut is a lot of fun.

Oh man I dont know how you keep up with 3 batches going...but i'm impressed! Love the set up.

Regarding the weldless strut - i had not thought of that. Assume a home depot/lowes type item...i may eventually design a new table like this
 
With the California drought I can't justify water-cooling all 3 batches, and I'm happy with no-chill except when I don't want the first-wort/whirlpool flavors that the slow cool-down of no-chill brings. This way I immediately re-use 1/3 of the immersion chiller water (and save on heating to strike); the next 1/3 I save for clean-up, and the final 1/3 goes into the rain barrel for the yard/chickens.

All very good points. I live east of Sacramento (the armpit of CA) and water is a bit scarce here as well. Our chickens absolutely love brew days as much as I do! We give them maybe 1/3 of the grains and put the rest in the freezer for a nice cold summer treat. We also keep my chilling water for the plants, the chickens, and for the kiddie pool or bath water for the boys.

Cheers to being water wise as I work for the State Water Board!
 
Oh man I dont know how you keep up with 3 batches going...but i'm impressed! Love the set up.

Regarding the weldless strut - i had not thought of that. Assume a home depot/lowes type item...i may eventually design a new table like this

If you stagger them right so that the boil in one coincides with the mash in another, 3 batches is pretty straightforward.

These guys are great for strut, and there are several threads here where people describe their builds.
 
All very good points. I live east of Sacramento (the armpit of CA) and water is a bit scarce here as well. Our chickens absolutely love brew days as much as I do! We give them maybe 1/3 of the grains and put the rest in the freezer for a nice cold summer treat. We also keep my chilling water for the plants, the chickens, and for the kiddie pool or bath water for the boys.

Cheers to being water wise as I work for the State Water Board!

Our 2 chickens can't deal with 40lb of wet grain, so I give it to friends with a flock of 200. Last time they picked up and didn't get the spent grains to the farm for a few days, by which time fermentation had started ... imaging laying an egg with a hangover.

And cheers for working for the State Water Board - crucial stuff.
 
Ok but for the mash strike, you mean start at 180 or wherever i need to be in order to achieve my mash temp once the grain is added, then pump or gravity from the hot tank to the mlt?

Sorry for all the newb questions guys...definitely going to run a test before i start

Heat strike water to 165F
Add to mash tun
Add grains
Note temperature difference between 165 and mash temp.
Add water to HTL and heat to 170
Wait an hour then drain mash tun runningings to boil kettle
Add 170F water to mash tun
Wait 15 minutes
Drain to boil kettle
Boil, add hops and drink beer.
 
Heat strike water to 165F
Add to mash tun
Add grains
Note temperature difference between 165 and mash temp.
Add water to HTL and heat to 170
Wait an hour then drain mash tun runningings to boil kettle
Add 170F water to mash tun
Wait 15 minutes
Drain to boil kettle
Boil, add hops and drink beer.

Thank you!! Well summarized :mug:
 
Back
Top