Show us your sculpture or brew rig

Homebrew Talk - Beer, Wine, Mead, & Cider Brewing Discussion Forum

Help Support Homebrew Talk - Beer, Wine, Mead, & Cider Brewing Discussion Forum:

This site may earn a commission from merchant affiliate links, including eBay, Amazon, and others.
Omfg I think i may of fainted that is one killer mood setting brew area my friend many props killer set up

Ha! Thanks. The brew stand and the tap wall have colored LED strips above them. Looks cool with the steam. I prefer the red or random colors but blue seemed to show up best in the pics.
 
Was using an old piece of laminate desktop for my brewing surface. It gave me more space, but was beat up and didn't handle liquids well. Any moisture on it left the area an ugly white spot for a few weeks and it started bubbling up in places. I was thinking of a way to cover it with a thin piece of stainless, but found a eight foot long piece of butcher block from Sears for $152. Really happy with the result. Looks so much better and the glossy finish should be easy to maintain.

I needed an 82" piece, so had enough leftover from the 8' to replace the plywood shelf being used for my HLT gravity feed.

(edit to add: If you like this idea, Sears had the best price I could find on butcher block. They also have a 6' length for $124.)
 
Here's my 2 tier, 1 pump setup I built.

Design:

M7IUxDo.jpg


Implementation:

RNBflPD.jpg


A few mods, and in use on a brewday:

1908138_10153197012340219_8284879012182579525_n.jpg


Process:

1. Heat strike water, pump to igloo to mash in.

2. Once mash is complete, heat sparge water and pump to MLT

3. Pump sparge water from MLT to top of igloo, gravity drain to boil kettle.

Works great :ban:

I've removed the 90º elbow from the pump input, it really wan't necessary.
 
I build them for friends that BIAB since they are made with bed frames they are easy to build. But i am thinking about making kits and plans. So what do the forum thinks? :confused:
 
I build them for friends that BIAB since they are made with bed frames they are easy to build. But i am thinking about making kits and plans. So what do the forum thinks? :confused:


I'd love to see the plans...especially if it didn't require welding skills. That's my problem. The guys that can weld are usually willing and able to make their own stands because it often seems they have the tools to do it. I'm not one of those guys. [emoji107]
 
Yup, good advice from Mr tripper of days. Think about it in terms of the complete system. You want your liquid at the lowest point at all times so that it can push air out -- if you leave places for air to pocket it leads to flow stoppage and/or ruined pumps due to cavitation.
 
1fast636 said:
How do you like there bottom drain mash tun? Thinking about pulling the trigger but not sure yet lol
I really like the concept. However, if I had to do it again, I would look a bit more in to the side drain mash tuns from Glacier Tanks and Brewer's Hardware.

One thing I really like about the BH kettles is their use of full 1.5" TC ferrules at all vessel outlets and temp probe locations; it really opens up the options for valves, pickup tubes, thermowells, etc. I'm not a huge fan of the standard vessel outlets (3/4" tubing x 1.5" TC flange) on the Stout kettles.

Also, I will be replacing the stock false bottom from the Stout MLT with a Jaybird false bottom when I get around to it...those things are nice.

Yup, good advice from Mr tripper of days. Think about it in terms of the complete system. You want your liquid at the lowest point at all times so that it can push air out -- if you leave places for air to pocket it leads to flow stoppage and/or ruined pumps due to cavitation.
Thanks for noticing that day_trippr and iijakii. I should have noticed the incorrect orientation - I am glad I posted up a pic so you guys would notice it before I burned up a pump.

Here is a shot of the TC pump heads - TIG welded, ground, and polished:

TC Pump Heads.jpg
 
One thing I really like about the BH kettles is their use of full 1.5" TC ferrules at all vessel outlets and temp probe locations; it really opens up the options for valves, pickup tubes, thermowells, etc. I'm not a huge fan of the standard vessel outlets (3/4" tubing x 1.5" TC flange) on the Stout kettles.
Ditto this! I'm building a new rig right now with 3, 30 gallon BH kettles. Cool thing is they can add any other custom ports you need, so I'm having them do return ports up high/left on all 3 kettles just like my current rig.
 
Nice I just did as well. You in the fire protection business? Noticed a 3 gallon Ansul wet chem cut in half in your system

Scrap business.

Yeah, chopped in half, ground down the sharp edge, soldered a 1/2" coupling to the bottom - attached a camlock female.

Makes for a awesome lauter grant!
 
Finally finished my new brewing rig single tier stand. What isn't pictured is my 30 plate chill and the electric toggle switches (shown seperate) I use to control the 2 pumps. Ran a wet test on thursday and things went well. Christening the stand on 7/18 with my Robust Porter Recipe! Can't wait!

IMG_5251.JPG


IMG_4283.JPG


IMG_0353.JPG
 
Finally finished my new brewing rig single tier stand. What isn't pictured is my 30 plate chill and the electric toggle switches (shown seperate) I use to control the 2 pumps. Ran a wet test on thursday and things went well. Christening the stand on 7/18 with my Robust Porter Recipe! Can't wait!

Looks nice. Is that galvanized pipe on your gas manifold? I believe Galvanized is a no no with gas. Maybe someone else can chime in.
 
Looks nice. Is that galvanized pipe on your gas manifold? I believe Galvanized is a no no with gas. Maybe someone else can chime in.

Everything I have read states it is ok to use but there was concern of flakes jamming the valves or orfices. This appears to have been disproven at this point. For the most part it is based on local code.

It was located right next to the black pipe in the gas section and for me that works. It is not a huge amount of piping so I don't see it causing an issue.
 
Finished welding up my sculpture this past weekend and broke it's Cherry on Sat. and again on Sunday. I made this out of 2 bed frames and donor steel from a wall bracket from some pump-jacks. The 2 small out riggers in the middle of the base (added tip over protection that isn't really needed) fold up. The brackets bolt on and off when in use. I want to eventually hard plumb the gas lines but for now it works. (I also welded on some wheels to one end so I can tip it up and wheel it around easier. The lower burner rests inside the angle iron base. I can slide it closer or farther from the center. I have it closer to the Mash tun when draining and then slide it out to give myself room from under the HLT before I start the boil. Easier to stir/add hops/chill ect with it slid out.

b1.jpg


b2.jpg
 
Finished welding up my sculpture this past weekend and broke it's Cherry on Sat. and again on Sunday. I made this out of 2 bed frames and donor steel from a wall bracket from some pump-jacks. The 2 small out riggers in the middle of the base (added tip over protection that isn't really needed) fold up. The brackets bolt on and off when in use. I want to eventually hard plumb the gas lines but for now it works. (I also welded on some wheels to one end so I can tip it up and wheel it around easier. The lower burner rests inside the angle iron base. I can slide it closer or farther from the center. I have it closer to the Mash tun when draining and then slide it out to give myself room from under the HLT before I start the boil. Easier to stir/add hops/chill ect with it slid out.

To be honest, it looks a little scary... Maybe the steel is of a thicker gauge then it appears? At very least, I would add a strap to the ends of the two horizontal supports holding your mash tun. That would prevent the weight of a full tun from spreading the end of the supports and dumping the mash tun on the ground.

Sorry... Don't mean to be a downer but 160 deg + liquid is not something to take chances with. Be careful...

Good luck!

I also thought of that, my brew partner (father) talked me out of it. I did try to spread them apart but they didn't seem to budge. They are recessed into the angle iron of the uprights. It won't take much to weld on a strap between the 2 underneath at the end though. Err on the side of safety is always a good thing.
 
Have you ever held the metal he used? It's plenty strong for this. Most of the rigs we see here are massively over built. Don't get me wrong I'm all for safety and a cross bar is a good idea but that steel he used is plenty strong for the task.
 
View attachment 290608
Latest rebuild, from gravity to single tier.

Even though it's OK to use copper piping for propane, it shouldn't be exposed like that right in front where you'll be wirking. All it takes is one drop of something onto the pipe to bend the soft copper or even cause a pin hole leak at one of the solder joints. I've seen it happen with water lines and spring a leak. If the copper was covered and protected in some way, it may be OK but the way it's exposed right in front, I would opt for black pipe. This is just my opinion.
 
This is my first rig that i have built so far. I wanted to do it right the first time and so i went with a 2 tier option so i only need 1 pump, the Mash tun is gravity fed down to the boil kettle. I also went ahead and made the top tier detachable if i ever decide to turn it into a single tier, 3 burner, 2 pump HERMS set up. (the frame underneath the decking is already prepped for a third burner. all i would have to do is add the flashing for heat protection) My next step (after staining and sealing it) is going to be installing all my HERMS components, then rigging up a mash tun agitator. Let me know what you think.

IMG_1401.jpg


IMG_1408.jpg


IMG_1411.jpg


IMG_1404.jpg
 
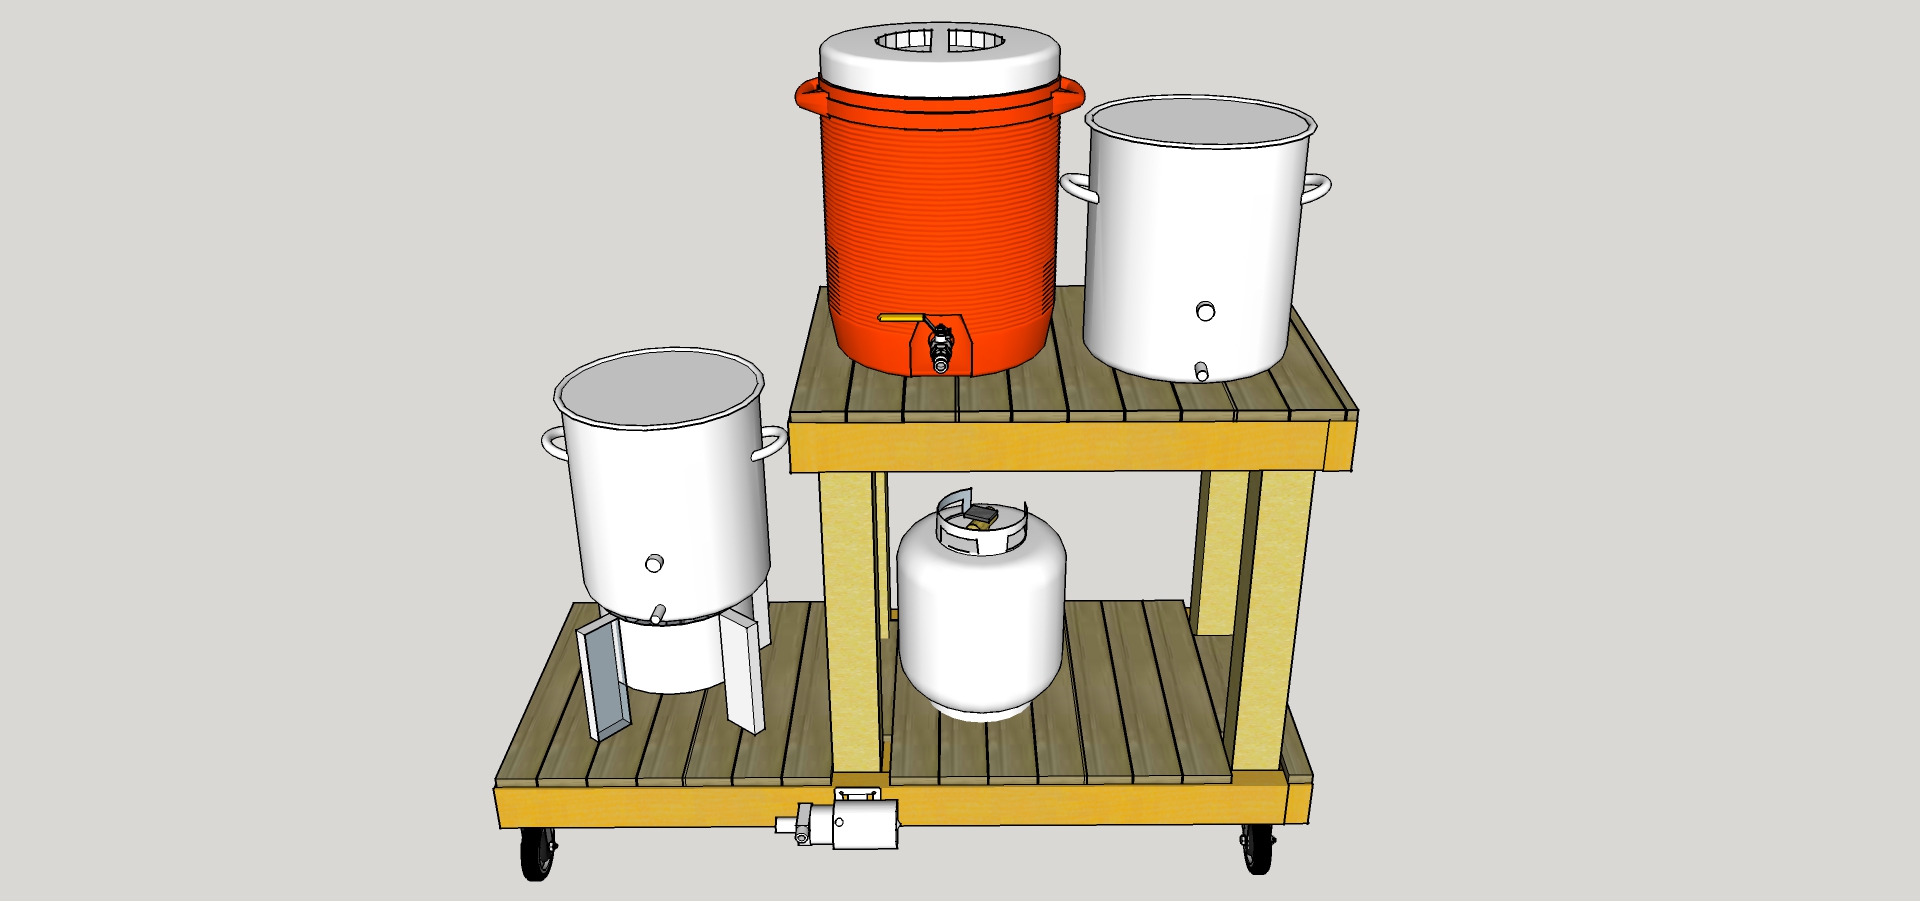
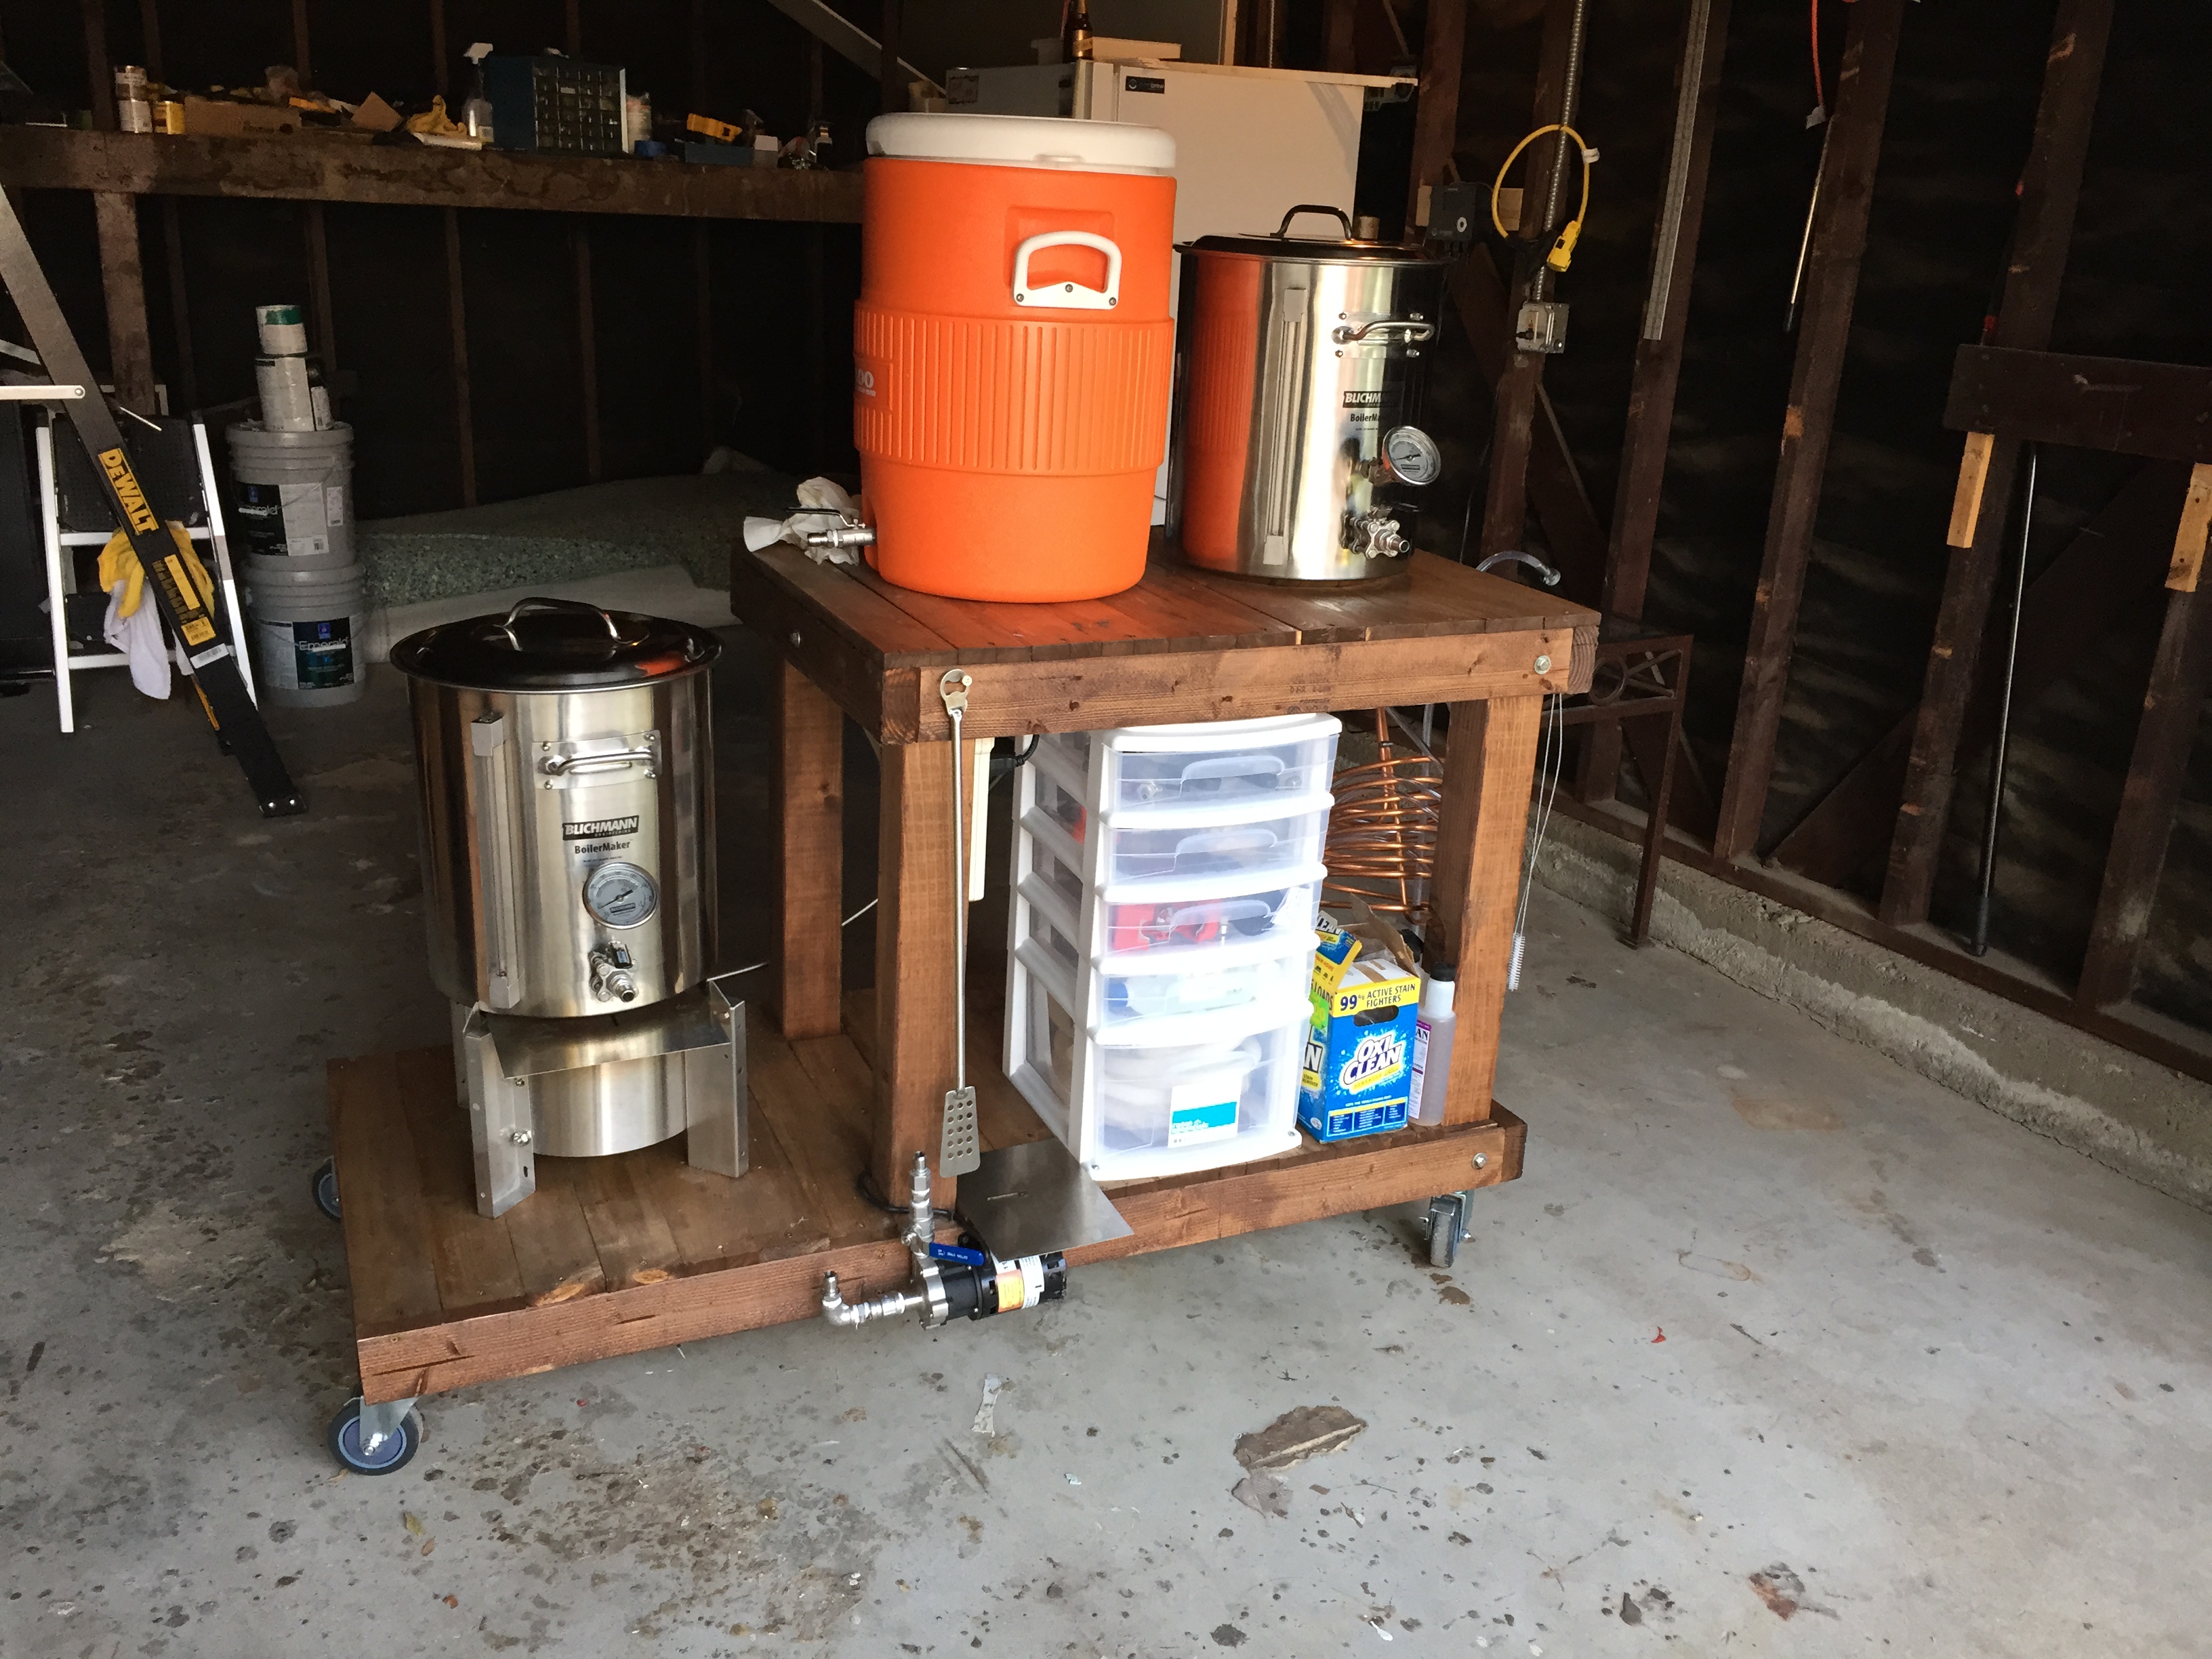
I like it, however, I have some concerns. First, as was mentioned, charring. You do have some shielding, but you may find that it's not enough. Keep an eye on it, and keep either a fire extinguisher or charged water hose near by. I have a wood stand, and had to add shielding to prevent charring. Second, it appears that your burners are only supported by four bolts. What size batches are you planning on? Maybe they'll be ok for a five gallon, but I'd be very afraid to be near that with 10 gallons on it. The bolts could soften when they get hot, and having 100+ pounds pushing on them could cause them to fail. That won't be pretty if you have 10+ gallons of boiling wort splashing all over you.
 
Appreciate the feedback guys.
First of all, I know the pump is upside down, I was going to flip my head before testing it out.

In regards to the charring concern, I might go back and install flashing that covers the entire height of of the 2x6 and install some fireplace insulation between the wood and flashing. You think that would suffice?

And about the bolts holding my burners in place, they are 4 3/4 carriage bolts. I only do 5 gallon batches right now so I think I should alright. I stood on them after I got them installed and they held fine. I'm 6'4 215lbs so I think they should be able to hold up just fine for 5 gallon runs. When I do decide to start brewing 10 gallon batches, I will probably go back and add some more support just to make sure I don't take a nice surprise boiling wort bath.

Thanks for the feedback guys! I really appreciate it! :mug:
 
Maybe I'm risk averse, but for two of the four carriage bolts to fail I would think they would need to get extremely hot, if this were to happen, the burner frame would also be at risk of failing, which is typically not a concern. Also guessing that flashing alone would provide adequate heat protection.
 

Latest posts

Back
Top