Show us your sculpture or brew rig

Homebrew Talk - Beer, Wine, Mead, & Cider Brewing Discussion Forum

Help Support Homebrew Talk - Beer, Wine, Mead, & Cider Brewing Discussion Forum:

This site may earn a commission from merchant affiliate links, including eBay, Amazon, and others.
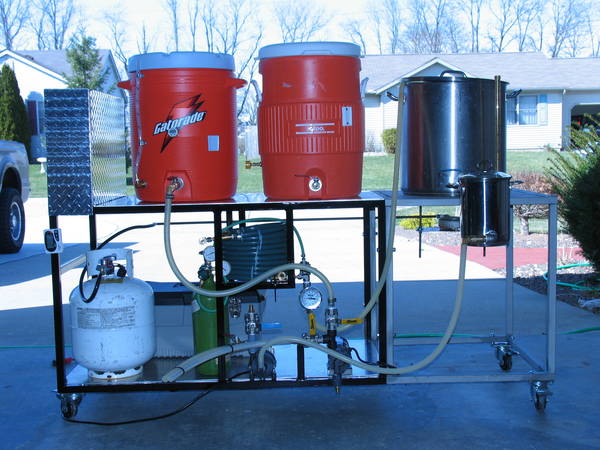
Turtle Cook: The top shelf has the same cheap self adhesive vinyl floor tile surface although most of the time you can't see it. It is visible when I transport laying on its side.

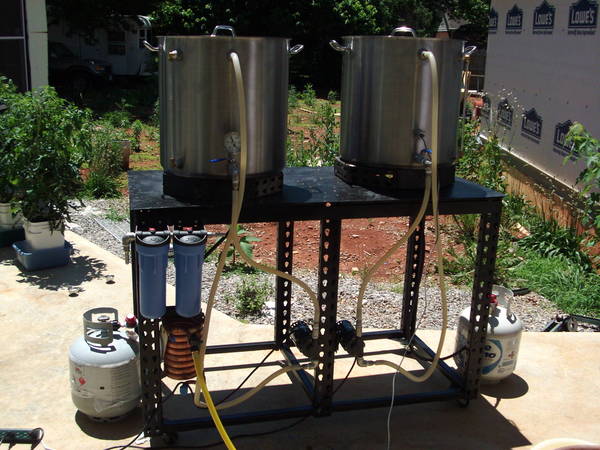
bdvanza: I sometimes brew outdoors and sometimes late at night. The swivel mounted shop light has proved to be very useful. There's a power strip on the back side of the tower that the pump and shop light plug into. Not shown is the remote control I use for the the pump. The transmitter hangs on the inside back of the tower frame and plugs into the power strip. Note also the mini-shotgun replica igniter mounted to the side like a gun rack.

3388675228_3aa4290ebd.jpg


3387076665_d7d94c059c.jpg


Tlhis hobby need not be totally serious all the time!

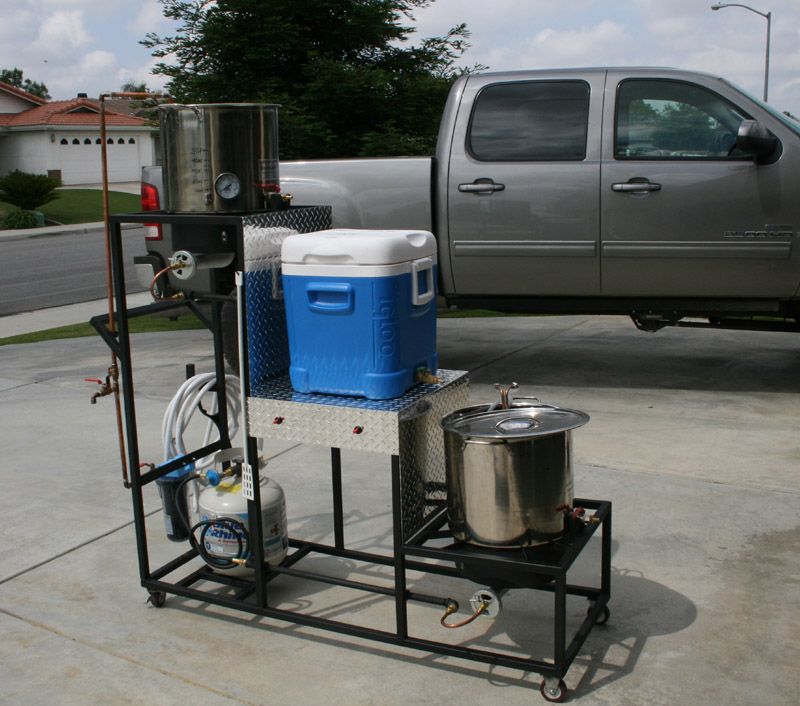
Space was the number one consideration for my set up and weight was number two. The tower foot print is only 2' x 2' and becasue its so light weight its easy to move around/transport.

3387073605_fdd72b33a6.jpg


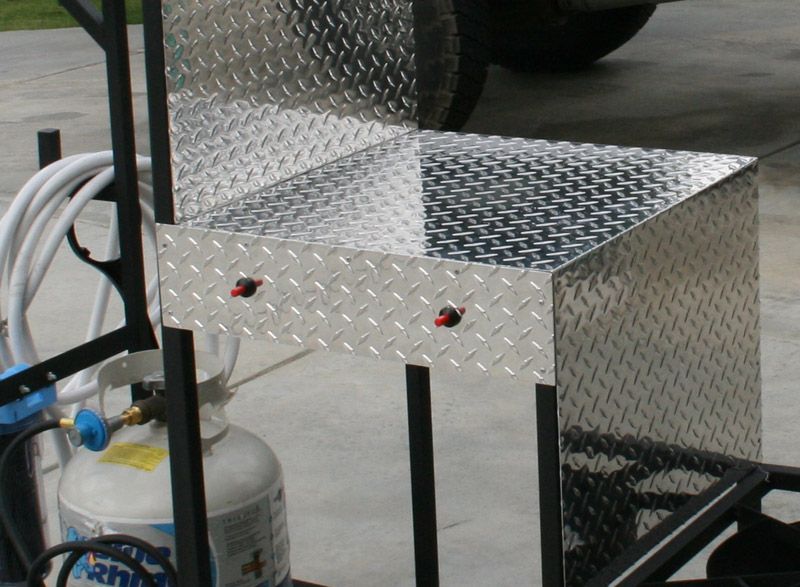
the last one shows the water filter and my mash rake hanger.
 
Here is my new brew rig. I still have a few things to finish like wiring up the pumps but that shouldn't take too long. The aluminum clad box on the right serves as a place to mount the pump switches and also store brewing chemicals and test equipment. Mostly steel and aluminum except the part of the stand under the boil pot. That part of the stand is stainless.
IMG_3898.JPG

What's that little coffee pot sized thing in front of the kettle?
 
What's that little coffee pot sized thing in front of the kettle?

It's a hopback, almost all my Pale ales and IPAs have a flameout addition of hops. That is what I'm going to use that for. I might use it for all my late additions as I'm recirculating the boiling wort through the pump and chiller to sanitize.
 
Bigheart Brewery,

Just made some minor burner adjustments and she works like a champ. Thanks go out to this brewboard, Brotherhood Brew and "the King", Lonnie Mac!

BrutusTenBA.jpg
 
What is all this crap for!!!! What happened to the "ale pail" your stove and a cheap pot you stole from your mom!!?? No but seriously why all this complicated stuff, somebody explain this to me?
 
Because to some, including me, it is also fun to build these rigs. Not having to lug around moms pot is nice also.
 
Ok, but I still dont understand the three story thing going on. Is this for all grain? IM new so Im only doing extract as of now.
 
Three tier system is to allow for gravity liquid transfer. The flat rigs or 2 tier most likely have some sort of pumping system. Some of these are almost fully automatic with computer controlled temperature controlled valves.

These types of rigs may seem complicated, some are, but the real reason is it is easier in the long run to control the final product.

Plus it is FUN.
 
Ok, but I still dont understand the three story thing going on. Is this for all grain? IM new so Im only doing extract as of now.

Yep. Top is hot water (hot liquor tank or HLT) middle is the mash/lauter tun (MLT) where the grain sits with the hot water (mashes) and out comes wort into the bottom, or kettle, at which point the AG process very much resembles the extract process. 3 tiers use gravity and when you see a 1 tier or 2 tier, they use a pump at some point to transfer wort.

Most stoves can't do full size boils.
 
What is all this crap for!!!! What happened to the "ale pail" your stove and a cheap pot you stole from your mom!!?? No but seriously why all this complicated stuff, somebody explain this to me?


I think I can speak for the group in general terms. We are gadget freaks and geeks. Designing and building stuff is in our genes. Brewing beer is as good an excuse as any to play with these tools and toys. Keeps us off the streets and out of the bars too. This hobby need only be as complicated as you want it to be. There seems to be no upper limit. It's been said that brewing isn't rocket science unless you want it to be.

I'm firmly convinced that you can make top quality beer with very basic equipment. Probably the smartest and most economical method would be to single infuse and batch sparge using a pic nic cooler for a mash tun. This is not my style, but for others it might very well be.

There is also the bling value to consider. Some of these rigs are works of art. Many rigs show case the skills and knowledge the builder possesses.
 
Because this complicated stuff makes reproducing the same beer over and over again, exactly... really easy.
 
Seriously, though, for me these are the two main reasons I built my stand.

1) I typically brew 10 gal batches now, and things get heavy. Virtually no lifting w/ a stand, and I don't like lifting buckets or pots of scalding water over my head onto a makeshift platform for gravity drain.
2) Multiple burners speed up my brew day (while still providing the benefits of #1)

The extras, like my combo thermo/sight glass fittings just plain make things easier. It takes a quick glance to see the volume as you fill your tuns, and you always have an instant readout on the temperature of things. You don't NEED them, but they sure are nice.

Of course, the automated systems take things one step further, and provide an extra level of precision and repeatability. I haven't quite made that jump yet, and I don't know that I will, not that I don't think they're cool as hell.
 
Anyone know of someone or anyone who has a 3 tier system around the Twin Cities MN. That they will be using this summer as I would like to come over and help brew a time or two to get the hang of it while im saving up money to start putting mine together?? Ill be in Buffalo starting in july. Just PM me if you can help me out thanks in advance.
 
My brew in a bag tier I welded up out of bed frames and leftover garage door rail and parts.

Plywood deck thats been stained and sealed with teak oil. All the metal parts have been primed and painted a dark copper.

briabrig.jpg
 
Bigheart Brewery,

Just made some minor burner adjustments and she works like a champ. Thanks go out to this brewboard, Brotherhood Brew and "the King", Lonnie Mac!

Beautiful work! Is that paint or powder coating on the stand?

Brian
 
A year of wishing, dreaming, and planning, and building has come to an end. She's operational. I wouldn't say complete, but operational. I'm going to pop her cherry this weekend. I still need to insulate all the copper. The control panel is spartan and temporary. Just switches for now.

A special thanks to cdburg for answering a few questions for me as they arose.

A few of my "must have" features that I implemented:
- Stainless
- Single Tier
- Future upgradable to 20G
- Hard plumbing and redundant connections (so I don't have to move hoses)
- HERMS
- Intermittent Pilot on HLT
- Sight glass

Future:
Control panel with 2 PIDs, countdown and absolute timers, alarm, liquid level detector (to enable burner lockout on empty tun and overflow protection), mash tun float switch.

Have a look.


Mylo
 
Disclaimer: I am new to brewing

I noticed many of you guys use a 3 tier system where each container is on a separate level. Is this so you can drain fluid easily into the next container without using pumps?

Also, I don't know much about full grain brewing but is the top kettle for boiling water to then move into the next container to add the grains to move to the final container to add hops?

Yes, for gravity feed purposes. And sort of. The top kettle, also known as the hot liquor tank, is used to heat the water to add to the grains, not to boiling, but maybe to 170F-180F. It is also used to hold the hot water that will be needed to rinse the grains after draining the mash tun(where the grains are soaked) into the boil kettle. once all the drained liquid is in the boil kettle, it( the wort) is boiled and hops are added then.
 
Mylo. You should start a thread for that one, it is beer equipment porn indeed.

A year of wishing, dreaming, and planning, and building has come to an end. She's operational. I wouldn't say complete, but operational. I'm going to pop her cherry this weekend. I still need to insulate all the copper. The control panel is spartan and temporary. Just switches for now.

A special thanks to cdburg for answering a few questions for me as they arose.

A few of my "must have" features that I implemented:
- Stainless
- Single Tier
- Future upgradable to 20G
- Hard plumbing and redundant connections (so I don't have to move hoses)
- HERMS
- Intermittent Pilot on HLT
- Sight glass

Future:
Control panel with 2 PIDs, countdown and absolute timers, alarm, liquid level detector (to enable burner lockout on empty tun and overflow protection), mash tun float switch.

Have a look.


Mylo
 
jims_pictures_321.jpg


Here is my new rig, just brewed day before on it and it performed well, Did my first lager based on a Slovakian beer called Golden Phesant:mug:
 
Yes, and I visited the Pivovar in Moravia? last month when I visited a freind for two weeks, It was like a beer tour of Slovakia and Czech, they gave me a hard time cause I wouldn't go to any castles or museums , eventually they just called me Degustator Piva
 
heres a shot of my poor boy set up

<a href="http://s666.photobucket.com/albums/vv30/norm_58183/finished%20sculp/?action=view&current=finished2.jpg" target="_blank"><img src="http://i666.photobucket.com/albums/vv30/norm_58183/finished%20sculp/finished2.jpg" border="0" alt="Photobucket"></a>

and a nother
<a href="http://s666.photobucket.com/albums/vv30/norm_58183/finished%20sculp/?action=view&current=ignitors.jpg" target="_blank"><img src="http://i666.photobucket.com/albums/vv30/norm_58183/finished%20sculp/ignitors.jpg" border="0" alt="Photobucket"></a>
 
Nice, that certainly aint no "poor boy set up" though! Nice rig, nice truck, nice driveway...aint nothin at all in that pic that's "poor boy".

We all can't brew like Claudius B now can we really?

edit...maybe now I get the expression...might be a regional thing yall.
 
Just switched the bottom end of my rig around. I now have the O2 unit hooked directly to the pump which saves a hose and clamp. (Not to mention now I don't have to lay the thing down on a bucket and worry about it falling off.) The thermometer is now easier to read with it aiming up instead of horizonal.

DSC00759.JPG
 
Back
Top