problems using a fridge/freezer as fermentation chamber?

Homebrew Talk - Beer, Wine, Mead, & Cider Brewing Discussion Forum

Help Support Homebrew Talk - Beer, Wine, Mead, & Cider Brewing Discussion Forum:

This site may earn a commission from merchant affiliate links, including eBay, Amazon, and others.

Tiredboy

Well-Known Member
Joined
Oct 11, 2011
Messages
200
Reaction score
3
Location
Kingston
Controlling fermentiation temp is an issue for me. I was going to build a son of a fermentation chamber but for some reason, when the air temp rarely drops below 85F, nowhere sells the insulation board I need! So I'm thinking of stepping up a gear and getting a small fridge or chest freezer and temperature controller (I'd use my current drinks fridge but suspect it is too small - need to check measurements tonight).

Are there any advantages/disadvantages of using a chest freezer compared to a fridge? I'm concerned that running a freezer a lot warmer than it "should" be might be an issue and result in it failing quickly.
 
I think both options are good, but I personally like the freeze myself. It may just be me, but I think that it protects the carboys more than an upright, no worries of them falling out. Just my two cents. Happy brewing
 
I just converted a free mini-fridge with defective thermostat to a fermentation chamber. Just added a pre-wired digital Johnson temp controller (A419), and it works great. A little tight, but after bending the freezer shelf to the back, it works perfect.

As to a freezer failing prematurely, there are tons of people who have converted them to keezers with temp controllers. I don't think they have experienced any problems, so I think that's a solid option too.
 
I use 3 full size refridgerators with their own temp controls. 2 side by sides and one with freezer on top and fridge on bottom. With the side by sides you can cut out the middle vertical divider so you can fit full size kegs, build a shelf and have top and bottom racks, but with the top and bottom one you cannot because the freezer coil goes thru it, and if you try to bend it up you will kink it. you can usually find used fridges for really cheap if you look around. I prefer them because lifting a heavy carboy out of a chest freezer sucks, and going vertical takes less floor space.
 
I use an old chest freezer. Apart from the heavily lifting of getting beer in and out, I like it a lot. The design helps keep cold in when you open the door.

Before you buy your temp controller, check out the eBay aquarium temp controller thread. You can easily build a digital two-stage controller for under $50.
 
Guy who manages QA for a refrigeration controls company here (not Johnson)...

The only thing you need to be concerned with about freezer life and custom controls is the value of the hysteresis (commonly called the "dead band") which is the amount above & below your setpoint that the temperature is allowed to go before taking action. A lot of people make the mistake of thinking that holding a temperature at 50 degrees means anytime it goes higher than that, you want the compressor to come on. If you set it up like that, you're going to be cutting your compressor on and off all the time and you WILL wear out your fridge/freezer a lot quicker.

A more appropriate dead band would be 3-4 degrees F, leaving room for the temperature to swing before your controller takes action to bring the temp down. In a converted freezer you want to aim for at most 2 compressor activations per hour (and that's probably high unless it's summer and you live in Guam, or else your freezer is poorly sealed/insulated). In my rig, it's set up to where if the setpoint is 50, it cuts on at 52 and keeps going till it gets to 48 (that's considered a 4-degree "dead band"). I keep a 5-gallon bucket full of water with a temp probe in this freezer at all times, and in a steady state, a swing of 4 degrees in air temperature moves the temperature of 5 gallons of liquid less than half a degree in either direction. In the summertime, the most I've seen the compressor come on is 14 times a day.

I just converted a free mini-fridge with defective thermostat to a fermentation chamber. Just added a pre-wired digital Johnson temp controller (A419), and it works great. A little tight, but after bending the freezer shelf to the back, it works perfect.

As to a freezer failing prematurely, there are tons of people who have converted them to keezers with temp controllers. I don't think they have experienced any problems, so I think that's a solid option too.
 
Guy who manages QA for a refrigeration controls company here (not Johnson)...

The only thing you need to be concerned with about freezer life and custom controls is the value of the hysteresis (commonly called the "dead band") which is the amount above & below your setpoint that the temperature is allowed to go before taking action. A lot of people make the mistake of thinking that holding a temperature at 50 degrees means anytime it goes higher than that, you want the compressor to come on. If you set it up like that, you're going to be cutting your compressor on and off all the time and you WILL wear out your fridge/freezer a lot quicker.

A more appropriate dead band would be 3-4 degrees F, leaving room for the temperature to swing before your controller takes action to bring the temp down. In a converted freezer you want to aim for at most 2 compressor activations per hour (and that's probably high unless it's summer and you live in Guam, or else your freezer is poorly sealed/insulated). In my rig, it's set up to where if the setpoint is 50, it cuts on at 52 and keeps going till it gets to 48 (that's considered a 4-degree "dead band"). I keep a 5-gallon bucket full of water with a temp probe in this freezer at all times, and in a steady state, a swing of 4 degrees in air temperature moves the temperature of 5 gallons of liquid less than half a degree in either direction. In the summertime, the most I've seen the compressor come on is 14 times a day.

Good advice. Thats exactly how I ferment in converted freezer. I set my Ranco with a probe at 47 F (fermenting lager at the moment) with 4 F step before it kicks in. I also set my carboy in tub of water where temperature swings are MUCH less than air. This way its not affected so much by opening the freezer all the time and temp swings are almost non-existent. During first 12 hours I let the wort cool to pitching temp. I add frozen water bottles to the tub until the wort is at desired temperature or less and only than pitch yeast.
 
... I'm concerned that running a freezer a lot warmer than it "should" be might be an issue and result in it failing quickly.


A temperature controlled chest freezer will fail sooner (personal experience and assistance with HVAC friend) than if it is used for its intended purpose, but you'll get 6-8 years out of it.
 
Newb:

What is a good/simple temp controller to buy for a chest freezer?

If one is fermenting ale in the winter using a chest freezer inside will this work ( 17c and up) while fermenting in chest freezer?

Thanks
 
I bought a Ranco and the homemade one from RebelBrewer.com they both work great. There are forums on here about how to make them yourself for fairly cheap, and would be a fun project.

If I understand your question, you are asking how do you keep the fridge warm enough to keep ales in winter? I live in FL so never have this problem, but I've read people put a light bulb in the freezer, it makes enough heat to keep the temp right.
 
If I understand your question, you are asking how do you keep the fridge warm enough to keep ales in winter? I live in FL so never have this problem, but I've read people put a light bulb in the freezer, it makes enough heat to keep the temp right.

I'm in Northern California, and just started having this problem last week. I use an electric heating pad, and just threw it into the freezer. It's fairly slow to heat, but at 40W, I would imagine it's about 2/3 as fast as a 60W bulb.
 
I'm in Northern California, and just started having this problem last week. I use an electric heating pad, and just threw it into the freezer. It's fairly slow to heat, but at 40W, I would imagine it's about 2/3 as fast as a 60W bulb.

The bonus I found with the light bulb method is there is almost no residual heat to over shoot your temp. The bulb turns off and cools down quickly. When I tried the heating pad method, it saturated the wall that it was touching and caused it to slowly over shoot. However, I could see how this would be beneficial in a cold garage. OFC YMMV. ;)
 
I have a $50 used chest freezer (13cu ft?) that holds 4 carboys. We get 100* summer and low 30* winters. I have a dual stage Love controller. I think it was like $60.
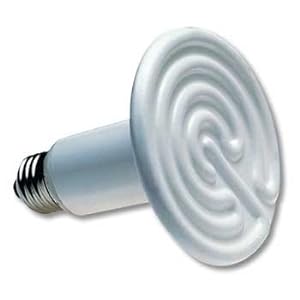
Works great in summer and in winter I have the second stage controlling one of these reptile heaters:
31Kgg3xWFdL._SL500_AA300_.jpg


I have a single 60 watt model, that it has been working great for about a year and a half now and seems to be plenty to hold desired ~70* temps.

I have the hysteresis (temp differential/droop) set at 3* and I have the temp probe submerged in a bottle of water to help prevent equipment cycling and to better estimate the temp of the fermenting beer. There have been debates on this, but IMHO the temp of the beer is whats important, not the ambient air temp in the chamber.
 
Last edited by a moderator:
An other difference between a chest freezer and a fridge is control on humidity. A refrigetator is built to stay dryer than a freezer.

So, there is more chance for mold to grow in a chest freezer.
 
I'm in the middle of my fermentation chamber build right now. I have a couple more things to put together and it should be operational. I need to get the chest freezer from my parents as they just decided they didnt want their 15 cu ft chest freezer anymore. I built the ebay temp controller mentioned earlier for around $40. there are four setting you can change on this controller. the first one is the obvious what temperature you want it to maintain, the second is the dead band, the third is how often you can let your compressor cycle. obviously it wont cycle if it doesnt have to but if it has to this setting will stop it from cycling too often. I think most people max out this setting at about 10 minutes. the fourth setting is temperature calibration and only needs to be set if your probe isn't working correctly. I plan to plug my chest freezer into it and then I bought a small personal heater at walmart for about $10 that will be my heating source. I am also building a small computer fan and cell phone charger to circulate the air inside the chamber better. I think I'm going to put the fan on a timer switch so that it doesn't have to blow all the time.
 
An other difference between a chest freezer and a fridge is control on humidity. A refrigetator is built to stay dryer than a freezer.

So, there is more chance for mold to grow in a chest freezer.

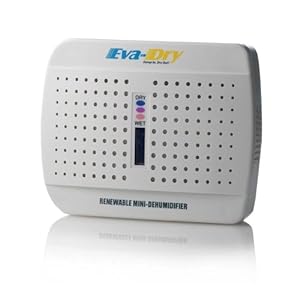
Yes, this has been an issue for me. I've bought a dehumidifer that seems to help.
4164erZav0L._SL500_AA300_.jpg
 
If all you're doing is ales in the winter you might see if there are areas in your house that stay between 65-70 DF before going out to buy something. For example I have an area under my foyer stairs that's enclosed and insulated but not heated, and I ferment ales during the winter there without a problem. If you have a similar area you can safely wait until summer to worry about it.
 
A more appropriate dead band would be 3-4 degrees F, leaving room for the temperature to swing before your controller takes action to bring the temp down. In a converted freezer you want to aim for at most 2 compressor activations per hour (and that's probably high unless it's summer and you live in Guam, or else your freezer is poorly sealed/insulated)

I don't live in Guam, and my freezer isn't poorly sealed or insulated, but I do live in Texas with garages that easily get 110+.

I adjust my dead band to be 10 degree's during the summer, and 5 degree's during the winter. My probe is air temp, not liquid temp, so I use a wider band.
 
It takes ALOT of energy (large specific heat), and hence time, to change the temp of 5 gallons of water. Along with the insulating capabilities of a chest freezer mean that the controller shouldnt need to cycle very often.

Therefore, put the temp probe in a water.
 
It takes ALOT of energy (large specific heat), and hence time, to change the temp of 5 gallons of water. Along with the insulating capabilities of a chest freezer mean that the controller shouldnt need to cycle very often.

Therefore, put the temp probe in a water.

I think most people have found that it works best taping the probe to the side of the fermenter with some insulation around it. a normal glass of water would be the same as an actively fermenting carboy. the yeast can warm up the temp of a caboy by a couple degrees.
 
I have a single 60 watt model, that it has been working great for about a year and a half now and seems to be plenty to hold desired ~70* temps.

I have the hysteresis (temp differential/droop) set at 3* and I have the temp probe submerged in a bottle of water to help prevent equipment cycling and to better estimate the temp of the fermenting beer. There have been debates on this, but IMHO the temp of the beer is whats important, not the ambient air temp in the chamber.

Hey, Triangulum - as Tinga stated, you might want to tape the probe to the side of your fermenter and cover with some insulation - water will not estimate the temperature of FERMENTING beer because of all the yeast activity. However I will respectfully disagree with Tinga's temperature assessment - Your fermenter is often 5-10 degrees warmer than the ambient air during the first 3 days of fermentation (not a couple)

This...from experience. measured. I've actually hit 10F over. Which is why I now use a water bath method, and keep the water at 63F.
 
Another question is if you have a chamber with stuff aging in secondary as well as stuff in active fermentation (assuming its up to 10* higher in temp), which do you control temps to?
 
Once initial fermentation is done (where the control is most vital), I would pull your beer out to let the temp come up to 68°-70°. That way your yeast has an easier time dropping those last couple points.

The first few days are the more vital during fermentation, as far as temp control goes, so that is always my priority.

Ok.
How much lower than "optimum" would you set the controller assuming its sitting in a water bottle?
Or wrap the probe to the fermenter?
 
Ok.
How much lower than "optimum" would you set the controller assuming its sitting in a water bottle?
Or wrap the probe to the fermenter?

In my setup, insulated to the side of the fermenter is the closest to actual. My friends setup is best taped to the wall. I would test a few methods and see what works best.
 
Sitting in air, (refrigerator) for the first three days I'd set the thermostat somewhere around 62, pitch the yeast into a 68F wort, tape the probe to the side of the fermenter and hope for the best. If the probe is simply in water, you'll need the temp closer to 55F

Sitting in water, you have an advantage because the water will help remove heat from the fermenter, especially if you drop a small pond pump into the bath. Then, if your water bath is set for 63-65, your beer will be something like 64-66. I have the probe dropped into the corner of my water bath, not taped to the fermenter, because
1) it's easier
2) the pond pump is dispersing the temps evenly

I have a heat exchanger in my water tank, but I suppose you could put the water tank/tub into a refrigerator and then you could set the refrigerator temps to about 63-65, with the probe in the water.

If I've got something in a secondary and I'm running my primary, I favor temps toward the Primary. after a week or two, I'll re-adjust the controller to the upper 60s.
 
I think I'll measure the temp of fermenting wort next week with a sanitized thermometer probe to validate some of these numbers in my system.
 
The bonus I found with the light bulb method is there is almost no residual heat to over shoot your temp. The bulb turns off and cools down quickly. When I tried the heating pad method, it saturated the wall that it was touching and caused it to slowly over shoot. However, I could see how this would be beneficial in a cold garage. OFC YMMV. ;)

Have you had any skunking effect from the light (or do you block the light from getting into your bucket/carboy)? That's my big worry with a light bulb.

And yes, I also get overshoot to the tune of about 0.3F (not bad, but not that great). I had to widen my deadband to +/-0.5F when I added the heating pad.
 
Oh, and I also meant to add: I just drop my temperature probe right into the bucket. I went to all this trouble to acquire and build my fermentation temp controller... I might as well measure the temperature of my actual beer!

I just give it a spritz of Star San in between batches. The probe tends to sink -- or at least to not float -- on its own, and the stopper still seals enough to force bubbles through the airlock.
 
Skunking is a problem with ultraviolet light. (sunlight, fluorescents). regular incandescent bulbs are not prone to skunking beer - there are links around here somewhere....


belmont - to avoid contamination in the future (good luck so far!), you might consider a thermowell. If you have a glass carboy for a fermenter, a double holed stopper has a long stainless diptube and a conventional airlock hole.
the probe drops into the diptube, which is surrounded by your wort.
 
Have you had any skunking effect from the light (or do you block the light from getting into your bucket/carboy)? That's my big worry with a light bulb.

And yes, I also get overshoot to the tune of about 0.3F (not bad, but not that great). I had to widen my deadband to +/-0.5F when I added the heating pad.

I have been using a standard 150w incandescent bulb, and from my understanding does not put off (enough) UV to cause skunking. I have not had any issue with it yet.

FWIW, I could turn off the deadband on the heating side in my setup, the cooling side is a whole other story, the 5k BTU ac unit undershoots on the cooling by a lot. But for me, tinkering is half the fun.
 
I also saw those thermowells with the hole in the stopper pre-drilled. I was thinking about this the other day. Would it be better to control the air temp or beer temp? If you control the air temp, you should see less variation in beer temp right? That is, when your fridge overshoots by 3-4 degrees on the cool side, it will not necessarily move the beer by much at all (maybe a degree). Alternatively, if you control the beer temp you will for sure be varying the beer temps by a minimum of 1 degree plus overshoot (depending on your differential temp).

For now I'm going to control the air temp. But I also have a digital thermometer with a remote probe (insulated) that is stuck to the side of the fermenter so I can monitor what the beer is really at.
 
Aren't those illegal now? :eek:


They still have some at my local Lowes, and that sucker was $3! Even with them being expensive, I'm going back and getting 4pack to keep as spares. The only other alternative to incandescent would be the UV heat lamps, and I wouldn't trust that with clear carboys.
 
Last edited by a moderator:
It takes ALOT of energy (large specific heat), and hence time, to change the temp of 5 gallons of water.[/B]

So that means your air temp could be cooled to 30, but your beer is only at 62. How do you prevent further heat exchange, cooling the beer further than 62? If you control air temp, your beer will always be in your deadband range. I normally set my deadband range to what Wyeast recommends for their strains.

This is probably along the lines of if you prefer a secondary or not but we all have our reasons to do what we do.
 
Hang Glider and Tinga, I verified the temp difference between ambient and fermenting beer in my chamber. I measured consistant 6 difference over the first few days between a probe taped with insulation to the side of a fermenter and the ambient air in the chamber.
Pretty sure some of my brews were probably a sustained 78-80* in the fermenter in the past due to this discrepancy.
 
Back
Top