List of PJ Electrical Diagrams

Homebrew Talk - Beer, Wine, Mead, & Cider Brewing Discussion Forum

Help Support Homebrew Talk - Beer, Wine, Mead, & Cider Brewing Discussion Forum:

This site may earn a commission from merchant affiliate links, including eBay, Amazon, and others.
P-J,
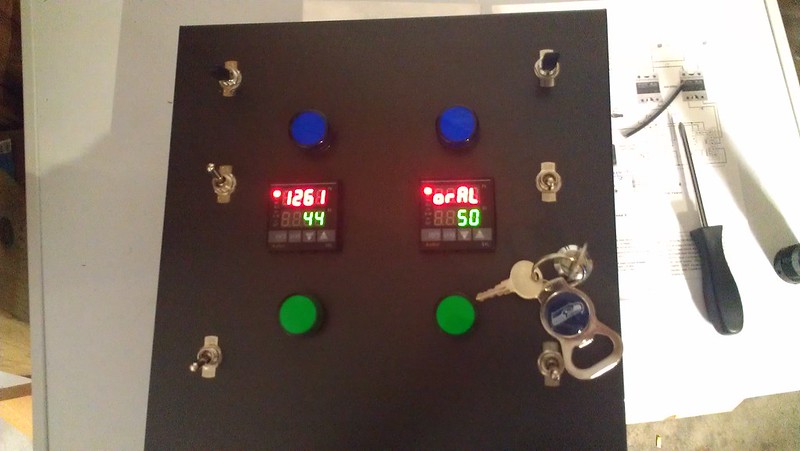
I've got all my parts purchased and on their way! Thanks for diagramming this for me.

I've got a question that I hope you could help me out on though....

I've got a toolbox pump that I use and would like to incorporate into this control panel build. The pump uses a GFCI outlet, and a 2 Gang switch (one for main power, one to turn on pump) The outlet is wired in on the back to power a 3 bank power strip that I plugged my pump into. How would I wire/rewire the pumpbox to run separately of the control panel, but also run when plugged into the control panels pump outlet?

Any takers?!
I redrew the diagram to provide a second outlet for your setup. The diagram also shows that the RIMS element outlet could be used for additional purposes with the use of the heat switch.

As always click on the image to see and save a full scale diageam that is printable on Tabloid paper. (11" x 17")


I hope this helps you in your desired plan.

P-J
 
If I decided to go off this diagram exactly with the only change being the RIMS element as 120v what all would I need to change? Would the contactor still be a good idea or should I wire it up just like the 3 120v outlets on the bottom? (I know I talked of putting it other switches and being able to power up the 460 without anything else being powered but I don't want to get overly complicated.) I am planning on a 30a circuit so I went with 4500w 240v's and a 1500w 120v for the RIMS.

BCS-460-wiring-2-4.jpg
 
If I decided to go off this diagram exactly with the only change being the RIMS element as 120v what all would I need to change? Would the contactor still be a good idea or should I wire it up just like the 3 120v outlets on the bottom? (I know I talked of putting it other switches and being able to power up the 460 without anything else being powered but I don't want to get overly complicated.) I am planning on a 30a circuit so I went with 4500w 240v's and a 1500w 120v for the RIMS.
With the set up as you describe, the amp draw is over 30 amps with any 2 elements on at a time (RIMS + .

Now, if you use the 4500W elements plus a 1500W-240V RIMS element, you would be good to go.

Think about it.

P-J
 
With the set up as you describe, the amp draw is over 30 amps with any 2 elements on at a time (RIMS + .

Now, if you use the 4500W elements plus a 1500W-240V RIMS element, you would be good to go.

Think about it.

P-J

Wow, brain fart. Just looked and I bought a 1500w/240v element, not a 120v. So I can basically use the diagram as is.
 
These diagrams are absolutely fantastic P-J. I've just read every page of this thread from the start to the end and I'd like to say I am delighted to see you are still here posting away. I am sincerely hoping your health has improved since page 1!

I'm just starting out on this journey into electric brewing and am looking at the ebrewsupply kits at the moment. I think I am going to get this one http://www.ebrewsupply.com/ebrew-kits/bcs-controlled/bcs-4-element-2-pumps-50a-kit.html and a BCS-462 and emulating something like https://www.homebrewtalk.com/f51/single-tier-3-pump-bcs-462-automated-rig-204705/ in an electric form.

I am starting to grasp the wiring from your diagrams, they just are nice and easy to understand for those of us who are just delving into electrical wiring, thank you for all of these as they have helped me greatly in grasping what each of these components and wires are doing.

My challenge is to go from the ebrewsupply kit and translate it into one of your diagrams from http://www.ebrewsupply.com/designs/50a-BCS-4-Electric.pdf

I am thinking that your diagram in post 163 above is fairly similar, and that I can probably work most of it our from that one. http://www.pjmuth.org/beerstuff/images/BCS-460-wiring-2-4.jpg
 
These diagrams are absolutely fantastic P-J. I've just read every page of this thread from the start to the end and I'd like to say I am delighted to see you are still here posting away. I am sincerely hoping your health has improved since page 1

...
It pleases me a great deal that I've been of some help to you in your adventure.

Please let me know if you run into problems. We can work it out for sure.

P-J
 
PJ,


My sincere thanks for all the knowledge and guidance that you provide to us novice e-brewers. You're input has been indispensable in the construction of my first, modest control panel. I've built a 30W, single PID, 2 pump, 2 element panel based on one of your drawings from the first page of this thread. It's up and running but there's a mod I want to make that perhaps you or one of the other experts could advise me on.

I'd like to add a second temp sensor to the system in the boil kettle so that I can set a temp just below boiling...so as to prevent boil overs until I'm ready to devote all my attention to the boil. I've scoured your diagrams and haven't seen one with two temp probes switched from a single PID...do you know if this is doable and if so, what type of switch/wiring setup I'd use?

Thanks a ton.
You referennce a diagram. Which one?

P-J
 
please do your research on these forums about the web site your looking to buy from. I put in my order almost a month ago and have seen nothing with no answers to emails or phone calls. Over 40 pages of negative reviews I wish I would have seen before I placed my order. That's a high dollar item your looking to buy.

I got my stuff just fine...
 
Tried to edit my post and fix my mistake but someone already replied to it so I'll say it again my mistake I had web sites mixed up when I made my comment and should of just moved on.
 
I had a question about the diagram of the 30A 5500W single element with PID and no pump since this is the kind of setup I am going to want to use since I have a separate plug for my pump.

I noticed it uses a switch instead of a contactor. Is the reason for this because you only need the switch to control power to the element instead of the element and pump or is there another reason? Thanks.
 
P-J you always use 2 one watt one ohm resistors to ground in the emergency off circuit. Why is that?

The resistors are 1,000 ohm units (1K ohm 1 watt resistors).
They are there to provide a very small leakage current to trip the GFCI breaker and completely power the brew controller down when the E-Stop is pressed.

P-J
 
I had a question about the diagram of the 30A 5500W single element with PID and no pump since this is the kind of setup I am going to want to use since I have a separate plug for my pump.

I noticed it uses a switch instead of a contactor. Is the reason for this because you only need the switch to control power to the element instead of the element and pump or is there another reason? Thanks.

I drew it that way as I was able to source a switch that could be used in a 25A 240V circuit. Using a contactor and a different switch would have been more costly.

It most certainly could be done if the builder does not like the appearance of the switch that I chose.
P-J
 
Perfect, thanks for the reply P-J. I don't care what it looks like, I just want it to be functional. I'll probably add the light in like the same drawing for the 4500W element scheme to indicate when I switch the element on.
 
Hey guys, i've been digging through this thread but haven't found what I need.

Does anyone have a 30a 5500 1 Element 1 PID 2 Pump Estop Diagram they could share with me?
 
Hey guys, i've been digging through this thread but haven't found what I need.

Does anyone have a 30a 5500 1 Element 1 PID 2 Pump Estop Diagram they could share with me?

Finally got a little time to complete a diagram for you.

As always click on the image to see and save a full scale diageam that is printable on Tabloid paper. (11" x 17")


I hope this helps you in your desired plan.

P-J
 
P-J, just wanted to start by saying thank you once again. I've been reading so many of your previous posts and have been learning so much. Just when I felt I had a good understanding of 120v wiring I start looking into an electric brewery with 240v and it seems like that 1 extra wire/leg makes things 4x as complicated.

I know I had asked this of you before but then I went another direction, but now I'm back. If you have the time and can find the extra space in this diagram I would love to add:

1) A Keyed switch that powers on the BCS and nothing else (I have a separate/dedicated circuit breaker in my panel build for the BCS). and 2) A Keyed switch that turns on everything else.

Thinking out loud, would the "everything else" switch need to be wired to a relay that would then turn on power to the system since we're switching 30amps? How about the BCS switch, does it depend on the amps the switch is designed to handle and seeing as the BCS power supply looks like it's 1a, as long as the switch is rated for over 1a no relay would be required?

BCS-460-wiring-2-4.jpg


Thanks again for all the knowledge you've shared and thanks in advance if you are able to modify the diagram to include the 2 extra switches and necessary components.
 
So I get my box all wired up using the 2 element rims diagram and go to plug it in and the gfci trips right away. Ok fine probably did some wiring wrong after a few homebrews then I decided to totally remove the estop and wires and that stopped the breaker from tripping but I still get no power. I'll go through it this week wire to wire but it also got me thinking does the box need to be grounded somehow? I see on kal's boxes he has them grounded but the diagram I am using does not show that. I only have the main wire going into the box to the terminal strip and that has a ground on it but that's it.
 
I finished up my RIMS box! I couldn't have done it without all the help I learned here. Thanks a ton to P-J for getting this figured out for me!

It's a 120V system, using a BrewHardware RIMS Tube. Auber 2352 controlling a 2000w Camco ULWD Element. I used Front Panel Express for my cutouts and a Hoffman 8-C812 box from Ebay (Got it for $21 plus shipping!)

I can't wait to brew now!

SAM_3714.JPG


SAM_3715.JPG
 
So I get my box all wired up using the 2 element rims diagram and go to plug it in and the gfci trips right away. Ok fine probably did some wiring wrong after a few homebrews then I decided to totally remove the estop and wires and that stopped the breaker from tripping but I still get no power. I'll go through it this week wire to wire but it also got me thinking does the box need to be grounded somehow? I see on kal's boxes he has them grounded but the diagram I am using does not show that. I only have the main wire going into the box to the terminal strip and that has a ground on it but that's it.
Which diagram are you using? With that info I might be able to help you.

P-J
 

I am going back through all my wiring now. All the spots where I have to connect multiple wires together is where I think I got something mixed up. I figured it was all off one hot leg so I just kind of connected everything mixed up for some reason. Hopefully that was my problem and I'll just go back through and wire nut the right wires together this time and see what happens?
 
I am going back through all my wiring now. All the spots where I have to connect multiple wires together is where I think I got something mixed up. I figured it was all off one hot leg so I just kind of connected everything mixed up for some reason. Hopefully that was my problem and I'll just go back through and wire nut the right wires together this time and see what happens?
Please let me know what you find.

P-J
 
Will do and thanks but what about the box being grounded? The only ground wire I have is coming from the main wire to the terminal strip is that enough?
 
Will do and thanks but what about the box being grounded? The only ground wire I have is coming from the main wire to the terminal strip is that enough?
The ground wire must go to the element shells, the pump outlets and also the controller box. Basically any metal in the system that you can touch during a brew session.

I hope this makes sense.
 
Makes sense. I got 2 element kits that will be grounded to the box that houses the wires for the element so that's taken care of. Inside the box can I just run one of the wires from the ground terminal strip to the bolt that holds in on the box or is there a better or safer way?
 
That will work if it's bare metal and reliably connects to the rest of the box. The terminal strip in the drawing is really just for illustration. You'd normally use something like a grounding bar which is not insulated from the box to tie the box and all of your ground runs together.
 
That will work if it's bare metal and reliably connects to the rest of the box. The terminal strip in the drawing is really just for illustration. You'd normally use something like a grounding bar which is not insulated from the box to tie the box and all of your ground runs together.

Going to hit up Home Depot tomorrow and get one of those to finish this build off. After re doing all the 14g wires and adding a ground I went to the garage and plugged it in and again the breaker popped so I disconnected the E stop wires and plugged it in again and there we go the box works so I have no idea what is wrong with the e stop or maybe it's how I wired it but it keeps tripping the breaker. But now that it's on the PID's keep flashing random numbers and letters ( actually one says "oral" which is disturbing) at me so I connected one of the temp probes and that worked for the one. Now to finish my kegs and stand hopefully this weekend. Thanks for all the help here I could not of done it without you! :mug:


IMAG0202 by Ludahchris, on Flickr
 
Looking good!

Yeah the PID's flash like that without the probes.

What kind of switch are you using for the e-stop? I can't see it in your pic. It really sounds like you have that circuit wired so that it's always closed somehow.

Good luck!
 
Loodachris,

What are you using for your E stop? I do not see the switch on your panel picture. Is it possible that you are using a normally closed switch? (closed contact when not activated) If so that is the root of the problem.
 
I put the E stop on top next to the heat sink but it's the Auber Instruments SW6 I think and looking at it now I had it connected to the NC side which would make sense. I probably just did all this rework for nothing. Pretty sure I won't mix home brew pints and electrical boxes anymore :)
 
Loodachris,

Wht are you using for your E stop? I do not se th switch on your panel picture. Is it possible that you are using a normally closed switch? (closed contact when not activated) If so that is the root of the problem.

Have you ever face palmed and felt like a knuckle head before? I just did! :smack:
 
Just finished reading through this entire thread as I am in the process of building an electric setup in my basement.

I just wanted to take a minute to thank PJ for all his time and effort to put all this together. And, the support you have given everyone throughout - simply amazing. I am likely going to be doing something very close to BNB's design, but a 30A. Looking forward to continuing to follow along with this thread!
 
Back
Top