My RIMS addition build starting

Homebrew Talk - Beer, Wine, Mead, & Cider Brewing Discussion Forum

Help Support Homebrew Talk - Beer, Wine, Mead, & Cider Brewing Discussion Forum:

This site may earn a commission from merchant affiliate links, including eBay, Amazon, and others.

aboantopick

Well-Known Member
Joined
Apr 28, 2014
Messages
79
Reaction score
13
Location
Auburn
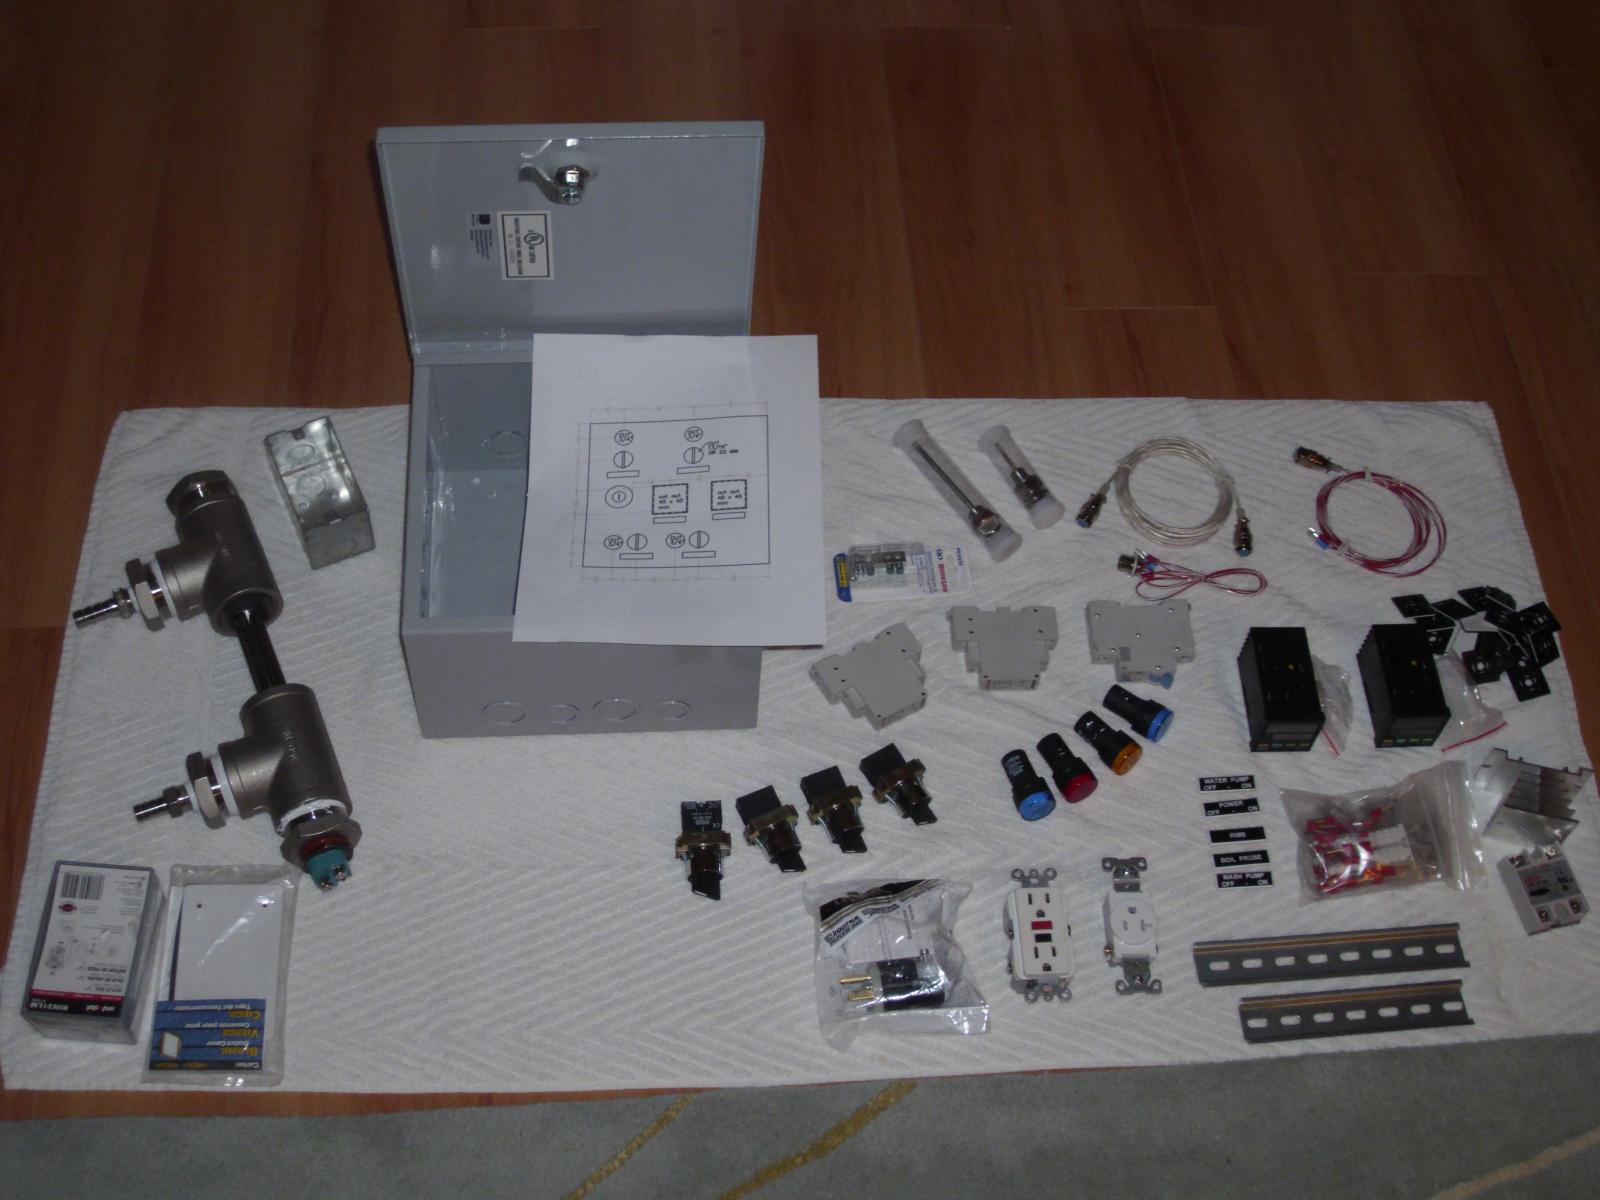
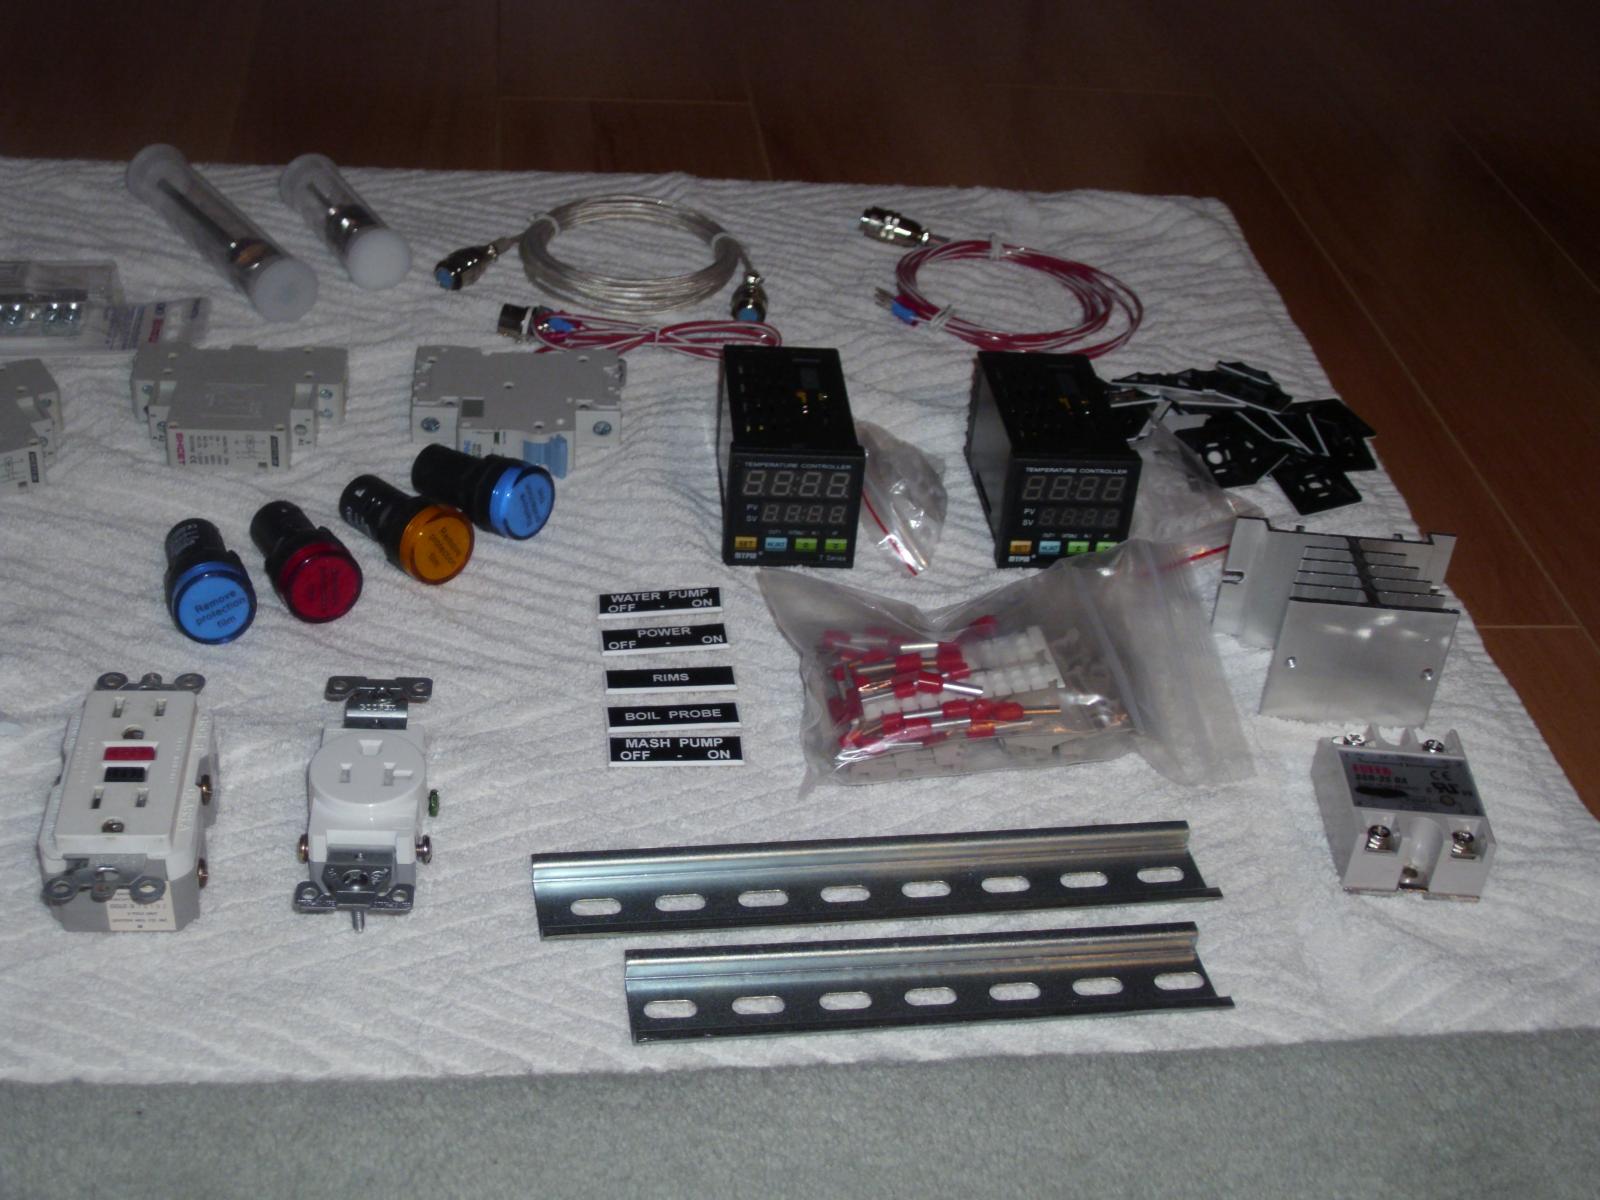
This is my brewery as created last year. I started to add a HERMS to keep my mash water up to temp and generally improve my brewery. After much planning I decided on a 2000W RIMS system and keep my Propane BK. My mash tun was going to stay a 10 gl cooler but decided to sell it and convert a 15.5 kegger.
I will post pics as I go along hoping someone ran into the same issues I may have.
I got news today that the 1-1/2"x8" SS pipe I ordered from Zorro for 20 bucks is not coming until 3-31-15.
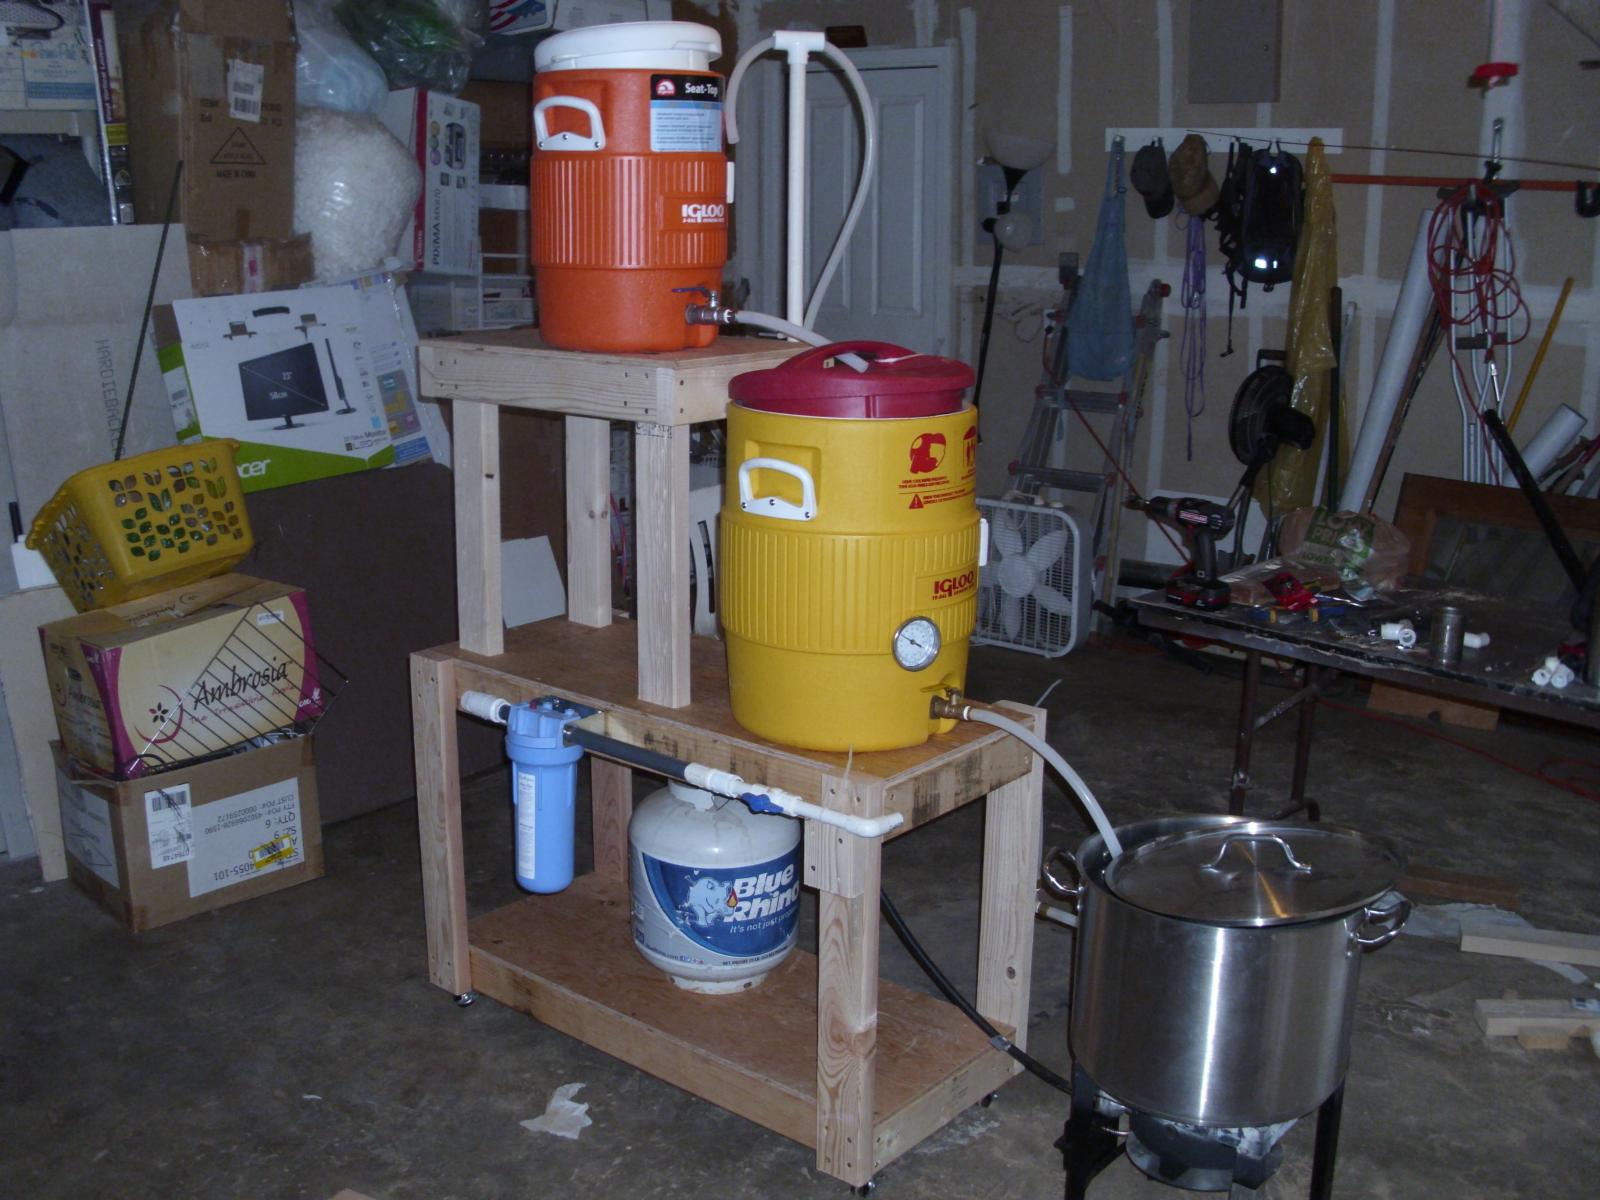
DSCI0067.jpg


DSCI0161.jpg


DSCI0158.jpg


DSCI0160.jpg


CONTROL-PANEL-RIMS ELECT.jpg
 
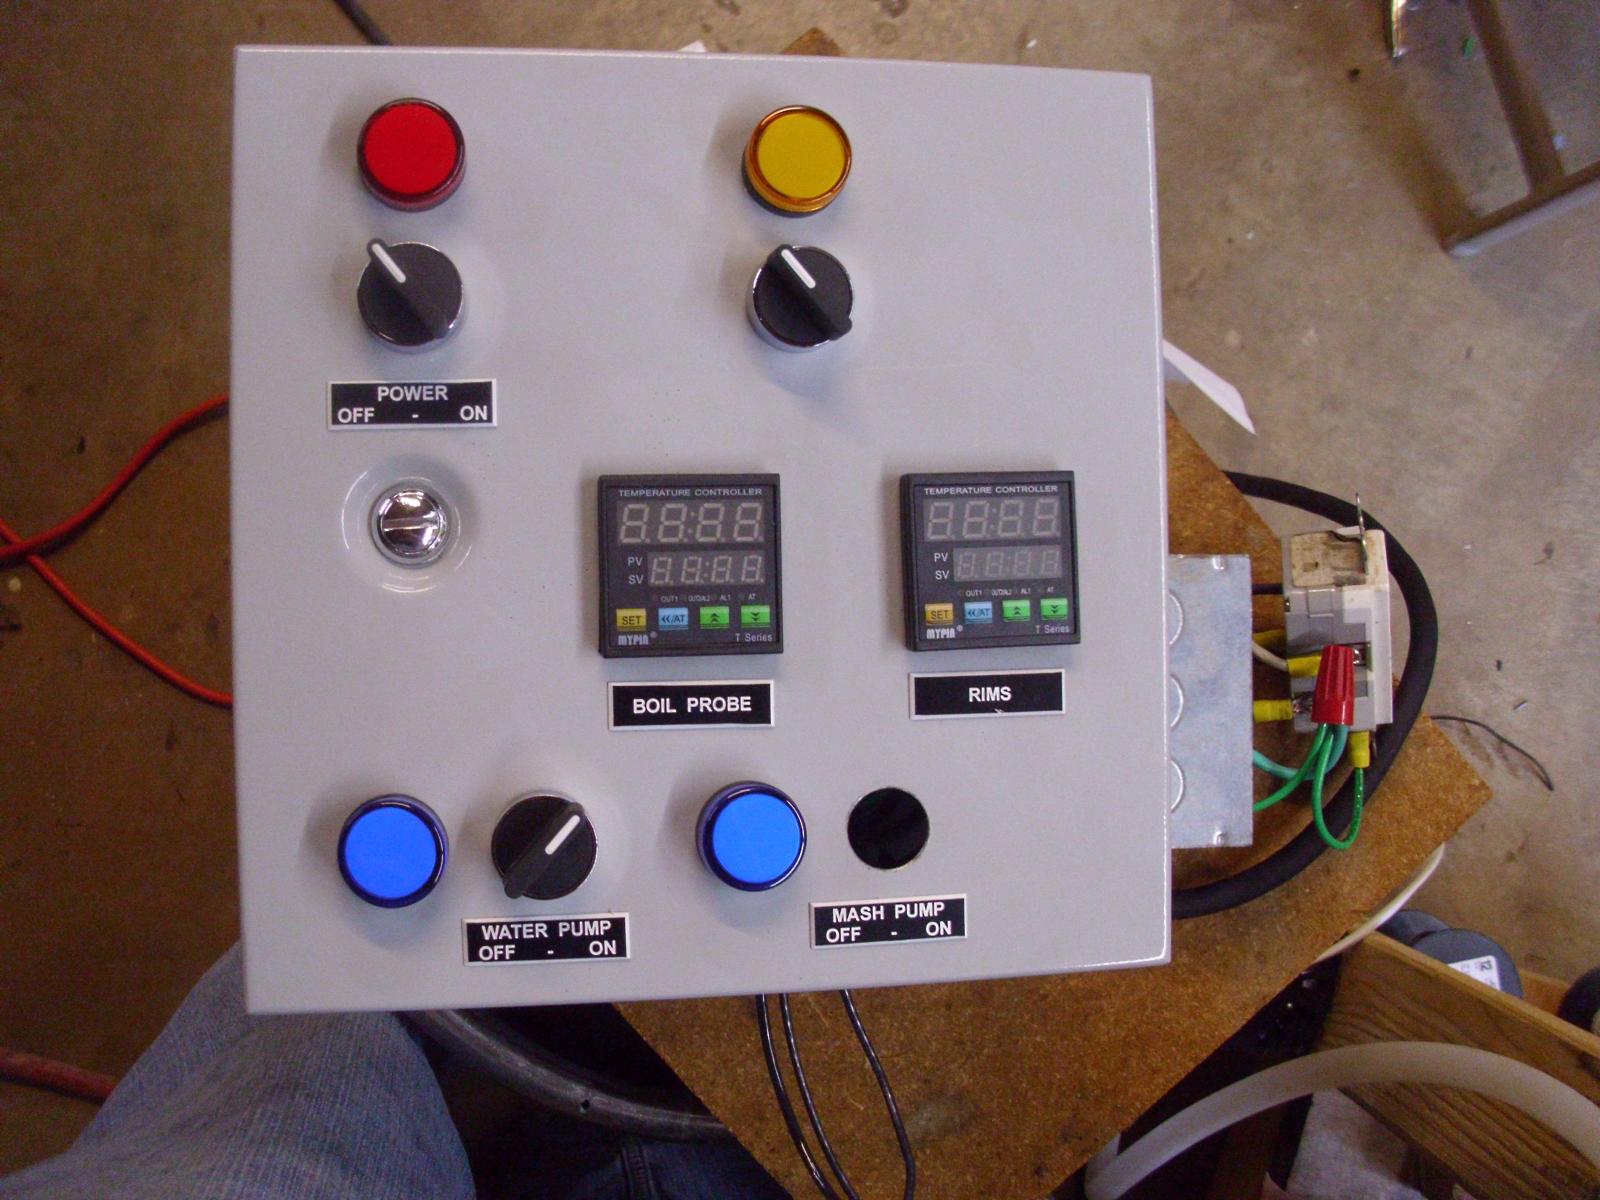
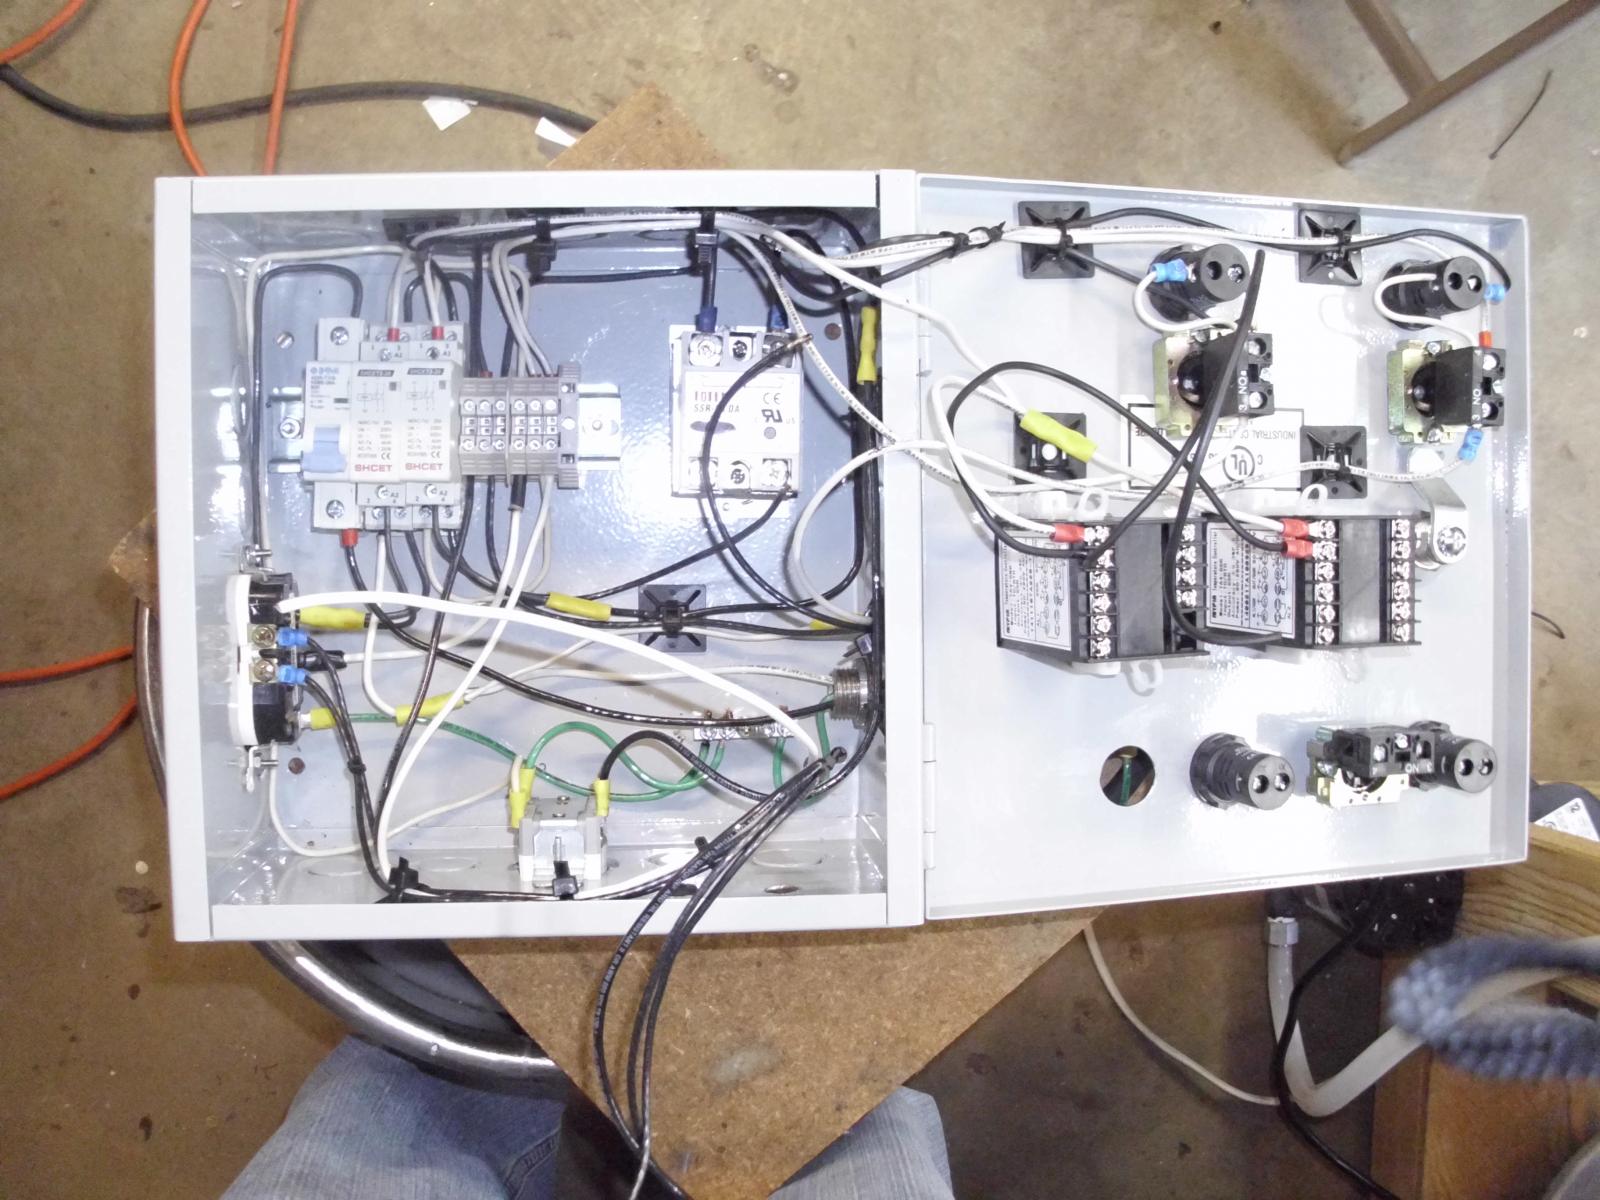
75 to 80% finished wiring the control panel, more work than I thought. Or should I say FUN! Only a few changes from my diagram, 1 amp in line fuse to PID's and 10 amp in line to pumps.

DSCI0005.jpg


DSCI0009.jpg
 
I see two pids but only one single ssr? I know you already bought it but the mypin TD4 with the gray face is about the same cost as the one you bought and also has the manual pwm mode to control a steady boil vs the constant on /off boil you get without manual mode.
EDIT
I see why your diagram is incomplete I missed the fact that you plan on using propane for the boil.... If thats the case you could have just bought a digital Fahrenheit temp display for $12 instead of using a pid just for a temp readout.

I am still confused with your diagram shows a 2000w element for a HLT and you only have a rims element.... you already made your purchase but a longer 240v element ran on 120v provides less watt density and is less likely to scorch your higher gravity beers... You might not have any issues but if you do its an easy cheap fix with a longer elements and longer piece of pipe later.
 
Looks great, what software did you use for the wiring diagram? I just wired my panel on the fly and am considering recording a walk through so I remember what I did.

Check ebay for your pipe nipple, they are less than $20 shipped and available today!

Chris
 
I see two pids but only one single ssr? I know you already bought it but the mypin TD4 with the gray face is about the same cost as the one you bought and also has the manual pwm mode to control a steady boil vs the constant on /off boil you get without manual mode.
Ya I looked for a digital temp readout with maybe an alarm because I am just using the PID to read water temps in my propane heated BK to preheat may mash water. At least the two PID readout look uniform. One is a TD4 SNR manual option,

I am still confused with your diagram shows a 2000w element for a HLT and you only have a rims element.... you already made your purchase but a longer 240v element ran on 120v provides less watt density and is less likely to scorch your higher gravity beers... You might not have any issues but if you do its an easy cheap fix with a longer elements and longer piece of pipe later.
No HLT. RIMS only yes. If I have scorching problems I will keep that in mind. With the 8" pipe I have not received yet I have ample room, about 15" total with the tees. I could get a longer pipe now just in case. thanks.
 
Looks great, what software did you use for the wiring diagram? I just wired my panel on the fly and am considering recording a walk through so I remember what I did.

Check ebay for your pipe nipple, they are less than $20 shipped and available today!

Chris

I draw for architects for work so I already have autocadd. Thanks for the info on the pipe, thats what I paid, but havent got it do I. On a slow boat from Hong Kong
 
No HLT. RIMS only yes. If I have scorching problems I will keep that in mind. With the 8" pipe I have not received yet I have ample room, about 15" total with the tees. I could get a longer pipe now just in case. thanks.

Gotcha... Unless mypin just changed something, The TD4 has a different color faceplate than the ta4.... the ones in your picture are both ta4s.. (I have both as well)
here is a link to the TD4,

http://www.ebay.com/itm/Universal-D...621?pt=LH_DefaultDomain_0&hash=item20d8476745
 
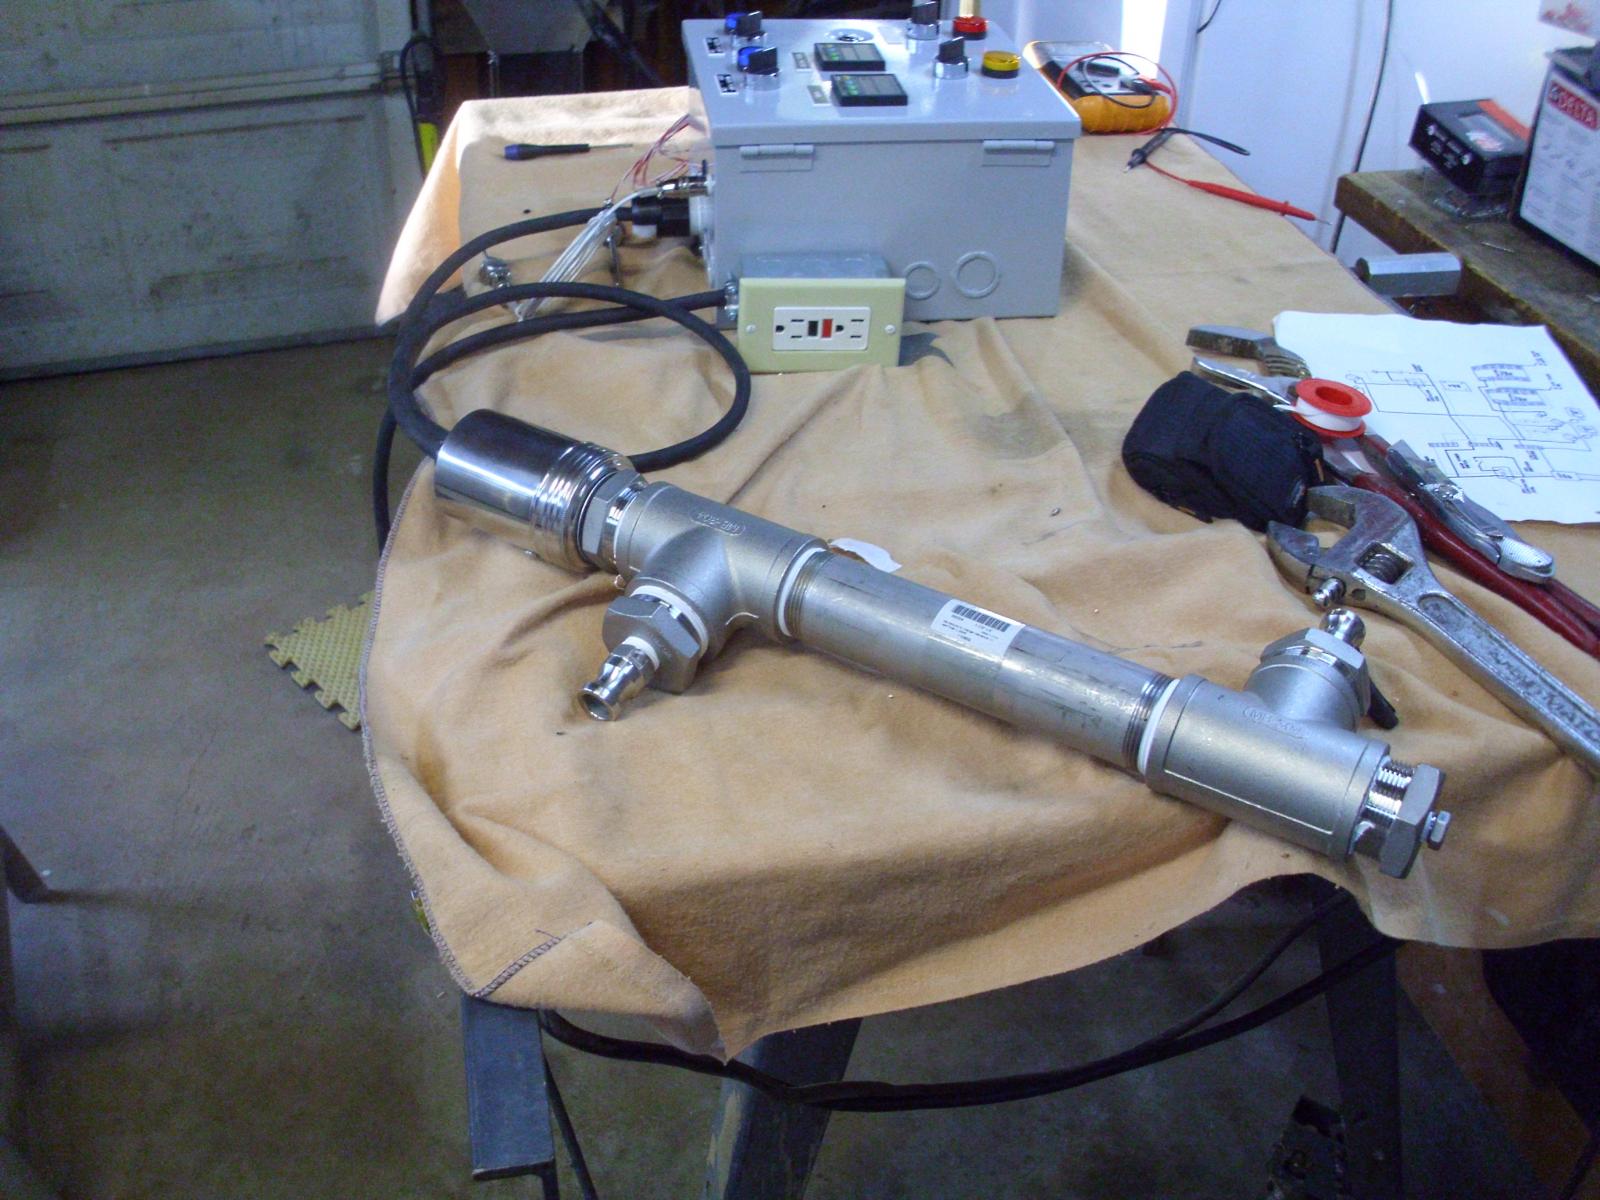
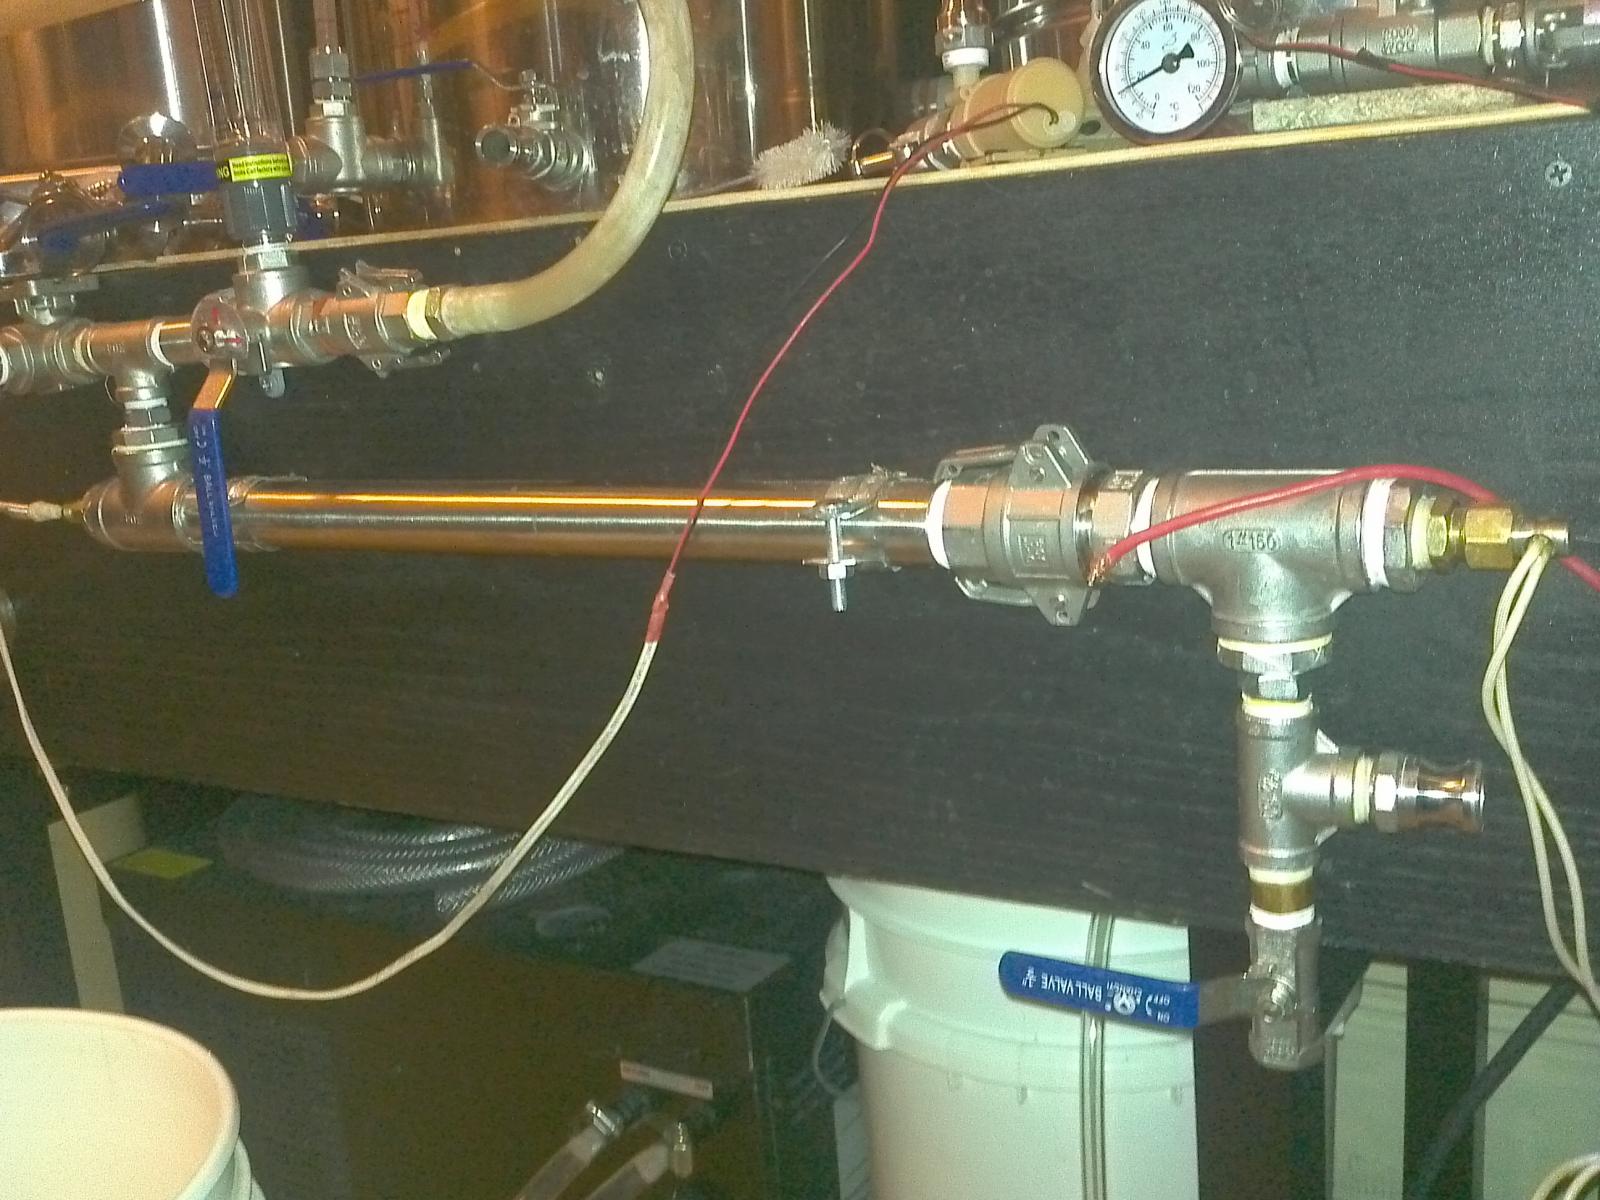
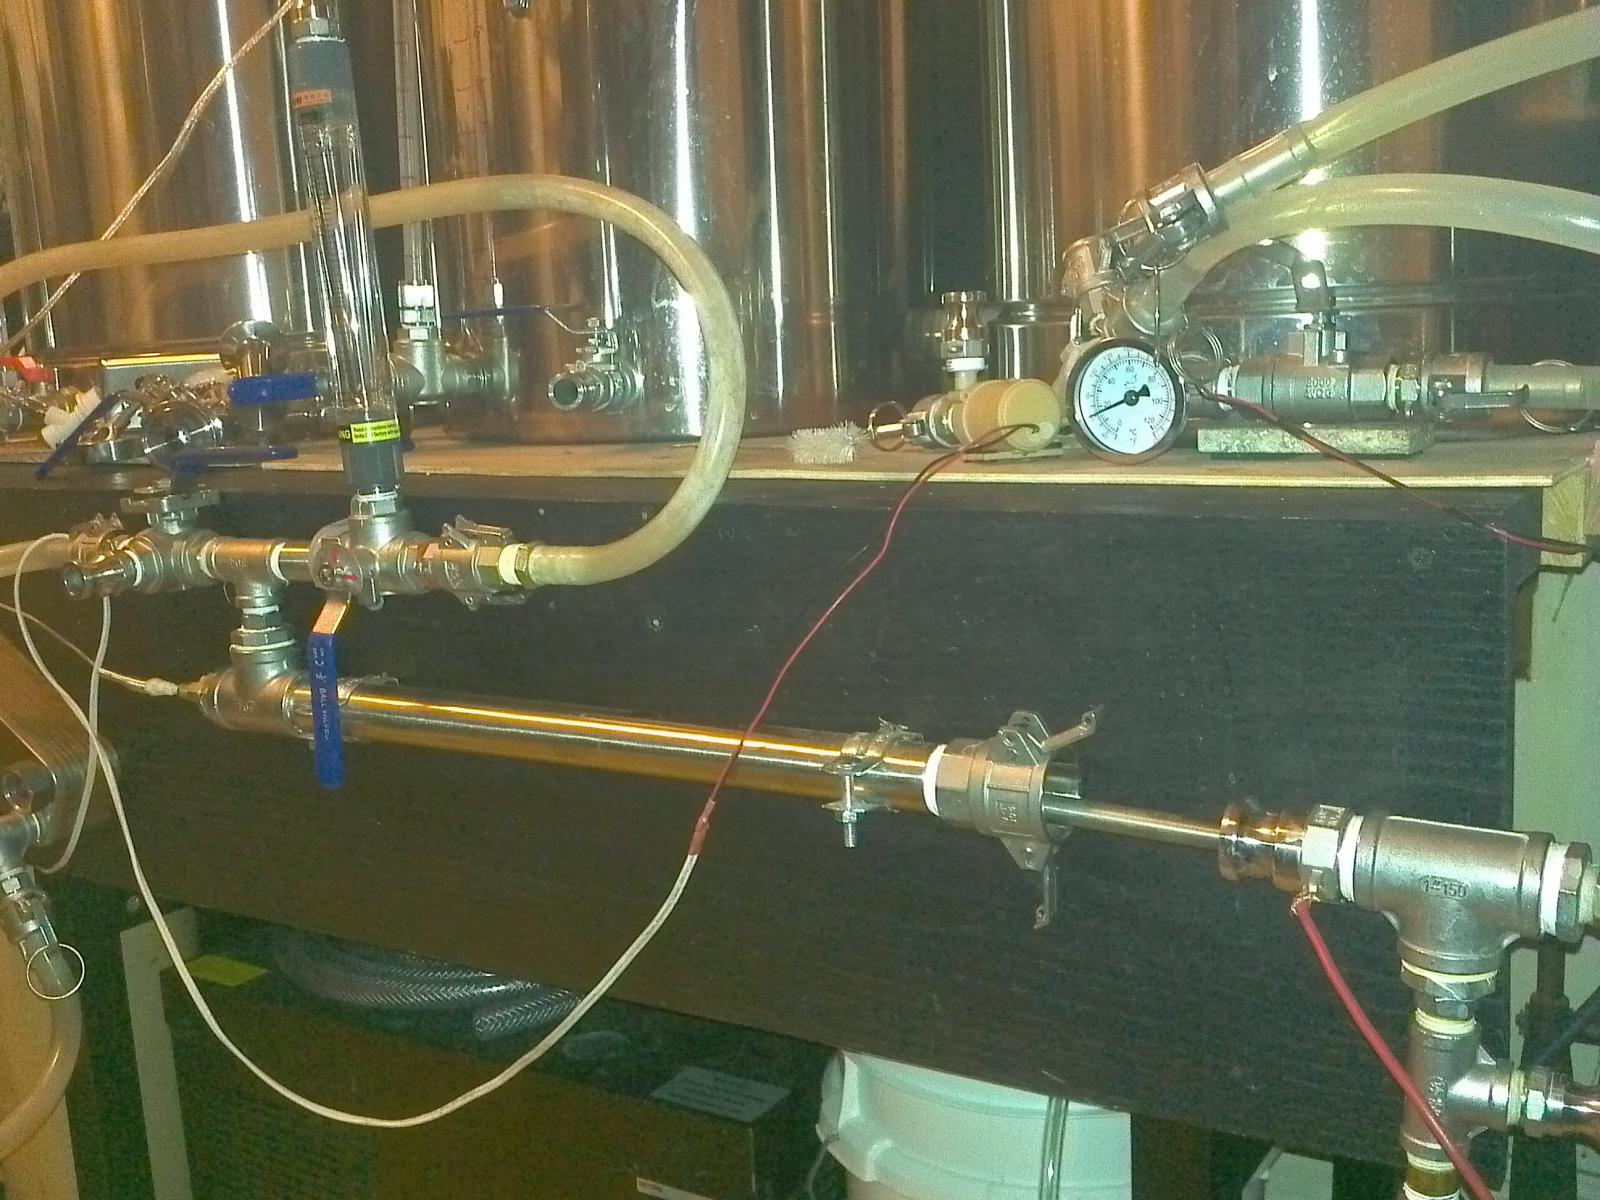
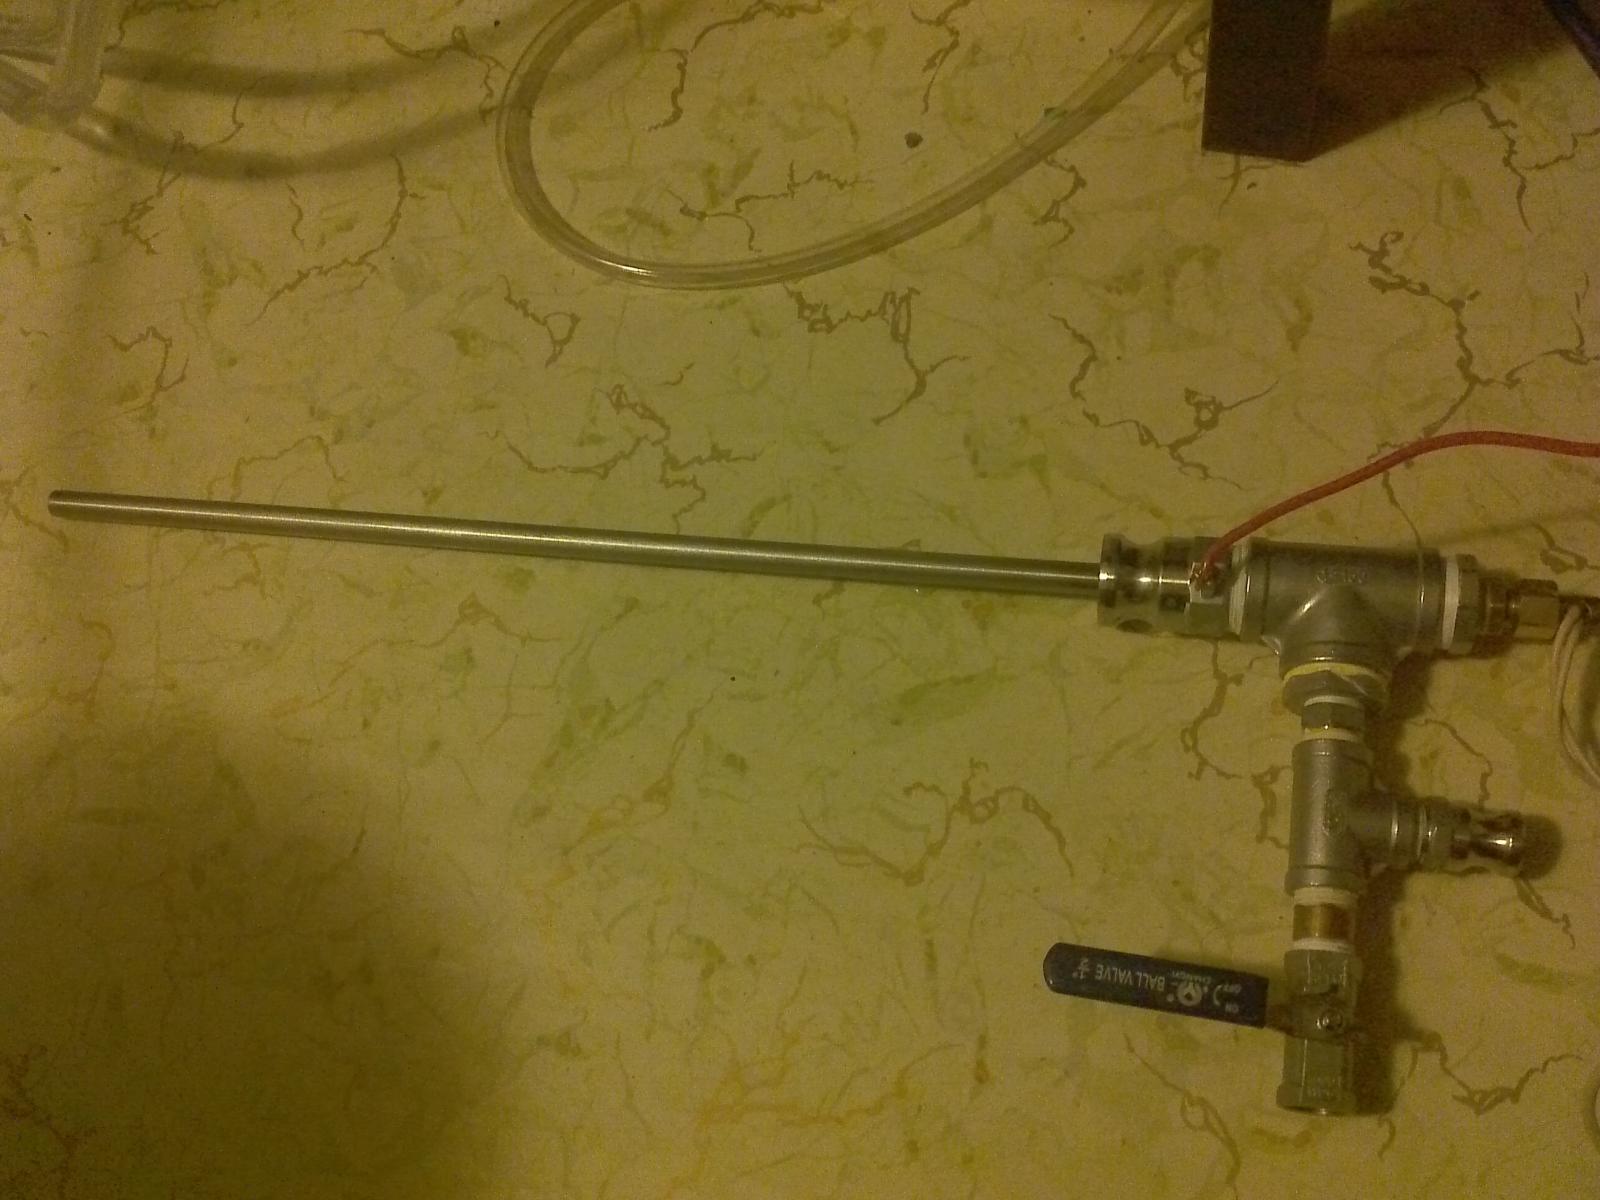
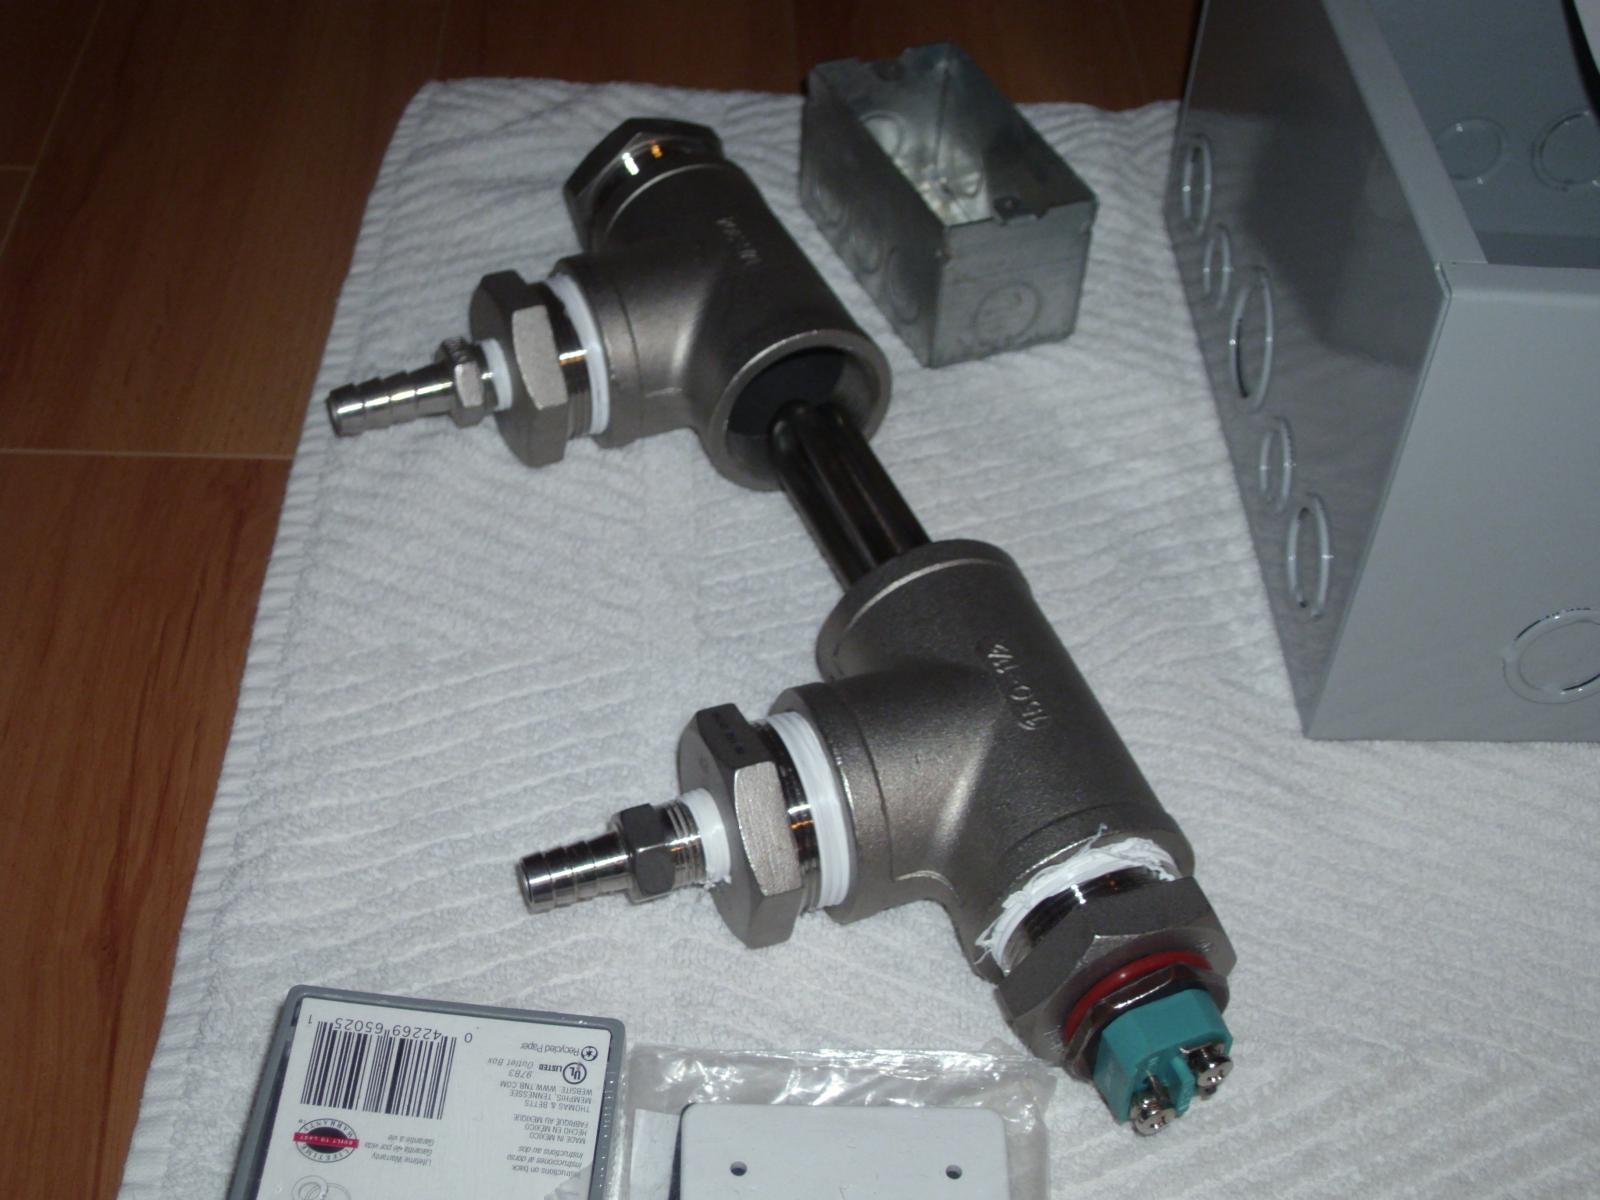
Here are a few pics of my RIMS Tube. I received a 9"x 1-1/2' stainless nipple I ordered 2 months ago. I originally ordered a 8" and it went on back order. Just decided to call and they had (5) 9" in stock! DUH! That's OK, I was working on the control panel anyway.

DSCI0015.jpg


DSCI0019.jpg


DSCI0016.jpg
 
Thanks for the great images of your RIMS build. I am building a RIMS tube modeled on your images. Did you build the Element Guard? if not where did you purchase it??
cheers
 
I forgot to ask...... did your 2000 watt element fit nicely into the 1.5" enclosure with out having to bend it??
thanks
 
Hey Lava Steam'
I made my wiring box from a sugar shaker. Even tho it was all a bit cheaper than buying it, not by that much unless you were making 2, the shakers come in sets of 2 from Amazon for about 6.75, then the grommet,a couple washers to cover the rest of the shaker holes and silicone, then you have to cut the holes. If I did it again I would buy it here for $20.
https://www.brewhardware.com/product_p/hotpod-ewl.htm
Either way you have the wire and plug in addition to that.

Yes, the stainless steel element I had to bend with a vice and that big 17" crescent you see in the photo, easy tho. Good luck!
 
It continually amazes me how creative brewers are to figure out alternative solutions. Sugar shakers, go figure! Brew Hardware folks are currently out of stock, but that part of my build is a way off. Just in the planning stages now. They should have more in by the time I get there. Gettinʻ kind of thirsty though.
I noticed that you eventually got a 9" nipple. Did I read correctly that your element was 17" or was that your crescent wrench? The element Iʻm getting is from BrewHardware.com and is a 2000 watt @ 8.5". Do you run your RIMS element at 120v or 240V?
Sorry for so many questions. Mahalos for your help. LS

Just so you know , I don't know **** about this. I am a creative guy so I might have a few good ideas, or know when I see a good one :)
I read a post here that says a longer 220v element ran on 110v may keep heavier gravity worts from scorching, so my RIMS tube is longer now so if I do have a problem I wont have to lengthen the tube, I bought a Heating Element, 110v 2000 watt, All Stainless Steel.
the 17" is my crescent. I love that tool, it has so much weight to it that it works by itself! Ask and post away, I love the chat dude.
 
My build uses a similiar rims configuration only I went with 1" pipe.
These stainless cartridge heaters come in different lengths and watt densities and are super easy to clean... the larger camlocks work as well as TC fittings to remove and clean things as well...

IMG_20150116_221853%5B1%5D.jpg


IMG_20150116_221940%5B1%5D.jpg


IMG_20150116_221917%5B1%5D.jpg
 
What's the wattage on the cartridge heater augiedoggy? Those look interesting.

1000w at 240v....Its 25 1/2" in length and 1/2" diameter. comes out to be like 44w per square inch which is ULWD... They make them in all sorts of lengths ,diameters and wattages.. just search "cartridge heater on ebay... They are way easier to keep clean for sure. (mines only needed rinsing so far)
Theres more info in my build thread in my signature.
 
I ordered this one:
http://www.amazon.com/gp/product/B008BXE92I/?tag=skimlinks_replacement-20

That comes out to about 65 W/in2. I don't know what rates as ULWD but this should be good enough to play with for now.

It will work also I have one of the same size and wattage elements... used it in my first homemade copper rims tube but made the mistake of creating too much dead space with no flow at the end where the element mounts to the compression fitting and since the space was very narrow stuff accumulated there and caused scorching with ruined two batches of beer before I noticed it.
 
Last edited by a moderator:
I silver soldered mine directly into the bushing since I couldn't find a compression fitting that would seal. That should minimize the amount of dead space I would think.
 
I silver soldered mine directly into the bushing since I couldn't find a compression fitting that would seal. That should minimize the amount of dead space I would think.

I did this as well and am using a 3/4" diameter pipe to keep the velocity up. I have two 15" cartridge heaters on either end of a 36" tube. I've only tested on water but its working pretty good.
 
I did this as well and am using a 3/4" diameter pipe to keep the velocity up. I have two 15" cartridge heaters on either end of a 36" tube. I've only tested on water but its working pretty good.

I used 1" pipe and have had no issues with velocity.... Unfortunately my copper rims was 3/4 and the narrow space at the end of the tee past where the input teed in is where the scorching occurred... Hopefully you won't have the same issue. It had nothing to do with my compression fittings.
 
Currently, mine is in a 3/4" pipe and I'll try a cheap test wort first. I'm hoping that because I didn't use the compression fitting that there will be less constricted space and thus no scorching. If not, I'll upgrade to 1" pipe.
 
Update to my RIMS system build.
Control panel built and tested
Rims tube together
Just finished my Mash Tun (sold my cooler tun over 2 months ago)
Here is a slideshow

[ame]https://www.youtube.com/watch?v=ys6eOlb6xOg[/ame]
 
Update to my RIMS system build.
Control panel built and tested
Rims tube together
Just finished my Mash Tun (sold my cooler tun over 2 months ago)
Here is a slideshow

https://www.youtube.com/watch?v=ys6eOlb6xOg

my camlock/locline sparge arm looks identical to yours only with a float sensor mounted to it...
How does the sight glass in the mash tun actually for for you? I have been debating about installing one for a while and figured it would be more hassle than worth. Does it ever plug with grain? and read real time levels?
 
How does the sight glass in the mash tun actually for for you? I have been debating about installing one for a while and figured it would be more hassle than worth. Does it ever plug with grain? and read real time levels?

I'm planning to install one also. This downside didn't occur to me, but since I want it mainly to measure strike water - it doesn't really matter if it's not accurate after dough in. Altho' now I realize that cleanup may be a pain....
 
my camlock/locline sparge arm looks identical to yours only with a float sensor mounted to it...
How does the sight glass in the mash tun actually for for you? I have been debating about installing one for a while and figured it would be more hassle than worth. Does it ever plug with grain? and read real time levels?

Well heck Auggie. This is a new system for me. I dont think clogging will be a problem since it is the strike water I want to measure. If it clogs, one nut with a couple orings and flush it out at clean time.
Hey btw. You know of any videos of rims system in action. I am taking apart my brewstand you see on my avatar today, I am ready to set up the system, pumps, hoses and the equipment I have shown putting together.
Its time to get it on!

I dont know of any but im sure youtube is full of them. thats where I checked out a ton of systems before building mine.

I have a sightglass as well as gallon marks in my HLT so its easy to see what my strike and sparge water levels are but I was thinking more along the lines of preventing my MT from sucking dry during sparging without wasting extra treated water because its hard to judge how much of the water different grainbills with absorb.
 
Well
All who followed this thread hoping to see a finished RIMS unit. It is done after 9 months!

Ran several tests, used info in site for mypin settings,
A change I would do is 3 way valves so I dont have to change hoses so much.
I also used and had planned on using the propane to heat the strike water, The RIMS tube will do it in appox 20 min!

Here is my video [ame]https://www.youtube.com/watch?v=NpxQ2RL0w9U[/ame]
 

Latest posts

Back
Top