You are using an out of date browser. It may not display this or other websites correctly.
You should upgrade or use an alternative browser.
You should upgrade or use an alternative browser.
Show Me Your Wood Brew Sculpture/Rig
- Thread starter twst1up
- Start date

Help Support Homebrew Talk - Beer, Wine, Mead, & Cider Brewing Discussion Forum:
This site may earn a commission from merchant affiliate
links, including eBay, Amazon, and others.
jmbingham3
Active Member
Running the Maiden brew on it tonight. Almost 100% still need to install the pump switches and put my hot rod together. Sight gauges, thermometers, cam locks, and hot rod purchased from Bobby M. Great quality stuff!
jmbingham3
Active Member
Not alot of wood , but was enough to catch fire ") heat shields installed working like a champ
heat shields installed working like a champ
View attachment 1419896356334.jpg
View attachment 1419896373700.jpg
heat shields installed working like a champ View attachment 1419896356334.jpg
View attachment 1419896373700.jpg
jmbingham3
Active Member
Not alot of wood , but was enough to catch fire heat shields installed working like a champ
View attachment 1419955054774.jpg
View attachment 1419955073551.jpg
heat shields installed working like a champ View attachment 1419955054774.jpg
View attachment 1419955073551.jpg
MockY
Well-Known Member
This is exactly the type of setup I needed as well and your example is the first I've seen anywhere. Where were you when I planned mine? (would have eased the planning ...
).I mean the exact same configuration: Mash tun on a pedestal with the HLT on the left and BK on the right, with pump for the water and gravity feed the wort through a plate chiller to the carboy.
I opted for a 2 piece configuration, where I have a shelf that goes through the pillar to supports the two burners. Easy to take apart and to setup. I'll post some pictures of the final thing once done, in the meantime, I figured I could at least post a picture of the pillar as it stands today (finished the first coat of Polyurethane yesterday).

BayerischBier
Well-Known Member
I'll post some pictures of the final thing once done, in the meantime, I figured I could at least post a picture of the pillar as it stands today (finished the first coat of Polyurethane yesterday).
Nice! Like the way the grain came out. Dark walnut stain, scrubbed? And then clear coat?
Sent from my iPad using Home Brew
MockY
Well-Known Member
Dark walnut stain, scrubbed? And then clear coat?
I added one layer of stain made by Minwax (will check the can for what it is exactly but I think it's red oak) and once dried, I added 2 coats of polyurethane, sanding lightly with 220 between the coats.
While I complete the bride/shelf, this pillar is now inside the house being used by my two children as a climbing rig, pretend store and many other things. I call this quality control since if it hold up during this time, it will definitely work for brewing.
kev211
Well-Known Member
My new stand. I may add a 3rd tier in the future, but for now its gonna be 2 tier (and I plan on staining it in the next couple of weeks)
View attachment 1420220768724.jpg
View attachment 1420220768724.jpg
kpr121
Well-Known Member
Here's my kal-inspired stand.... first coat of stain on, going to add a second coat and then a bunch of poly.

FamilyTradition
Well-Known Member
- Joined
- Jan 19, 2014
- Messages
- 68
- Reaction score
- 12
Built mine out of old skidsView attachment ImageUploadedByHome Brew1421944819.691087.jpg
Carlscan26
Well-Known Member
Built mine out of old skidsView attachment 250579
What kind of controller is that? Love the use of the box for it
FamilyTradition
Well-Known Member
- Joined
- Jan 19, 2014
- Messages
- 68
- Reaction score
- 12
Controller is home made using an Arduino, love electric brewing it's too easy
kev211
Well-Known Member
This is exactly the type of setup I needed as well and your example is the first I've seen anywhere. Where were you when I planned mine? (would have eased the planning ...
I mean the exact same configuration: Mash tun on a pedestal with the HLT on the left and BK on the right, with pump for the water and gravity feed the wort through a plate chiller to the carboy.
I opted for a 2 piece configuration, where I have a shelf that goes through the pillar to supports the two burners. Easy to take apart and to setup. I'll post some pictures of the final thing once done, in the meantime, I figured I could at least post a picture of the pillar as it stands today (finished the first coat of Polyurethane yesterday).
Did you use the minwax helmsman polyurethane? Im staining mine today and am trying to figure out the best clear coat that will stand heat and liquid
Did you use the minwax helmsman polyurethane? Im staining mine today and am trying to figure out the best clear coat that will stand heat and liquid
I like spar urethane. It's very good with water and temperature.
CaptKiRkLeS
Well-Known Member
10 gallon pot pumps to 10 gallon mash cooler and 5 gallon sparge tank. No more lifting!
What are you using as a pump?
CaptKiRkLeS
Well-Known Member
10 gallon pot pumps to 10 gallon mash cooler and 5 gallon sparge tank. No more lifting!
What are you using as a pump?
MockY
Well-Known Member
Phone App On the frits. Post content removed.
MockY
Well-Known Member
Phone App On the frits. Post content removed.
MockY
Well-Known Member
Phone App On the frits. Post content removed.
MockY
Well-Known Member
I like spar urethane. It's very good with water and temperature.
I used Minwax Fast-Drying Polyurethane - Clear Semi-Gloss. Used the structure for the first time yesterday and I could not see and Ill effects. Plenty of spillage and it wiped right off, nor did I detect any odors due to heat. On the other hand, I don't use wood where the burners are, but the frame is and it's fairly close.
- Joined
- Oct 22, 2012
- Messages
- 751
- Reaction score
- 86
My rig as of last fall. I'm going to cover the top with stainless steel and polyurethane the rest. No need for the top tier any more as i'm going to use pumps for transferring from the hot water tun to the sparge tun to the boil kettle.

Been building this out for the past month and finally took it for a spin today. View attachment ImageUploadedByHome Brew1422856941.429347.jpgView attachment ImageUploadedByHome Brew1422856953.706374.jpgView attachment ImageUploadedByHome Brew1422856980.869408.jpgView attachment ImageUploadedByHome Brew1422856999.416783.jpg
n240sxguy
Well-Known Member
Been building this out for the past month and finally took it for a spin today. View attachment 253494View attachment 253495View attachment 253496View attachment 253497
Nice
Been working on this for the last month or so. Taking it out for a spin now!
View attachment 1422910331787.jpg
View attachment 1422910349075.jpg
View attachment 1422910331787.jpg
View attachment 1422910349075.jpg
FamilyTradition
Well-Known Member
- Joined
- Jan 19, 2014
- Messages
- 68
- Reaction score
- 12
Been working on this for the last month or so. Taking it out for a spin now!
Man o days I'd love to brew and hang out by the pool. Nice work on the stand
kev211
Well-Known Member
I used Minwax Fast-Drying Polyurethane - Clear Semi-Gloss. Used the structure for the first time yesterday and I could not see and Ill effects. Plenty of spillage and it wiped right off, nor did I detect any odors due to heat. On the other hand, I don't use wood where the burners are, but the frame is and it's fairly close.
Photos? I'm curious how close the wood is to the burners
Been building this out for the past month and finally took it for a spin today. View attachment 253494View attachment 253495View attachment 253496View attachment 253497
Like the valve set up. What do you have holding those in place? Do you have camlocks on the backside?
Like the valve set up. What do you have holding those in place? Do you have camlocks on the backside?
The elbows have a 1/2" close nipple going through the wood panel. On the other side I have a female NPT to hose barb that secures it from the back. From there I run my silicone tubing with camlocks to the kettle, MLT, cooler, etc. View attachment ImageUploadedByHome Brew1423025740.095777.jpg
PissyFingers
Well-Known Member
My wooden stand, just finished it and the build today! 18mm marine grade ply with 100x100mm treated posts then cladded with white powder coated 4mm Ally.


FamilyTradition
Well-Known Member
- Joined
- Jan 19, 2014
- Messages
- 68
- Reaction score
- 12
My wooden stand, just finished it and the build today! 18mm marine grade ply with 100x100mm treated posts then cladded with white powder coated 4mm Ally.
Absolutely wonderful great job it paid off!
What's in the green bin? What did you go with for kettles? The metal edging?
PissyFingers
Well-Known Member
What's in the green bin? What did you go with for kettles? The metal edging?
HI, the green bin is my IC pre chiller, the kettles are 12 gallon pots i picked up off a site here in NZ, similar to EBAY in the U.S, they are hefty pots. The edging is 1.6mm Aluminium.


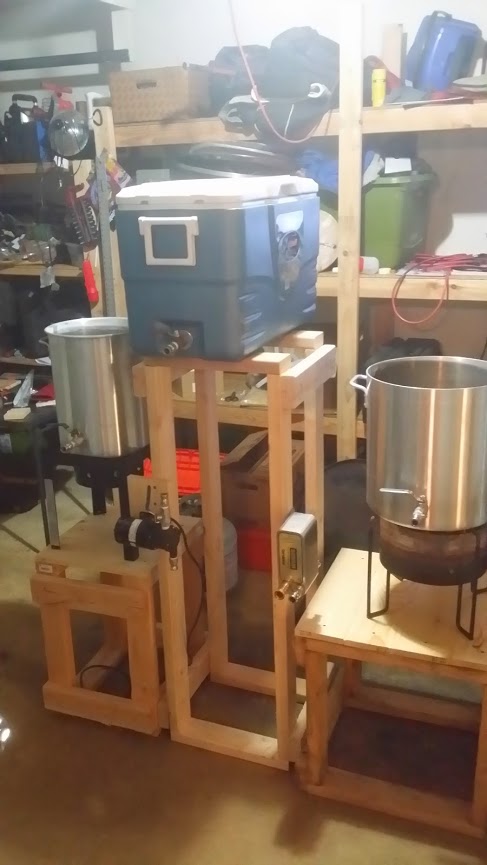
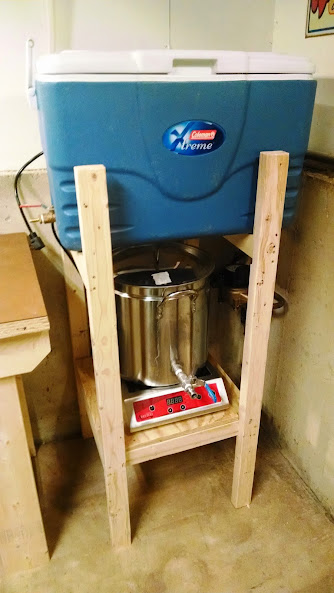
Well, my efforts pale in comparison to @PissyFingers, but still will accomplish what I need it to!
Stand at Rest
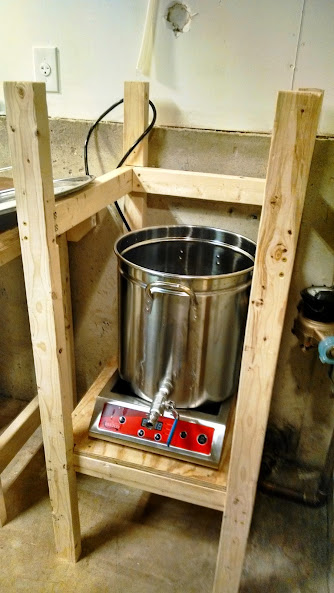
Stand in hypothetical Sparge Mode

Hypothetical Boil Mode
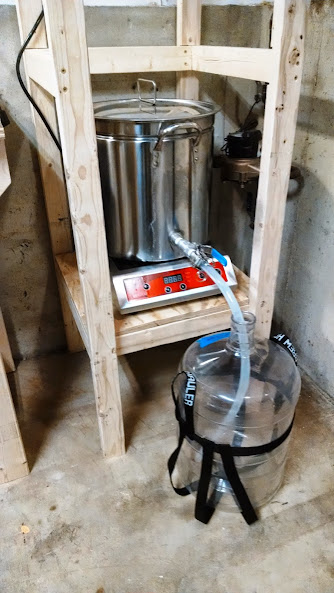
Hypothetical Siphoning to fermenter
Stand at Rest
Stand in hypothetical Sparge Mode
Hypothetical Boil Mode
Hypothetical Siphoning to fermenter
BrewDawg79
Well-Known Member
- Joined
- Sep 4, 2013
- Messages
- 74
- Reaction score
- 9
Just added propane plumbing. Next is a sheet of durock and this baby is pretty much done.
View attachment 1425850244587.jpg
View attachment 1425850244587.jpg
n240sxguy
Well-Known Member
Well, my efforts pale in comparison to @PissyFingers, but still will accomplish what I need it to!
Stand at Rest
Stand in hypothetical Sparge Mode
Hypothetical Boil Mode
Hypothetical Siphoning to fermenter
Is that an industrial hot plate or something?
Is that an industrial hot plate or something?
It is the avantco ic3500 induction burner.
n240sxguy
Well-Known Member
I use propane, but I'll have to look that thing up. Looks like a huge stir plate. Does it have a stir function by any chance?
hafmpty
Well-Known Member
I posted very early pics of my system but there have been many upgrades and changes so I posting the latest version. I just put the wooden sculptures together over the weekend. I'm a fan of modular so I can put things away as I'm done using them. Also, I had back surgery last September so maneuverability is a plus. Less lifting, more rolling. Anyway, pics are below with a description of features.
Here's a breakdown of the features by piece:
HLT - Tri-Clamp fittings throughout. It's a Sabco HLT. It has 1/2" fittings welded for use as a normal HLT but I can swap the stainless immersion chiller out of the BK and it doubles as a HERMS Coil. I don't currenlty use it in that way, but I could if I wanted to.
MLT - Tri-Clamp fitting throughout. I recently had the 1/2" fittings that were originally on the MLT & BK replaced with 3/4" fittings. I can get some SERIOUS movement of wort now during the mash and chilling. It is a direct-fired RIMS. The control panel is an Auber PID that turns the NG on and off. There is also a relay timer that turns the Hot Surface Ignition on waits 4 seconds before opening the solenoid to allow gas flow. There is also a vacuum gauge that ensures I'm not pulling a vacuum during recirculation. Before replacing the 1/2" TC w/ 3/4" it was difficult to get a good flow. Now though, I can have it full bore and there is no vacuum whatsoever.
BK - Tri-Clamp fittings throughout. Removable Tri-Clamp stainless immersion chiller. Sits on a hydraulic lift table that allows me to adjust the height during transfers to the fermenter.
PUMP - Tri-Clamp fittings throughout. Has a bleeder valve to release air and for samples if needed. Again, the modular method allows me to use only the one pump and move it around as needed.


Anyway, pics are below with a description of features.Here's a breakdown of the features by piece:
HLT - Tri-Clamp fittings throughout. It's a Sabco HLT. It has 1/2" fittings welded for use as a normal HLT but I can swap the stainless immersion chiller out of the BK and it doubles as a HERMS Coil. I don't currenlty use it in that way, but I could if I wanted to.
MLT - Tri-Clamp fitting throughout. I recently had the 1/2" fittings that were originally on the MLT & BK replaced with 3/4" fittings. I can get some SERIOUS movement of wort now during the mash and chilling. It is a direct-fired RIMS. The control panel is an Auber PID that turns the NG on and off. There is also a relay timer that turns the Hot Surface Ignition on waits 4 seconds before opening the solenoid to allow gas flow. There is also a vacuum gauge that ensures I'm not pulling a vacuum during recirculation. Before replacing the 1/2" TC w/ 3/4" it was difficult to get a good flow. Now though, I can have it full bore and there is no vacuum whatsoever.
BK - Tri-Clamp fittings throughout. Removable Tri-Clamp stainless immersion chiller. Sits on a hydraulic lift table that allows me to adjust the height during transfers to the fermenter.
PUMP - Tri-Clamp fittings throughout. Has a bleeder valve to release air and for samples if needed. Again, the modular method allows me to use only the one pump and move it around as needed.
ibrewmyown
Well-Known Member
I've made some changes to my system recently (Cleanable counter flow chiller, whirlpool arm, and a few others) but about 8-10 years ago I saw the "Tippy Dump) on the More Beer site and built my own version. The mash tun tips right into a garbage can / bag, wheels and all in one system make moving it around effortless. Its also natural gas with a 15 - 20 foot quick disconnect hose.

Similar threads
- Replies
- 7
- Views
- 547
- Replies
- 13
- Views
- 3K