The full Monti

Homebrew Talk - Beer, Wine, Mead, & Cider Brewing Discussion Forum

Help Support Homebrew Talk - Beer, Wine, Mead, & Cider Brewing Discussion Forum:

This site may earn a commission from merchant affiliate links, including eBay, Amazon, and others.
GM,

Like everyone else, I am in awe and envious of your skills, not just welding but design and fabrication.

You show a die grinder in one of your pics with a burr of some sort you use for cutting odd shape holes in stainless. What kind of burr is it, what material of construction, where can I get one? I have a couple oval holes I need to cut in stainless. Thanks.


The bit is nothing special. Its just a carbide bit. That one is made by GARR TOOL. Its a double cut bit cause I like to minimize the shavings ability to stick in me. Single cut bits throw a longer (more splinter like) shaving. I used that shape cause it allowed me to use different size bits, kind of an all in one if you will. If I wanted a bigger radius I would just stick the bit in further. That's all, it kept me from having to change bits.

Go slow. Check your burr often, SS likes to break off the cutting faces.

Here is a link to GARR. Its the one listed as EDP# 64012. The third one down.
http://www.garrtool.com/doc/pdf/SF.pdf
 
Thanks GM, I just ordered one from Amazon. I assume you mean slow feed rate as opposed to slow tool rpm?
 
Top workmanship as always. This has been a pure joy in following your process.

I'm just waiting for the other shoe to drop.

I think the welder you have just needs a little work and will serve you for many years. I think back to the High Freq. box and buzz box I first started trying to Tig weld with and have a good lol.

Keep up the Great work and I know you will.

God Bless
Dominus Vobiscum
Swagman:cool:
 
Funny, I just sold my High Freq box a couple weeks ago. The owner of the welding supply knew I had it. A guy comes in looking for one. A little dusting and everybody's happy.
 
Top workmanship as always. This has been a pure joy in following your process.

I'm just waiting for the other shoe to drop.

I think the welder you have just needs a little work and will serve you for many years. I think back to the High Freq. box and buzz box I first started trying to Tig weld with and have a good lol.

Keep up the Great work and I know you will.

God Bless
Dominus Vobiscum
Swagman:cool:

Hey Swagman.

I haven't seen you around much lately. Maybe its just me. Thank you for the kind words. :mug:

I have been busy getting some other things done around the house. In a couple of my pics you can see some tile. I still have more to do, I just don't get in there and get it done. I get side tracked on different projects. I am still at the point of figuring out the clocking position so I can weld on the bottom.


Funny, I just sold my High Freq box a couple weeks ago. The owner of the welding supply knew I had it. A guy comes in looking for one. A little dusting and everybody's happy.

Story of my life, a day late and a dollar short.
How's you build coming along? Did you get the welding done?
 
Been busy this year but I'm closing the shed for the month of July also have a long list. I start with an old forney welder with front pugs and a Hi Freq box. I made a spring loaded foot switch so I could start at a higher amp and switch to a lower setting. In fact the freq box is still around here someplace.
Monti question how large is the argon tent you use at work. Was thinking of one for the shed but maybe a little smaller


God Bless
Dominus Vobiscum
Swagman:cool:


Are you asking about the purge chamber I used on my FB build? If so that unit is at work. I am far too cheap to have one here at the house. Those things SUCK the life out of a tank of gas. I just build make shift purges here at the house to fit the application at the time. Metal tape, pieces of copper or brass shim stock, ect... I do have a couple back purges I built and one diffuser that I use inside my little "tents".

A small acrylic box to weld up all the funky stuff would be real cool though. If you build or buy one I will be very envious of you.
 
GM,

A follow up to your good advice on die grinders and bits. I used them tonight to open up the mis-measured opening of my eHLT, and in maybe 20 minutes took an 1/8" more out of the radius of the opening, and now the top fits perfectly. The bit you recommended worked nice and smoothly. I couldn't be more pleased.

Now I have some other holes in the eHLT to finish off, and it'll be good to go.

Thanks!

No problem. I am glad it all worked out. They're pretty nice bits.

You got a thread going?

Cheers.:mug:
 
No thread yet, coming soon. I have various pictures in other threads, but haven't started a build thread yet. Soon, I have some of the new brewery done, but much to do.
 
Hey Monti, any updates?


No, sorry. I've been doing other things lately. I've had to put a fair amount of time in my reef aquarium. I was putting it off a little too much.:D

To be honest, its been nice. I have run through a few different ideas for the build. I'm ready to weld the bottom/jacket onto the kettle. I need a bottle of purge gas and some time. I know I want to clock the pieces so the steam input is in the right place, but I'm kinda stuck on just what position. I'm also toying with making the input manifold shorter.

I also need to tap the steam line for the direct injection for the mash recirculation. So I can keep temps. I want to make a steam heater for that process. That's kinda started already. I'm also thinking of using the steam to pre-heat the wort while its running into the kettle. I will have a lot less temp to make up that way to get to boiling.

Decisions, decisions. LOL.

Prost everyone.:mug:
 
Well its killing me. I just can't wait. Its time to dust off the thread.

Ohio Ed has un-knowingly triggered my brain to do a little bit of work on the build. So after some thought, a few what if's.......I decided to change things up slightly, and jacket the whole kettle with steam. I'm still using a sanke as the outer portion of the kettle. I have built a new inner wall out of .045" 304 SS sheet. It will hold 9 ish gallons according to the math. I figure that will be just about perfect for 5 gallon batches. Boil off, foam head before hot break ect.

Sorry no pics yet. "IF" my laser guy comes through for me tomorrow (he was supposed too today) I will have the bottom section to the inner liner. I'm using the top to the sanke keg I cut up earlier in the thread. It dusted with white paint. I will then be able to weld the two together. I'll post up pics before I start the welding.

Cheers all :mug:
 
Greenmonti,

I have to say. Seeing your work forces me to step it up a notch.
After 21 years of welding, I sometimes loose the desire to make the best weld possible.
It takes a lot of focus, and patience to make sure all the variables are optimal.
Having the work in the ideal position. Being in the ideal position to make the weld.
I could go through every variable, but you get the point.

I know what a good weld is so if I'm not not in the mood I'll just put down something that I know is a good weld.
A good weld may not always look pretty. Pretty welds are the icing on the cake.

Don't get me wrong, I still like what I do. At work I do my best because I'm getting paid to do my best. For myself I slack off some.

Do me a favor, and keep posting photos, so that I stop slacking.
Your work is inspiring.
 
Thank you guys for the kind words. Its good to be doing a little work on the system. I got my piece today so when I vet home ill put up a couple pics. It would take forever to do from my phone.
 
OK, picture time.

This started off life as a flat piece of sheet metal. I rolled it, welded the seam, roll planished the weld, and then re-rolled it. It came out pretty round.
P1010210.jpg

P1010211.jpg


This is the top I had laser cut. Just so it would be as round as possible.
P1010209.jpg


The top will become the bottom to the inner liner. You can see the laser recast still on. If I don't get too crazy in the removal of the recast, I should get a nice fit up for the weld.
P1010212.jpg

P1010214.jpg

P1010213.jpg


Here's a side by side shot. The inner liner is sitting up off the floor on the sanke's tap port. I still need to final trim the opening so it will slide in but, I should end up with about an 1" of jacket all around. I'm not too sure just yet as too how much space I will have on the bottom. I haven't fully decided the drain yet. I have a couple ideas.
P1010215.jpg

P1010216.jpg

P1010217.jpg


Any thoughts? Thanks for looking.
 
Craig

Is this the boil pot?

Really looking good can't wait to see the weld on the keg top aka bottom.

By the way took your advice and got a defuse for the back flow. What a difference. Thank you for great advice.


God Bless
Swagman
 
As always... I'm amazed at your skill.

I don't have any experience with steam, but I'm glad to see some activity in this thread again.

Ed
 
I envy your fabrication skills. That's gonna be a sweet steam keggle when you're done.

I sure hope so, LOL. Thank you.

Craig

Is this the boil pot?

Really looking good can't wait to see the weld on the keg top aka bottom.

By the way took your advice and got a defuse for the back flow. What a difference. Thank you for great advice.


God Bless
Swagman

Hey Martin,

I'm glad you like a diffuser. They sure come in handy on different occasions. Did you buy or build?

Yes its the boil pot. I'm kinda broken on the idea of a single vessel setup at the moment. What do you think?

I am SO glad this thread is alive again.

Hey man, how's your setup doing? Last I remember you were having issues with rust. WOW, its been a while.
 
Not to go OT, but I'd like to know more about this. Sounds like something I need.

Hey Ron,

Not OT at all. I don't mind. The piece is a gas diffuser that your able to just place where ever you need it. No tape required. I have a few pics posted in OhioEd's thread about welding. The pics are of the ones I've made. I'll be happy to post a pic or two for you here. Just let me know. I'm feeling lazy right now about opening the photo account.LOL

Wow sexy welding. very very nice...

Thank you.:mug:

As always... I'm amazed at your skill.

I don't have any experience with steam, but I'm glad to see some activity in this thread again.

Ed

Howdy,

I need to get this thing going. I can't brew beer at the moment, and I haven't been able to brew in about a year now. I wonder if you'd be willing to loan me your setup?? That thing is sweet.

OMG! It's back!!!!!! Can't wait to see how this goes down.

Hey bro,

I also still plan on playing with the cyclone hop separator. I owe thanks to you on that find. I just hope I can make one. Did you ever build a flash boiler?
 
First off, your welding and creativity are awesome, Monti. I could only hope to have half the skill that you possess.

Secondly, I was thinking of a way to get a side+bottom steam jacket, but I don't know the dimensions of the kegs. It may be possible, and it may not. Here is the idea:
put this
15.5g%20Coors%20Keg.JPG


inside half a sanke or pony w/ the top or bottom cut off (basically like Monti had done w/ the bottom of the keg)
images

like that w/o the handles
 
Well its not a great amount of progress but, its progress. I'm almost ready to start welding pieces together. A little more fitting to do and a couple more parts to acquire.

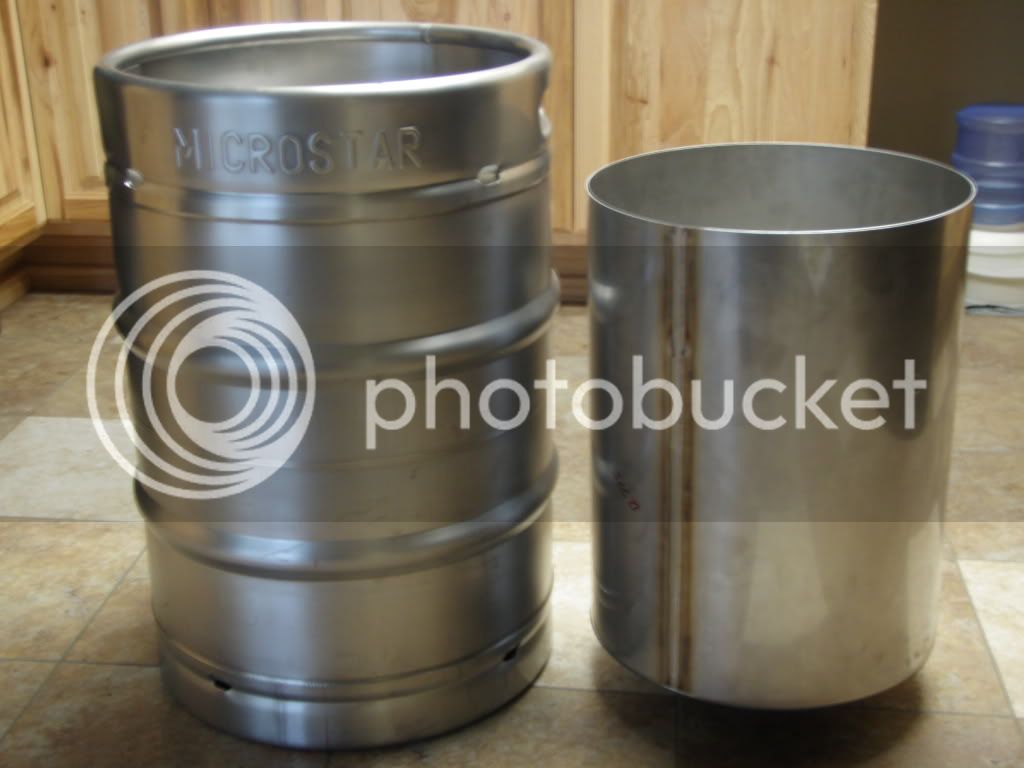
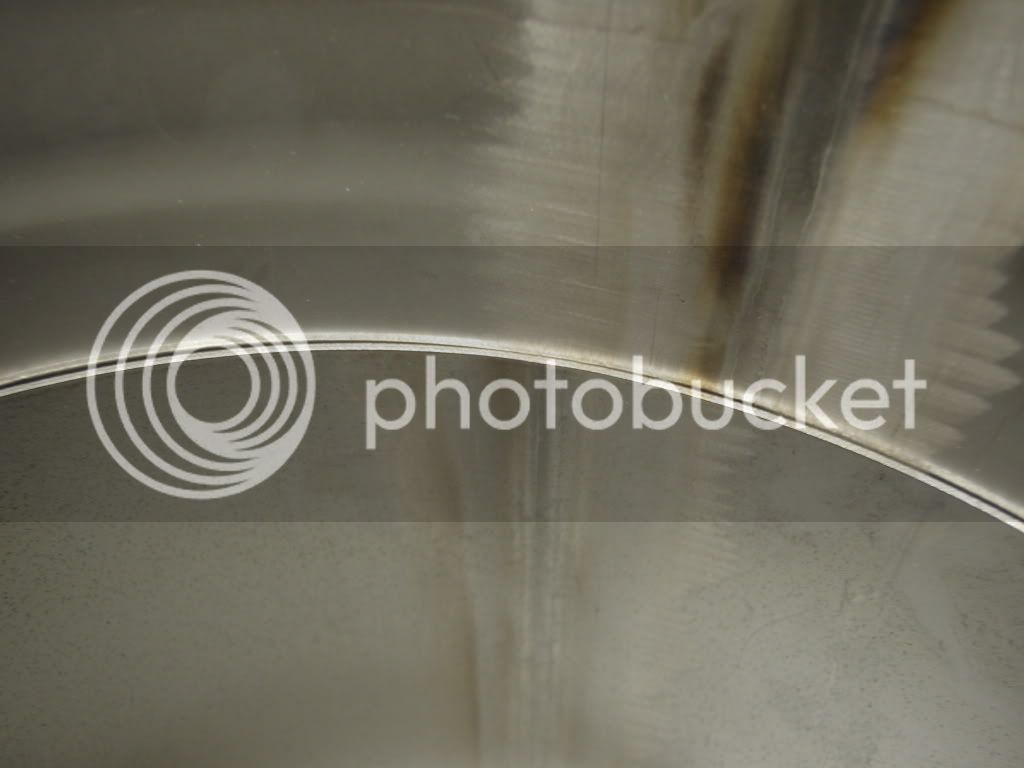
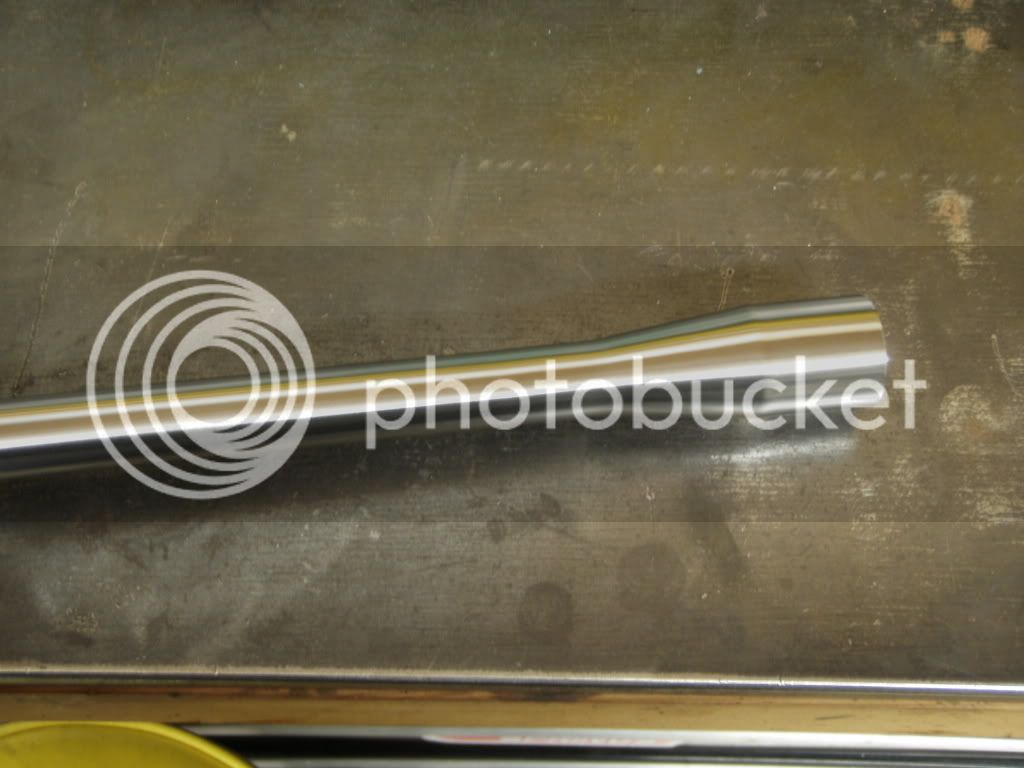
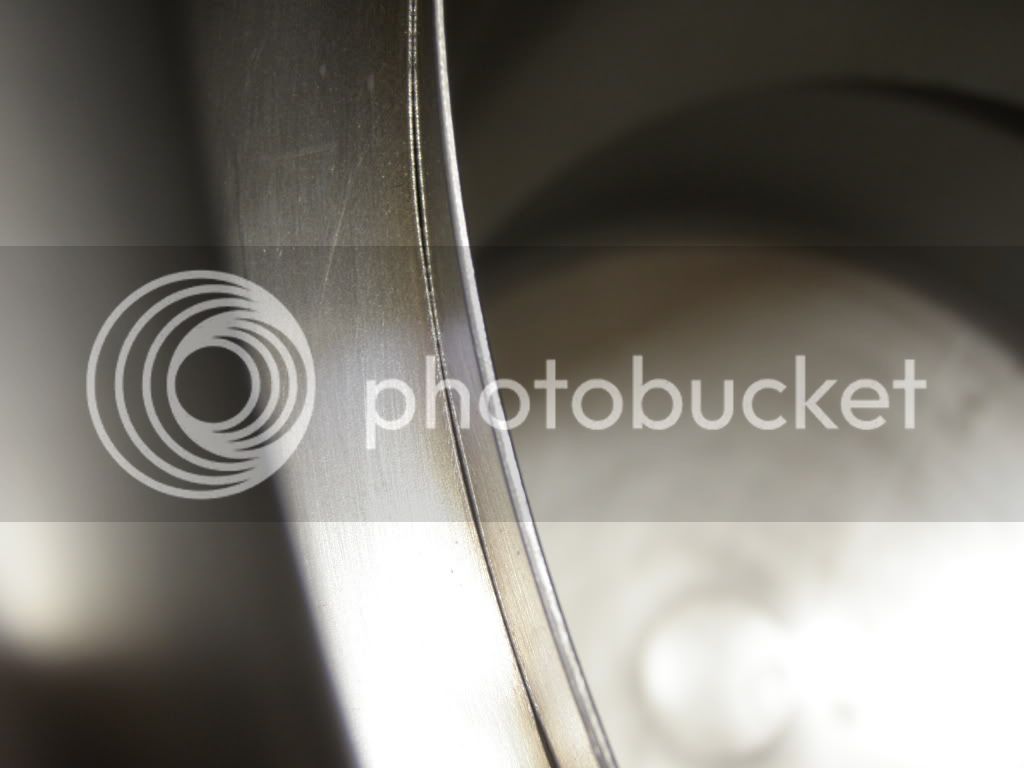
I took the cylinder I made and cut a 4 1/2" section off of it. I then sized the ends of it so its larger then the orignal size. It currently goes over the other section but I want it to be a little bigger.
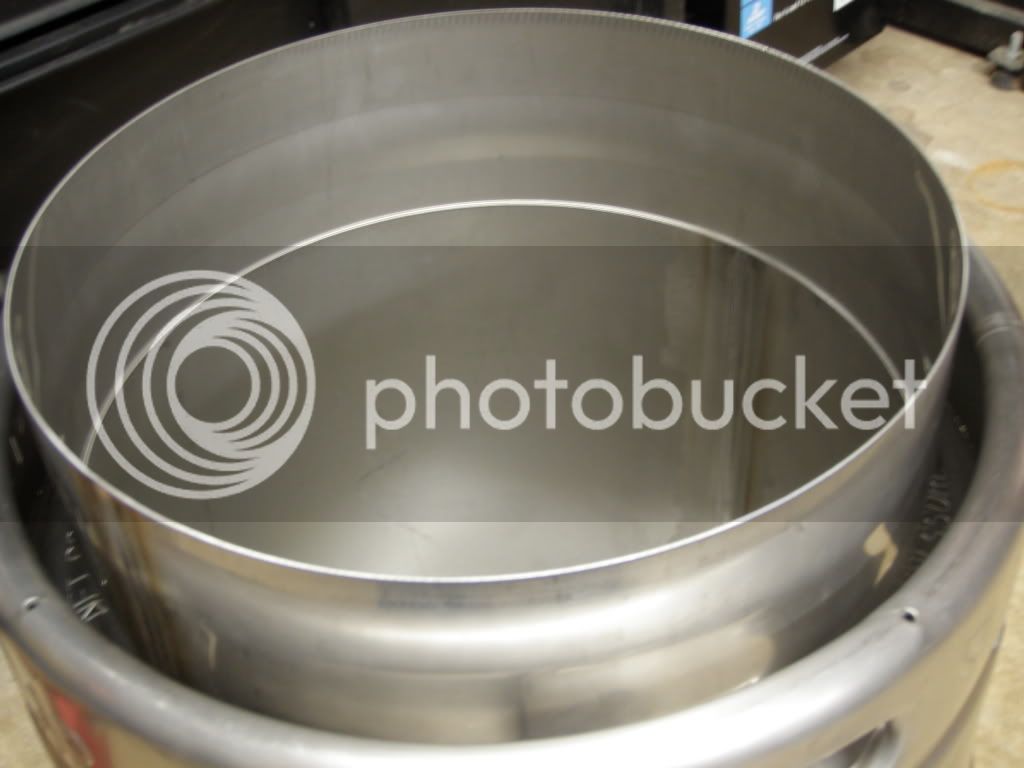
This pic shows the ends. The middle is smaller in diameter.
P1010219.jpg

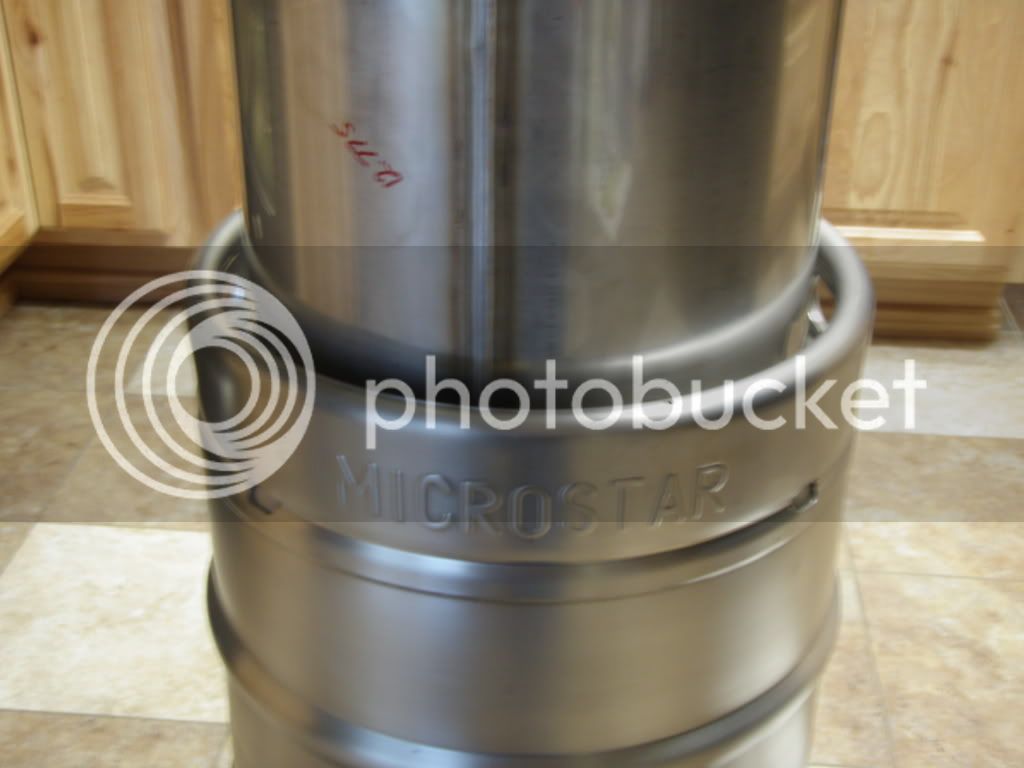
This pic shows how it slide over the other section.
P1010220.jpg


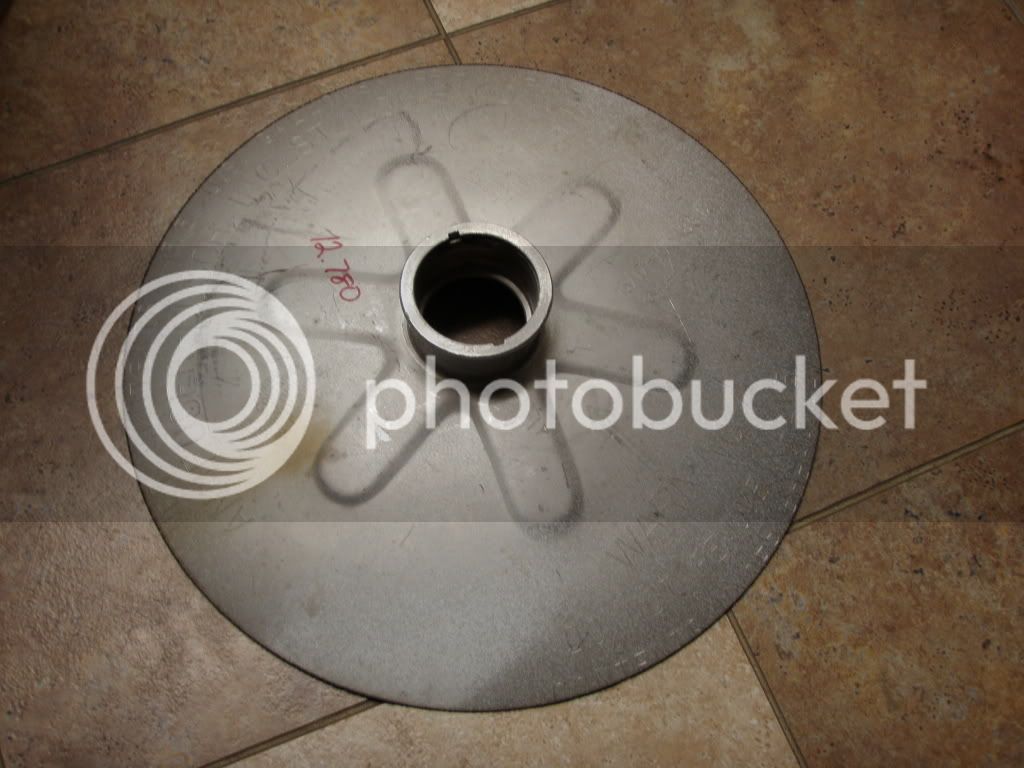
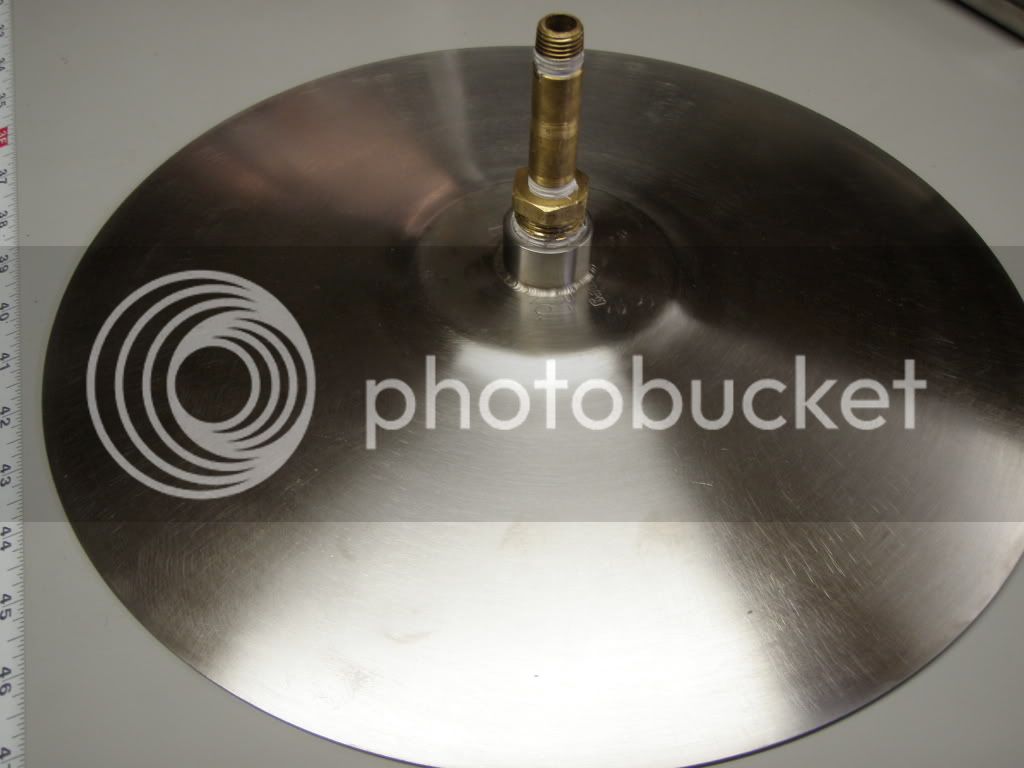
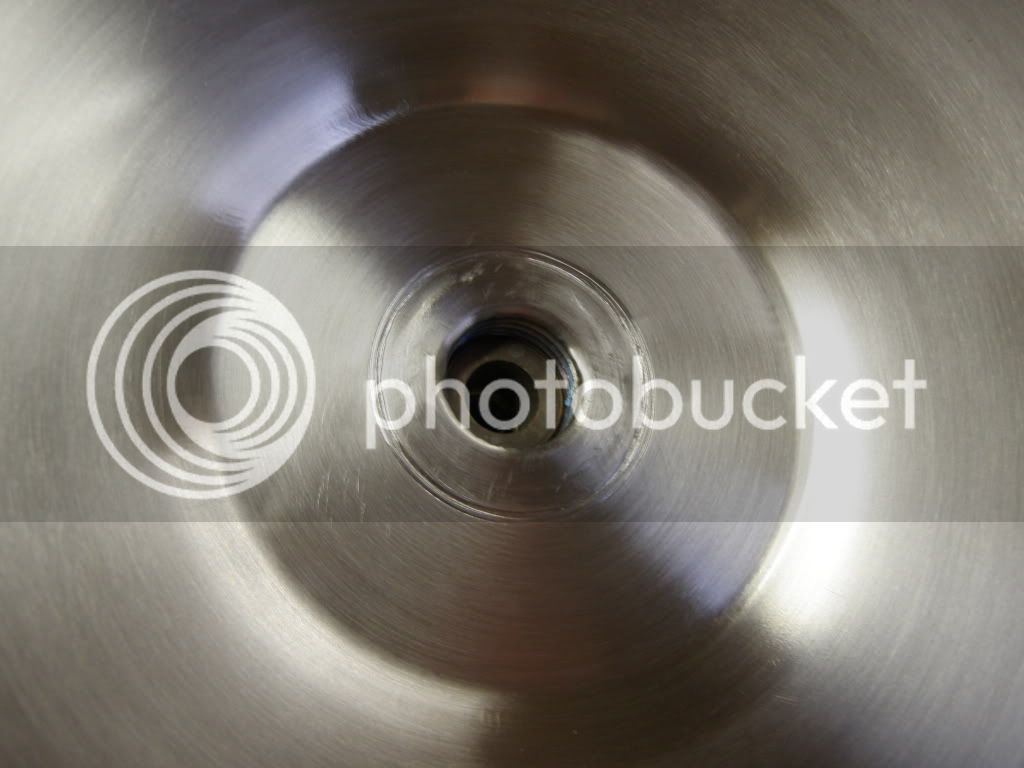
This is the drain I made. I'm going to have a bottom drain on this kettle. I welded a reducer to a piece of tubing and polished it.
P1010218.jpg


I didn't like the bottom I had laser cut. So I took the bottom that I already started for this project, when I was just going to jacket the bottom. I cut this one myself.
P1010226.jpg

You can see where I have it scribed to cut out the half coupling. The new drain will be going on.
P1010227.jpg


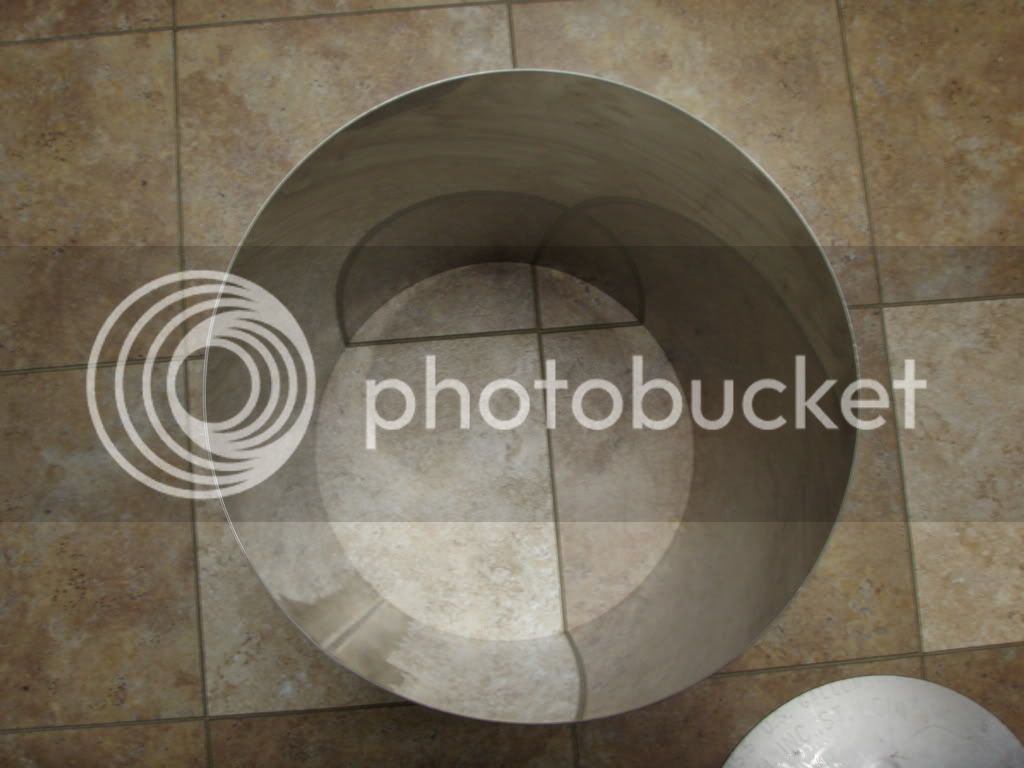
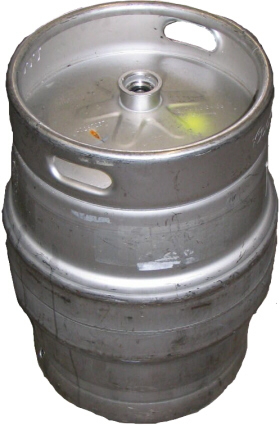
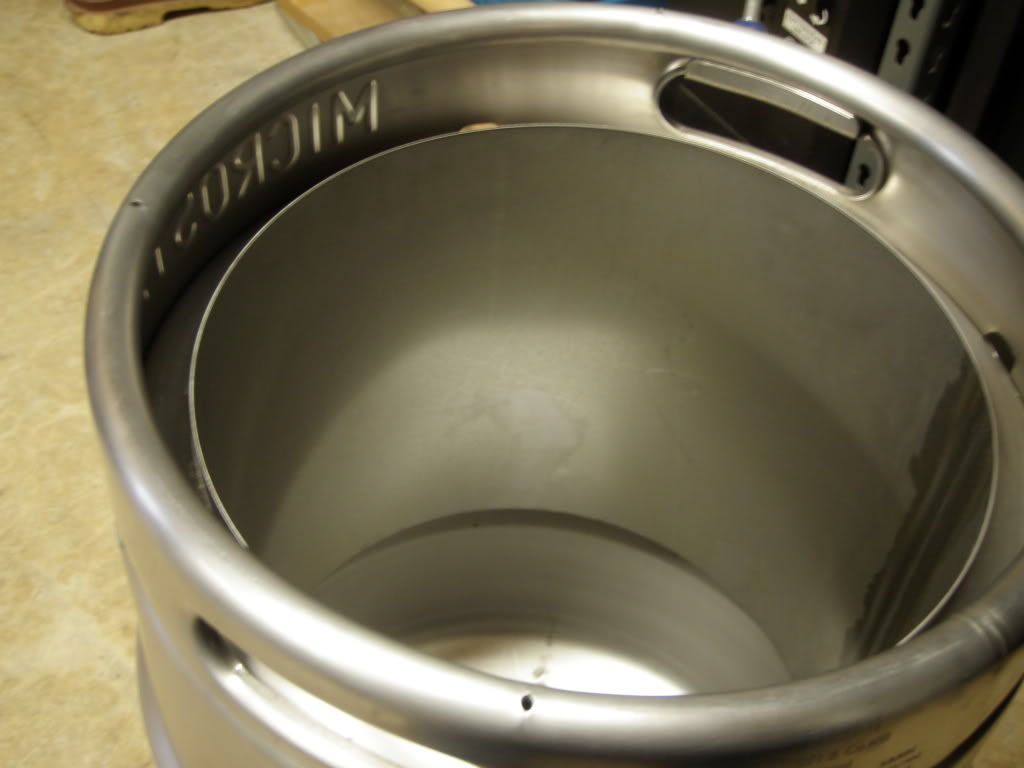
I hope I don't loose you folks here. This is the inner assembly mocked up and not placed inside yet. This is just to give you an idea of how the parts fit in the end. You can see the three separate pieces minus the keg.
P1010225.jpg


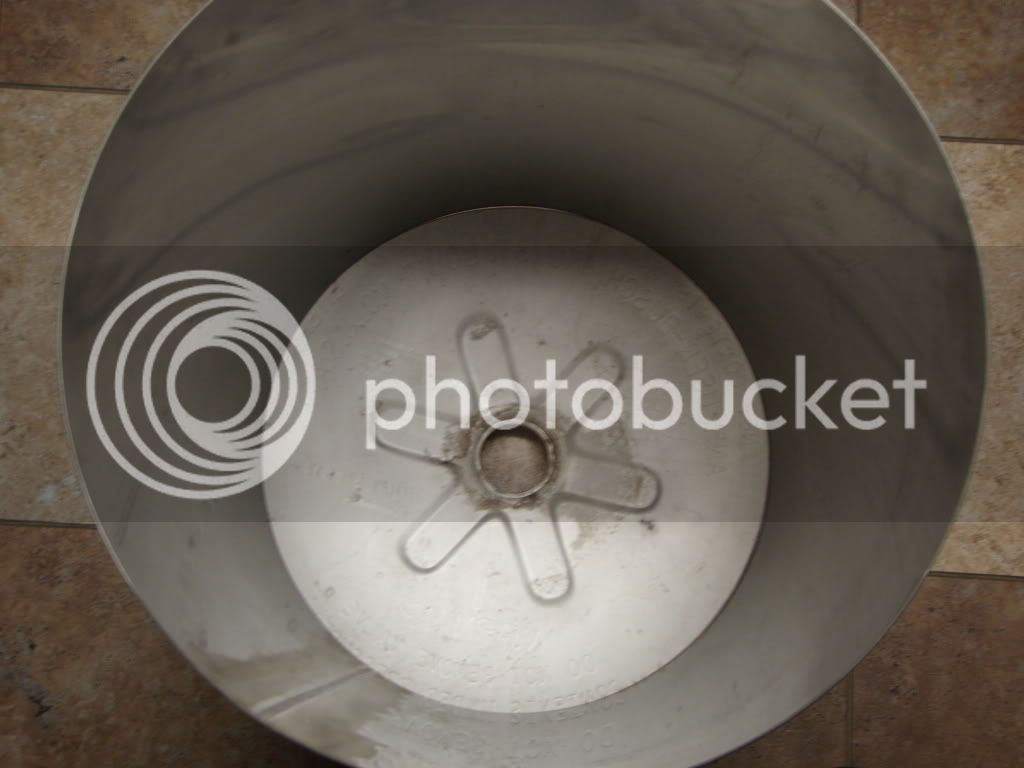
This is the bottom inner piece. This will be welded to the keg and have the bottom attached to it. This whole piece will be jacketed with steam. Just this bottom section will hold 6.5 gallons.
P1010221.jpg

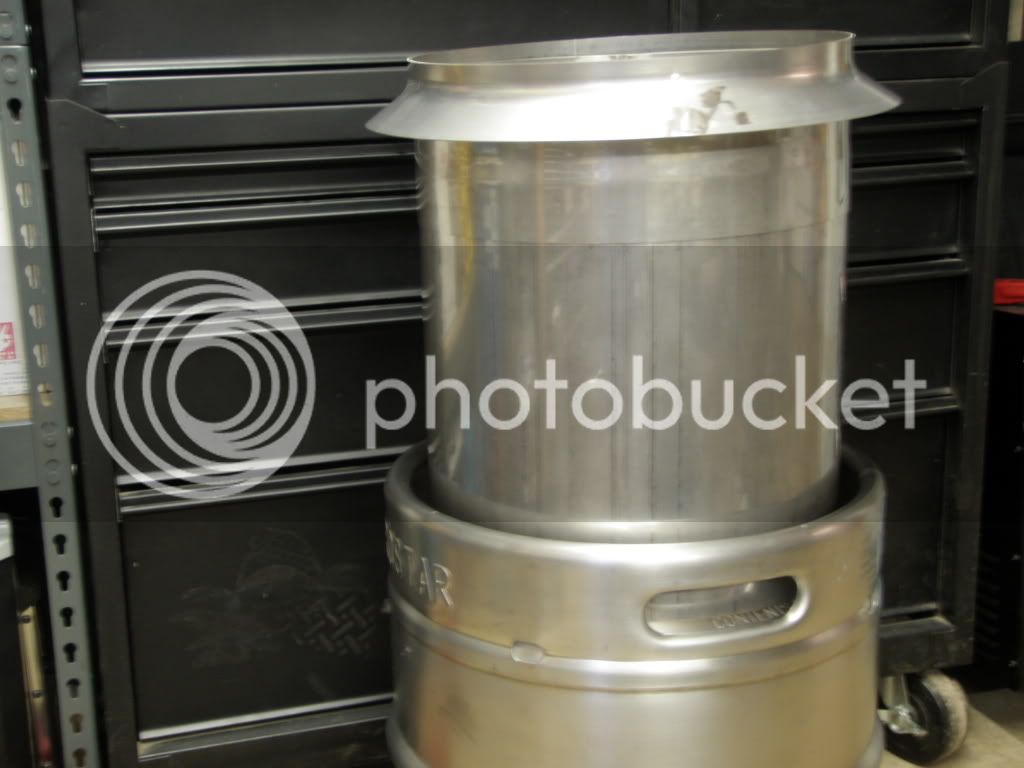
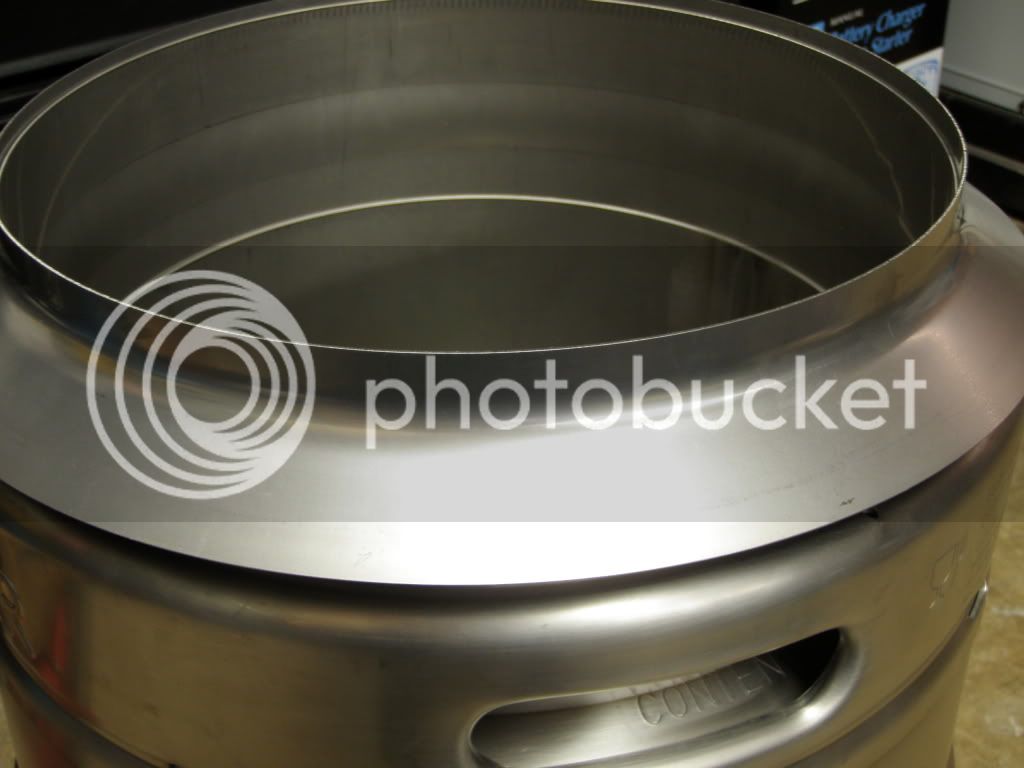
This is the final fit to the keg.
P1010222.jpg


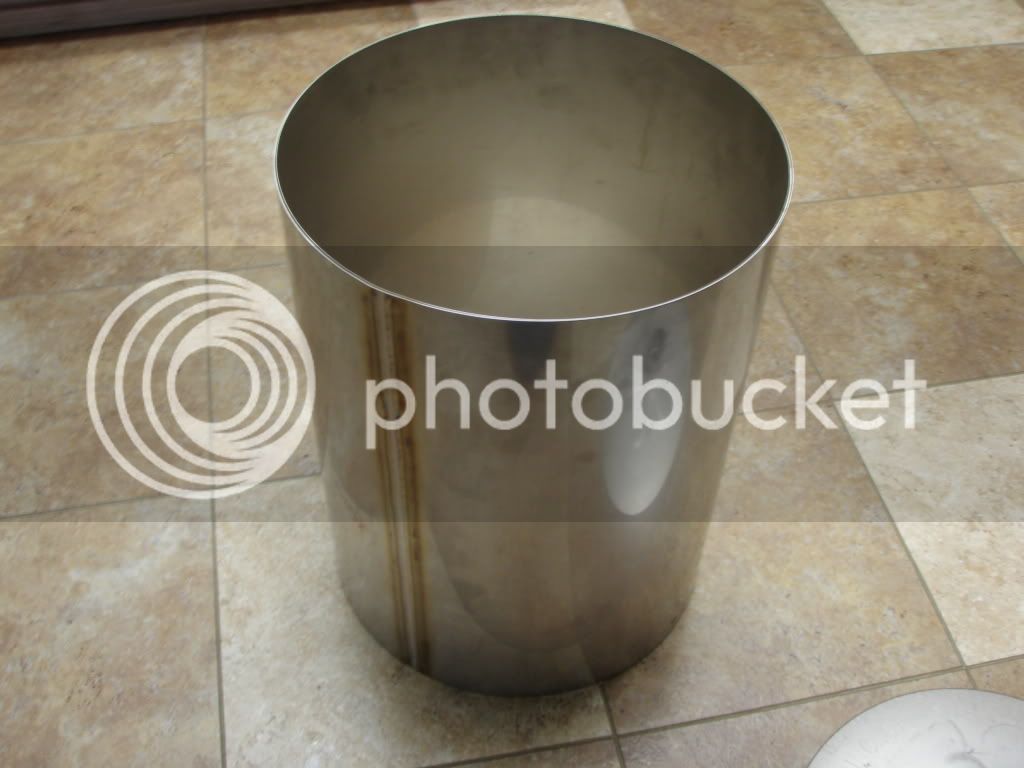
This is the fit of the middle section. This will get welded to the top of the keg. Its whole purpose is to extend the keg upward. A place for the foam to rise into and hold the rolling action of the boil. I want to size it bigger due to the fact that after I weld in the lower piece and polish the weld. That lip will be rounded.
P1010223.jpg


This is the last piece. The transition. I'm going to build this so that only from the top of the handle holes up is visible through the top of the stand. Like what you see in the big breweries.
P1010224.jpg


Thanks for looking.

If there are any questions I'd be glad to answer them and make things as clear as mud.
 
I almost forgot. I'm making things move upward cause I've decided to go electric with this unit. It will be an all in one steam kettle. I have the element (6000 watt) and I need to get the fitting to weld in. I will use the kettle as the boiler for steam generation for the mash, or for heating water on the fly. This way any residual heat in the kettle (aka boiler) wont go to waste.

The bottom of the kettle will get insulation wrapped around it. The fact that I wont see the bottom allows me the ability to insulate it with what ever I want and not loose any points for looks.
 
WOW! You sir, are very inventive! You've definitely got enough volume in the steam jacket.
 
WOW! You sir, are very inventive! You've definitely got enough volume in the steam jacket.


Thank you.

I think things will fall just about right on this build. Its not gonna take too much steam for the mash or heating water on the fly. I hope to only need to over shoot the volume needed in the kettle for the boil by 1 gallon for the other procedures.
 
I hope to only need to over shoot the volume needed in the kettle for the boil by 1 gallon for the other procedures.

I just meant that with a 1" spacing for steam on the sides of a 9 gal pot, you'll have a ton of thermal energy at your disposal. This of course is dependent on your method of generating pressurized steam.

EDIT. How are you planning on generating steam?
 
I just meant that with a 1" spacing for steam on the sides of a 9 gal pot, you'll have a ton of thermal energy at your disposal. This of course is dependent on your method of generating pressurized steam.


Right. It's gonna be an all in one kettle. There will be a 6000 watt element. The other bonus for using the kettle as the boiler for the other heating operations is. As I use the steam for heating water and the mash, I will purge the kettle of air so I will get all the goodness out of the steam.
 
Back
Top