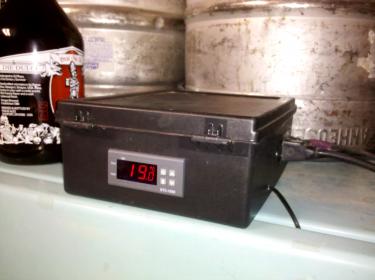
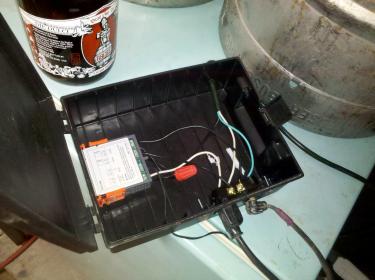
ebay aquarium temp controller build

Homebrew Talk - Beer, Wine, Mead, & Cider Brewing Discussion Forum

Help Support Homebrew Talk - Beer, Wine, Mead, & Cider Brewing Discussion Forum:

This site may earn a commission from merchant affiliate links, including eBay, Amazon, and others.
I suppose that you could measure the resistance with an ohm-meter in ice-cold water (0C) and warm water (say 60C, measured with a thermometer), and deduce the ohm range, and try to find an sensor that has a similar range and the same readings at the same temperatures.

JP

I know people have asked before, but I dont think I have seen the answer. Has anyone discovered a replacement Temp Probe that will work with these controllers? I would like to have a second one that I can keep in a thermowell for my fermentation chamber, so i dont have to keep removing the one I have set up in the Kegerator.
 
Ordered mine 2/14. It shipped 2/16 and showed up today.
I ordered mine form Uni_Mart
They shipped the 110v to me with out an issue.

Now to wire it up.......
 
Went to wire this install this per the diagram below. It turns on just fine, I can hear it trip the internal relay and it sends power out as it should. But the compressor doesn't turn on.
I connect the other aftermarket thermostat back up and the compressor turned on right away.
Put my multimeter on it and its only drawing .6 volts with the old thermostat on the neutral regardless of which post I check it on. :confused:
This temp controller puts out 120v on the neutral lines.

Is this controller going to work? Do I need to put some form of resistor on it?


I know several of you are going to say build a box like everyone else. I may end up doing that. But I would like to see if I can get it to work as a direct replacement for the analog aftermarket thermostat pictured.


EDIT: The blue(BU) wire is actually live with 120 as well with out the thermostat completely disconnected. So now Im back to square one again.There are two groups of wires on this fridge. 1 is 4 wires - Black(120) White (0) Green(0) and Blue(120) (Voltage when plugged in with no thermostat) The second set is a black and white that feed the switched light inside.

I have a wine cooler that I bought used that has an older analog thermostat hard wired into. I would like to replace it with one of these and hard wire it in and add a light to use as a heat source if needed/wanted.

Here is what I think would be the right way to wire it. Electrical is something I have to stare at forever before it finally makes sense to me.

Do you guys see anything wrong or that should be changed? (Other than the 220 label :p )

wiring.png


Here is a picture of the current thermostat
DSC_0970.jpg


Thanks for the help.:mug:
 
The fridge diagram shows that the thermostat is switching the neutral to turn the compressor on/off. Move your wire on #7 in your diagram from the 120v bus to the Neutral bus.

Here's a revised schematic. The only change is #7 goes to Neutral insteal of "Positive/Black".

wiring.png
 
The fridge diagram shows that the thermostat is switching the neutral to turn the compressor on/off. Move your wire on #7 in your diagram from the 120v bus to the Neutral bus.

Here's a revised schematic. The only change is #7 goes to Neutral insteal of "Positive/Black".

wiring.png
Interesting that it could get UL listed when switching the neutral. I've always heard that you switch the power side so that when the component is off it doesn't have a live current. Hmmm......
 
got mine in the mail today (about 3 weeks from payment to receipt). may be posting back here tonight or tomorrow with questions.. haha
 
I have a few questions - I have tried to search through the thread, but it is quite difficult, as any unique words have been in almost every post. so without further ado...

My extension cord is rated 13A / 1625 W - will this be fine for a standard 2-keg minifridge? (I assume it will - I had the fridge running on this wire before i got the regulator.)

When I insert the ends of the probe wire into the thermostat, do I need to tighten the screws or will they stay in on their own?

My extension cord will have three wires inside - Live, Neutral, and Ground. I attach the live wire to outlets 1, 6 and 8 (according to the included wiring diagram. The one in this thread says 1, 5, and 7 - I assume this shouldn't make a difference?)

I then attach a wire from 7 (8 according to the wiring diagram in this thread) to my outlet. (i'm only using for cooling).

I attach the neutral wire to the outlet and to 2 (on the thermostat)

I attach ground to the outlet

Is this all? Am I making some grave error in my wiring theory?
 
When I insert the ends of the probe wire into the thermostat, do I need to tighten the screws or will they stay in on their own? Tighten

My extension cord will have three wires inside - Live, Neutral, and Ground. I attach the live wire to outlets 1, 6 and 8 (according to the included wiring diagram. The one in this thread says 1, 5, and 7 - I assume this shouldn't make a difference?) why wire differently?

see above
 
why wire differently?

because by wiring them the other direction, I would be following the instructions included with the temp controller, instead of those posted by android. I'd rather not burn out a diode if it has one in there.. but I don't know.

thanks for the other answer too :)
 
Hey I just got mine in the mail. What is this little tiny thing on a wire that came with it? Is it the sensor? Just a little pill sized rubber thing?
 
Somewhere in this thread I could swear I saw info on how to include a relay to power fans so they will be activated by either the heating or cooling mode of the controller,but I can't seem to find it now. I just ordered a controller and since I would also want to add fans to my system I was wondering if someone could help me out with some sort of schematic and information about what configuration of relay I should use. Any help would sure be appreciated.Thanks.
 
Huh so I got the controller, I looked at it and just figured plug wire goes in, then one pos/neg set each out from the hot and cold to the plugs. Wow, was I wrong! This is a bit more complicated!
 
A few general questions:

- Does it matter if the indicator lamp is wired in series or parallel with the load? If so, why?

- Is there a reason to have a power switch instead of just unplugging it when you want it to turn off?

- Where are folks getting the stress relief grommets for the power cord?

I'll try answer these but if anyone has better answers go with them ;)
1. I would wire in parrallel, as if you did wire in series the indicator lamp would have to take the current of the load and I would guess most wouldn't handle that (someone with more knowledge should be consulted though)
2. Best practice, that is what a switch is made for so you are not plugging/unpluggin hot equipment which could lead to damage, probably not but could.
3. So that if the cord gets pulled on there is a lower risk that any of the wires inside the box get pulled off what they are connected to.
 
Built this at work on Friday with the added lamps. Works great and it's such a relief to not have to plug in and unplug my thermawrap constantly.

For anyone debating whether or not they want to try building this...I have little to no electrical experience and I was able to do it without running into any issues. Just be careful carving out the project box slots...I cut my finger pretty bad with my leatherman
 
- Does it matter if the indicator lamp is wired in series or parallel with the load? If so, why?
It has to be wired in parallel. When things are wired in parallel, then both items see 120V. If you wire them in series, the two items combined will see 120V. Plus, wires in series means that both items will see a current flow that the hungrier item wants. This can result in a bulb frying because the fridge could want more current than the bulb is able to handle.

- Is there a reason to have a power switch instead of just unplugging it when you want it to turn off?
The controller already has a power button on it. You don't need any additional switches of any kind.

- Where are folks getting the stress relief grommets for the power cord?
You can get those in the electrical section of Lowe's or Home Depot. Look for "cord grips".
 
My extension cord is rated 13A / 1625 W - will this be fine for a standard 2-keg minifridge? (I assume it will - I had the fridge running on this wire before i got the regulator.)
That cord is fine. I use the same thing.

When I insert the ends of the probe wire into the thermostat, do I need to tighten the screws or will they stay in on their own?
tighten.

My extension cord will have three wires inside - Live, Neutral, and Ground. I attach the live wire to outlets 1, 6 and 8 (according to the included wiring diagram. The one in this thread says 1, 5, and 7 - I assume this shouldn't make a difference?)

I then attach a wire from 7 (8 according to the wiring diagram in this thread) to my outlet. (i'm only using for cooling).

I attach the neutral wire to the outlet and to 2 (on the thermostat)

I attach ground to the outlet

Is this all? Am I making some grave error in my wiring theory?
You are fine here.

The pairs of screws that form the switches (5&6 or 7&8) are completely are just two terminals that will be connected together when the controller says it's time for heating or cooling to happen.

It makes absolutely no difference whether you connect your incoming hot to 5 and 7 or whether you connect to 6 and 8. Hell, if you want to, connect to 5 and 8 or connect or 6 and 7. As long as you are connecting one side of the pair to live 120V and the other side of the pair to your outlet, it's totally irrelevant.
 
It makes absolutely no difference whether you connect your incoming hot to 5 and 7 or whether you connect to 6 and 8. Hell, if you want to, connect to 5 and 8 or connect or 6 and 7. As long as you are connecting one side of the pair to live 120V and the other side of the pair to your outlet, it's totally irrelevant.

Oh... and it makes no difference whether whether you connect black wire to 1 and white to 2 for the controller power source or vice versa either.
 
I just wired up my dual stage controller last night just before flame out. It works like charm. I love having a heat source plugged in so I don't have to keep plugging in a heating pad

-= Jason =-
 
EricT said:
Is this build a lot cheaper then the Ranco for 100.00?

Sooo much cheaper. And you can customize to make it look as cool as you like. I'm thinking of painting a skull and some flames on mine.
 
I picked up a box from good will for .50 cents. It was some type of card catalog box with a hinged lid. I'll snap a photo tonight.

Cost =
controller $27
Outlet $2.50
Box $.50
50' 16ga christmas green extension cord $8.99

Total = $38.99

Cheaper than Anything else you bet.

-= Jason =-
 
Sooo much cheaper. And you can customize to make it look as cool as you like. I'm thinking of painting a skull and some flames on mine.

Well, that solves it then. Looks like my next project after I get done with my stand. Although, I wont need the heat portion till next year :)
 
Cost =
controller $27
Outlet $2.50
Box $.50
50' 16ga christmas green extension cord $8.99

Total = $38.99


-= Jason =-

mine came out a bit more expensive then above

more like :

controller $27
Outlet $2.50
Box $6.99
15' 16ga extension cord $14.99 (couldnt find a cheaper one at HD... might be able to fine one cheaper at walmart or lowes)

Total = $51.48.. still better then $100
 
I've been waiting to do this build and finally found a freezer. What is the link to the current ebay item so i can get my purchase on and start another project that SWMBO will have to tolerate.
 
Oh get yourself a precision screwdriver set! I'm so pissed. I finally got all my wires cut, placed and ready to go and what do you know, I don't own a tiny slotted head screwdriver to screw the stupid contacts down on the temperature controller. Fuuuudddggggeee. But I didn't say fudge.
 
What size of box should I get?
As well I'd like to say thank you to all on home brew talk, I have found a hobby that i love.O and some kick ass people who share my passion :mug:
 
Back
Top