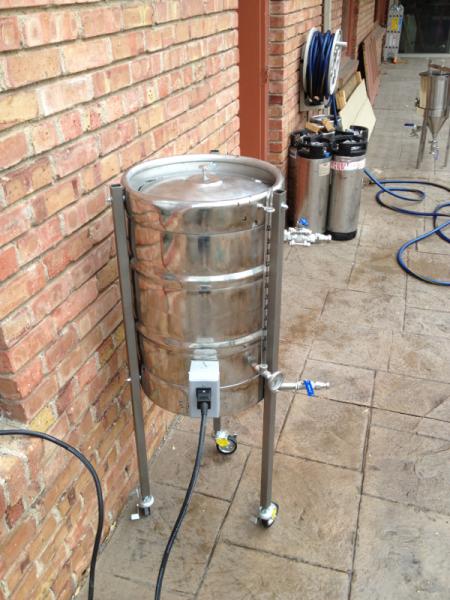
Bottom of vessel plumbing

Homebrew Talk - Beer, Wine, Mead, & Cider Brewing Discussion Forum

Help Support Homebrew Talk - Beer, Wine, Mead, & Cider Brewing Discussion Forum:

This site may earn a commission from merchant affiliate links, including eBay, Amazon, and others.

gnatp2

Well-Known Member
Joined
Jun 16, 2009
Messages
98
Reaction score
3
Location
Hoboken
So I am planning on plumbing the outlets of my 3 vessel herms electric setup from the center of the bottom of the kettles. Doesn't seem like most people do this but I would think it would be more efficient and easier to clean after brew day. Any reason not to?

Nate
 
Not going bottom-drains on my system I regret very much. As long as you have a semi-permanent setup (Not hauling it out of the closet or something every brewday) I'd definitely do it.
 
As long as you're going with a semi-permanent install, absolutely! No pickup tubes, no tipping, etc. If you're using converted kegs, you're all good. If using a flat bottom vessel, mount the drain fitting near an edge and then build your mounting frame a little bit off-level. I think a slope of 1/8 to 1/4" per 12" length is sufficient from a sanitary design perspective to ensure you're self draining.
 
Did you already cut the TOPS off the kegs? If not, flip them over and use these kits.

http://www.brewhardware.com/valves/137-tcsanke

tcbottomdrainkit.png


tntcbottomdrain.png
 
Here is what I ended up doing with my E-Brewery Kal-setup.

Cut hole in brew bench.
69803d1343359772-my-brew-stand-valve-passthrough01.jpg


Place in "open bottom" disposal flange to protect the wood.
69804d1343359772-my-brew-stand-valve-passthrough02.jpg


View looking through the "Handle" of the keg.
69806d1343359772-my-brew-stand-valve-passthrough04.jpg


Valve assembly from bottom side. I would have turned it 90* like Bobby's kit but I worried about feeding an "elbow" shape through the hole in the bench top. The HLT with the HERMS coil in it is somewhat clumsy trying to feed the valve through the hole already. I can not imagine trying it with an elbow on there.
69807d1343359772-my-brew-stand-valve-passthrough06.jpg


Here are all my keggles on the bench.
69808d1343359867-my-brew-stand-brewstand03.jpg


I purchased the 2" triclamp to 1/2" female NPT adapter because it let me use whatever length nipple extending to the valves. I may go with longer nipples once I get a few batches through this system. Just depends on how difficult it is to operate the valves in their current location.
 
Bobby...
When did you start offering these kits? Man, I wish I would have been able to support you with my order when I pieced together my bottom drain assembly. You may give thought to offering another 5 pc kit option in your order menu for these. A Female NPT adapter with a few nipple lengths to chose from.

Just recently, a few weeks ago.
 
Bobby_M said:
For pots, I'd solder in a 1/2" welding spud.

Is there such thing as a "weldless" welding spud? I like that it will allow for a complete drain as it doesn't protrude inside the kettle, but I'm not sure if I have the skill for welding.
 
You CAN make the bottom port weldless, but there's no way to do it where nothing protrudes into the keg. The best I could figure is that you can use a 1/2" x 3/8" NPT hex reducing bushing and grind down the height of the hex so barely any of it sticks up inside. Yes, that would work out just fine. Then a big gasket on the outside followed by an elbow.
 
Back
Top