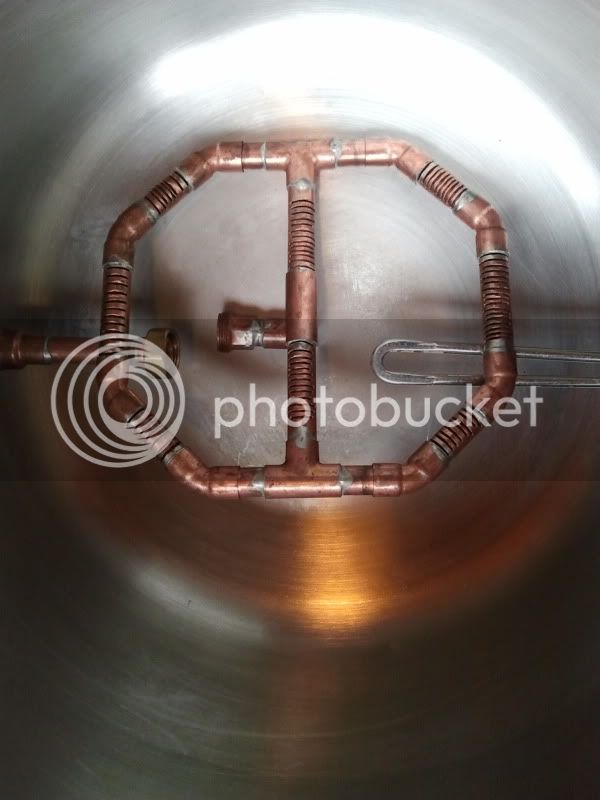
Efficient Octagonal CPVC manifold for Rubbermaids

Homebrew Talk - Beer, Wine, Mead, & Cider Brewing Discussion Forum

Help Support Homebrew Talk - Beer, Wine, Mead, & Cider Brewing Discussion Forum:

This site may earn a commission from merchant affiliate links, including eBay, Amazon, and others.

jmo88

Well-Known Member
Joined
Sep 17, 2008
Messages
1,374
Reaction score
31
Location
Seattle
Efficient Octagonal CPVC manifold for Rubbermaids:

I've gotten many PM's about my manifold so I thought I do a write-up.

I began using Flyguy's easy braided hose rubbermaid conversion. I eventually tore up a couple of hoses and experienced too varied efficiencies. I decided I needed a quality manifold capable of fly sparging. This design would work great for batch sparging as well. I was inspired by another HBT member for this design, but have made some improvements I think.

Follow FlyGuy's popular tutorial here but eliminate the hose clamps, hose, brass square head plug, and 3/8" male barb adapter.

Internal parts:

-5 feet of 1/2" CPVC pipe (at least)
-8 1/2" CPVC 45 degree elbows
-3 1/2" CPVC tees
-1 1/2" CPVC FIP adapter (though mine was not labelled FIP, I think it's basically the same, I can't recall what it was labelled)
-1 90 degree CPVC street elbow
-Optional parts could include some brass fittings depending on the availability of CPVC fittings at your local HD. Mine uses two different brass fittings from the brass nipple to extend the manifold connection into the cooler farther. This was also due to the availability of parts at the time I made this. Basically, if your HD has the proper CPVC adapter (one that fits directly on the brass nipple), there shouldn't really be a need for additional brass fittings.

All prepared pieces:

IMG_04913.jpg


Cuts:

You'll want to use a Dremel for this, though I suppose the slots could be drilled instead.

From the 5' pipe cut:
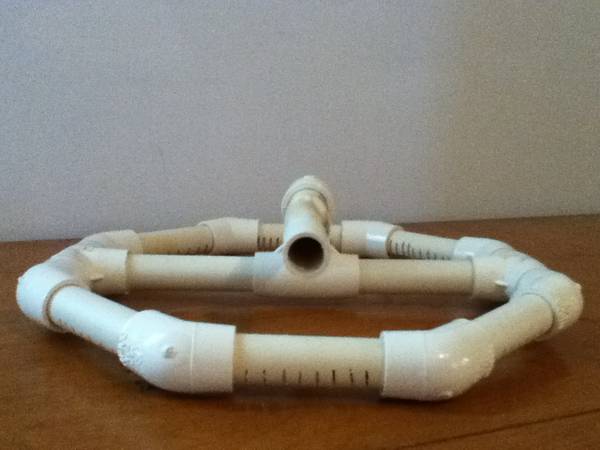
-6 3" pieces. These will need to be slotted as shown in the picture.
-4 1" pieces without slots.
-2 3.5" pieces without slots.
-1 4.5" piece without slots. This will be bent as shown in the picture. I used a torch to do this. Holding the piece a few feet away from the torch and slowly spinning it allowed the piece to bend without burning it, like toasting a marshmallow. Also, this may need to be shorter or longer depending on how far the adapter extends from the cooler wall. Basically, cut to the size that will center the octagon in your cooler.

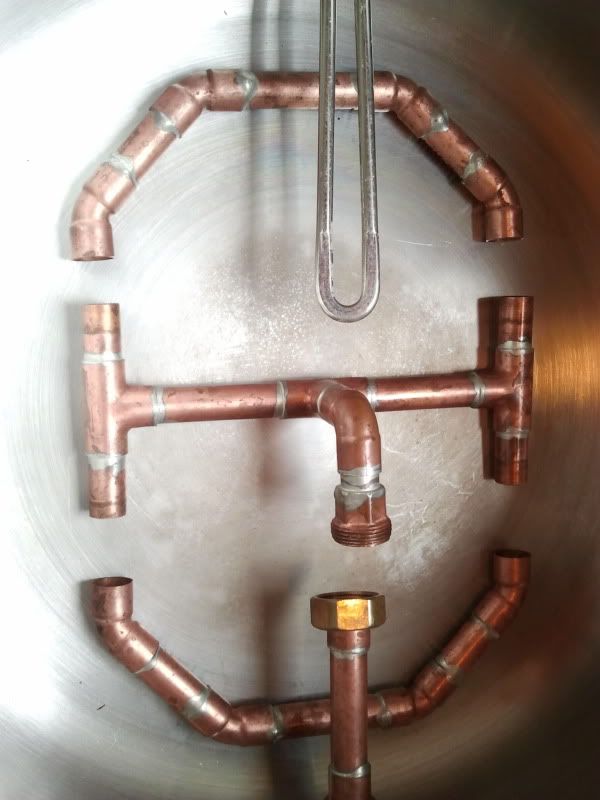
Cross section with 1" pieces connected to tees:

IMG_04952.jpg


Top of assembled octagon:

IMG_04992.jpg


Bottom of assembled octagon:

IMG_05014.jpg


Bent 4.5" piece connected:

IMG_05032.jpg


Adapter and brass fittings in place and connected to nipple:

IMG_0505.jpg


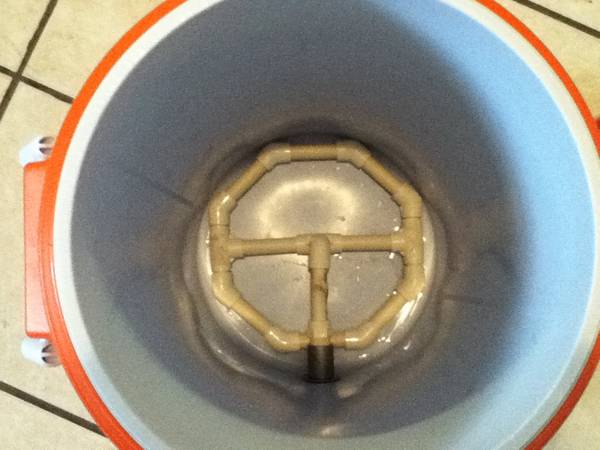
Manifold in place and sitting flush:

IMG_05071.jpg


The bend in the 4.5" piece is crucial for the manifold to sit flush and reduce dead space.

Overall, I wouldn't change anything about my design. I'm quite happy with it. The best part about this design compared to other manifolds IMO is that it pulls the wort from the middle of the octagon. Most designs connect to the spigot directly from the edge of the manifold next to the cooler wall, creating more channeling than this design– which is especially necessary for fly sparging.

My system is designed to 77% efficiency for normal size mashes. Since I fly sparge this is directly related to the flow rate, which is 1qt per minute. If I go slightly faster I might get 75%, slightly slower and I might get 80%. I guarantee I can get much higher efficiencies than 80%, but that is not what I am looking to do.
 
I have basically the same system only larger and two "rings" in my 55 gallon tun. Works great. On a 150 pound grain bill I will pull 80%.
 
This is sized for a 10 gallon rubbermaid right? Looks good. I use the stainless braid now but have been thinking about upgrading to something like this. Thanks for the nice parts list and pics.
 
This is sized for a 10 gallon rubbermaid right? Looks good. I use the stainless braid now but have been thinking about upgrading to something like this. Thanks for the nice parts list and pics.

Yes, 10 gallons. The braided hose was killing my efficiency and the ability to predict it. The main reason was probably the dead space.

One more thing, do you remember about how much this cost you in parts?

I believe the 10' pipe (though I didn't need more than 5') was a few bucks, probably under $5. Each piece (elbows, tees, and adapter) was about $0.30 each. I don't remember how much the brass fittings were but they were probably the most expensive, but like I said, depending on what cpvc adapters your local store has, you may not need the brass as you could just thread it onto the brass nipple you already have.
 
jmo88, thanks for providing this instructional. Your directions and my band saw made this build very easy.

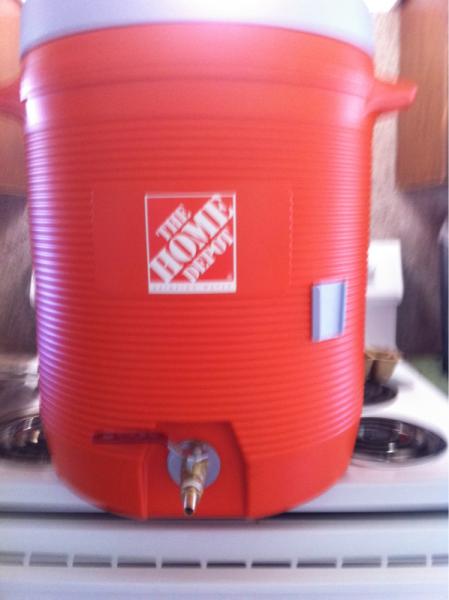
I needed this type of manifold for a 5 gallon Home Depot water cooler, so I basically followed your guidelines using all the same type and number of connectors, but cut the straight pieces shorter to fit the slightly smaller cooler.

Below are the dimensions I needed for the 5 gallon cooler. Hopefully this will be useful to others.
6- 2.75" pieces (slotted)
4 - 1" pieces (no slots)
2 - 2.87" (2 7/8") (no slots)
1 - 3" piece bent w/ blow torch (no slots)

Looking forward to making many 3 gallon experimental AG brews with this setup.

photo_217.JPG

photo_312.JPG

photo_412.JPG

photo_114.JPG
 
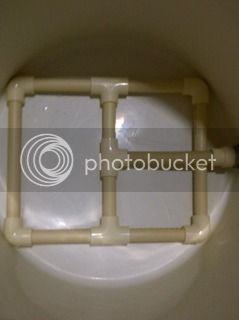
I built one, though didn't bend the 4" piece and it still seems to work ok... was my first all grain and I got 72-75% or so with a dual batch sparge...
 
Oh, and I used a bandsaw to cut the slits (nice and small)... almost zero vorluf required (at least I couldn't ever see any grain come out, though it was a darker brew)...
 
Carter, Looks great. The only thing I may be worried about is the torched piece. Correct me if I'm wrong, but heating and bending the CPVC like that may release some nasties. I know for sure it did when you bent it.

Call me a bit paranoid, but what I would do in order to get the height you need to the outlet is remove that 90 on the outlet and replace it with a 45. You can then cut a piece of straight CPVC to match the height you need.

Again, I could be completely off-base here, and I'm no plumber. I am an electrician that has bent LOTS of pvc in my day and I know the fumes it releases when it bends are not pleasant.
 
I did get a bit too close with the torch and ended up scorching it. I tried a second time but still got a bit too close. So, word to the wise, hold the torch a good distance away, it will still heat up enough to bend.

Only the exterior got scorched, however it did stink so I was concerned it might leach unwanted flavors. I sanded it down real good and washed it thoroughly; it no longer has any smell at all. Had 75% efficiency last time I used it.
 
To the OP, you might consider giving your Mash Tun and manifold a nice oxyclean bath.

Having a sparkling clean mash tun isn't critical, but clean never hurts. =)
 
scottland said:
To the OP, you might consider giving your Mash Tun and manifold a nice oxyclean bath.

Having a sparkling clean mash tun isn't critical, but clean never hurts. =)

Lol. Nonsense! I attribute that great house flavor to my cruddy mashtun an manifold. Seriously though, it gets cleaned. It does look nicely stained and a little dirty in the pics though. It's three years old.

As for the torching, I slowly spun the piece about 3-4 feet away from the flame ad got a good bend in probably about 15 seconds. No scorching or fumes.
 
As a novice, I want to go to all-grain after a few more batches. After looking at this I assume you have to use a pump for this setup correct?
 
no gravity feed works just fine for any setup as long as the mash tun is above the grant or boil kettle (wherever you are collecting the wort).
 
chickens4life said:
no gravity feed works just fine for any setup as long as the mash tun is above the grant or boil kettle (wherever you are collecting the wort).

Wouldn't you lose a couple cups of wort that just stays in the piping since the outlet is above the manifold?
 
Wouldn't you lose a couple cups of wort that just stays in the piping since the outlet is above the manifold?

Only if you don't have a tube connected to your spigot that's lowered into your kettle. The tube pulls practically every last bit of wort out. If you just opened the spigot without any tube connected to it, you'd have a quart or two leftover (dead space). Make sense? Think vacuum or siphoning...
 
jmo88 said:
Only if you don't have a tube connected to your spigot that's lowered into your kettle. The tube pulls practically every last bit of wort out. If you just opened the spigot without any tube connected to it, you'd have a quart or two leftover (dead space). Make sense? Think vacuum or siphoning...

Yeah that makes sense, we would be using a tube. I should have known that would create a siphon. Not having to buy a pump means we can make this sooner! Thanks!
 
it's a good design, but there's no real need to bend the one pipe into an "S". As long as the outlet connects positively (no leaks) to the valve connector, it will flow properly.

My "Cube" picnic cooler has a 3-4" riser (unbent) that allows the liquid to pull all the way to the bottom (down to 1/2 cup).

Hard to see the rise, but it's there: http://i54.tinypic.com/bdplb8.jpg

FYI... none of this is glued.

MC
 
it's a good design, but there's no real need to bend the one pipe into an "S". As long as the outlet connects positively (no leaks) to the valve connector, it will flow properly.

Except that if you don't bend it the manifold won't sit flush on the bottom of the cooler. Half of the manifold is raised off the floor of the tun without the bend. That's bad.
 
Misplaced_Canuck said:
Turn the fittings. If it's not glued, it should sit nice and flush. At least it does in my system.

MC

I know what you're saying. I did this first but the piece doesn't sit well into the connector and looks kind of wonky and halfassed, plus it came disconnected too easily. I like the nice secure seating of the manifold with the bend.
 
I didn't bend mine... first brew was Sunday and it stayed together, not glued, and latest pretty flat with just rotating the t coupler some... got about 75% on my first AG...
I guess you could use a short riser and regular 90 if you wanted to make it dead up and across...
 
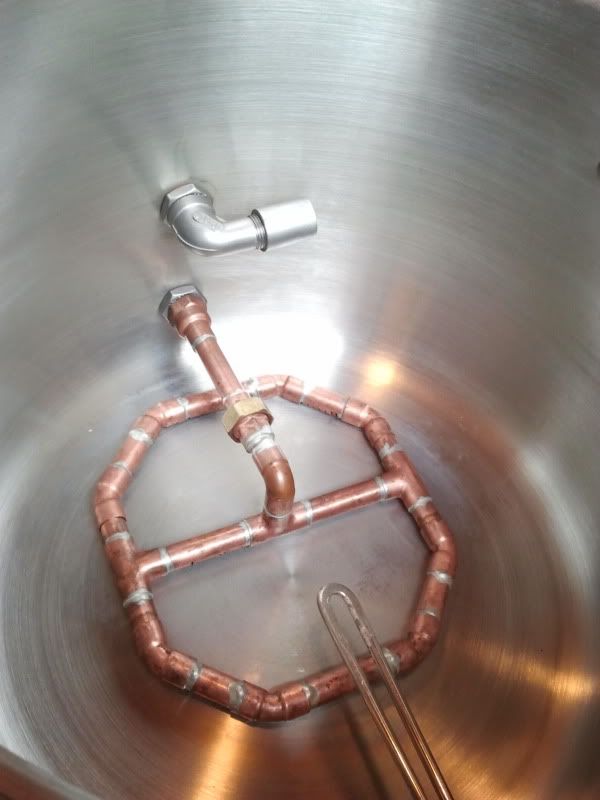
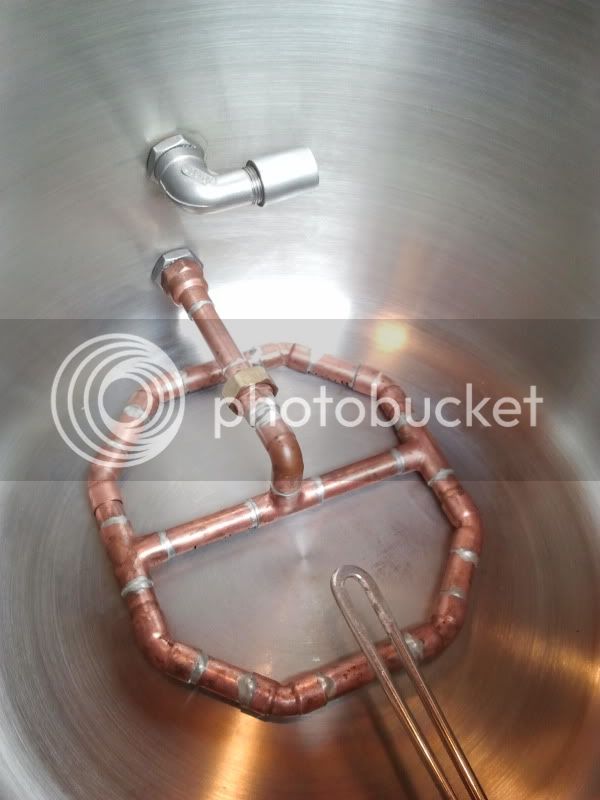
I built one out of copper when I was using a 10 gallon igloo for 5 gallon batches. It now resides in my boil kettle as a leaf hop strainer. I always had excellent results when mashing with it.
2011-08-31145151.jpg

2011-08-31145207.jpg

2011-08-31145422.jpg

2011-08-31145522.jpg
 
We built our version this weekend. Getting the seal to be leak free was a big hassle and we ended up having to use extra washers, but we got it done. We got the cooler from home depot for $45 and for all supplies it ended up being right under $100. Thank you for the directions and inspiration.

image-3732182951.jpg


image-666161285.jpg


image-3685865708.jpg
 
I plan to build my mash tun soon using this CPVC design due to the cost of copper.

Is a 10 gallon beverage cooler too large to use for 5 gal AG batches? I want to be sure that with only 10-12 lbs of grain I will have sufficient grain bed depth with the 10 gal cooler?
 
I made this using cvpc and a 10 gallon cooler, I just did Yoopers 60 min ipa clone with 14 pounds of grain and it worked very well.
 
Jayhem said:
I plan to build my mash tun soon using this CPVC design due to the cost of copper.

Is a 10 gallon beverage cooler too large to use for 5 gal AG batches? I want to be sure that with only 10-12 lbs of grain I will have sufficient grain bed depth with the 10 gal cooler?

The 10 gallon cooler is perfect for 5gal batches. I've made beers with grain bills from 8lbs to 17lbs. I probably could've gotten more grain into it than 17lbs.
 
The 10 gallon cooler is perfect for 5gal batches. I've made beers with grain bills from 8lbs to 17lbs. I probably could've gotten more grain into it than 17lbs.

That is good to know. I'll be shopping for my cooler this weekend! :ban:
 
Curious if using rounded holes vs. slits has any impact?

Don't have the means to slit mine, but I can drill.

Any ideas on drill size? Was thinking somewhere 1/16-1/8"
 
Curious if using rounded holes vs. slits has any impact?

Don't have the means to slit mine, but I can drill.

Any ideas on drill size? Was thinking somewhere 1/16-1/8"

I drilled my cpvc manifold. I think i used 1/32 holes. I get a consistent 75% efficiency. My manifold is in a 48 quart igloo cube. With grain bills from 8-24 lbs.
 
I drilled my cpvc manifold. I think i used 1/32 holes. I get a consistent 75% efficiency. My manifold is in a 48 quart igloo cube. With grain bills from 8-24 lbs.

Sweet, thanks.

i suppose a lot of small holes vs. a lot of larger holes is a better set up for the manifold. I'm very much looking forward to this set up vs. my old unreliable braid
 
I drilled my cpvc manifold. I think i used 1/32 holes. I get a consistent 75% efficiency. My manifold is in a 48 quart igloo cube. With grain bills from 8-24 lbs.

Do you think a 3/32 bit might be too big? That's the smallest I have, and it looks smaller than the dremmel slits in the photos. I just don't want to have too much husk coming through and clogging my hoses.
 
I am trying to find the "black" piece. I have looked, but it seems I am unable to make the connection from the first brass/cvpc piece to the ball valve.

Any advice would be great.

UPDATE: I found everything at Home Depot (minus the fender washer). Love the design and I used 1/2 brass nipples on both ends - hammering them into the cpvc.
 
As any determined a good way to clean this guy up?

Mine is getting kind of grubby looking.

I tried an Oxyclean soak, didn't seem to do much. Was thinking maybe CLR?

Need something good and deep cleaning to get all the insides where a bursh can't reach
 
As any determined a good way to clean this guy up?

Mine is getting kind of grubby looking.

I tried an Oxyclean soak, didn't seem to do much. Was thinking maybe CLR?

Need something good and deep cleaning to get all the insides where a bursh can't reach

Just take it apart. You didn't glue yours together, did you? I'm pretty sure you're not supposed to glue the pieces together, as they fit snugly anyways. That also allows you to disassemble it.
 
I glued mine so it's 3 pieces, a middle section and 2-3 sided sections.

I didn't want to jack around putting it together everyone I brew.

Might not have been the best choice in hind sight


Sent from my iPhone using Home Brew
 

Latest posts

Back
Top