OP
OP
kal
Well-Known Member
I take it that only brews root beer right? ")
Kal
Kal

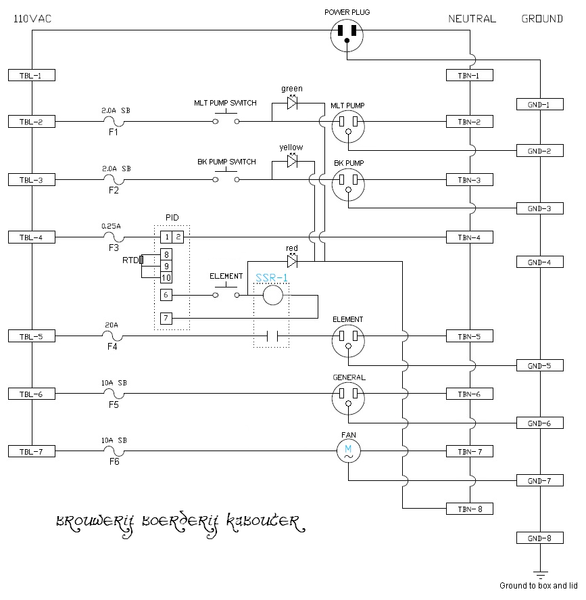
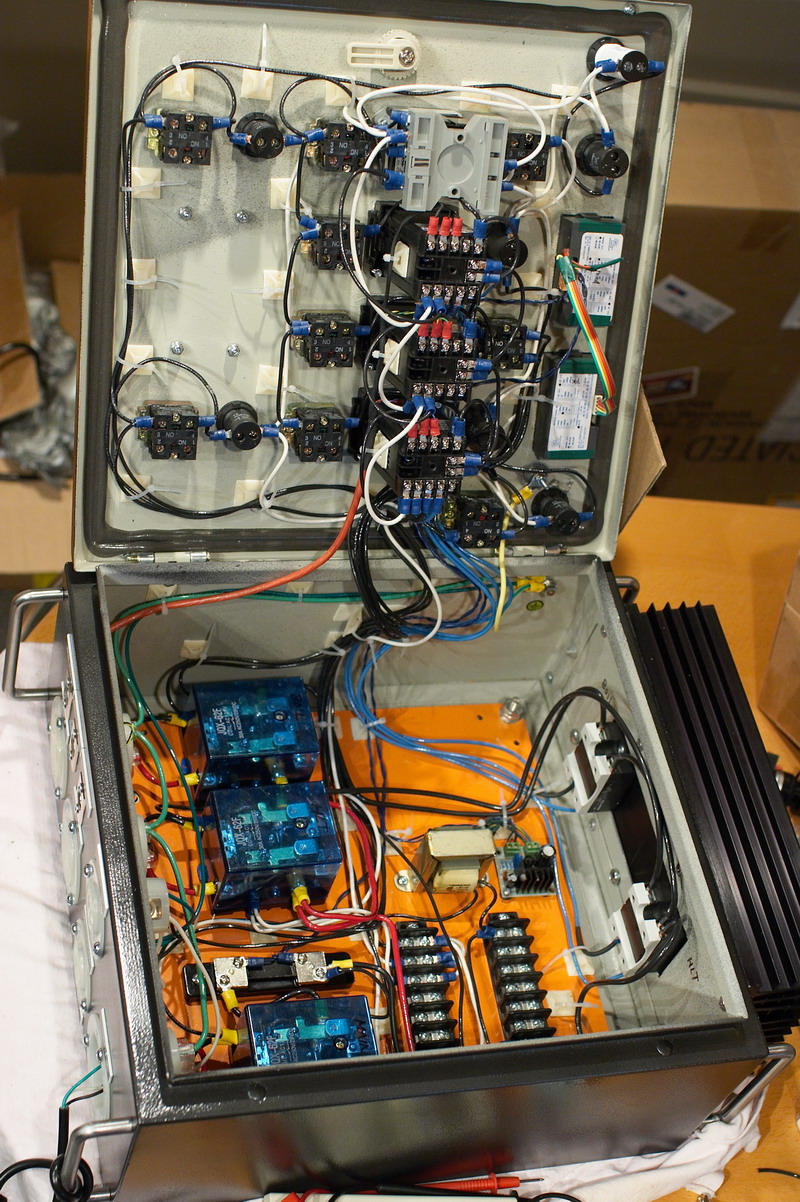
This wouldn't work for me as I use 2 1500 watt elements in my system which requires 2 separate electrical circuits in order to power the system.
Also, I don't know that you can control heating at 2 set points with that but since I have never used one I am sure I could be wrong.
Linc
Missing Link
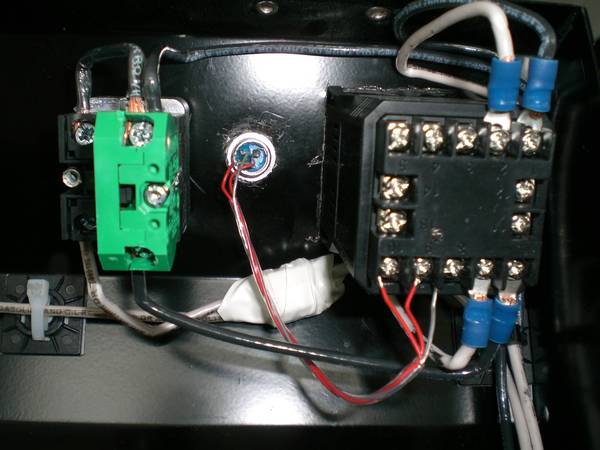
Just because you are using two circuits doesn't mean you can't use one controller to control one or both of them. Earlier in this thread I show my panel which is set up for 2x 1500 Watt elements run on separate circuits. You control each circuit with its own relay, but both of those relays can be controlled with one DC output from your controller. You can even put an intermediate switch on each circuit so only one element is on at a time even if both relays are switched on by your controller.
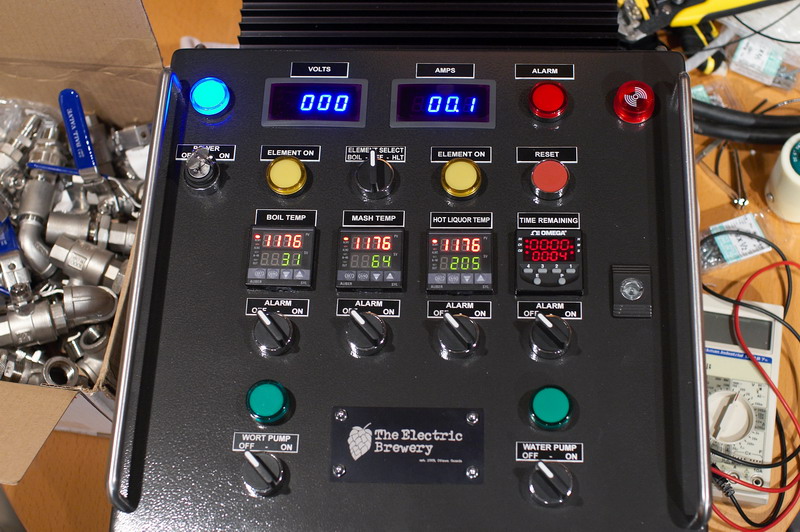


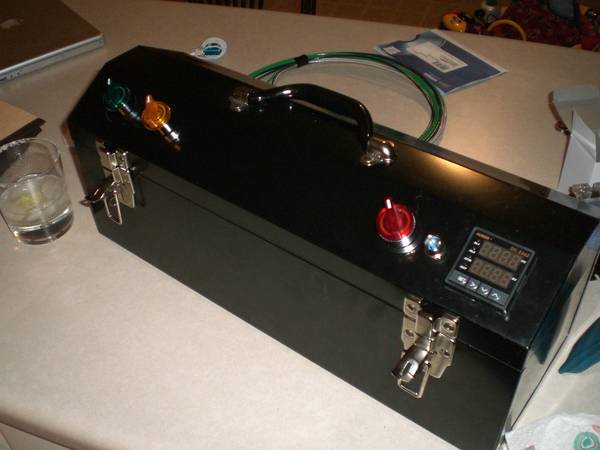
I laughed when saw that at first too but it got me thinking: I have a couple of small kids (2 and 5) and was going to put a big 30A disconnect on the wall up reasonsably high above my power outlet for my brew setup to avoid them walking up and hitting any buttons ....
Then I thought why not put a key switch right in the control panel. They're cheap (bought one on ebay for under $10). I'm adding a 30A relay and now everything can be in the one box. No disconnect needed.
I can put hang the key up high to ensure nobody starts flicking switches and hurts themselves (or fries an element).
Plus, it looks cool.

Kal
Sawdust guy:
Have you done any calculations on current draw? I don't know what elements you are using but all your stuff looks like it might be rated for only 15 Amps. That might be cutting it close. Also since it's all 115V, you may need a 30A service feeding this thing. Just my $.02.
Edit: Ooops looked at your profile and see that you might know what your doing!!!
Nice! That's something I have yet to do... What software did you draw this up with?
Kal


 My brother told me to put some electric tape over it and noone will notice, I've not yet done it
 I use AutoCAD 2005 which I borrowed a copy from a previous employer for 99 years. I used to be a design engineer and built all my own audio equipment including my turntable. A good design and drawing makes fab much easier (see below).
Beautiful! Simply amazing work. What's that platter weigh?
My side job is running a fairly popular home theater website and forum (CurtPalme.com Home Theater sales, calibration, service, and discussion forum) that is mostly dedicated to analog CRT projectors so I can appreciate analog...! My love of HT started way back when in 2-channel analog land with 5' high electrostatic speakers. The good old days!
Kal

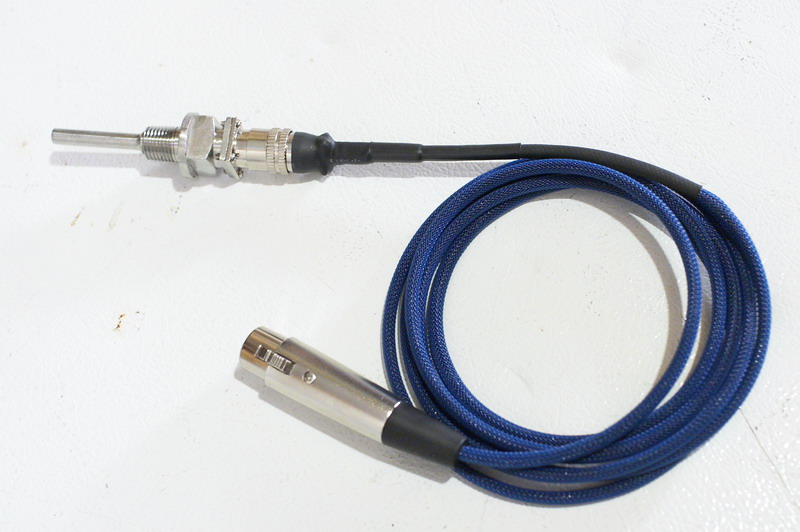
I also built some RTD probes based on the ones from Auberins as a starting point using locking connectors and some expandable sleeving for extra protection. There's also a braided stainless wire in there for strain relief.
I've taken over 200-300 photos so far of my brewery build process. It'll all be documented step by step in my upcoming website: TheElectricBrewery.com (to be launched some time in 2009).
Kal


Here are some pictures of the skid itself.

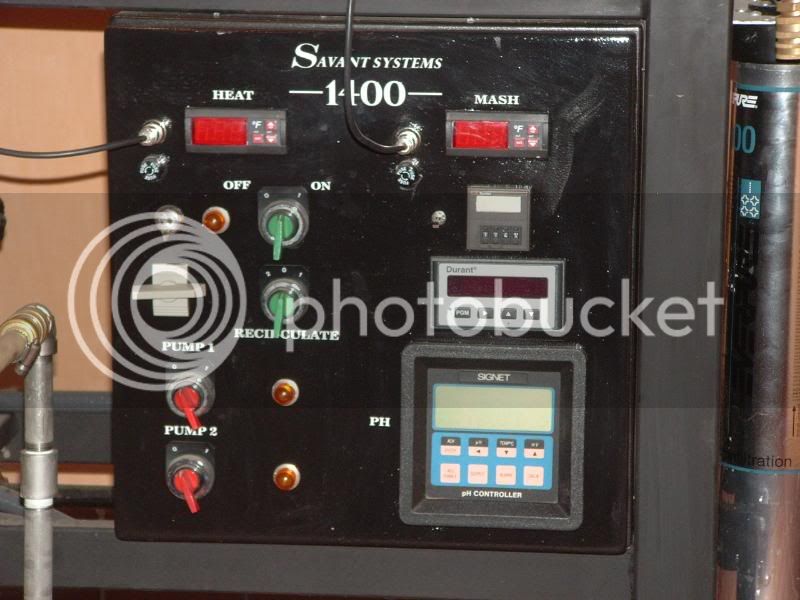
Here is an older pic of the brewing skid and touchscreen panel.

Here is a better one of the touchscreen panel and part of the electrical panel below.
I'm surprised you didn't go for stainless head March pumps as well!...the entire thing, from frame to tanks, to all connections and control valves is made from 304 or 316 stainless.
Wow! I'm speechless! Fantastic!
Any more pictures of inside the pots or closeups? I'm curious how you did your connections to the Blichmanns since I have the same 3 pots (looks like you went with three 20 gallon pots as well).
I'm surprised you didn't go for stainless head March pumps as well!
Kal
Come to think of it, the flowmeters are also made of the same poly-don'tknow material, so I guess my original 100% SS statement isn't 100% accurate. I'm not sure what language it is called as I'm not a trained programmer, but it's somewhat intuitive. I'm using samples from the manual and some trial and error to get the automation done. I'm using a USB DAQ device called LabJack and for the the automation I'm using DAQFactory. In terms of the number of I/O, the are currently 20 (10 valves, 3 pumps, 2 flowmeters, 2 spark ignition modules, three temp probes). I'm still debating the level transmitters or just using some float switches to prevent overflows.A couple questions, what is the programming language, and what is the equipment interface hardware?. Looks nice so far, I am curious how many I/O points it has taken to automate your system.
I had looked at the labjack hardware but needed more I/O points and capabilities than that hardware could provide. The system I have under construction has 62 points, 44 for brewing system and 18 for fermentation system hardware. Software has been developed using netbeans and my sql with the design goal of complete brewing automation and fermentation temperature control for 6 fermenters. What make is the touch screen computer you are using?, have aquired an advantech PPC-153T touch screen to run the java application for the phase 2 system.


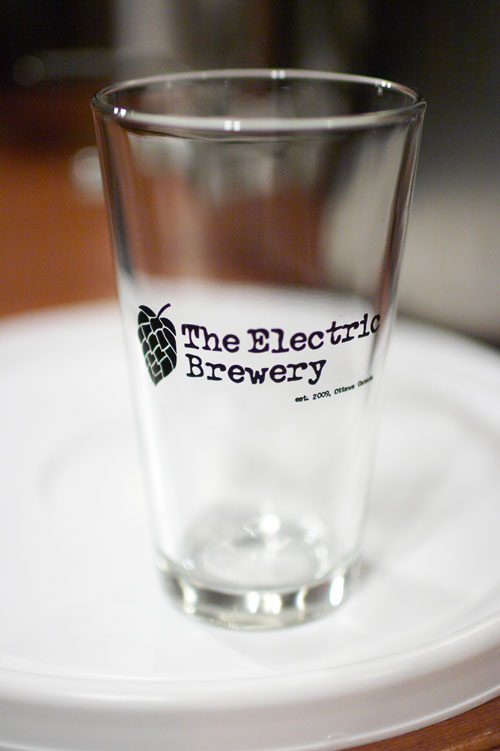
My wife took the logo off my control panel and got a birthday present which just arrived today: A case of pint glasses with my brewery logo on them.
Enter your email address to join: