Boerderij_Kabouter
Well-Known Member
So I have seen a lot of people interested in a temperature controller they can use for a fridge or freezer but do not want to install directly into the unit. Many people in this situation opt for the Ranco or Johnson controllers.
I prefer the adaptability of the LOVE controllers because they are more programmable and can be used for whatever purpose and in whatever way you want.
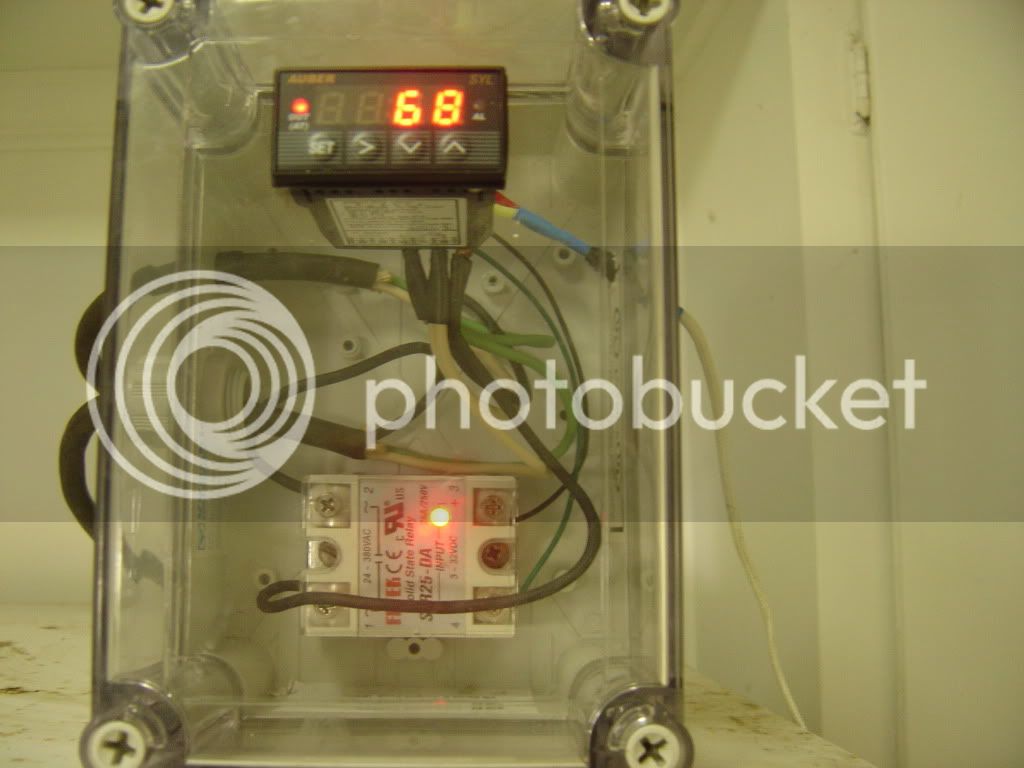
For this project I used a LOVE TS2-2100 two stage controller, a gfci outlet, an extension cord, a waterproof box, and some spare 14 ga. wire.
First for wiring information look here:
https://www.homebrewtalk.com/f11/love-temp-controller-series-ts-wiring-diagram-2008-a-88369/
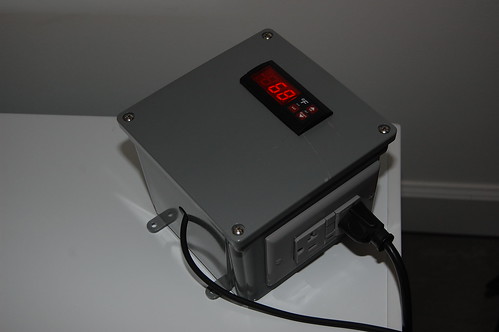
This is my brother's new controller box and how we programmed it...


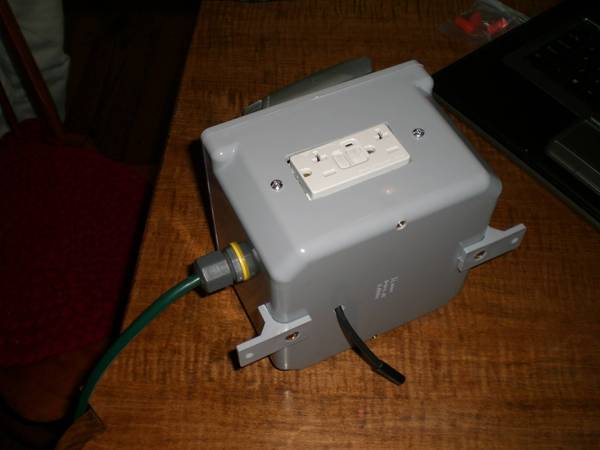
That is the probe sticking out the back. He just cut a hole in the back so he can pull out the probe and push the excess cord into the box. He secured the probe cord with an anchor to avoid accidentally pulling out of the unit.
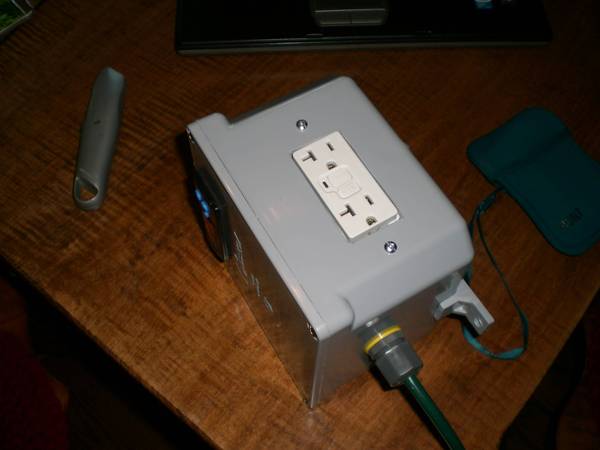
The outlet is a two circuit outlet. The top receptacle is wired to the first relay and the bottom receptacle is wired to the second relay. This unit can be used for heating and cooling.
Wiring diagram: Disregard the programming cues at the top, read below:

Here is how to program the unit:
When you first plug the controller in and fire it up a buzzer will sound and ErP will flash on the screen. Here is how to enter your controller into single probe mode:
1. Press and hold the "SET" button for 8 seconds or until "0" flashes on the screen.
2. "0" is the code to grant access to the controllers programming and can be changed to any digit 0-999 to selectively allow access tot he controller.
3. Press "SET" again to tell the controller "0" is the correct code ("0" is the default).
4. Now a parameter will be flashing on the screen. Cycle through the parameters using the "up arrow" until you reach "P5".
5. Press "SET" to enter "P5" programming.
6. Press the down arrow sot hat "1" is displayed on the screen. This indicates single probe operation.
7. Press "SET" again to select single probe operation and return to the parameter screen.
8. Press "SET" and the "down arrow" simultaneously to exit the parameter screen.
You are now operating normally in single probe operation.
To program the controller to work properly with heating and cooling as we have discussed above... follow the same programming steps (now that the beeping has stopped ) to enter parameters "r0"=dep, "r2"=1.5, "c1"=dir, "c2"=inv, and "SP2"=-1.5.
Your programming is now complete and your controller ready to use. To exit the programming screen press set and the down arrow simultaneously.
To set your controller to your desired temperature, press "set" once. "SP1" temperature will flash. Use the arrows to select your desired temperature. Press "set". "SP2" temperature will flash, press "set" again to operate controller at your desired temperature.
.................
"SP2" = -1.5 allows the controller to bring the chamber to temperature without over/under shoot. The temperature will glide to the set point.
............................
This design is best used with a fridge plugged into the first relay (top receptacle) and a heater plugged into the second relay (bottom receptacle). In this arrangement, the controller will cool and heat the chamber to maintain whatever set point you have set regardless of ambient temperatures. For example, you can ferment a lager at 50º, raise to 68º for a D-rest, then drop incrementally to 34º just with the push of a button in any temperature environment. It is a very nice thing to be able to do and is my favorite part of my brewery.
I hope this helps. If you would like to see some more info on this controller check out my fermentation build thread in my sig.
I prefer the adaptability of the LOVE controllers because they are more programmable and can be used for whatever purpose and in whatever way you want.
For this project I used a LOVE TS2-2100 two stage controller, a gfci outlet, an extension cord, a waterproof box, and some spare 14 ga. wire.
First for wiring information look here:
https://www.homebrewtalk.com/f11/love-temp-controller-series-ts-wiring-diagram-2008-a-88369/
This is my brother's new controller box and how we programmed it...
That is the probe sticking out the back. He just cut a hole in the back so he can pull out the probe and push the excess cord into the box. He secured the probe cord with an anchor to avoid accidentally pulling out of the unit.
The outlet is a two circuit outlet. The top receptacle is wired to the first relay and the bottom receptacle is wired to the second relay. This unit can be used for heating and cooling.
Wiring diagram: Disregard the programming cues at the top, read below:
Here is how to program the unit:
When you first plug the controller in and fire it up a buzzer will sound and ErP will flash on the screen. Here is how to enter your controller into single probe mode:
1. Press and hold the "SET" button for 8 seconds or until "0" flashes on the screen.
2. "0" is the code to grant access to the controllers programming and can be changed to any digit 0-999 to selectively allow access tot he controller.
3. Press "SET" again to tell the controller "0" is the correct code ("0" is the default).
4. Now a parameter will be flashing on the screen. Cycle through the parameters using the "up arrow" until you reach "P5".
5. Press "SET" to enter "P5" programming.
6. Press the down arrow sot hat "1" is displayed on the screen. This indicates single probe operation.
7. Press "SET" again to select single probe operation and return to the parameter screen.
8. Press "SET" and the "down arrow" simultaneously to exit the parameter screen.
You are now operating normally in single probe operation.
To program the controller to work properly with heating and cooling as we have discussed above... follow the same programming steps (now that the beeping has stopped ) to enter parameters "r0"=dep, "r2"=1.5, "c1"=dir, "c2"=inv, and "SP2"=-1.5.
Your programming is now complete and your controller ready to use. To exit the programming screen press set and the down arrow simultaneously.
To set your controller to your desired temperature, press "set" once. "SP1" temperature will flash. Use the arrows to select your desired temperature. Press "set". "SP2" temperature will flash, press "set" again to operate controller at your desired temperature.
.................
"SP2" = -1.5 allows the controller to bring the chamber to temperature without over/under shoot. The temperature will glide to the set point.
............................
This design is best used with a fridge plugged into the first relay (top receptacle) and a heater plugged into the second relay (bottom receptacle). In this arrangement, the controller will cool and heat the chamber to maintain whatever set point you have set regardless of ambient temperatures. For example, you can ferment a lager at 50º, raise to 68º for a D-rest, then drop incrementally to 34º just with the push of a button in any temperature environment. It is a very nice thing to be able to do and is my favorite part of my brewery.
I hope this helps. If you would like to see some more info on this controller check out my fermentation build thread in my sig.

 just wire a second outlet to the second relay.